Currently, I have a shapeoko 3 with a custom thread board for clamping my materials down. Im looking for a more efficient method that is not as time-consuming to set up as I am using it to carve art for my business.
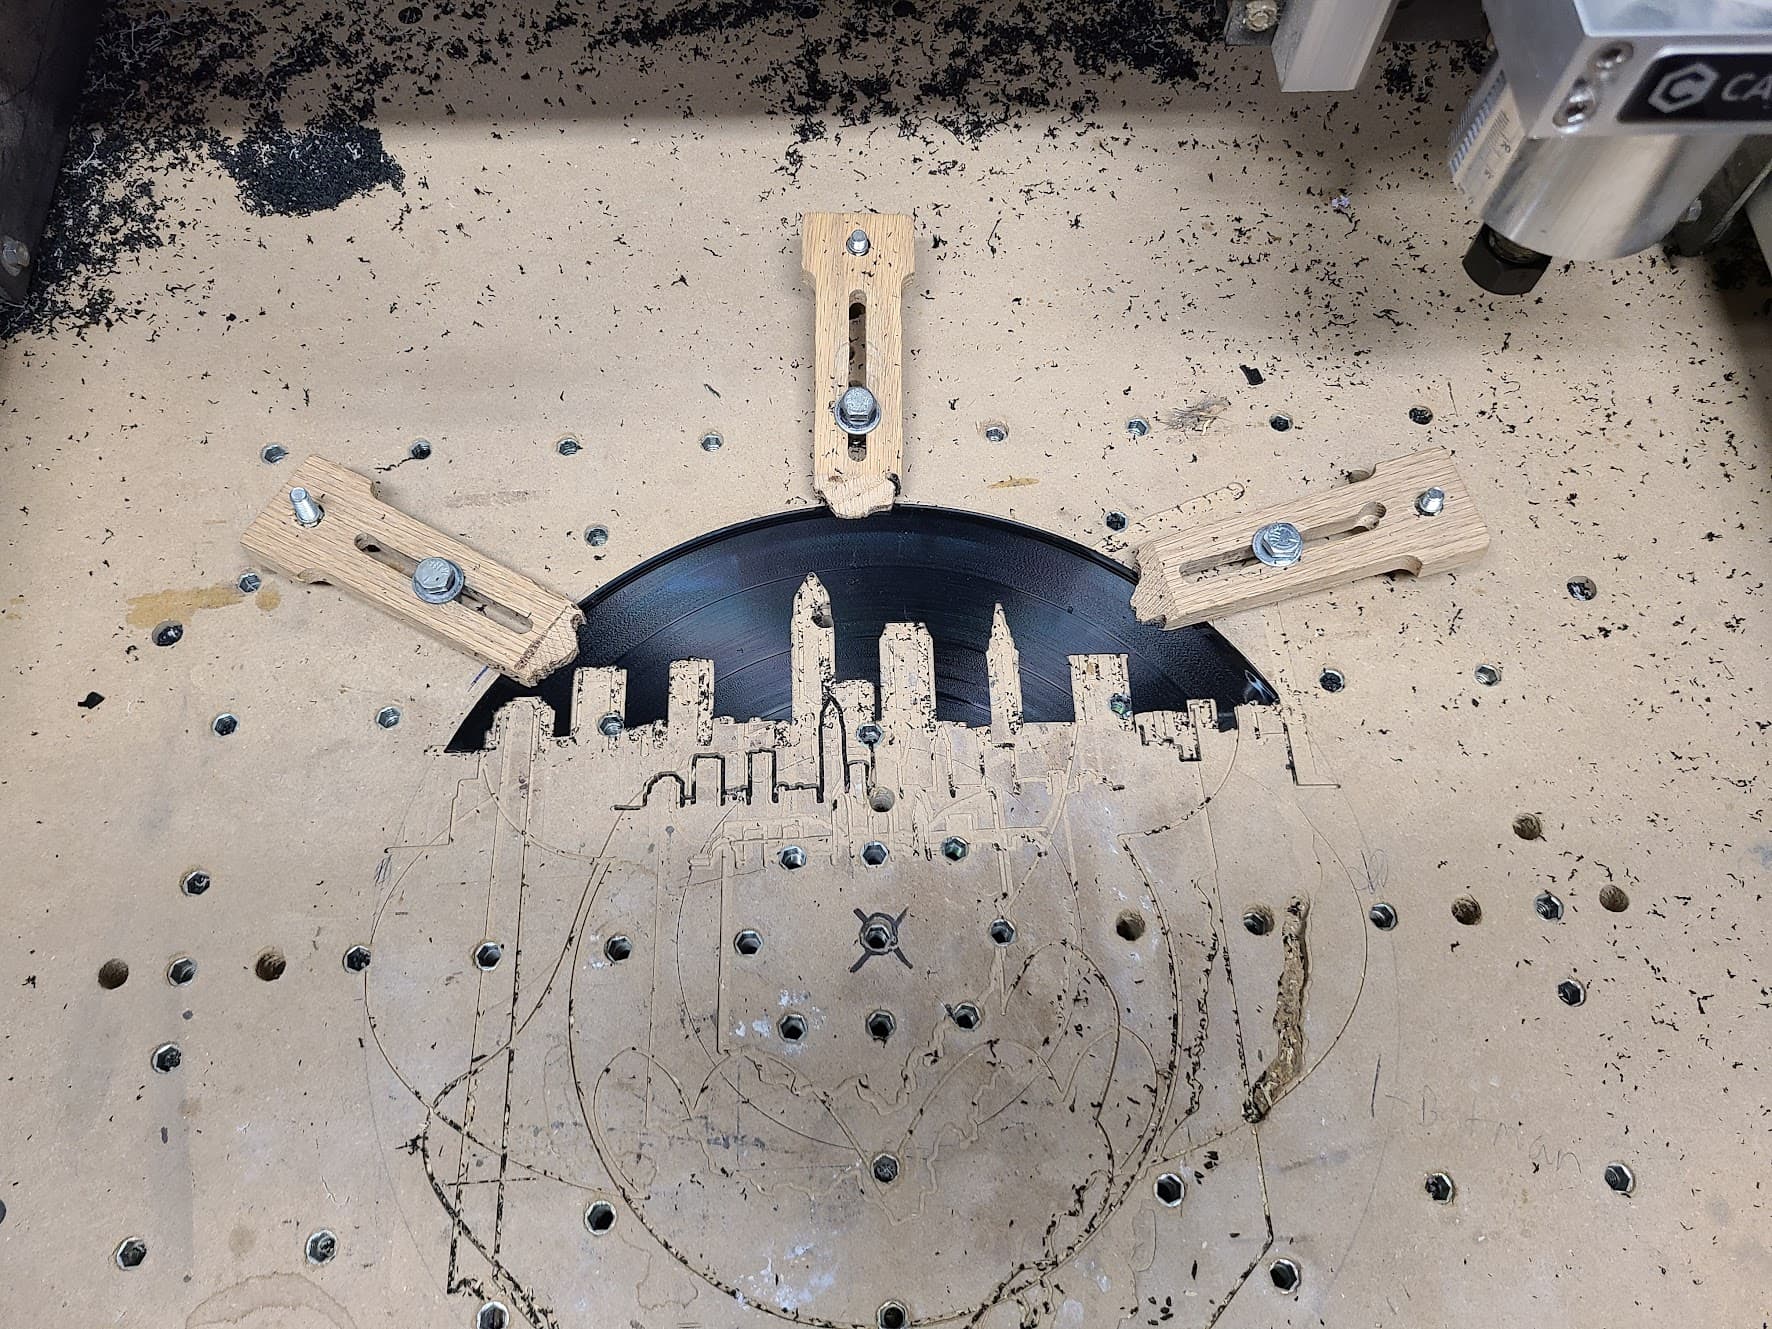
It is currently the most time-consuming part of my process as I have to line up the clamps to be out of the way of the design and if I am changing designs I have to completely unscrew the clamps and rearrange them for my design. the bit I use also has a tendandancy to pull up on the records so clamping is necessary. i honestly don’t know where to start with this so any suggestions would be helpful
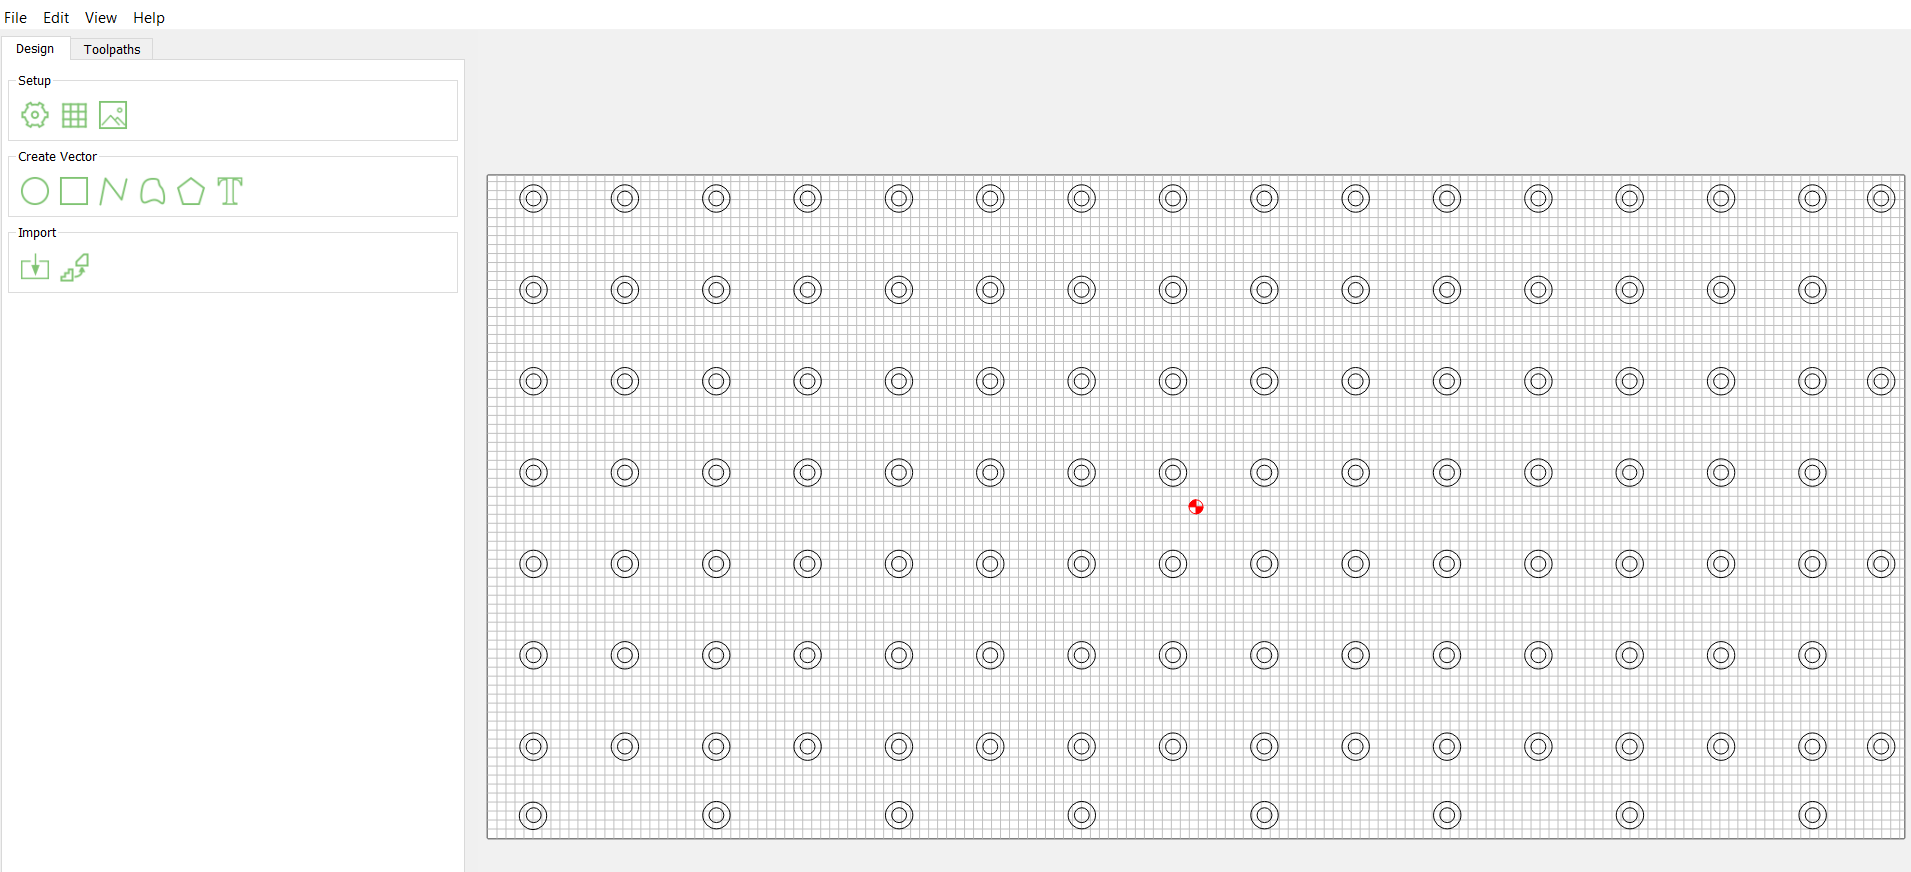
I really like to carve out hold downs that match the screw placement in the waste board. What I do is cut the stock slightly larger than needed for the piece. When designing the piece I will start with a grid pattern file that matches the threaded inserts in my waste board. See the image below. This is setup so that it is ready to carve out any of the holes I leave behind. The smaller inner hole goes all the way through or very close to the bottom of the material and the larger hole goes in about .35 inches. This allows the bolts I use to end up below the surface.
I draw a shape around the circles the same size as the board. Then I would design what I expect the final shape of the piece to be. This shows me which circles will be within the full board but outside the final piece. I would delete all the circles that are within the final piece or outside the board and leave me only with usually 4-6 holes to hold the part down while carving. An example of this is the cribbage board I am designing below. The two sets of circles on the far left and right are for my hold downs.
Once I have the basic design and holes determined I will group the whole thing and centre it since I work from center usually. Once they are centred so the hold downs and parts have not moved in relation to each other but have centred on the project I ungroup them again. As you can also see above I will then also configure a box around the entire board to allow me to surface it with a surfacing bit so it is all flat in relation to the router.
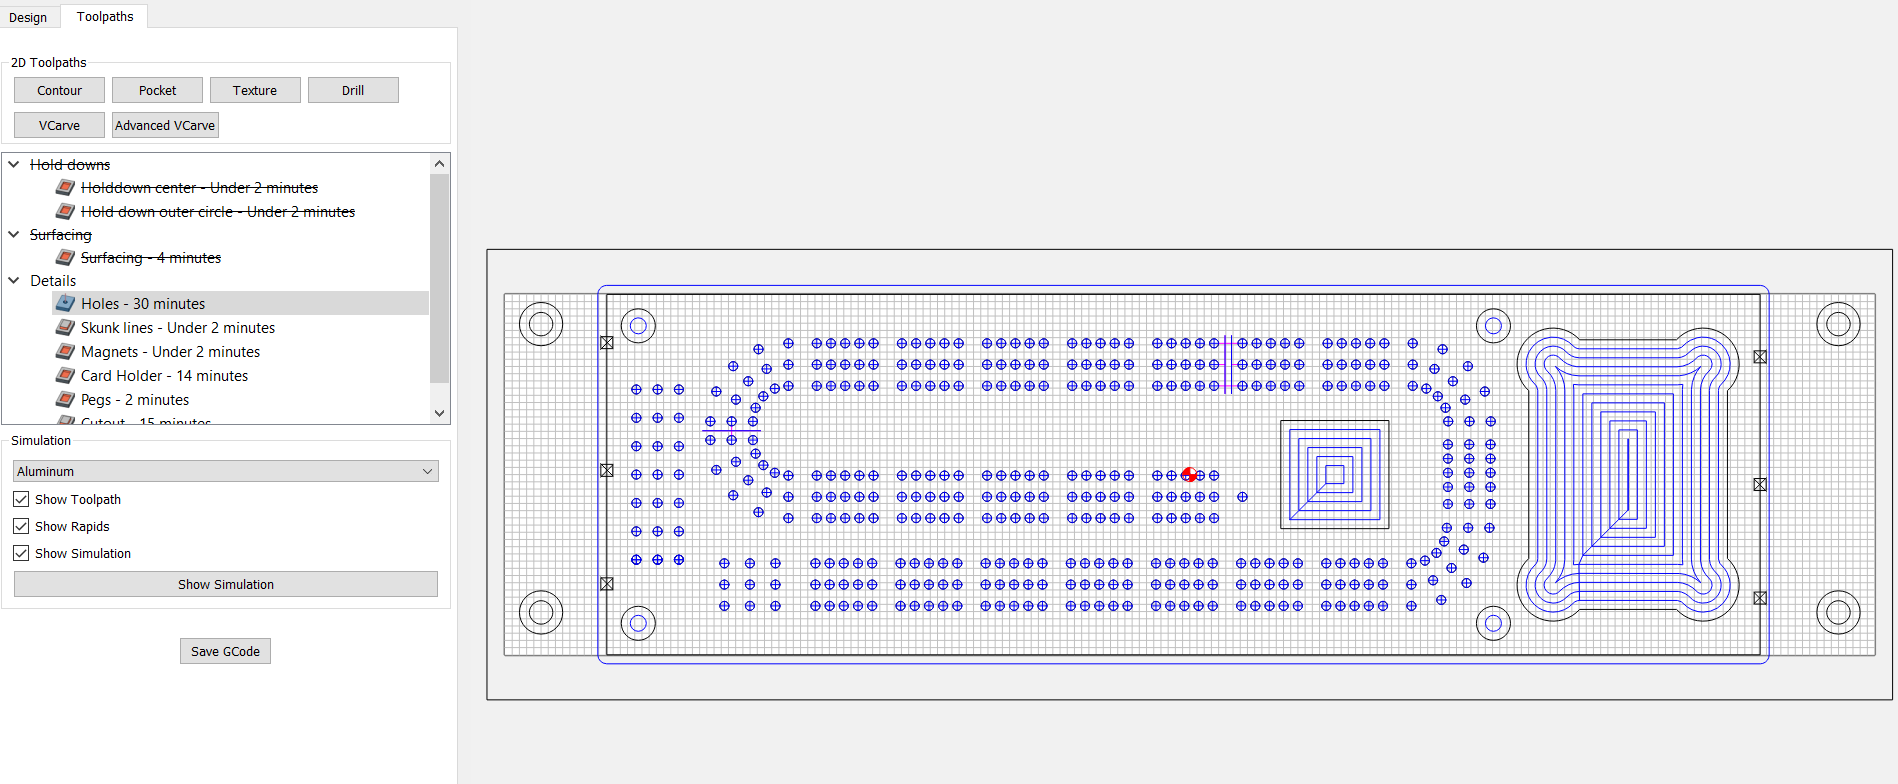
Once I start carving I will clamp down the board in places where my hold down holes are not going to be and set the retract height to .5 inches. This means as the CNC cuts out the holes it will go over the clamps I have. I set zero to the centre of the board and carve out the holes. Once those are done I take off the clamps and then I bolt the board directly to the waste board using the new holes since they line up perfectly with the threaded inserts.
I then re-centre Carbide Motion and run set my retract height to something much smaller since nothing will be in the way now. I usually go for around 0.1 inches. The bolt heads are below the surface and outside anything I plan to carve. I run a surfacing pass and then will run the final project. I like to keep the surfacing as a separate nc file since I have had some boards that needed more than one pass so I will re-zero the z axis and just run it again if the material needs it before I start the actual project.
I know this sounds more complicated than what you are doing but it has served me very well when it comes to making sure my work holding is out of the way and the boards are flat and ready for carving. It took me a fair bit of trial and error but this seems to provide me with a very consistent work holding solution that I know I can trust.
Are you always doing things on records? If so, I’d pocket a hole in some fresh MDF to hold the record, and then maybe use some double sided tape to hold the record firm in the pocket.
You could pocket a few tiny circles around the outside of the larger circle to pry up the record after the machining is done.
If you are doing things other than records, I’d make the jig for the record, then mount it to the machine in known coords, and then make other jigs for other parts/materials to mount to nearly same points. That way you have a swappable fixture for your different products.
Happy to help someone carving Cleveland silhouettes!
There’s always CA glue and tape. You just have to be careful on vinyl records that they don’t start flapping around if using an upcut.
I’ve used the clear, double-sided Scotch tape when carving a record like that. A big washer in the middle plus hot glue around the circumference works as well, depending on the design and end mills used.
Another option which is fairly involved to build but then would be super quick to replace records, is a vacuum table. basically uses a vacuum to suck the material to the table. If you are always doing records it would be pretty easy to build since you dont have to turn the whole spoil board into a vac surface just a records sized portion.