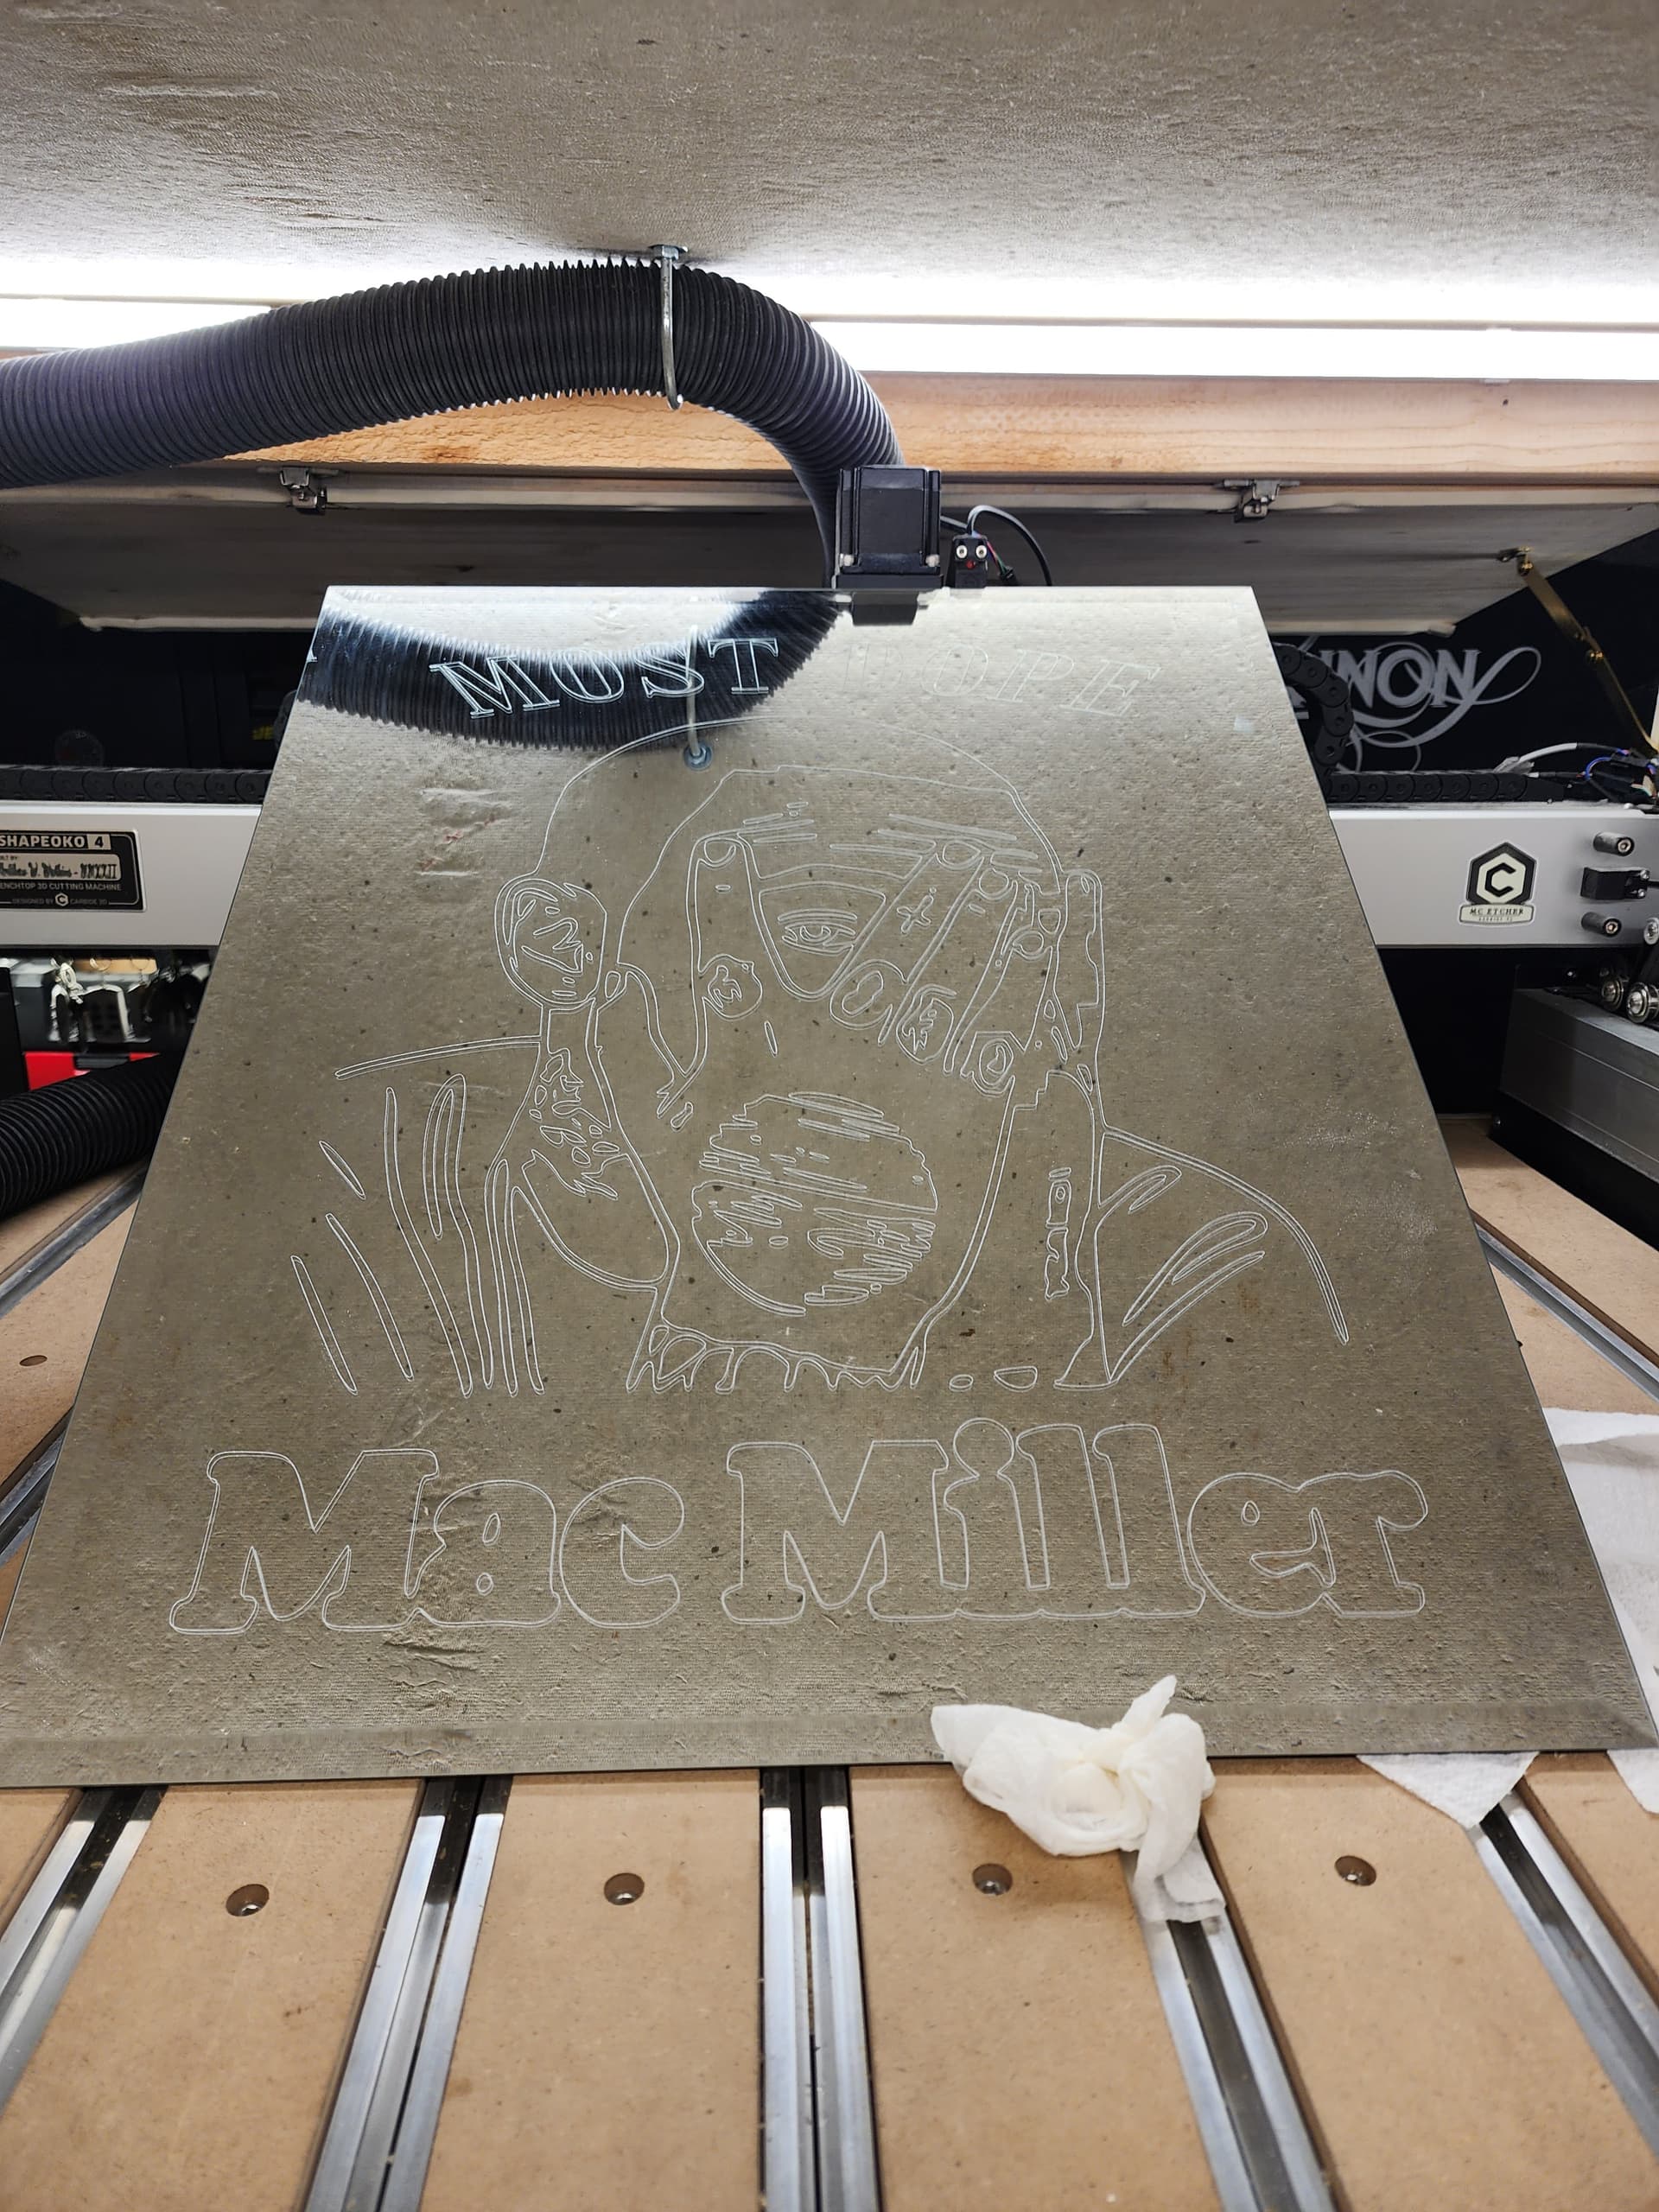
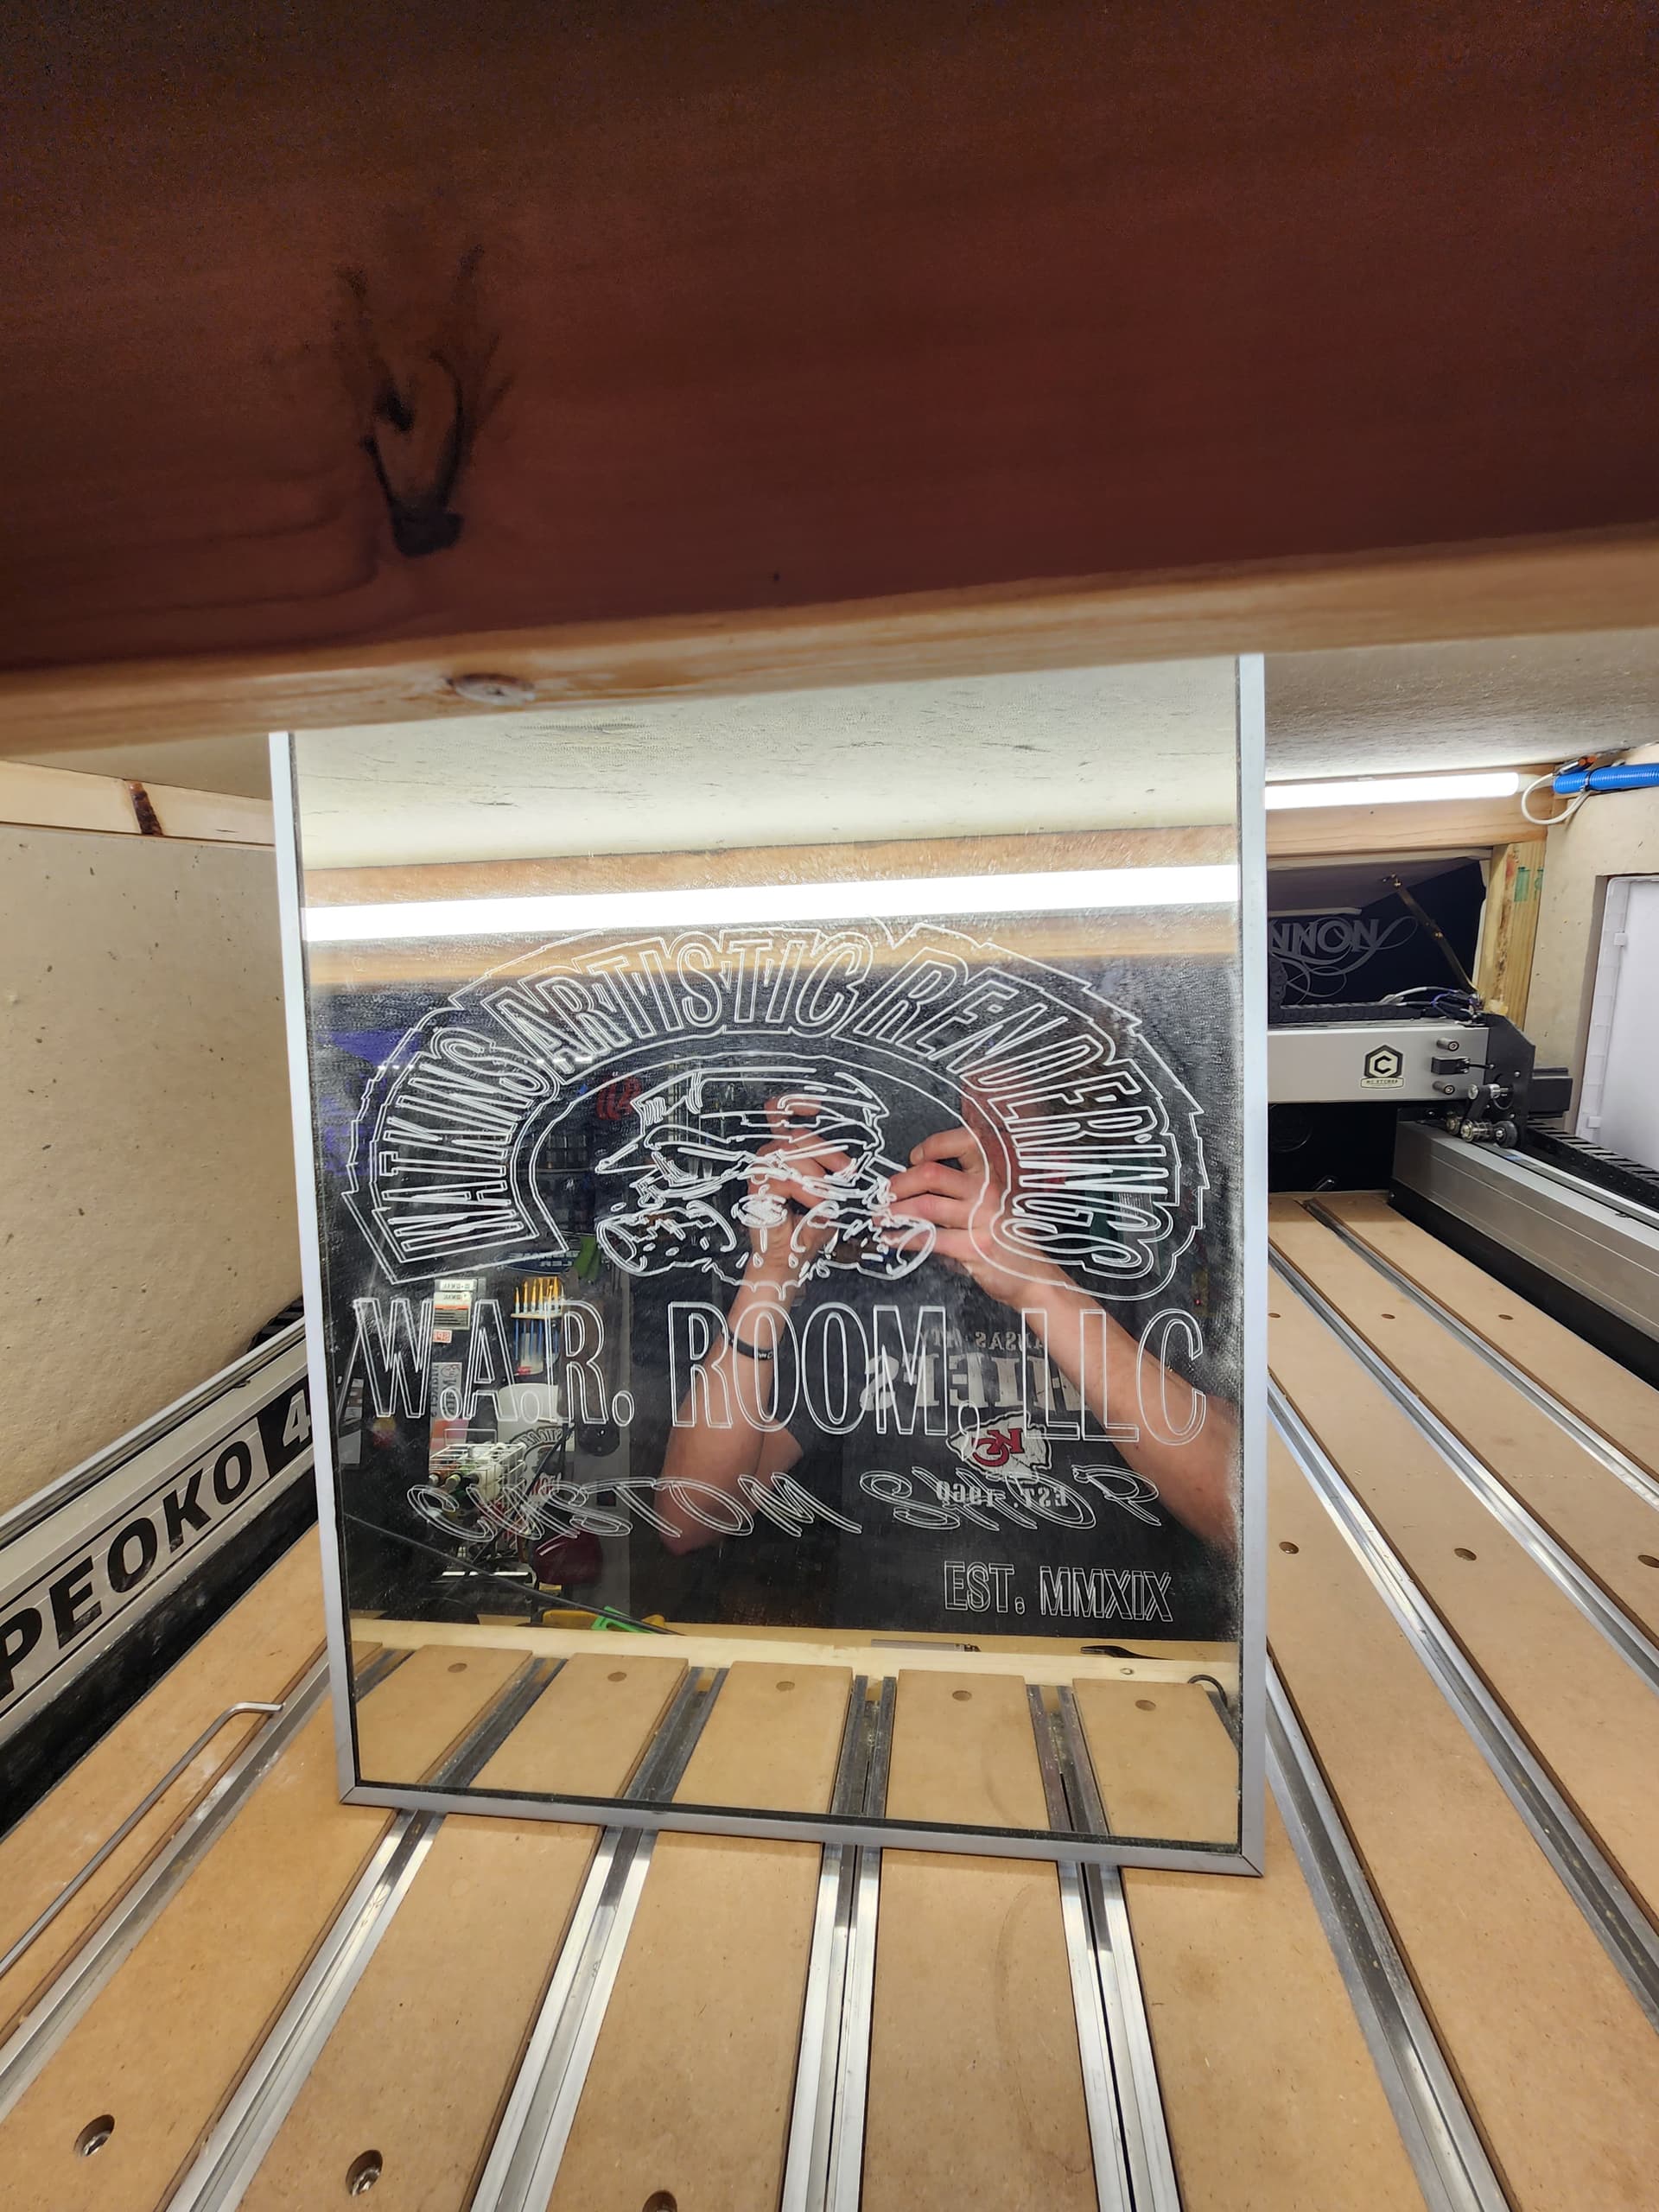
Couple of engravings using the MC Etcher 90 degree bit on some cheap mirrors from Menards. Really impressed with the quality of engraving that the Shapeoko 4 and MC Etcher produced. Both are around 16" W X 24" L.
I kept the mirrors lightly misted with water from a spay bottle to keep the dust and noise down.
I am thinking about using some oil for future projects to help lubricate the bit. Anyone try this or have other suggestions? TIA
.015" depth.
.118 stepover.
30 PR.
60 FR.
No offset.
Shapeoko 4 XXL
Now I know what to do with those 12 x 12 mirrors that I got on sale for a cancelled job!
@mwatkins003 Matt, do you think you could turn those upside down (and reverse the image) and cut the reflective coating off the back? Then backlight it, of course.
IME if you cut the reflective coating on the back the reflective material will rapidly oxidize and lose its mirror-ness — might be a way to seal immediately after cutting, but I wouldn’t count on it.
That is on my list to try. I’ve done it with my laser and had decent results. I would think that it is definitely possible and would give a stunning result as the engraving is much deeper than what my laser can do. Oxidation may be an issue but I would think a quick shot of clear would prevent this.
I’ve been messing with acrylic edge lit panels and have had pretty good results with those as well. Biggest challenge is coming up with a frame for the led tape lights. I’ve found a keyhole bit on the router table puts the perfect size cut for the tape to lay flat (3/8" diameter bit). Then it’s simply getting the spacing correct to ensure the edge of the panels sit flush.
I will update as soon as I have experimented with the backs of some mirrors.
Good luck!
MW
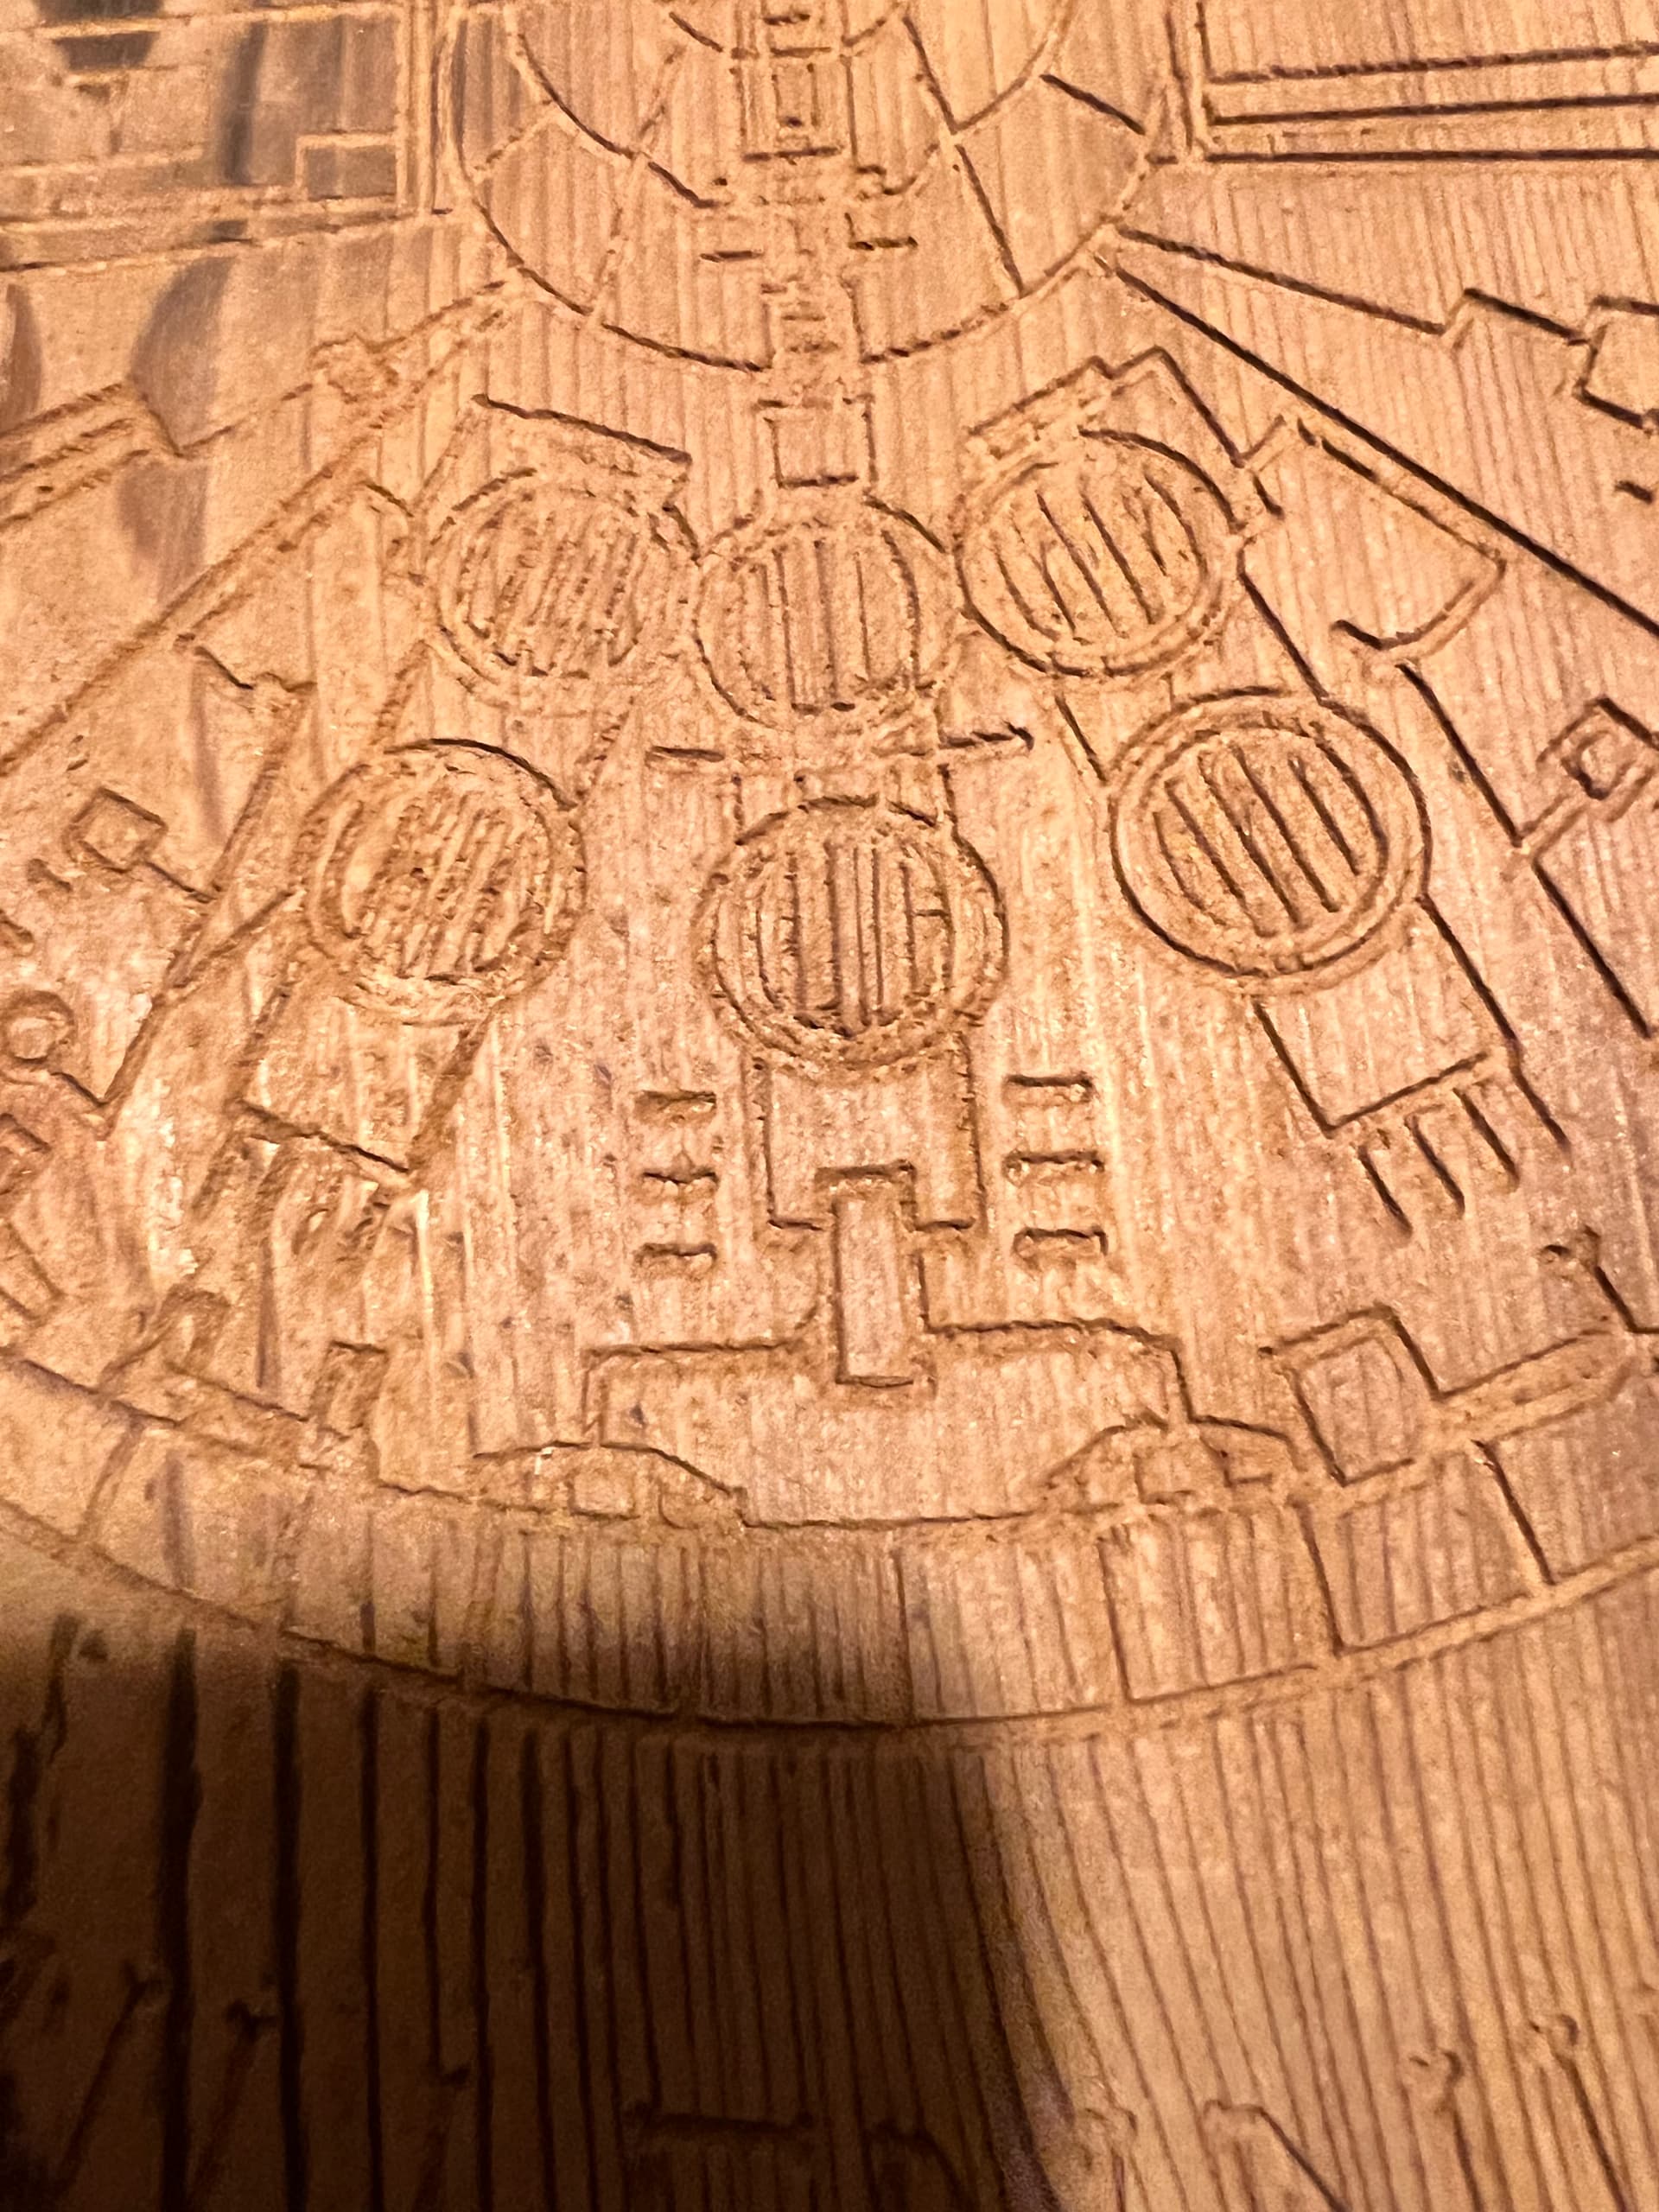
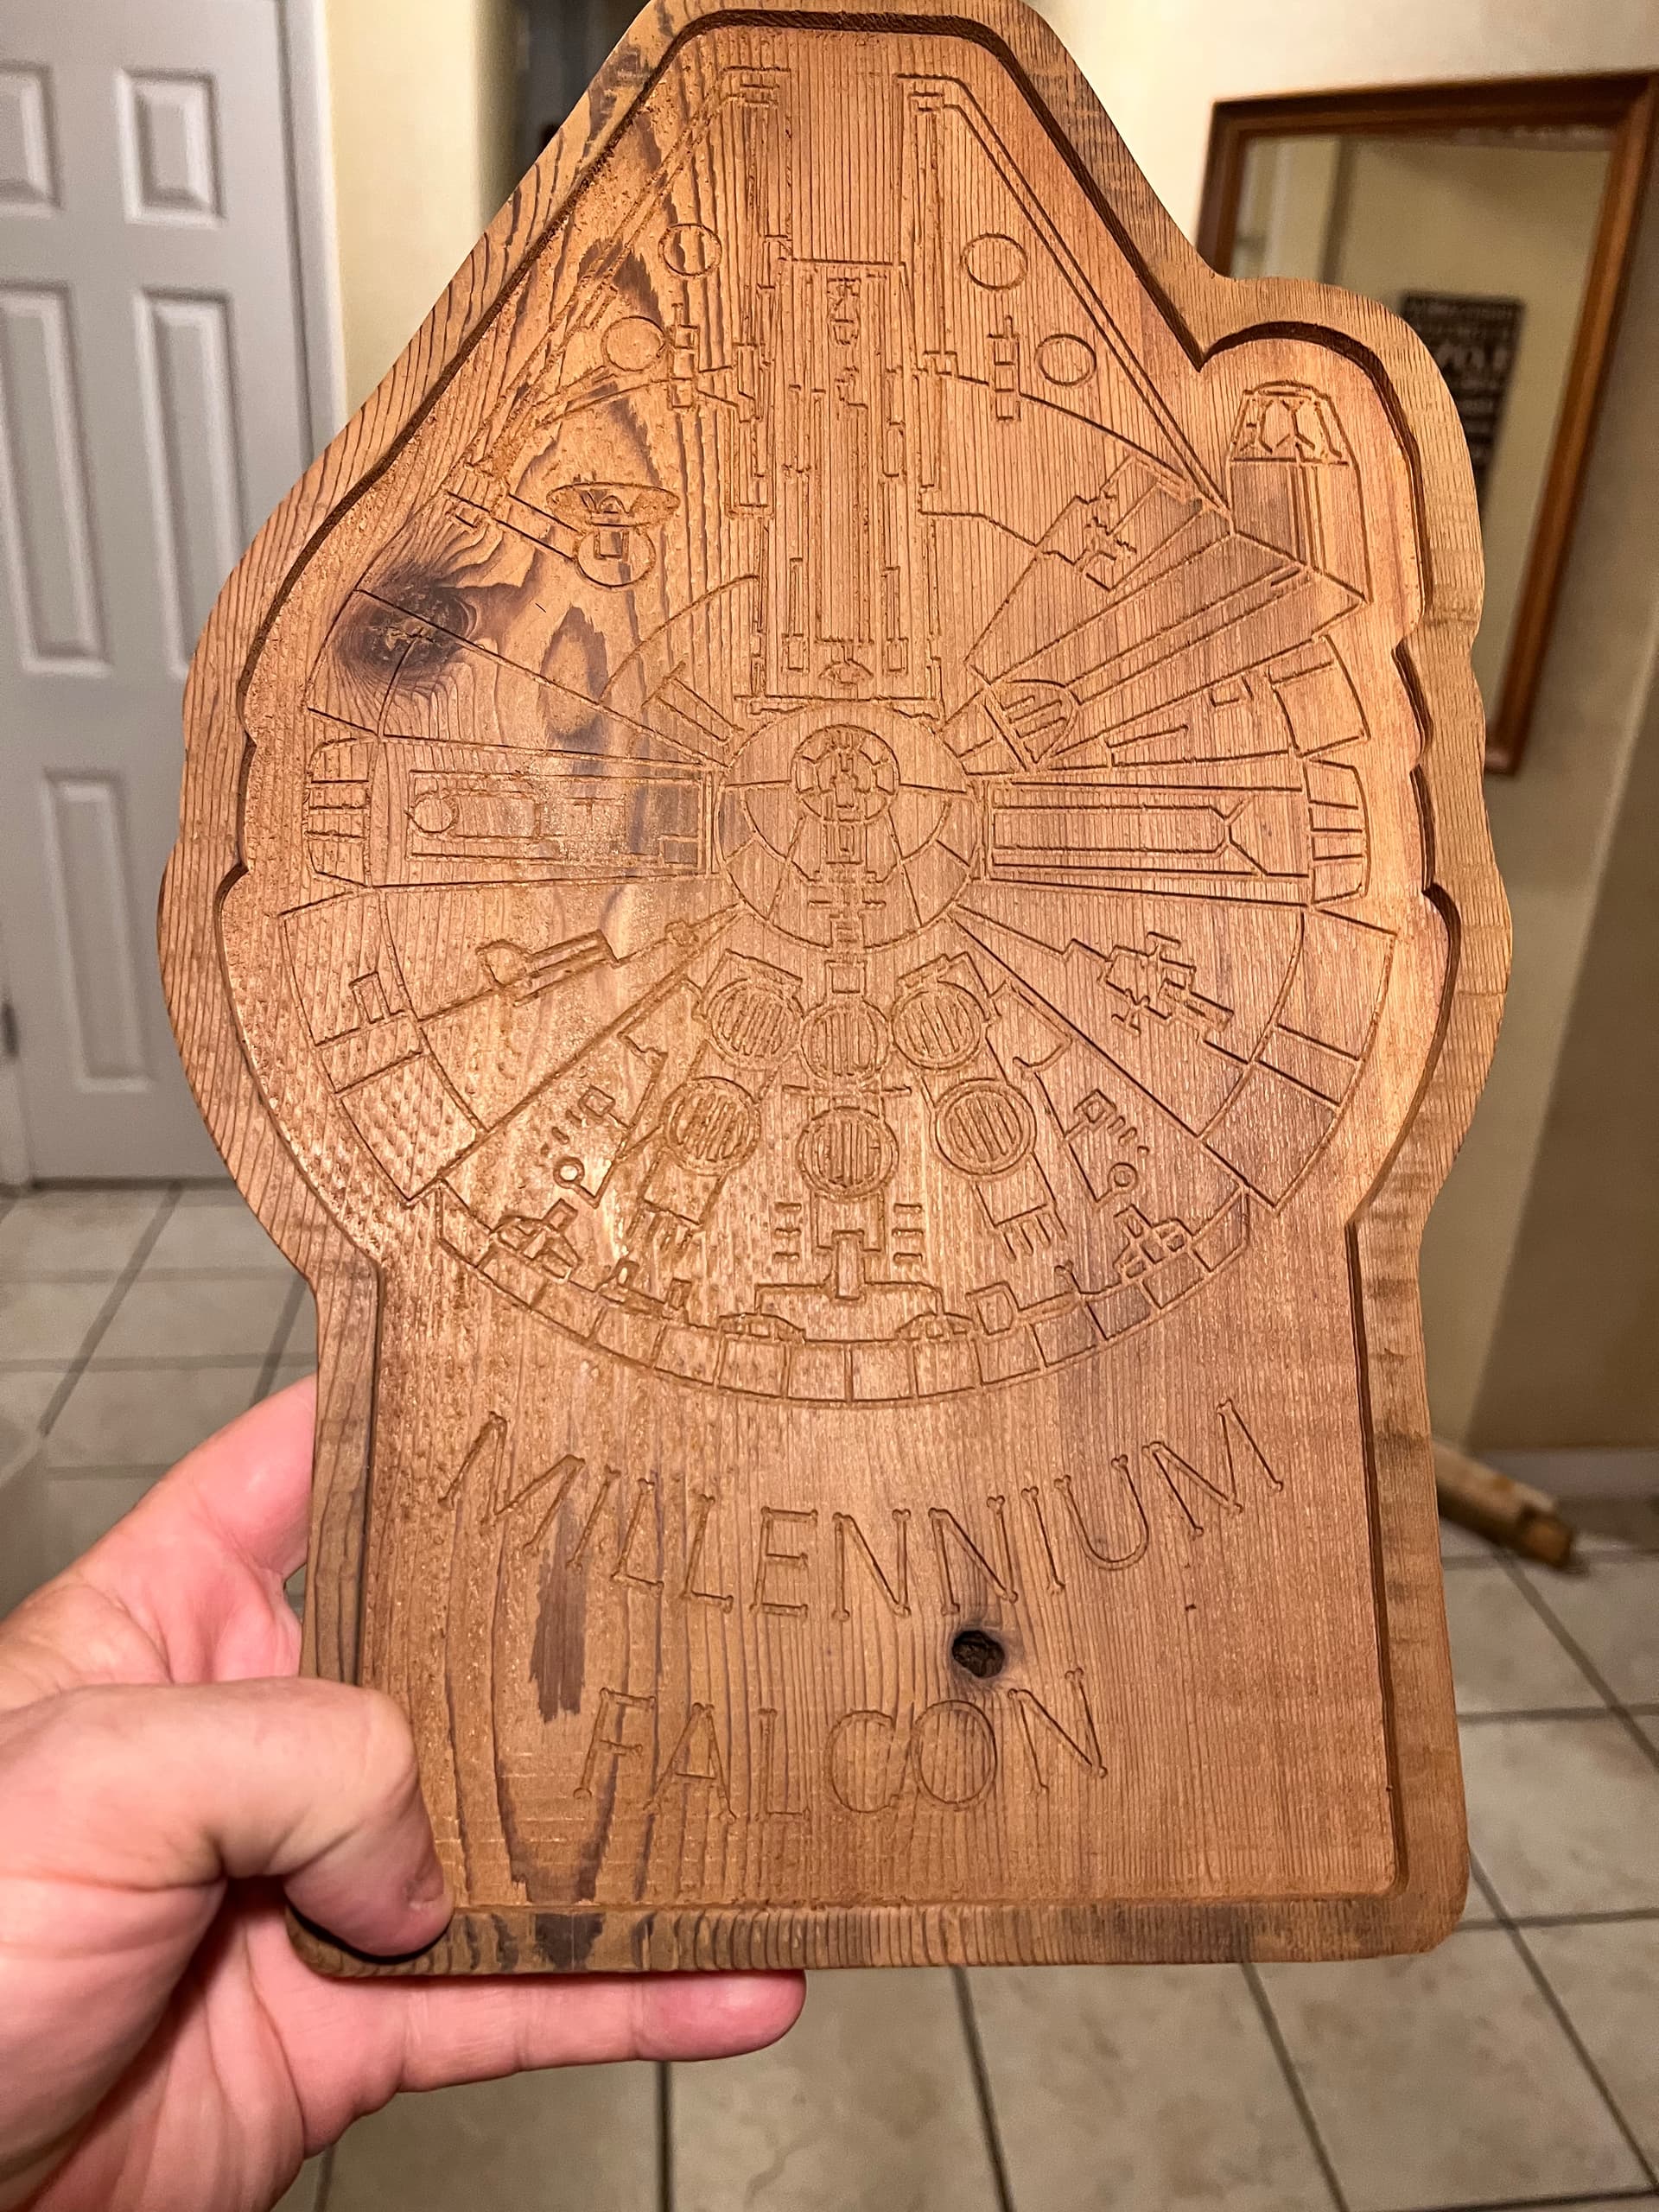
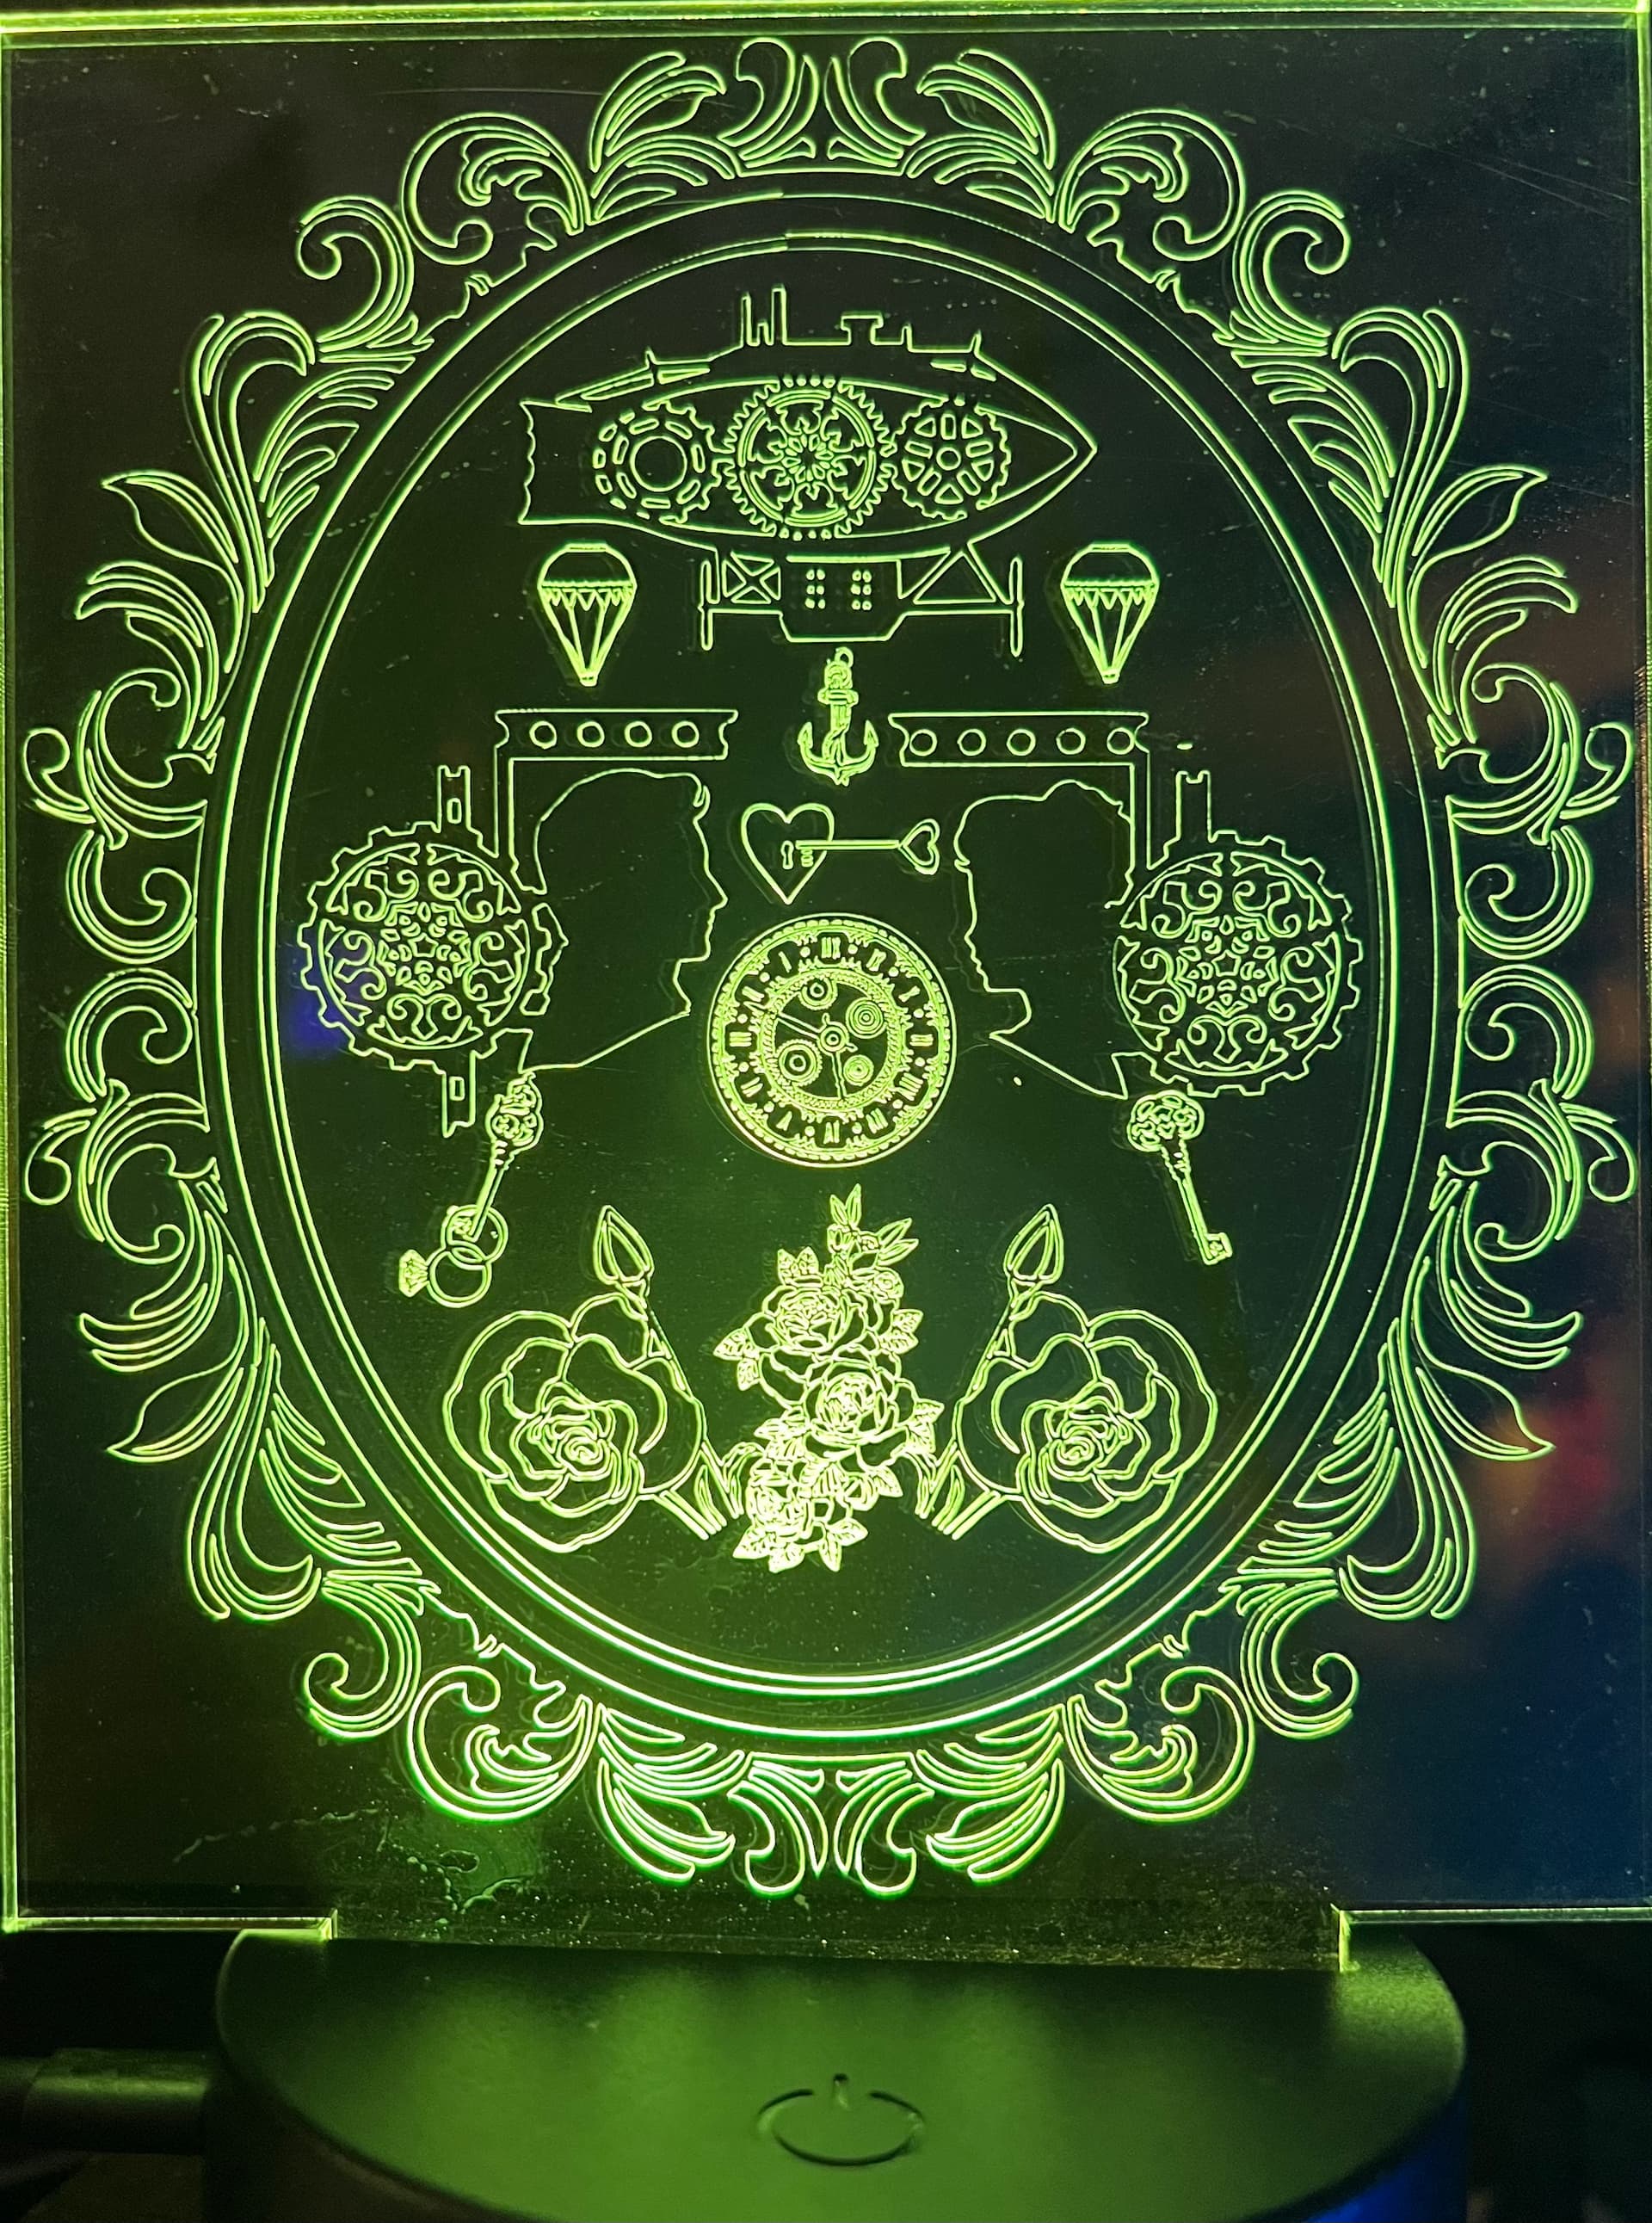
Here’s one of my better cuts for holding detail I have had recently
Sharp 60° bet and I’m cutting pine so I’m kind of amazed I didn’t break anything off
I set my zero just a little high, so I did not cut too deep with a V bit. And then I drop the zero point .004mm , slowed the field right down a bit and cut it again. That took out 75% of the fuzzies and I use the steel brush, a little sandpaper to clean it up.
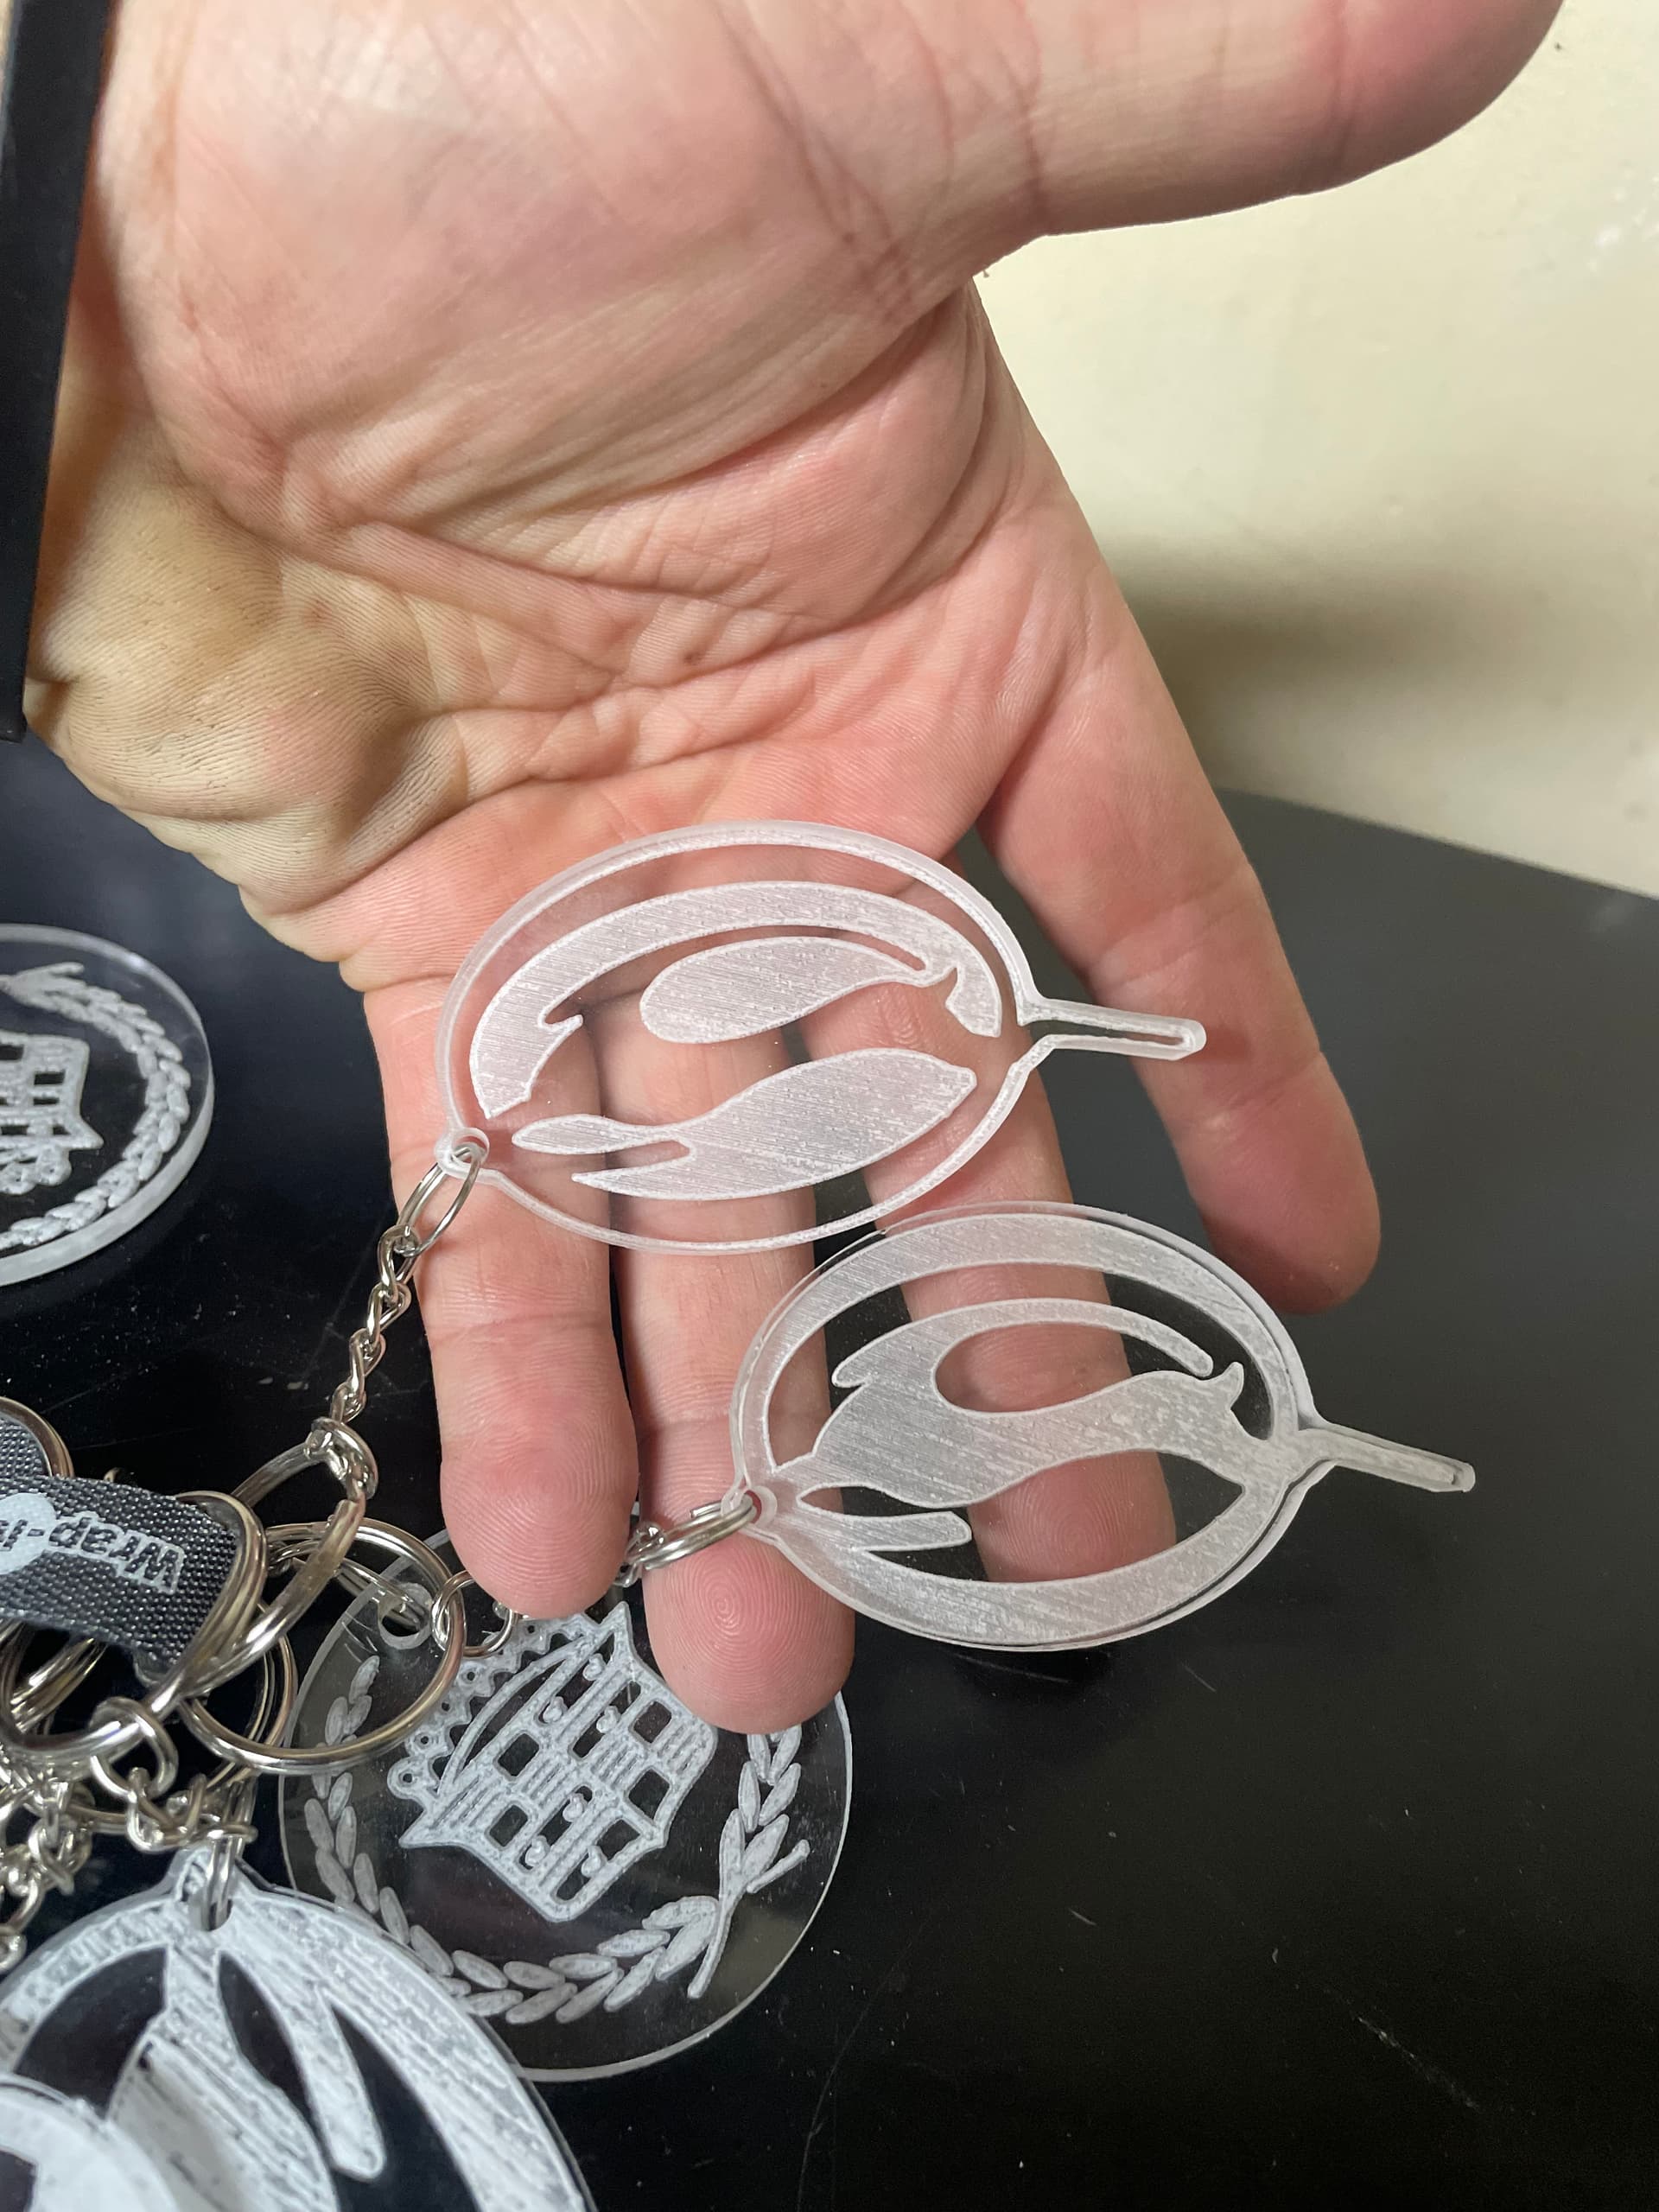
My daughter is using them as part of our wedding to label the tables so I’m making 13 different ones
I like back cutting of mirrors, lighting it with LEDs so many projects so little time
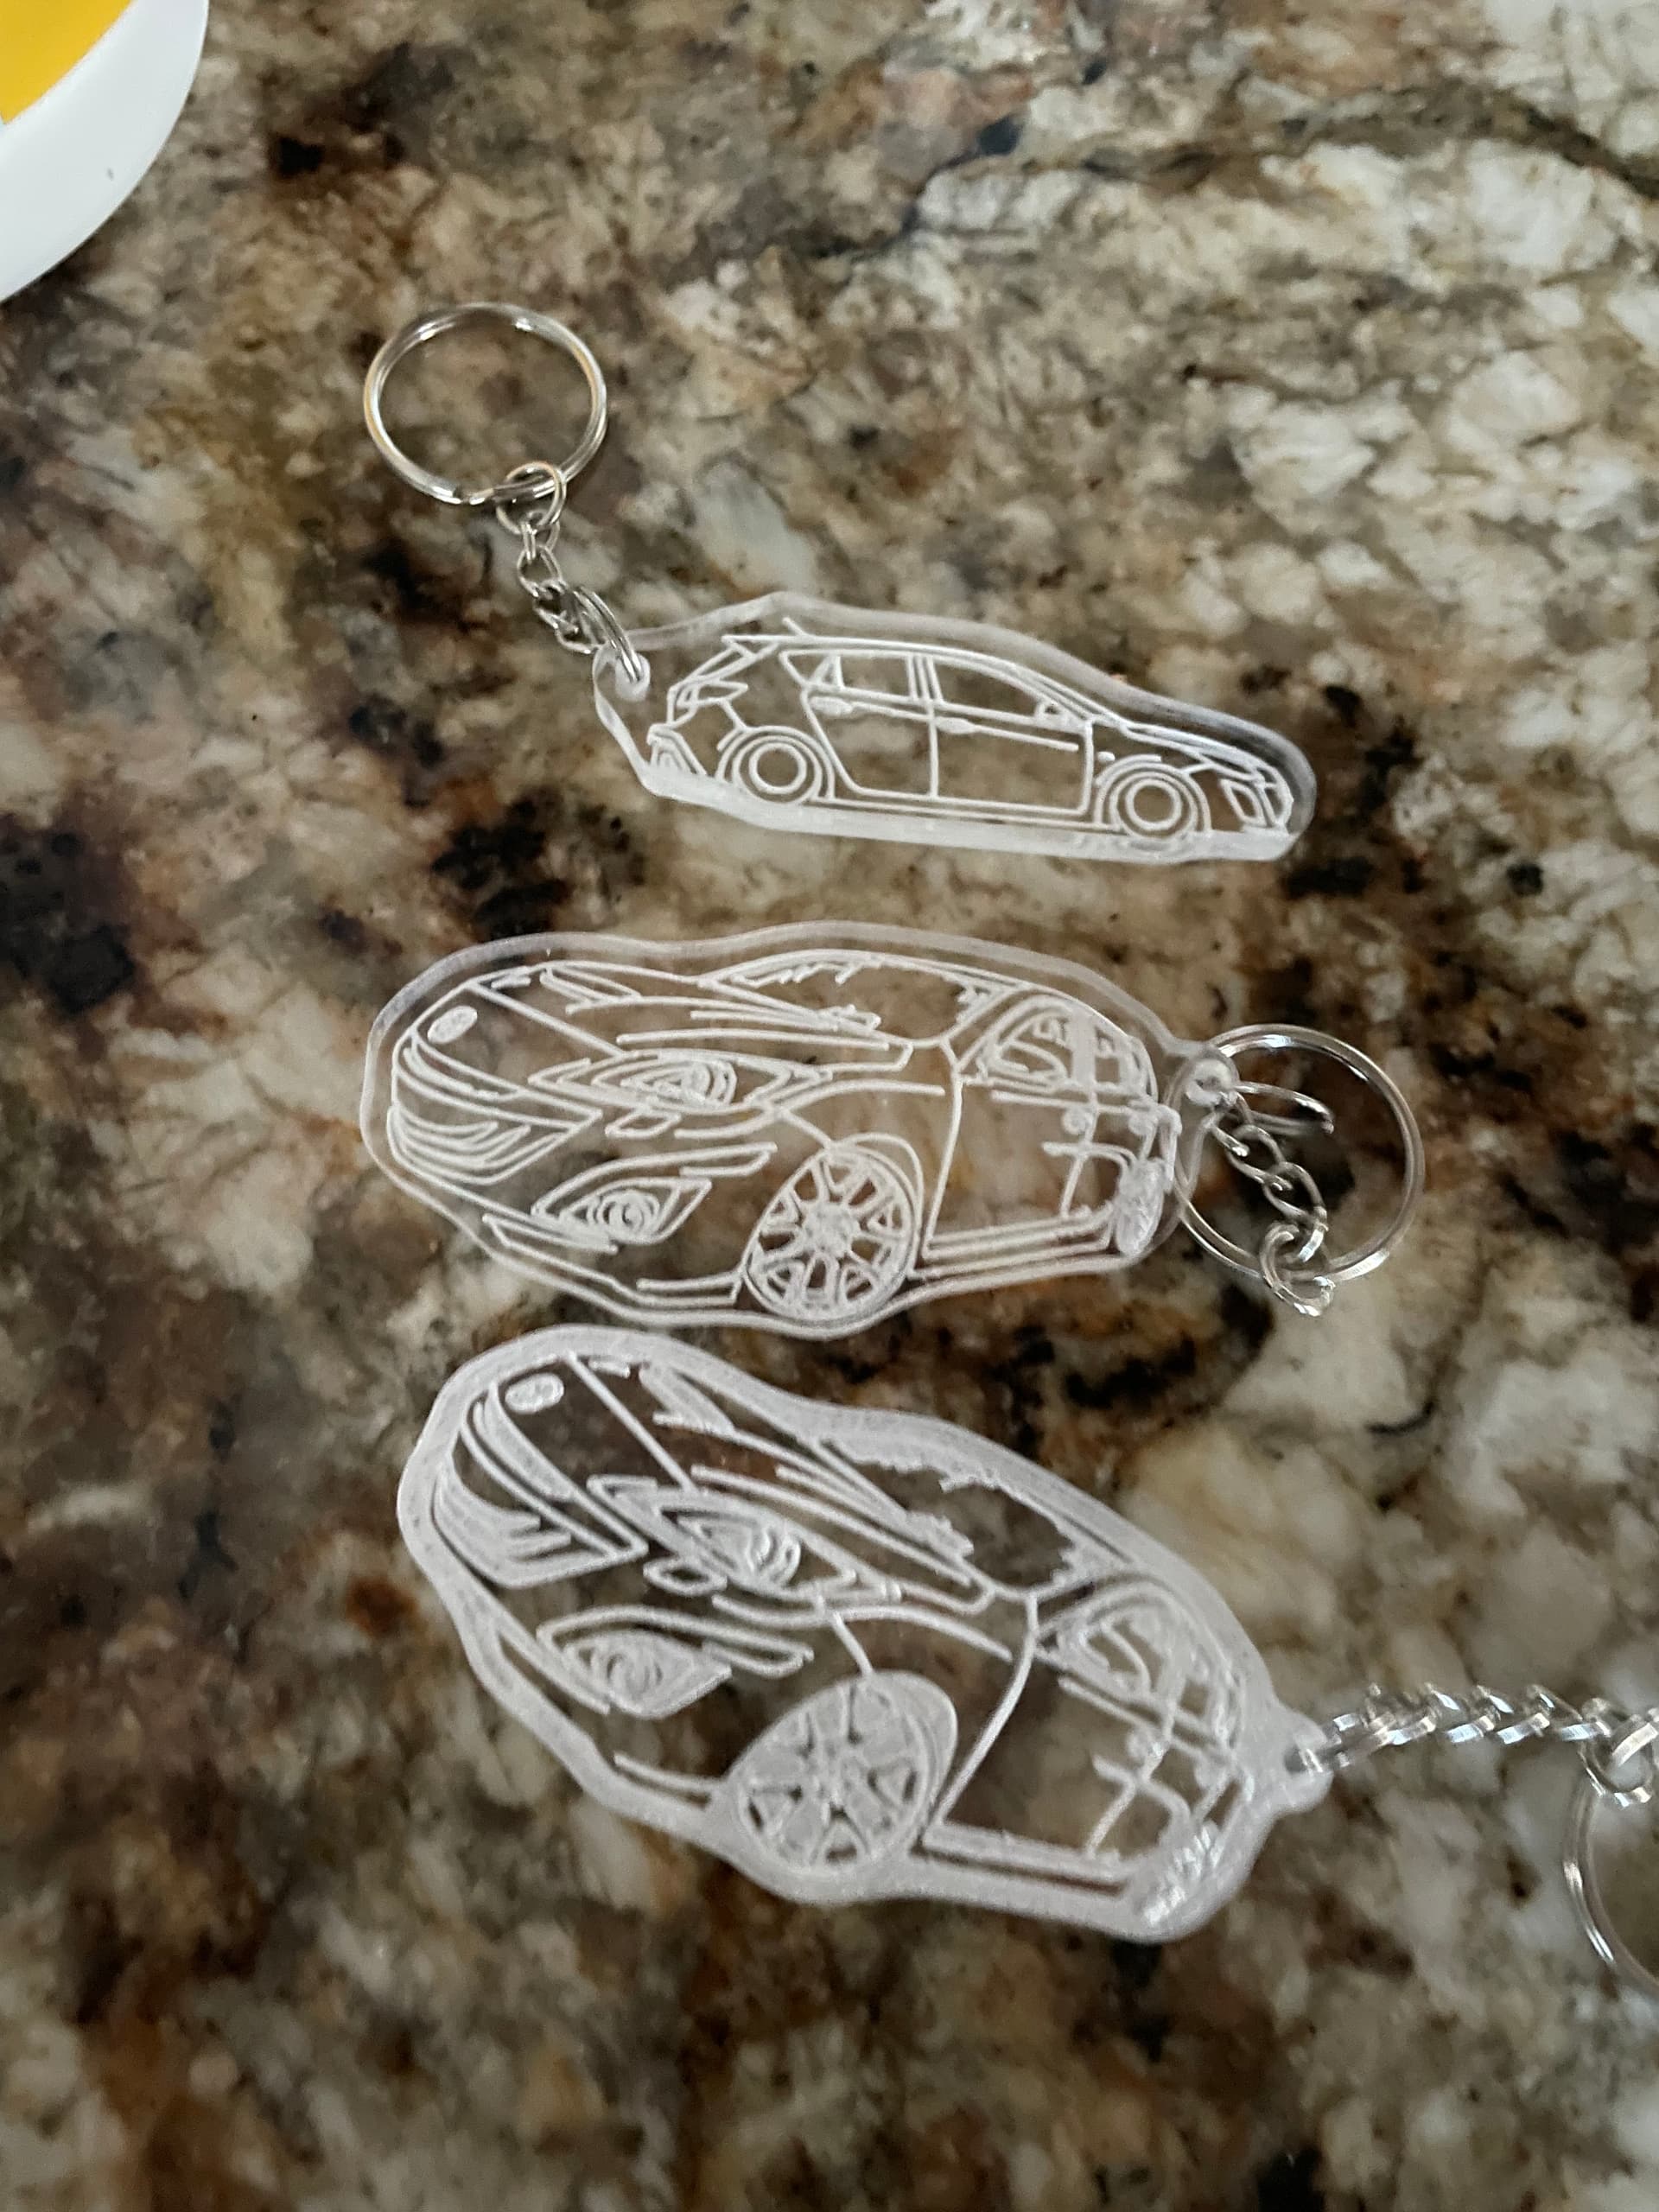
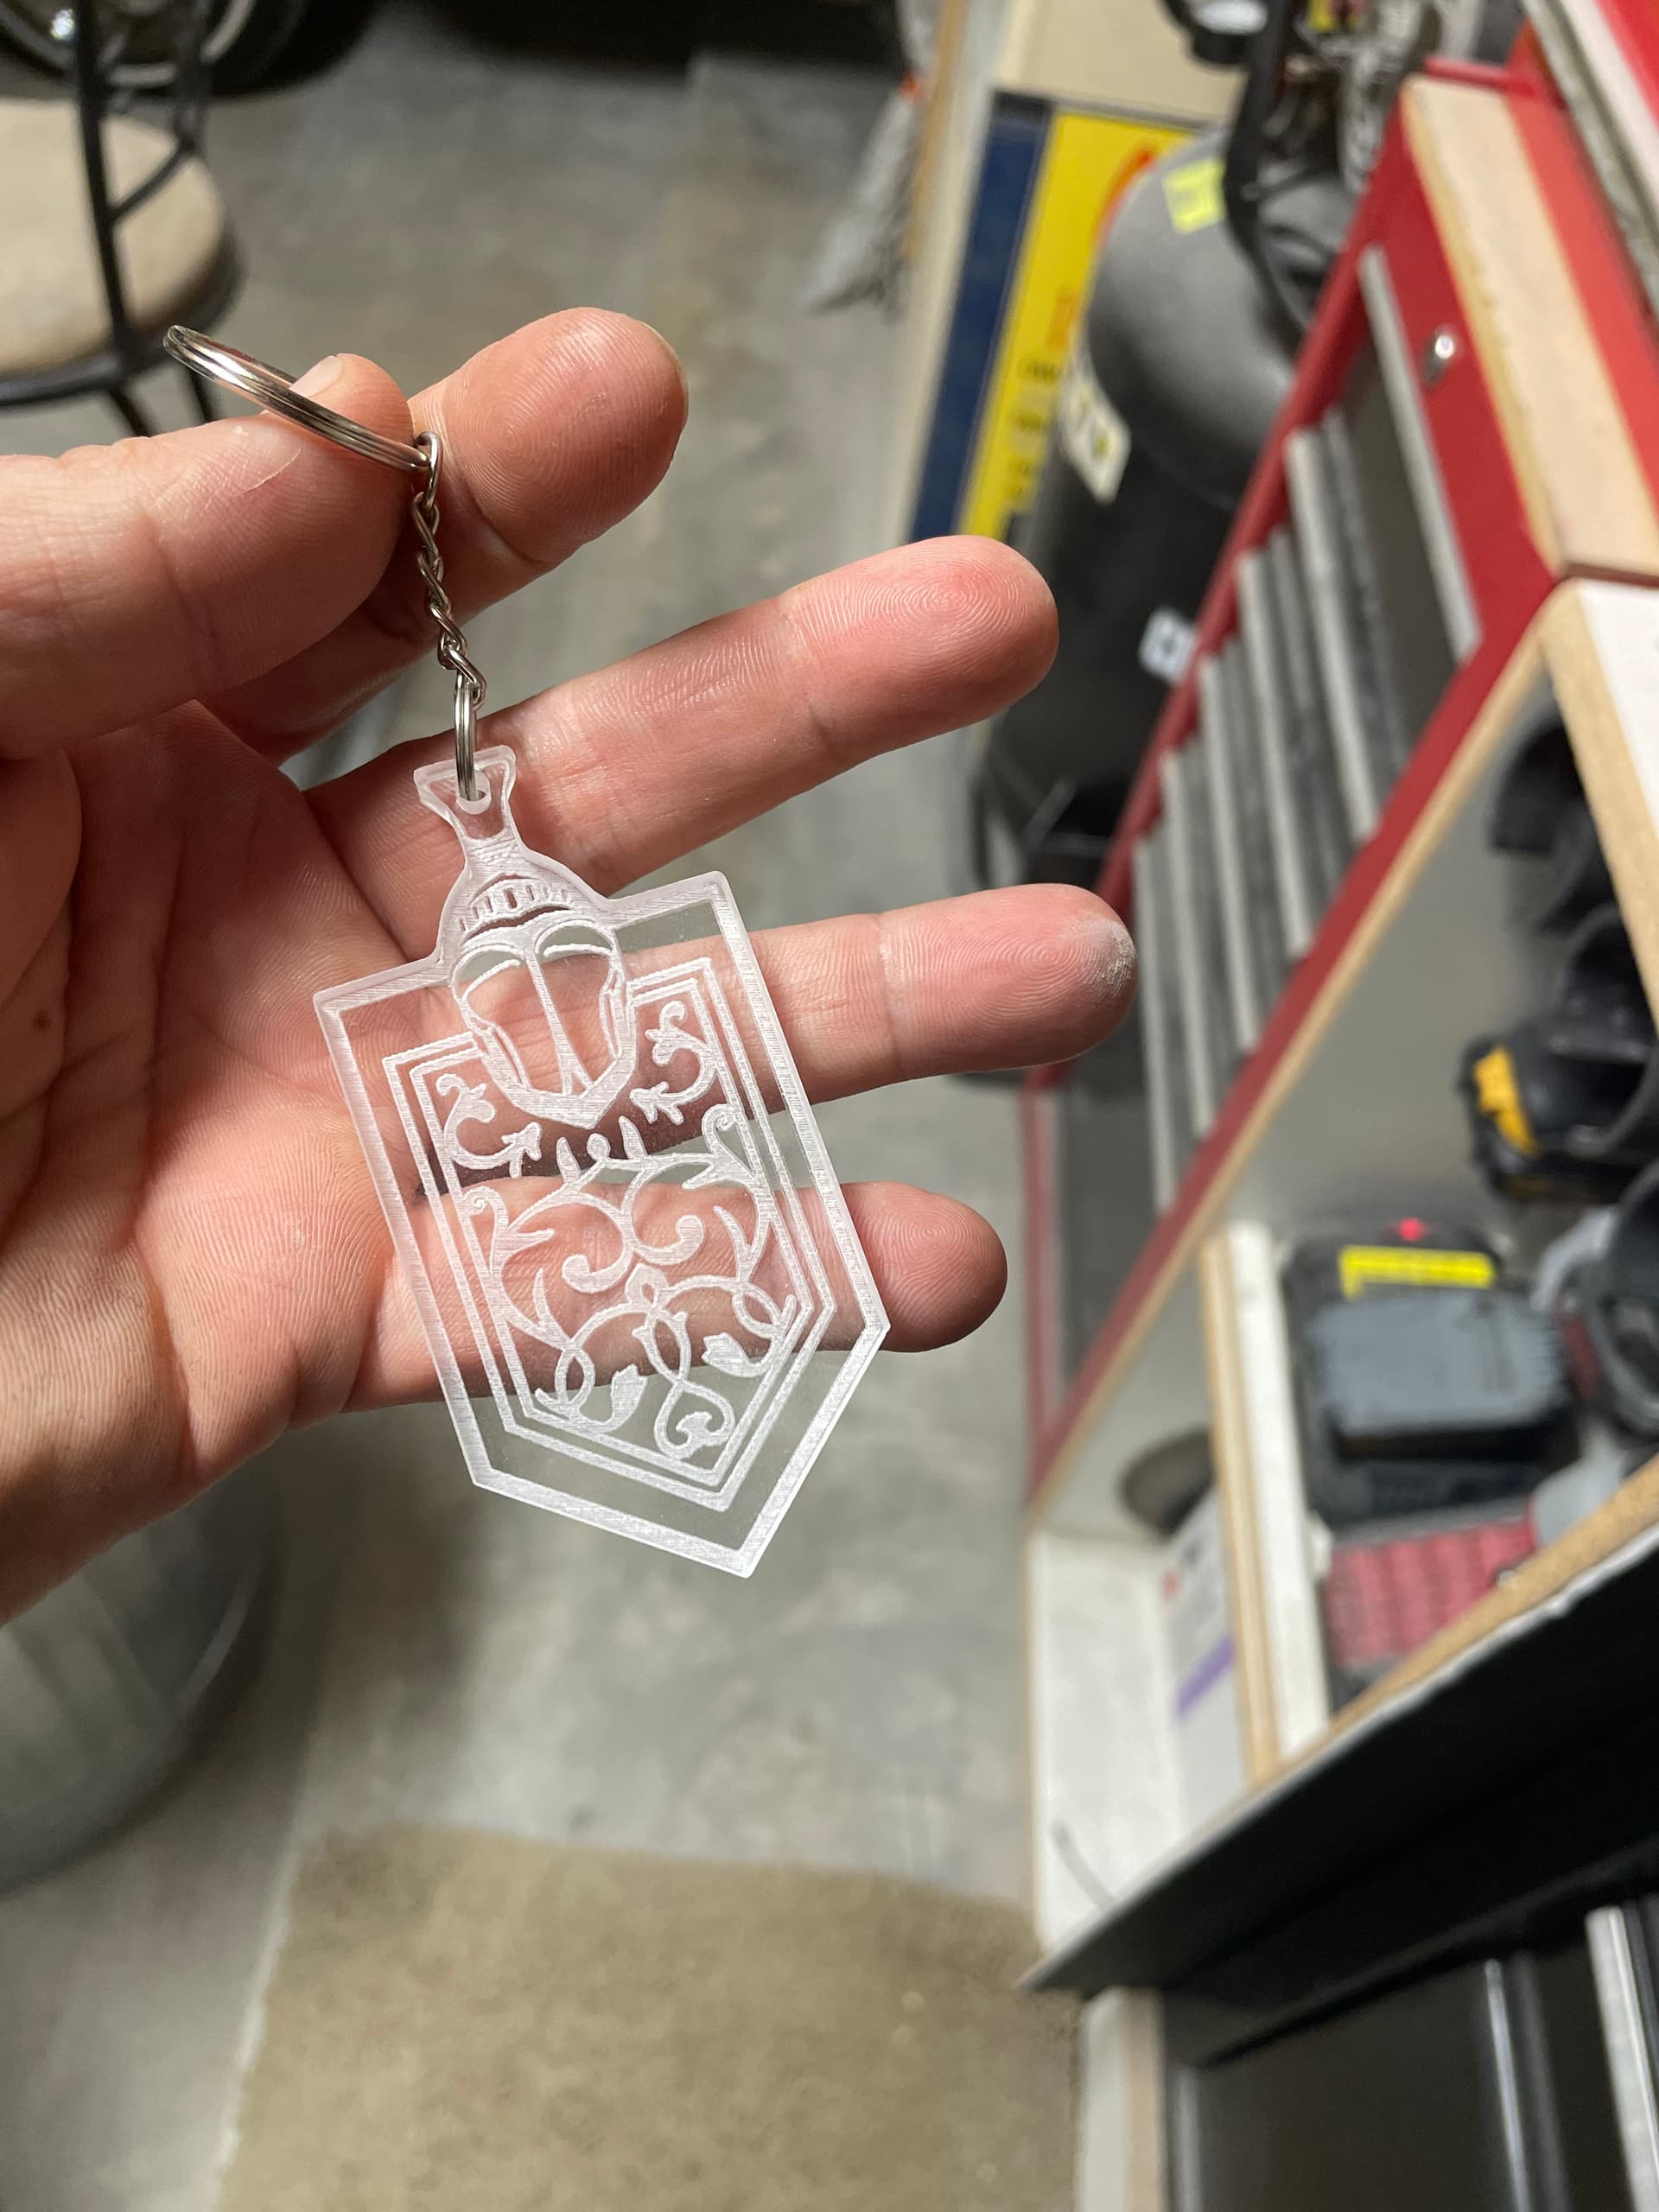
Looks great! I have been playing with the MC Etchers 120deg and 90deg bits too. I found that a drop or two of oil on the inside and running the router on the lowest speed also helps with acrylics. Here are some keychains I have been making. I pretty much use the default settings from Create.
I do not have the router running. I believe one of the replies to my original post referred to running the router on the lowest speed when engraving acrylic but I have not tried that.