Yep, circular. The crescent is because that mockup is carved in scrap plywood, so you get some uneven layers as you carve down through. It should not (in theory) look like that when I carve it in solid walnut.
Awesome! Can’t wait to see the final product!
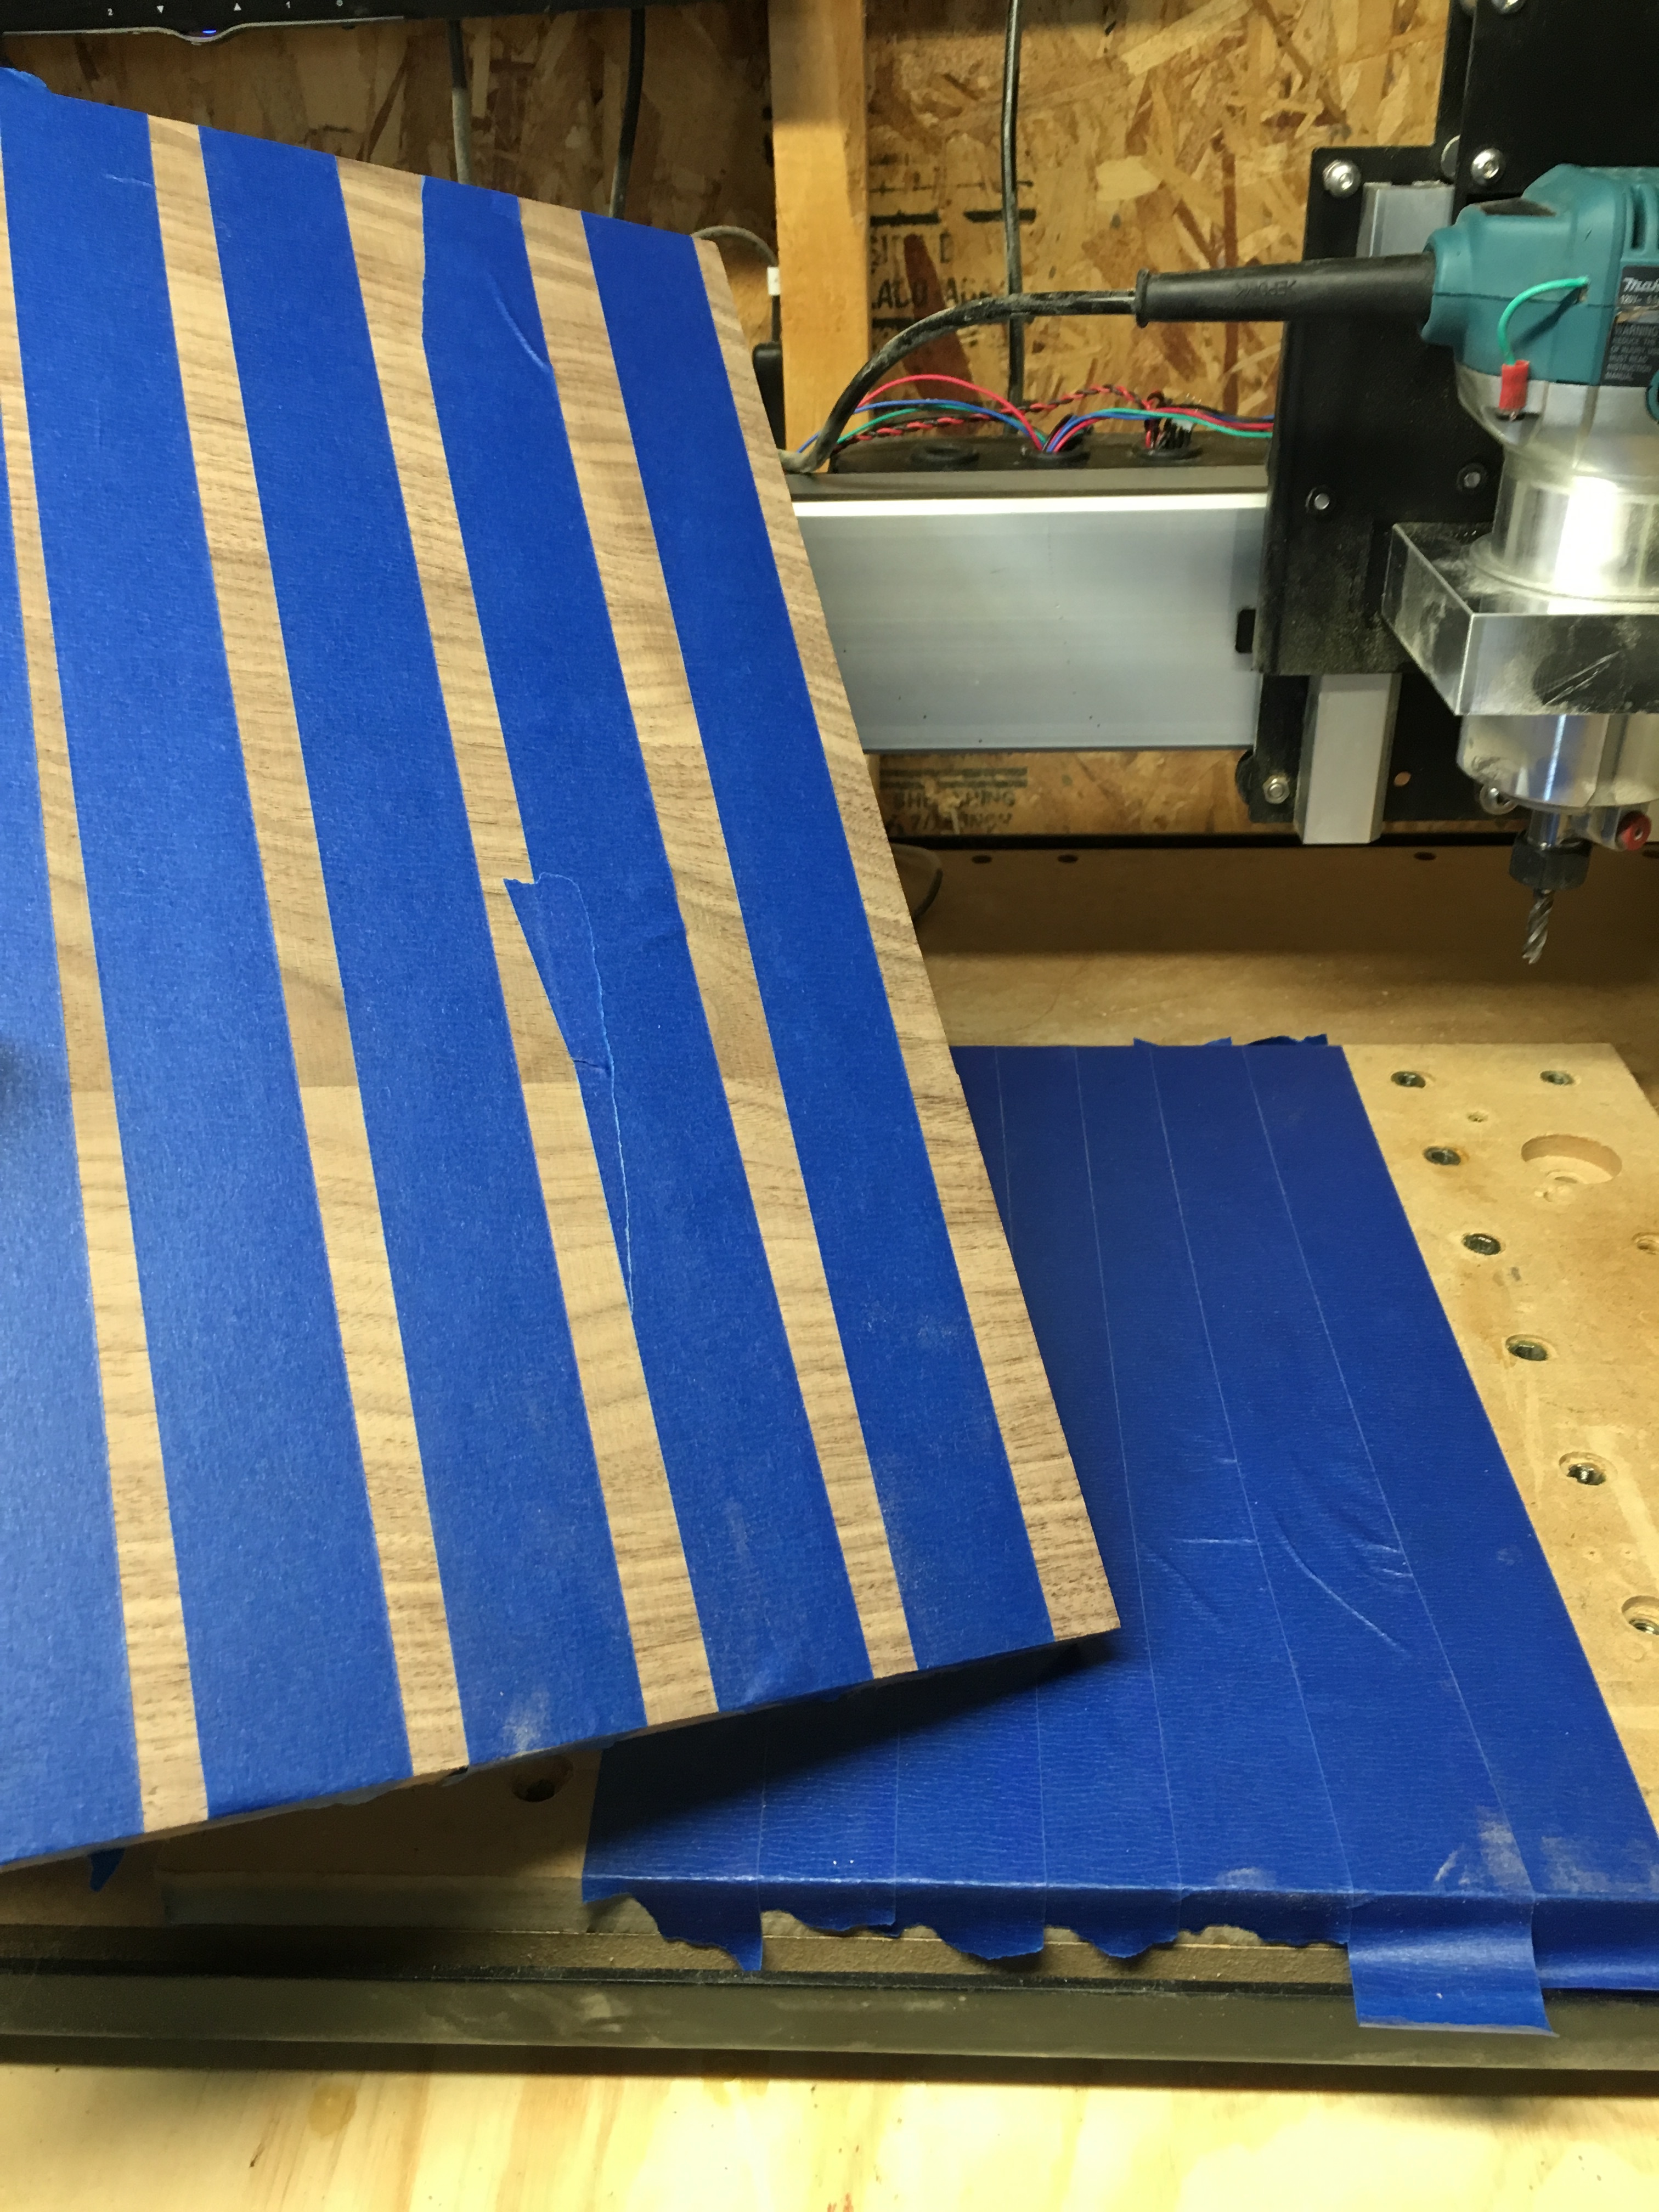
Thanks again all for the help. Here is what the carving in walnut turned out like today. I still need to polyurethane it, but I will have that done in a week or so if I can get a warm enough day. I have to say I tried the masking tape / CA glue work holding method that everyone keeps raving about and it worked fantastically. I don’t know if I would trust it for more aggressive feeds and speeds, but since most of this is ball nose with a very small stepover or vcarving, it had no issues keeping things in place. Pictures of today’s progress:
Masking tape on waste board and stock prepped. Didn’t want to have to worry about aligning tape, so put a continuous surface down on the wasteboard, and just some stripes on the stock. Glue went on the stripes and sprayed the activator on the wasteboard tape. I had measured and pre-marked alignment indicators on the stock and wasteboard, so that I could line it up as I pressed it into place. You don’t get much working time before that glue is stuck in place.
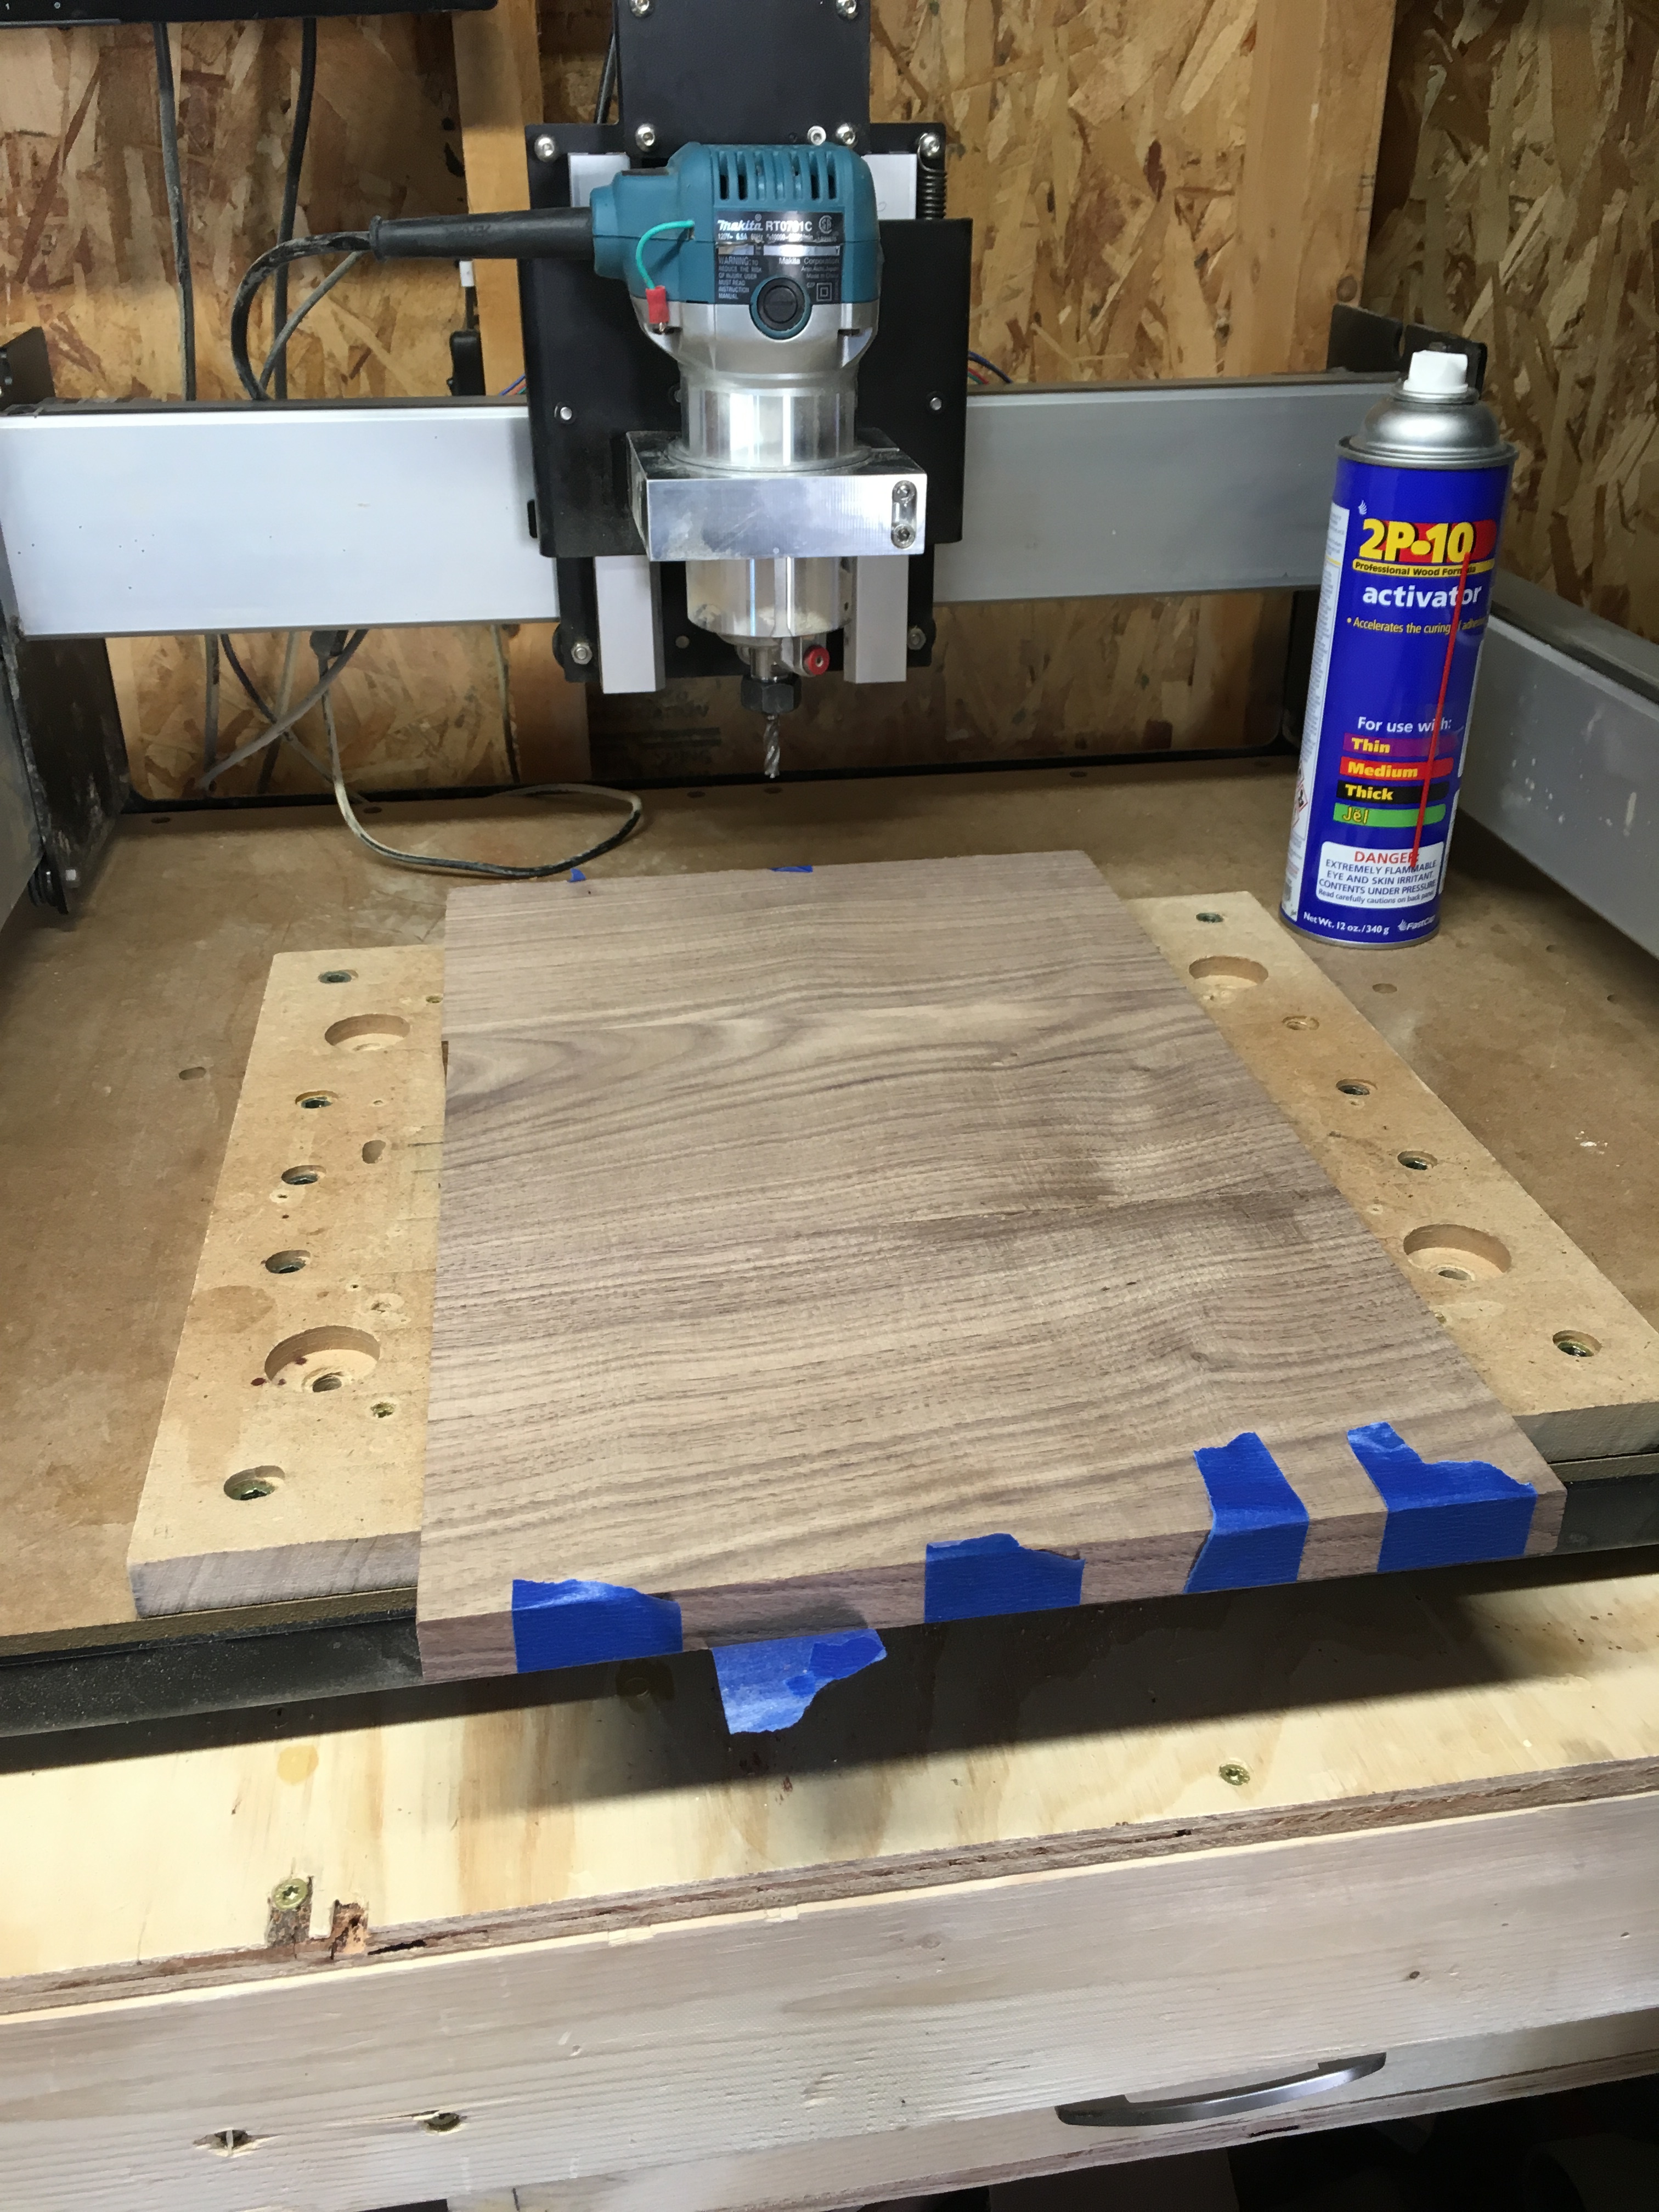
Used a 201 mill to run a profile around the stock and clean off any excess. Then used the 201 to rough in some of the 3D features. After that, a .25" ball mill to provide the outside texturing around the plaque.

Switched to a 1/8" ball mill for the Eagle Globe and Anchor with rope design.
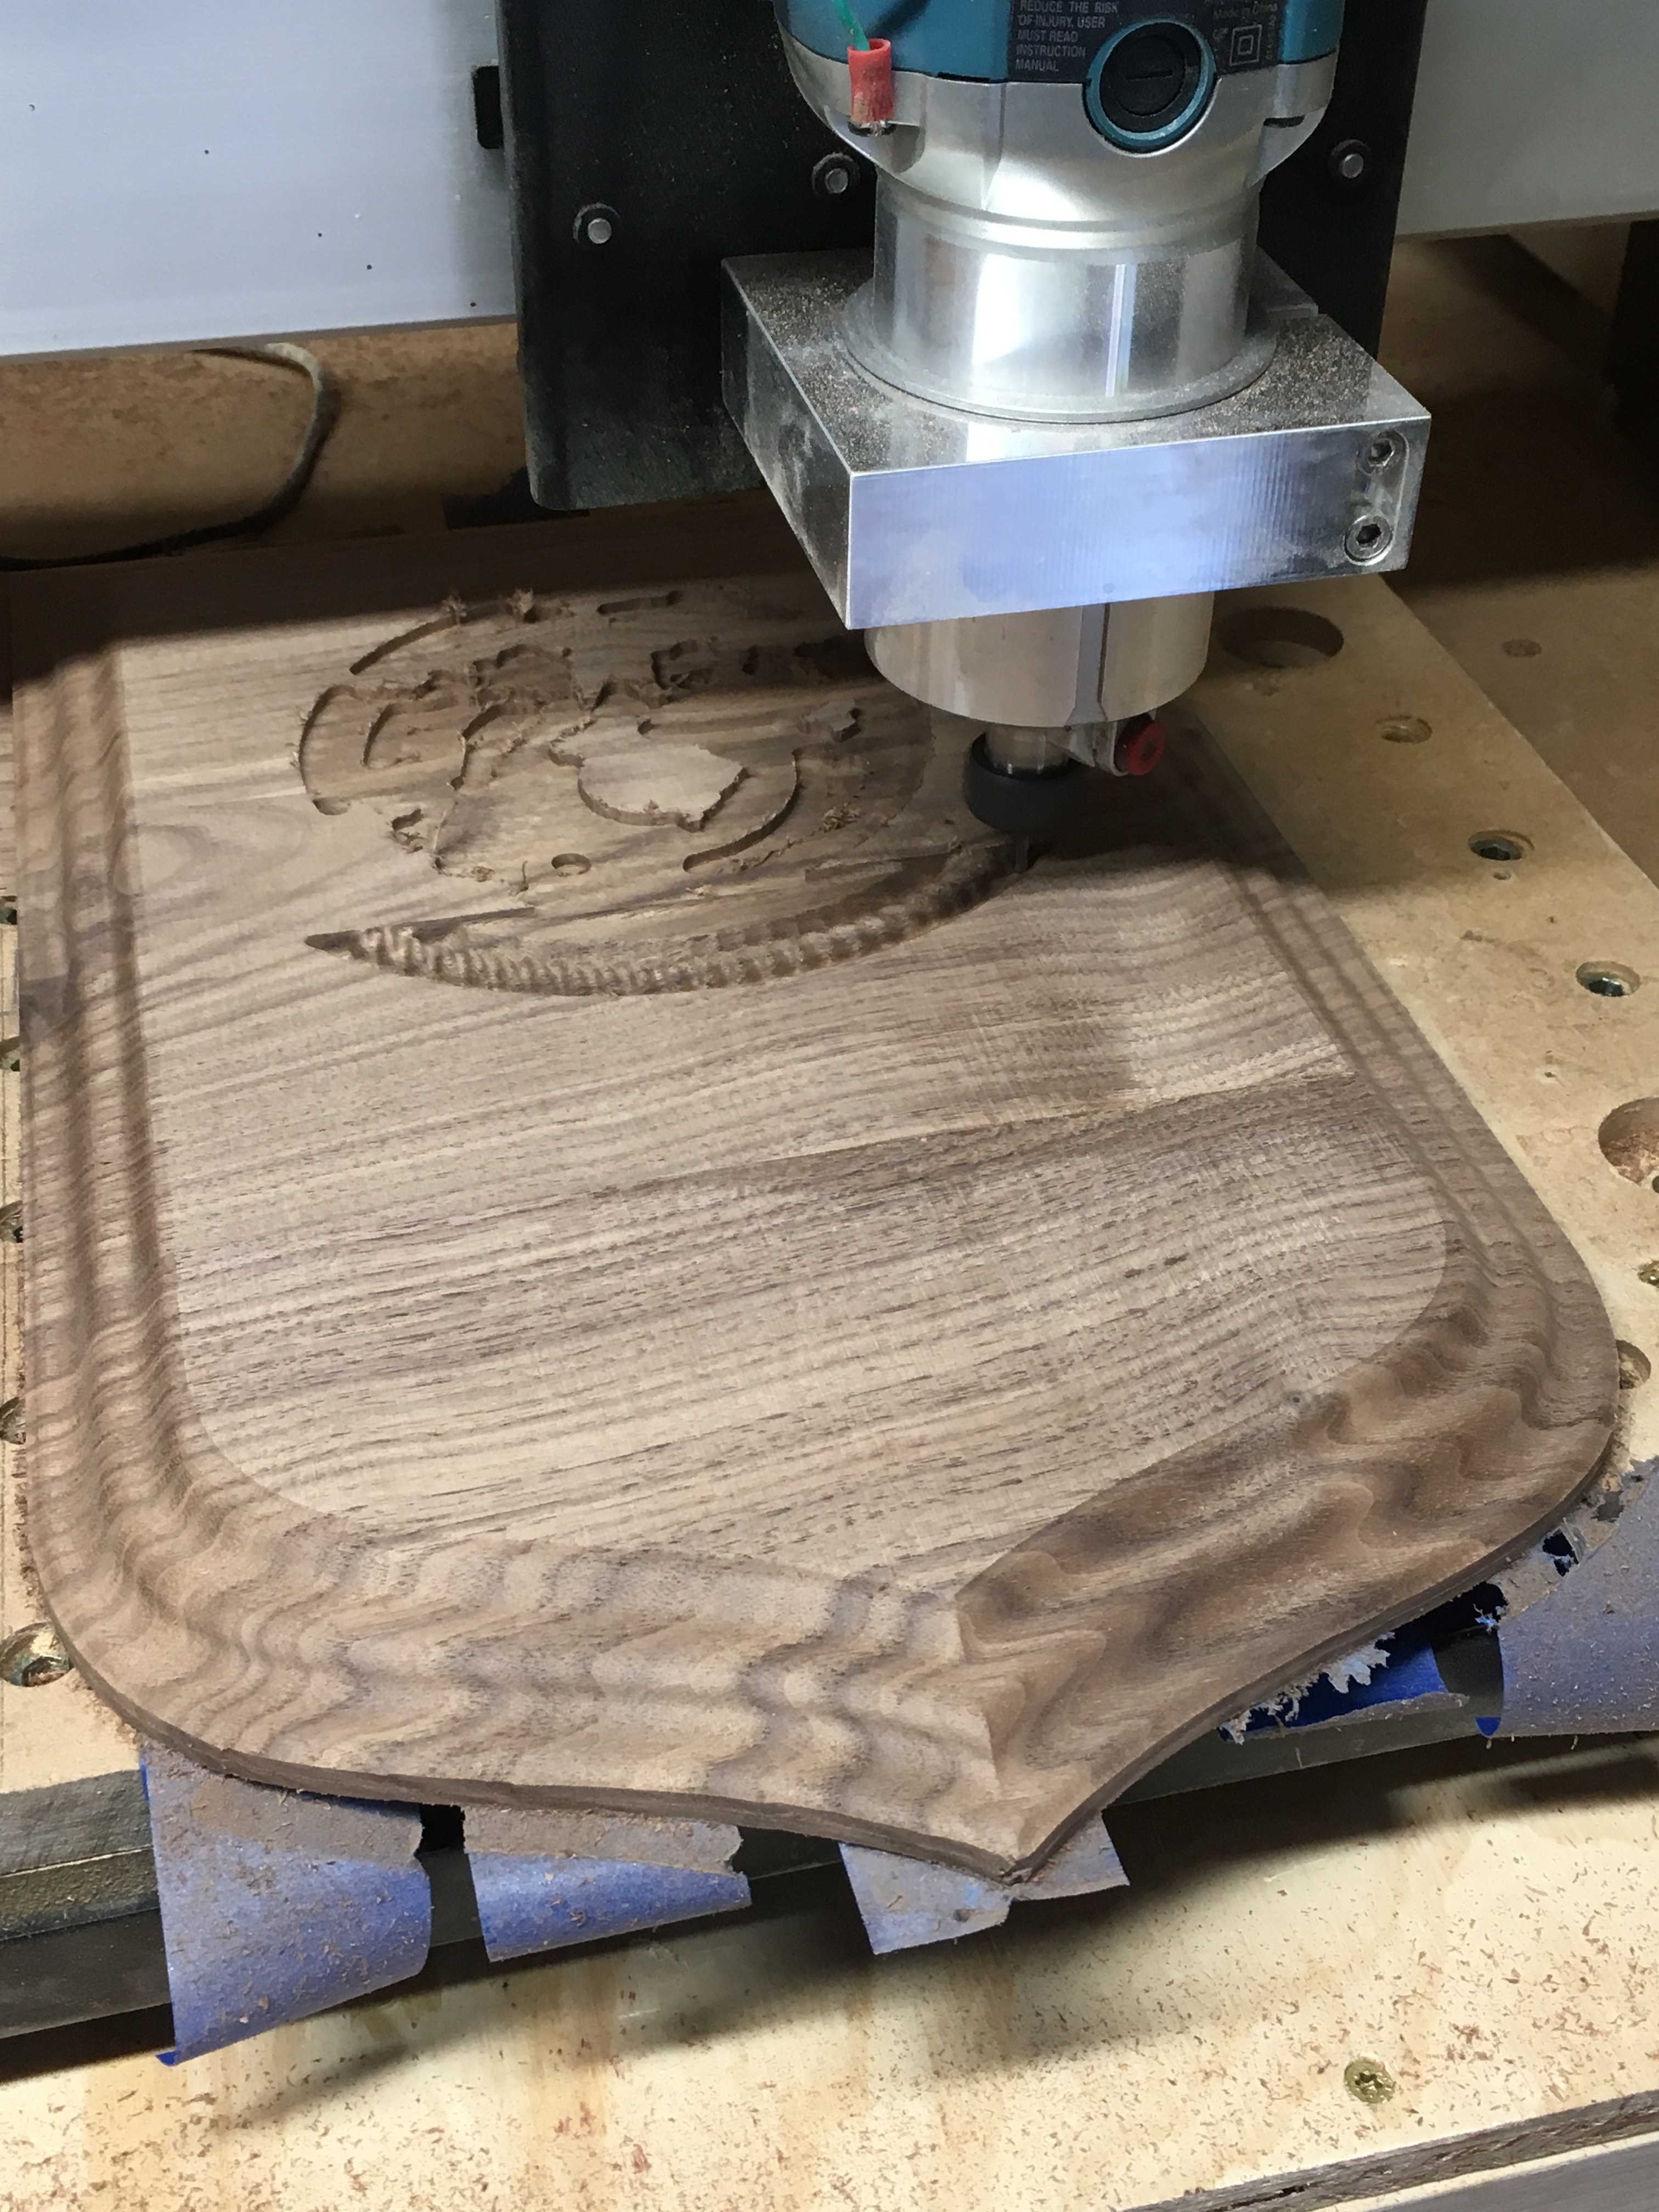
Then just V-carving the text using a .25" 60 deg V-bit. After that, some minimal sanding on the outside edges, and a little clean up with a tack cloth and the features start to come out.

Going to sleep on it, but I originally wanted to paint in the letters black, but I think I may just leave them plain. The polyurethane will darken up the wood and will bring out the depths including the letters, so paint may not be required.
13 Likes
Oooh–now that’s really nice. Congrats!
(Oh, hey, I’m late to the party):
The Top version seems to be visually stronger, but the lower one is easier to read through. MaxamillionX72 makes a good point to simplify by removing the quotes.
This came out GREAT!
I love this. All the great advice from so many folks. There’s lots to learn, and that turned out AWESOME!
1 Like
Picture of the final product after a few coats of General Finishes Arm-R-Seal. Thanks again for everyone’s help. The wife was absolutely correct when she suggested not to paint in the letters black. And I love how walnut comes out with just a simple satin finish on it.

19 Likes
Well done! That looks great.
1 Like
Wow, that looks amazing. I’d like to show that to my students. We are just getting started and that would inspire a lot of kids. Great work, sir.
1 Like
Really well done,EvanDay! I agree, the finish you applied really makes the plaque pop.
That is truly spectacular, nice work everyone!