Milling Aluminium on an S3

After reading through numerous posts on the forum and finding some inspiration from all the amazing work from community members, I decided to commence my CNC and Shapeoko journey earlier this year. I just wanted to share some of the projects that I have been working on and also any future work here.

Below are some images of the enclosure that I designed and built for my machine. The aim was to create something that was functional and helped improve my workflow when machining parts. A lot of consideration went into the design of the enclosure. All the wiring and dust extraction hosing are integrated into the enclosure and allow everything to be contained in the unit.


Below are some of the aluminium parts I have designed and machined on the Shapeoko. At the moment I am mostly using 6061-T6 aluminium and single flute end mills for machining. I’ve spent the last few months refining my speeds and feeds for fast material removal, whilst still providing a good surface finish. All these parts had custom fixture plates designed for them and I was using Mitee-Bite fixture clamps for the main work holding. I do also use adhesive work holding with blue painters tape and superglue, which works well for most parts that have a large surface area for the tape to adhere to.


Here is a short video showing how I machine one of the fixture plates.

If anyone is interested in seeing more parts or some of the fixture plates, then let me know. More than happy to try and provide as much help as possible! More to follow!

37 Likes

Are you @Vince.Fab’s Aussie cousin or something ? You sure share the skill to make an awesome first impression on the forum !
That setup looks fantastic, and your parts are evidence that a stock machine is perfectly capable of producing beautiful aluminium parts.
Now, we want to hear more about your CAD/CAM approach, toolpathing strategies, feeds and speeds, tips and tricks. Also, show us some of the finished RC cars where these parts go !

8 Likes

Truly superb design and execution. Looks like a bit of lab equipment rather than a dusty tool stuck in a garage.

4 Likes

Haha, thanks @Julien!

For CAD/CAM software I’m using Fusion 360. Where possible I will use adaptive tool paths for removing the majority of stock away. With adaptive cuts I’m mostly using 4mm-8mm single flute end mills, as they provide really good chip clearance in deeper pockets. In the adaptive cuts I tend to use a 10% radial width of cut and 100% axial depth of cut. If I was using an adaptive tool path with a 4mm end mill, that would be a 0.4mm radial width of cut and 4mm axial depth of cut. I mostly run the router at 24,000 RPM for adaptive cuts and use a feed rate of 1000mm/min-2000mm/min. I don’t really push the feed rate past this with the stock machine and have also found that with really secure work holding it’s easier to feed faster. The aim with this adaptive strategy is to try and produce a proper chip. It will be interesting to see how much more this can be pushed with the Shapeoko Pro.

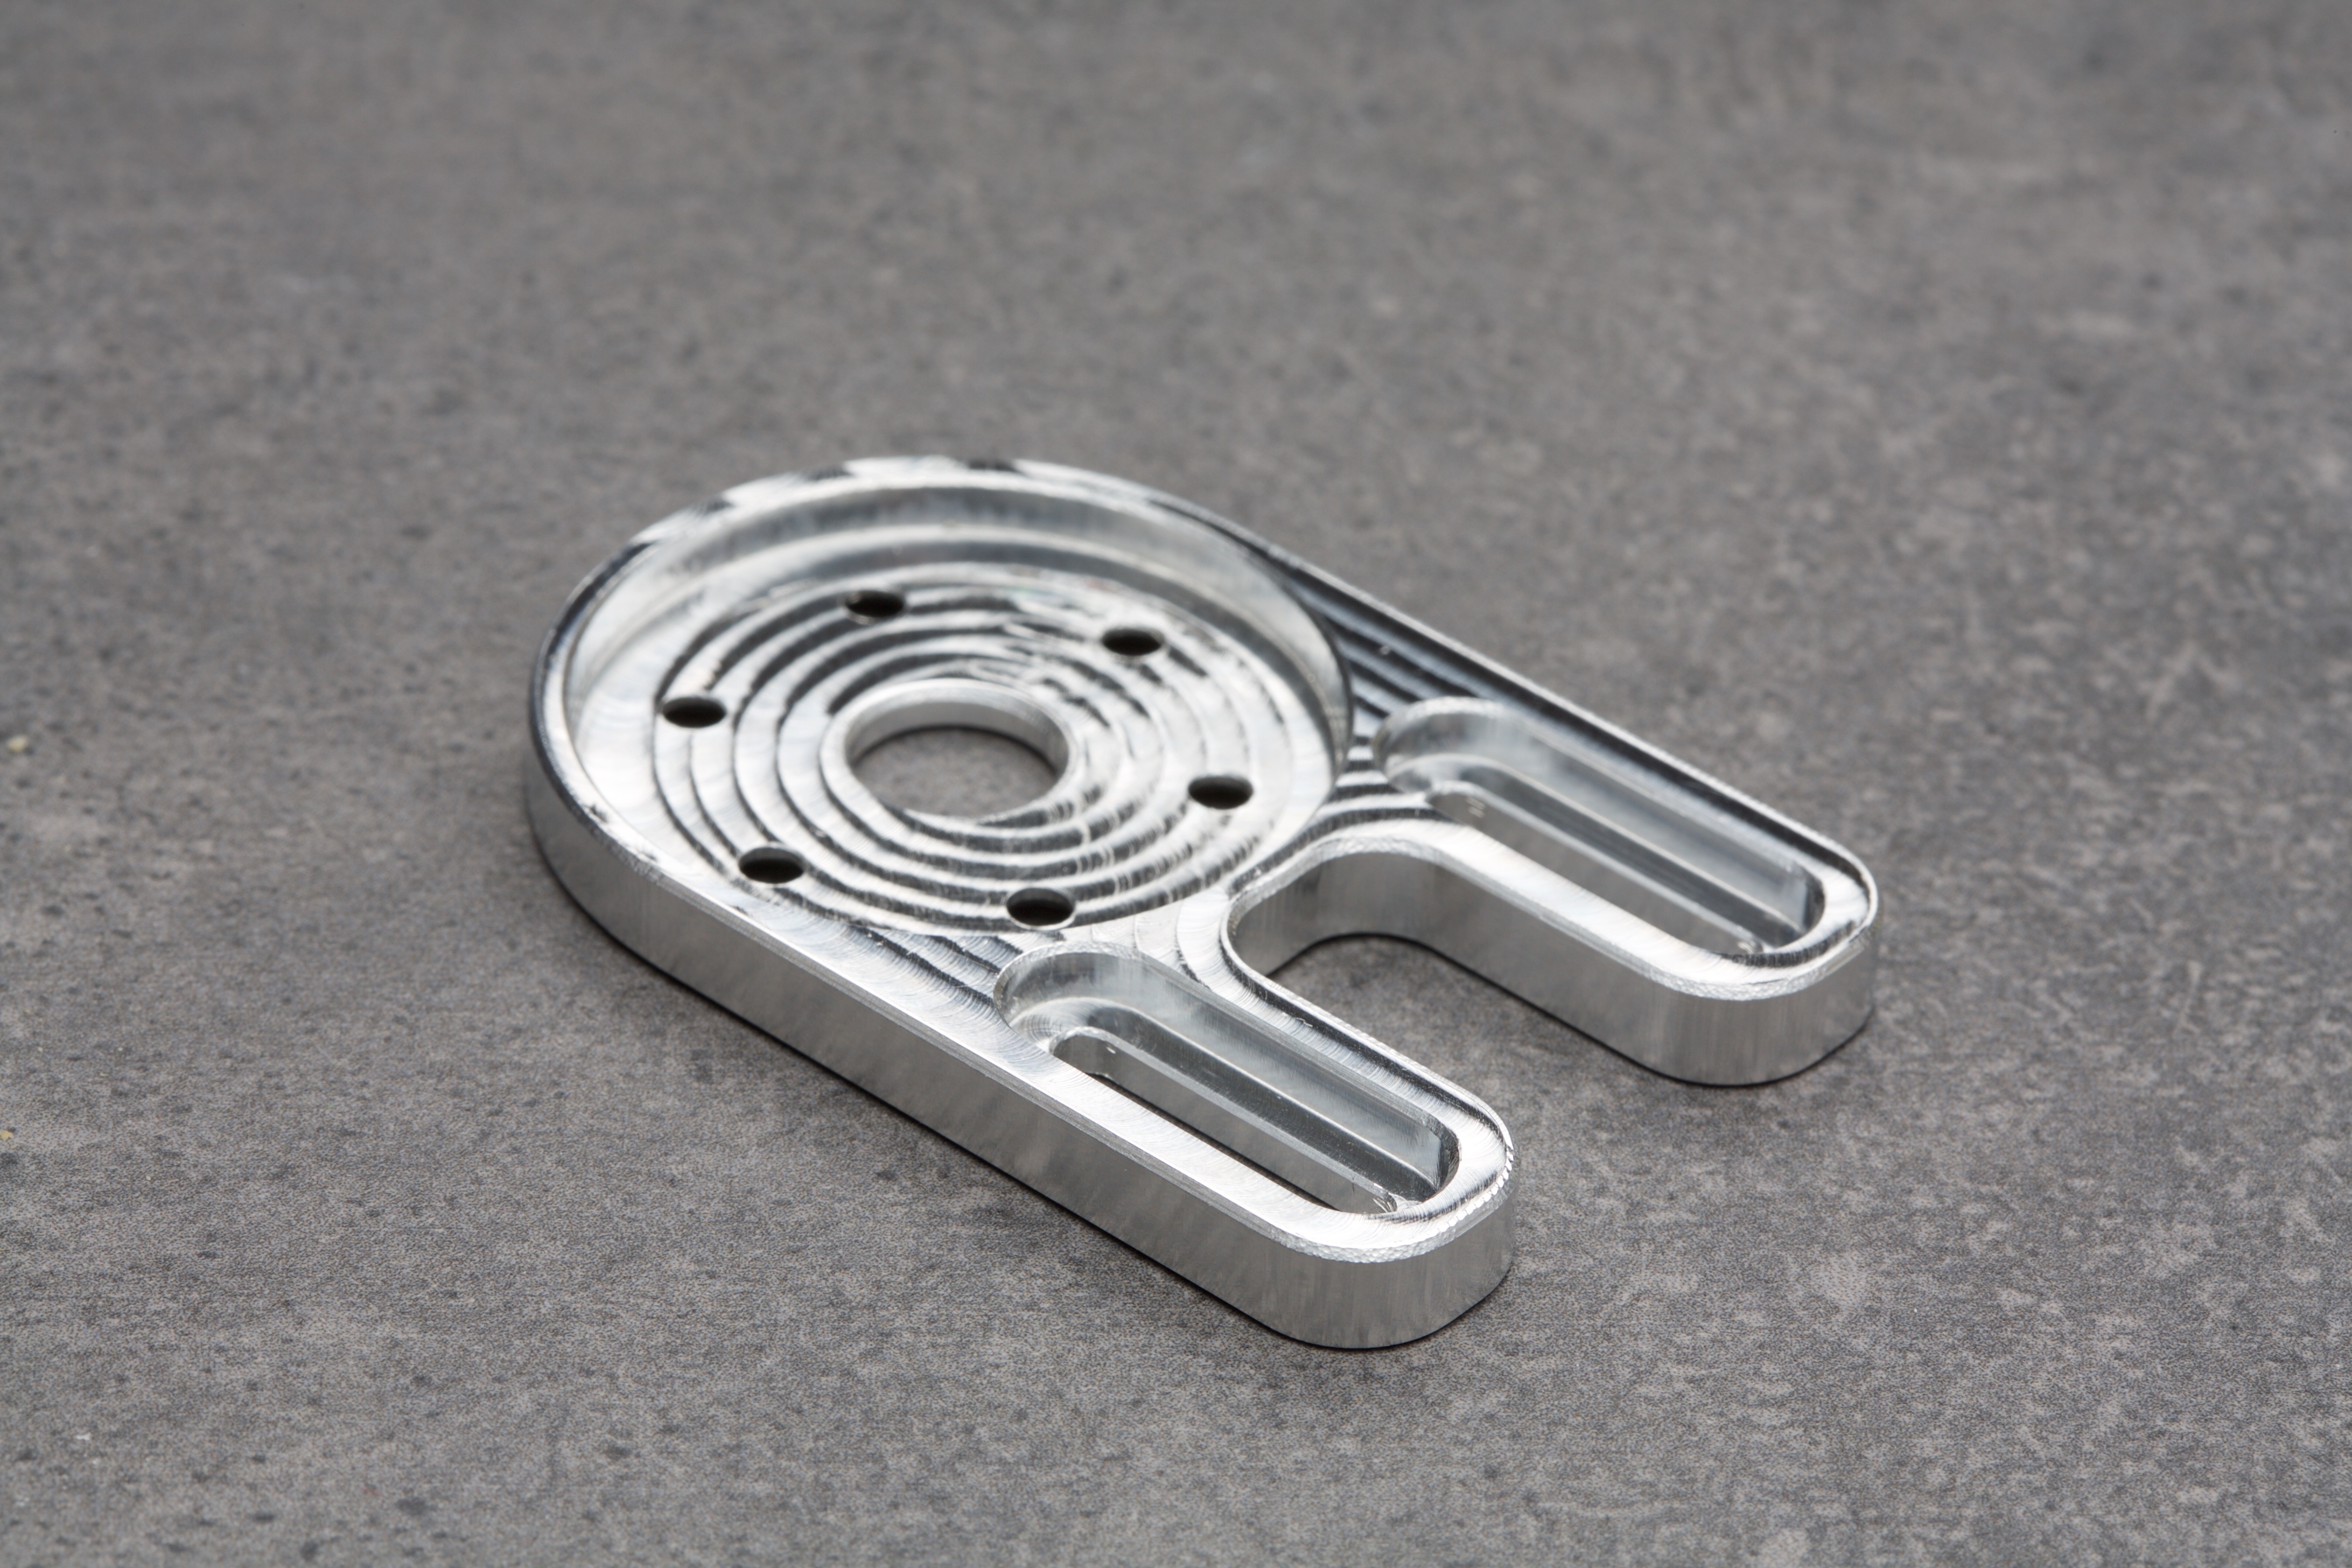
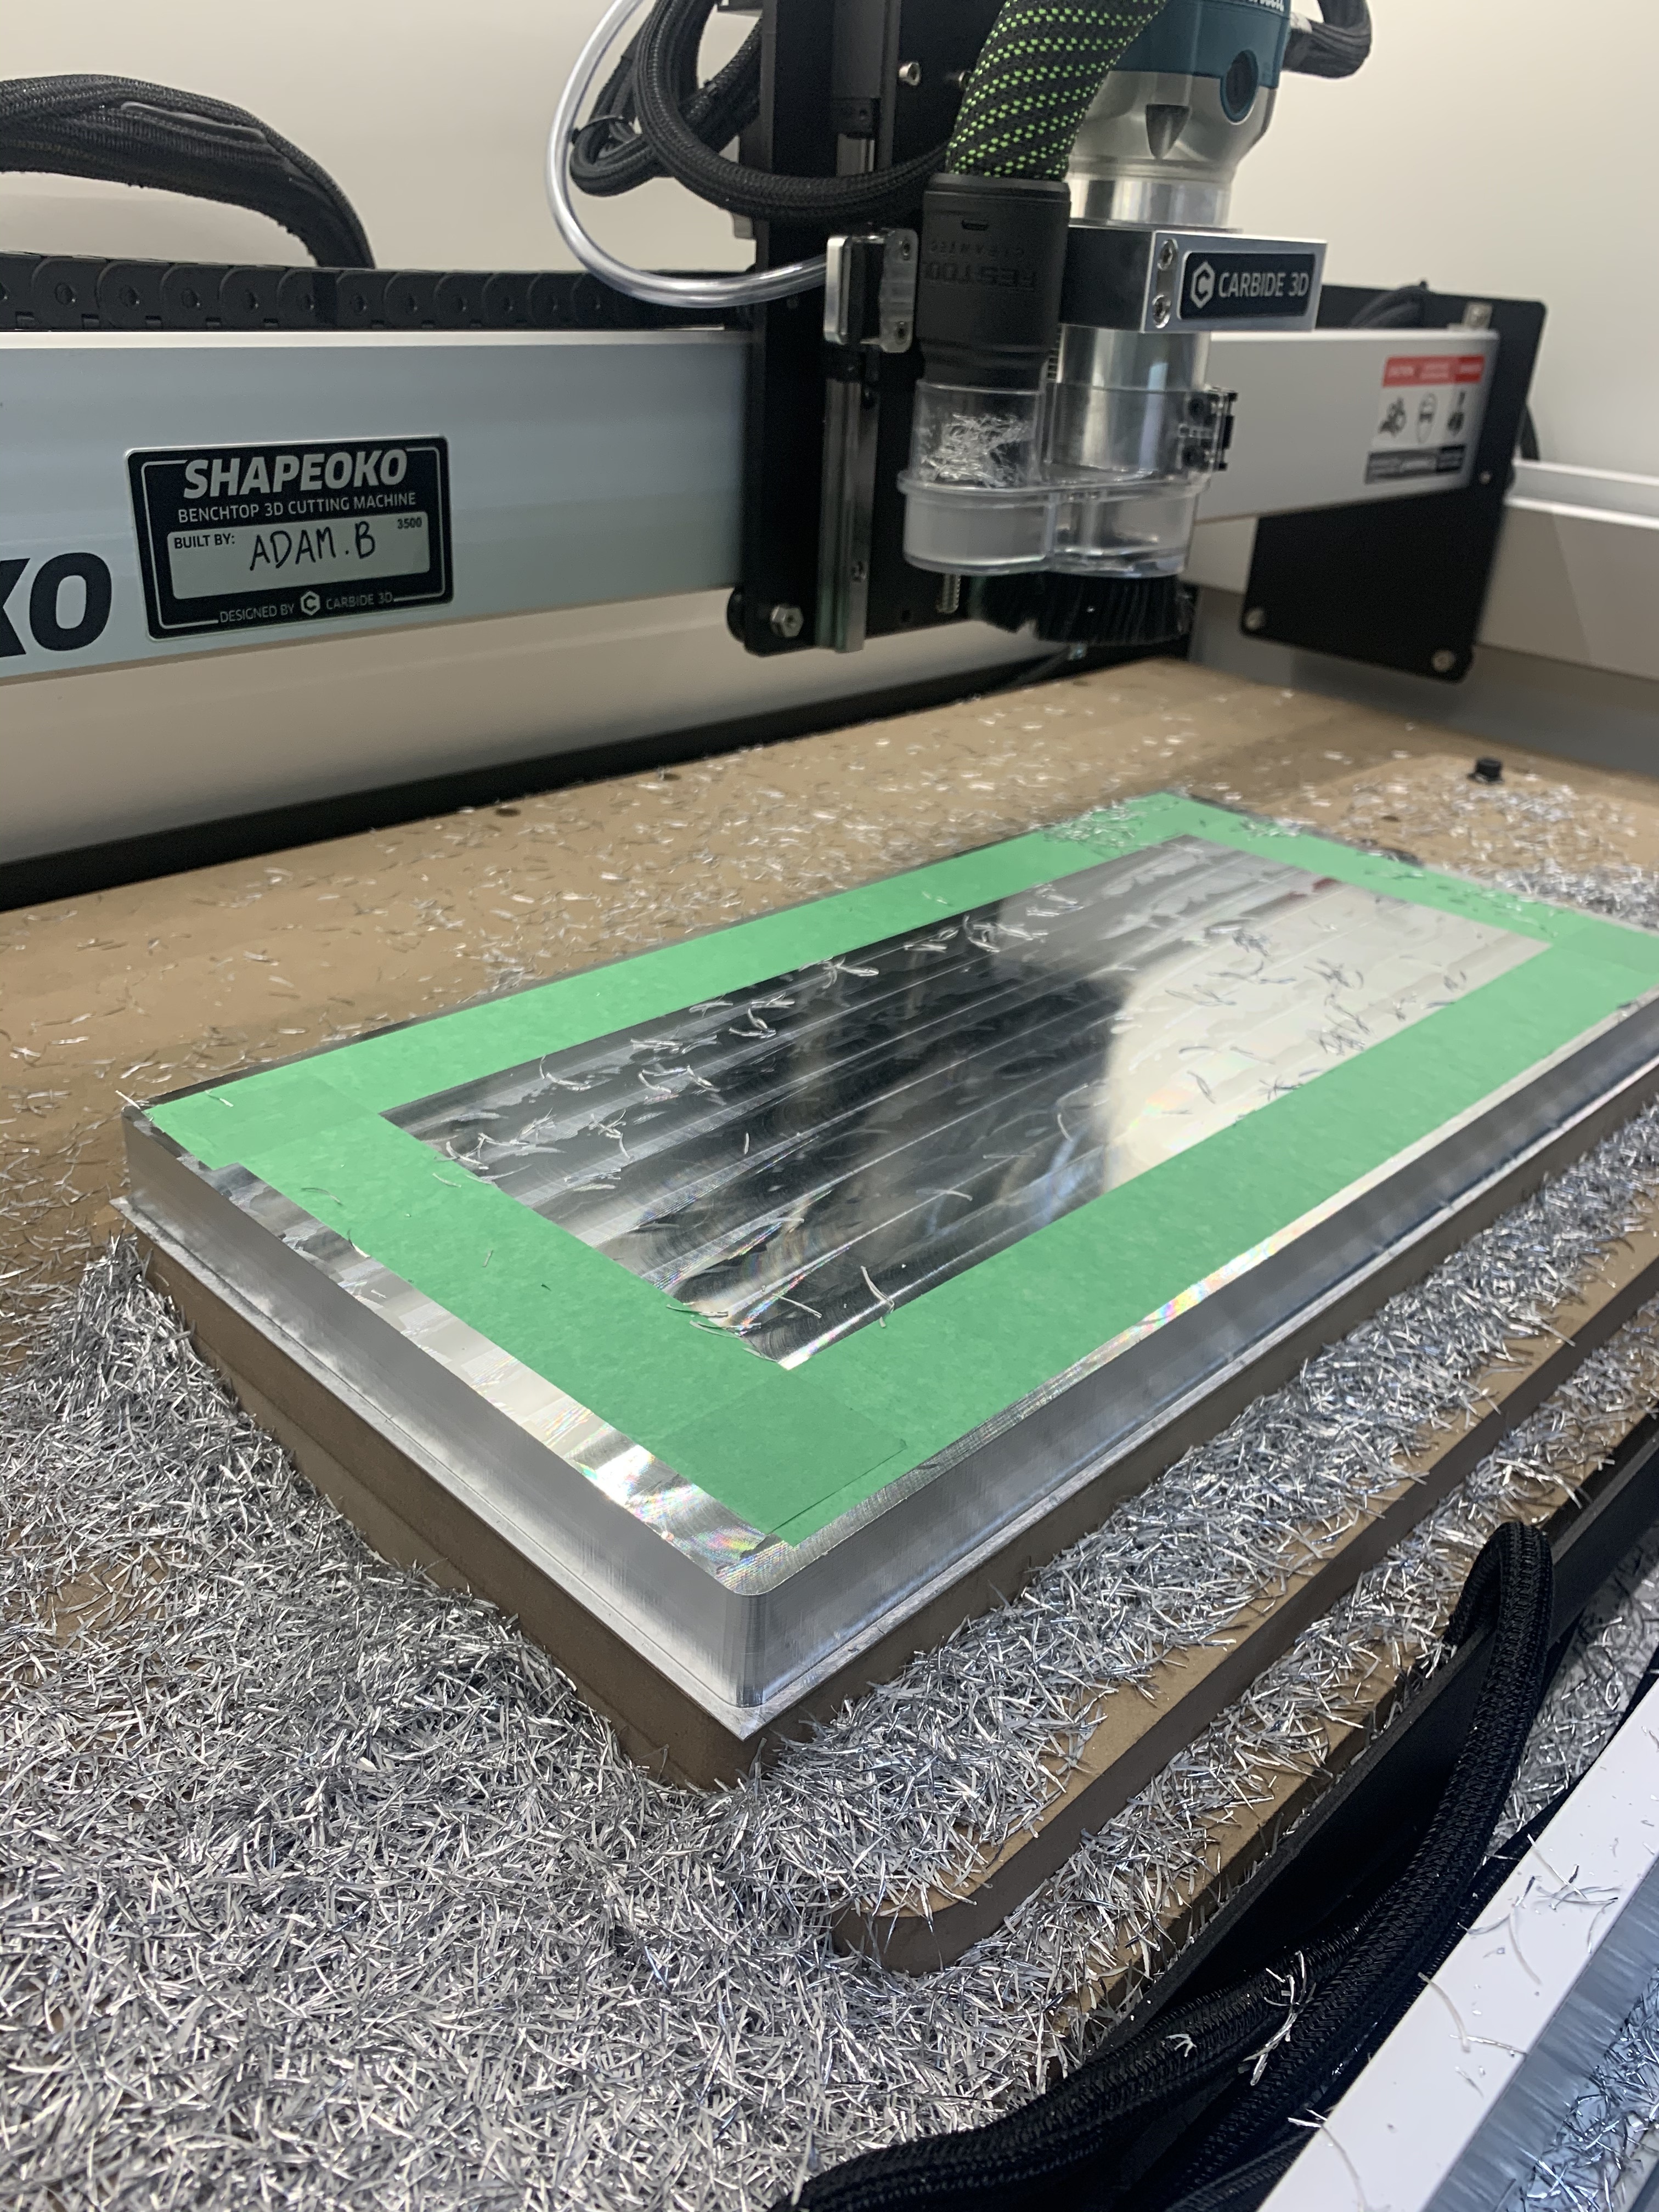
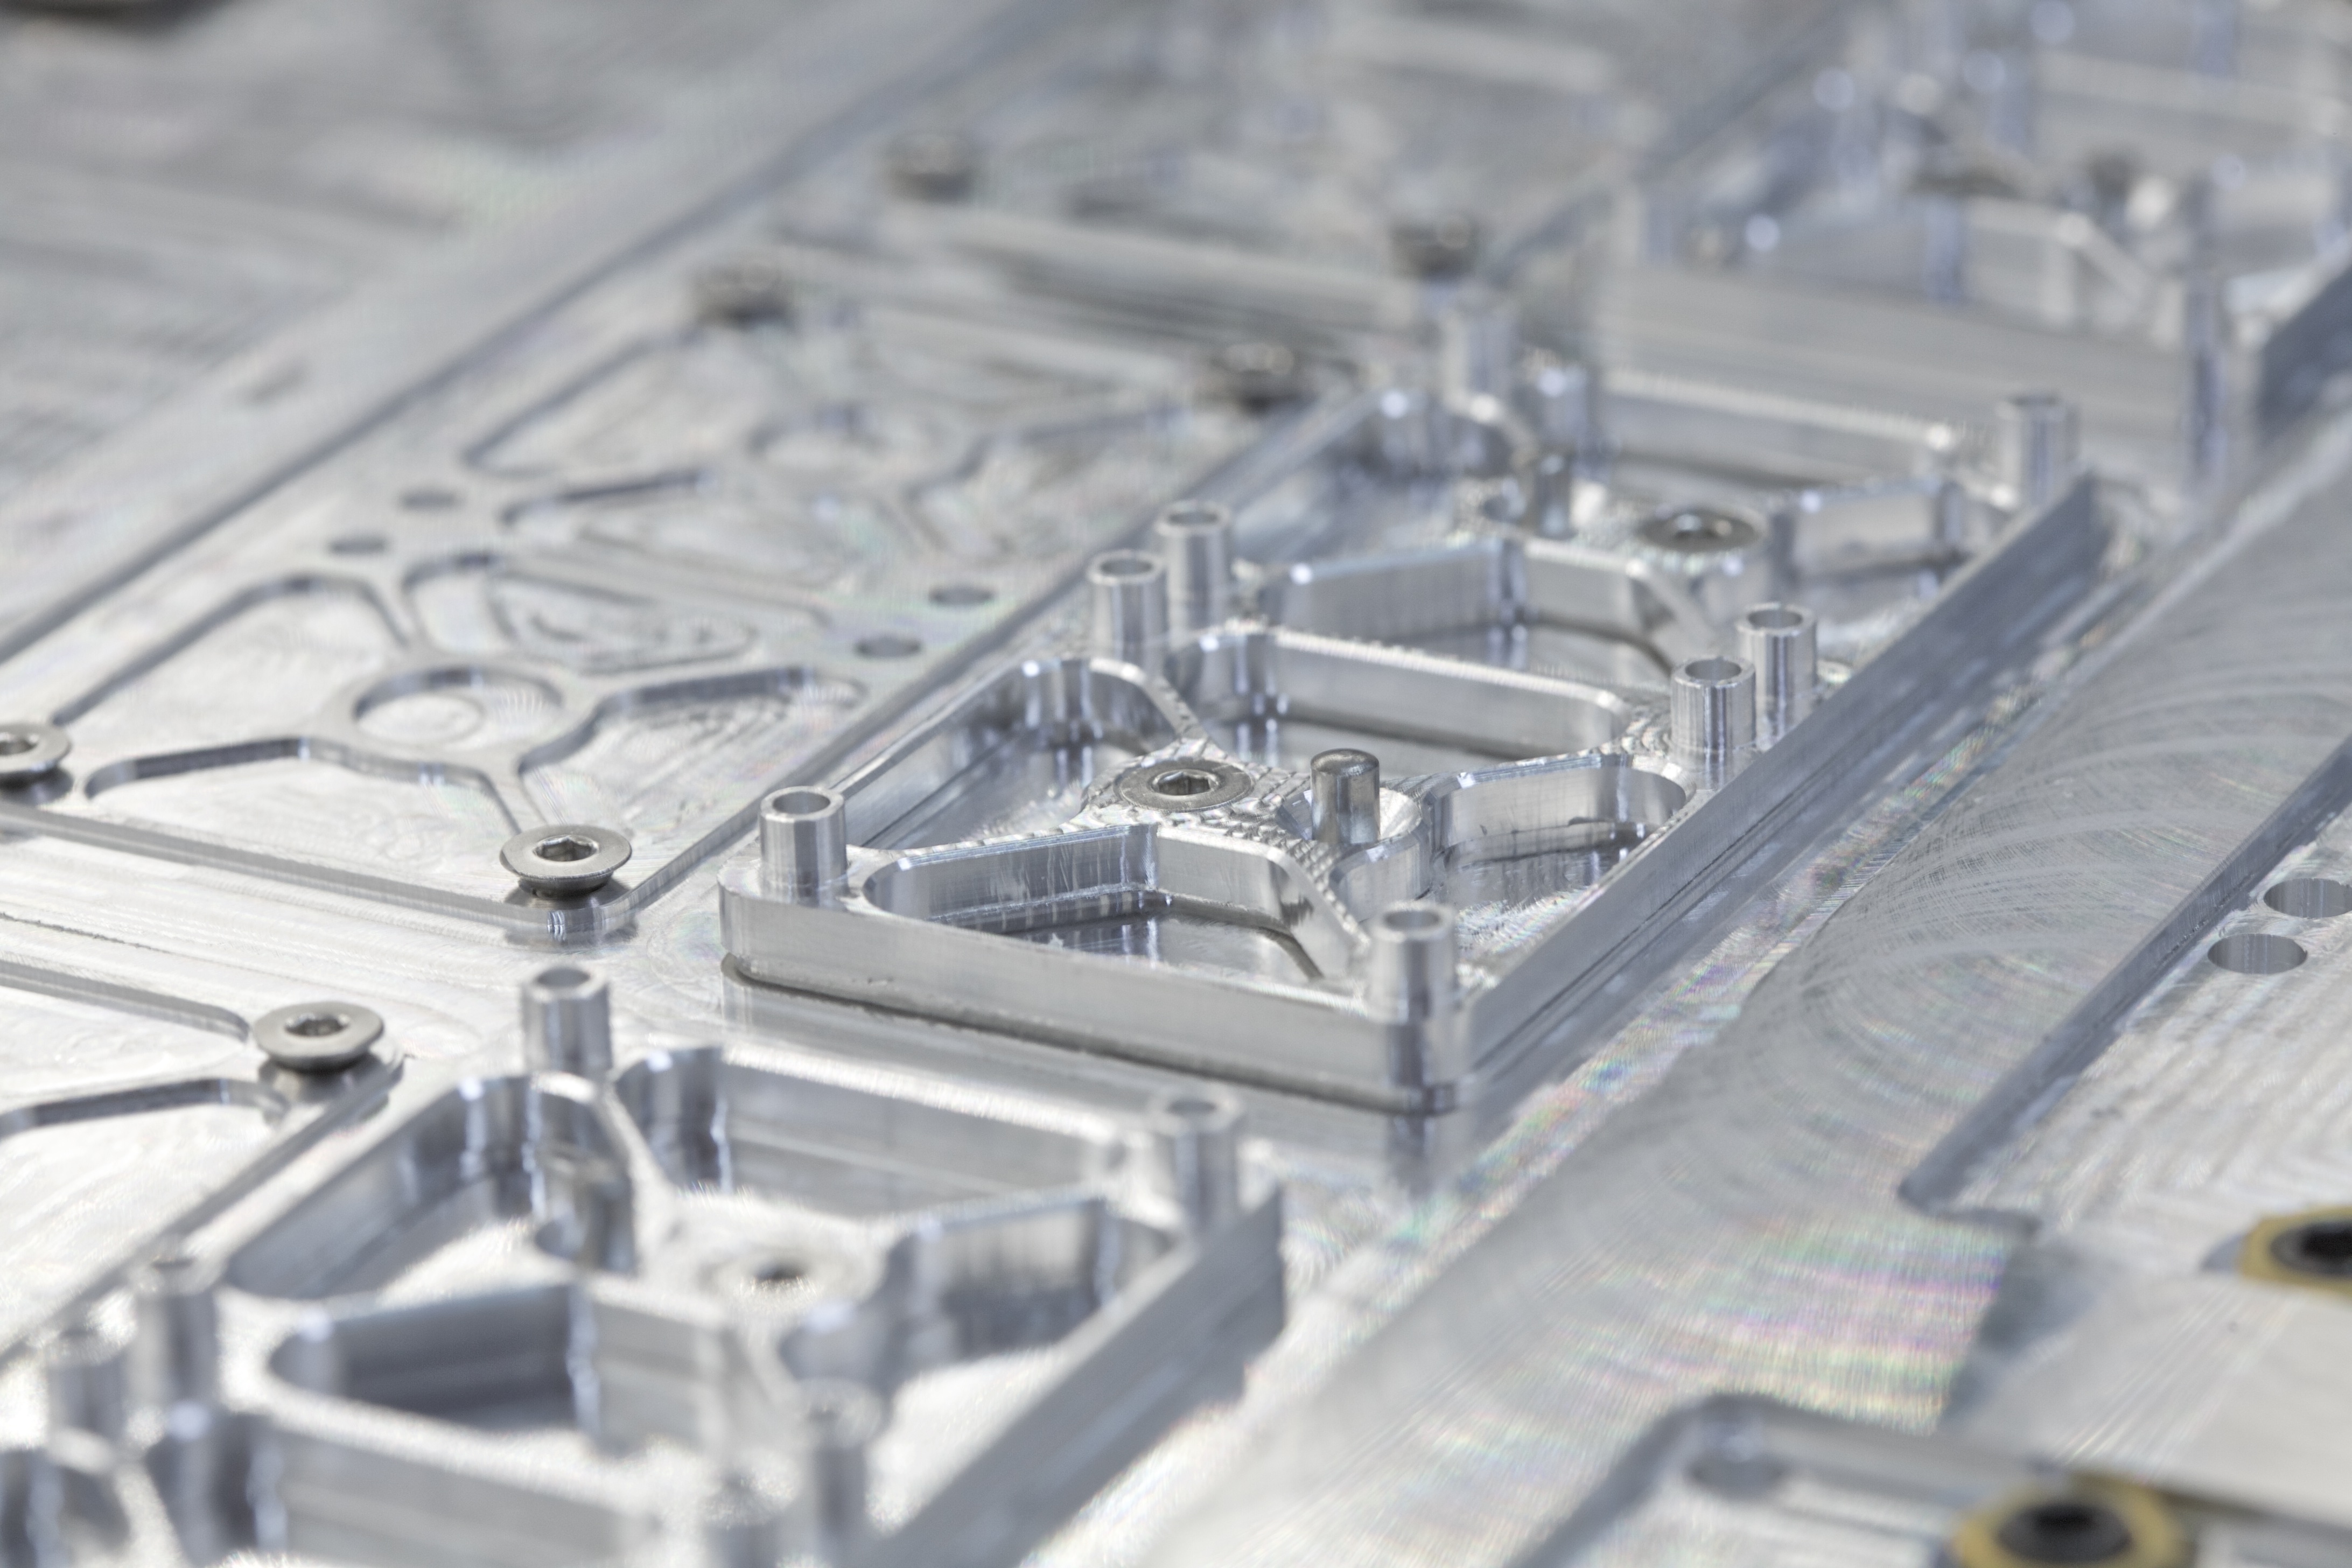
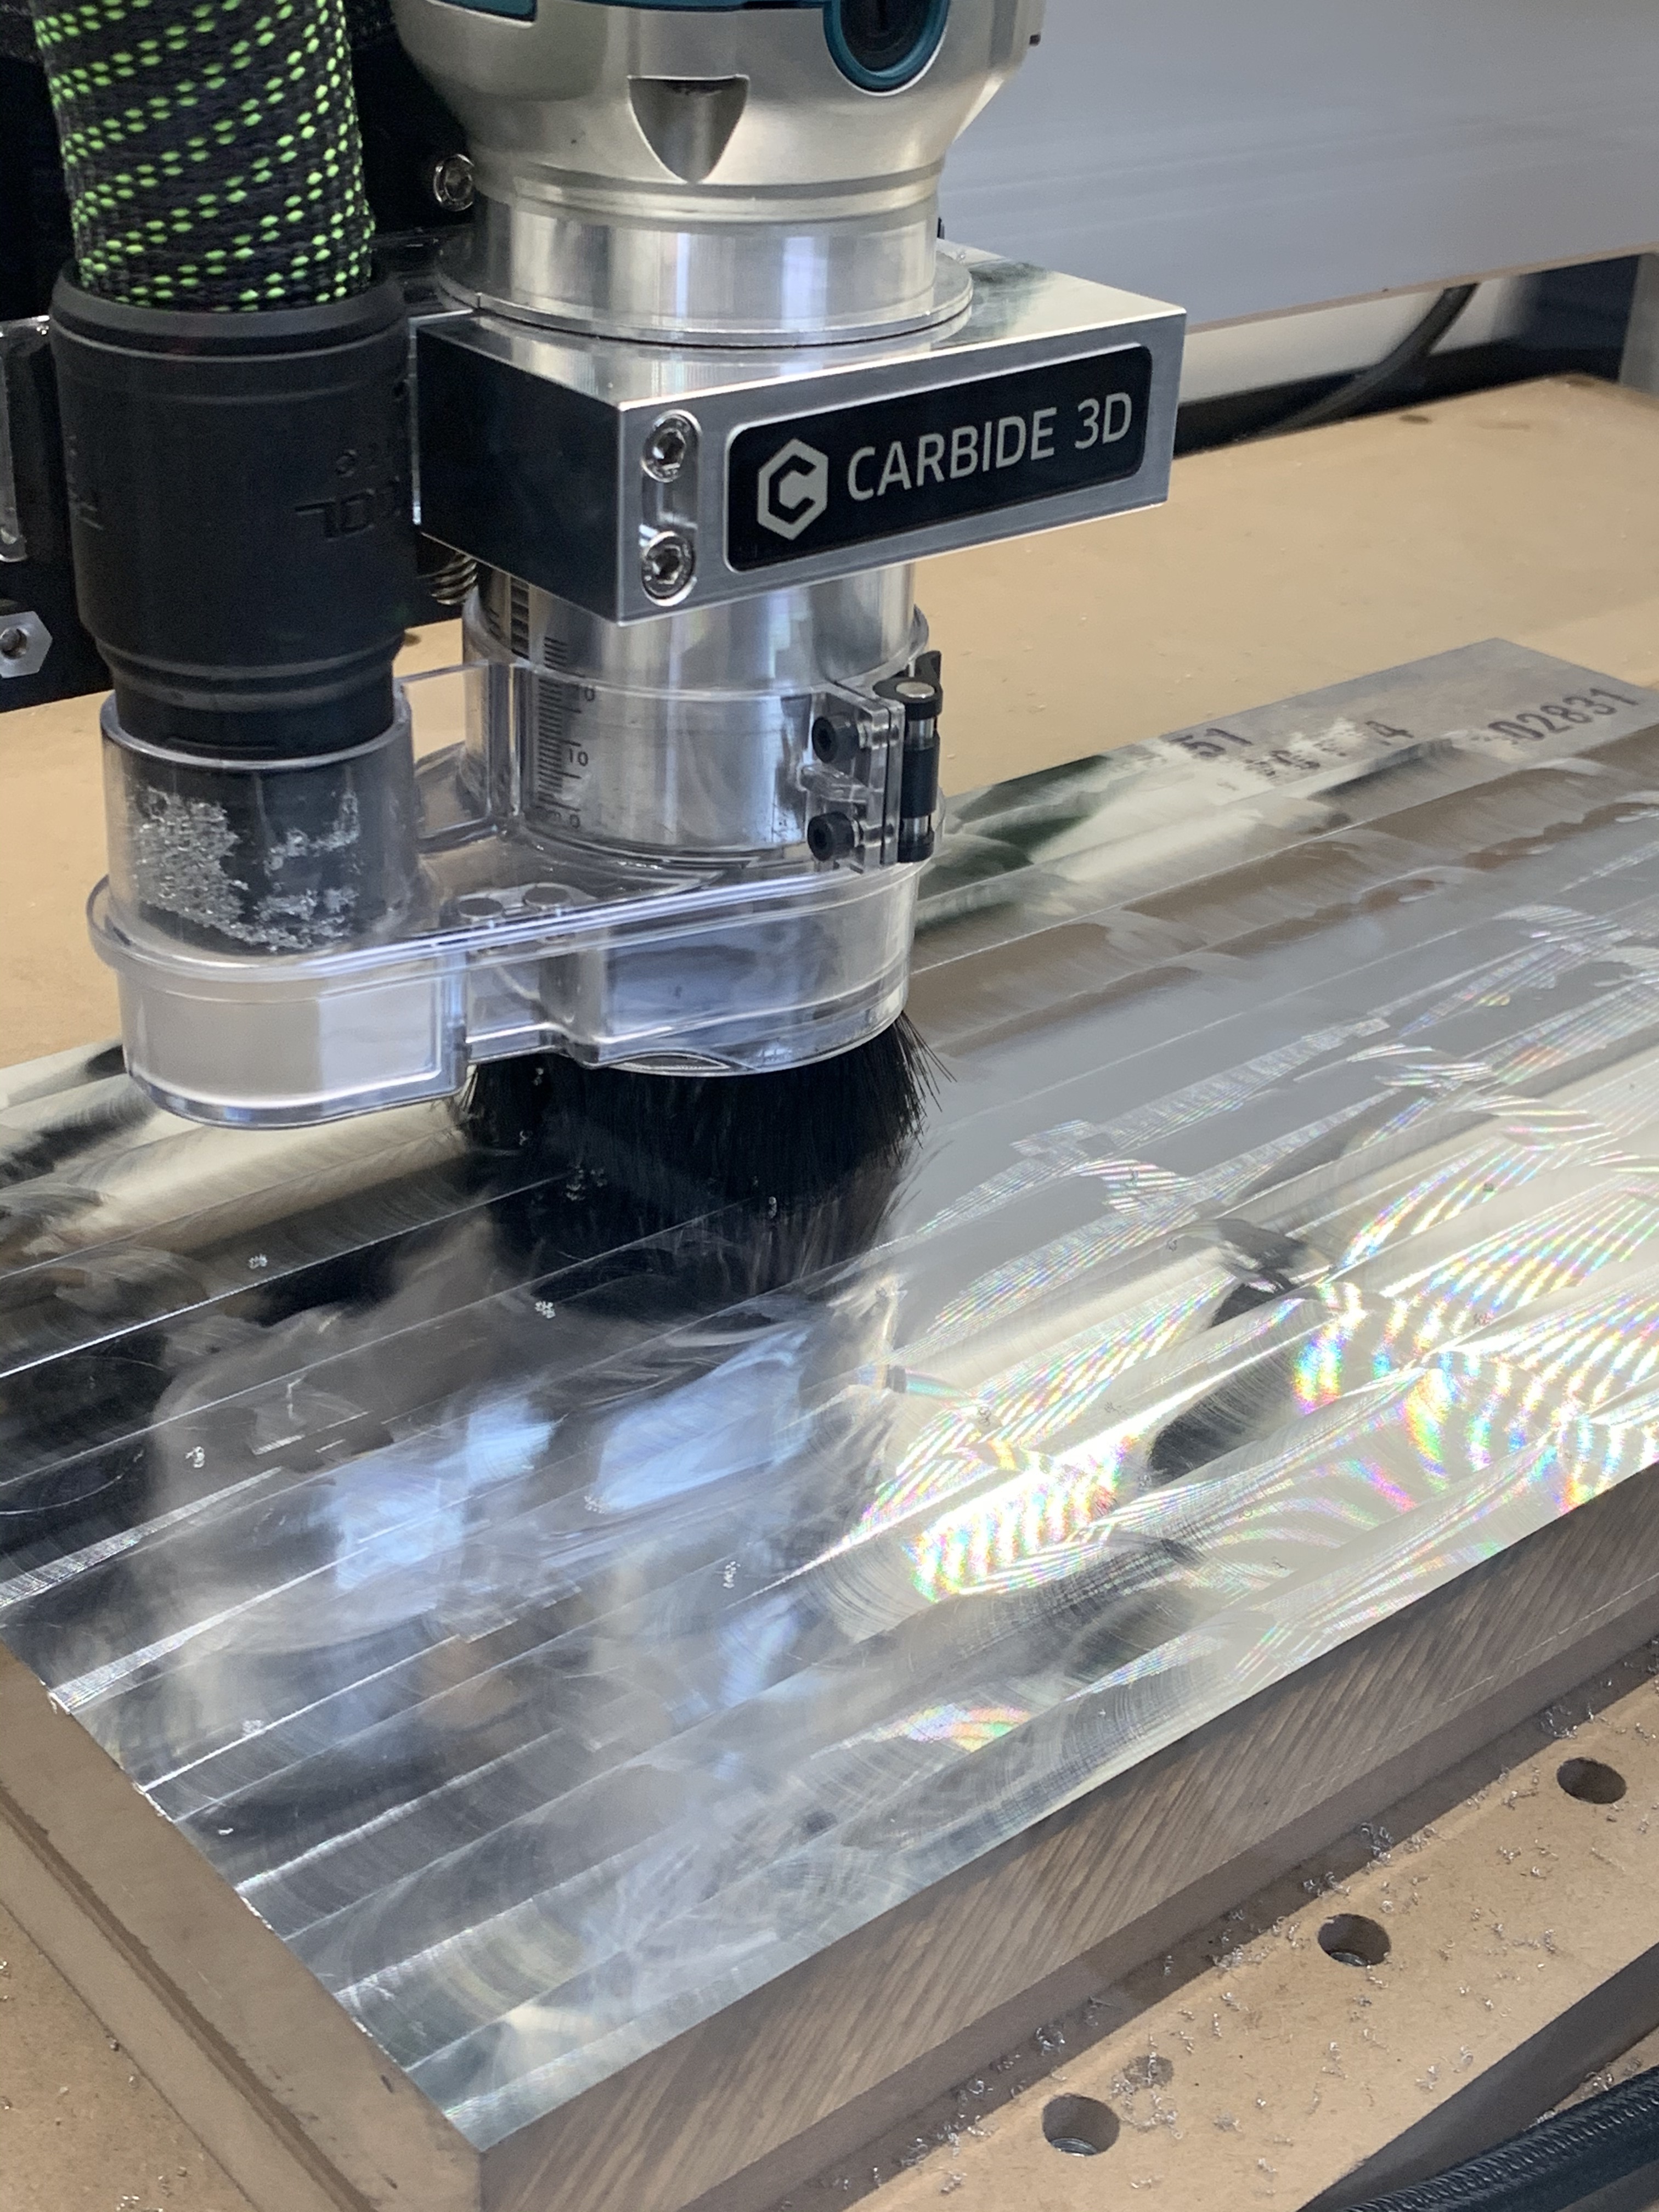
Below is an image of a fixture plate just after the adaptive. I was using a single flute 8mm end mill with the above strategy and running at 1000mm/min.

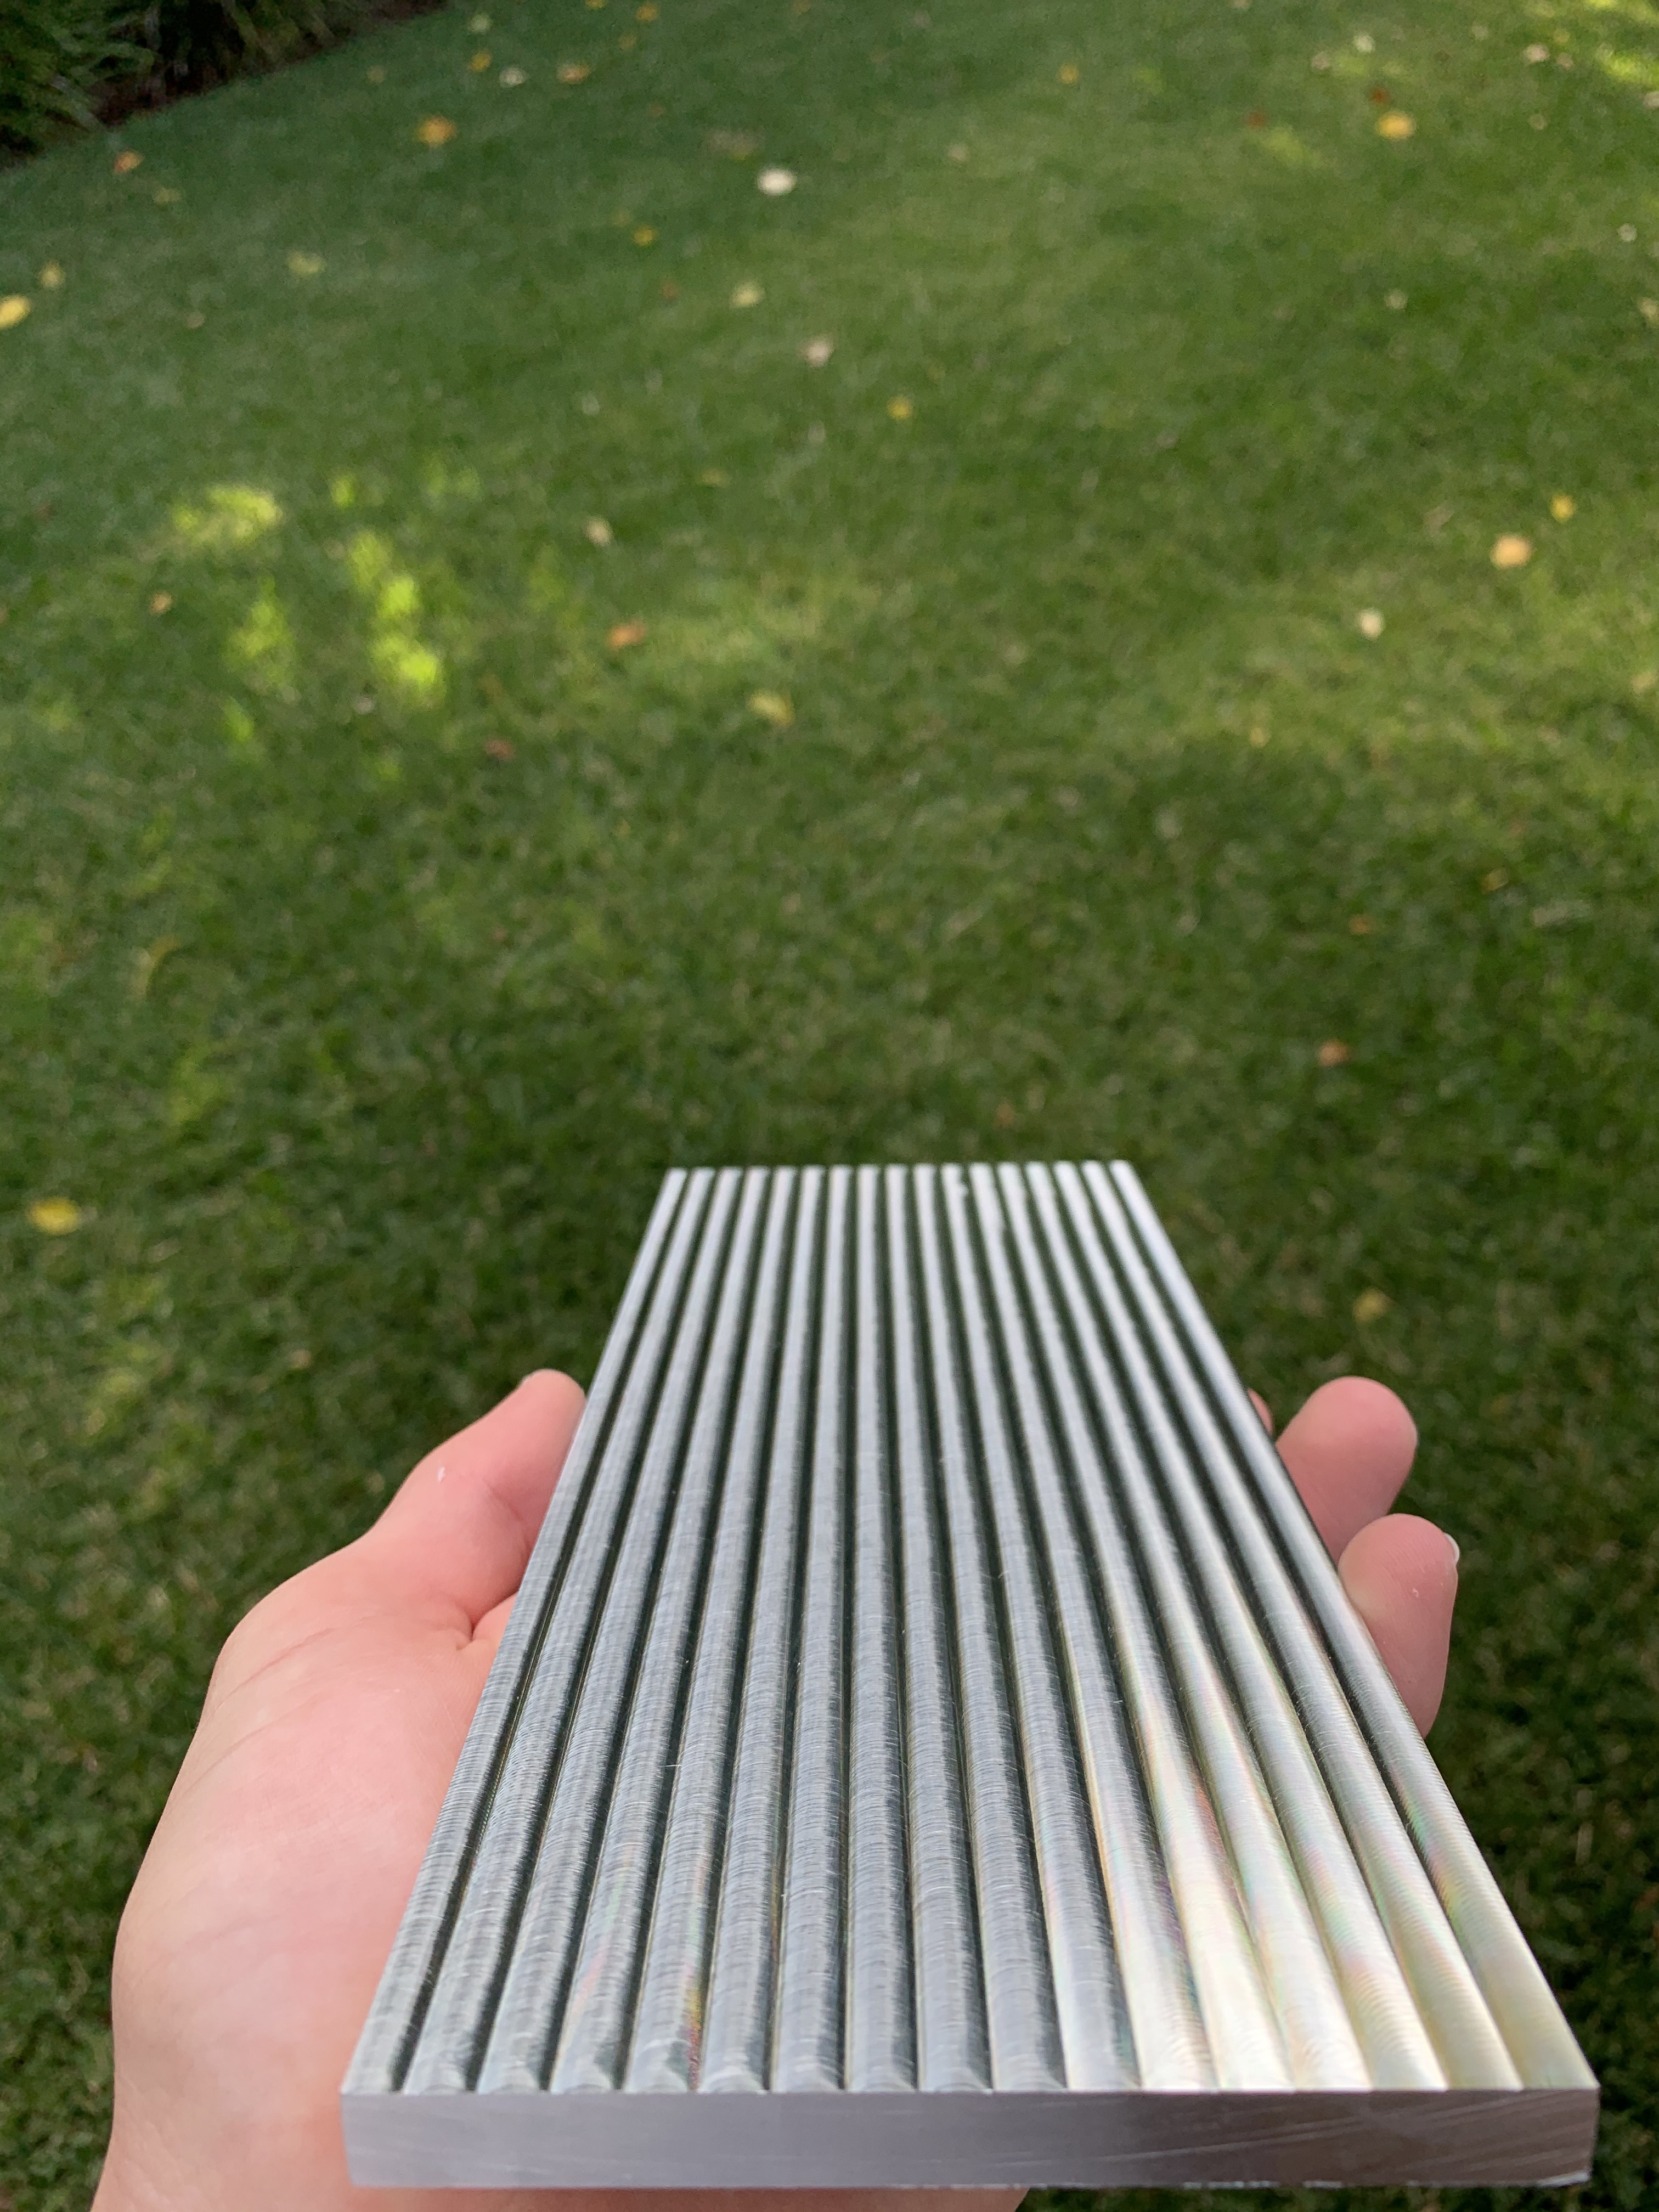
With the finishing passes I use a range of different tool path strategies. For a simple part where I’m trying to clean up the walls of a part, I will leave 0.1mm of stock when doing the adaptive cut. I’ll then come in with a 2D contour, running the router at 17,000 RPM and a feed rate of 750mm/min. I have also run 2D contour finish passes at 24,000 RPM and this still gives really nice results. The reason to run a higher RPM would be for time constraints, as it will save some machining time and still yield a nice result.

I have played around running finishing passes at 10,000 RPM vs 24,000 RPM and for my case they almost give the exact same result. For me the main thing is to make sure that I’m within the machines limits, so no chatter at all during cuts and tweaking and fine tuning a tool path if it does start to chatter. In general I have found that running at a higher RPM has been a lot better and I aim to keep my Feed per Tooth above 0.025mm.

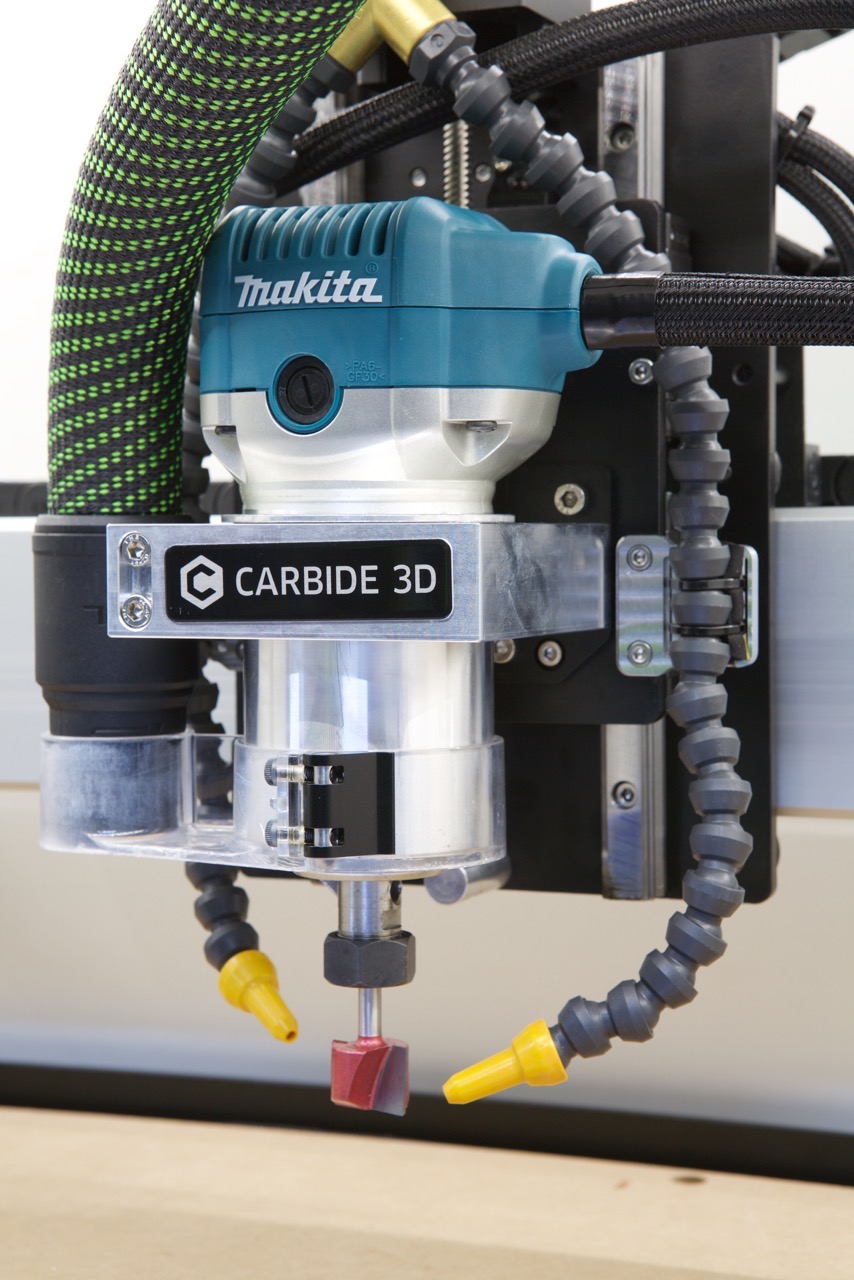
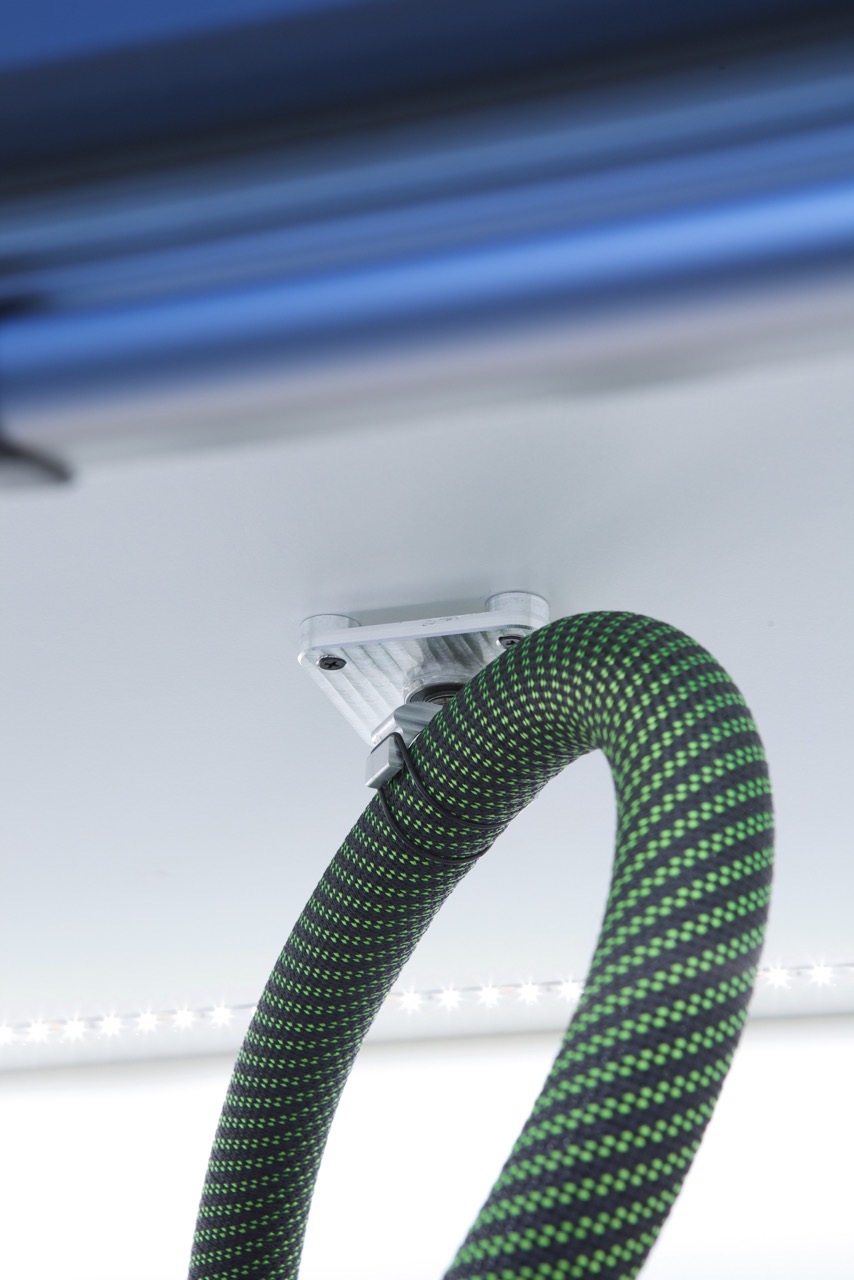
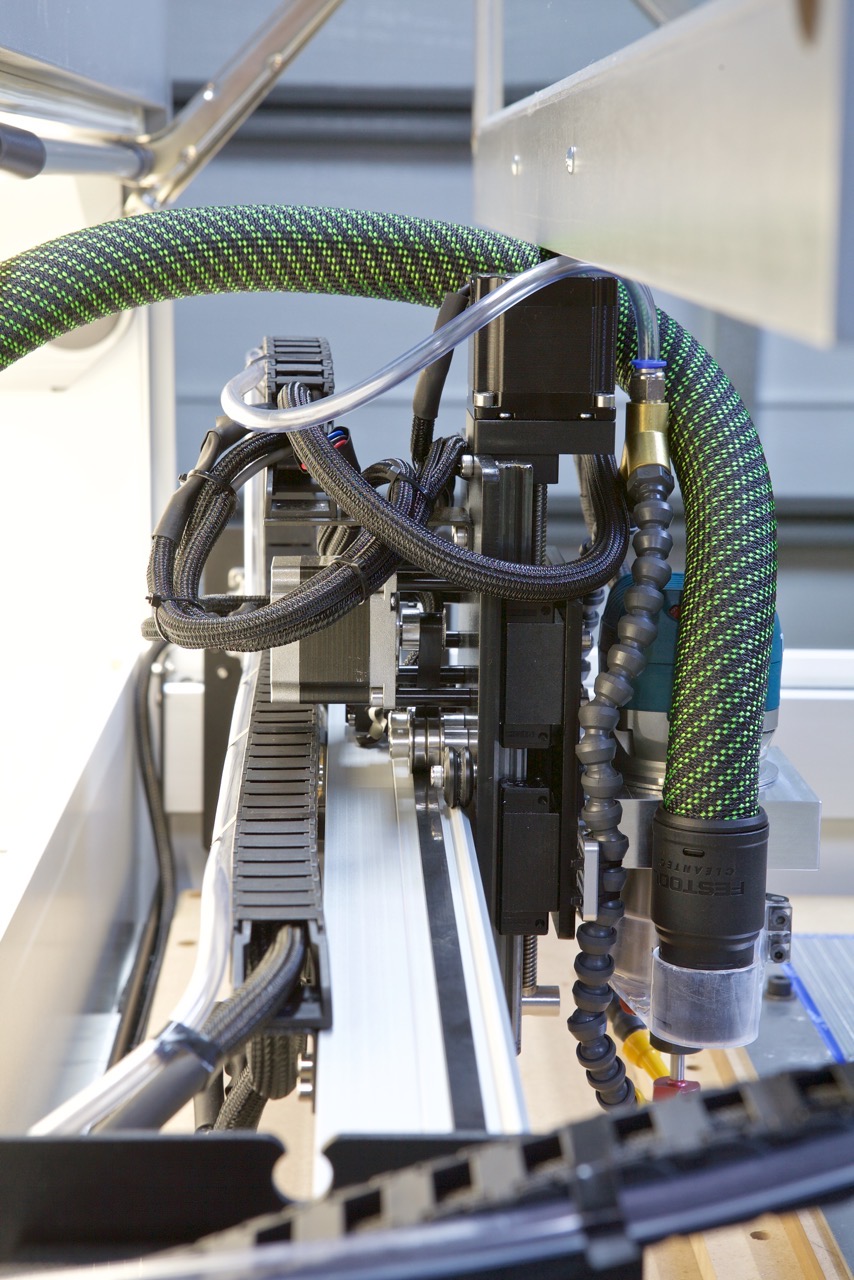
I run all the cuts dry and use a Festool Midi to clear chips during the cut so they aren’t being re-cut. From my experiences so far chip recutting can really effect the surface finish, so if you can clear these out quickly the parts will turn out a lot better. I have played around using WD-40 and 70% Alcohol to try and improve the surface finishes, but I only noticed a marginal improvement when trying this.

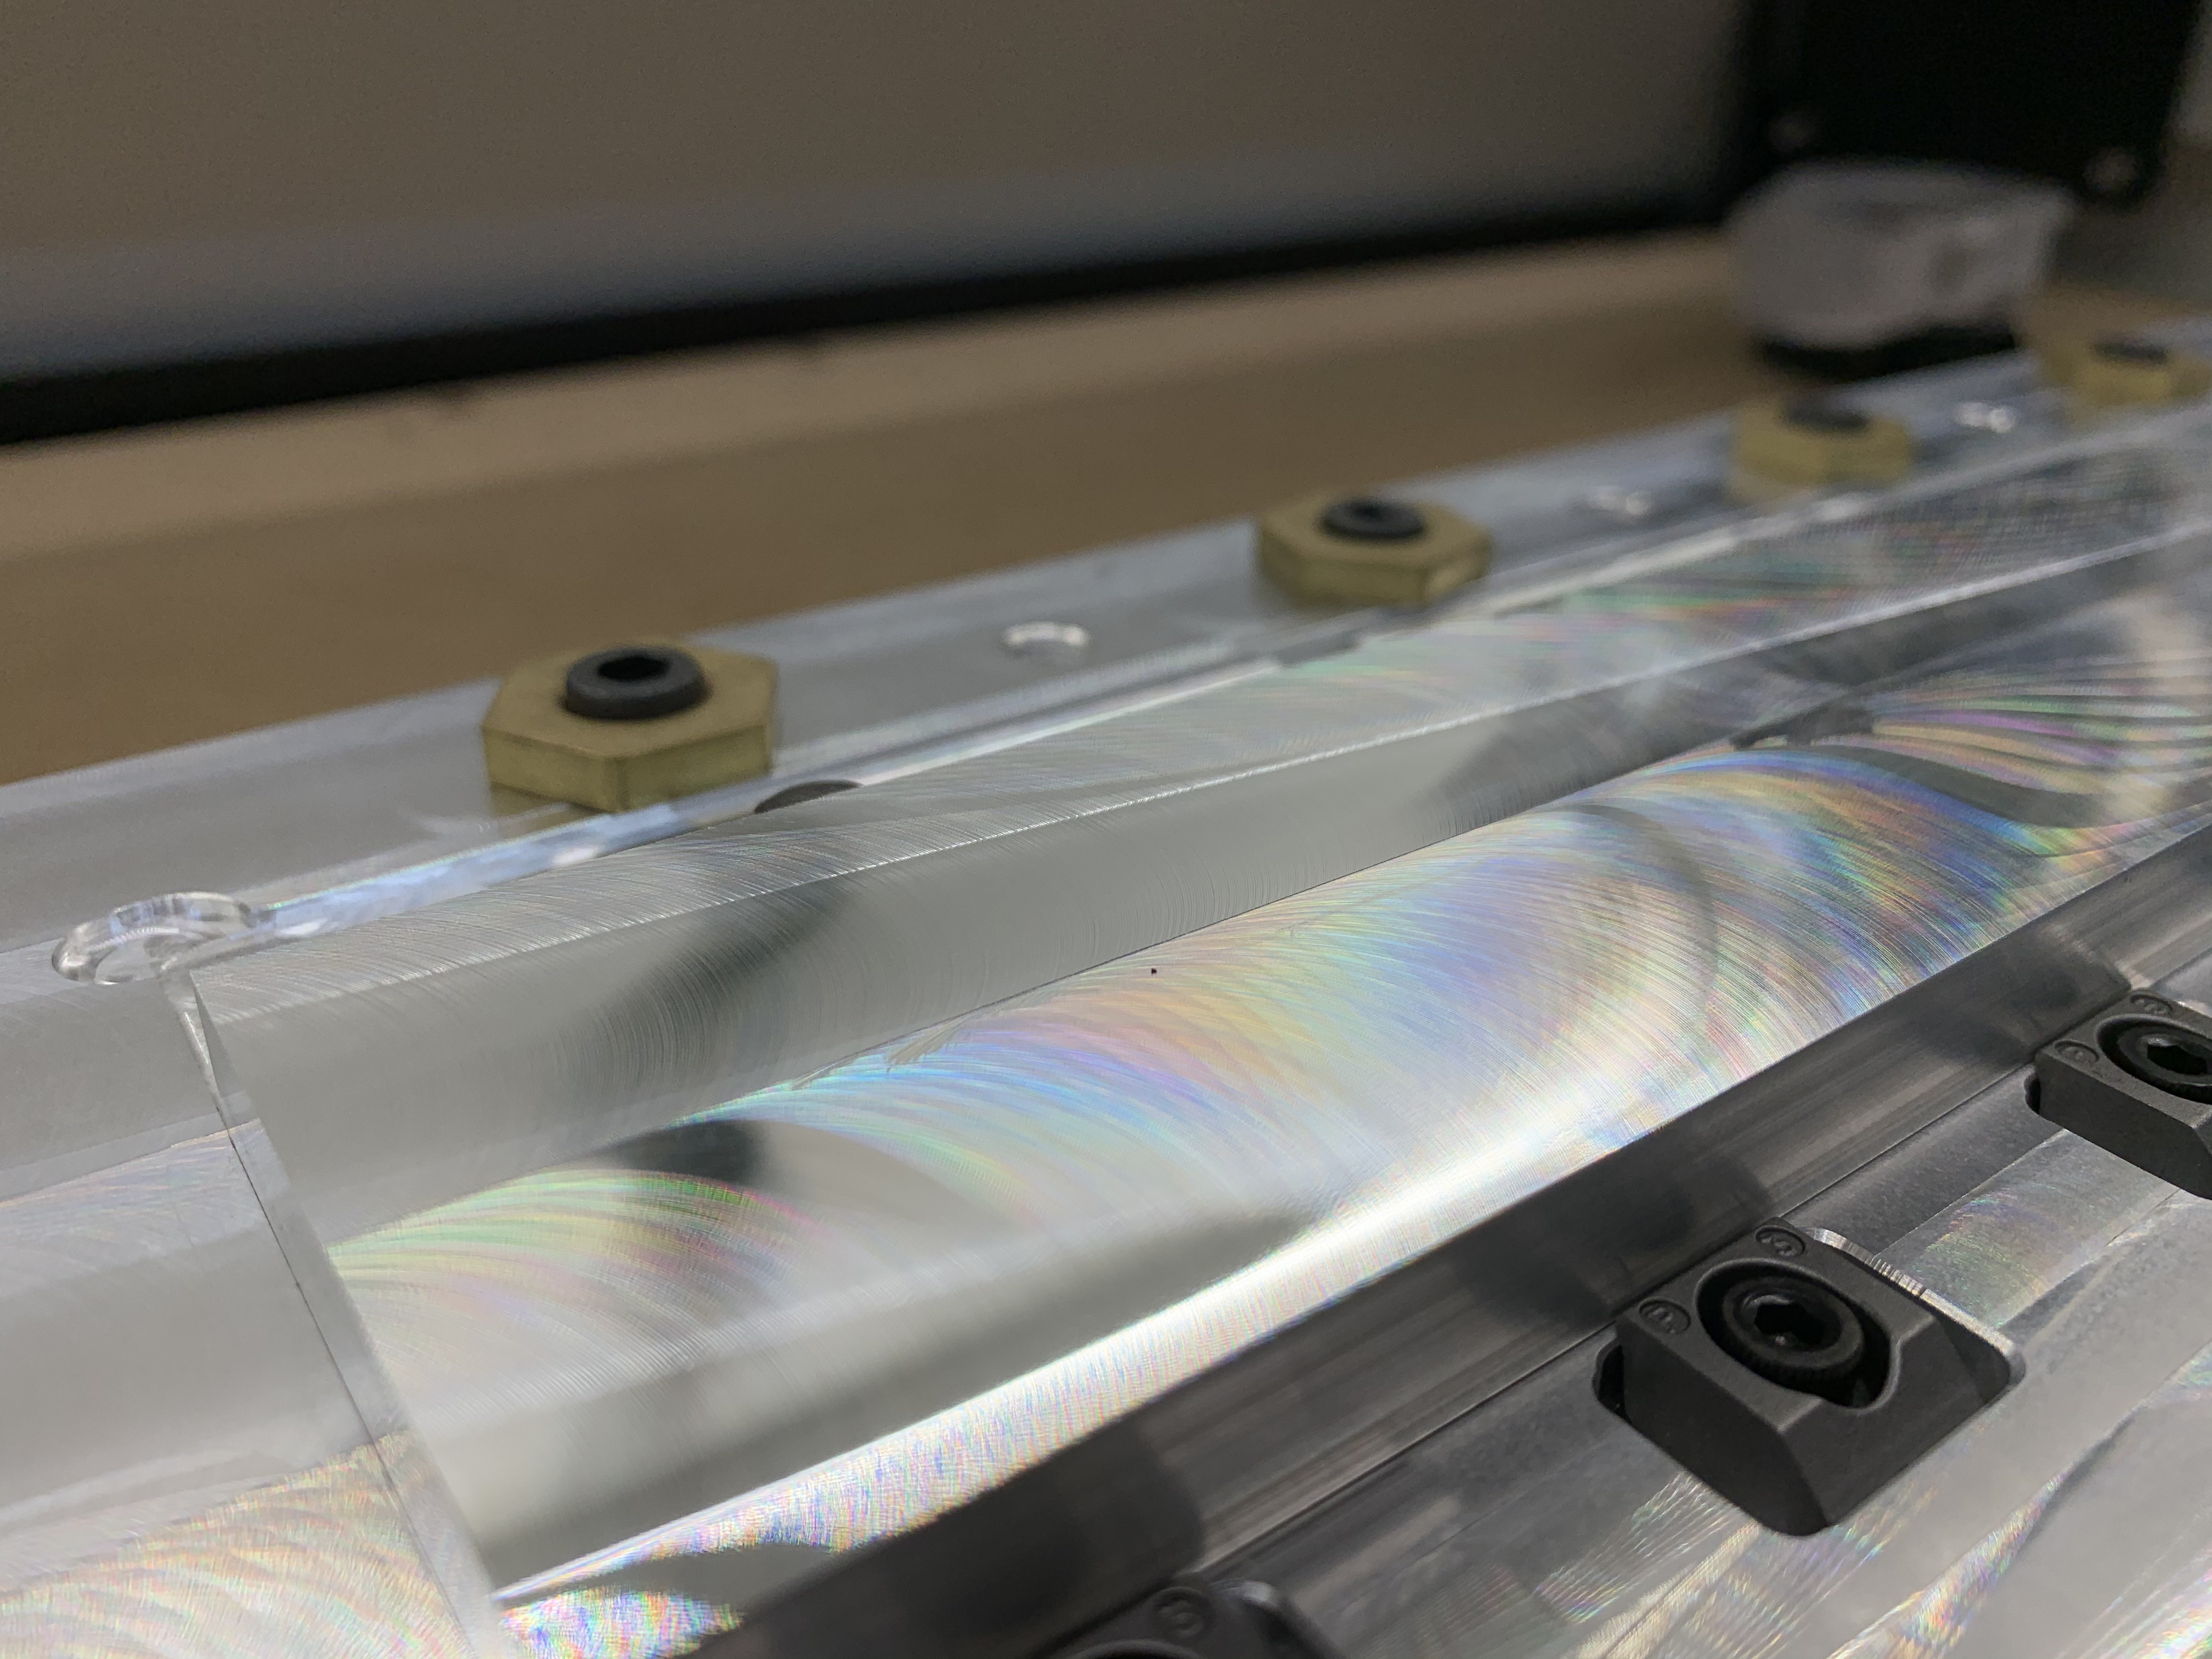
Another thing with aluminium is the work holding. I try and create the most rigid work holding set up that I can for each part, as soon as the part can move the slightest amount it starts to effect the cut and induce chatter. Another important factor is end mill stick out, for each project I run the least amount of tool stick out as possible and this helps too greatly improve surface finish.

There is a lot to cover when it comes to the machining strategies so if you have more specific questions, then let me know! This is just a general approach that I take.

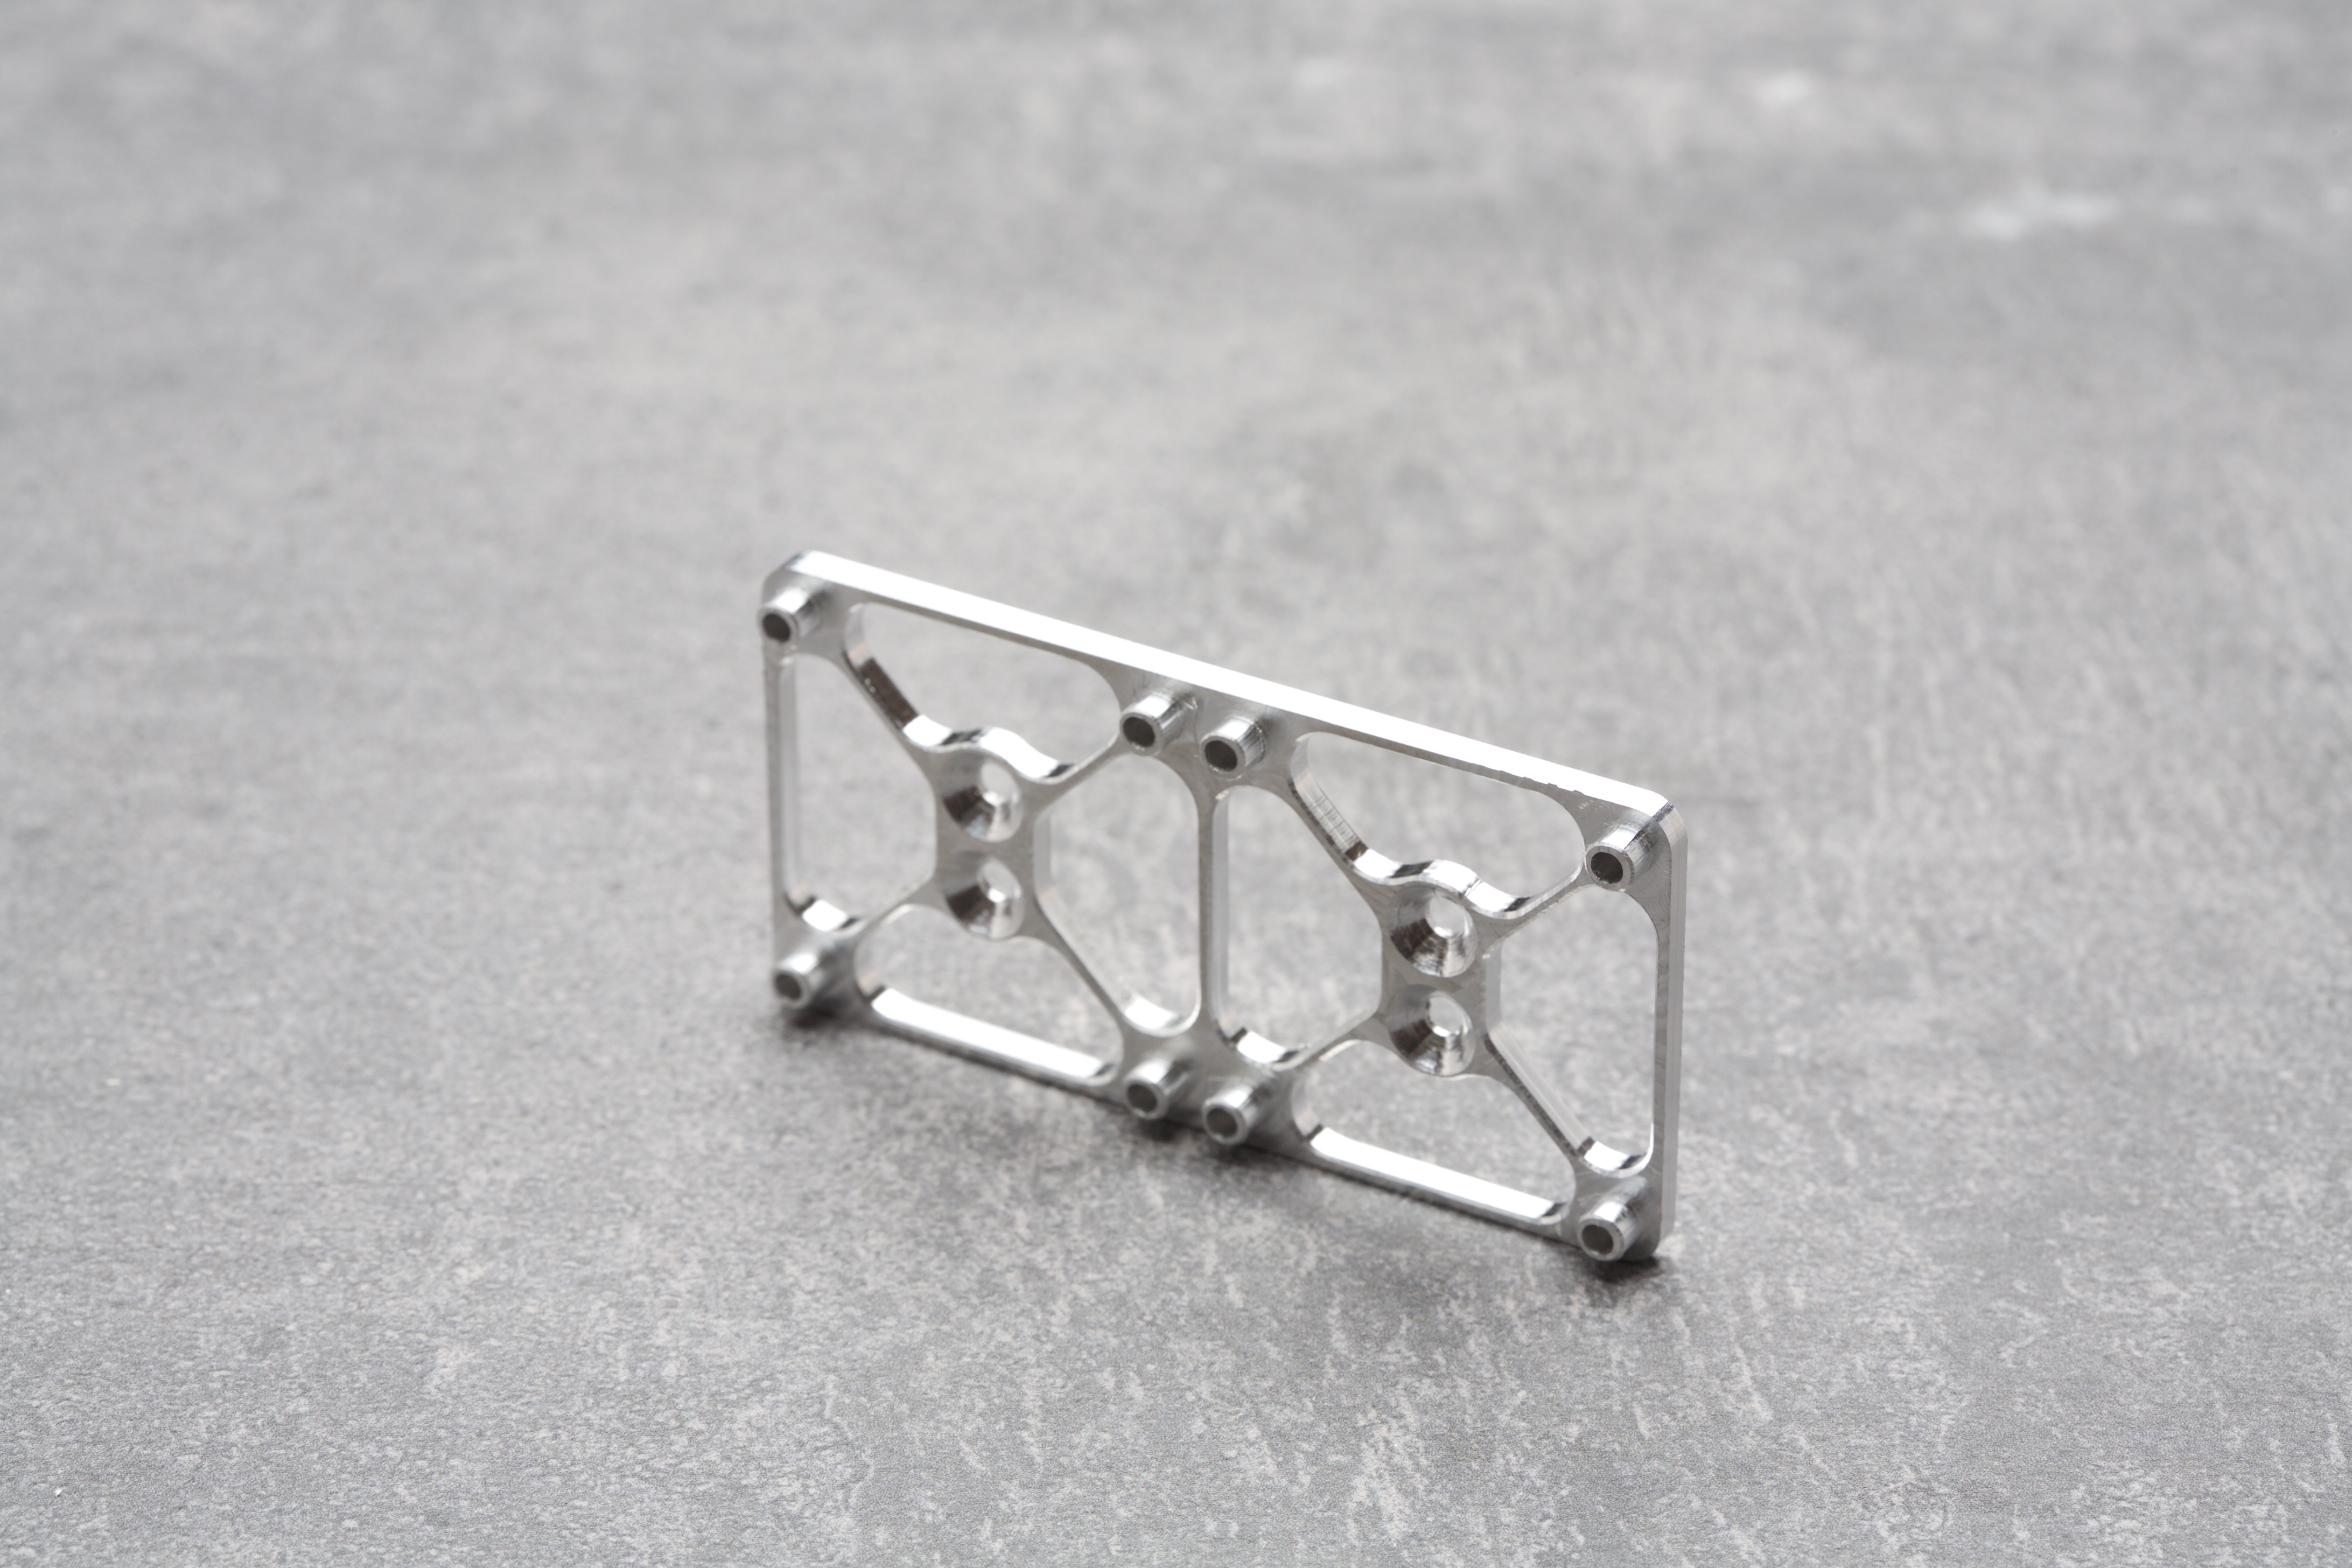
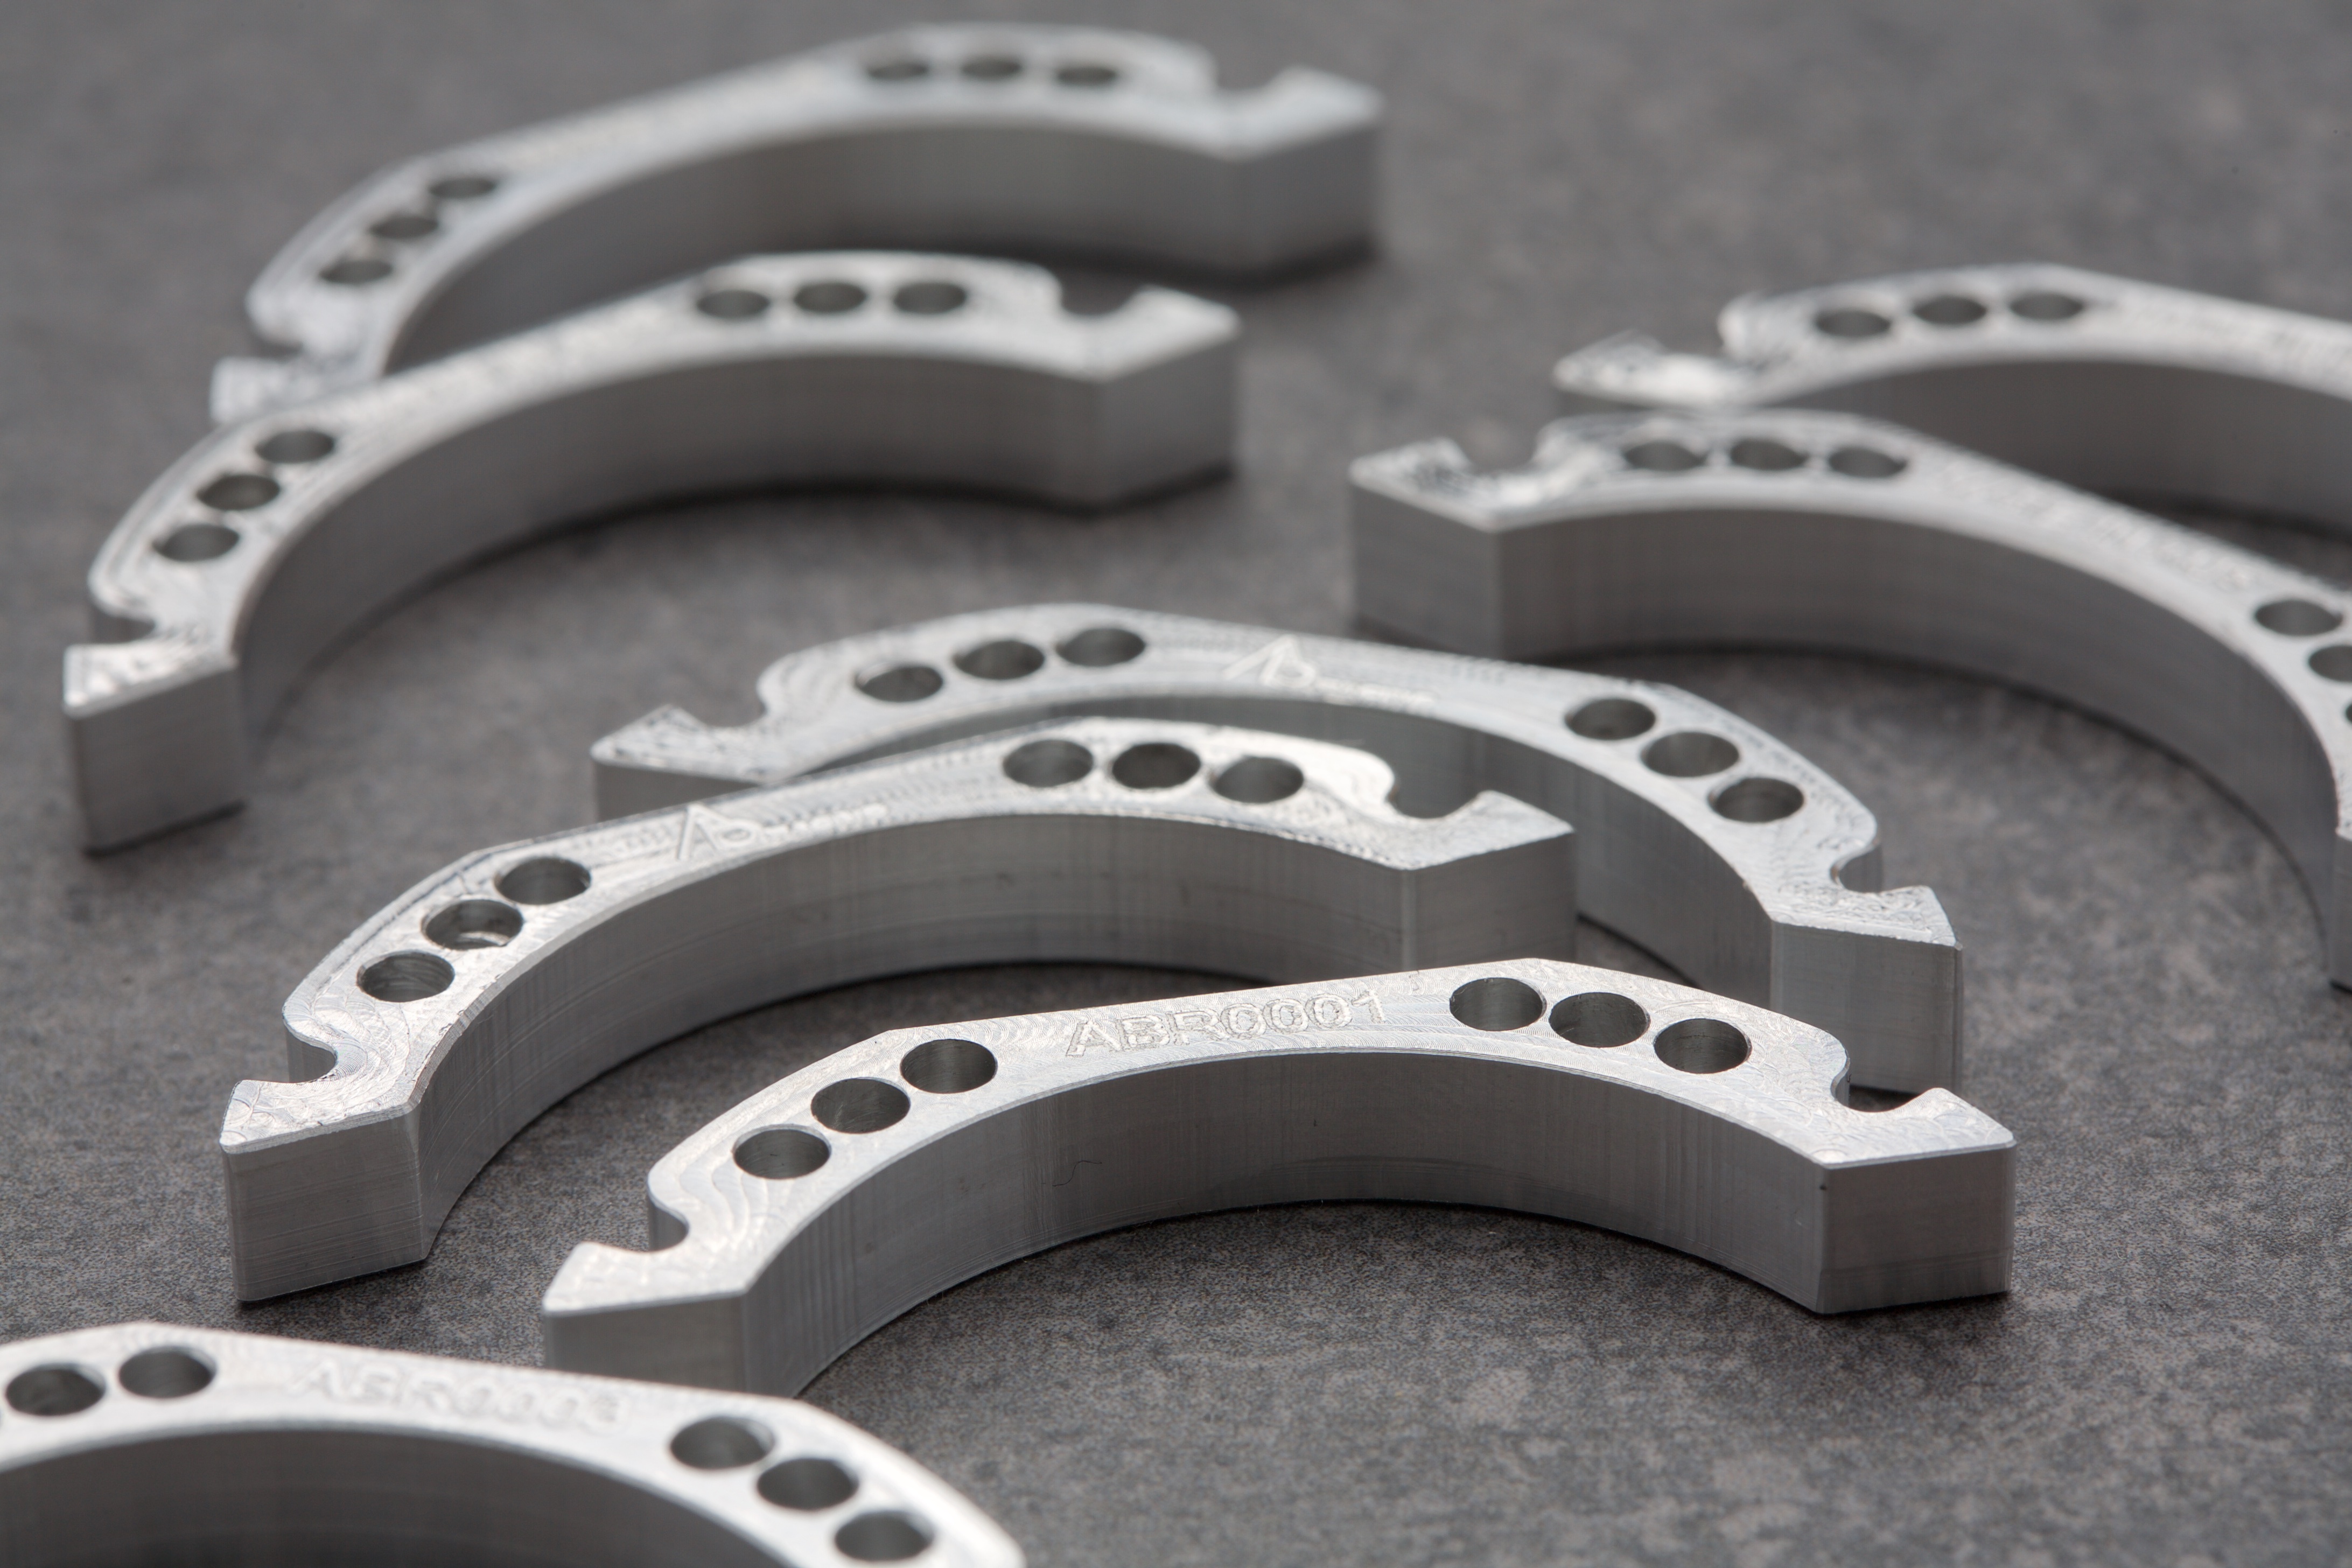
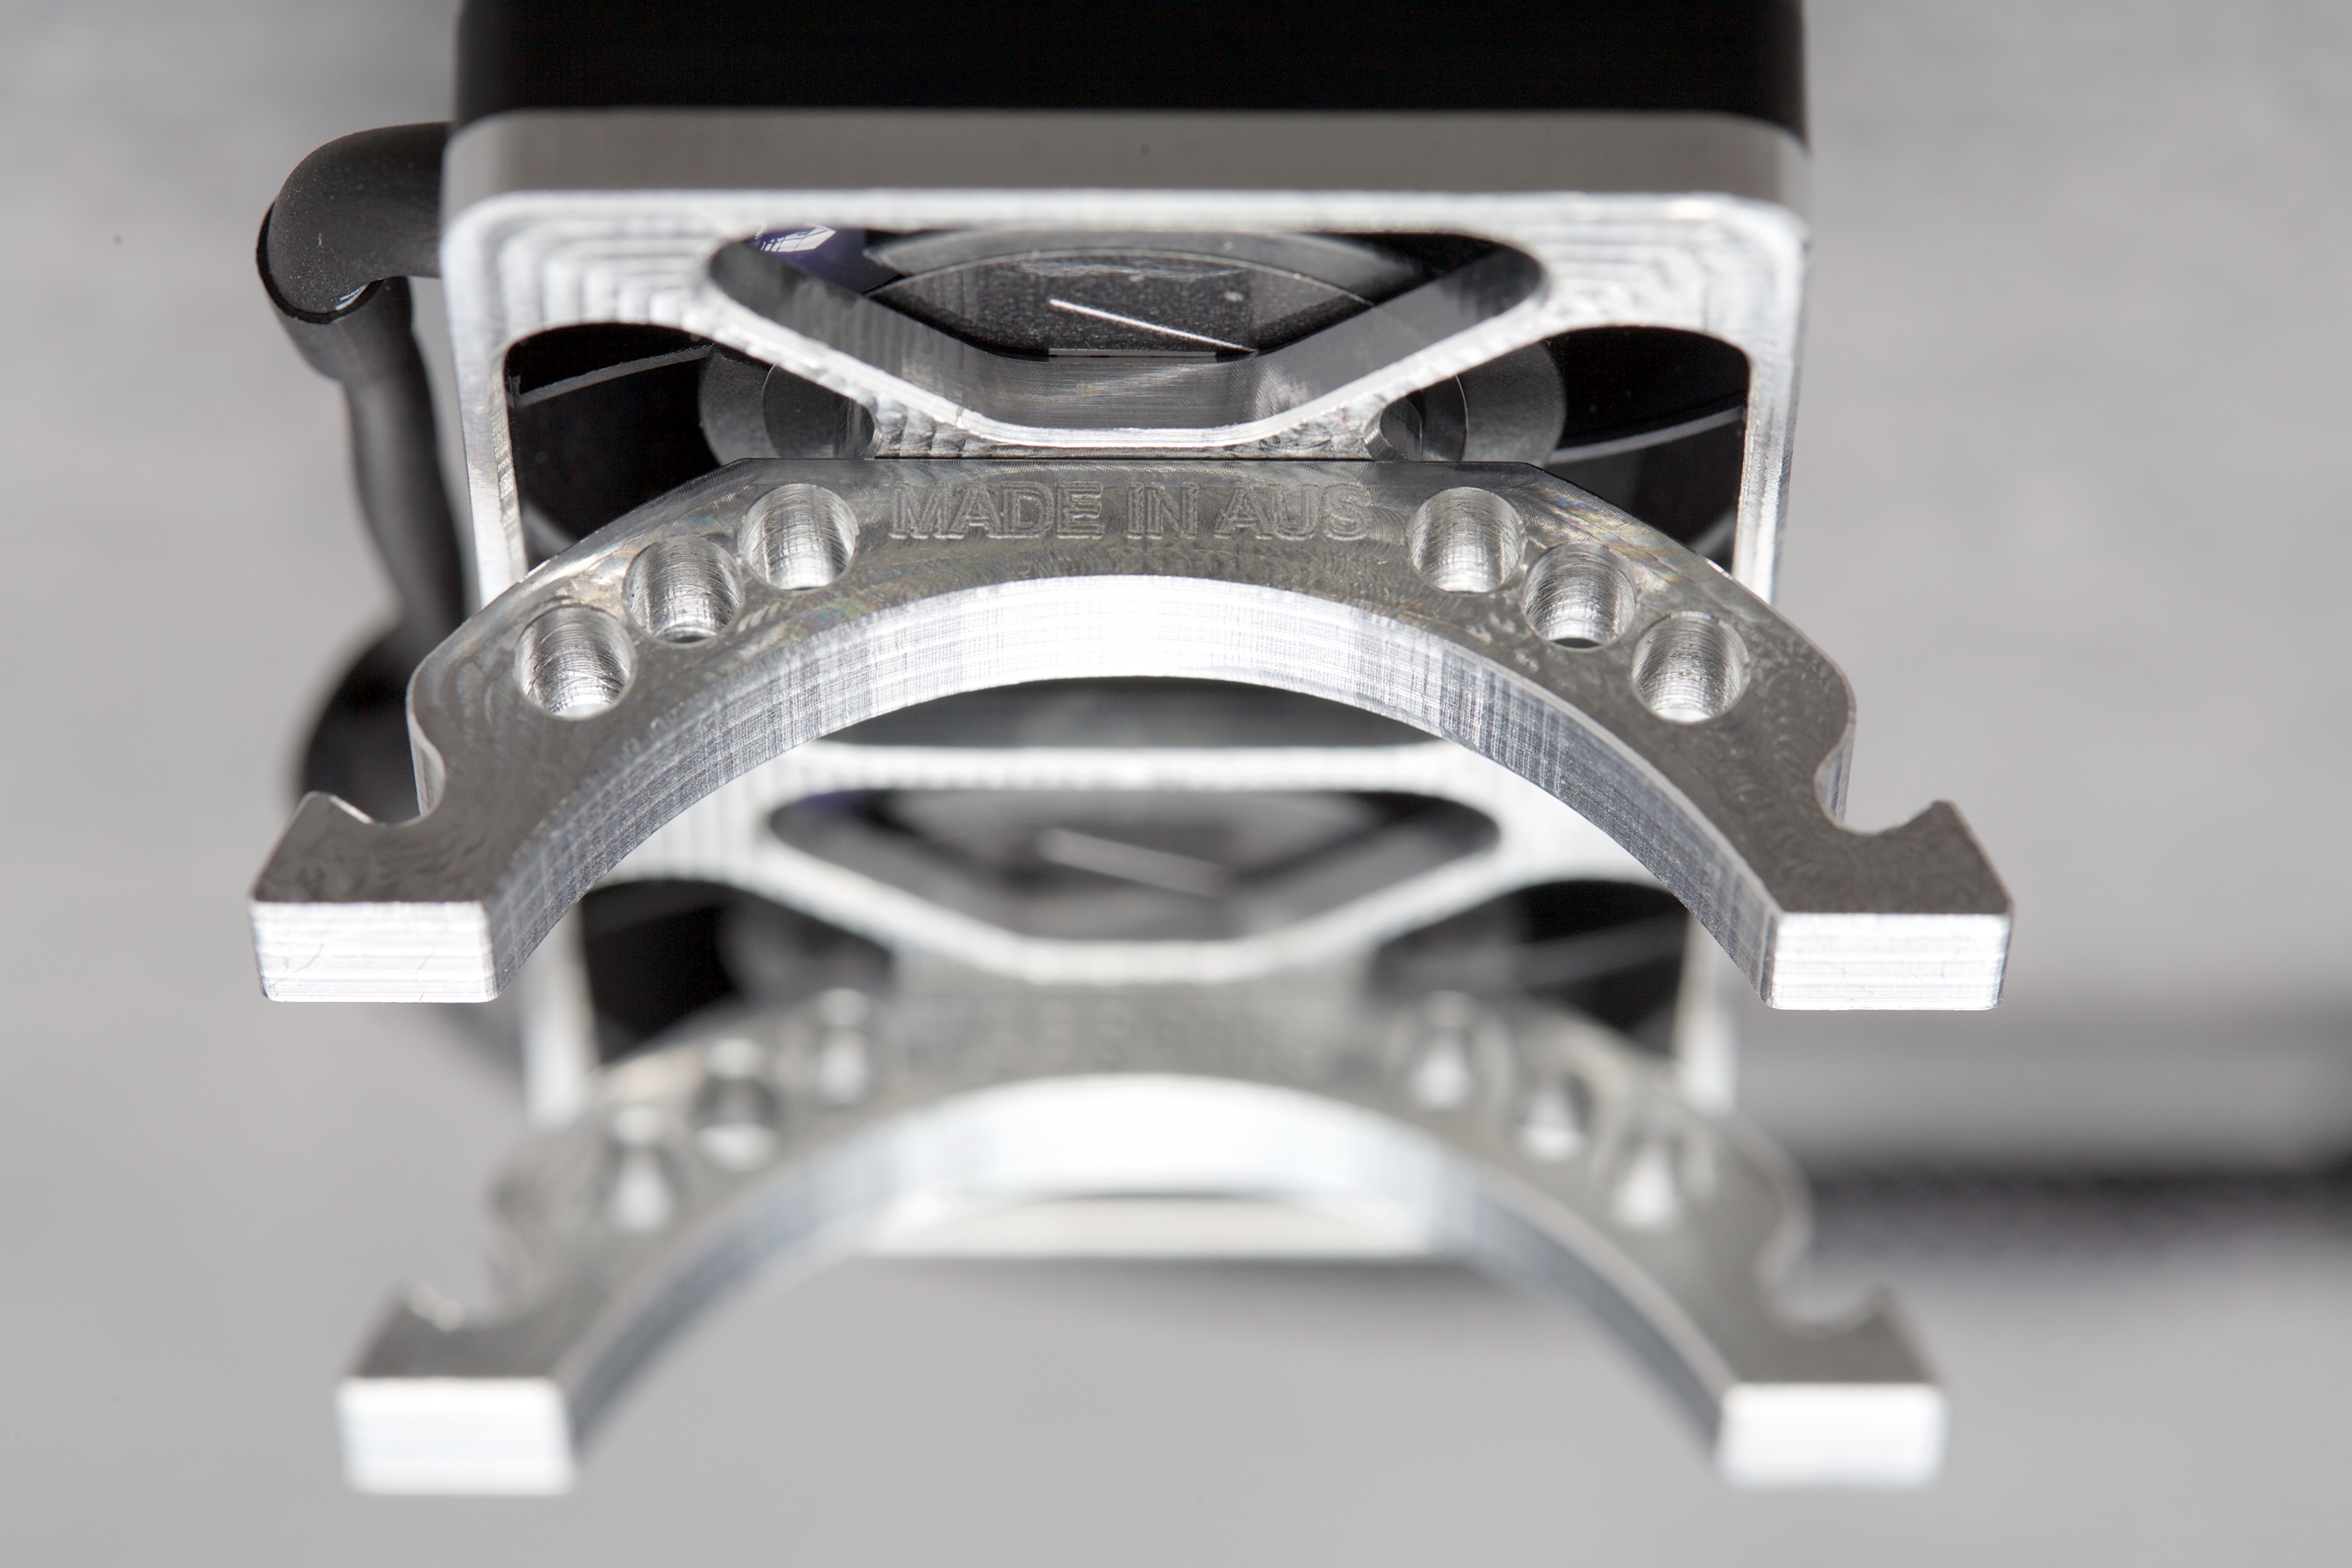
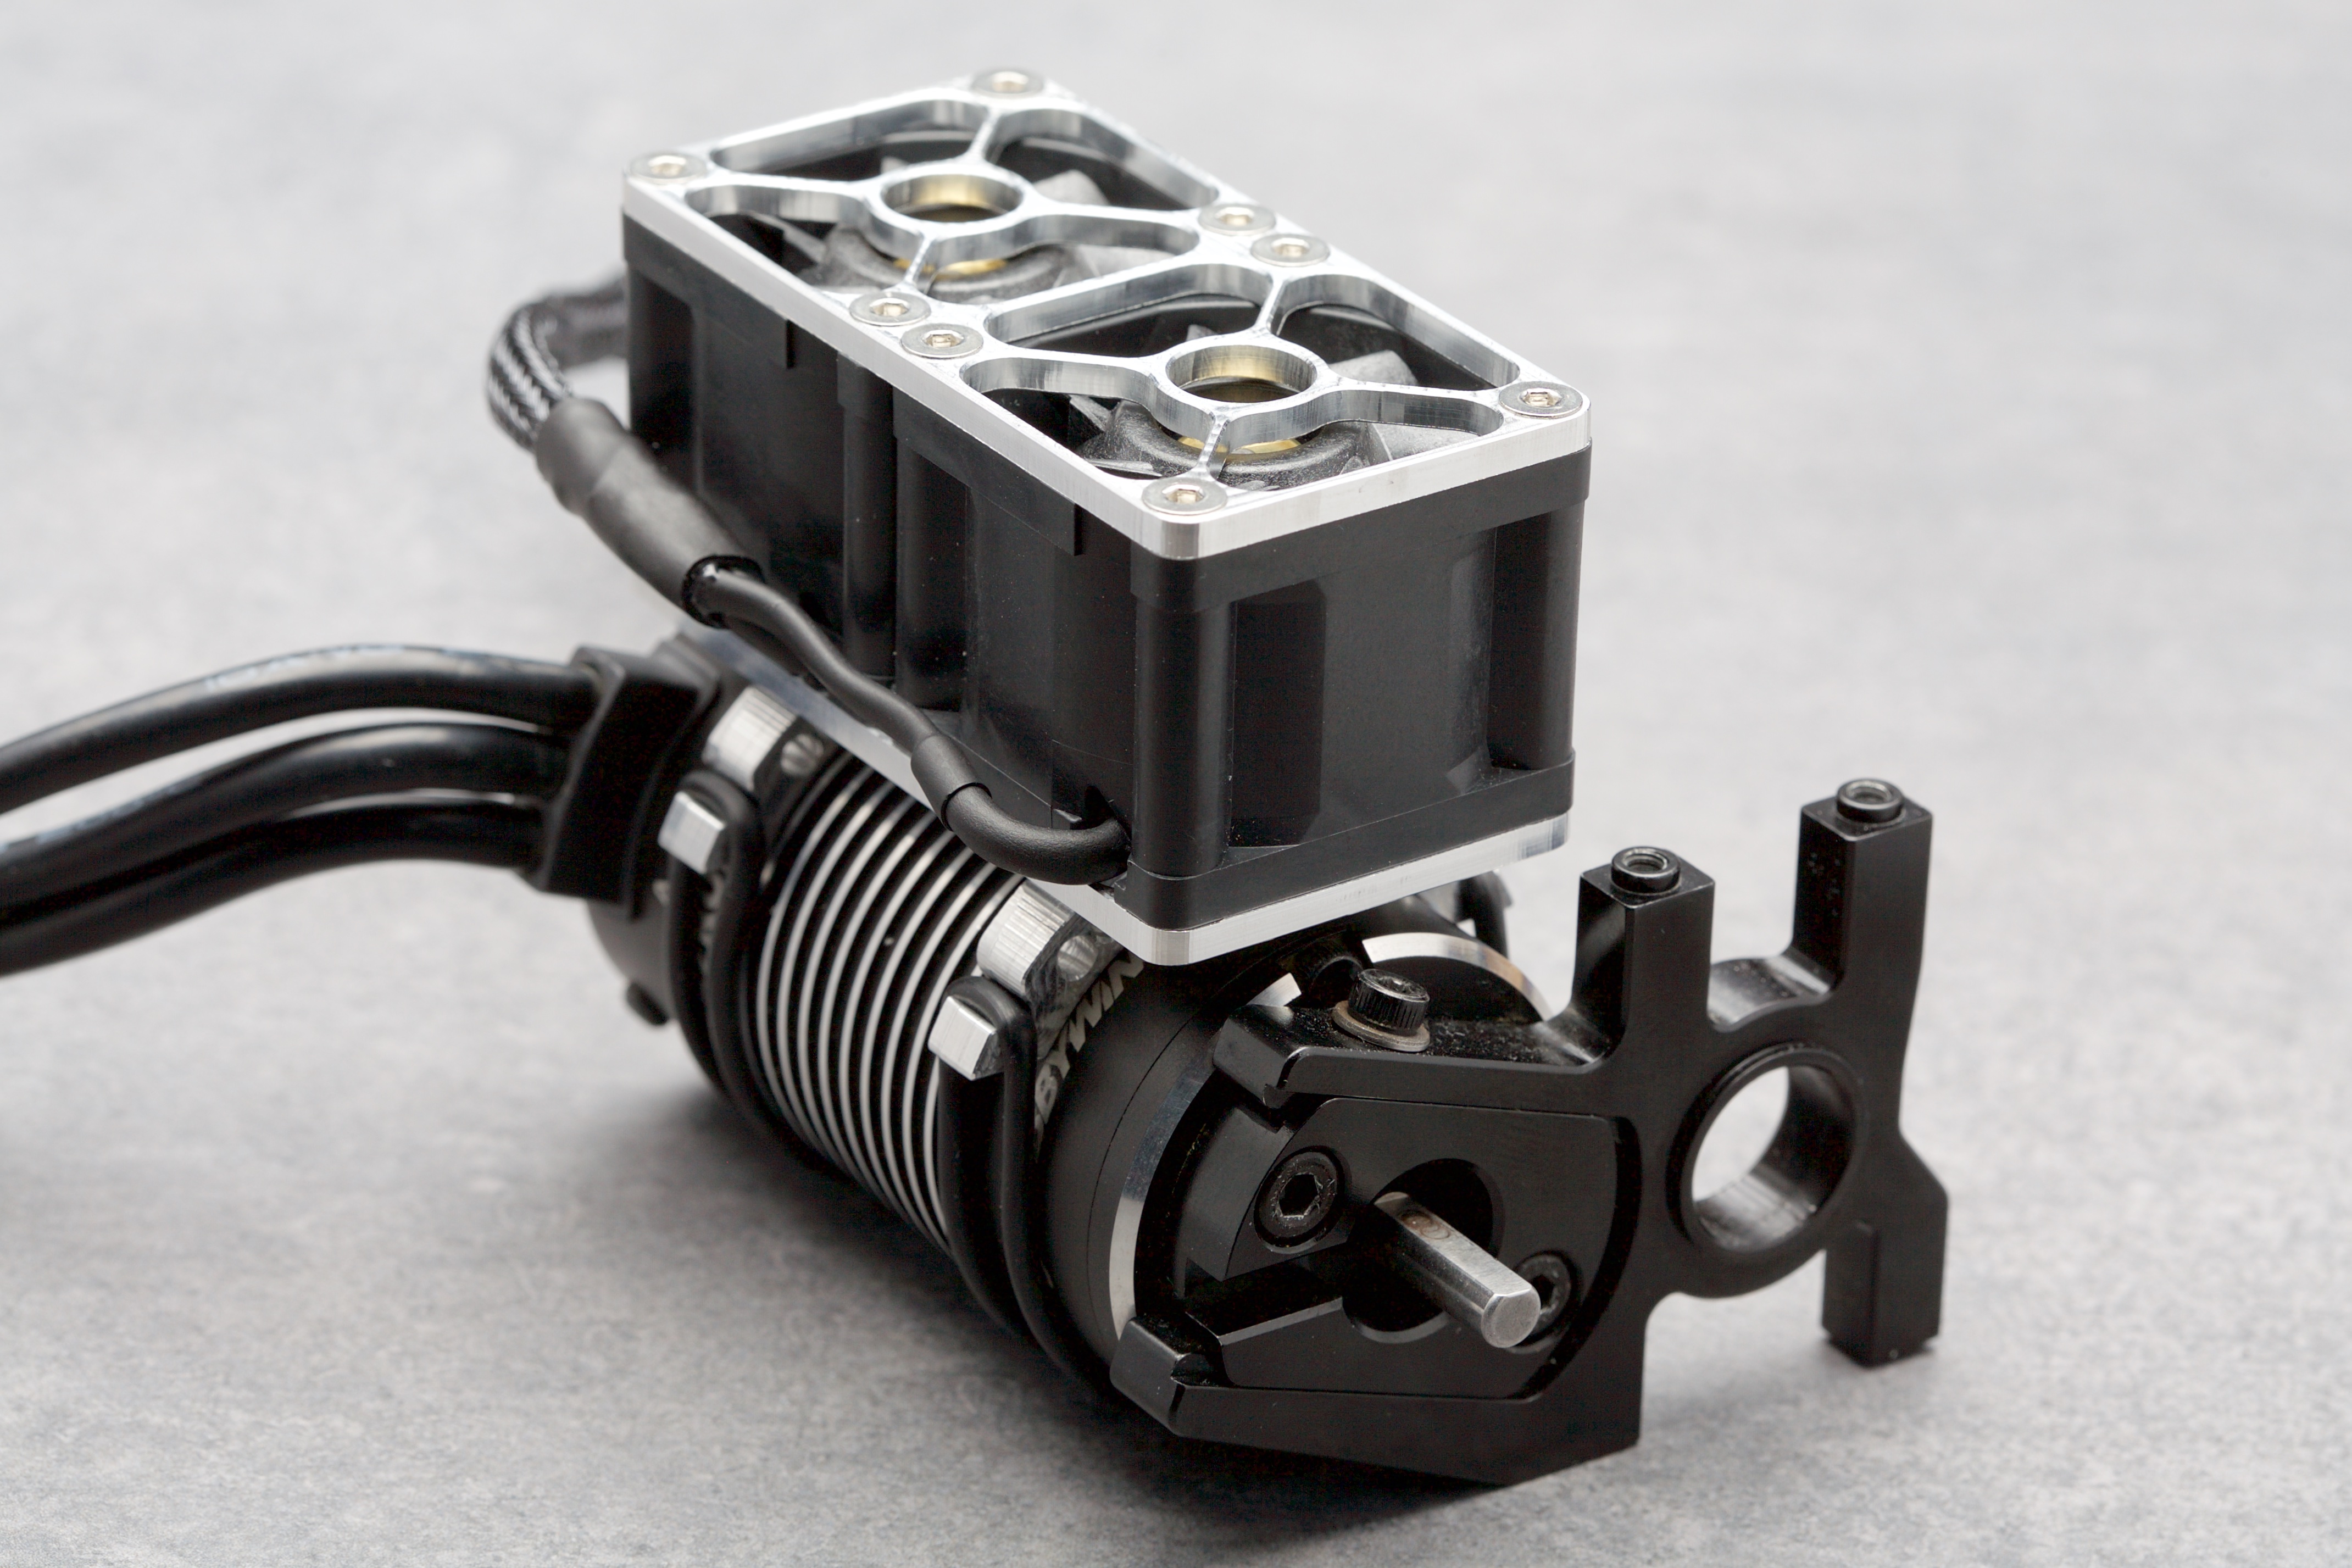
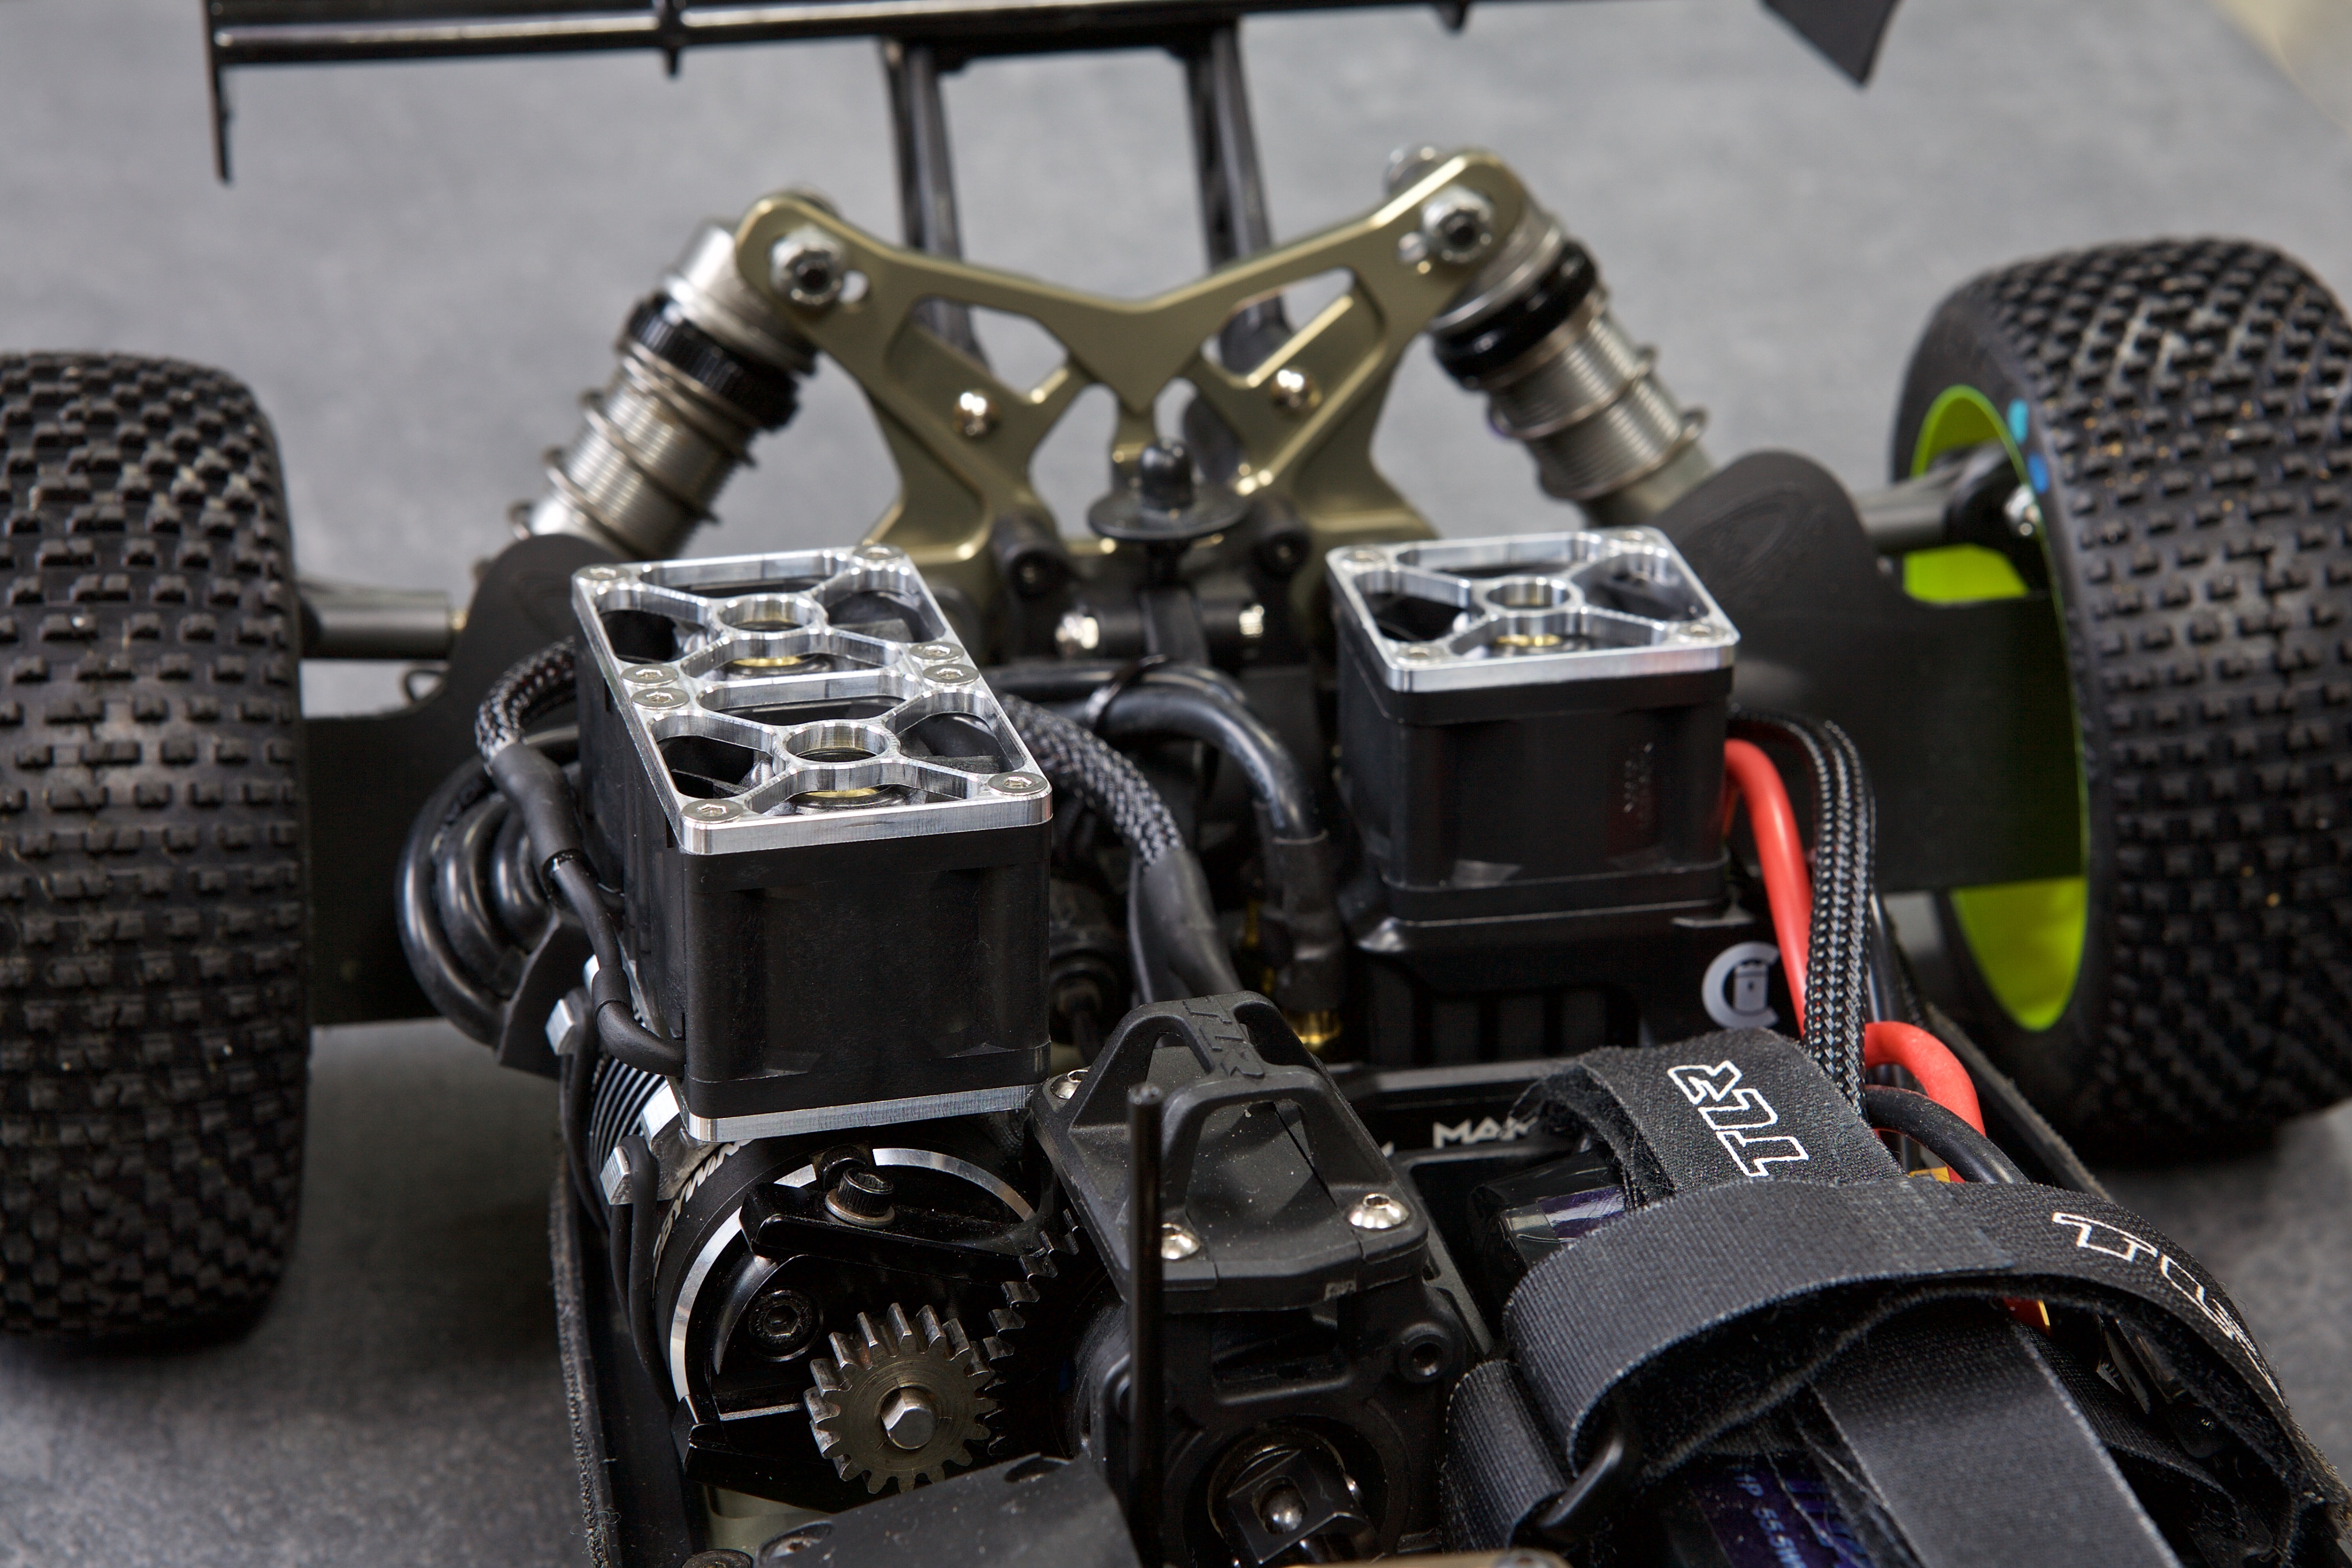
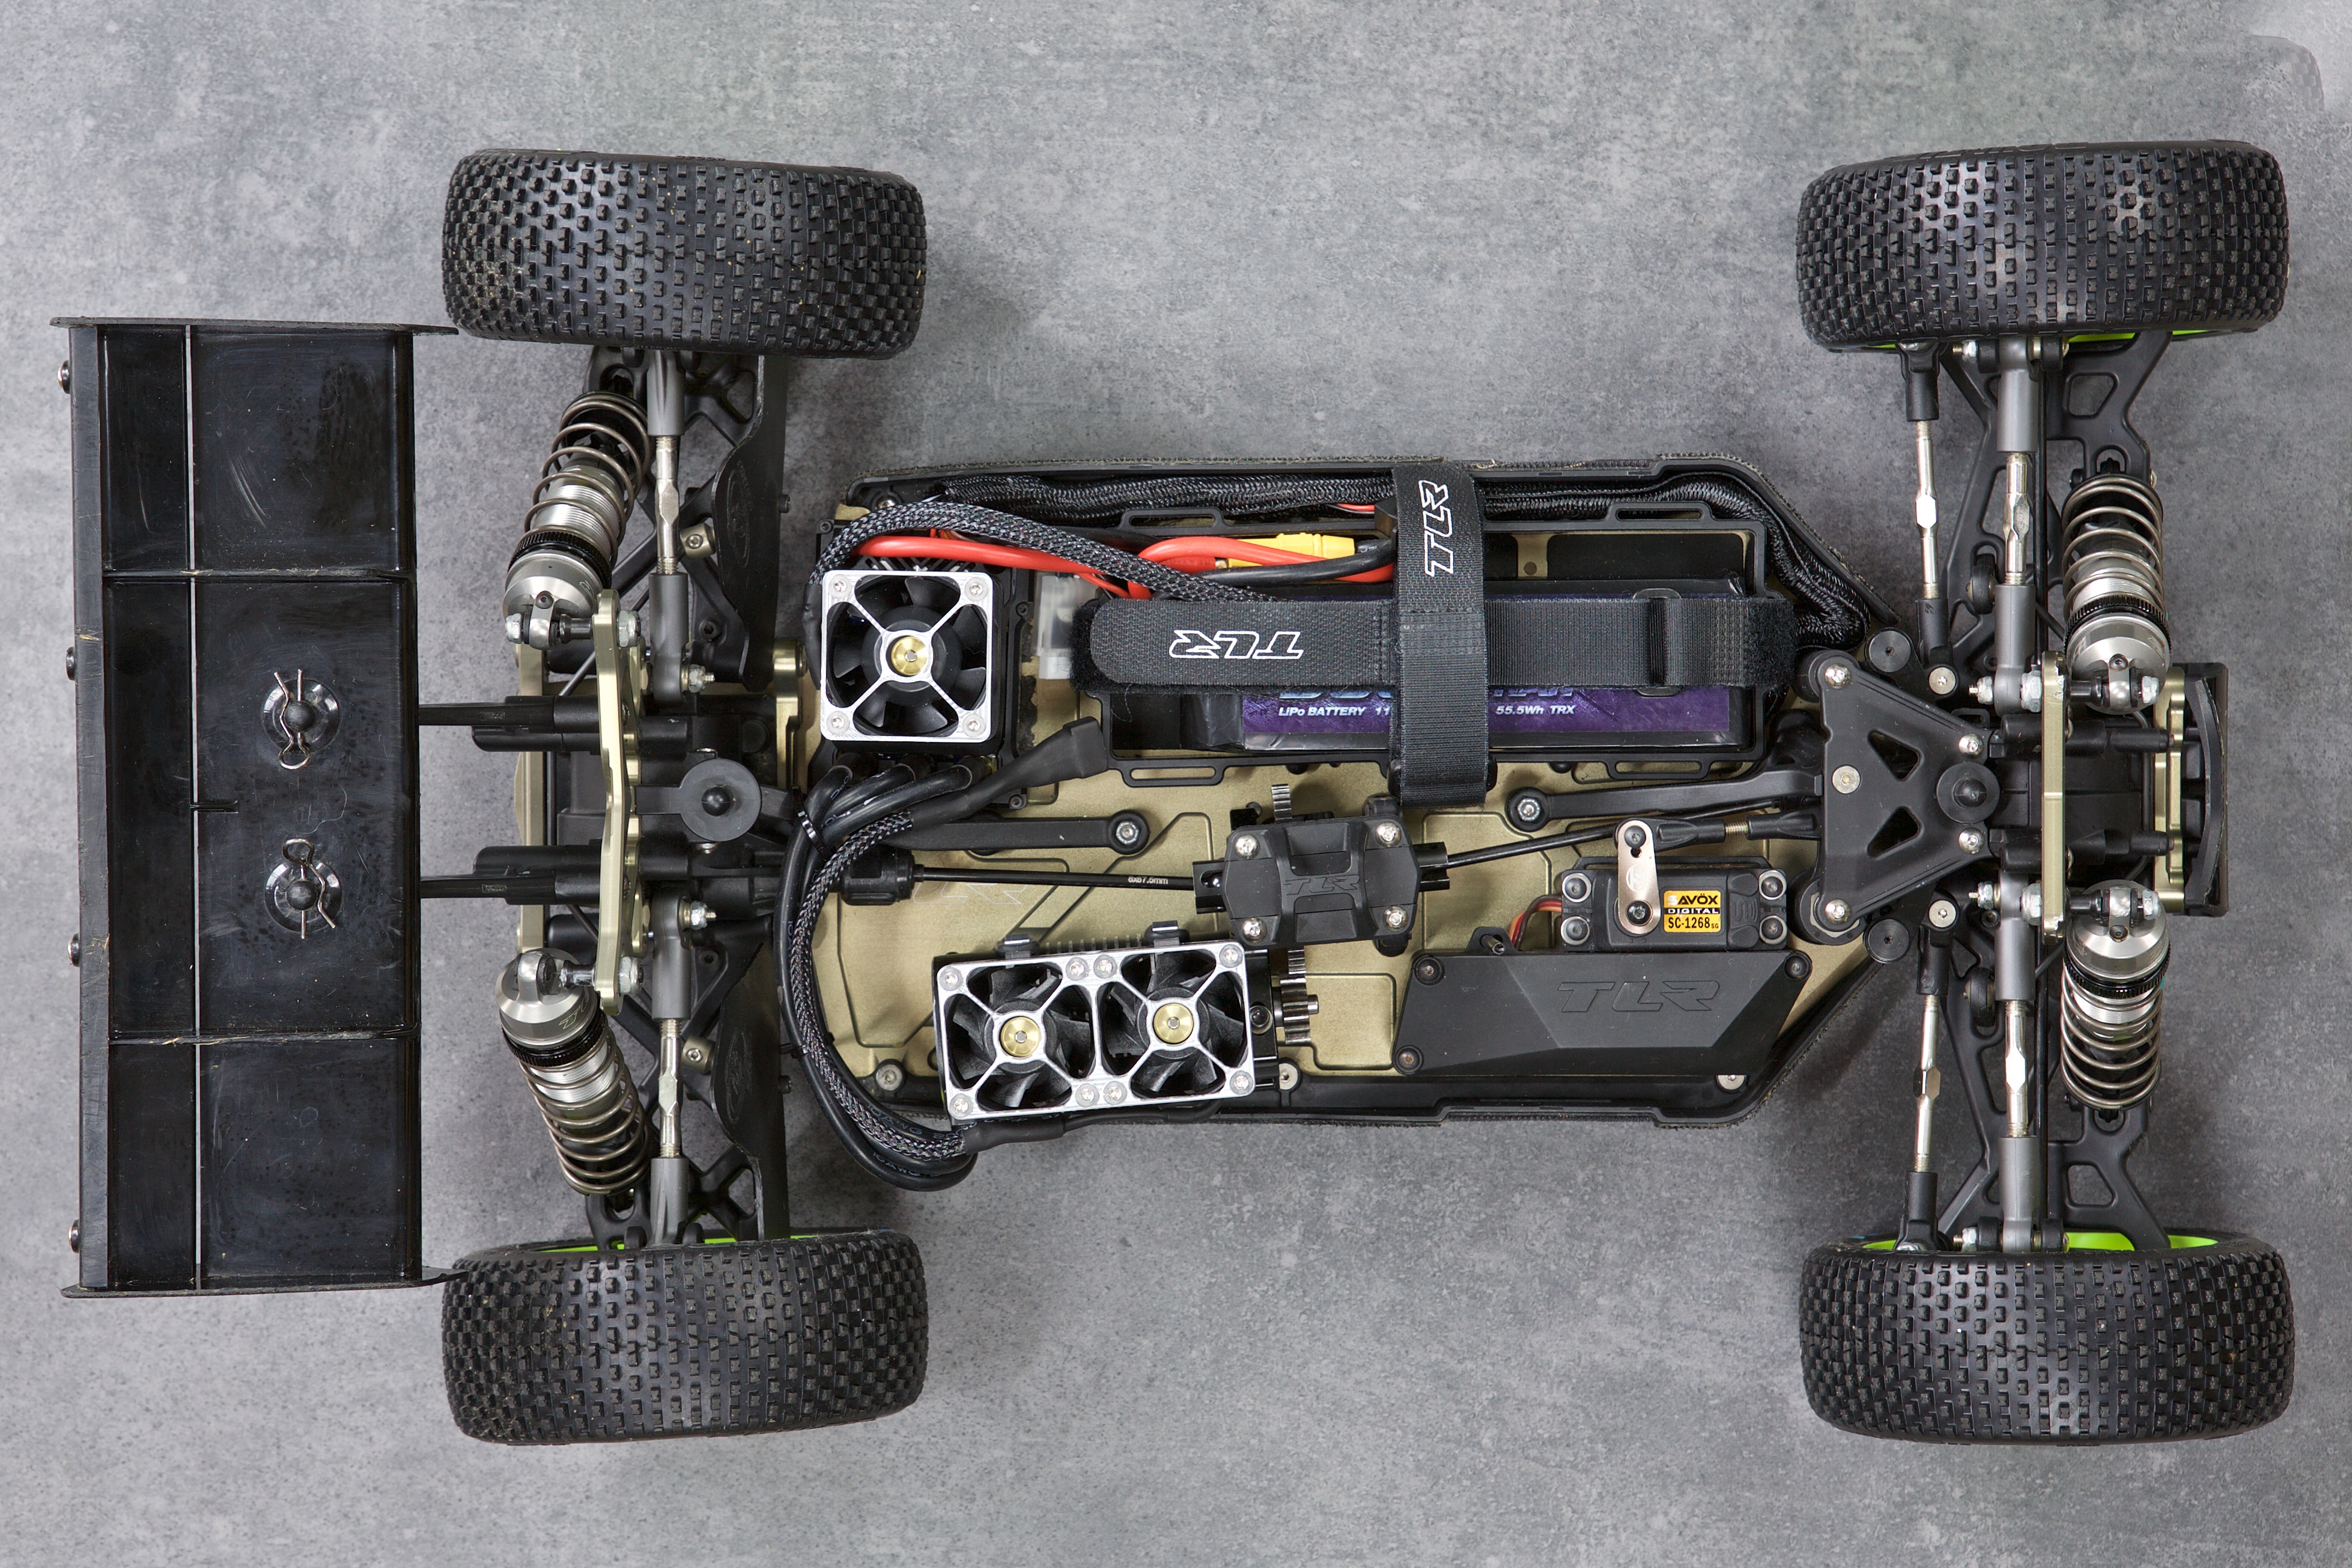
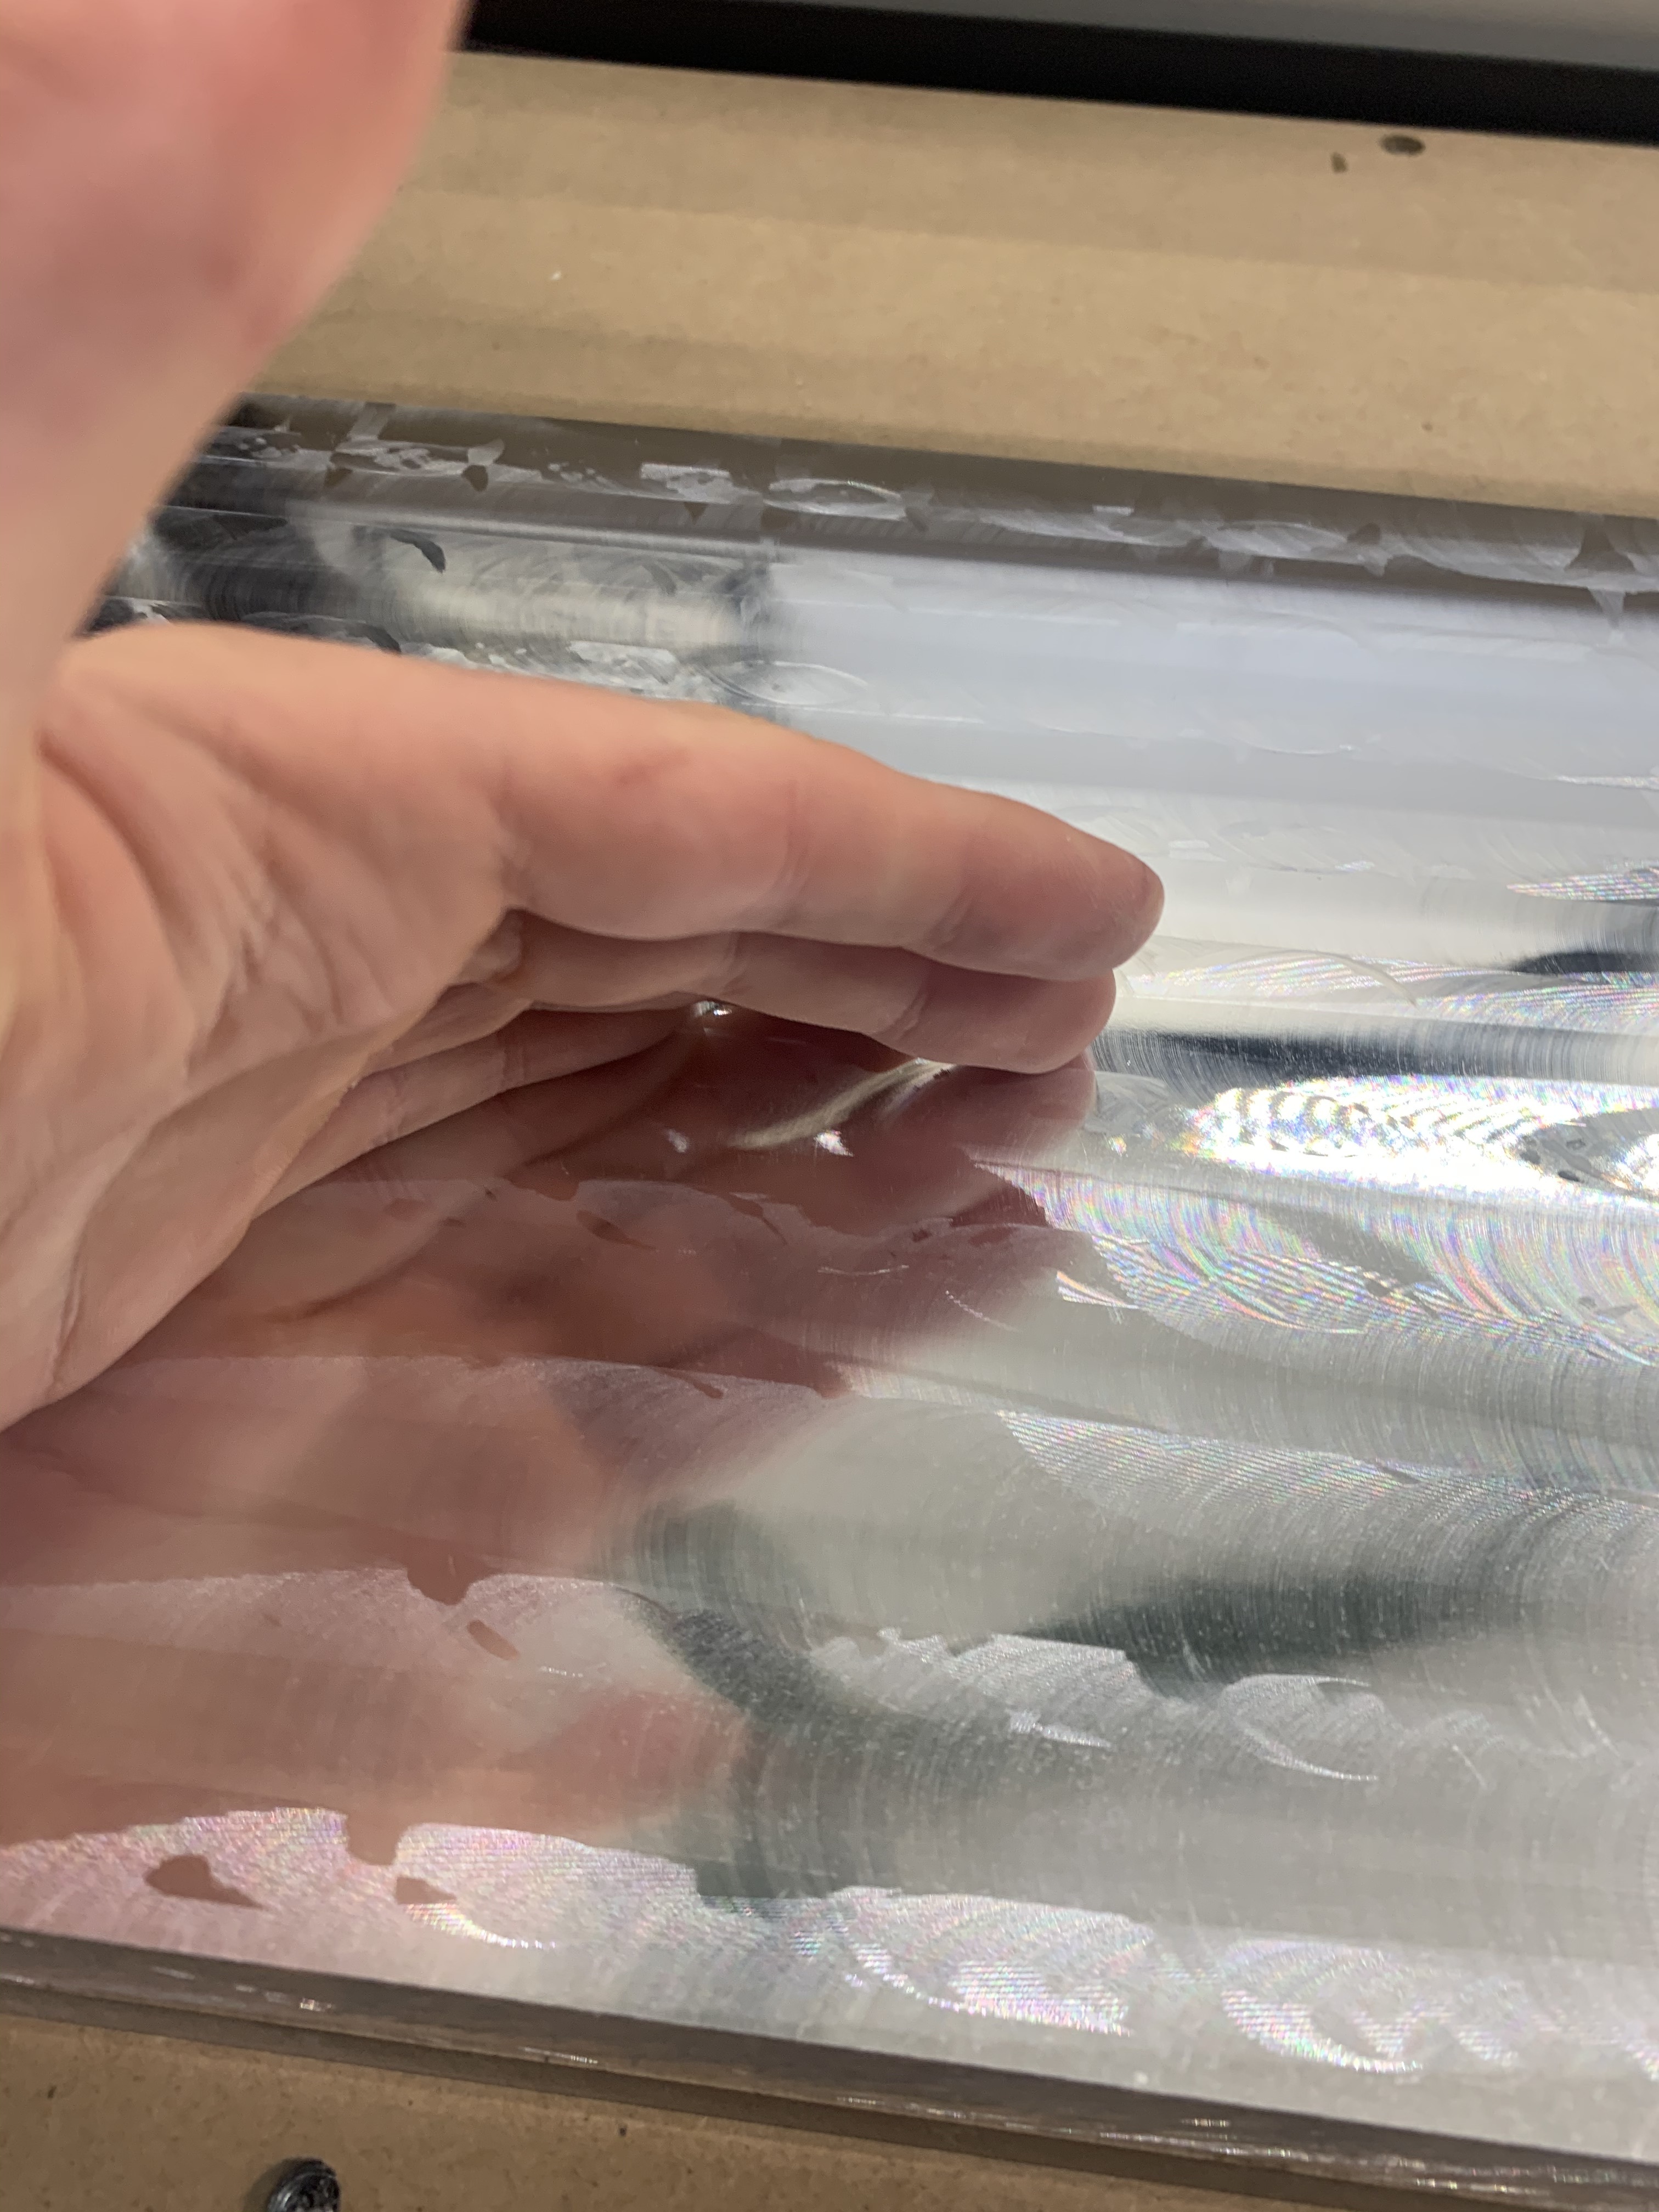
Also here are some images of the finished parts.


14 Likes

Thanks @Gerry! The aim was to try and design something that would contain all the mess and noise when machining.

1 Like

Impressively clean, functional execution! I’m curious how critical your tuning/calibration processes are…? I’m always interested to hear what people are “getting away” with.

1 Like

Really beautiful work :ok_hand:t3:

1 Like

Thanks @RoughDraft40!

I do spend a good amount of time getting my machine calibrated as best I can. For example, making sure each axis is aligned and perpendicular and making sure the spindle is trammed to my waste board. I also torque all of the bolts including the ones for the belt tension, as I find that helps to not over tighten them and tension all the belts evenly. In general keeping the machine clean and checking it often helps to keep it running perfectly. I’m sure you can go a lot further than this, but I have found this process sufficient for my projects.

2 Likes

@Adam.B, well done! The enclosure and the parts.

I’m curious about how your machine is mounted to the slide out “drawer”? And the slides, industrial rated I’d guess? Do they lock in place? The way you’ve set it up sure solves access issues when performing maintenance! I would have guessed having such a setup would open the door to issues with stability/rigidity/vibration? However, obviously not the case given the parts you’ve cut.

I’d appreciate learning your fixture plate system, if you care to share.

Oh, lastly, I think you’ve just forced me to raise the bar on my enclosure upgrade.

5 Likes

Love the setup!

I put drawer slides in my enclosure as well and it was the best addition to my enclosure. Being able to pull the machine out and get to the back is soooo handy for cleaning, maintenance, and fixturing. On my next design I might add a locking turn table so I can spin the machine around easily with it pulled out.

Your project is bringing me back to 2007 when I was doing brushless conversions on my EMAXX with a Fast lane Machine aluminum chassis and a gorilla maxx single speed transmission plate. Had a mamba max esc with a feigao 8xl. The golden age when Lipo’s first came out and the jump from IB4200’S to lipo was like having a supercharger.

3 Likes

Thanks @Griff!

The machine isn’t bolted down to the draw and they are industrial rated rails that lock in place. I haven’t noticed any rigidity issues when using a system like this, when its locked in place there is zero play or movement.

For my fixture plates I use a combination of Mitee-Bite clamps to hold the parts. An important thing to take advantage of when using fixture plates is setting a zero point that allows you to swap in different fixtures without having to re-probe for X,Y and Z each time.

Here are some examples of a fixture for one of the parts. In this I’m using Mitee-Bite Pitbull clamps, steel dowel locating pins and some fasteners to secure the parts.


6 Likes

Thanks @Able!

It’s a really nice feature that makes cleaning, maintenance and setting up fixtures a lot easier.

That sounds awesome! Lipo batteries were a big upgrade for the hobby and it’s nice that they are almost standard on most cars these days.

1 Like

@Able
Would you be able to share the part numbrs/source of the rails used and the hinges used on the door?

I’m in the process of designing an enclosure myself and this definitely made me rethink some of the choices I made.

Very clean build, I hope mine comes out half as good!

1 Like

Wanted to share some of the work behind surfacing aluminium. For the last few months I’ve been working on trying to get the best finish I can with the stock machine.

This is one of the first attempts at surfacing a piece of aluminium. For this piece I was using a 6.35mm 3 flute end mill running at 1000mm/min.

After this I started using a custom made surfacing bit which was made by a local company here in Australia. It’s 31.7mm in diameter and has two fixed carbide cutting inserts.

After some more testing, I started getting a bit closer to a “mirror” finish. It’s going to be hard to achieve a true mirror finish, but I’m going to keep working on it and also try out some different surfacing end mills. It’s definitely possible to improve on this further and I will provide an update after I conduct some more tests.


12 Likes

I have a standard size so3 so I used 22" 100lb slides from Lowes but my new enclosure will be using 500lb locking slides to support the extra weight of my aluminum bed, HDZ, turn table, and a 1.5kw spindle in the future.

https://www.ovisonline.com/24-Heavy-Duty-Locking-Drawer-Slide-FR5400-L-P1901.aspx

https://www.amazon.com/TamBee-Heavy-Duty-Aluminum-Turntable-Hardware/dp/B07D8PJ2BK/ref=sr_1_19_sspa?dchild=1&keywords=lazy+susan+turntable+base&qid=1602774836&sr=8-19-spons&psc=1&spLa=ZW5jcnlwdGVkUXVhbGlmaWVyPUEyNjZJTjQwOVVMVkFGJmVuY3J5cHRlZElkPUEwNDI4NTQ3MUdUTjVKSTVIRU1LMSZlbmNyeXB0ZWRBZElkPUEwNTIyOTk0MlNaT1NWWE8wWTM1SiZ3aWRnZXROYW1lPXNwX210ZiZhY3Rpb249Y2xpY2tSZWRpcmVjdCZkb05vdExvZ0NsaWNrPXRydWU=

Hinges are going to be stainless steel marine hinges because they look great and are very durable.

MAKE SURE you make a chip shield for the slides and never blow out the enclosure with the slides extended or you will get chips in the bearings. I learned that one the hard way.

3 Likes

Really nice work and awesome fixturing. I’ve been enjoying seeing your work on Instagram and love that we can see behind the scenes now! The slide is an awesome idea and really good follow through.

Have you tried using only one insert on your custom cutter? This will allow for more tool pressure without over powering your router. And will stabilize the cut so you don’t see as much “bearing noise” in the final finish.

P.s. - linear rails solves the bearing bumps :wink:

2 Likes

What 8mm single flute do you use? I just bought a few wildOX carbid single flute end mills to try because I saw the inside is polished but the 6mm cut horrible compared to my $6.00 carbide single flute from Ebay.

It shrieked and made tiny splinter chips at 1mm DOC, 5.5MM WOC, 1000MM FEED, 25K RPM

It did make it through several passes but the sound was intense.

I put my $6.00 single back in at the same settings and it made perfect chips and I pushed the feed up to 2000mm with no issues. It was really strange how different they performed on the same cut and how the chips looked.

These cut like a champ for the price

https://www.ebay.com/itm/2Pcs-6mm-Single-Flute-Spiral-End-Mill-Carbide-Router-Bits-For-Aluminium-6-22mm/233506037234?_trkparms=ispr%3D1&hash=item365e0b5df2:g:2MoAAOSw4-teVOyO&amdata=enc%3AAQAFAAACcBaobrjLl8XobRIiIML1V4Imu%2Fn%2BzU5L90Z278x5ickkai8xCwosGKpC0NWj85e%2FB0dm9Qv8Asokm0HybaniQKDSwOHGvTFj1DpCNao8qi84l3I%2FDLw8IVUtEdmMWWTatn6Lr4RPrD2dO6n%2B8wPiHGbkSbuAL05HVEeGF2kZkGe%2BQWIBh22WpXuiFZ2UwWQDKpEFkFtaYUshywtrsbWwfCtHS4FxFSXmX1M%2BVjckYrY7ZUy4jsu2G5GefTtI4PrMO%2F8RUJvgwBKUmQPfbjxAHqAAe3BnEswKlkWgQ6YqBXEOGrpehRJmq5EE8d2WIGze0z8JbBmHZvTJy%2FEfOLFgEVOAwDHf6yaHyUMiZyDUt3rx1TsZUxnYWw4vhSjR%2B58KFEStl4q2Wrz2VTbDqtT2N4vKkWWIJbMKXU%2B6QatDYB03YWMtPNAmXc%2BarstkkTU1x9RXVPT%2BGNWhdWrUSjhaLwnkdJ2MCJxJjcPAxEm7xG2b6Za%2Bv16l5dcdMn1fE9gGh3mf0e%2BquQAZO0Qq%2Fy%2Fzvg5SHhtp7JFNE4AKskhpodCTFbgmUux%2B1DP6zPVfIqvMbPIDv%2BLRiFzNRQN%2F4rjthaHC2J7EJSmVm9ExPeZHATbdwgadKTGjt9%2FtryDmyJ75UqfHJpdwsrSndLGH1lBg2Uc0Tu9GQcdWM0TxBLm%2FSbfGTkOI2i4WAsTlPMwGn8qEnUIiGIl6ELqeanyUV0WxUkBEphlYCieV5B1Bo2HzmCsaovuk5oVqvPliyzQW1I2dDqT%2F5eOleHE4M7tt7Or7iYvV8FUWWGqwfgXCBfvFqA5K%2B4pok1ouafHbFBrFWl%2B%2BYg%3D%3D|cksum%3A233506037234133e57c70df64ea59b4ca89c834f0fd1|ampid%3APL_CLK|clp%3A2334524

2 Likes

I bought some of these too. Haven’t used them yet, cause F360 removed my free 4-axis programming…cause I’m back to making these silly little (1/5 scale) Briggs and Stratton mini bike engines… (yes, that IS a drill chuck on my S3…G2.5 balanced to 20k)

8 Likes

I bet that made for an interesting first spool up. For $6 I get great performance out of them cutting aluminum but sadly the 8mm version only comes in a 32mm flute length. I wish they made a 10mm and 22mm version.

After the 6mm wildOx episode I don’t want to run the 8mm version I have on my desk.

I’ll ask Vince if he wants to try my spare wildox 6mm and see what his opinion is. They look great but just didn’t work for me but maybe it needs to be pushed harder.

1 Like

Luckily my enclosure is enclosed (sorry just wanted to use that word twice in one sentence) in high quality bullet proof (and hopefully drill chuck proof) Lexan…yes it wasn’t cheap…but it made me feel a lot safer sitting next to it…

2 Likes