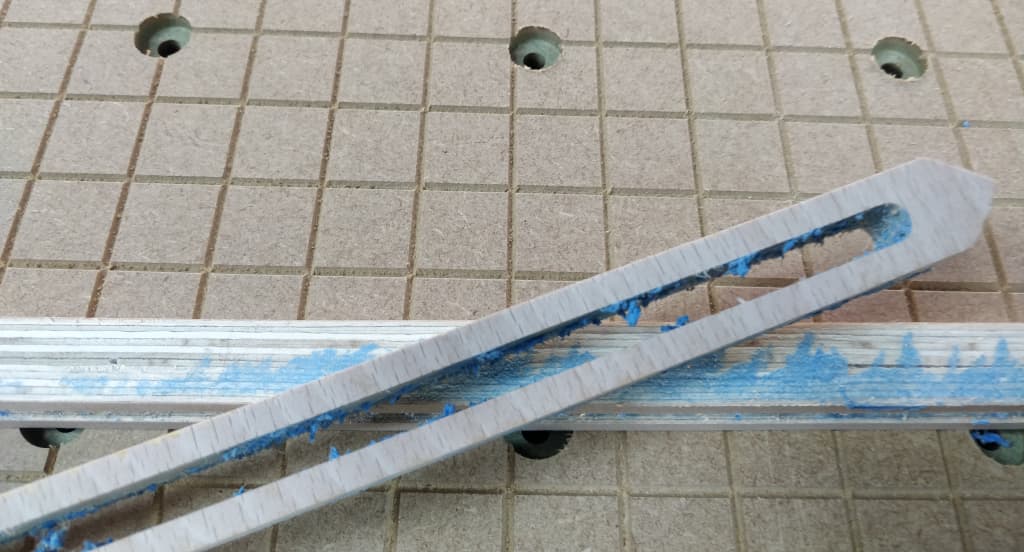
I still works as intended, but it’s a mess of blue tape - I’m not sure what I did wrong here. Any tips on avoiding it?
If I had to guess, perfect z height alignment if the tape was in the x/y plane is going to be near impossible as adhesive thickness isn’t coherent the entire way and prone to movement due to pressure etc.
In that case measuring your Z from the top would be more ideal assuming every other part of the system is as close as possible to perfection. There really is no good way when tape is involved in workholding and it can be hit and miss unless you want to pull out the scrollsaw and want to finish it yourself.
Also I’d consider flipping the grain 90 degrees if you can on a project like that unless that is ply to give it as much rigidity as possible.
Yeah, it’s ply so no worries with that. Just first time that the tape has been pulled up like that for me. Downcut just in case?
I’m not sure I don’t use the CA glue bluetape method for anything. hopefully someone can chime in with more knowledge.
I have run into this. You split the tape. I bet the bit has blue tape on it as well.
It will melt and go into the grain as well. Not fun.
Raise the bottom cut a few thousands of an inch. If you go too high, a ridge/edge will form and you will have to break/sand the edges. At least the tape will be intact and you can peel it off.
I use the bottom of material when cutting through. The tape gets eaten up by the bit because I zero away from the material on the spoilboard with no blue tape underneath it. Using the bottom on cut through projects has saved my spoilboard. I still have to clean the tools because tape and glue gets on the bit but I have never had the tape get all over the pocket I was cutting.
Using bottom of material is a bit of a change. I use rapid positions to check my X and Y position and the Z+6MM but you have to jog off the material before doing a Z+6mm or you will drive the Z right into the material. A small change but can cause major issues. If you ran the z into the material you can ruin the material and possibly lose steps causing you to initialize to get the machine back in syncronization.
Guy, move your Z-zero up 0.010", reset Z-zero to zero and you’ll miss that tape altogether.
Yes, I spent 20 minutes cleaning the bit, it was not a fun process.
It’s still all new to me and I still haven’t got over ‘the spoilboard is so smooth’ and moved to ‘the spoilboard is a consumable’ so I’m mounting 6mm MRMDF with clamps and then using blue tape to mount the project workpiece to that.
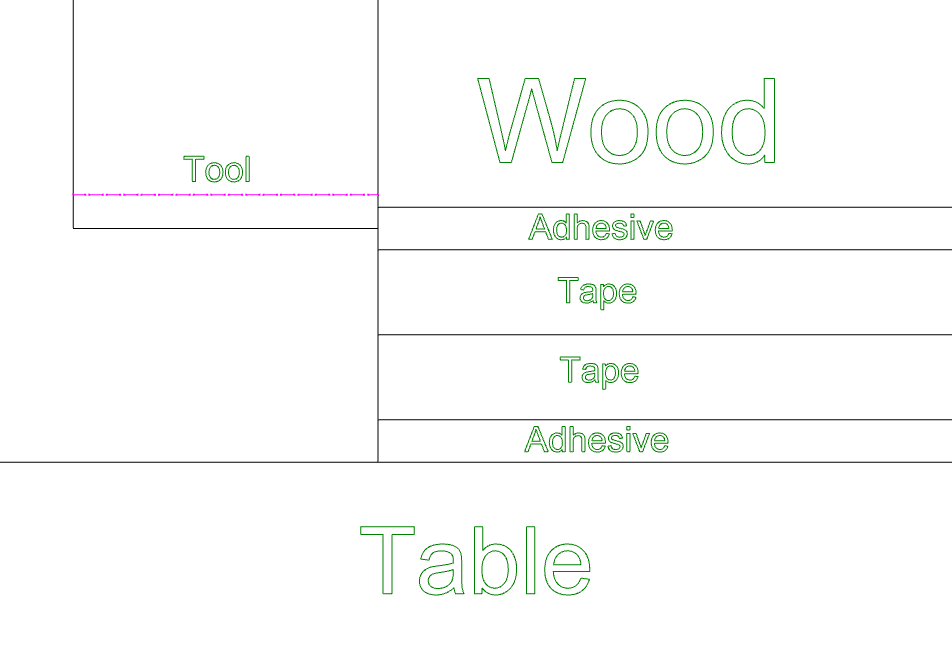
I find it helpful to draw side/section views when resolving anything with height / Z dimensions…
Two layers of tape is going to be about 0.009" - 0.010"
It’s nearly impossible to get the tool perfectly aligned with the bottom of the wood & the top of the adhesive. So make a choice, do you want to clean up adhesive, or do a little light sanding on that bottom edge?
Where you set your zero, top or bottom, is entirely arbitrary. If you have varying wood thickness & you’re carving relative to the top surface, it makes sense to index from the top.
If you’re only cutting through profiles/contours, and you always want the tool 0.009" - 0.011" from the table, index from the bottom. However, you can just as easily program for 0.750" thick material, touch off to the table and enter a Z of -0.760" (or -0.759" or -0.761"), whatever seems to work out best.
If you’re doing a mix of cuts that are relative to the top & bottom, then you need to be precise about the stock thickness in your design & machining. Else, you zero to the top to do your engraving, carving, etc… then output a separate path for cutting through the part & reset zero relative to the table or bottom of stock.
This topic was automatically closed 30 days after the last reply. New replies are no longer allowed.

