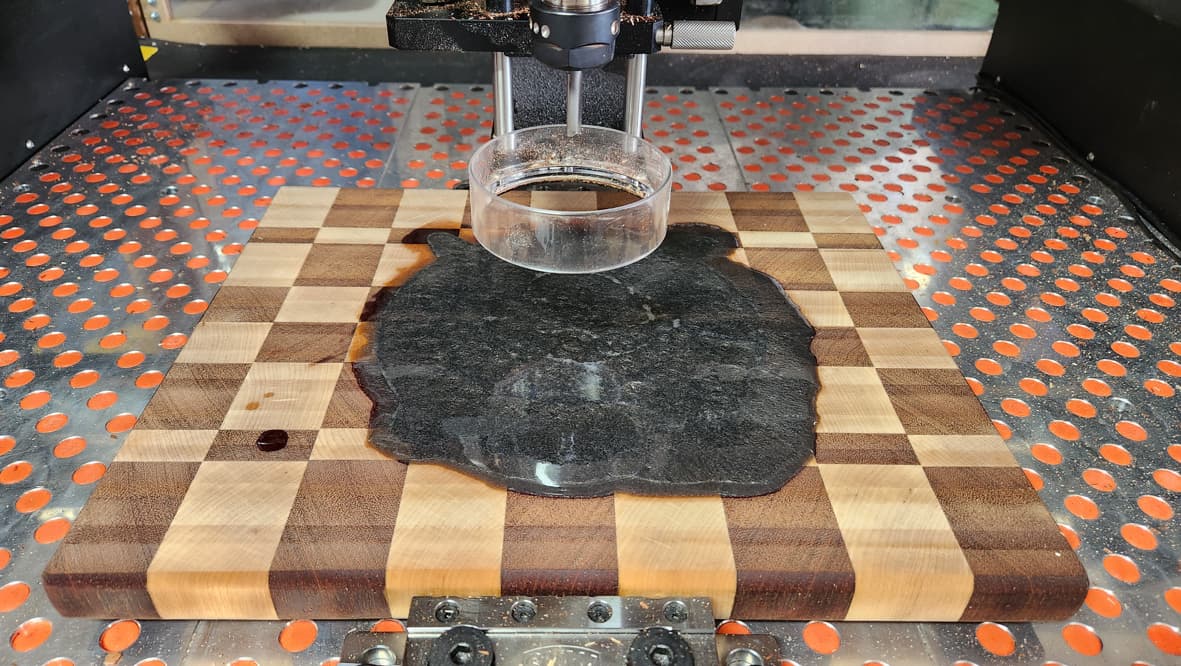
I decided to refurbish my OG cutting board (probably 11 years old) that I had sitting around. I wanted to spice it up a bit so I’m going to try for a multi-pour resin inlay. Started by flattening the board on both sides as it had a pretty significant cup to it. Once it was flattened, I cut the first pocket and made the first pour. I did seal the edges with clear resin before pouring so we’ll see how the bleed is.
Machined the next set of pockets at lunch today. I managed to use my tool change macros in the wrong order and ended up cutting a bit too deep in a couple spots. Fortunately it just took a bit of extra resin. I have one more operation tomorrow and one more pours. There is a bit of bleeding from the first pour where it spread outside the cavity but we’ll see if I can’t clean it up.
This is my first time doing multiple pours so it’s a great learning experience.
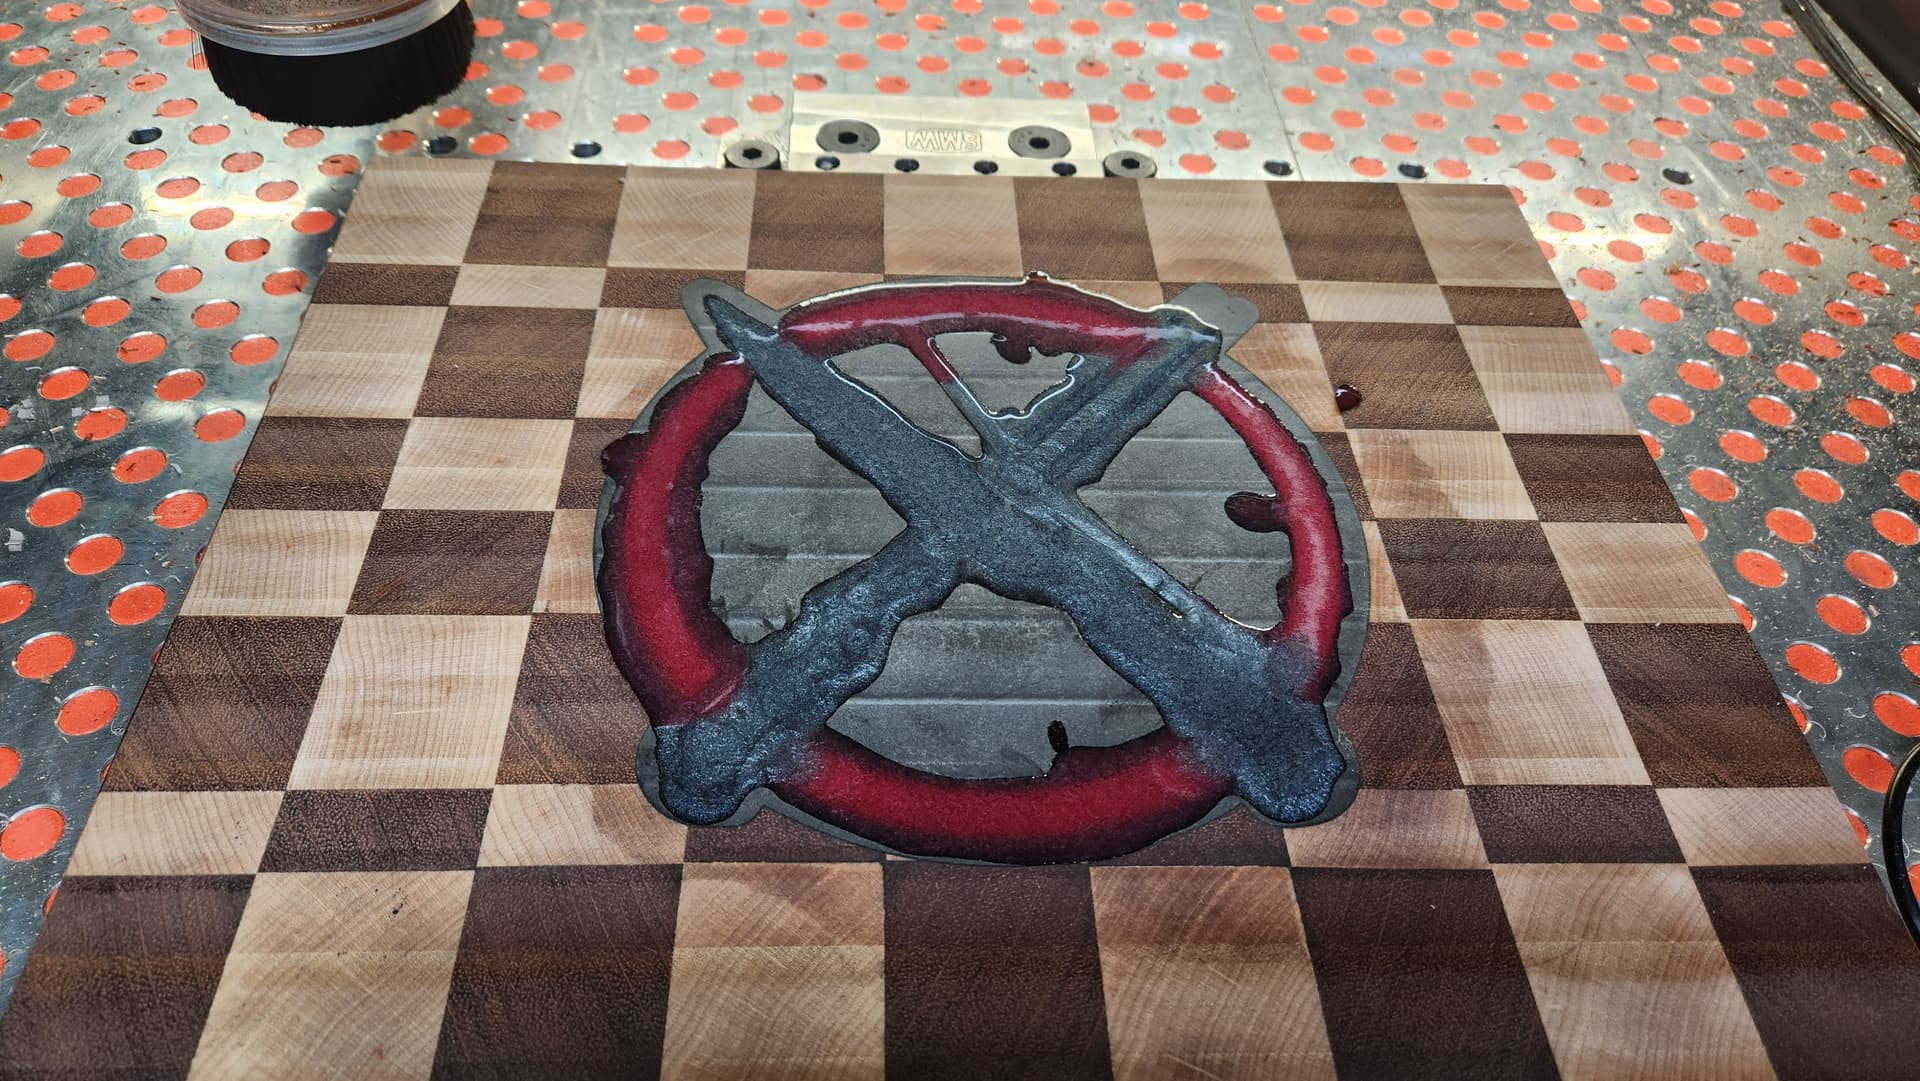
If I’ve cut pockets for more than one color and they aren’t connected, I’ll usually tape off all of them but the first color and leave it until it sets in a few hours, then remove the tape from the second color pocket(s) and pour the next. If the second color runs over the first and I left it alone long enough, it doesn’t matter.
In cases where two colors are against each other, you have to just fill the area, cut the smaller pocket again to remove the previous color and fill with the next one.
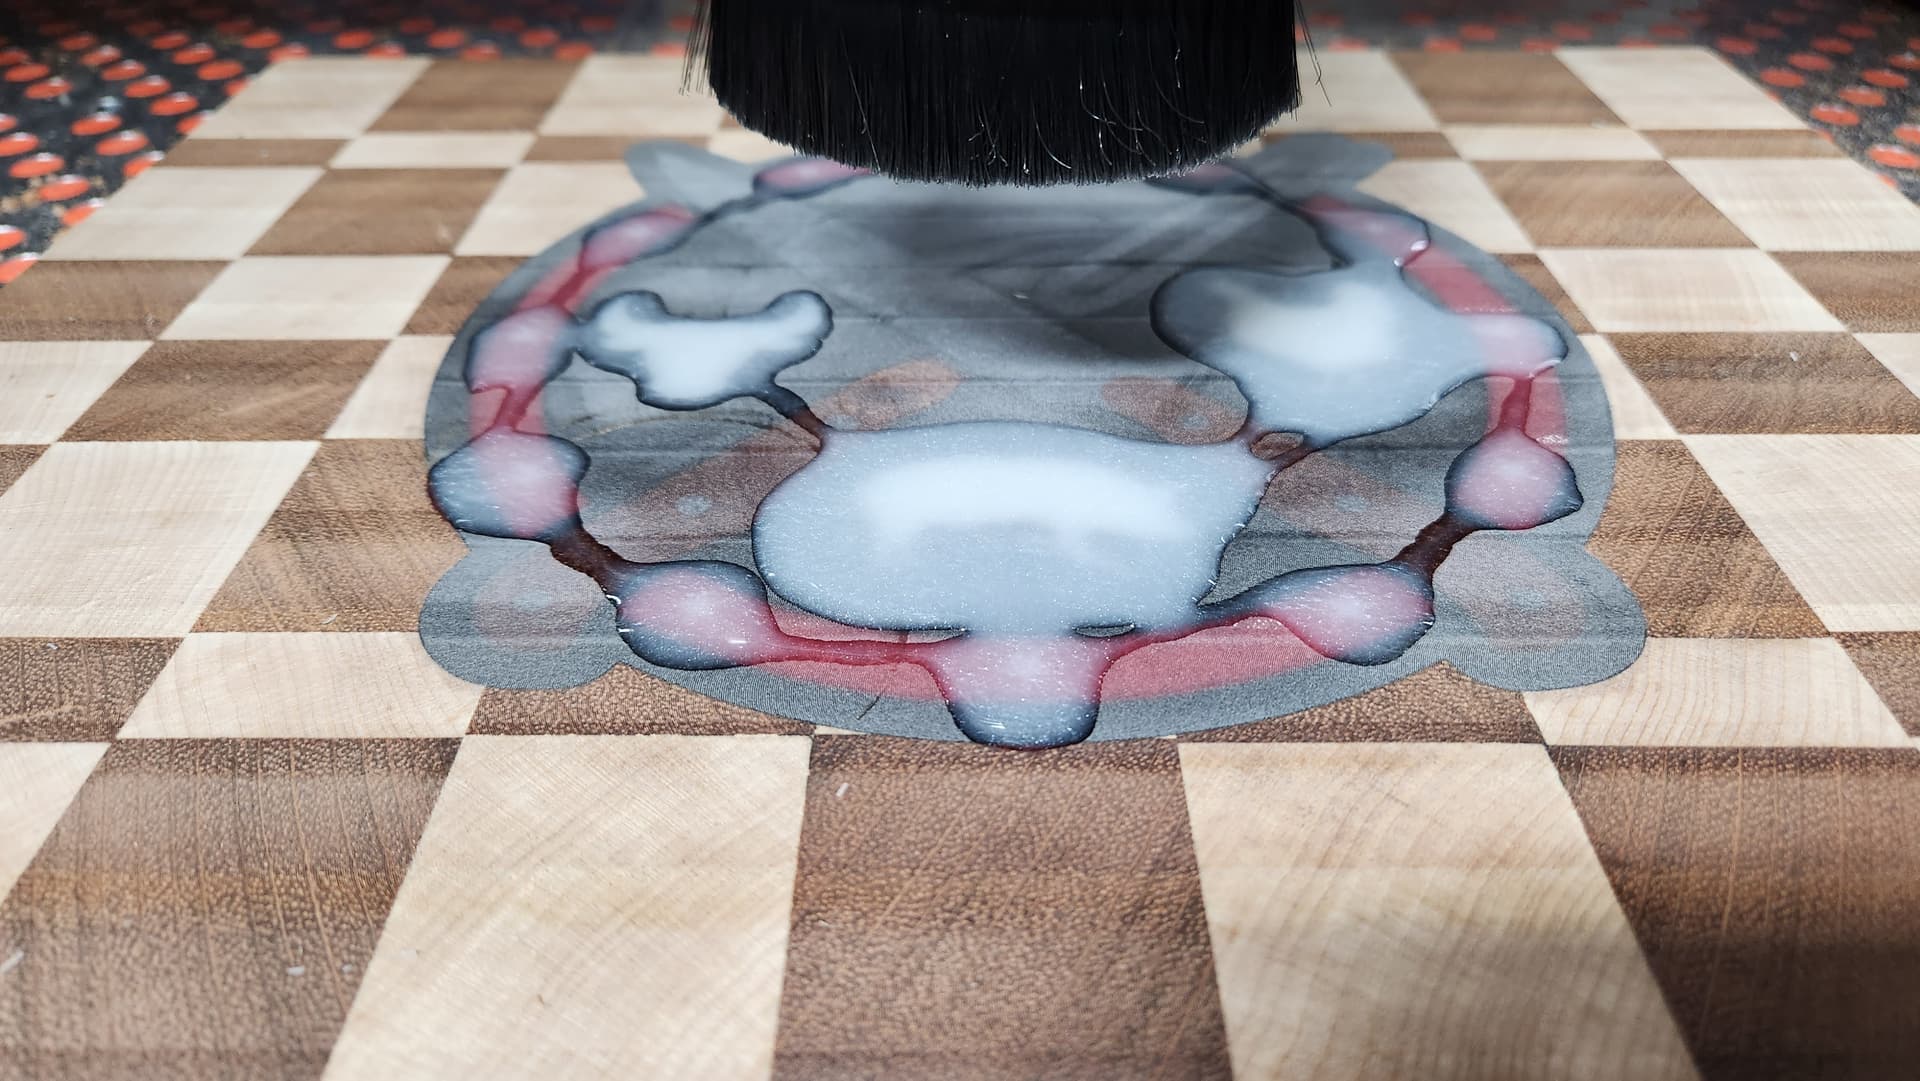
I’m not sure if I need to wait the full 72 hours for the resin to cure before cutting into it for the next color, but I always have.
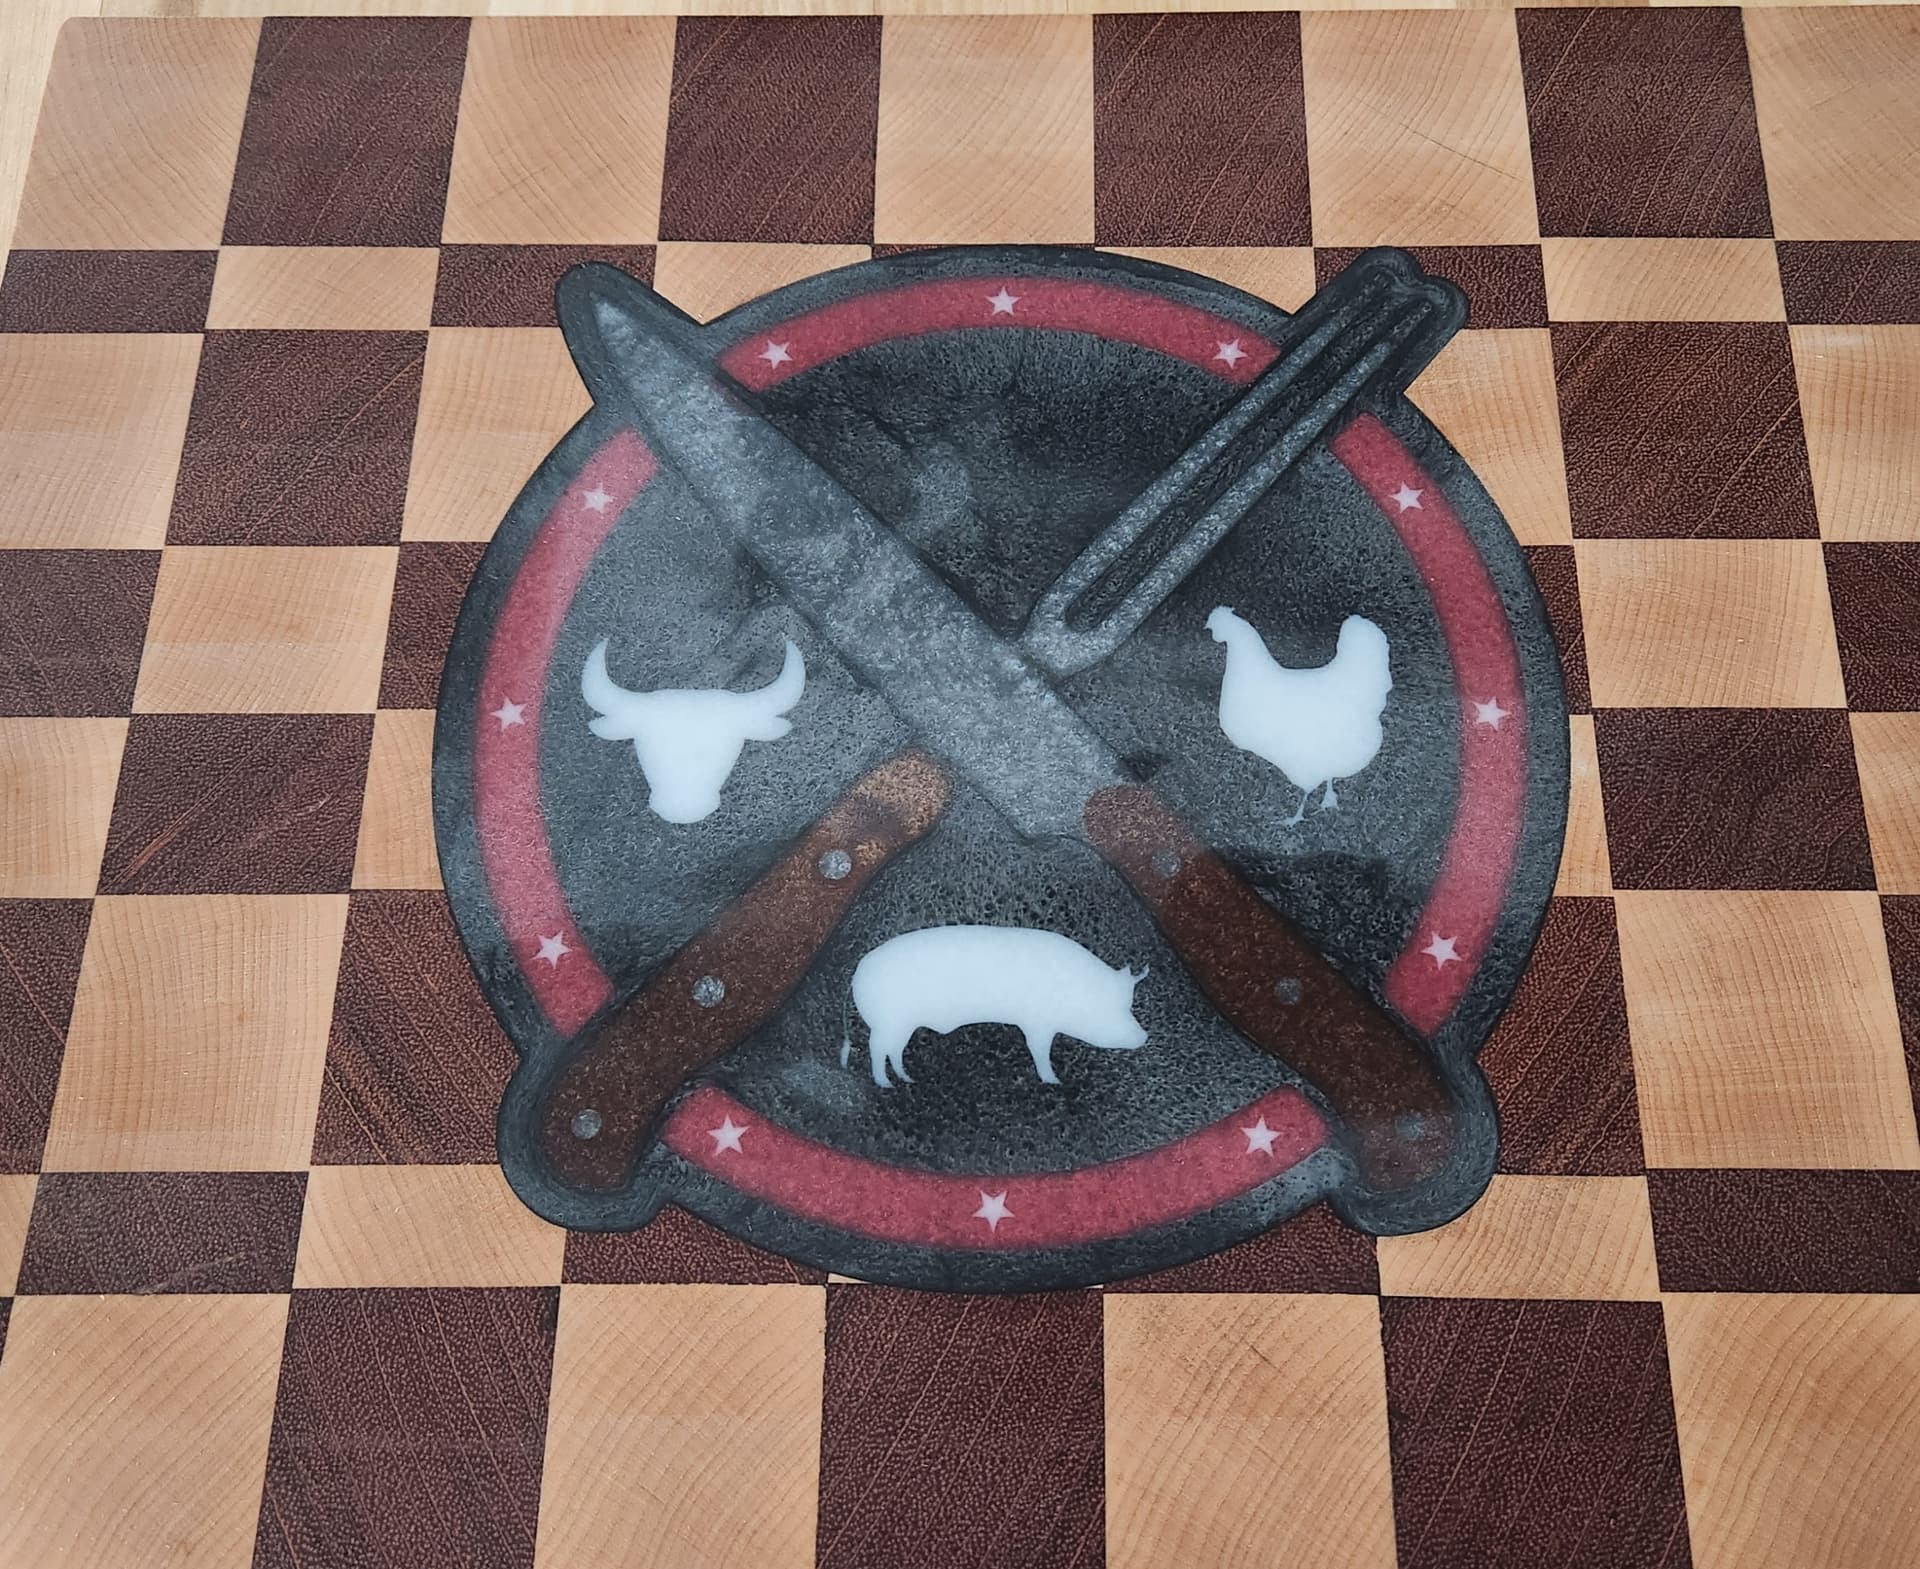
I ended up milling out the pockets with the spillover and re-pouring, albeit a bit more carefully. Turned out great this time. Still waiting on the resign to cure enough to make the final pass of animals and stars. Parts of the vcarve for the animals are very shallow so the final surface is going to be very thin. I’ll get an update photo this evening.