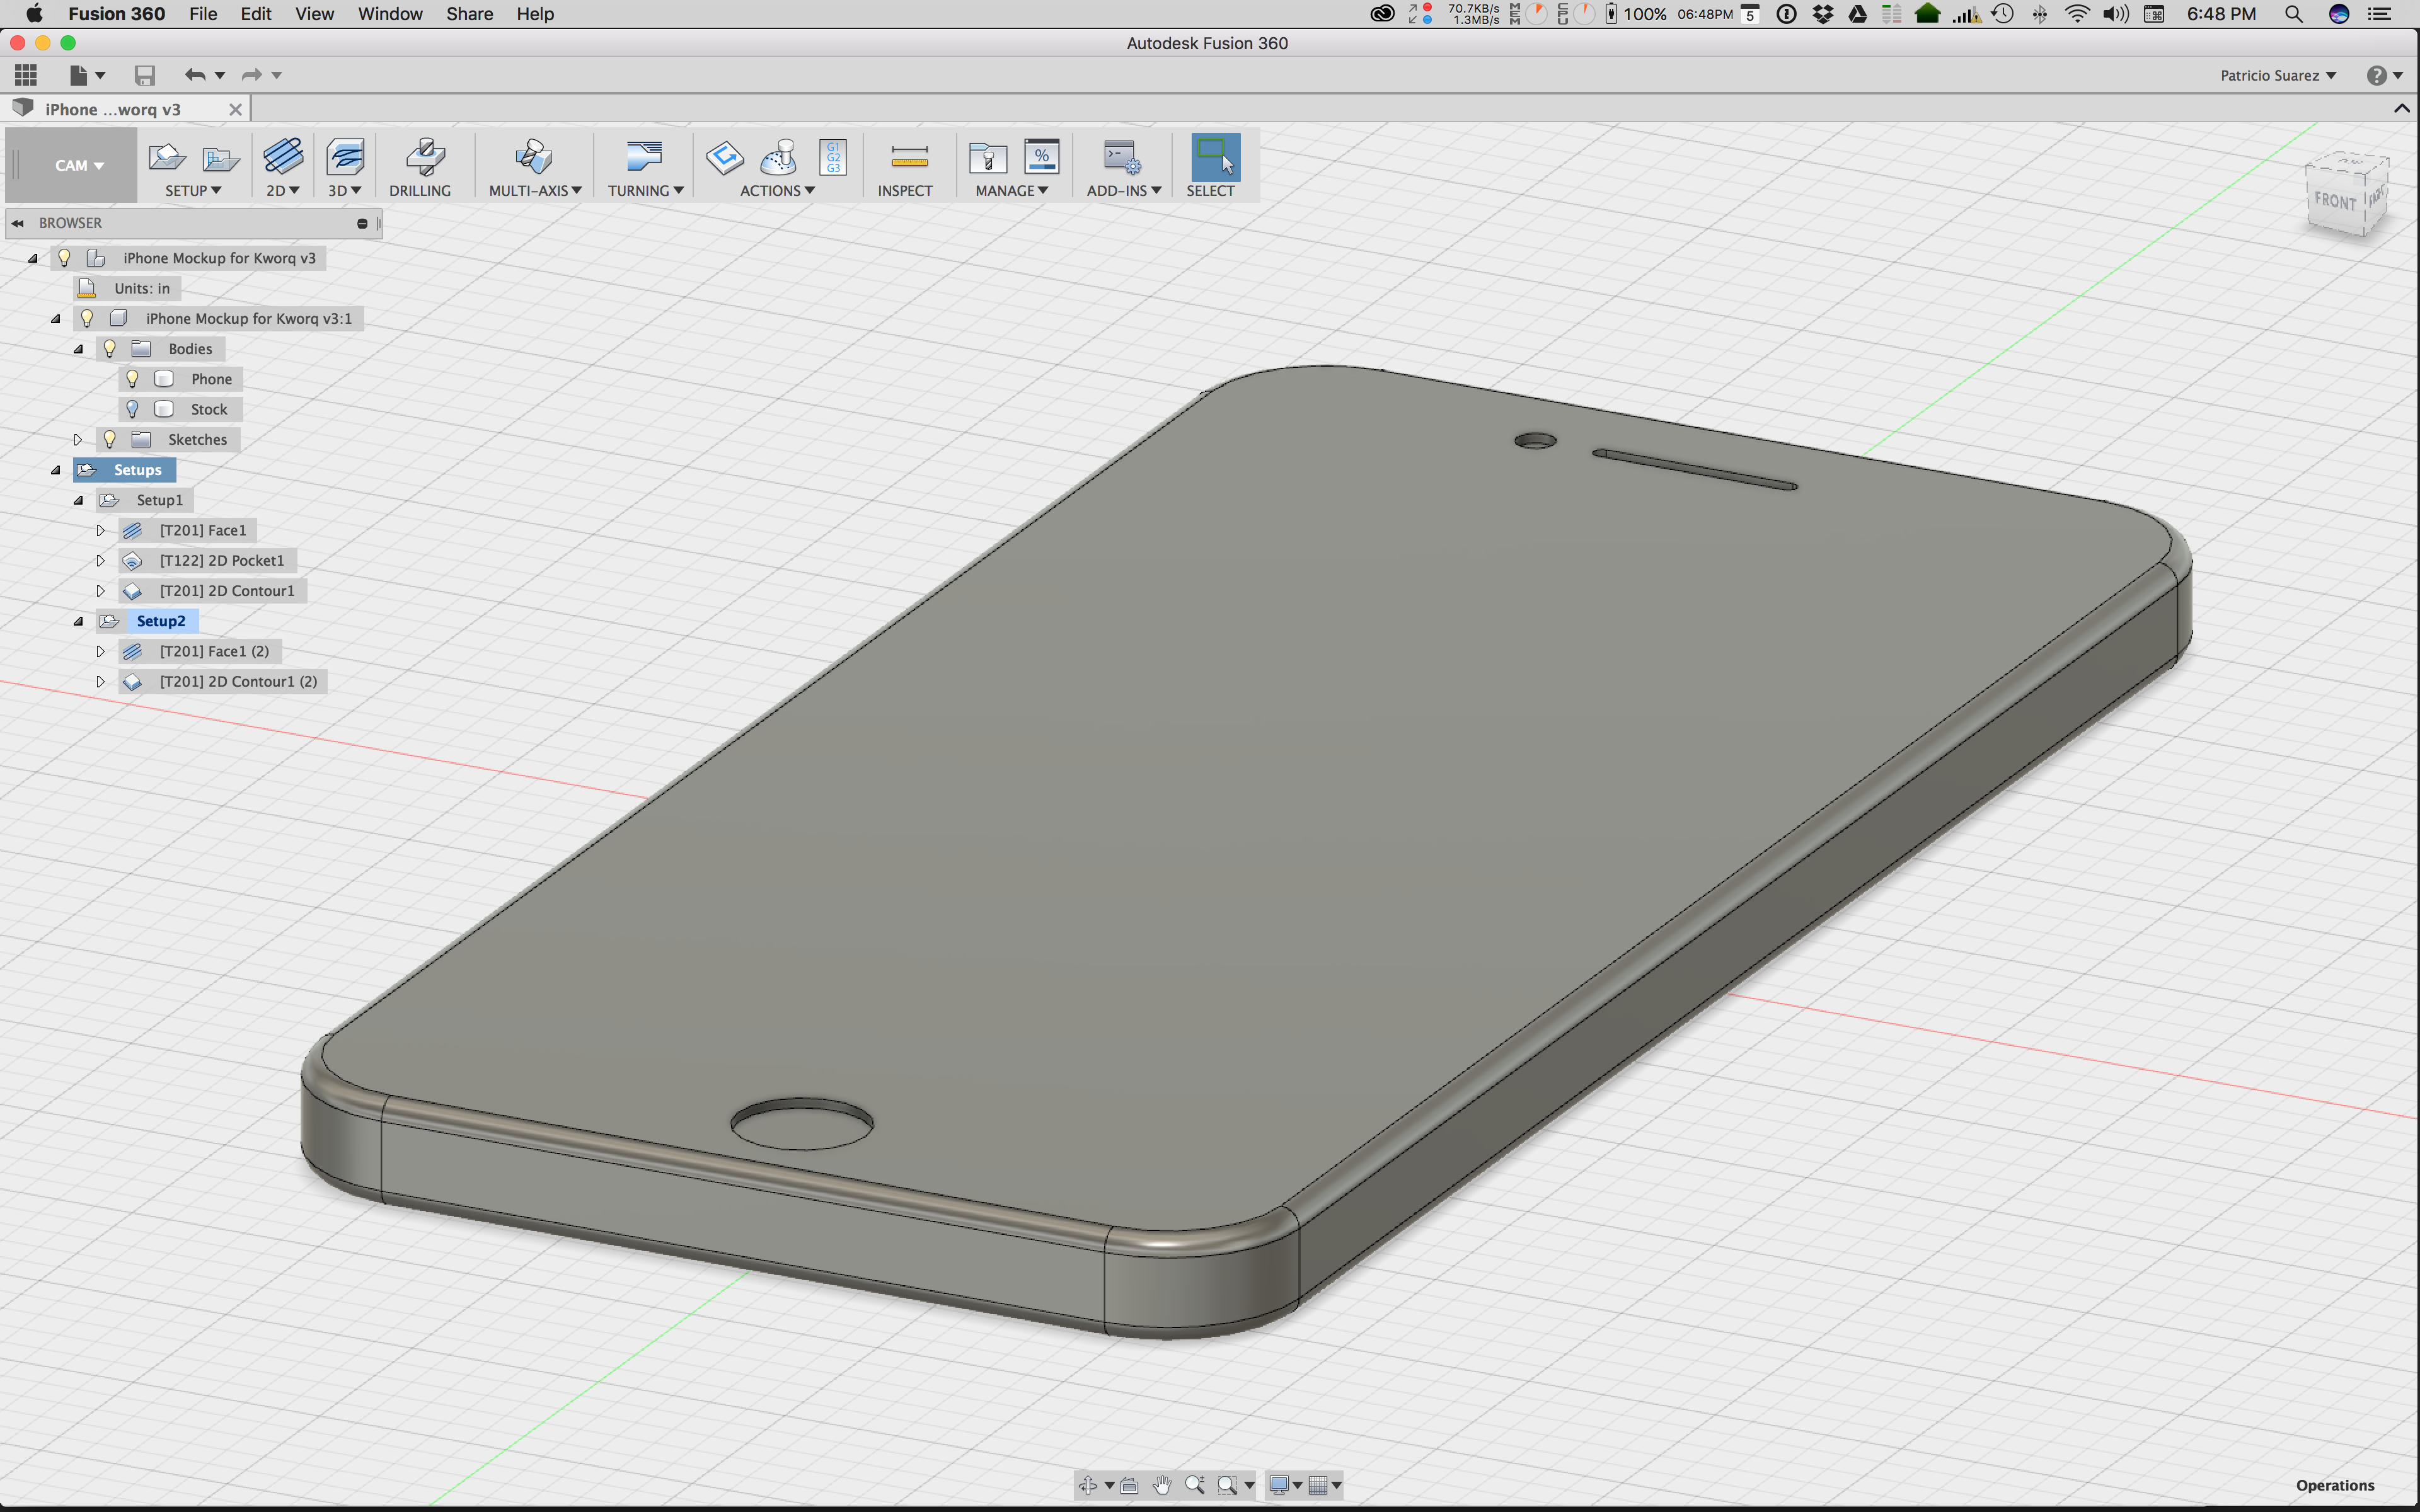
I work in the film industry. I was very proud to volunteer to make a mock smart phone for a scene. A complete white phone is needed and I had all the stuff needed to make it. Modeling was a breeze and most of the CAM pretty straight forward. It will be a flip job. I will drill registration holes and use the center of the four holes as my zero mark. I have been trying to figure out how to fillet the edges to make it look really nice and have not been able to. I’m sure I had figured this out a while back but obviously have forgotten. Tried looking for videos but can’t find any. Oh, all powerful community, I beg for your help. Need this in two days and was hoping to mill it today.
I’ve gotten the fillets by using parallel (finish) machining using a ball end mill in F360. I was already doing the parallel pass though for a sculpture on the surface. In your case it seems like it’d take an awfully long time.
Perhaps a contour pass with a ball end would do it?
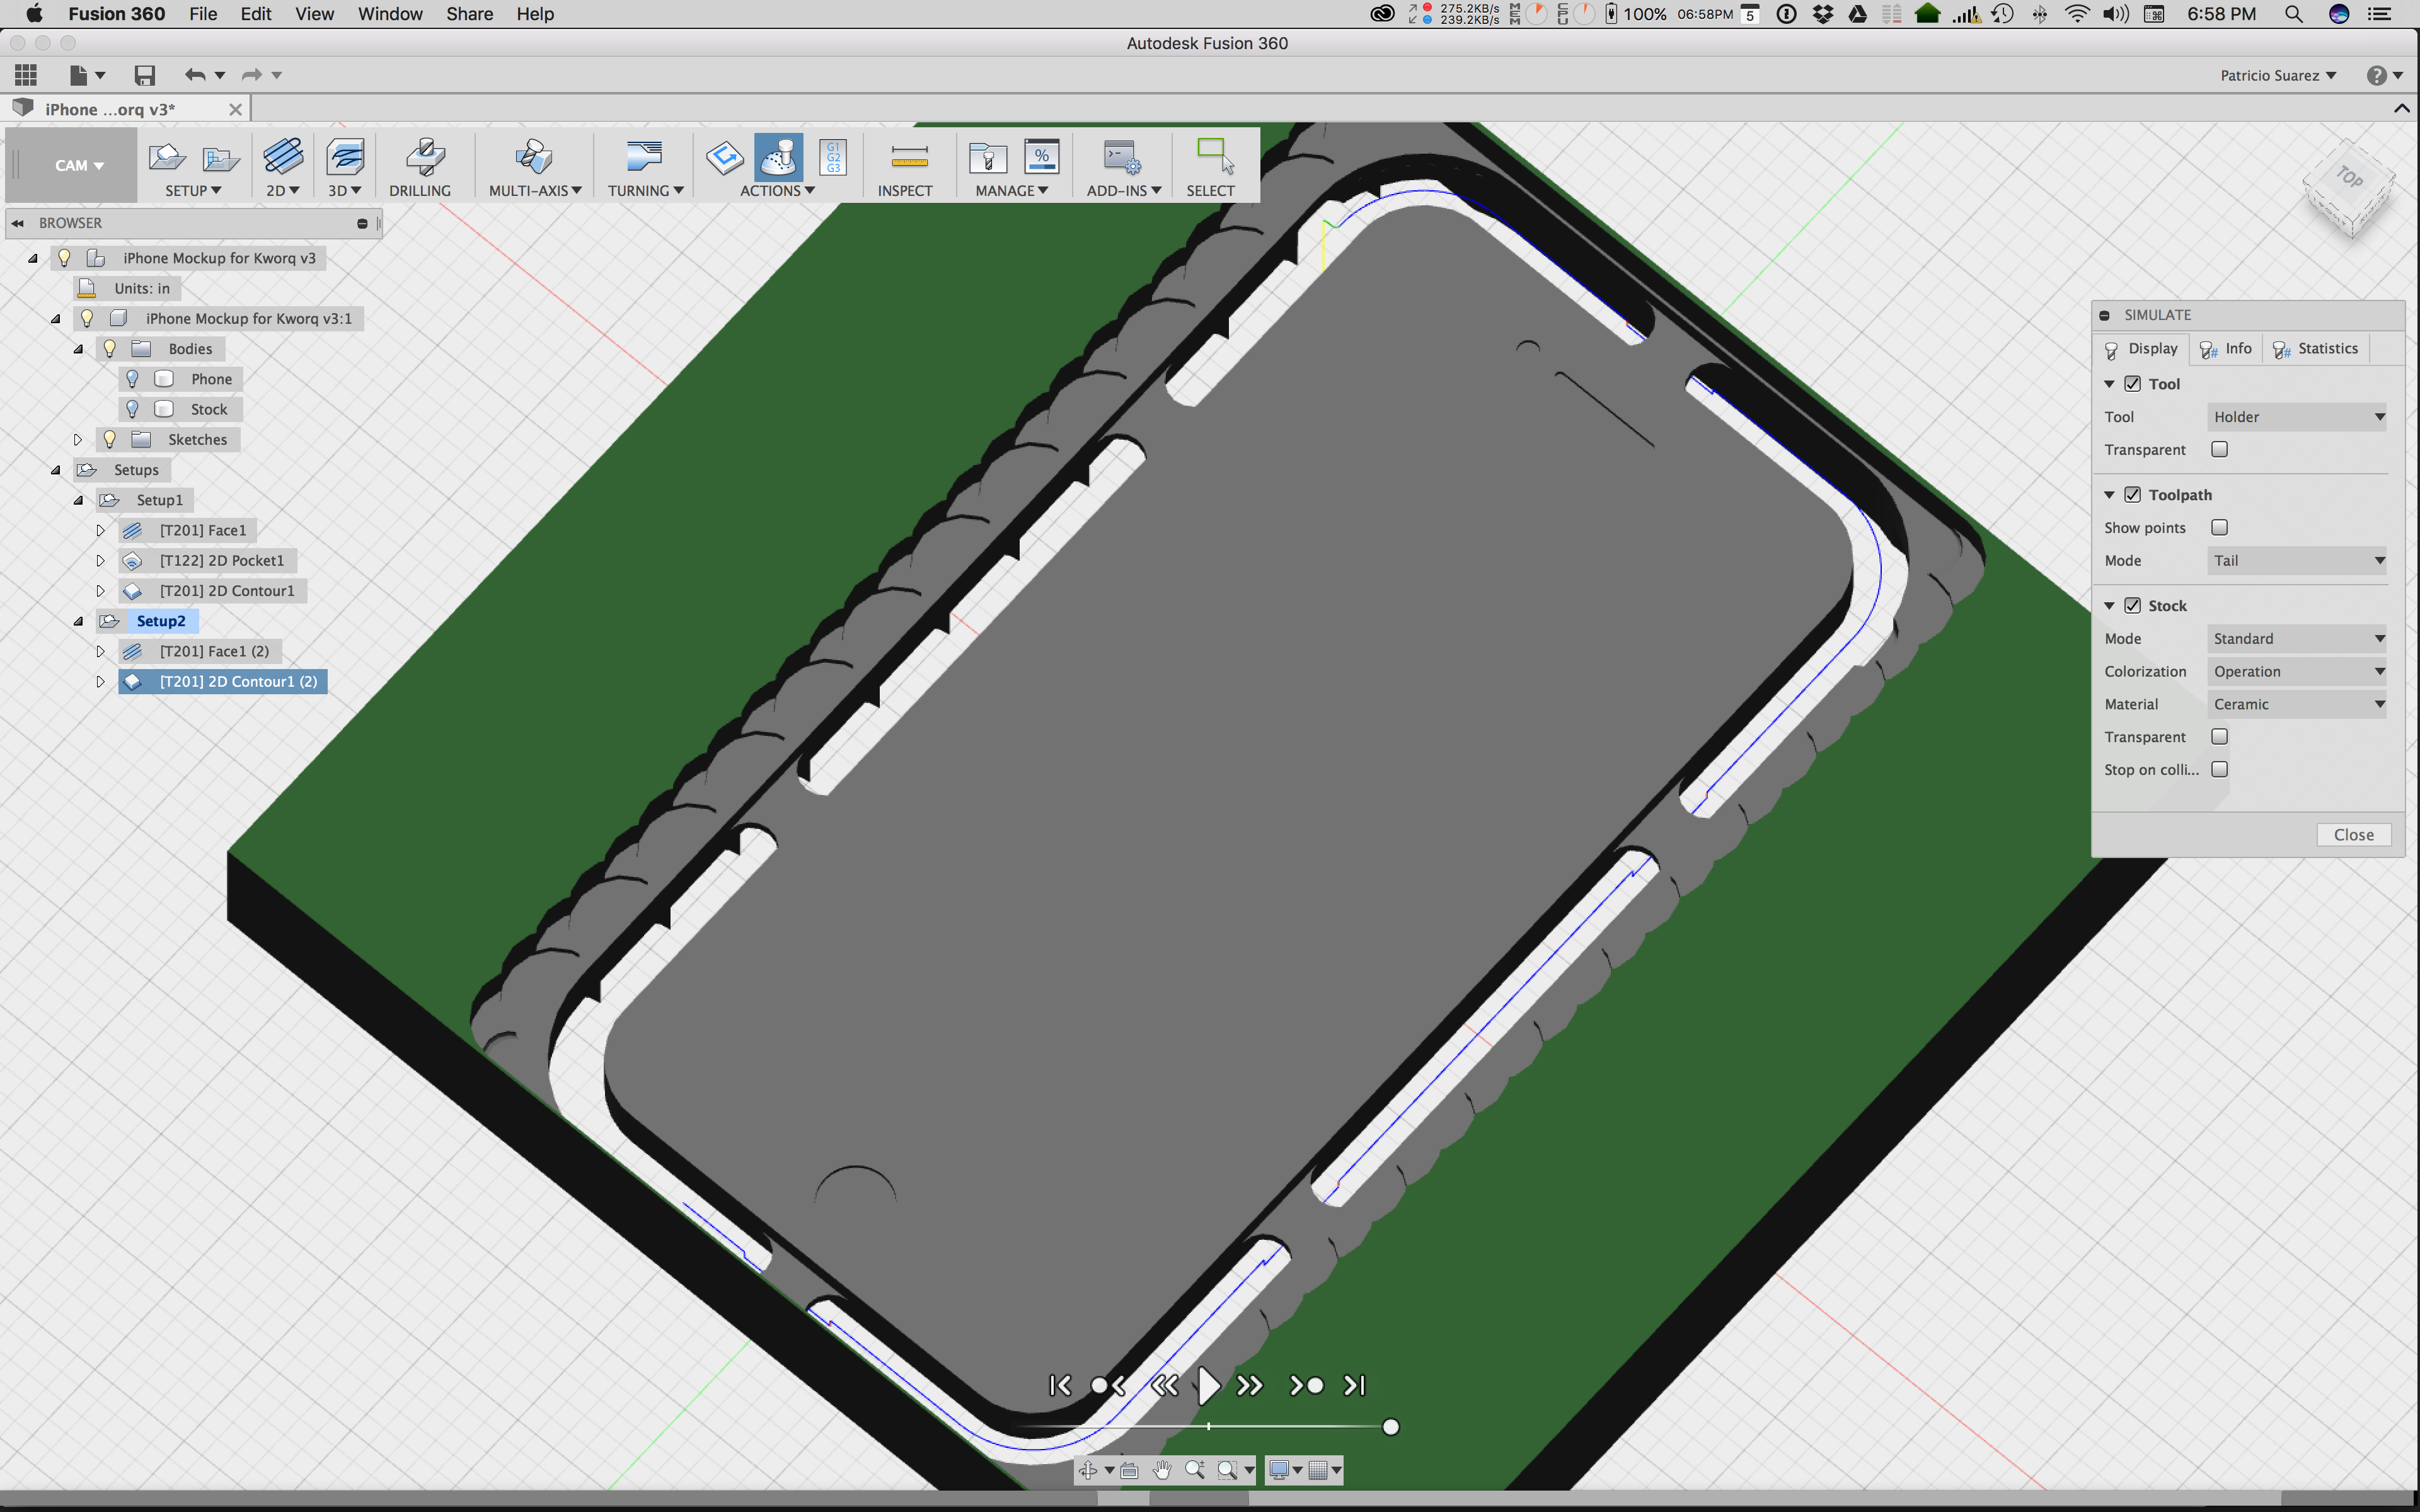
It looks like if you do a parallel pass and limit the angles to 0.5 degrees to 90 degrees (avoids the machining the flat again and making scallops all over it), that’ll do it. Probably also want to do the perpendicular pass as well.
Of course, it can only do the fillets on one side. You’d need to flip it to do the other.
It looked like the contour might also work, but you’d need a very small step down to avoid having it be funny at the top.
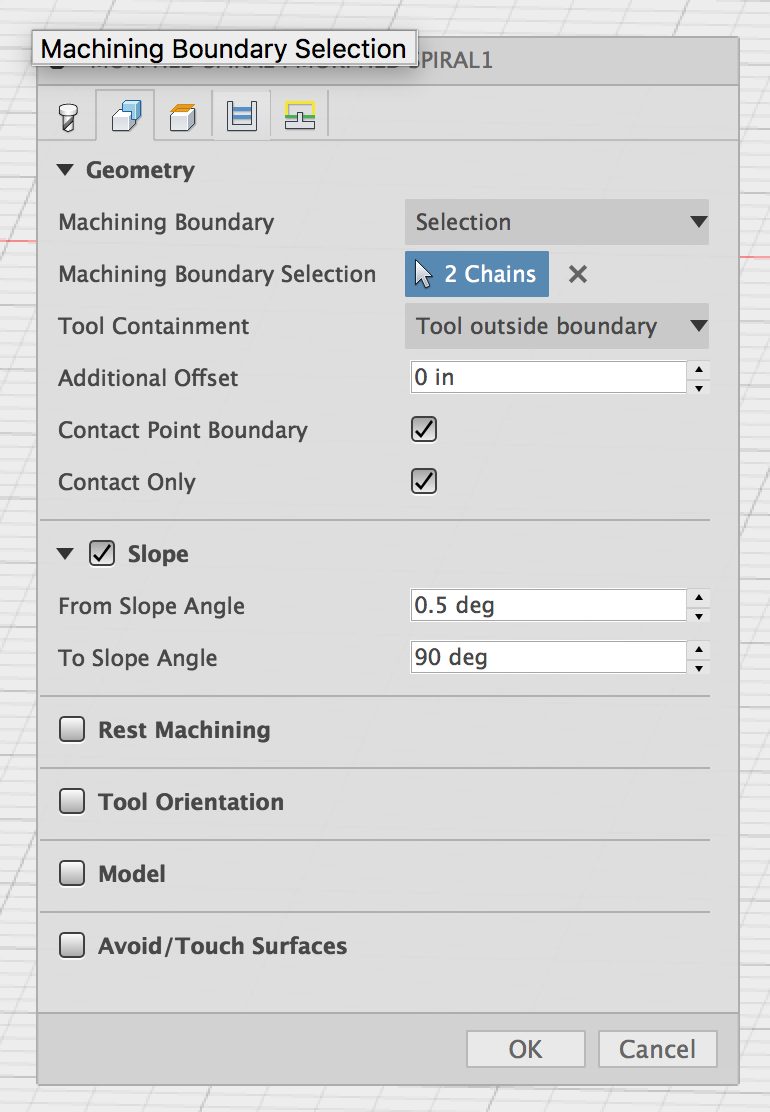
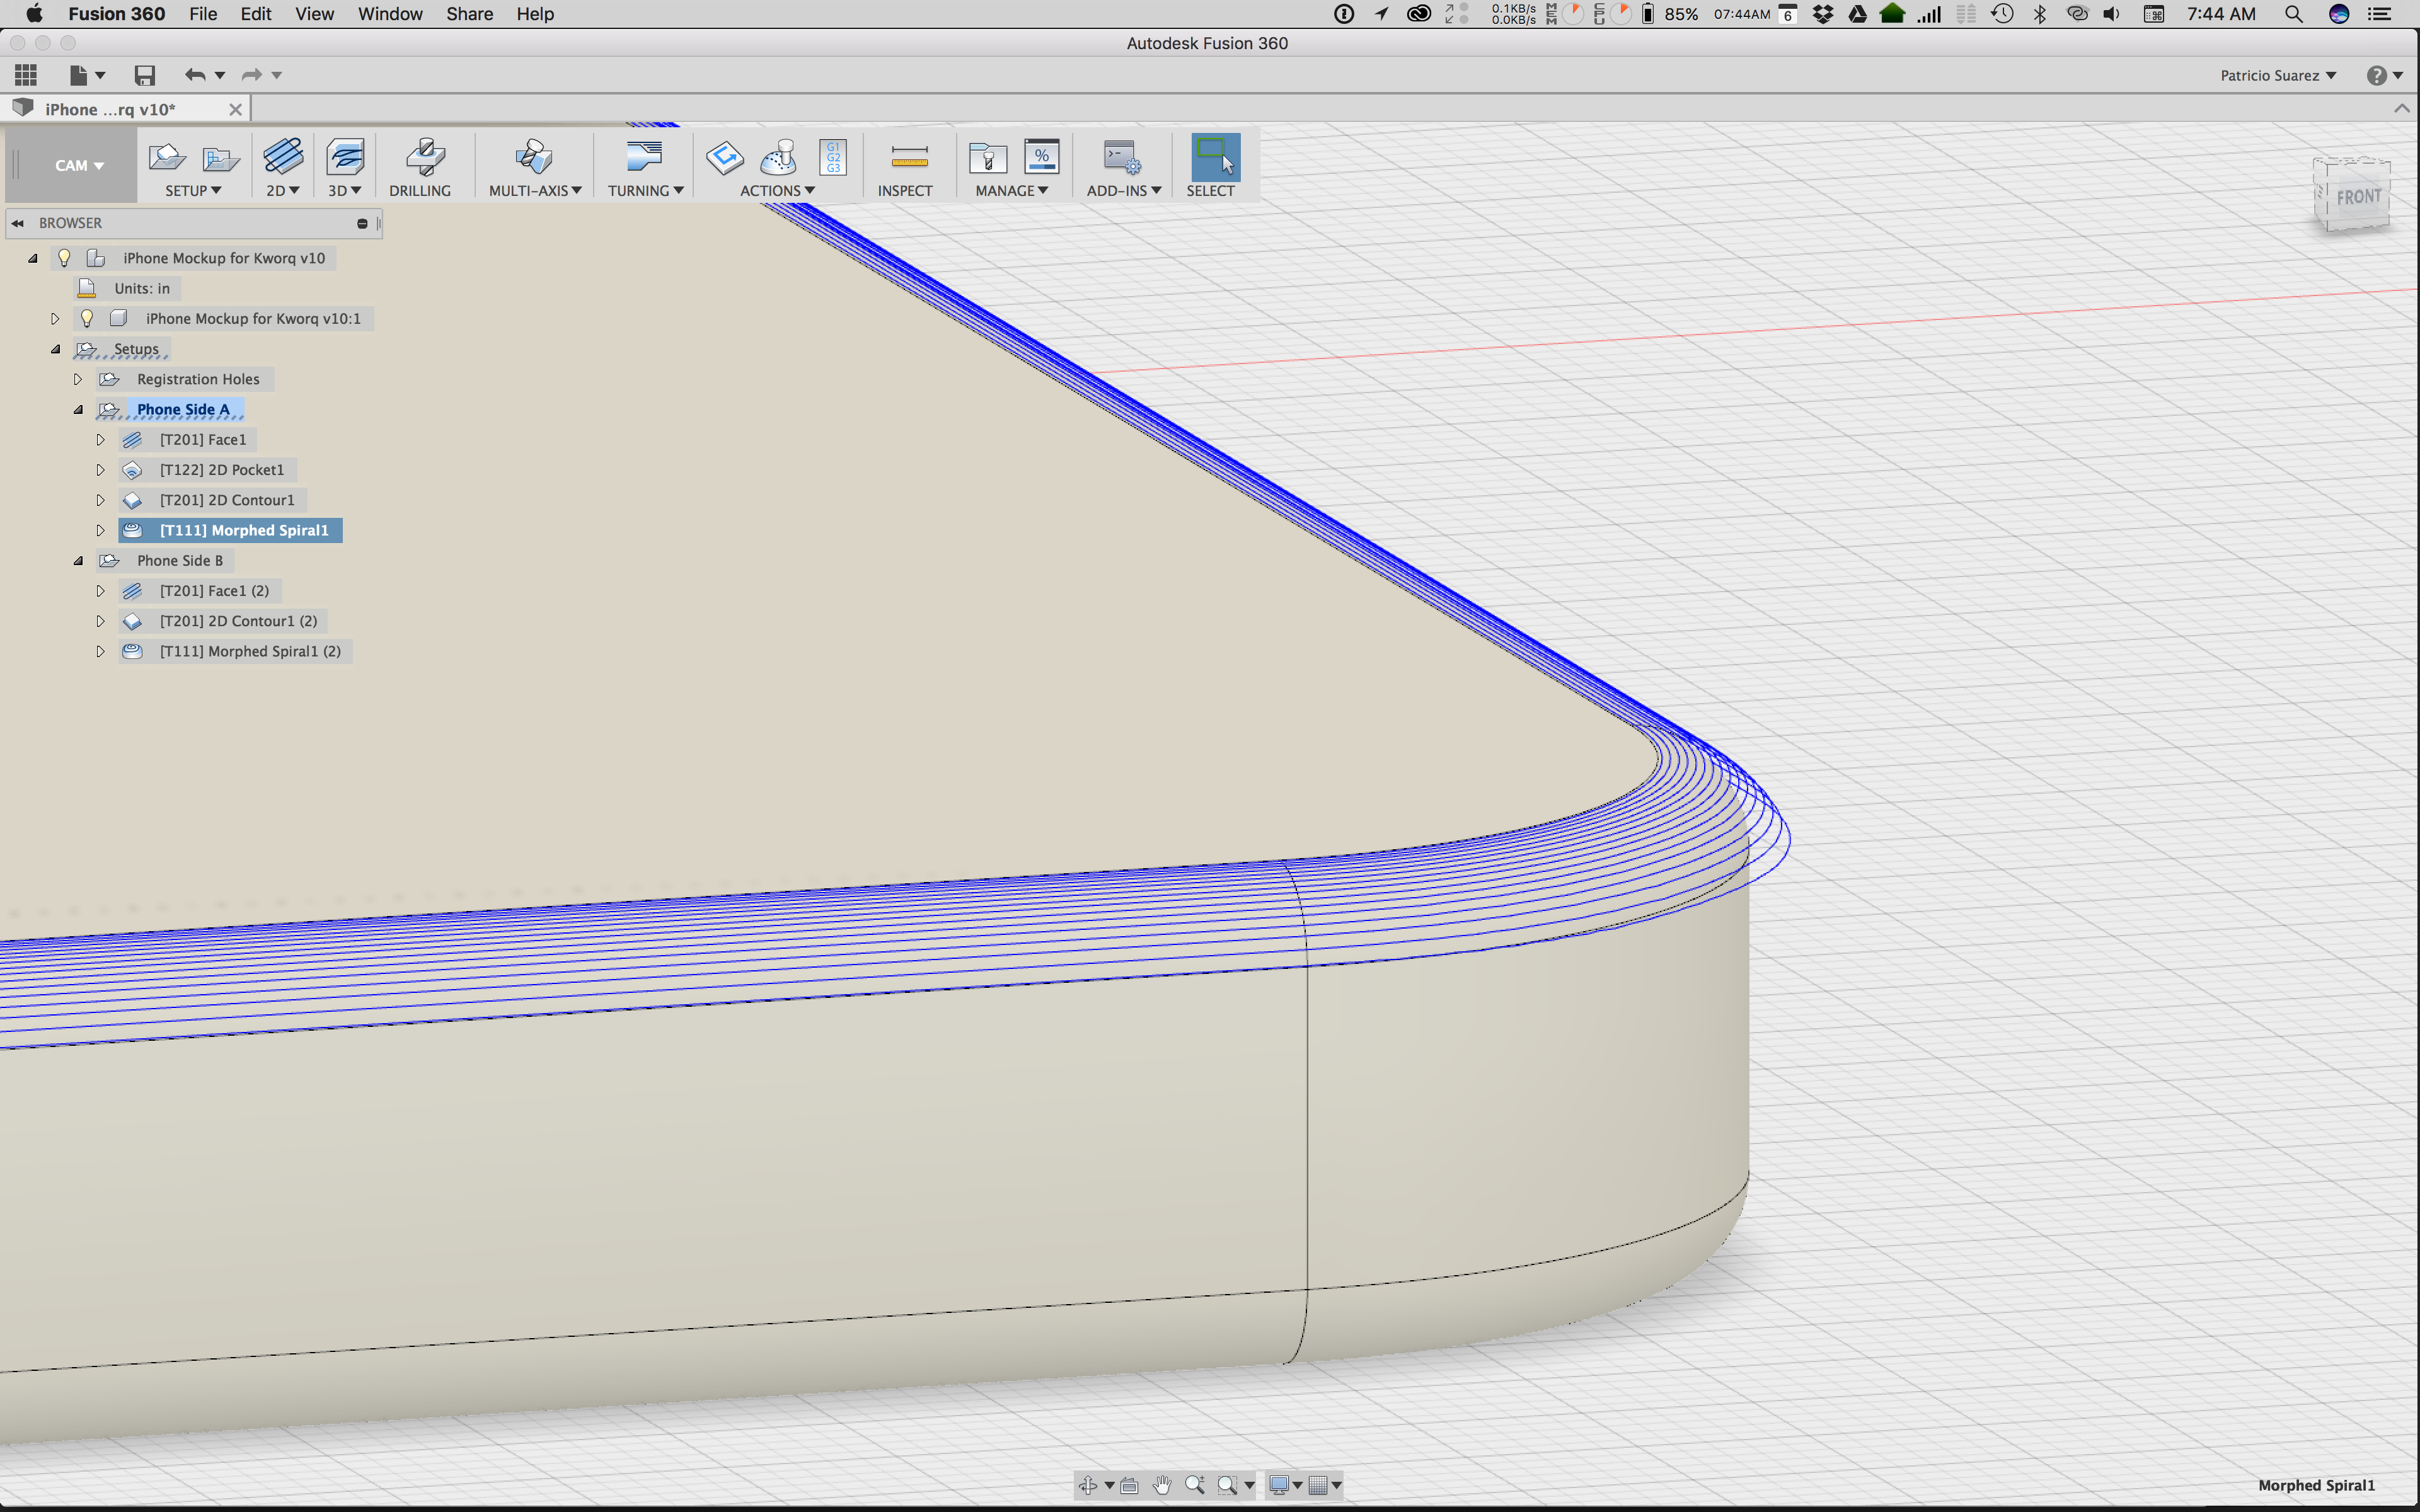
Thank you so much @markwal. Your angle limit was the answer. I found that morphed spiral seems to be a better finish strategy. I’ll find out tomorrow once I mill my first try. Here are my settings.
For the future, you might want to pop for a bit to do the chamfer/roundover cleanly. A chamfer endmill is a handy thing, as are corner-rounder endmills. The smallest I see on McMaster are 1/4" shank, but, conveniently, 1/4" collets are available and these are finishing and don’t require a lot of power, so both the Nomad and Shapeoko can use pretty much anything they can hold along these lines. For smaller chamfer features, 90 degree end mill-drills are available in shanks to 1/8" (or smaller from some places) and cutter diameters down to less than 1mm.
Then, select the tool and a single pass around each edge as a chamfer toolpath.
Yeah @1st_Kiwi_Nomad, share your strategy!. You use Fusion 360?. If so would love to know your settings. I’m ready to mill my first test tomorrow morning but are not too confident on my fillet setup. I used spiral. My setup is on a post above.
thanks! actually not that much sanding or elbow grease, just very close waterline passes and a lot of waiting for the cut to run, i used meshcam to make the gcode and solidworks to design it but as you already have the model meshcam will work fine for you, also your radius is much smaller so it should be quicker
I see. Will try, as a test, smaller and smaller passes to see what works. Maybe I will model many smaller fillets and use different passes for each one to test finishes. Thank you all.
Thats a good idea! Although for a fillet as small as what you are looking at by the time you test it you might have done it at a very fine setting. I think I might have used 0.2mm steps down, which just needed a very, very light sand. The much bigger thing to sand out was the little step left by my not quite perfect flipping of the part from milling the underside (I didn’t have the flip jig when I made the box).
Yeah, but 3D printing, while nice for prototypes, isn’t that useful for finished goods.
That said, I have found 3D printing incredibly useful for making small jigs and fixtures which have helped to eliminate the element of risk when doing manual tasks such as modifying hardware — you can see one such in the upper right corner of the prototype picture from:
In context with op’s topic a 3D printer would be superior hence why I brought it up.
In regard to what you said I agree with what you’re saying but only to a degree. They both have their place and printers can certainly be more useful than just prototyping. It just depends on the objective.
Well, 3d printers are cool and all and I have a pretty good one, but to make a nice job of a cell phone model would requrie a very expensive machine. The surface finish is just nowhere close to what the nomad can produce. Also the parts are never quite perfect or repeatable the way a cnc mill can be. Like I say, 3D printers are great! But for a job like the OP presented give me my nomad any day. Pretty sure my actual iPhone isn’t 3D printed although no doubt apple does have a bunch of the best printers in it’s prototype room, however I guess they would have a bit larger budget than most of us here.
 but fun to watch though.
