I have been using the following approach to Zero Z probing after I damaged my table top and I would like to share it with you and also ask for your comments and advices. I know there are some better methods for this out there but this one in particular makes a lot of sense to me due to its simplicity and low cost. Also, it is good enough for the kind of work I do (mainly wood). The approach is as follows:
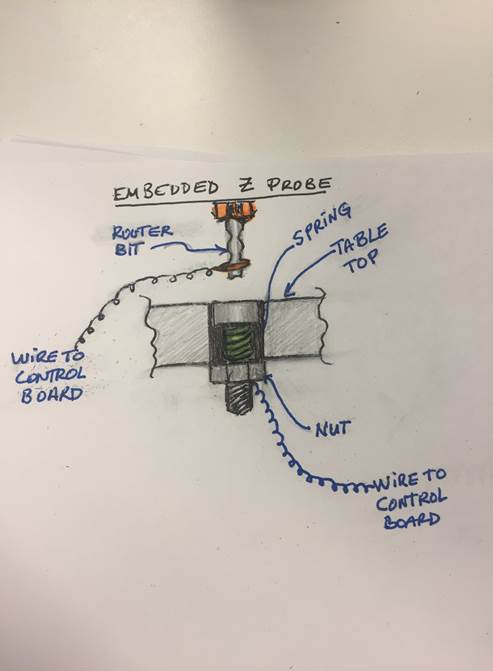
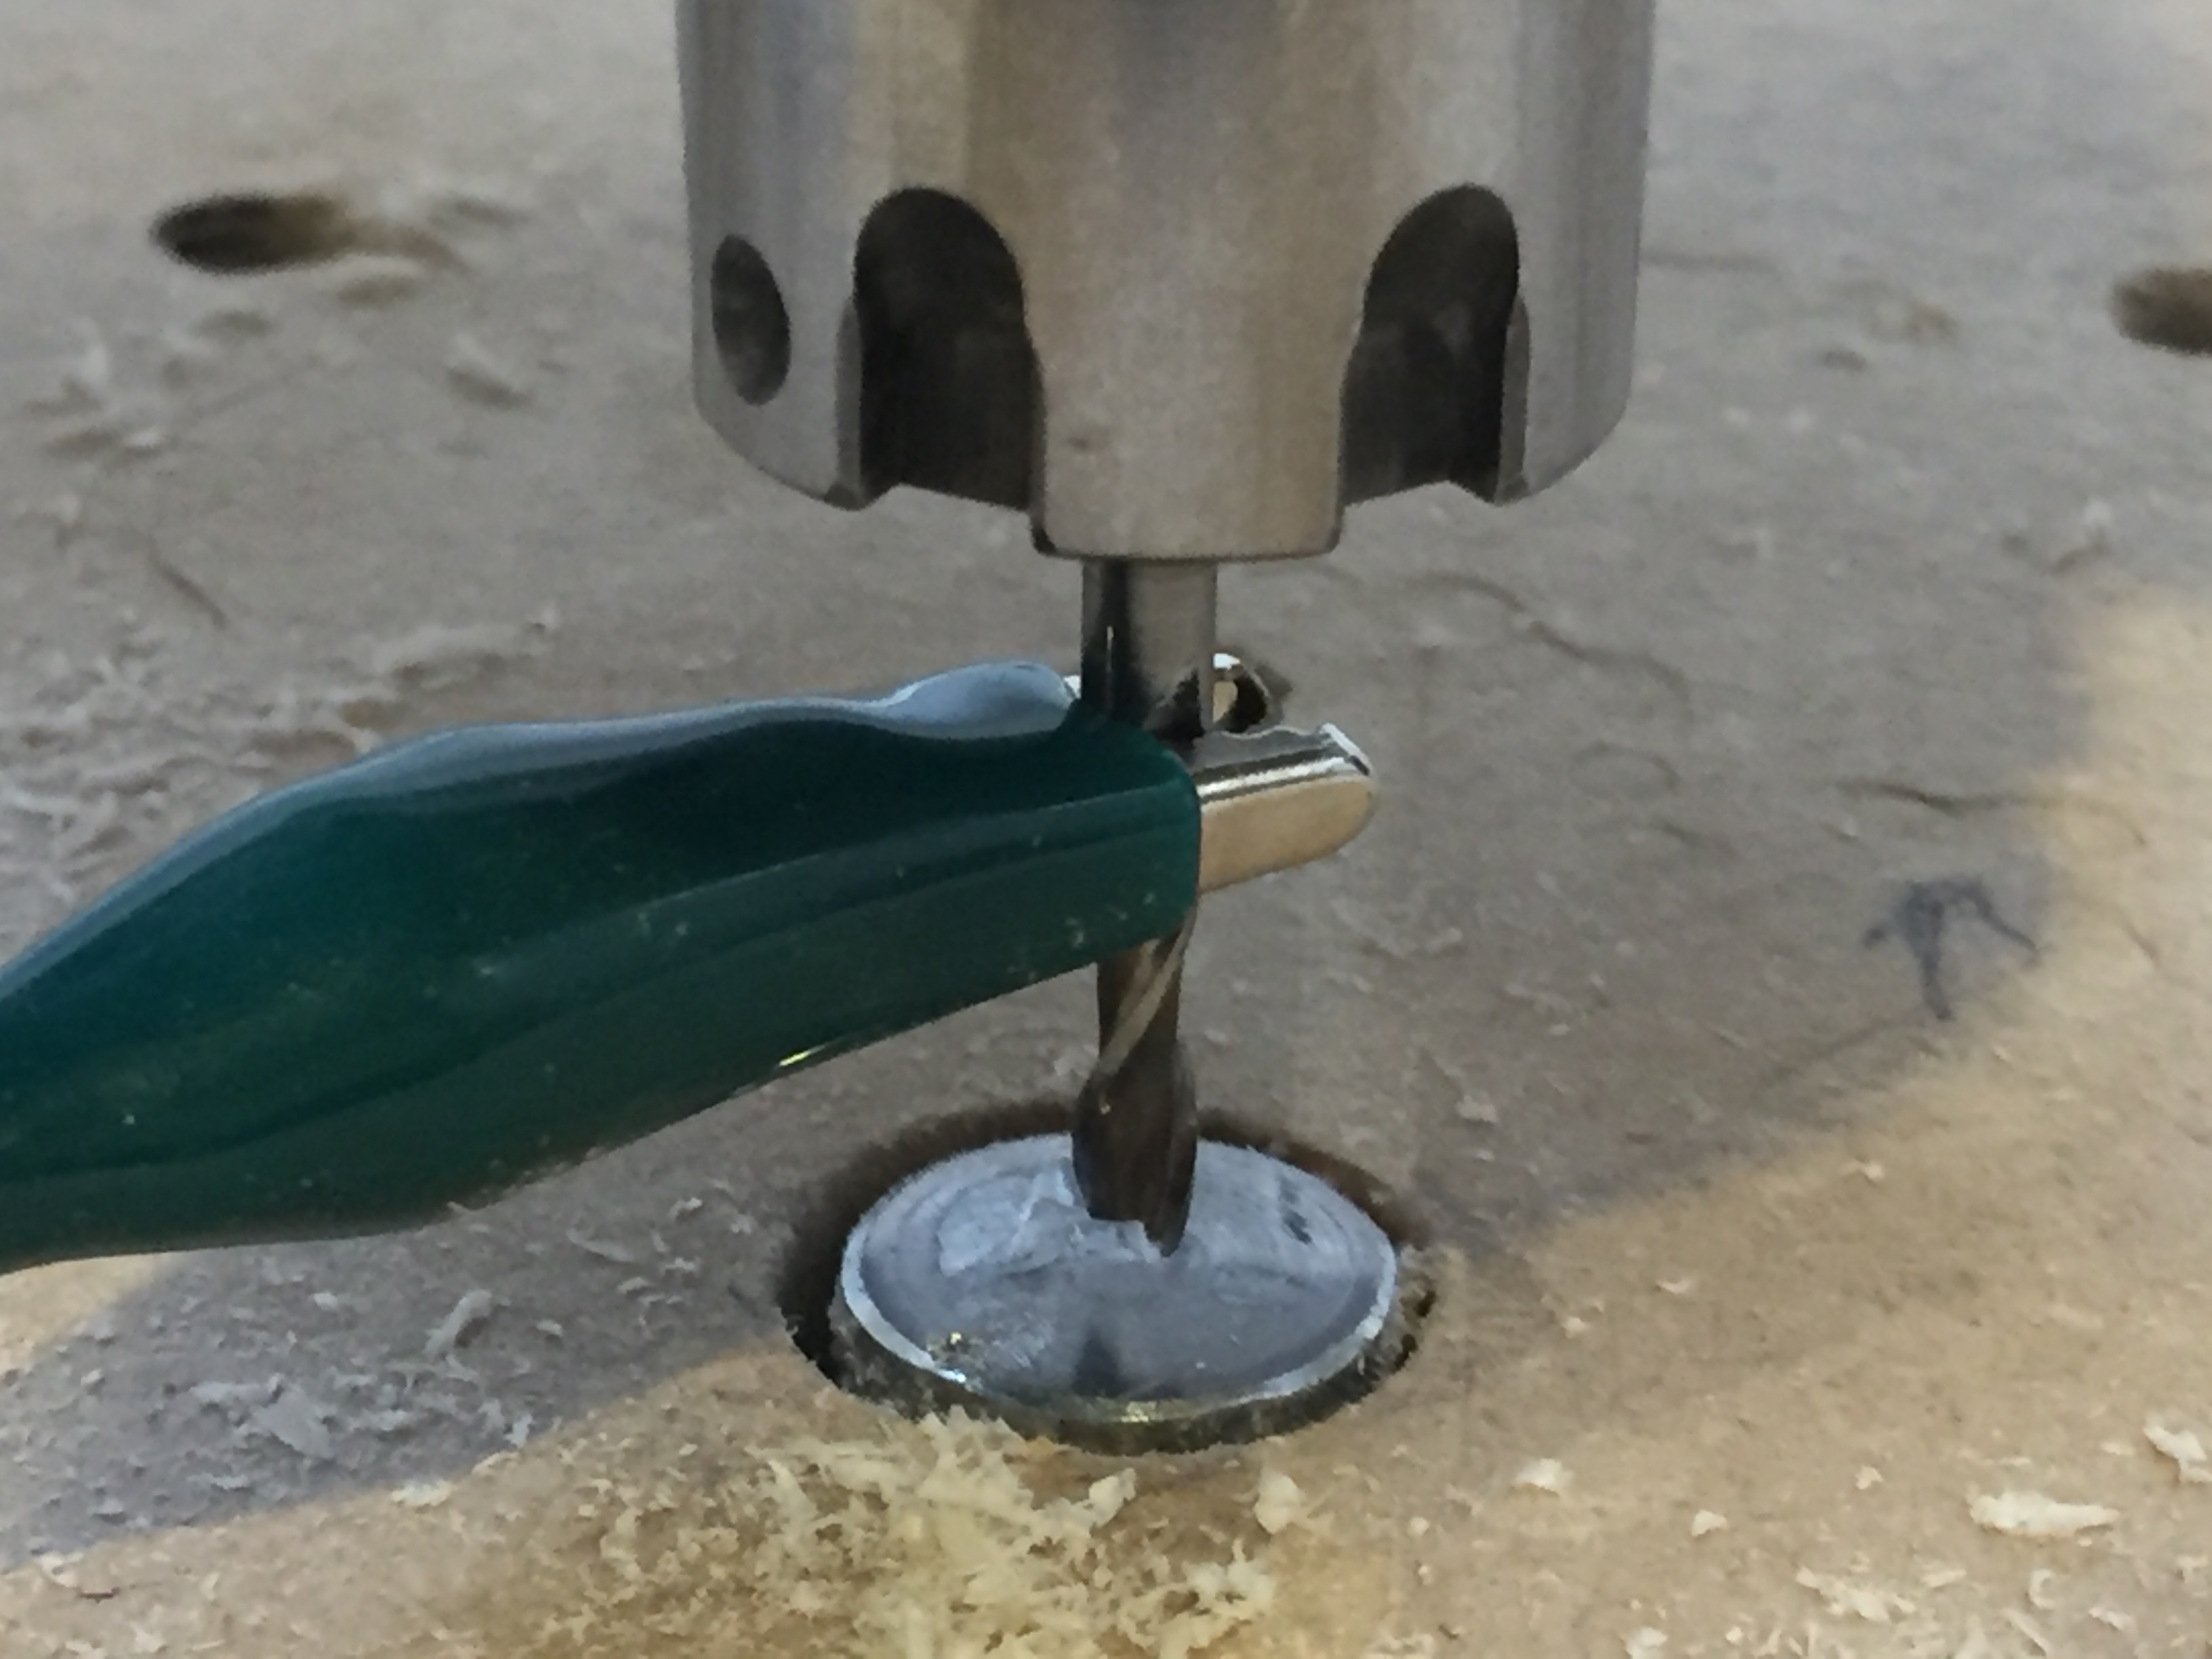
Using the embedded Z probe (see drawing below), I Z-zero the machine at table top.
Now the machine Z-zero is the top of the working piece
The main advantage to this method is that the router bit will never touch the table top and the router will correct any thickness irregularity that the piece may have.
I started on a similar thing (but using a push-button switch which I was planning on making adjustable) on my Shapeoko 1 — currently I’m hoping to work up a pair of clips for my Carbide 3D Probe which will let me hang it off the front of the machine, level w/ the top of the work surface and use it as a tool length sensor.
This assumes from the probe point that your gantry runs perfectly even and parallel across the entire usable cut area, and depending on your needs might suffice. My shapeoko xxl is not that flat so I prefer to probe stock top.
I’ve been thinking about using a 3-2-1 block (a 1-2-3 if the 3-2-1 isn’t available) so I could vary how far down I have to travel to touch based on the thickness of the stock. I even suspect you could fit AA or AAA batteries in the 3/8 holes bored in most of those blocks. As a matter of fact, the LED could go in it, too. My only problem with using a solid metal block is that I’ll forget I have the jog speed set to the speed of light and I’ll slam the bit into it.