One of the things I was excited for when I got my S3 XXL, was the ability to branch off into other materials. I’ve mostly been a woodworker and I’m currently building a pair of blanket chests for my two young kids. Same design, different wood combinations. When I couldn’t find a ready made keyhole escutcheon in a design I liked, I finally found my chance to play with some brass! I think I went very conservative in my feeds and speeds and will try taking a slightly deeper DOC on the next project. These are the numbers, for anyone interested.
C3D #201 1/8" carbide endmill, 2 flute
Speeds: 24,500 rpm (5 on the Dewalt 611)
Feeds: 4 in/min, 1in/min plunge
DOC: 0.01"
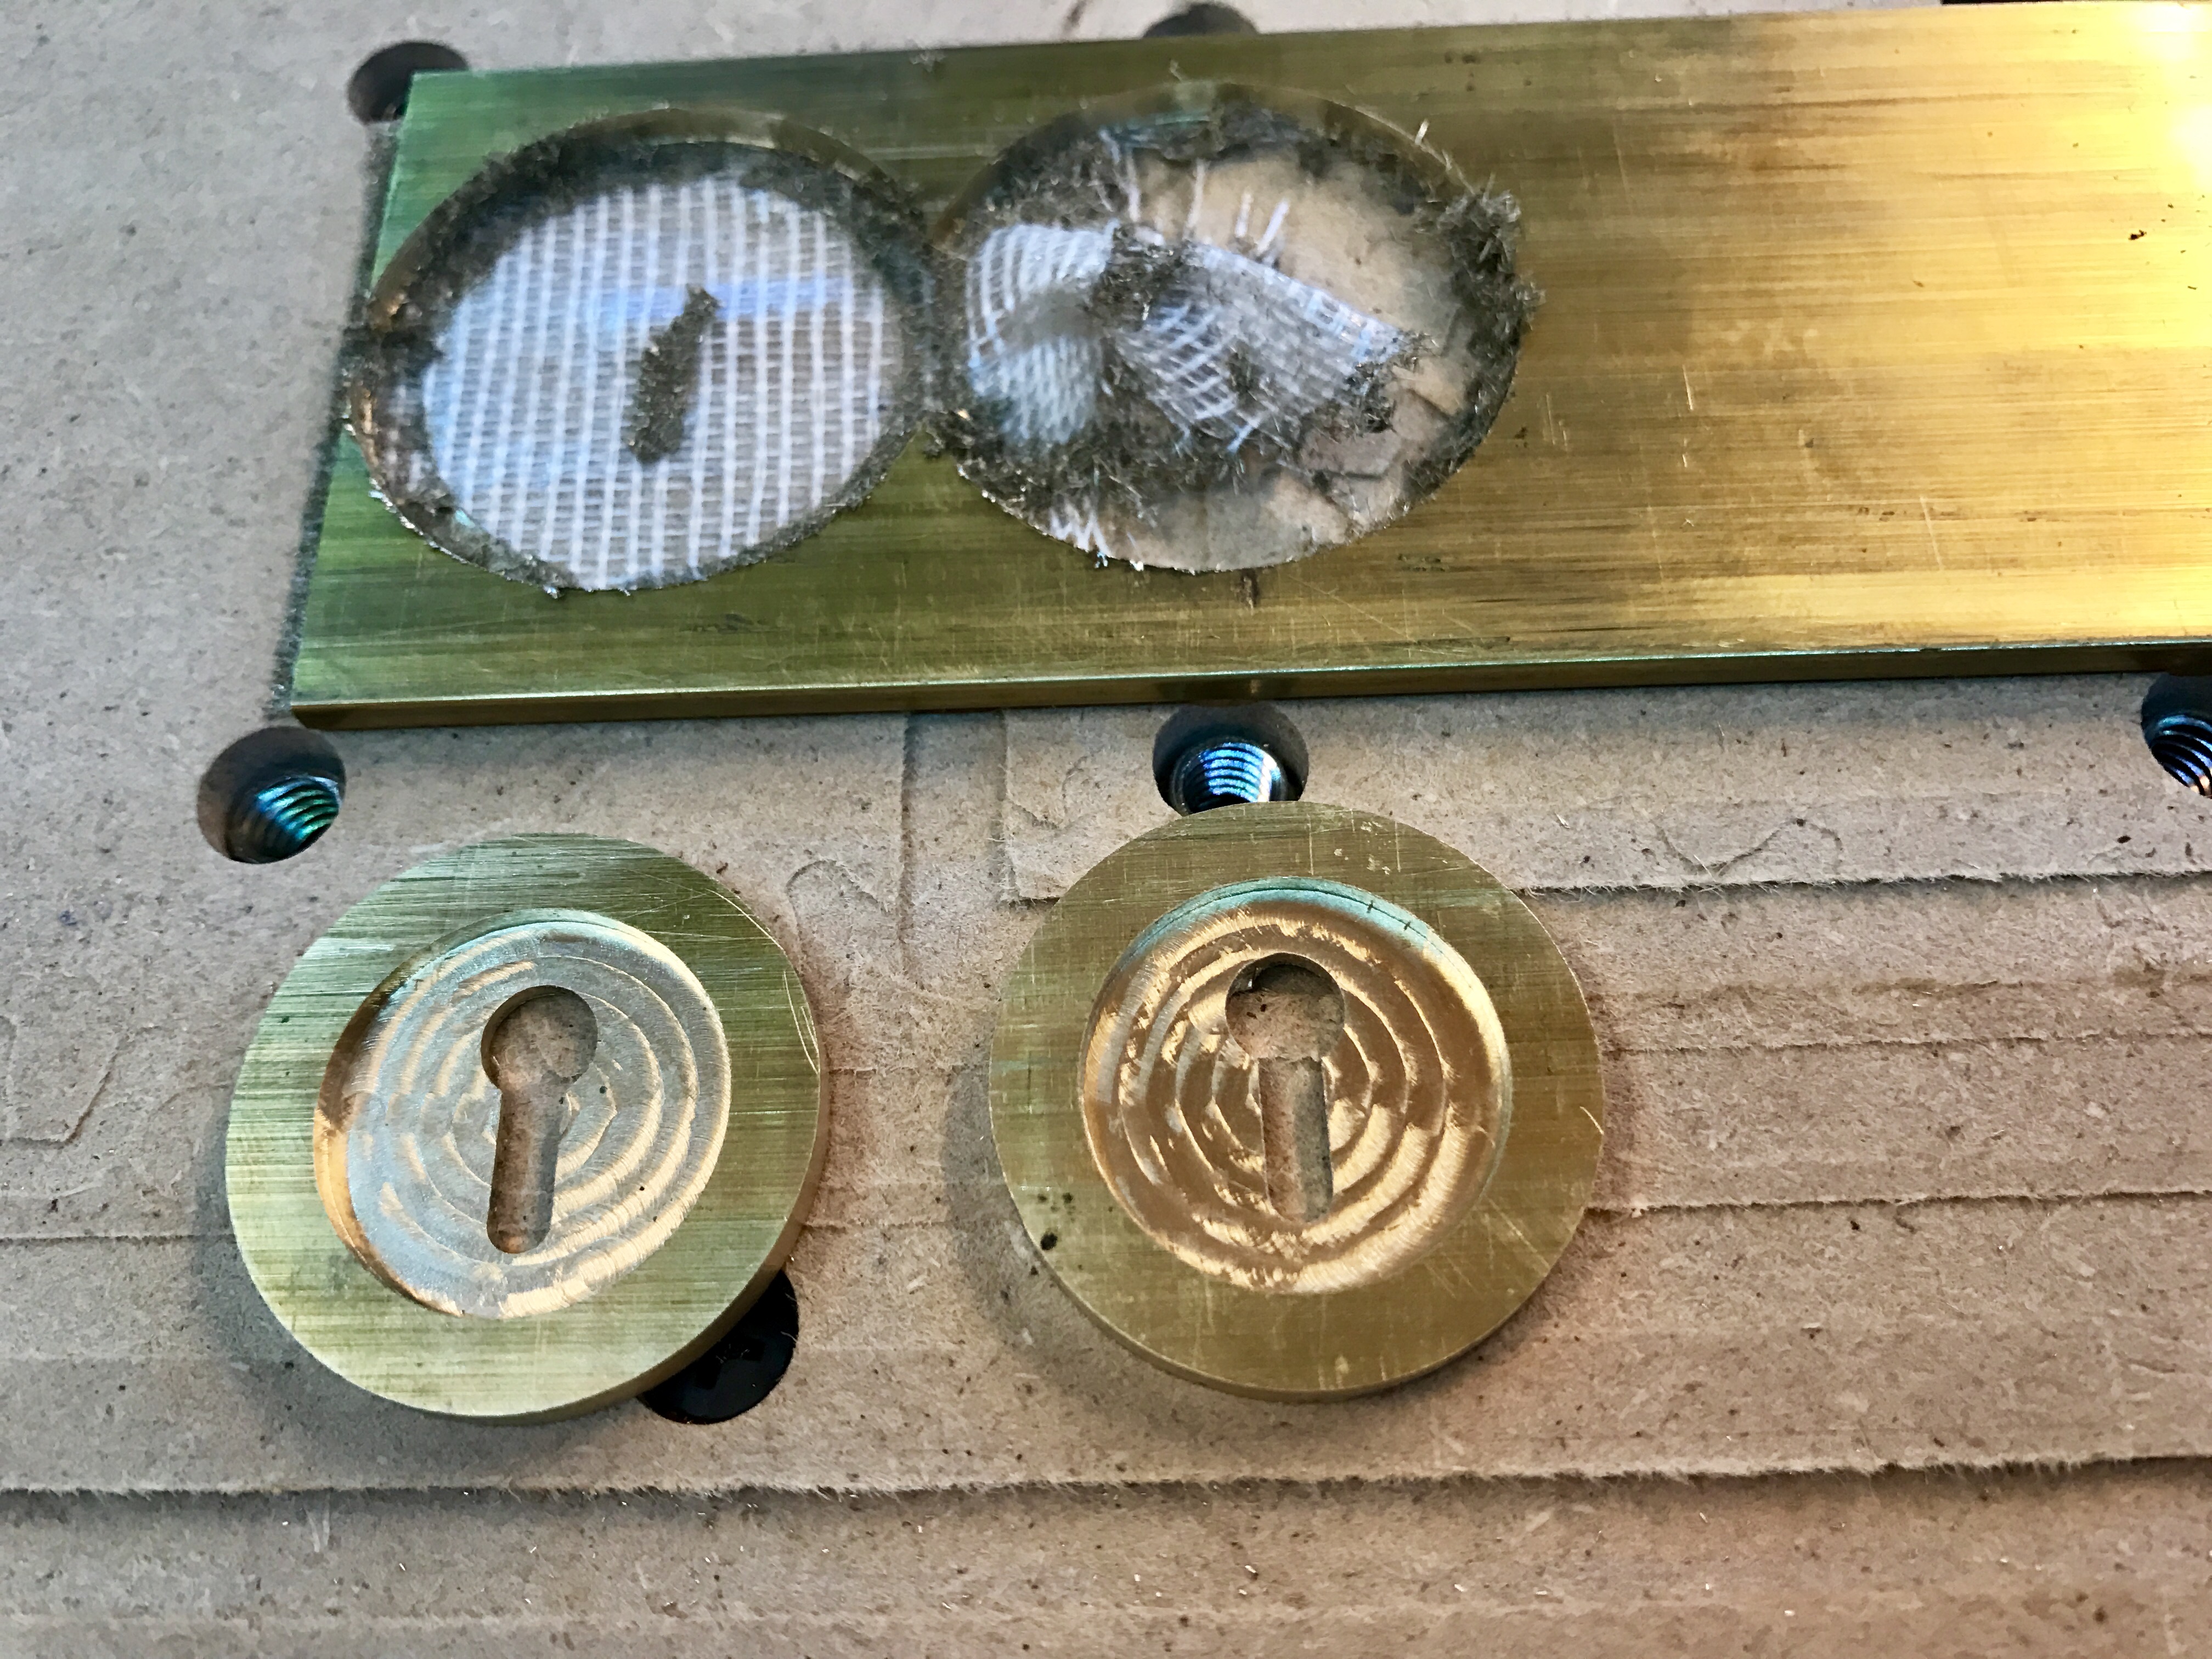
Anyone with more experience cutting brass, please feel free to chime in with setting change ideas. One of the pictures kind of shows the shavings and they don’t appear to be the preferred chips. More like metallic fuzz. Thanks for looking!
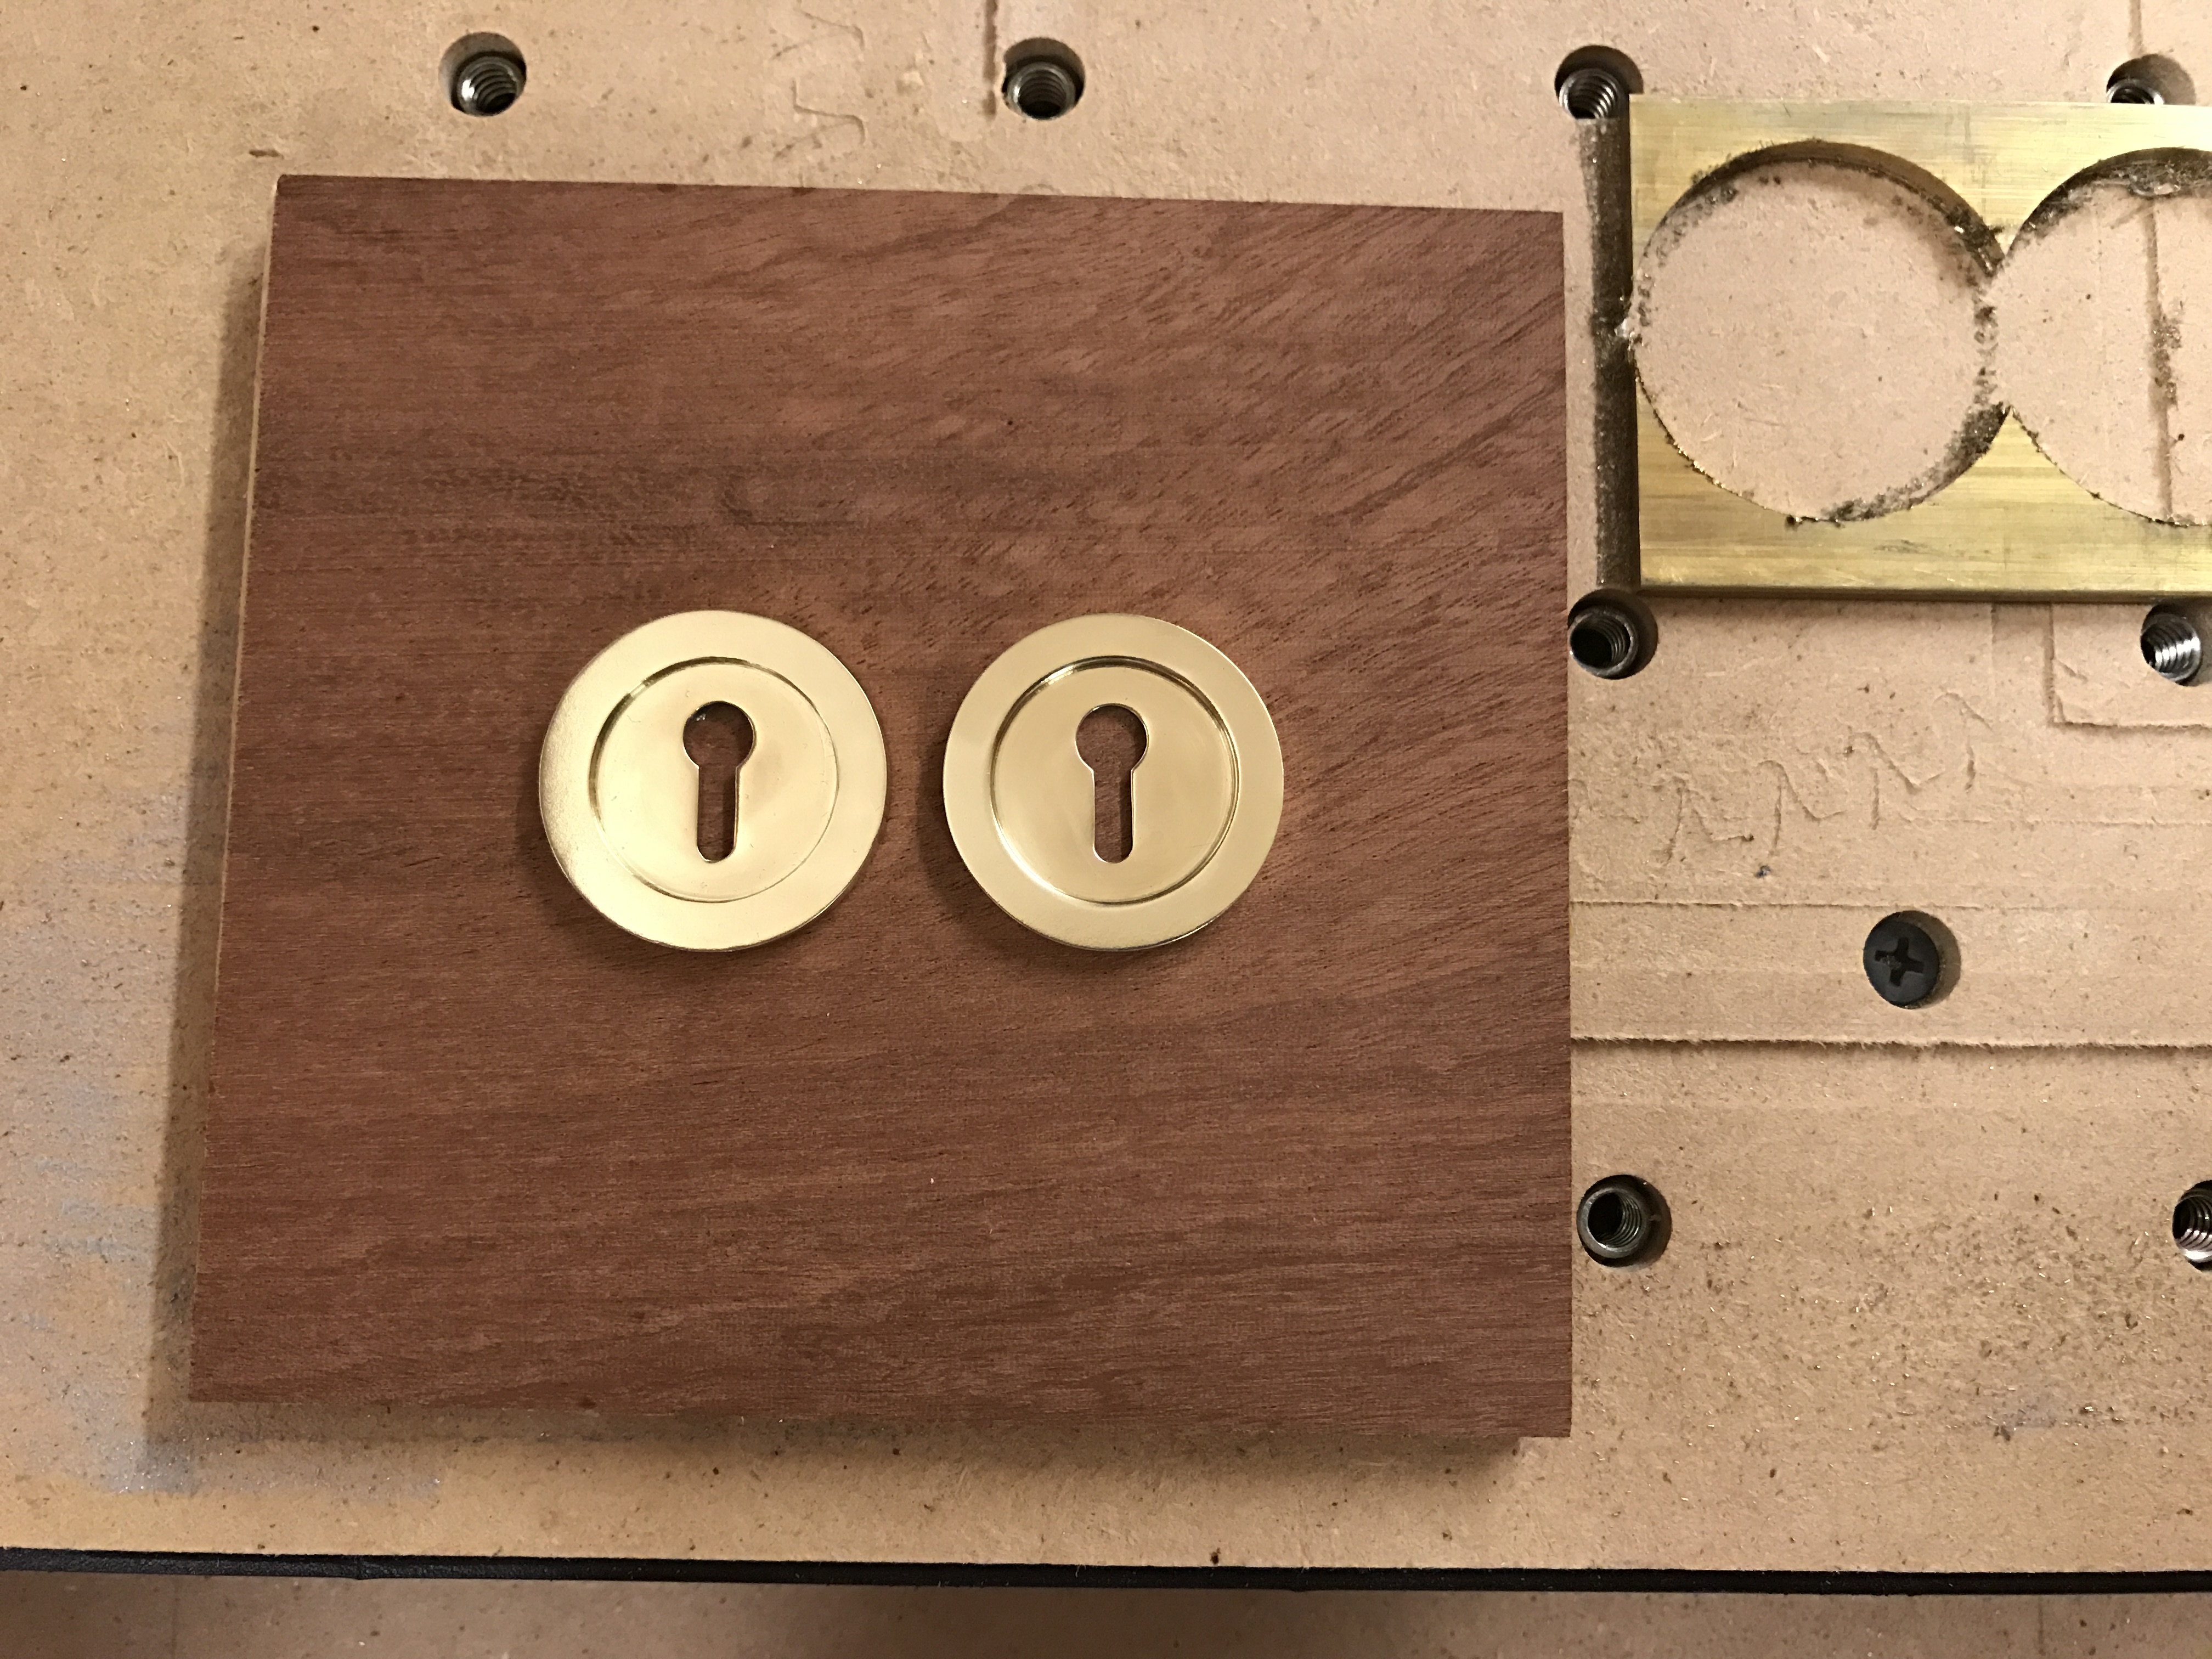
P.S. Polishing was done with an assortment of homemade Dremel sanding disks, working my way up through the grits to 1000, and then polishing with various compounds. Next time I’ll try to do a better, more uniform job. It looked like a uniform polish until I sprayed it with Brass Lacquer and now it looks a little muddled.
I’d go about 6000 to 8000 RPM with a 1/8 tool for most brasses (65000mm/min surface speed, give or take) unless I was really whaling away on feed rate. You are feeding quite slowly, so probably rubbing a good bit, hence the fuzz. At 24000RPM and 100mm/min (4 in /min), you are only feeding 2 microns (0.002mm) per cutting edge.
If using 360, work hardening shouldn’t be a issue. It is free machining (in fact, the standard for free machining brass) and awesome, as long as you don’t need to form it and won’t be brazing or soldering it.
Yep, 360. Unfortunately, I can only go as slow as 16,500 rpm with the Dewalt 611. Should I go to that and increase feed rate? I’ve been trying to find the chip load of the 1/8" carbide end mill in order to do the calculation for SFM. The only reference I could find was the Feeds & Speeds chart for the Nomad 883.
The formula for feed-rate is going to be chip-load per tooth (IPT) x number of flutes x rpm, so if you slow your feed down and keep the spindle speed equal, then your chipload gets smaller.
If you’re using a smaller cutter, you need a smaller chip load anyway, so you should calculate this all out based on that.
If you’re using a 0.125" 2-flute tool, then at 16,500rpm and a 1% of diameter chip-load (0.00125"/tooth) the feed rate would be 41.25 Inches per minute, which sounds reasonable for doing profiling cutting where between 25-35% of the tool is engaged, NOT plough cuts.
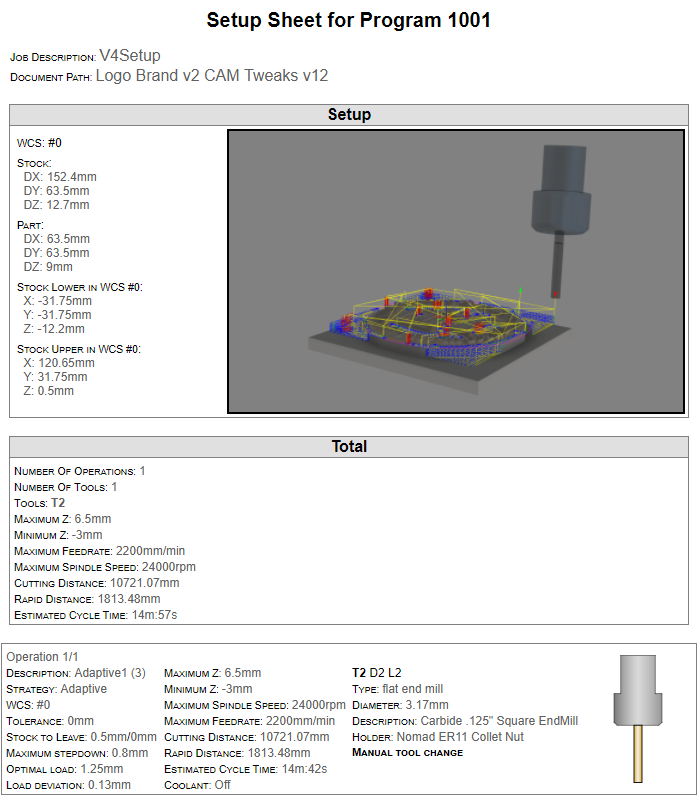
I recently ran some 360 free-machining brass on my So3 with these settings just fine, which was rather faster than the 16500rpm settings:
That’s really helpful, thanks for providing it. Is the chipload of 1% tool diameter (for profile cuts) a rule of thumb? I thought I had to rely on manufacturers providing chipload recommendations but that would be awesome to remember since getting that info is hit or miss with manufacturers. Either way, thanks again!
@JFischer911 thinking of chipload as a percentage of tool diameter is in general a good guideline, because it gets you thinking about how big of a “bite” the tool takes with each revolution.
In harder materials, you have to “nibble” with less of the tool, and in softer materials you can “chew” more with the same tool.
Also, if you’re using a smaller tool, it will need to have a smaller chip load that reflects the reduced flute-size.
I generally find that for the materials a Nomad and Shapeoko can handle, somewhere between 0.5% and 2% of tool diameter has been appropriate for adaptive-clearing work, which is a type of tool path strategy that prevents overloading the tool. This is assuming between 1x & 3x the diameter of the tool for cutting depth, depending again on whether the material is harder or softer, respectively.
So all that to say “your mileage may vary” but starting from 1% of tool diameter for chip-load is probably reasonable in most materials, if you’re careful with depths to respect the (lack of) rigidity of the machine.