My first inlay project

Yeah, I read the documentation and the inlay toolpath uses straight bits so the corners are rounded but depending on the design and bit, it may or may not show and the inlay does not have an angle.

1 Like

Nice work Julien…

Here’s my first inlay. It’s a ring box I made for my daughter’s wedding. Purple Heart wood and Curly Maple. A huge Thanks to John Clark’s YT vids on box making.

I used YT Shawn Gano’s inlay technique with Vcarve pro. Did not use Vcarve Pros inlay function.

8 Likes

Another test run with better contrast. I need to stock up on rosewood and the like…

9 Likes

And one more, to finish the inlay experimentation

5 Likes

O.K., nice job! NOW, on to the smaller world of Coasters. Try and do a 3", 3.5" or 4" coaster with an animal - OR - even shrink this design down to that size and try it! What the 60 Deg. bit does for the BASE is like doing the Inlay upside down. Angles just reverse and hopefully your pieces fit together. Instead of forcing therm together use less glue (minimal is better) and DO NOT clamp together, but do use some weight - you just want to keep the glue line from being pressed down to nothing.

For an added interest try something like trying to ENVELOP TEXT like the example shown. This makes for some interesting designs as well. Check HELP to see if your software package will allow you to do the ENVELOPE process.

image

Again, on your panel, great job!!

5 Likes

Is the round object a trivet or a cheese cutting board. I know you live in France where cheese is king. I had to look up “Miam Miam” and it means Yummy. Are you buying the bamboo in sheets or off the shelf at a retail store?

1 Like

It’s just a general purpose trivet, and honestly I randomly grabbed one I had from my pile of “those blank trivets I buy on impulse whenever I find cheap ones in home decoration stores, that I will customize on my CNC one day”. This was just an excuse to practice inlays really.

One could certainly use it as a cheese board, but to be honest cheese boards only happen in restaurants and fancy meals, most of the time we don’t bother and just use a regular plate :slight_smile:

The bamboo stuff, I tend to stock up on large (and cheap) cutting boards from Ikea or other similar stores and cut custom parts in them, but this particular one was already a trivet/serving-whatever, I just carved the inlays.

2 Likes

@Julien Love the olive wood, is it common in your part of the world? I’ve looked around the big box stores and started asking grove managers here, Southern California, but it’s not so easy to come by. Anyone else have a source?

Yes, it’s relatively easy to find here, at least in home decoration stores. I guess it’s easier to find in Europe, with olive trees growing all around the mediterranean sea.
It’s the opposite for Maple: it’s extremely hard for me to find some here, but you guys seem to find that very easily.

Yeah, and you have olive oil and we have maple syrup. :wink: I have hundreds of maple trees and use the broken ones for firewood. I have yet to find an olive tree. While maple is a very good and strong wood, it has a tendency of contracting and expanding significantly with the seasons. In the winter it contracts when the inside humidity level in very low then expand in the summer when the humidity level is very high. I find that yellow birch is almost as good from a strength perspective but easier to work with but a bit more stable.

2 Likes

I’ve been trying to wrap my head around this, I understand the concept but there is one part of this that I don’t understand. I am also trying to translate these instructions into Carbide Create, just need some hand holding.

Here’s how I think this would work with Carbide Create.

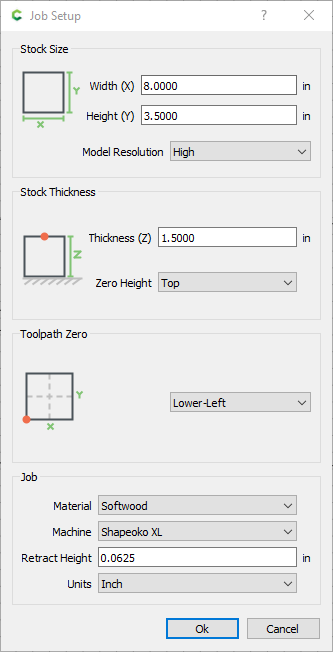
First the pocket (because that is easier to understand). I’m going to practice on some 2x4 lumber, so I setup the stock for the pocket.

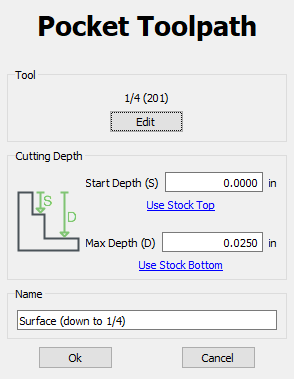
For toolpaths, I first surface off .05 inches to give me a flat starting point.

image

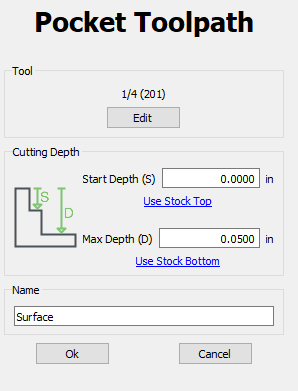
And then I create the pocket, which has a starting depth of .05 (because of the previous surfacing) and a max depth of .25 resulting in an actual pocket that is .2 inches deep (right?) because .25 - .05 = .20
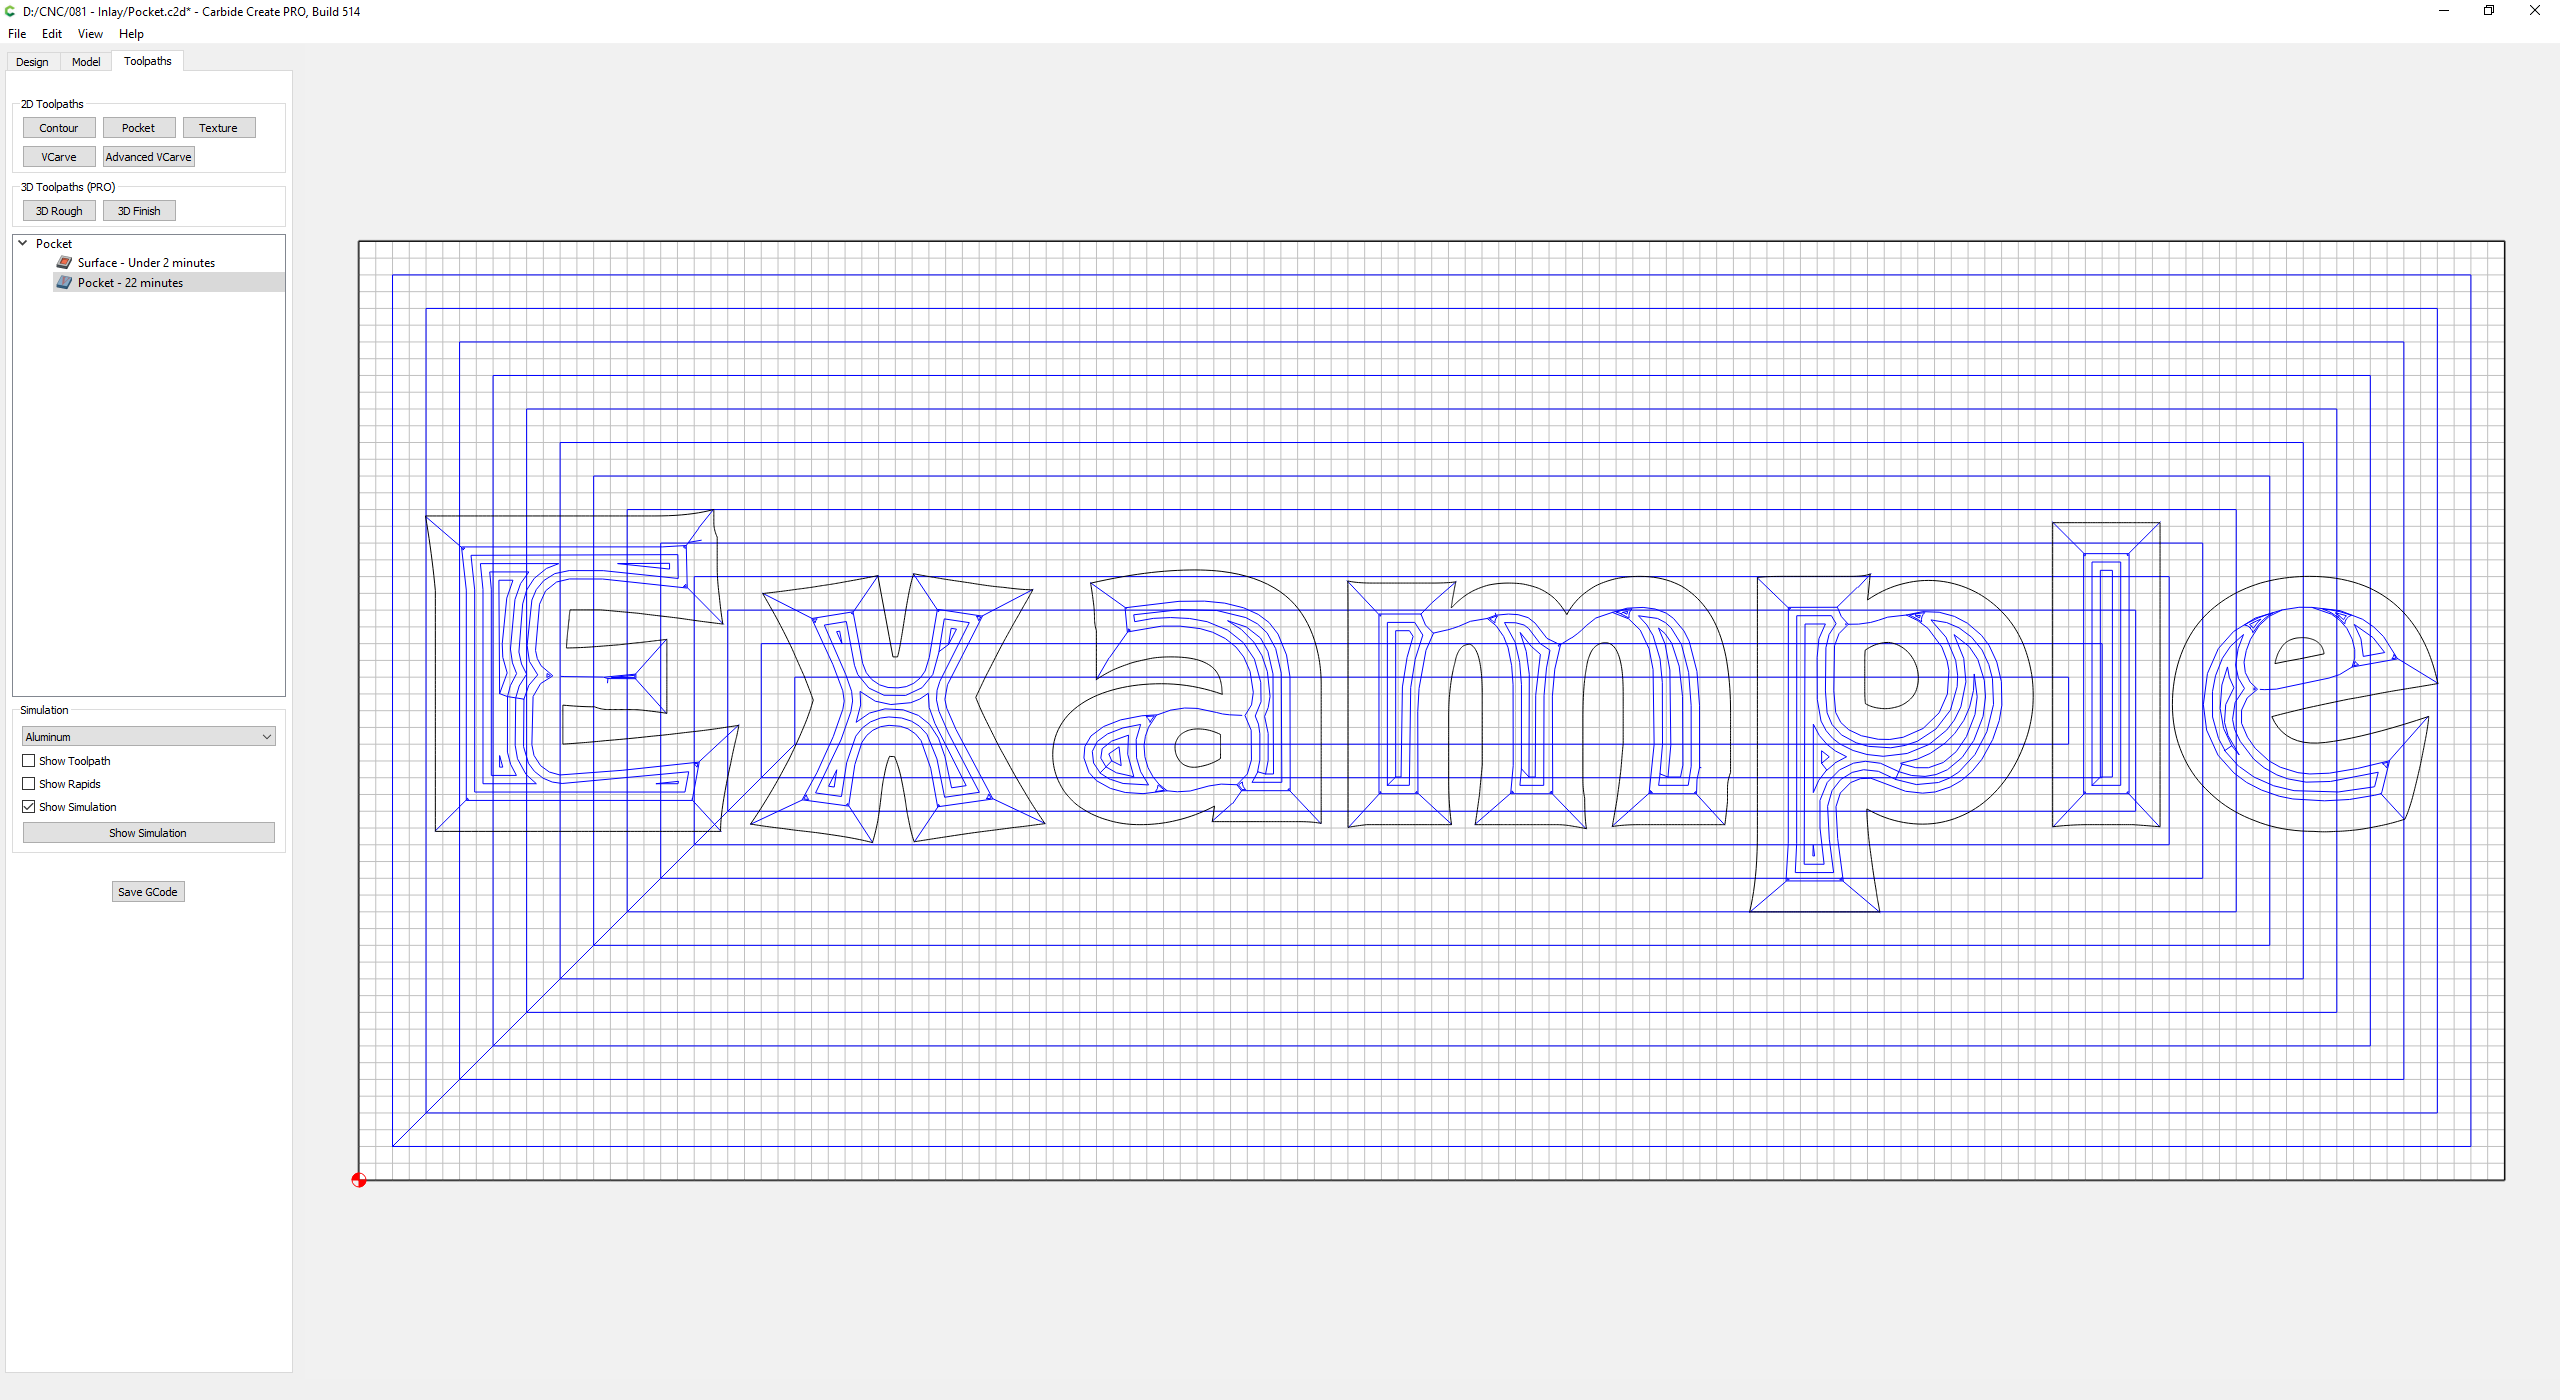
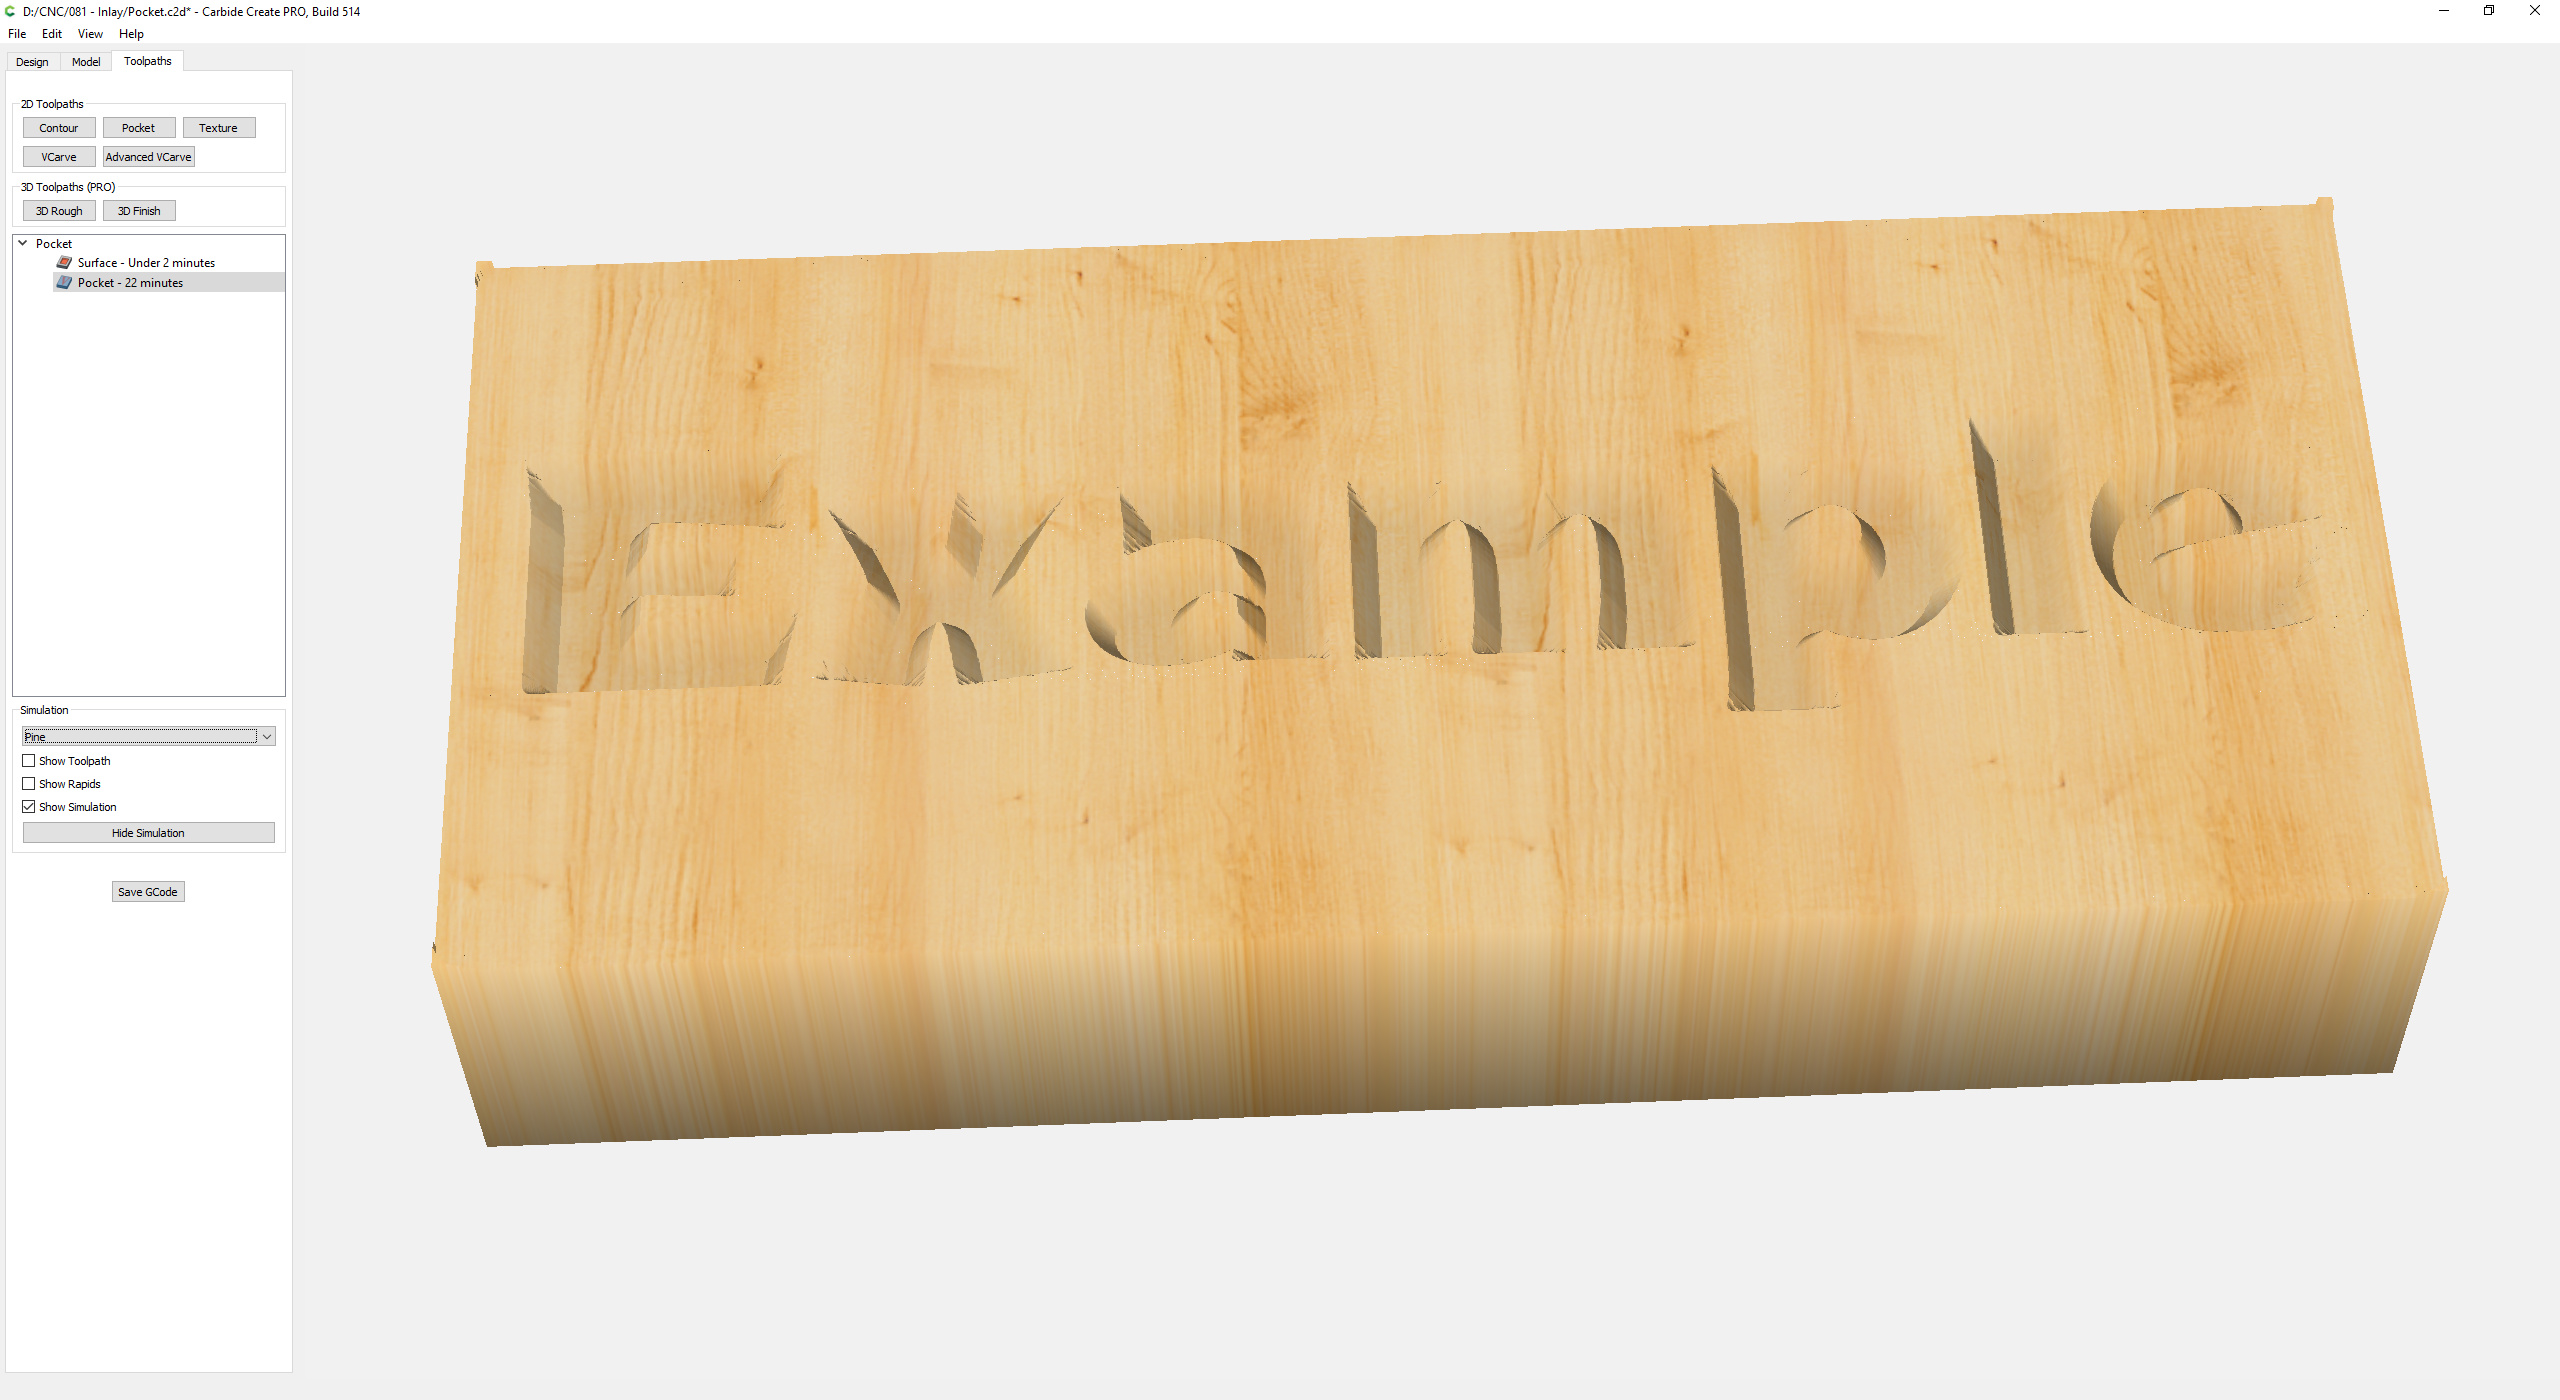
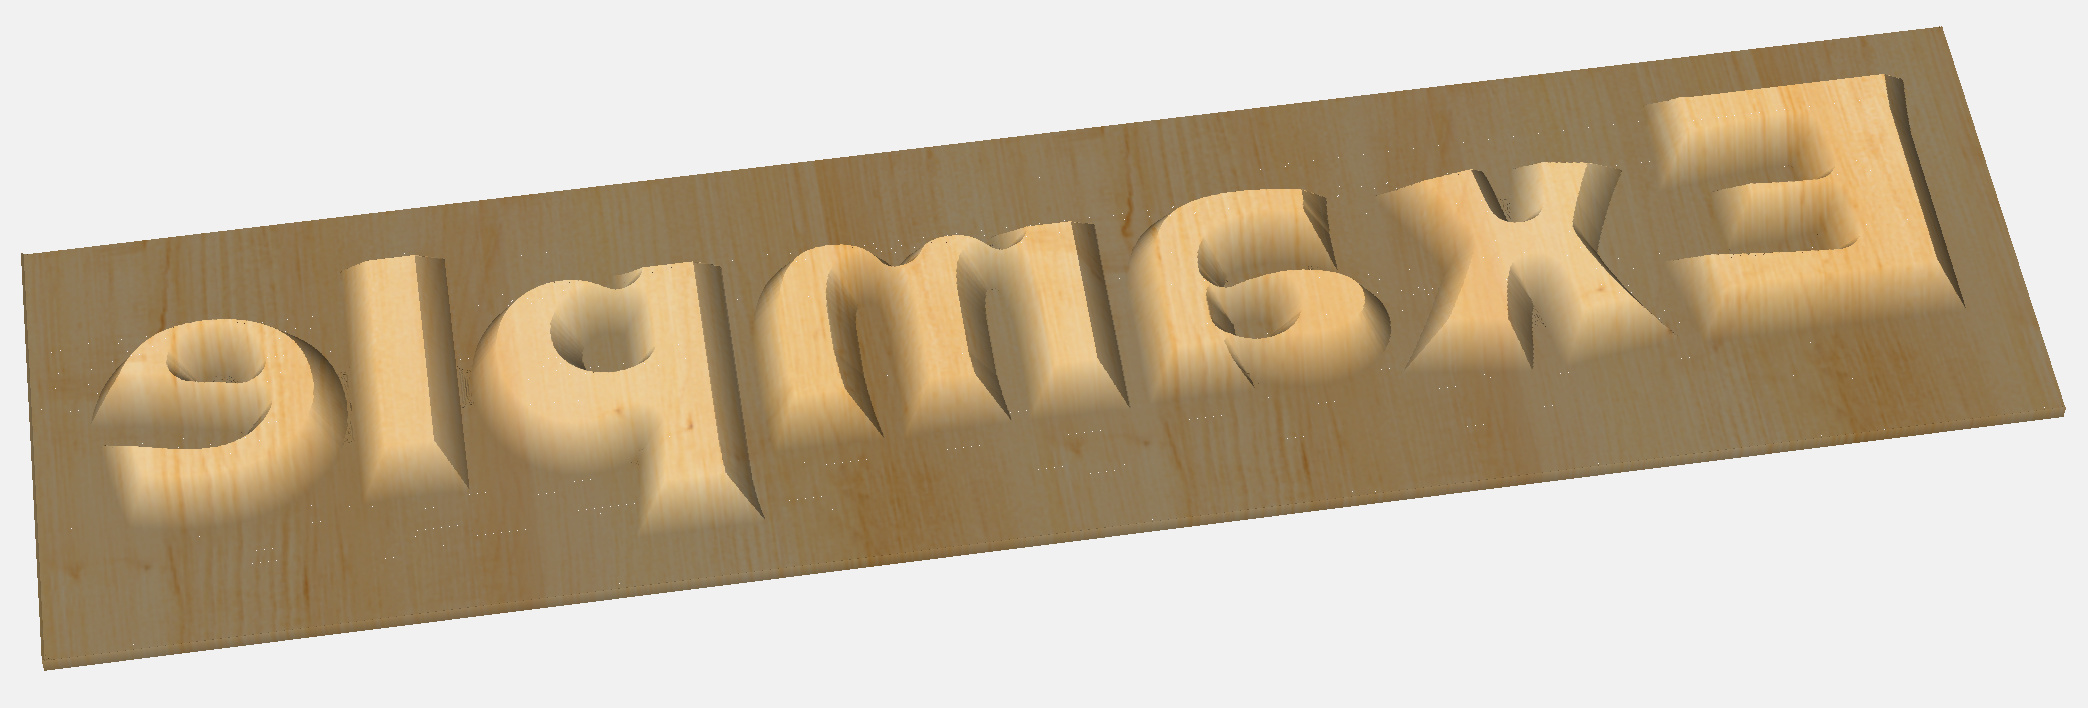
image

Resulting in…

Up to this point I think I have understood the process and correctly translated it into Carbide Create. But now the more difficult part, the plug.


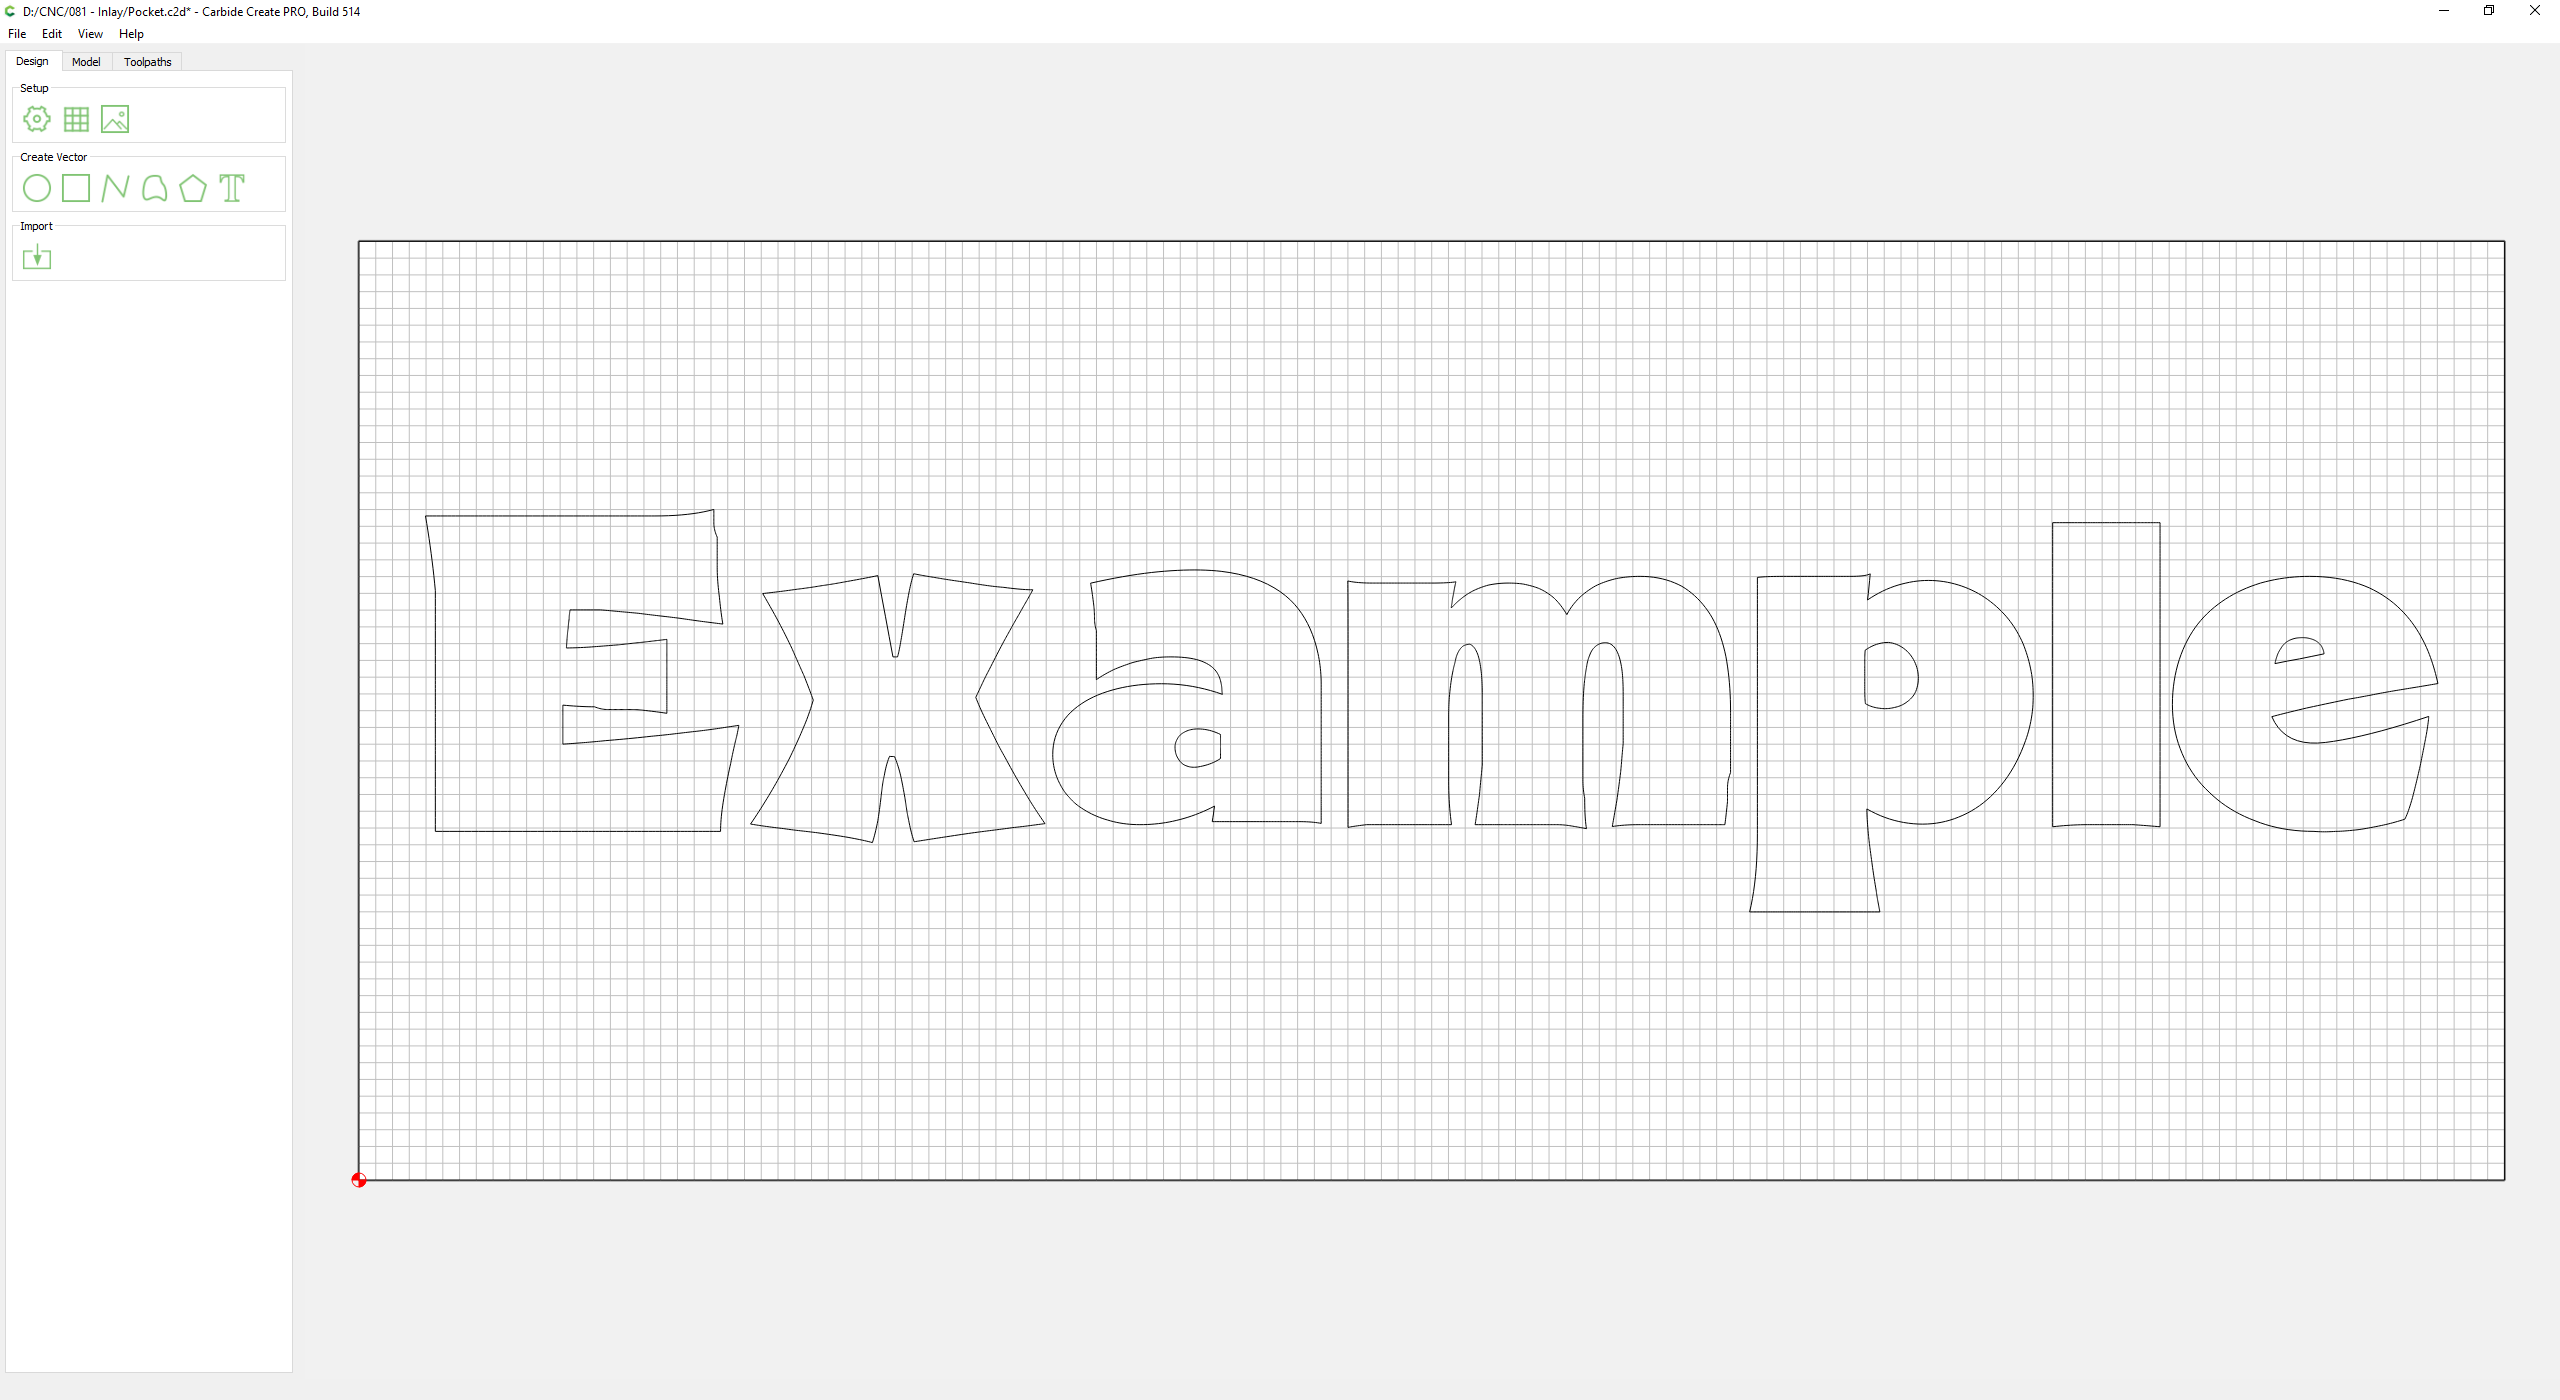
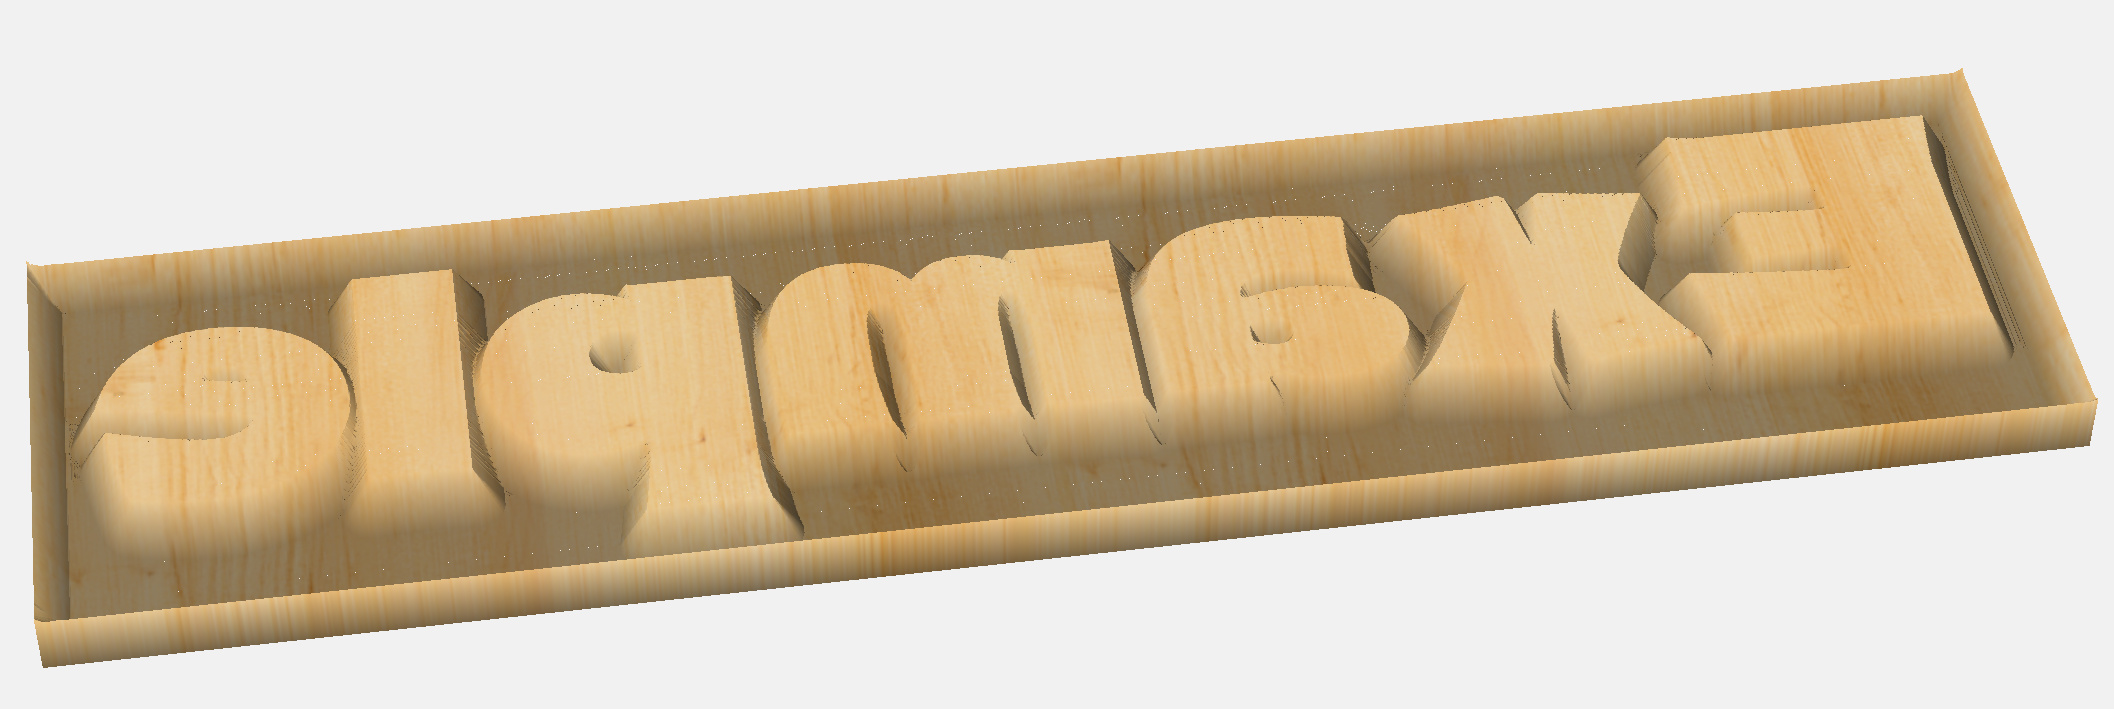
Let’s pretend that I measured the wood I want to use for the plug (aka inlay) at 8 inch width, 2 inch height and .275 inch thick.

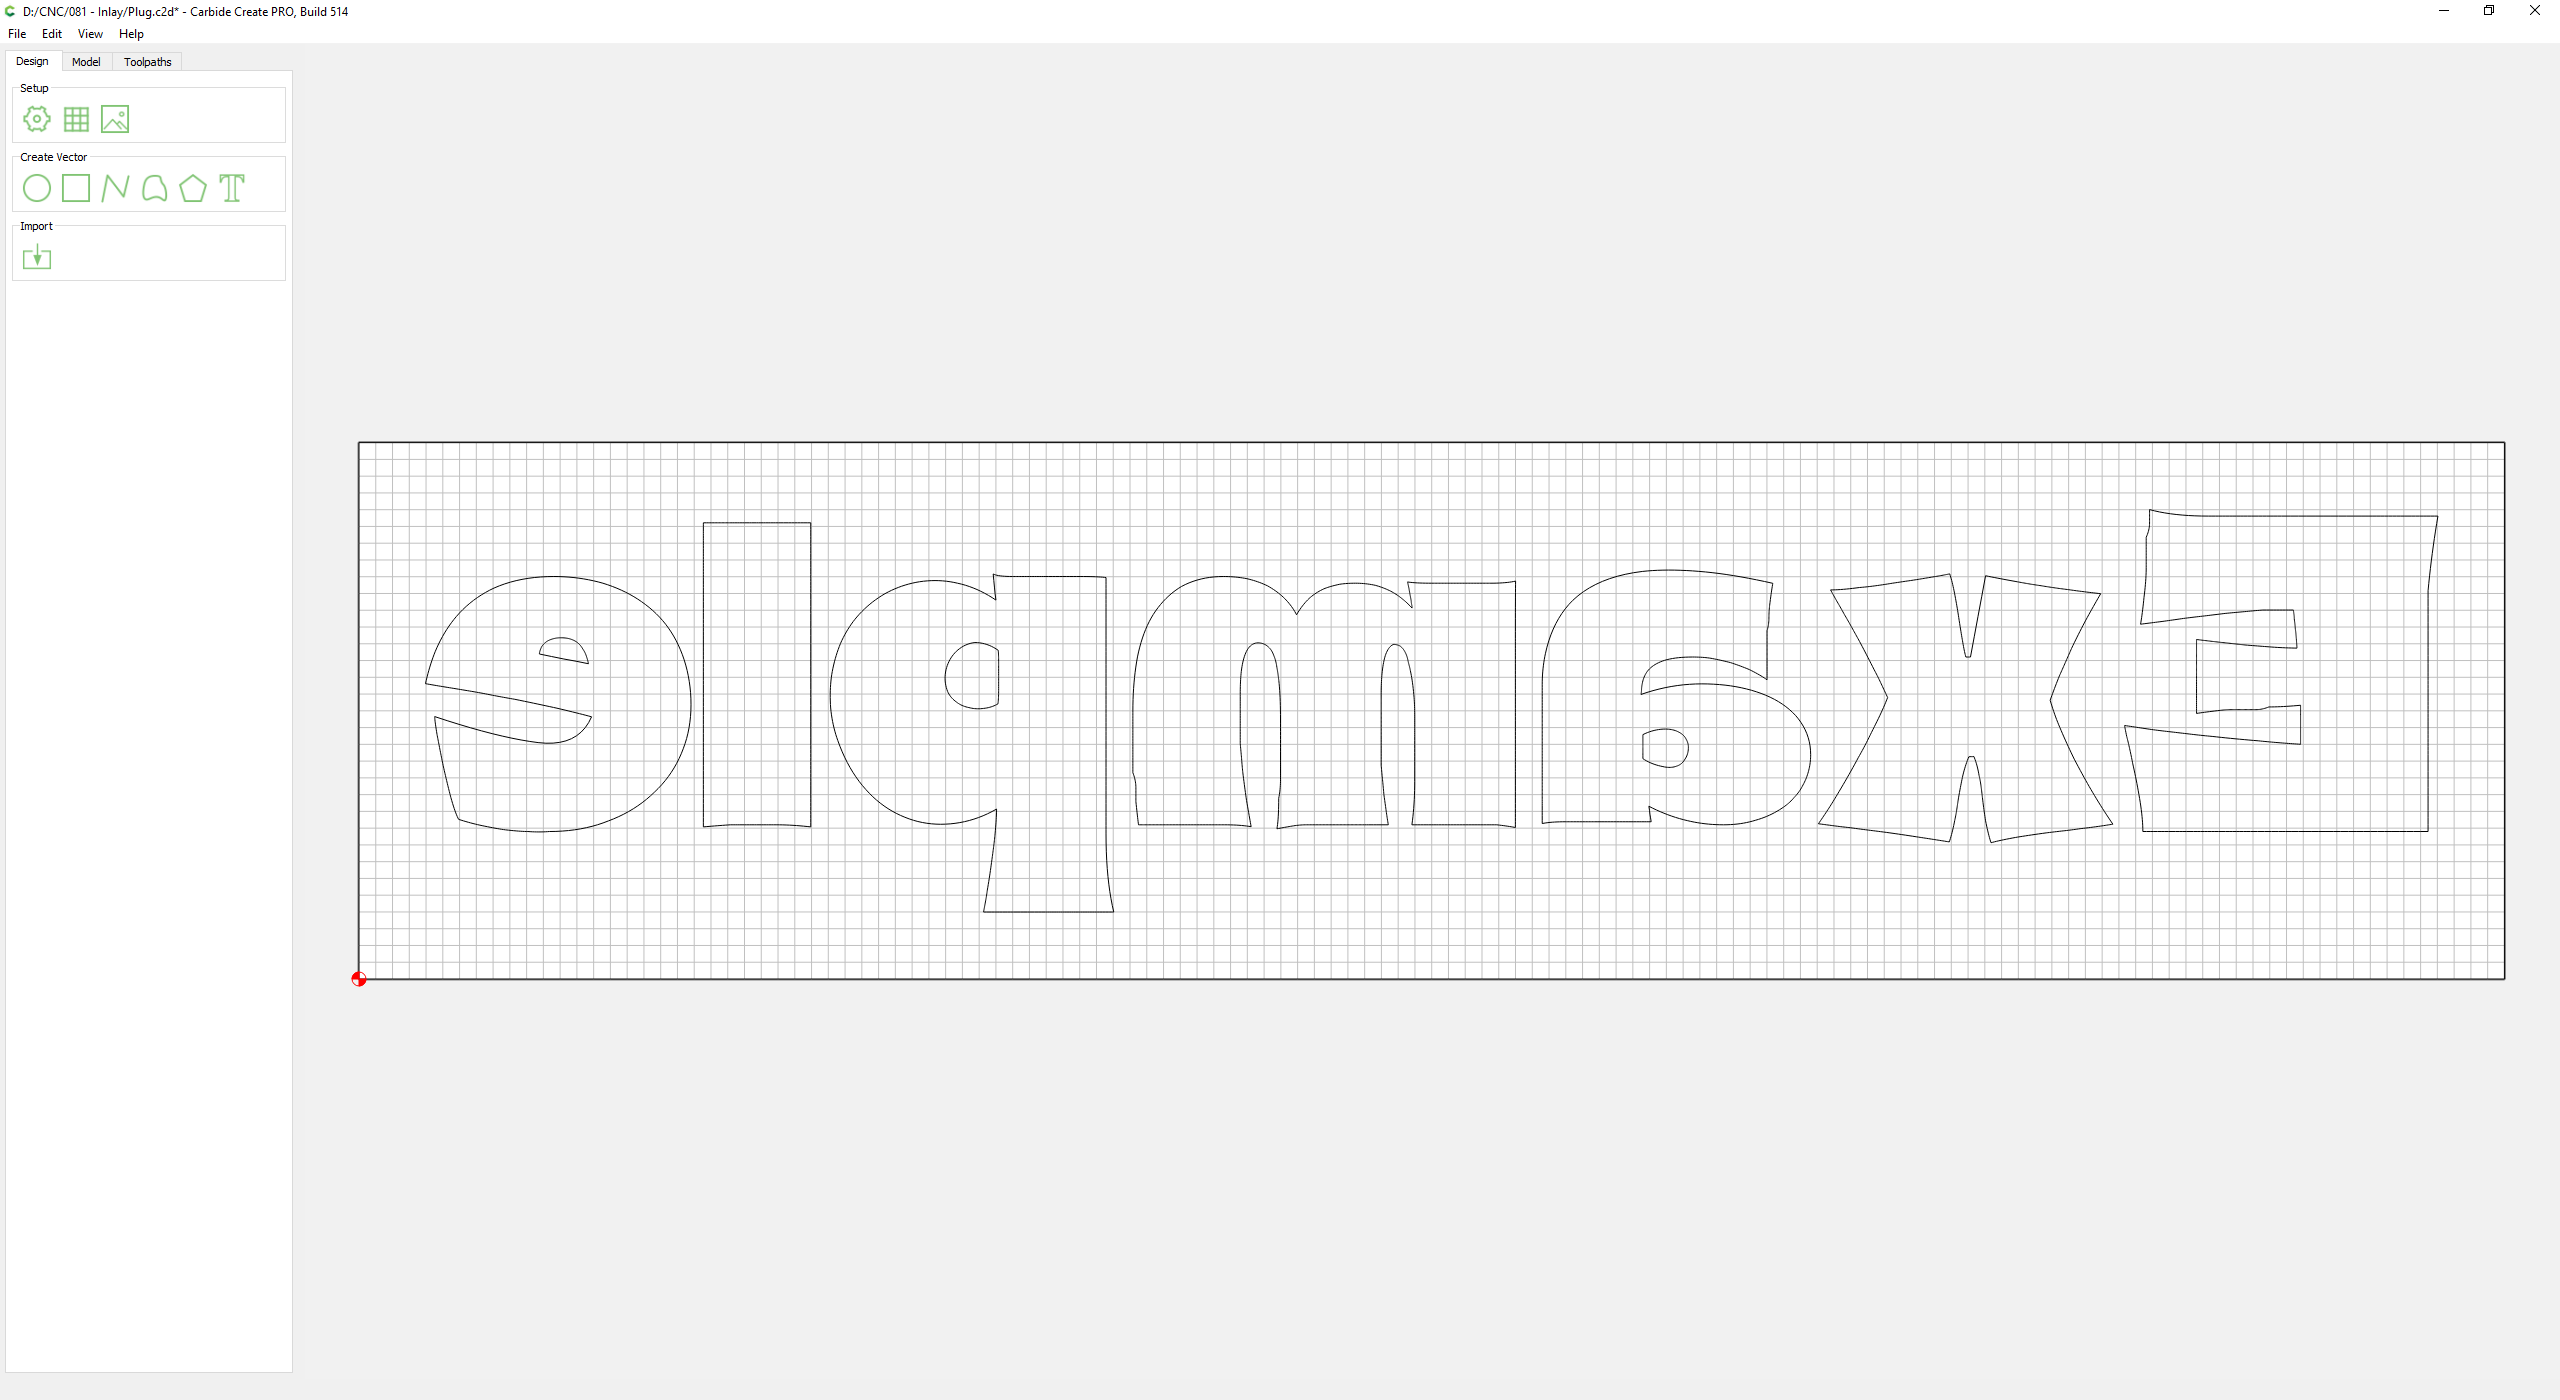
And after mirror flipping the inlay my Carbide Create design looks like this.

To make sure I start with flat stock, I surface the stock down to .25 inch. So a pocket toolpath with a start depth of 0.0 and an max depth of 0.025

image

Everything makes since to me up to this point, here is where it falls apart in my mind. I know the next step is to make the inverse plug that will fit into the pocket. The pocket is .2 inches deep, so what my mind wants to do is perform a VCarve that starts at .025 (what is now the top of the stock) and go down an additional .2 inches, so a max depth of .225… but this is clearly wrong.

image

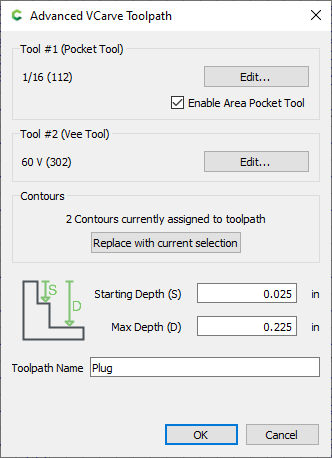
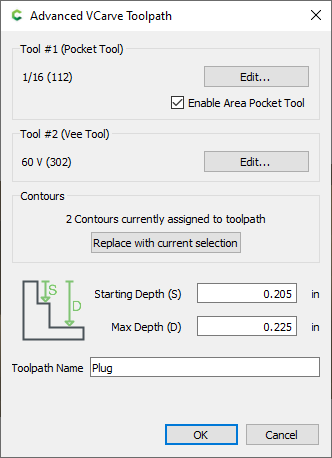
… the tutorials I found online that use VCarve use different terms “start depth” and “flat depth”. If I ignore the different terms and just follow their examples I calculate my start depth by taking the amount I surfaced off and add .18. For my example that would be .205 (.025 + .18), with a flat depth (aka max depth) of the amount I surfaced off and add .20 (.225 = .025 + .20).

image

This looks like it would work, but I don’t understand. If I’m asking Carbide Create to V Carve from .205 to .225 wouldn’t the plug be .02 inches tall? But somehow this makes it .18 tall?

The only way my brain can make since of this is if an inverse V Carve effectively processes everything upside down. I’m asking it to start (aka start depth) .205 inches up from the bottom of the stock? But go down to .225 from the top of the stock? :dizzy_face:

Help me understand, thanks.

1 Like

are the diagrams at Using "Advanced VCarve" in Carbide Create 461 to make Inlays of any use understanding ?

1 Like

That helps, still a bit cloudy in my mind but I think I know enough to try cutting something without it exploding.

maybe start with a square… means you can ignore symmetry… but also means you can measure the various output sizes very easily with calipers

1 Like

Your start depth is the depth at which the profile matches your design. Basically, it is the depth the inlay will sit into the pocket before the outlines match. There is stock above that start depth, but it’s basically ignored. When you flip it to do the inlay, that ignored stock is what goes in to the pocket. The difference between the start depth and the max depth ends up being above your inlay… It gives a little room for squeezing for a tighter fit or you can add more if you want to get a saw blade in between the male and female parts.
If you started at the surface, that’s where your male inlay profile would match the pocket, so it wouldn’t fit.
Make sense?

1 Like

Thank you, the fog is starting to lift. So that area above the start depth, what you called

So that area got machined properly (at the right angle) but you could say “by accident” because Carbide Motion plunged through that area thinking it was air (not wood)?

I’ll attach the two files I am going to try tomorrow, if anyone cares to look over my first attempt.

Pocket that will be 1/8 (.125) deep, and a Plug that hopefully fits .10 into the pocket with .15 sticking out.

Pocket.c2d (532.2 KB) Plug.c2d (535.4 KB)

Thank you @neilferreri, @fenrus and @Julien… I now understand.
The results matched how my mind had interpreted your instructions.
I was able to produce a .125 pocket, with a plug that fit (roughly) .1 inch inside the pocket.

After cleaned up, not to bad for cheap 2x4 lumber.

6 Likes

Bagdad lumber in Bagdad KY has a great selections of hard woods, rare and exotics

1 Like

What did you use to process the G-code? Carbide motion ignores the ‘flat depth’ instruction from the vcarve software.

How could Carbide Motion know which moves are related to flat depth and which are not so as to ignore them?

I used Vectric Vcarve and its flat depth option for:

which was sent to my machine using Carbide Motion.

2 Likes