So my story starts with one of the very early Shapeoko 3s, and due to the old, poorly maintained electrical circuit in the rental house I was living in I had a huge amount of issues with disconnects. C3D were great, sending me new revisions of the (at the time very new) control board, new cables, and many other suggestions that improved the situation, but didn’t complexly resolve the issue. During this time the XXL was released so I sold the original SO3 and bought the XXL – the intermittent disconnects were still an issue
I made the decision to upgrade the control system. I didn’t have a huge amount of knowledge of drivers and software but my research got me to buying a Gecko G540 kit from an Australian distributer, and a Mesa 5i25 PCI-E card. I decided to try LinuxCNC because it’s free and incredibly powerful.
The G540 is basically a parallel port breakout board with 4x 3.5A drivers, but in a small robust package.
The Mesa 5i25 is a motion control card that allows ‘realtime’ control, meaning zero lag at incredibly high feedrates and step frequencies. In hindsight the G540 is perfectly capable for the Shapeoko, there was no need for the 5i25.
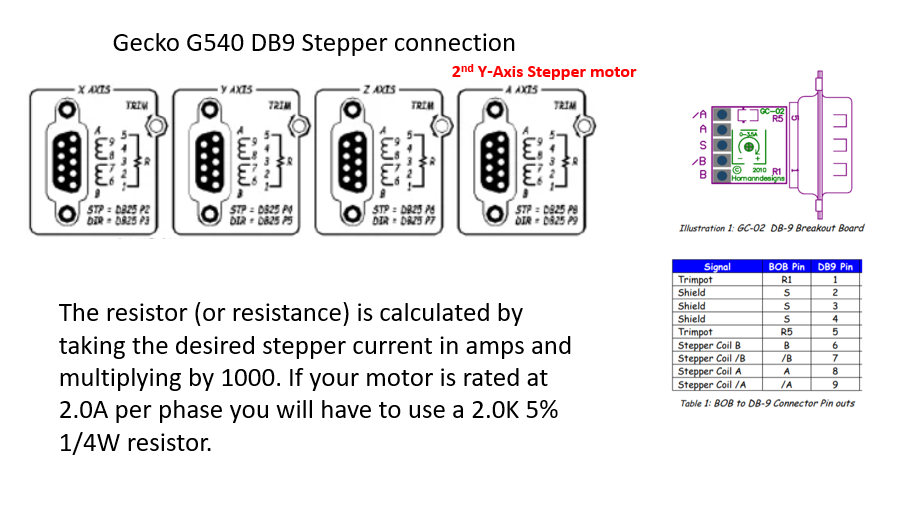
The G540 Kit including 7.3A 48Vpower supply, E-stop, relay, power sockets
4x breakout boards to set driver current to Steppers
The Mesa 5i25 (not required for UCCNC option described below)
I got the XXL running well under LinuxCNC, I extended the stepper and prox switch cables so I could have the control box separate to the CNC. I found LinuxCNC quite easy to run the machine, but initial setup was really hard for me to get my head around, I basically copied other people’s setups and changed bits and pieces to suit my hardware. It was super reliable and I ran it quite happily for a couple of years, but could never get probing or tool changes (i.e. the bitsetter workflow) to work properly. I still think LinuxCNC is incredible for free software, and offers a lot, I just wanted something easier to get working the way I wanted.
Which brings me to now. I have just bought a CNCdrive UC300ETH-5LPT motion controller, and a UCCNC Licence. I’ll detail this a bit more because I think it’s an upgrade that relatively inexperienced people can do, whereas I wouldn’t recommend the LinuxCNC path to a newer CNC’er. The UC300 requires 5V power, I found an old laptop power brick that supplies 5V and 12V, which works great for the UC300 and my Prox switches.
now to get it all set up…
Steppers:
Steppers are stock Shapeoko3, but I replaced all stepper cabling with shielded cable, and soldered on the stepper breakout boards. I definitely recommend these breakout boards, they made setting up the steppers so easy! To work out the coils, just touch any 2 of the four wires together, when the stepper gets hard to turn then those two wires belong to the same coil. Basically solder up as per the drawing, put your multimeter on and turn the trimpot until your resistance is correct for the desired Amperage. I aimed for 2A and haven’t had any issues at all in the 2-3 years running. Note that I use the ‘A-Axis’ to drive the second Y-axis Stepper so all steppers receive full current. Signals are slaved in UCCNC (covered further down)
Inputs:
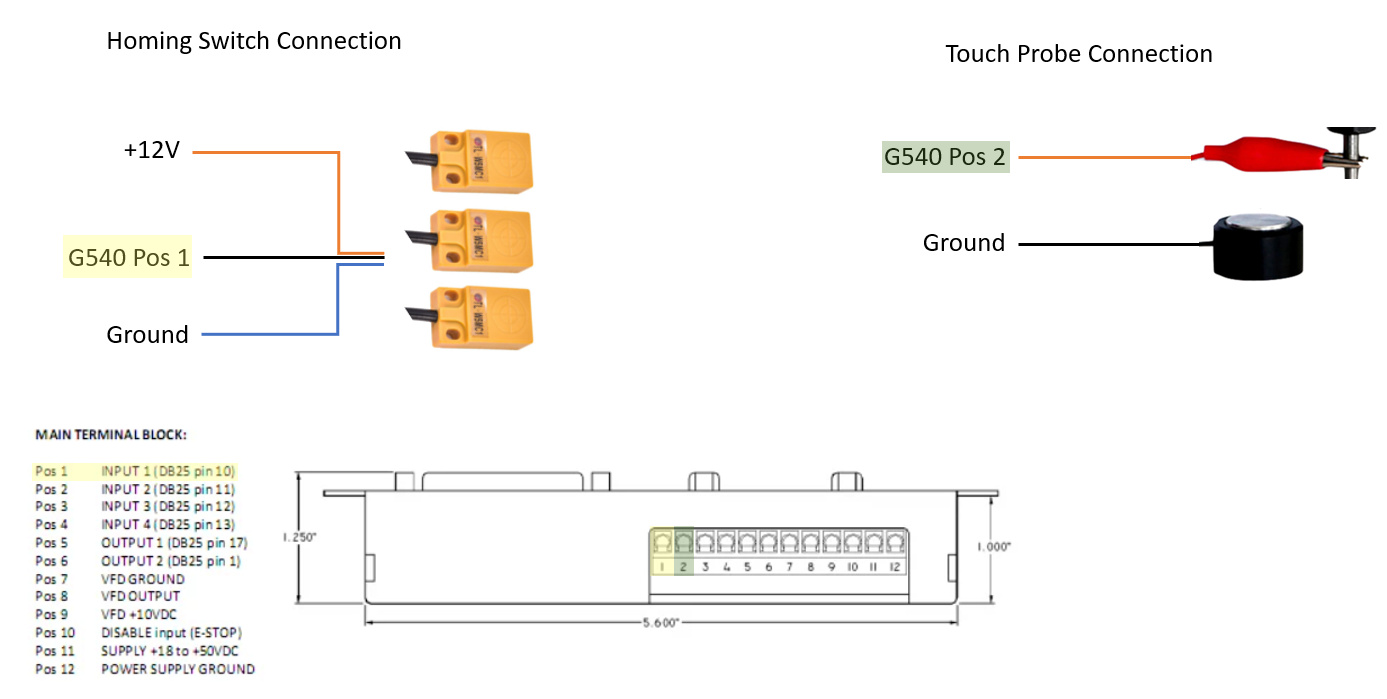
Homing Switches – I replaced the original Homing Switches with cheap ebay inductive prox switches, which have 3 wires – Ground, +12V and Signal. The model is TL-W5MC1. The G540 only has 4 Inputs, and I only use the prox switches for homing, so I commoned up the three switches which means if any 1 of the 3 switches is activated it sends the same signal to Pos1 on the G540 or ‘Input 1’
Touch Probe – Setup was pretty simple, just hooked the touch plate to the ground, and Alligator clip/magnet to the Pos2 on G540 or ‘Input 2’
E-stop – The Gecko G540 will not operate without a closed circuit between Pos10 and Ground, with the intent that an E-stop is placed here. You can just put a wire between the two for bench testing, but once you’re on the machine it’s the best option. You can put as many E-stops in series here as you want - Be aware you need Normally Closed (NC) E-stop. Hitting the E-stop on the G540 will kill the spindle and lock the steppers
Spindle:
I have a 1.5kw Huanyang VFD and Chinese spindle. The setup and settings on these has been covered a lot and basically my vfd settings are completely standard aside from the control input to be from the +10V rather than trim pot. If anyone has queries I can copy down all my VFD settings when I’m back home.
The wiring diagram explains this best, basically with the following setup, if I send a M3 s12000 gcode, the relay will close, which turns on the Spindle, then the 10V VFD output will go to the correct voltage to spin it up to 12000rpm (in this case 5.0V)
The Relay is a 48V 20A SPST (included in the kit) and it is used to close the circuit between ‘DCM’ and ‘FOR’ on the VFD. I don’t know if there are other ways to do this, but this is what worked for me. When the circuit is closed the spindle starts spinning. Without the relay I couldn’t stop the spindle, when an M5 gcode was sent it would reduce to about 5rpm but not actually stop.

UC300:
This was the easiest part, I connected the DB25 Parallel port on the G540 to the 26 Pin header on the UC300, there are 6 LPT Ports, I used port 2 which is the ‘standard’ port. The rest of the ports are used for more inputs & outputs (a simple breakout board can be used) Then it was only a matter of hooking up the 5V power supply, and plugging in an ethernet cable.
I used this cable to connect the Gecko G540 to the UC300
DB25 to 26Pin header cable
Software:
This was the toughest part of LinuxCNC, fortunately it is a breeze with UCCNC. The steps aren’t in extreme detail, because the manual covers it really well, and its actually quite intuitive
When I purchased UCCNC I received a license file, this file is copied into the UCCNC directory and will only work with the serial number of my board, this means that for every board you must buy a new license.
When you plug the UC300 ethernet cable into the PC it comes up as a network, I renamed it and forced the IP address as per instructions – pretty simple
Once in UCCNC its time to configure the system:
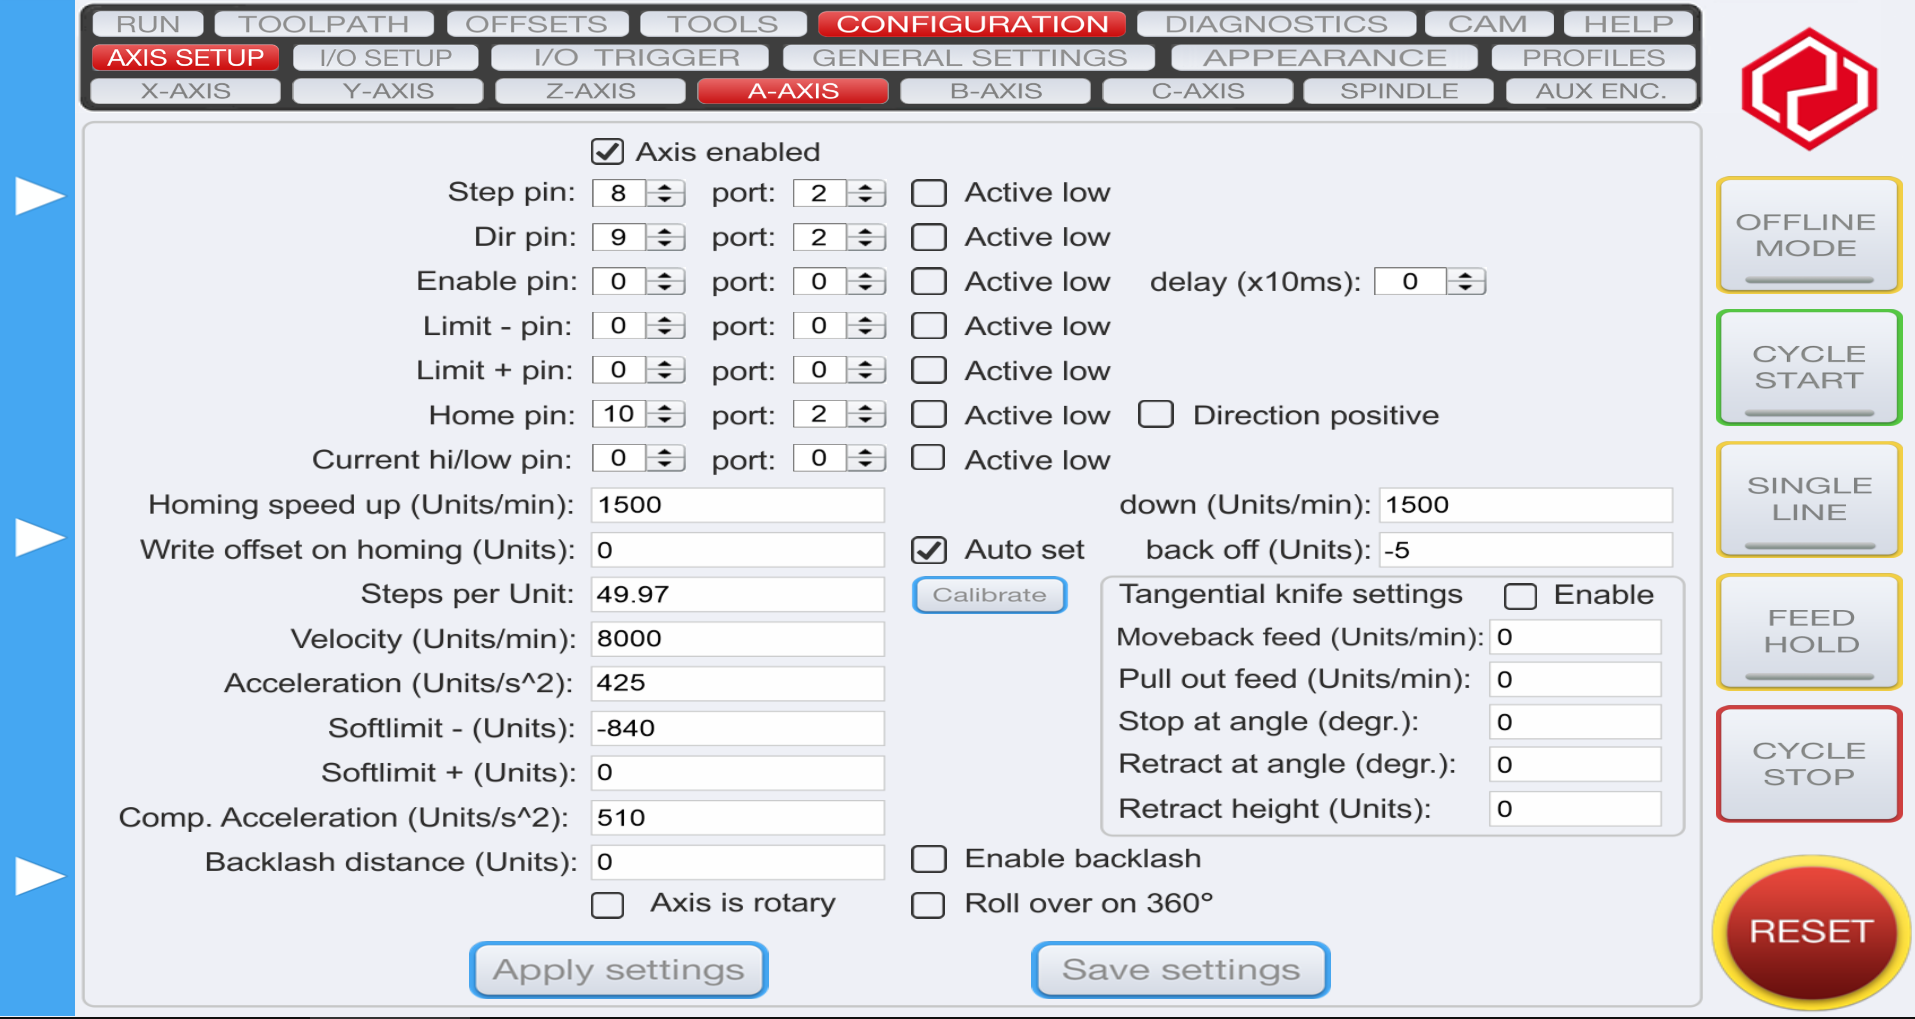
I just worked left to right, starting with the axis setup, where you put in the Step, direction & home switch pins, all the speeds and steps per unit etc. The key to working out the correct pins, is matching up the ‘Pos#’ from the gecko board to the ‘Pin#’ on the DB25 LPT cable, because that’s what the UC300 is looking at. The ‘Port’ refers to the LPT 2 that the ribbon cable is connected to. When its set up and you jog it to test, If an axis moves the wrong way then you can just click the ‘Acive Low’ checkbox and it’ll reverse.
Something to note is that if you look in the Y-Axis page, down the bottom I have clicked ‘slave axis’ and selected A-axis. The step and direction signals are still different for each driver, but this box sends the same output to both steppers when a Y-axis movement is sent. My two Y-axis steppers were moving in opposite directions, so you can see I have clicked the ‘active low’ on the Y axis direction pin.
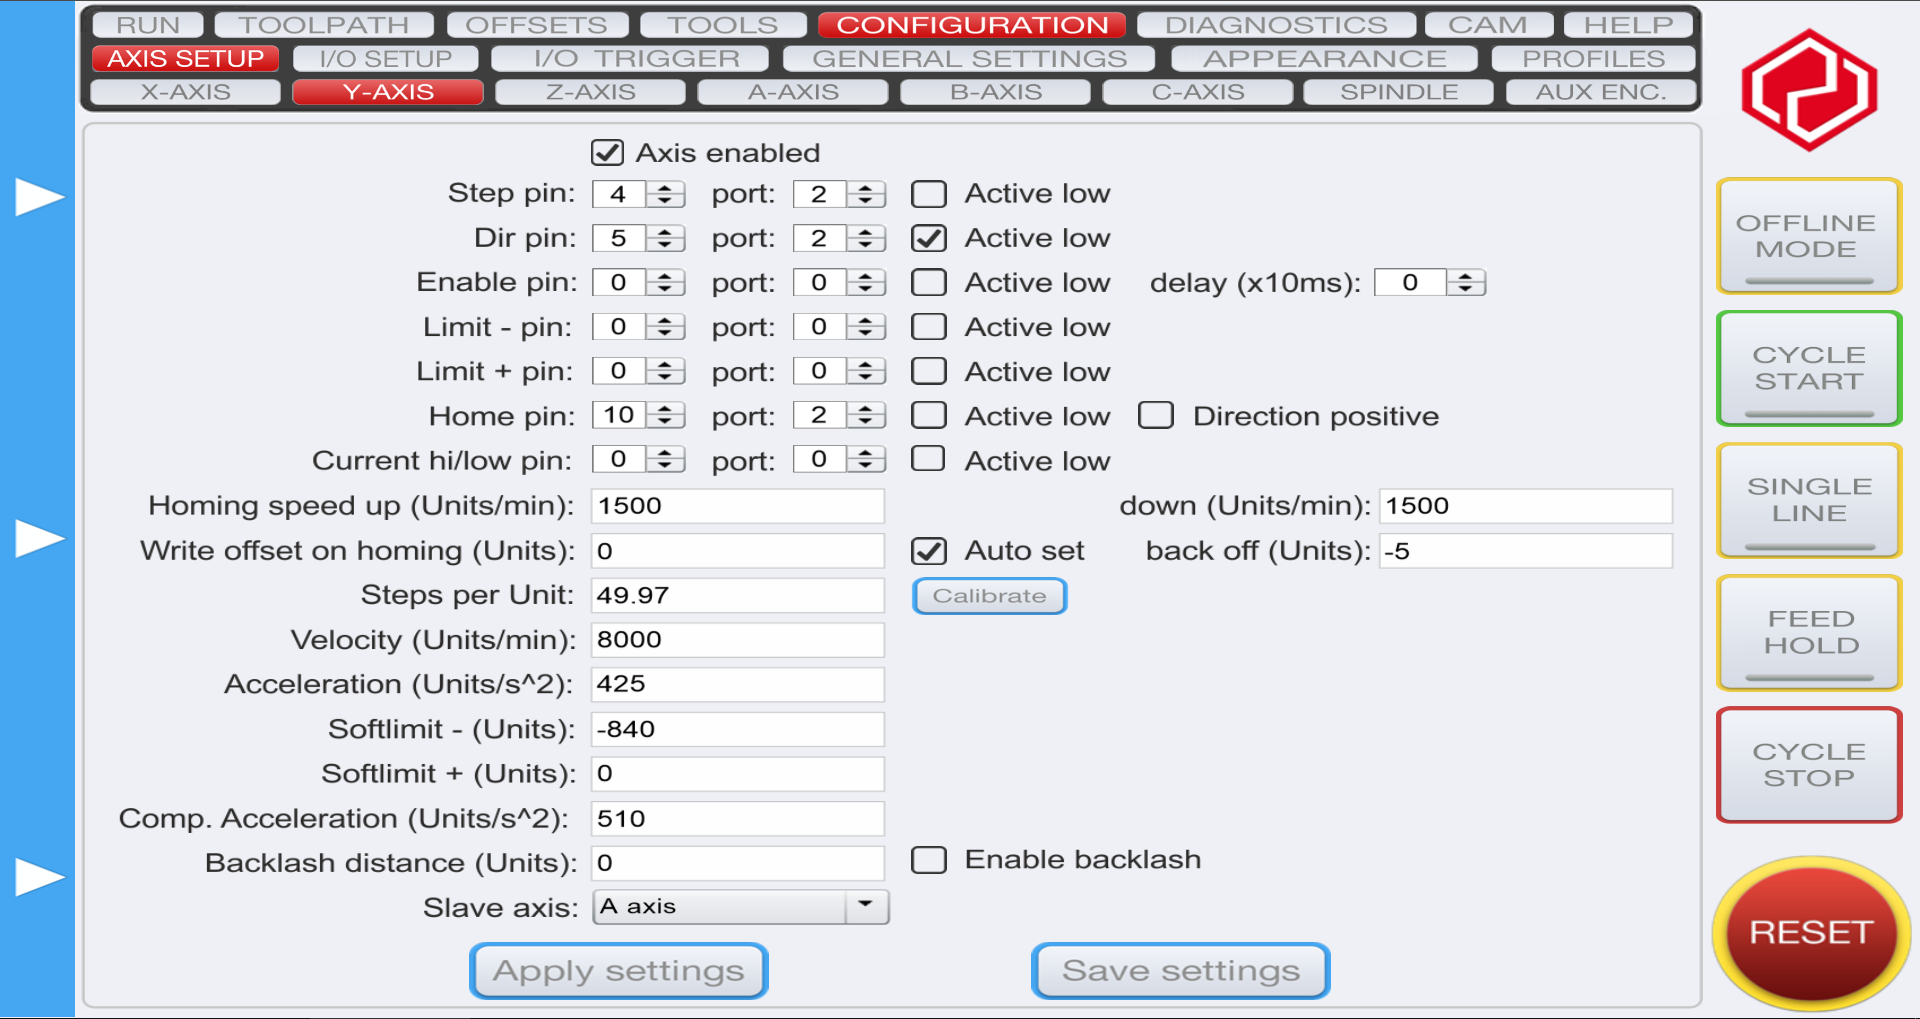
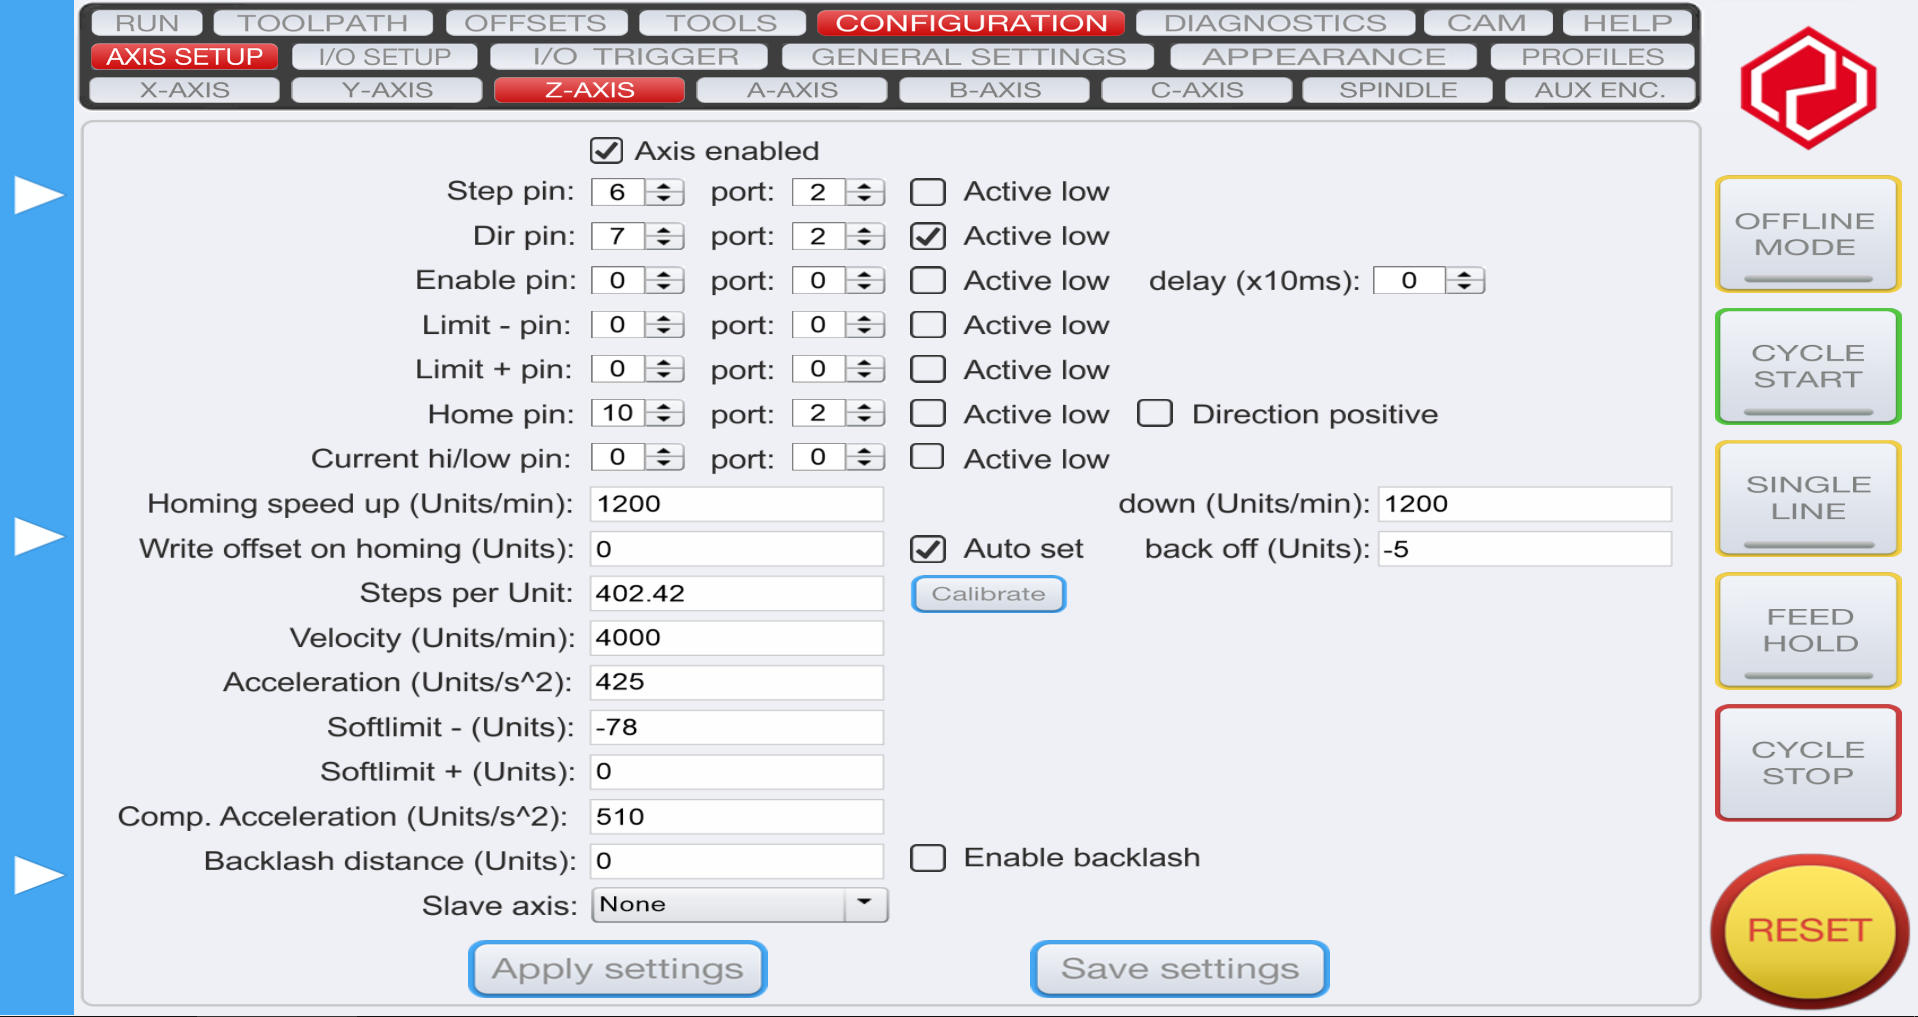
A VERY handy feature is the calibrate button next to the ‘steps per unit’ box. When you click this, ask asks for a distance to move, I selected 10mm, held my digital vernier in a position that would let me accurately measure the movement, then press ‘ok’ and it’ll slowly move the 10mm, you then punch in the actual movement, press ok again and it updates the steps per unit box in the settings with the correct number… so easy.
The homing is very easy to set up, though I did manage to stuff it up and unintentionally put in 41000mm/min instead of 1200mm/min as the homing feedrate. I didn’t catch it, but let me tell you that HDZ moves VERY quickly… I was quite fortunate in that the board errored out about 25mm from the top of the stroke and didn’t break anything.
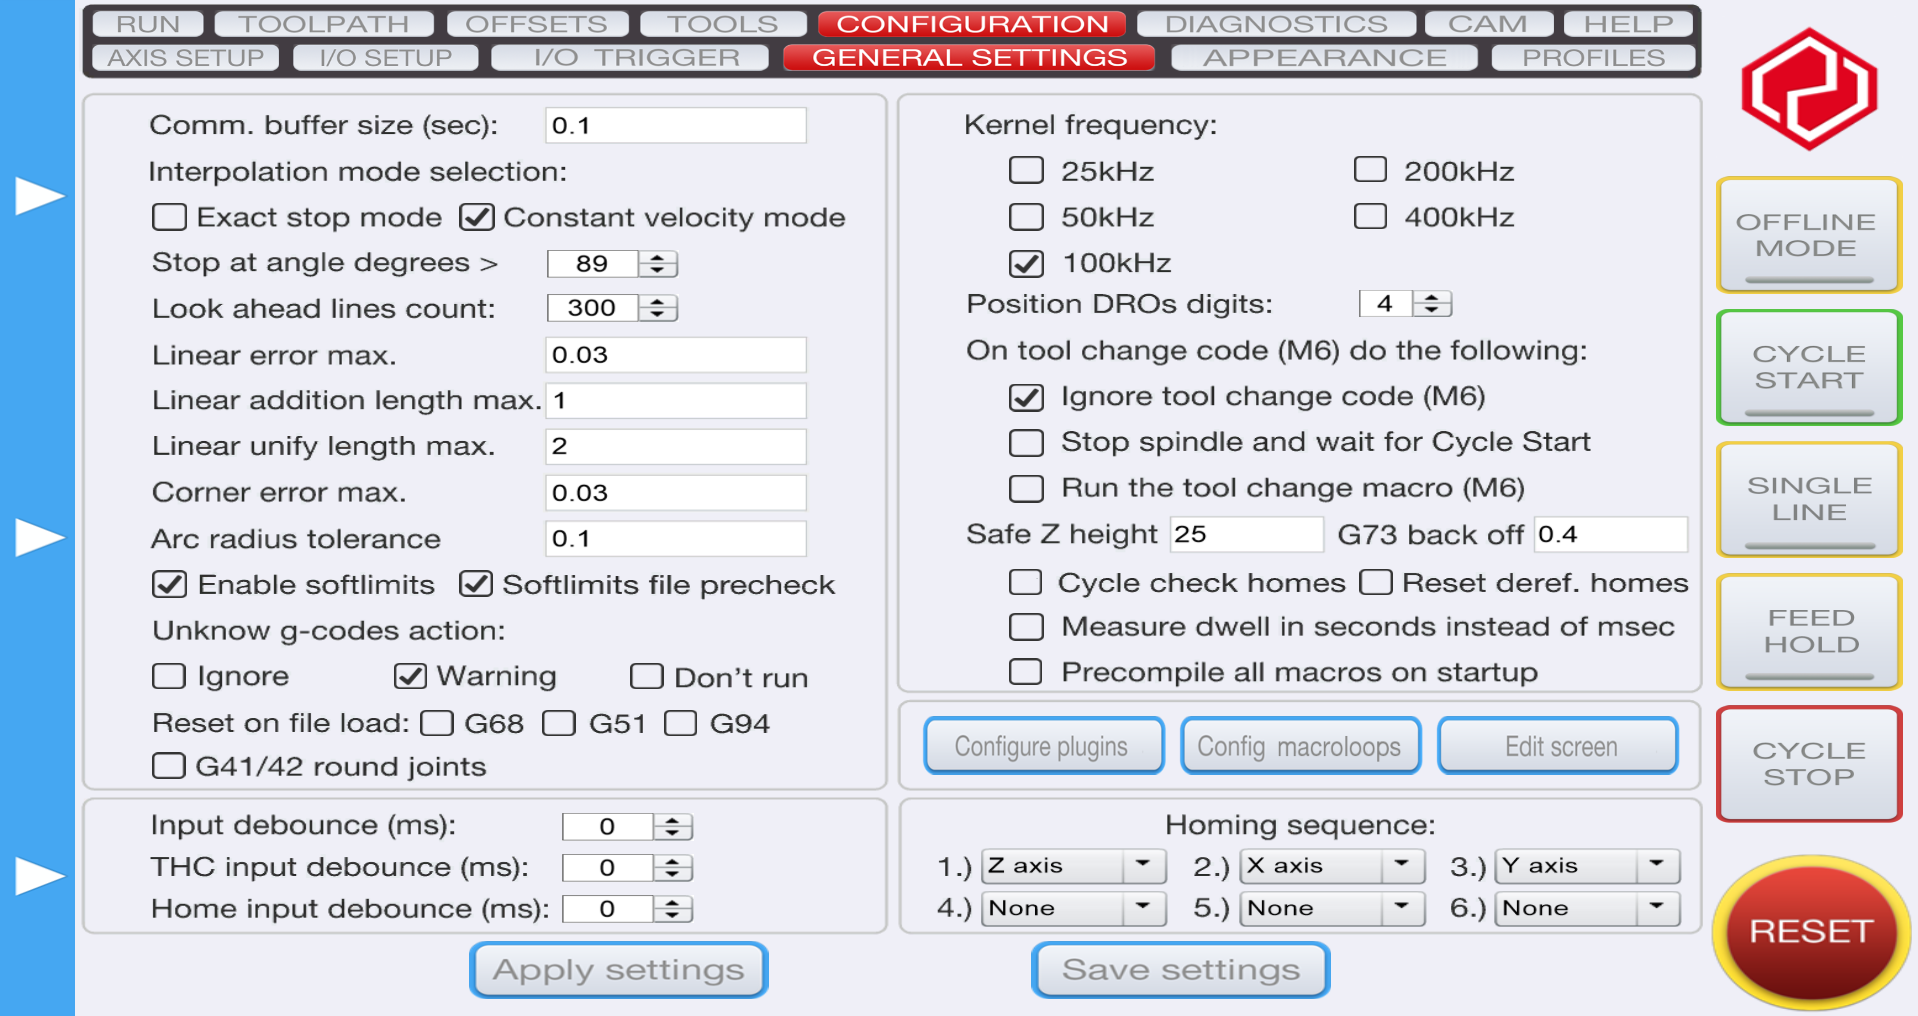
The I/O setup page is pretty straightforward, selecting the pins for E-stop, probe and charge pump. Charge pump is like a software e-stop, it won’t initialise or power up any of the steppers or spindle until you click reset on the screen, you can disable it but it doesn’t get in the way and is another layer of protection.

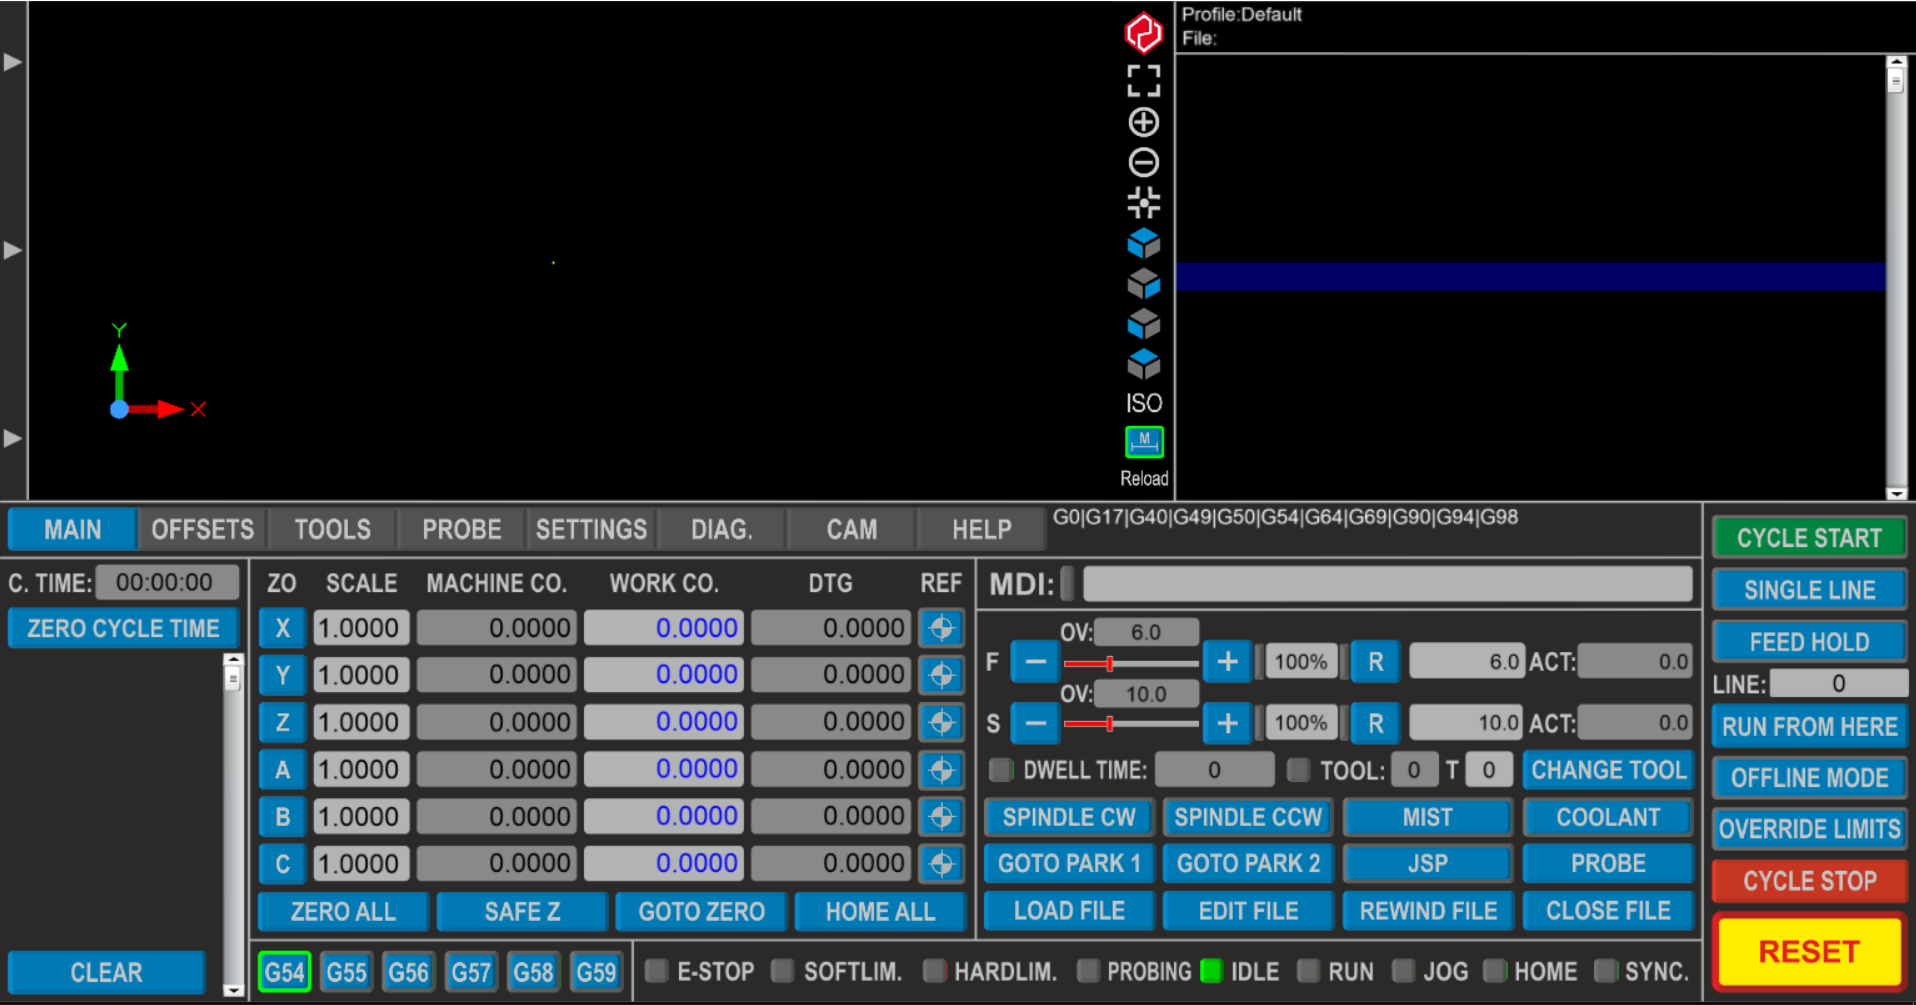
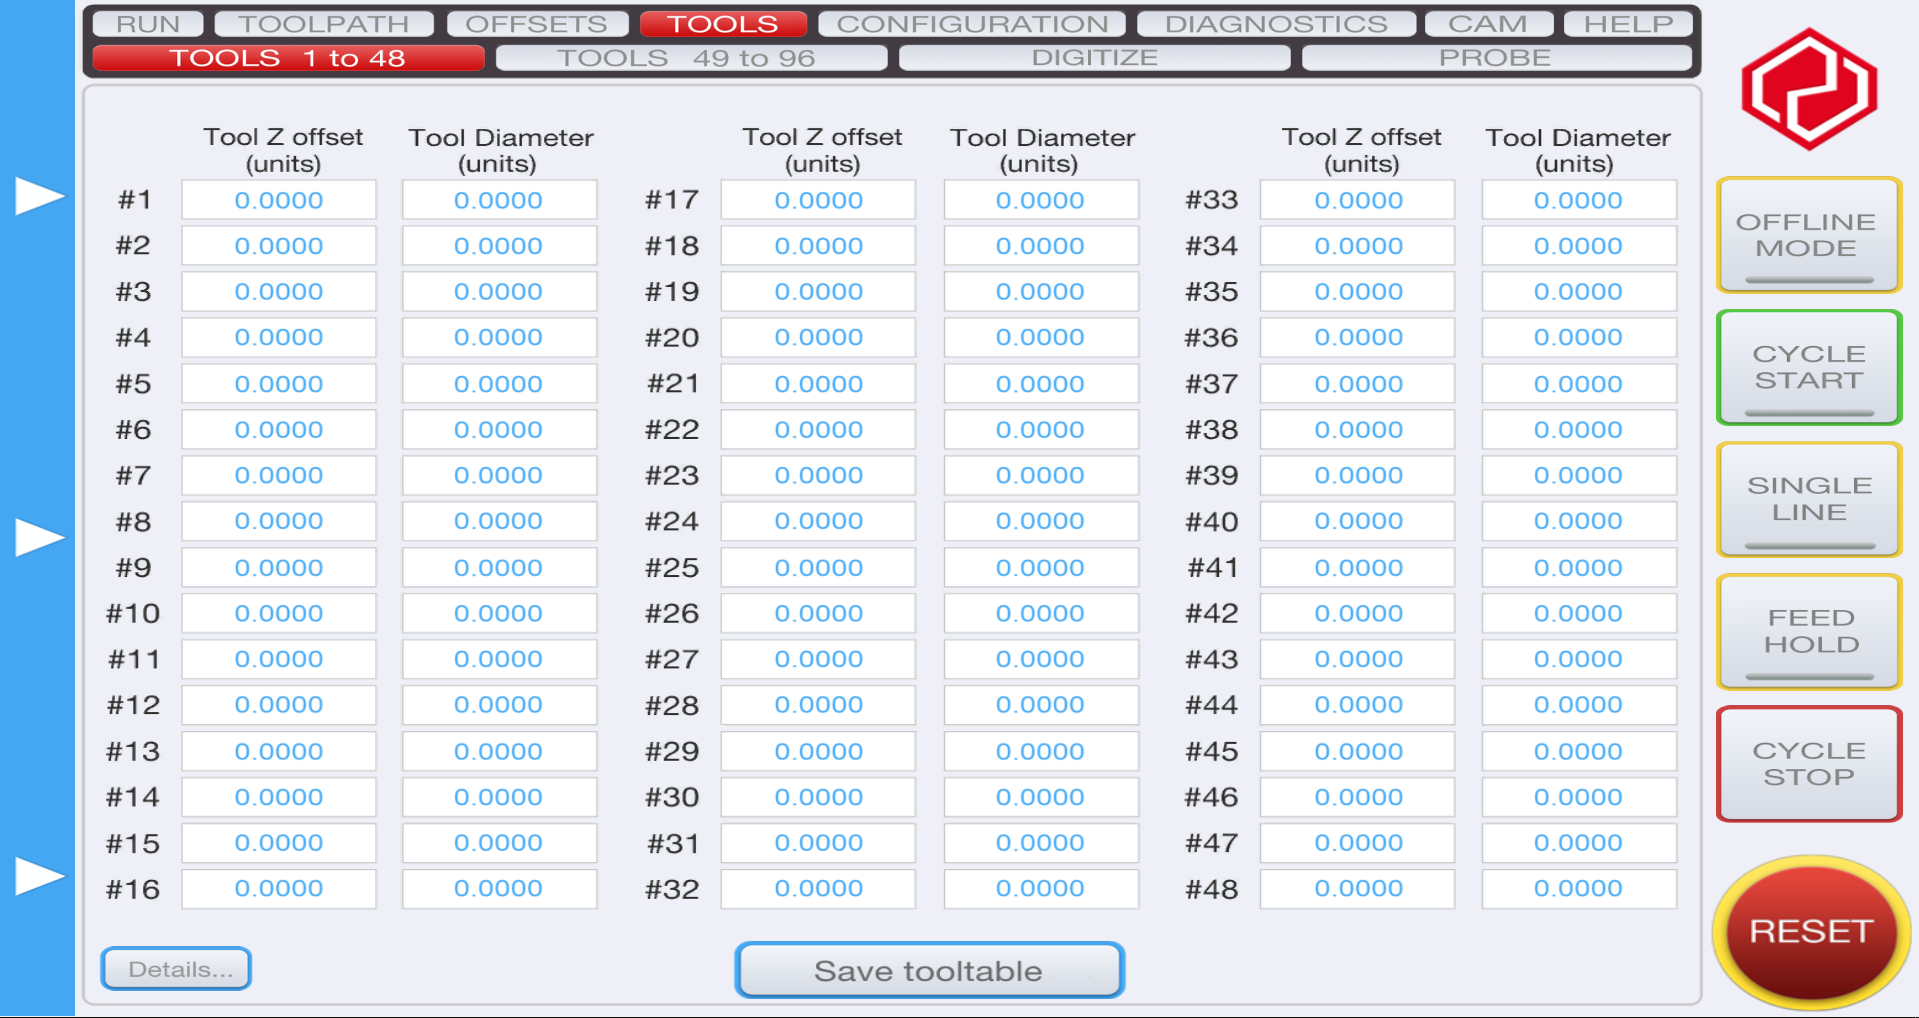
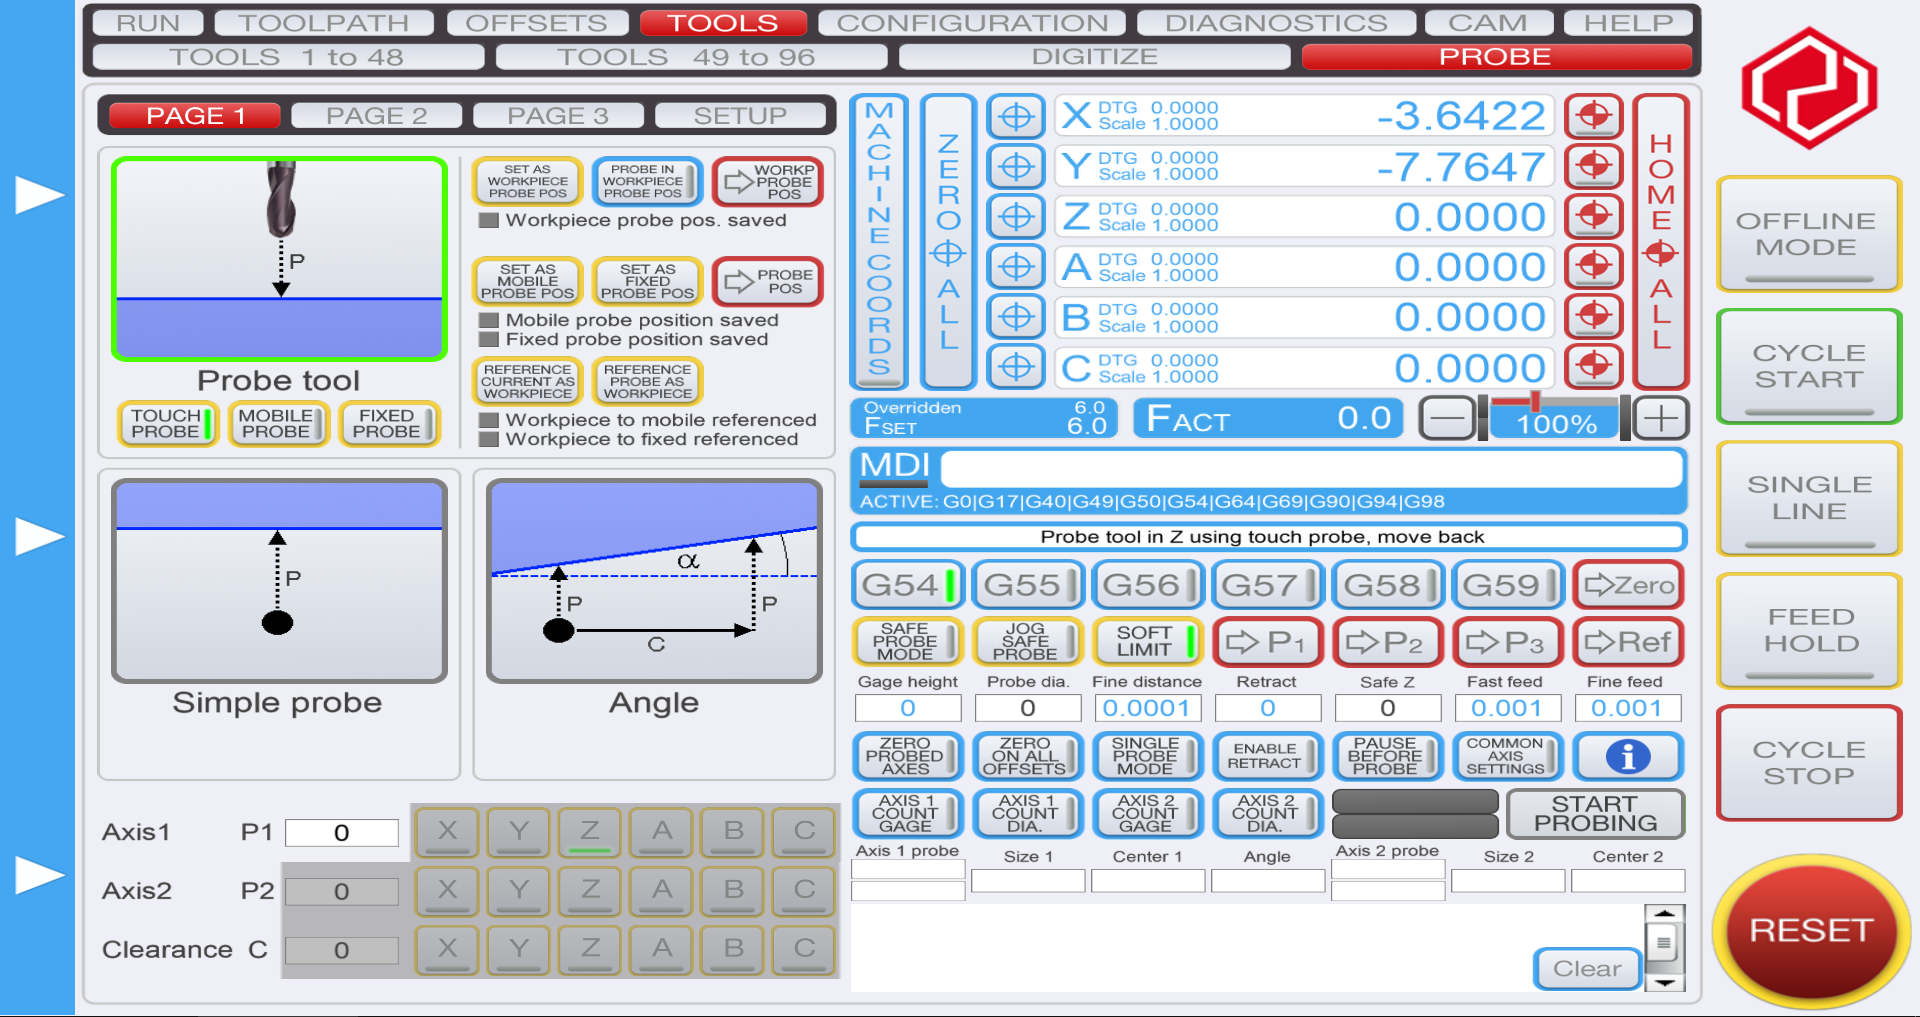
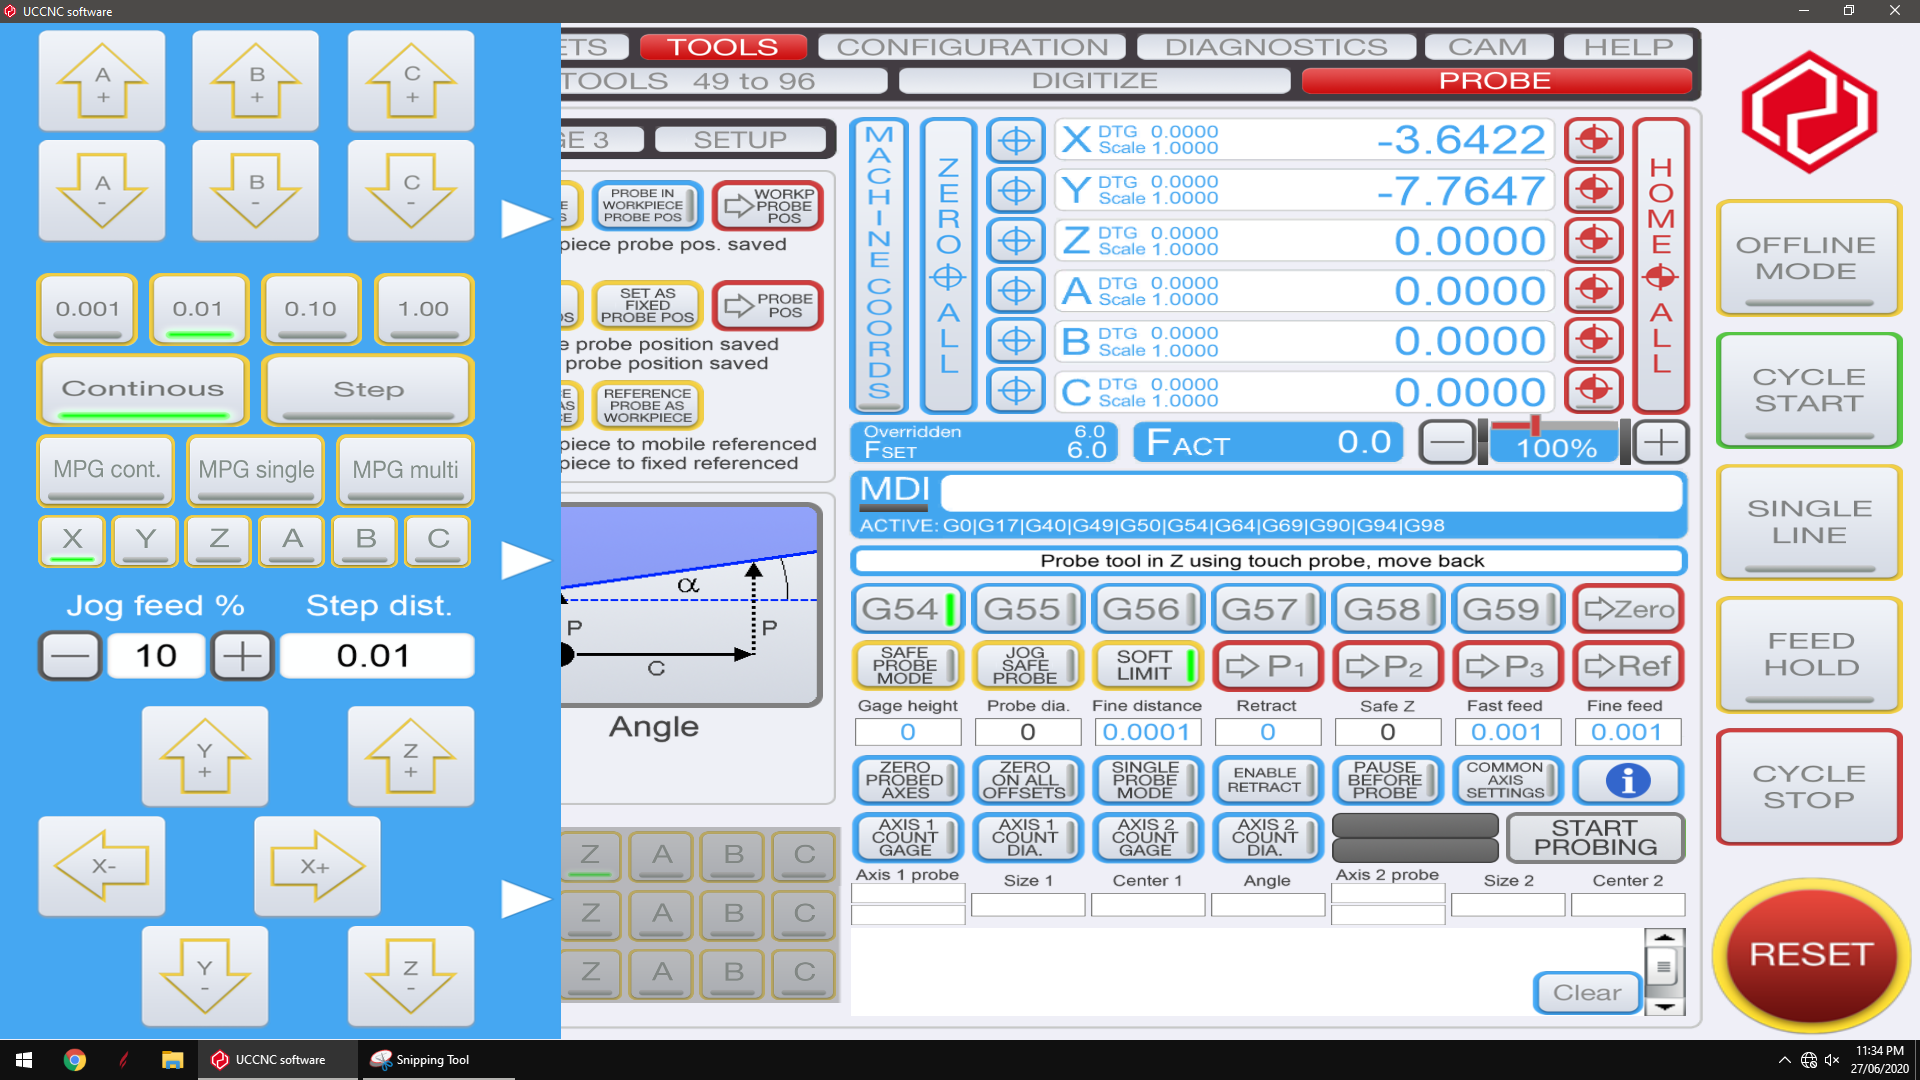
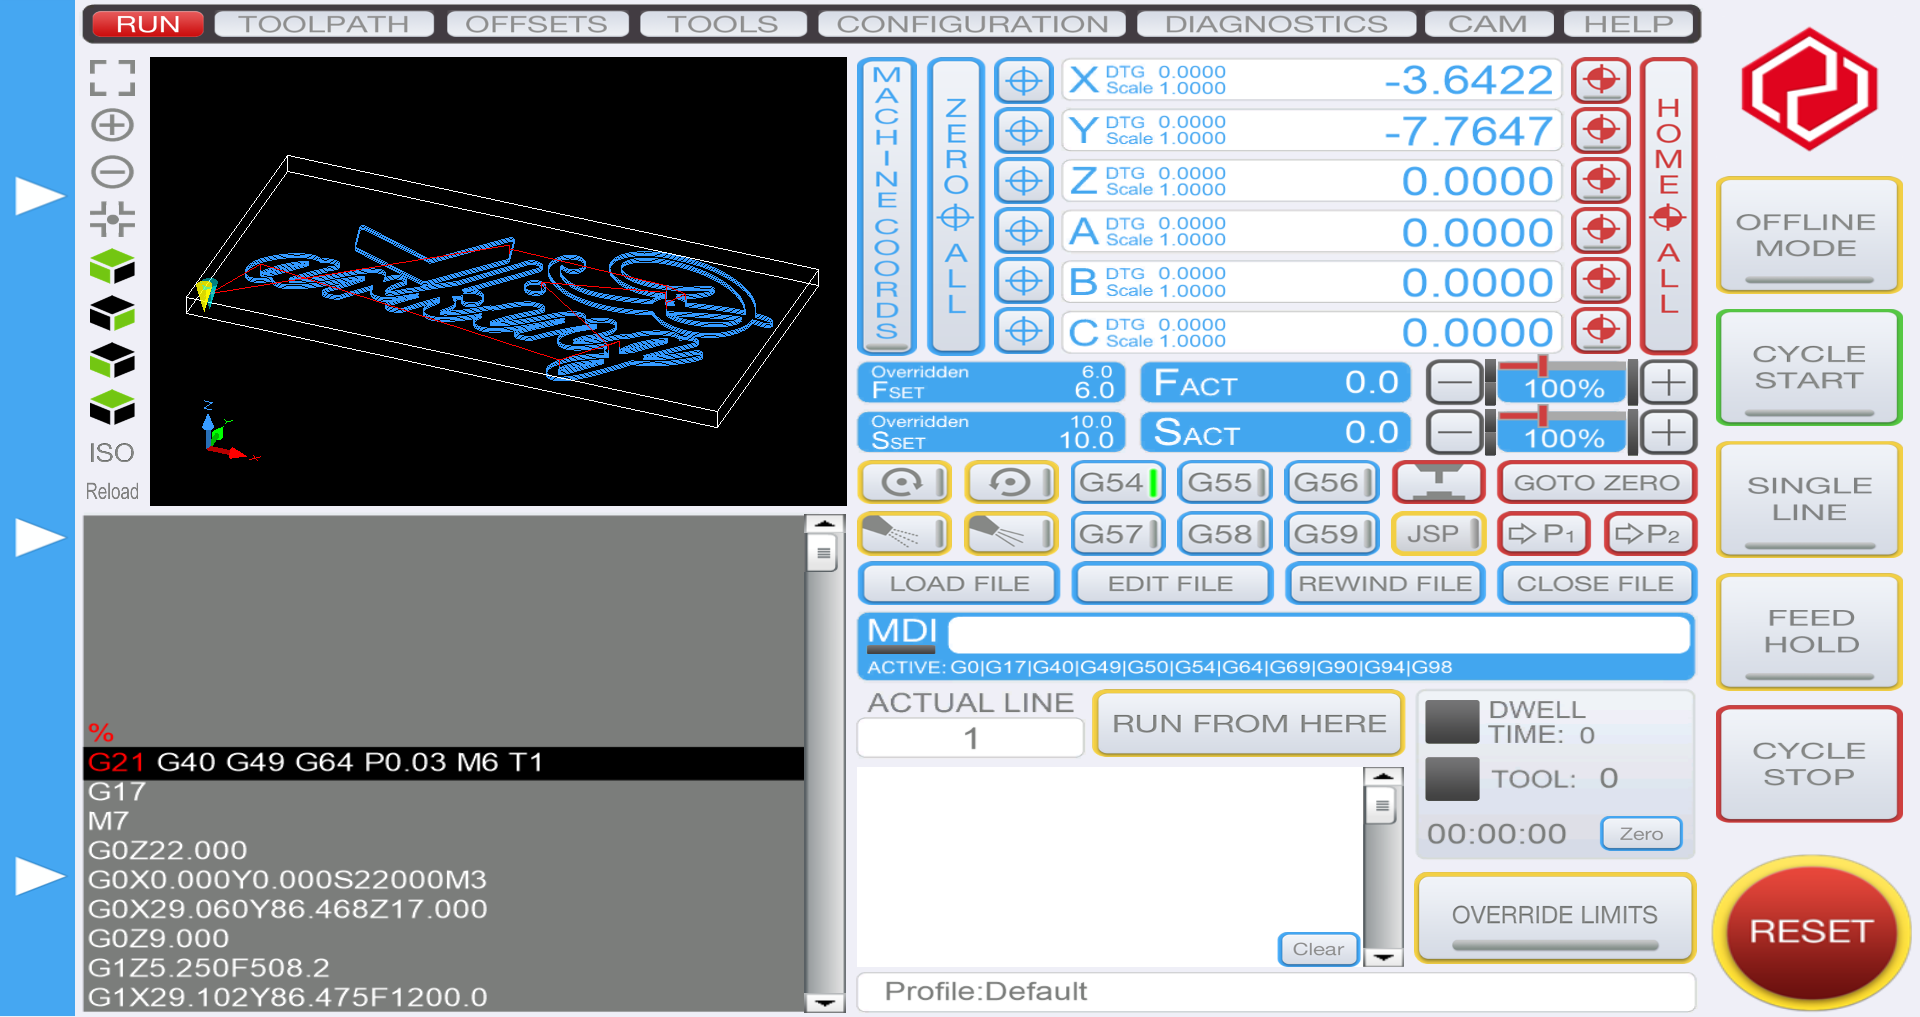
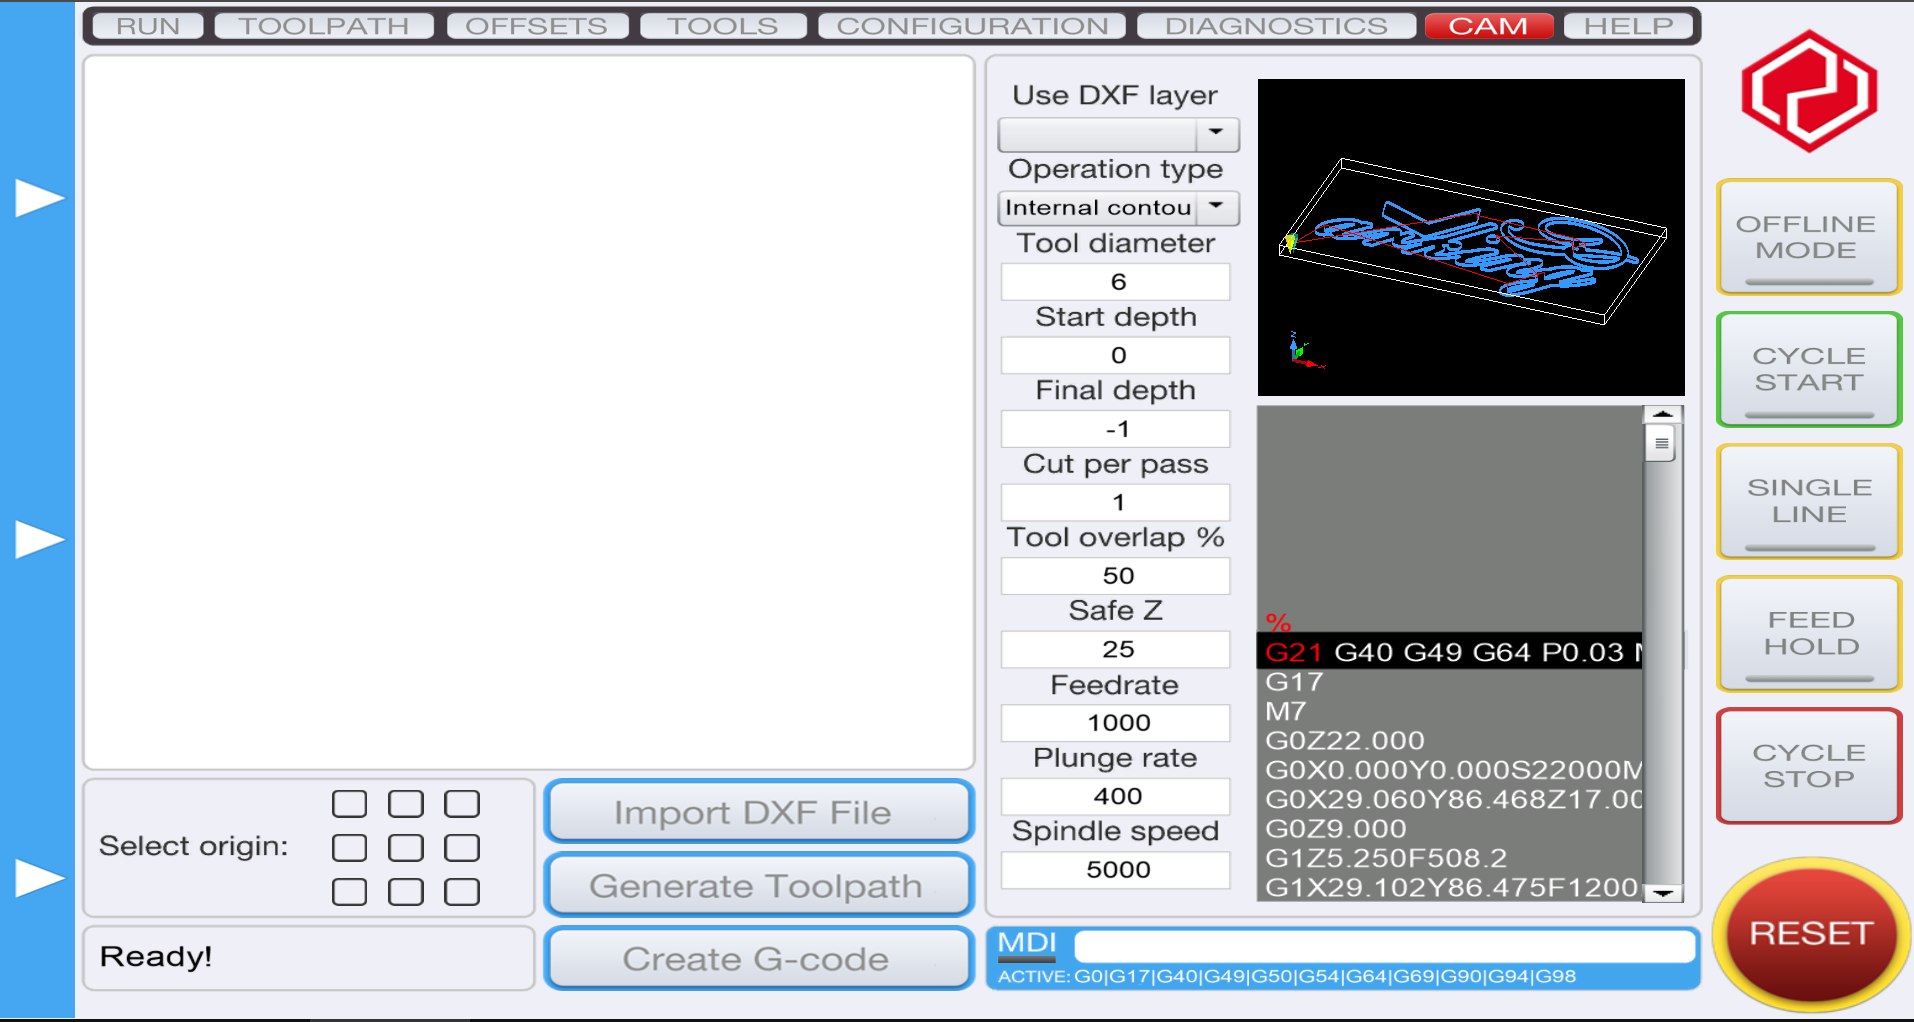
There are a few more screen dumps of the different screens – tool tables, probing, work offsets. Theres a built in conversational CAM page, where you can create simple toolpaths without any other software. I have a proper MPG pendant that I haven’t set up yet, but have read its fairly straightforward.

That’s about it, sorry it’s so long winded! If anyone wants any more info feel free, I just figured it was worth putting some words together – I would have gone this option straight away if I had my time again.
I only got to the stage of aircutting before I had to leave across the country for work, in 6 weeks I’ll get to give it a proper test. it aircuts at 4500mm/min quite nicely though 
I will create a dropbox folder with all the relevant manuals and notes and make it available for anyone who’s interested.