So, I have the Beaver CNC EasyTram plate, a Suckit Dust Boot, and a J Tech laser. I’ve also swapped the Y plates to shift the reachable volume 60-some millimeters +Y. I had printed custom spacers to make things work up to this point, but after doing the plate swap, I figured it was time for a refactor.
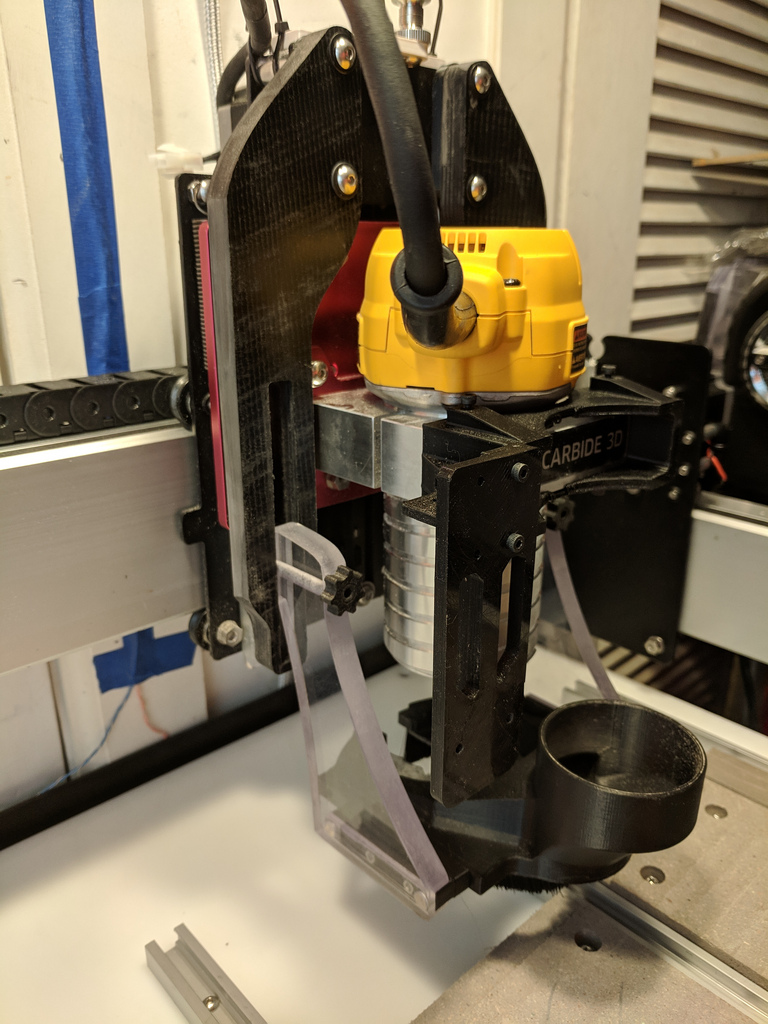
If I moved the slot in the mounting arms to put the clear dust boot holders another 8mm away from spindle-center in X, the sliders in the back would be clear of the Easy Tram’s tramming plate, and I could end up shifting the black mounting arms a total of 6-7mm closer to the Z plate. That would also allow me to widen the center gap between the black mounting arms by a few millimeters, gaining some desirable clearance.
As long as I was designing some custom mounting arms, I figured I’d do a few other alterations. I sacrificed a couple millimeters of dust boot travel to leave just a bit more material between the slot and the bottom edge, as that’s a weak spot (he said with experience). I also indented the bottom outside corners so they don’t run into the big PEM nut and screw that’s now sitting right there due to the plate swap. I slightly finessed the profile as well, mainly just to please my aesthetic sensibilities.
I printed new spacers to use between the black mount arms and the Z limit switch plate, and I also printed 8mm spacers for the boot so it would reach the now-wider clear arms. I had to go to the hardware store for #6-32 3/4" socket head cap screws to replace the stock ones that hold the magnet sliders to the Suckit body, but thankfully, on only my second stop, I found two unstolen pairs in the small parts drawers at Home Depot (a Saint Patrick’s Day miracle, if ever there was one) and could continue the project without delay. (The two spacer models, mount arm and boot body, are just a very few lines and circles, so I just bodged them in Fusion 360 while the print bed was preheating.)
I printed the spacers in black ABS, and I ran the new mount arms with a 1/8" end mill on the Shapeoko in half-inch black impact-resistant polycarbonate that I ordered from Amazon expressly for making these new mount arms. There was nothing special to machine them. I think I used 1000mm/min as a feed rate with plunge at half that and a couple millimeters or so depth of cut, but it seemed to be rather forgiving stuff.

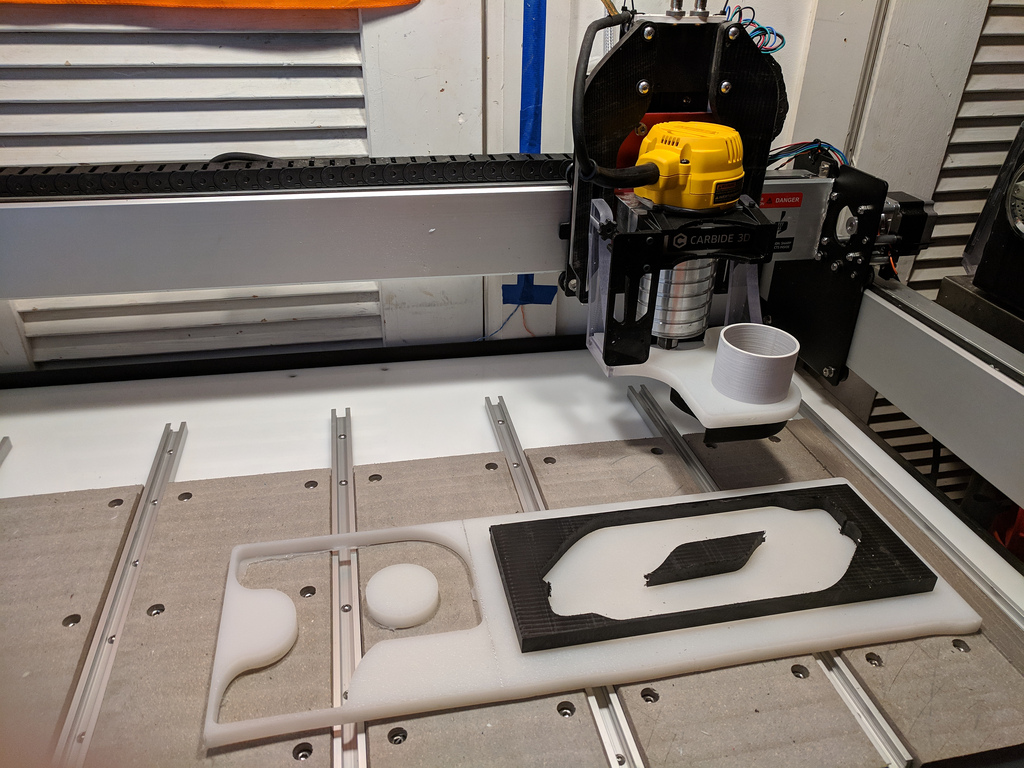
Of course, with the span between the clear holder arms now wider, I had to make a new mount plate for my SmokeSucker. I carefully pulled the two 3D printed parts off the old wooden bodge (cue the video of a guy with two wood blocks and a hammer bashing an innocent, well-serving accessory to bits). Then I actually got to use the new “ImportC2D” Inkscape extension to load the original SmokeSucker.c2d file into Inkscape. That worked wonderfully, and it was so much easier to shift nodes and objects about to reflect the new dimensions and design. Remind me to thank the guy who wrote that extension. 
I threw my changes together into the file (plus some little bits to make it easier to get exactly what I wanted for the toolpaths once I loaded the new SVG back into Carbide Create), and then it was back to the machine. This time I made the SmokeSucker out of some leftover HDPE cutting board stock (purchased at Sam’s Club, 15" x 20", half-inch thick, $9). 1/4" end mill, 1200mm/min (plunge half that), and also pretty forgiving, I’ve found. Also, it looks a bit like an impressionist’s starship.

So, with the new mount arms and spacers installed, I checked everything out. After throwing in a little sanding to finish things up, the dust boot was back to fully operational status. With the dimensional adjustments, everything’s got acceptable clearances again (or at last). I removed the spacer I had temporarily added for the X limit switch, and I disabled, determined, updated, and reenabled my soft limit on X. Using UGS, I now have as much reach in X as I had before the plate swap. (Carbide Motion has a built-in limit slightly less, and obviously I can reach that, too.)
For the new SmokeSucker, I wanted it to be held magnetically, just like the Suckit dust boot. I figured I’d be able to make magnet pockets on the edge since I made SmokeSucker Mk. II in HDPE, and it did indeed work out. I scribed a center line down the side, then marked the centers for 6mm disc magnet pockets. I then started the holes by hand, spinning a 1/16" drill bit between my fingertips. Then it was step up a size or few at a time until I had pockets that I could just press fit the magnets into. With the plate successfully adorned with magnets, I then used hot glue to install the 3D printed parts (which are almost a friction fit even without help).
I think I’m about done with non-project projects for a bit now (except wasteboard and fixturing things, which are always ongoing). I’m rather looking forward to enjoying some more actual projects now that I have everything just the way I’ve wanted. And my, do I ever feel accomplished. 