Finished my aluminum tooling plate base for the Shapeoko 3 and fabricated a dedicated stand to mount the assembly.
The stand has casters with internal adjustable pads to stabilize the unit where the floor my not be level. I plan on adding a
drawer unit to the base later on for storage.
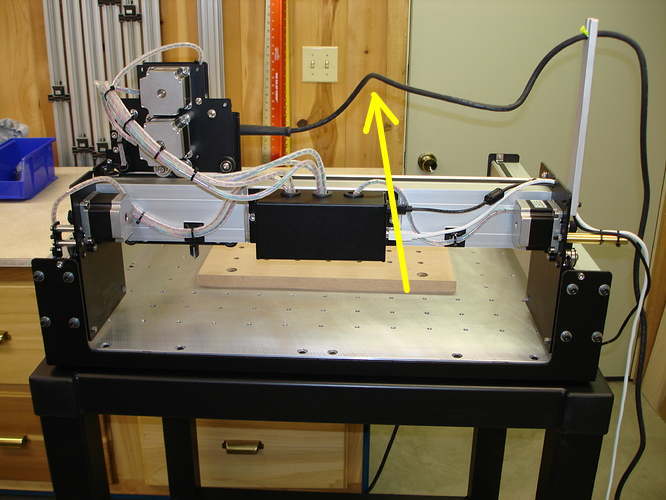
I used some spiral wrap for wire management and added two different posts to hold the power cord and USB cable plus
one for the router power cord.
Ran " Hello World " with success !
Made a spoil board and machined the top using jog this time and it came out great. Still thing of different work hold options depending on the project.
What dust shoes do most of you like ? Another option on the list.
Man that bench is slick! I love it!. Do you have and plans for storage on the lower shelf?
I had an aluminium base for my SO3 and loved it, I have upgraded to the XXL and haven’t found any aluminium in my price range to replace the standard MDF with.
Yes, I plan to add storage later to the router table. Still thinking about what I want do there. A later project.
I have a Vector Art 3D model of an anchor I’m going to try first. A gift for my daughter who is active
in her sorority Delta Gamma ,with the anchor as their symbol.
Happy with the quality and support from Carbide 3D, too.
I see from your 2nd photo down that you have one of those rare ‘sky hooks’ holding up your spindle power cable. Could you please advise where you purchased it from as I would like to get a couple myself.
I made the cord bracket from 1/4" x 1" x 9" long piece of aluminum bar stock.
Drilled and slotted for the cord at the top and drilled two clearance holes at the
bottom for two 8-32 socket head cap screws. Transferred the hole hole locations and tapped the side plate for mounting. I make you a sketch if needed.


 I can make a tracing of the cord ?