After over a year of making items with my XXL, I finally got caught up enough (thanks to the current crappy situation) to make a few major gifts for those in my family that have put up with me!
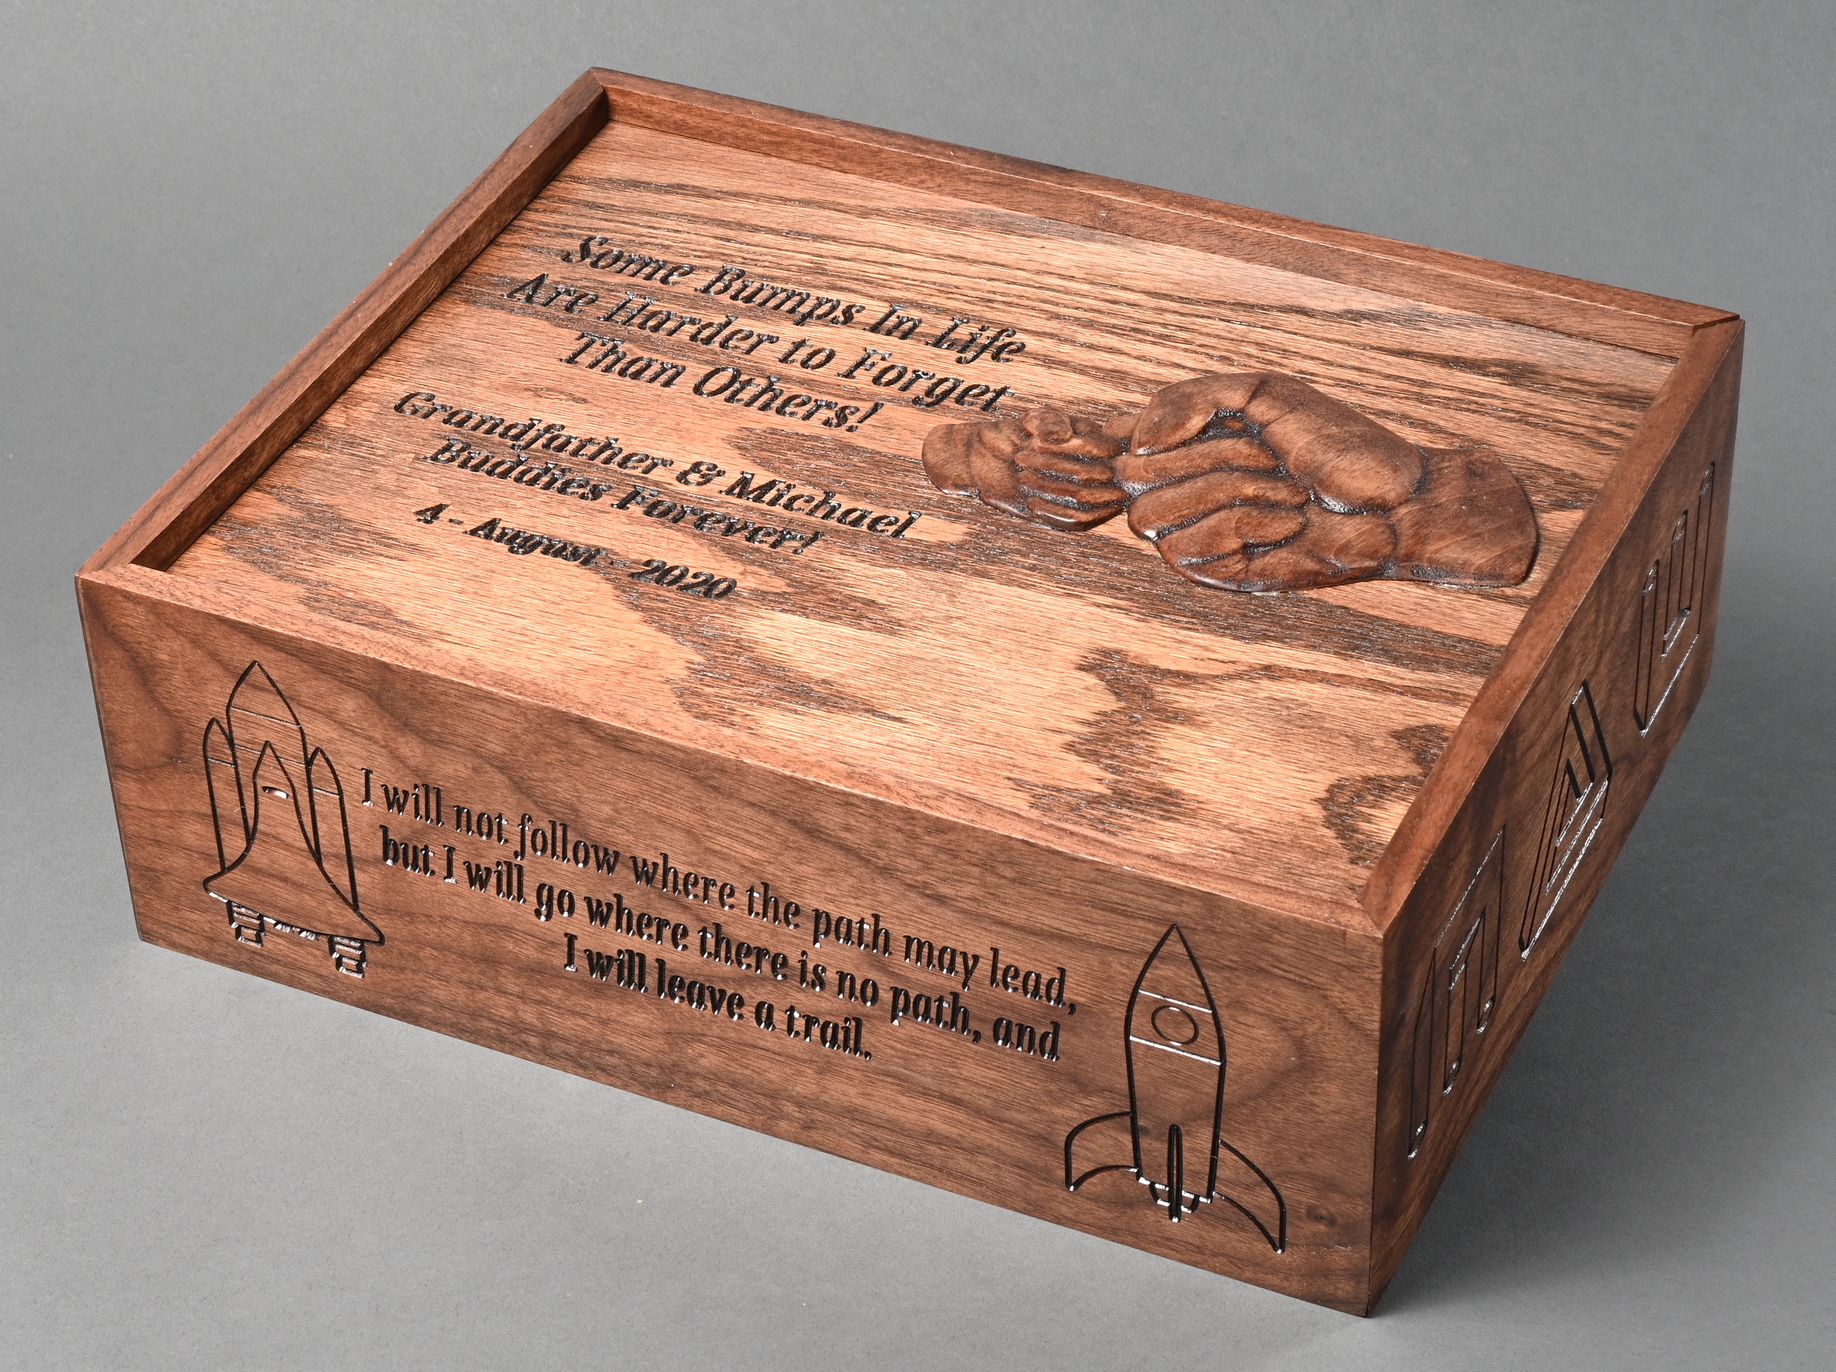
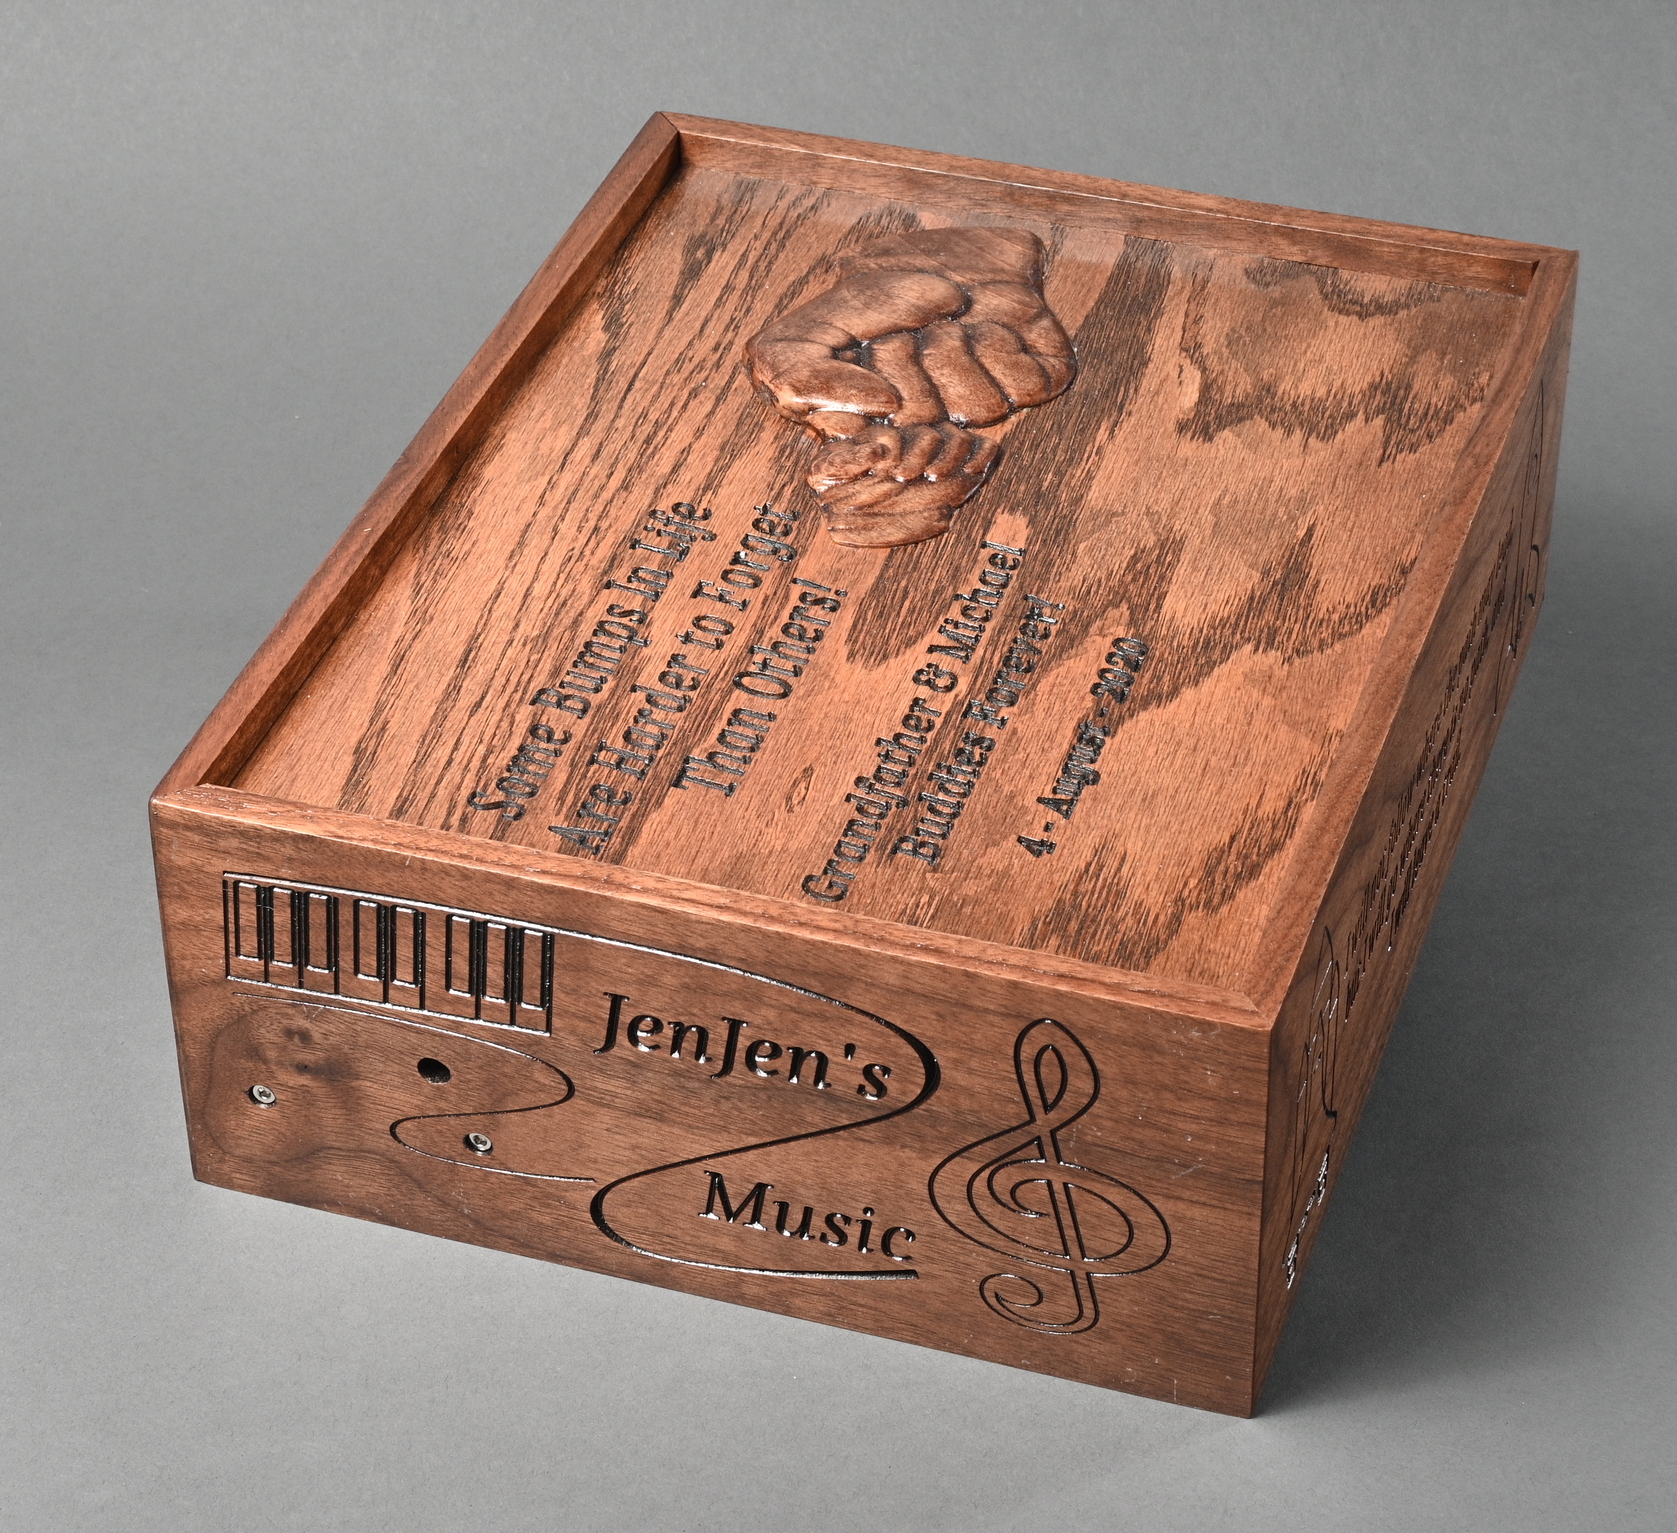
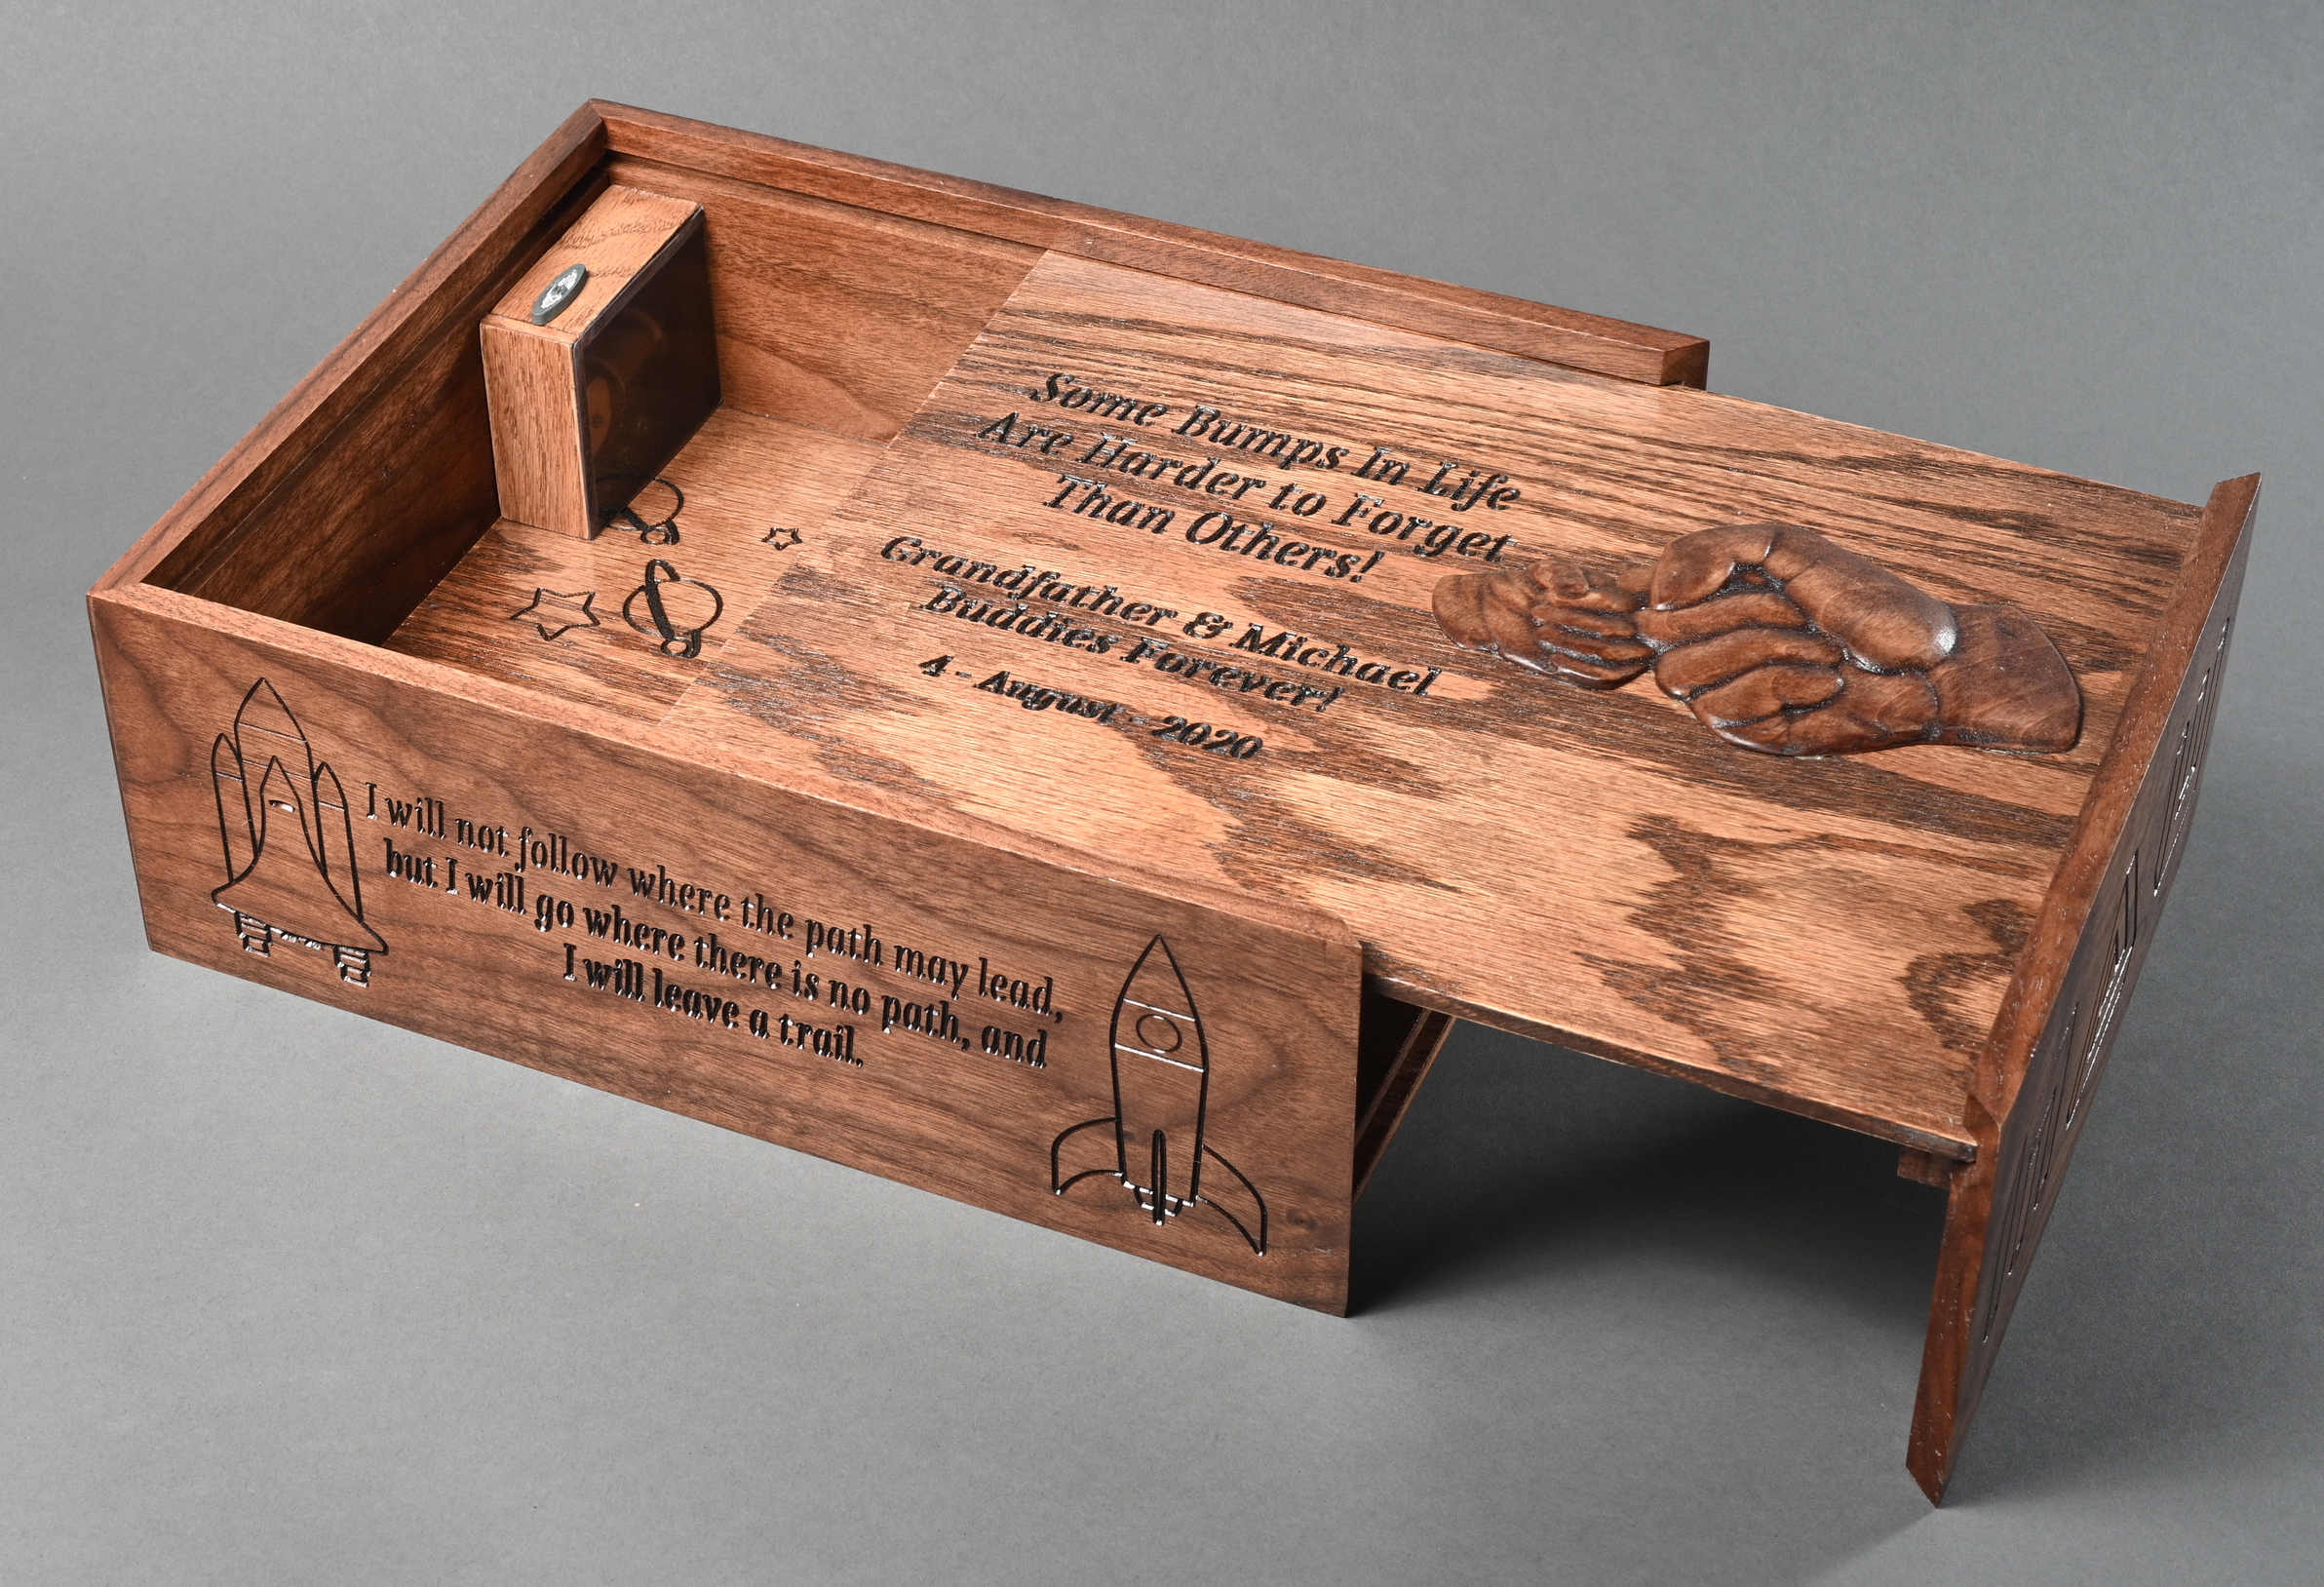
This box project was made for my Grandson’s 6th birthday. I guess I’m in charge of creating those lasting memories that we all talk about. Hopefully, this one will hang around long enough for him to remember us old folks.
I decorated all the flat sides with vcarving things that he’s expressed interest in for a few years. Unsurprisingly, the most difficult item was one that had the most detail in the graphic file. I had to edit many vectors to simplify the detail, but preserve it at the same time.
Of course, the intensity / apprehension was there at all stages, because the vcarving had to be done and finished before the box could be assembled. Then there was the ubiquitous sliding lid to be engineered to fit. While I was planning, I got the bright idea to add a hidden compartment for those “secrets” we all had when we were young. That compartment required some engineering to create a strong magnetic latching mechanism.
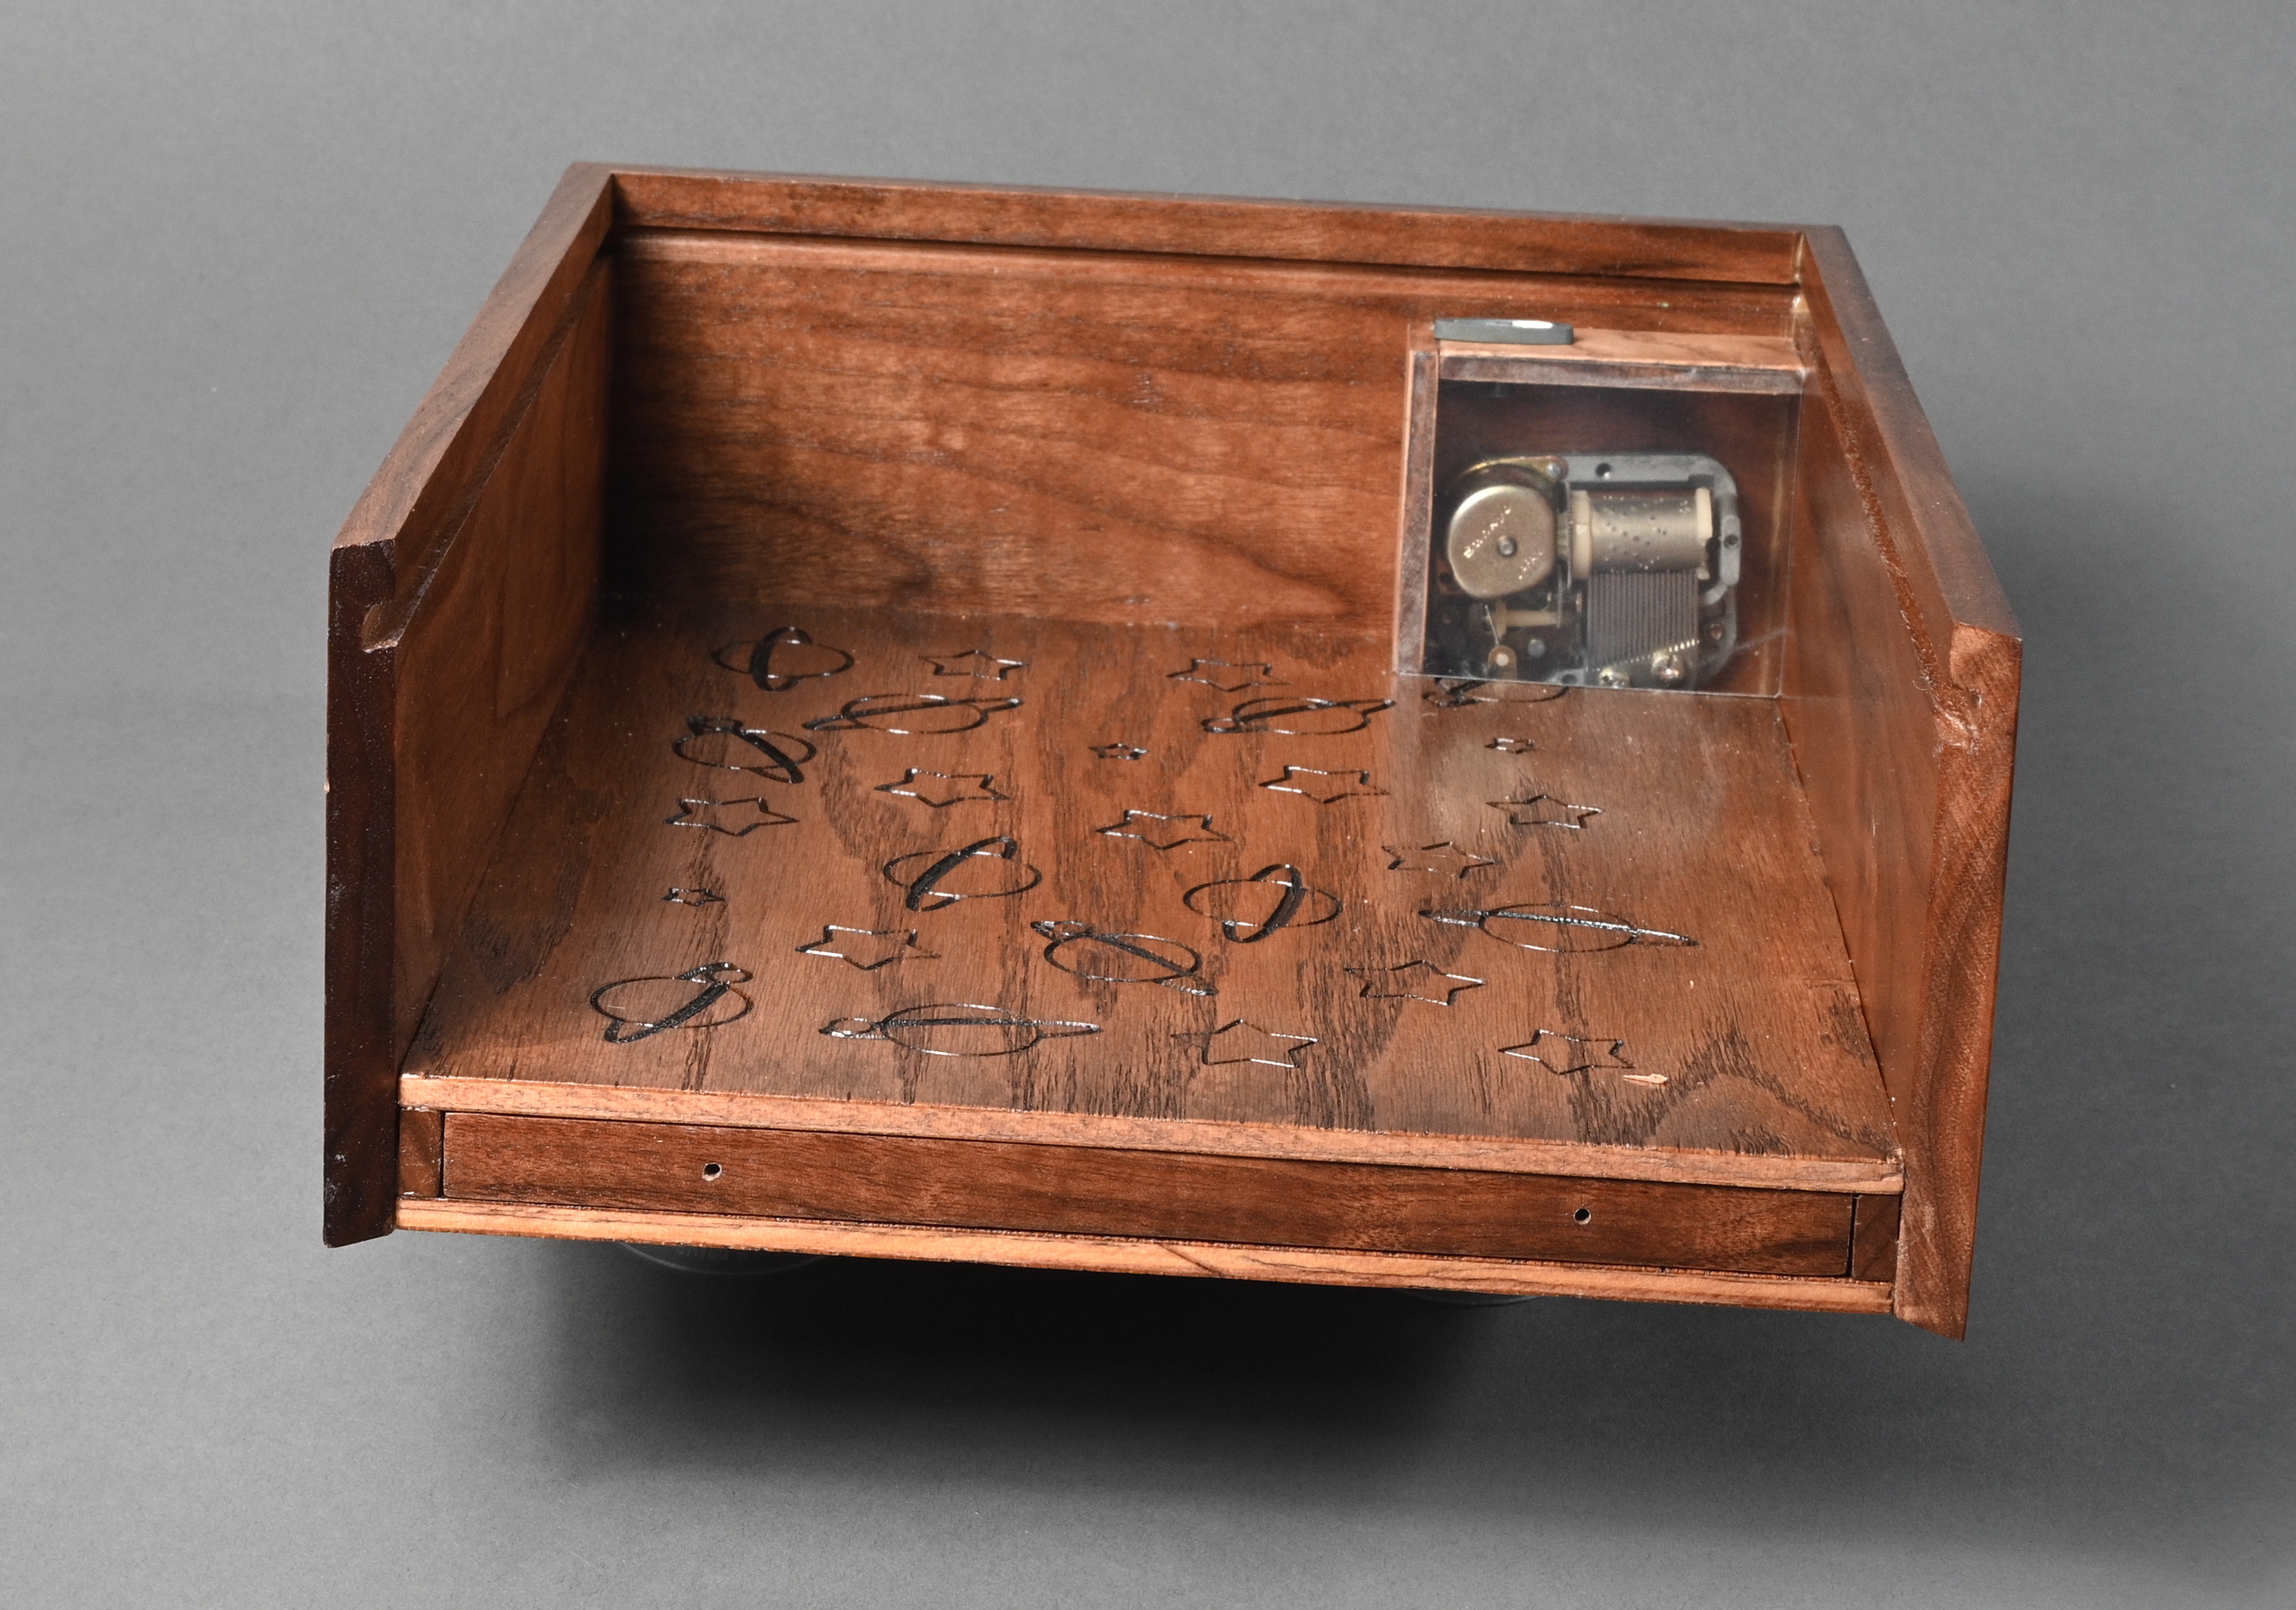
One of the key components was the addition of a windup music box that was saved from an old jewelry box that I gave my wife back in the day. Our Grandson has always been fascinated by the simplicity of a music box compared to his parents iPhone music. Go figger.
I made it out of walnut planks that came sanded and sized, but there were enough variations in thickness to cause me to do lots of fitting to the inside components. The finishing was actually a cherry stain that I added until I got the darkness needed. In the process, I was able to darken the vcarving to an acceptable level.
In any case, the Grandson likes it, and he alternately hides and unhides various items. I wish that I had had a hidden compartment to hide all my lousy school report cards!
I was able to find just the right 3D object (cut from poplar and glued to this top panel) to describe one thing that my Grandson and I have been doing for several years … fist bump! He’s left handed, so I had to remember to reverse it.
Since my Grandson was two, he’s been helping me drive the little Kubota tractor around, and his other grandfather has John Deere tractors. So the John Deere logo “Nothing Runs Like A Deere”, was so detailed that I had to make test cuts to get just the right detail.
Another point here was that I had to select the size of some of the graphics, because the vcarve can be quite deep and will cut through the thickness of the plank.
The music box was screwed through this end of the box, because a music box needs a sounding board to actually produce sound. I provided a place inside for the winding key, so miscreant visitors wouldn’t over wind the mechanism. A little anecdote on the music box: the plastic used to hold the cast parts together is now around 50 years old! I had to use quite a bit of super glue to hold the cracks in it together. Maybe it will last another half century!
I decided to use plexi to cover the music box mechism rather than wood. It was a good call, because my Grandson will sit there and observe the mechanism making music.
There are rather large embedded magnets in this piece that match embedded magnets in the internal side rails and also in the side that slides the top lid out. The magnets just hold it all together tight, as I did not want a locking mechanism. (So, Mom and Dad can sneak an occasional peek? )
Steve, I started by sealing with shellac before cutting. After cutting, I applied an espresso stain but quickly wiped it off the surface. When that dried in the vcarve, I lightly sanded the flat surfaces to remove the shellac as much as possible. That’s when I started the cherry stain process. I think I applied the stain 3 times. That also darkened the vcarve areas. Simple?
EDIT: The point was that I wanted a “brown” for the vcarve and not a “black.”