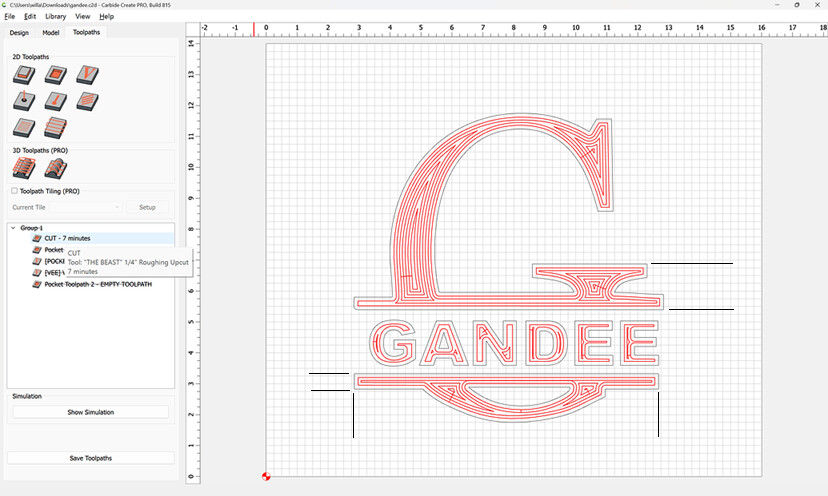
if I do a contour cut its either to small or to large or even with no offset is to small to fit and there is a gap
outside right offset is to large also to drop in the inlay
so I am stuck
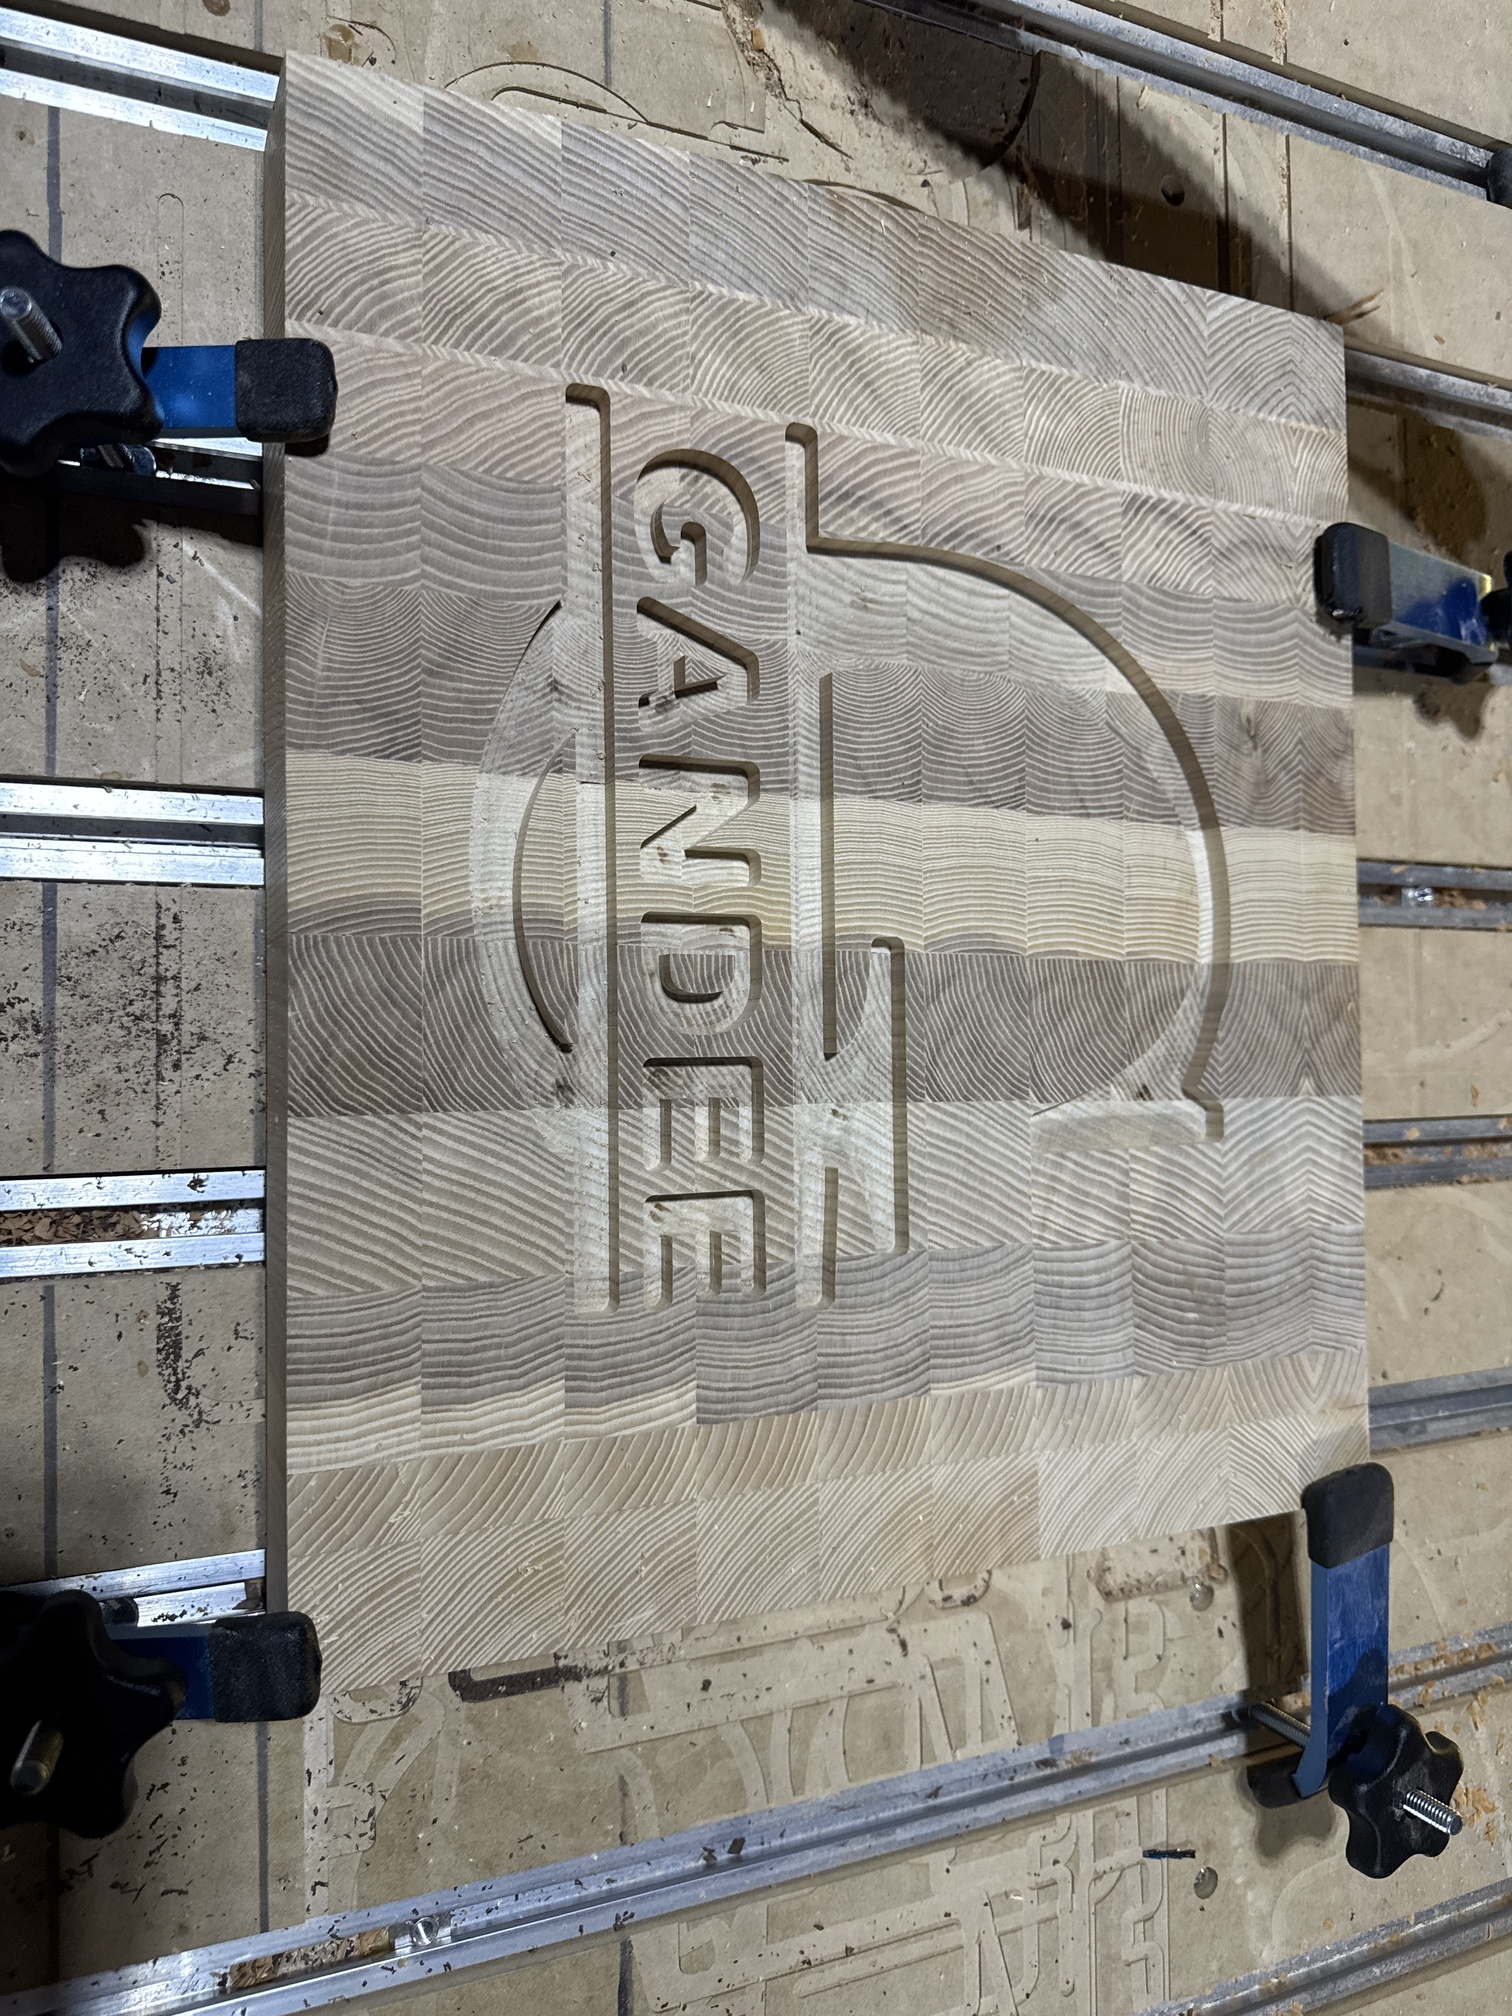
I only have 1 inlay walnut left from the kit for this board so I have to be dead on
Outside right is correct for the plug. The problem is even if the pocket & plug are exactly the right size, it won’t fit. It will be “press fit”, which means you’d have to hammer it in, or it just won’t fit.
Cut it outside right & measure a couple places to see what the difference in size actually is.
Measure where you can get an accurate reading…
So your plug needs to be just a smidge smaller than the pocket. I usually go about 0.010" clearance. Start with 0.005" & see how it fits. You can always take a little more off, but you can’t add stock.
You can adjust by offsetting the geometry by the distance you want.
Or you can lie to the software. If you program the path with a 0.240" tool, but cut with a 0.250 tool, you will get 0.005" clearance.