I am looking to make a bunch of blanks in advance and add customization (names, icons, etc) as the orders come in.
I am looking for the best techniques to zero things so that the customizations are placed correctly on the wooden blank. The blanks have rounded edges.
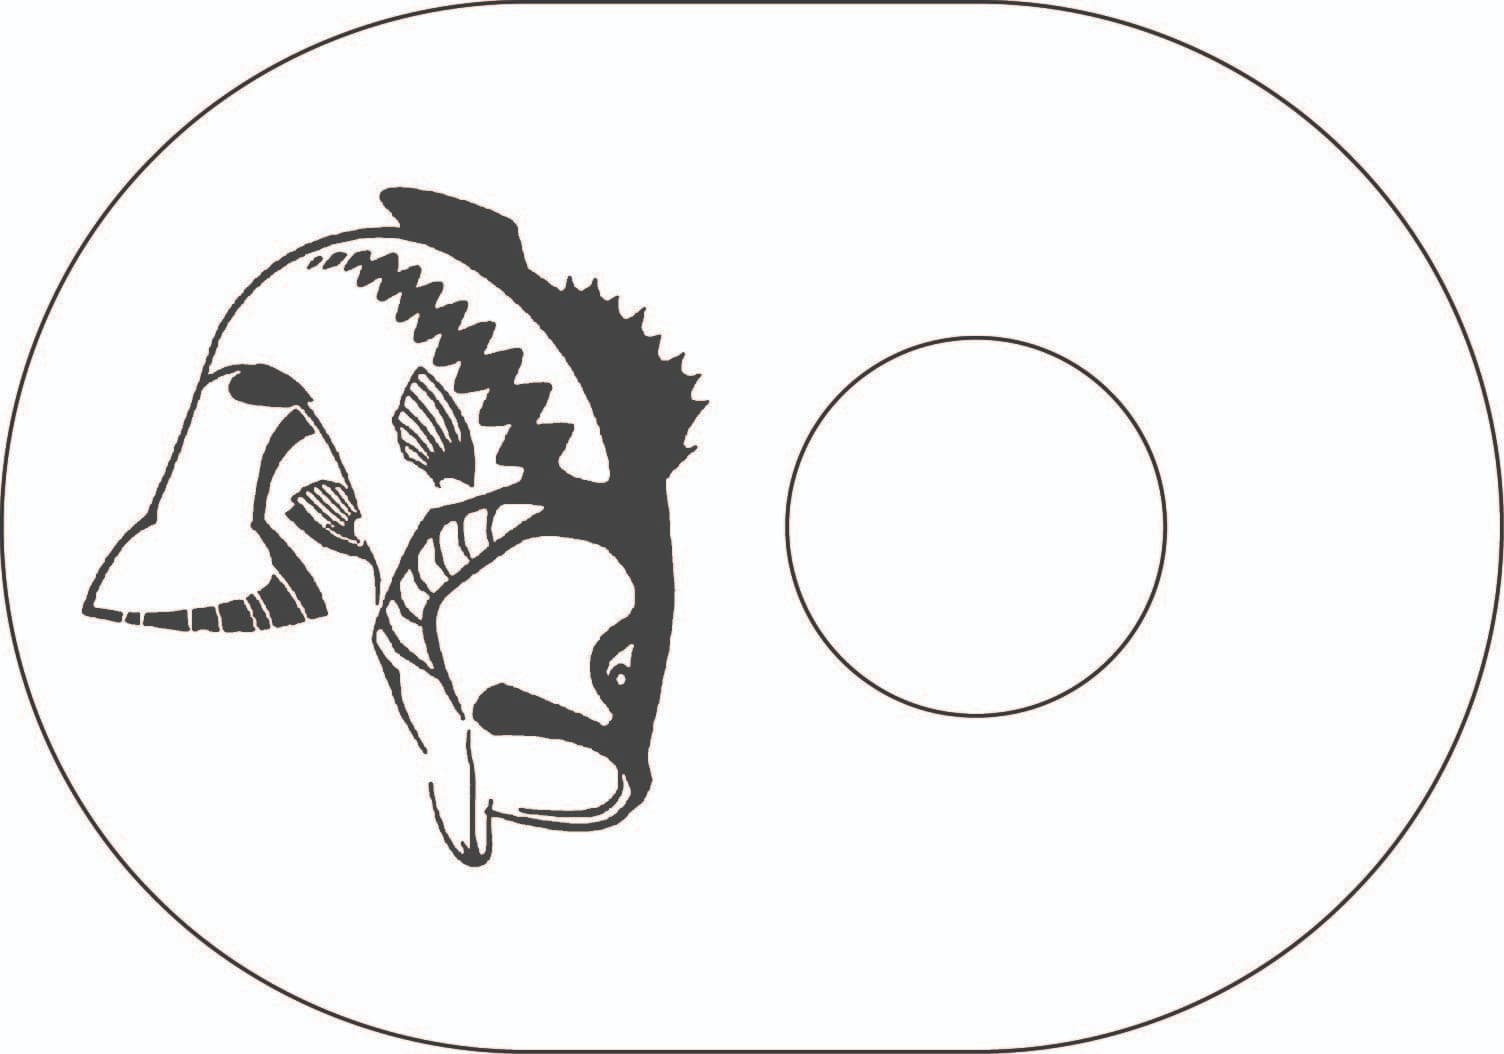
Here is an example of the shape of the wooden blank (the ovalish shape with the hole) and where I would like to add the fish (or other icons).
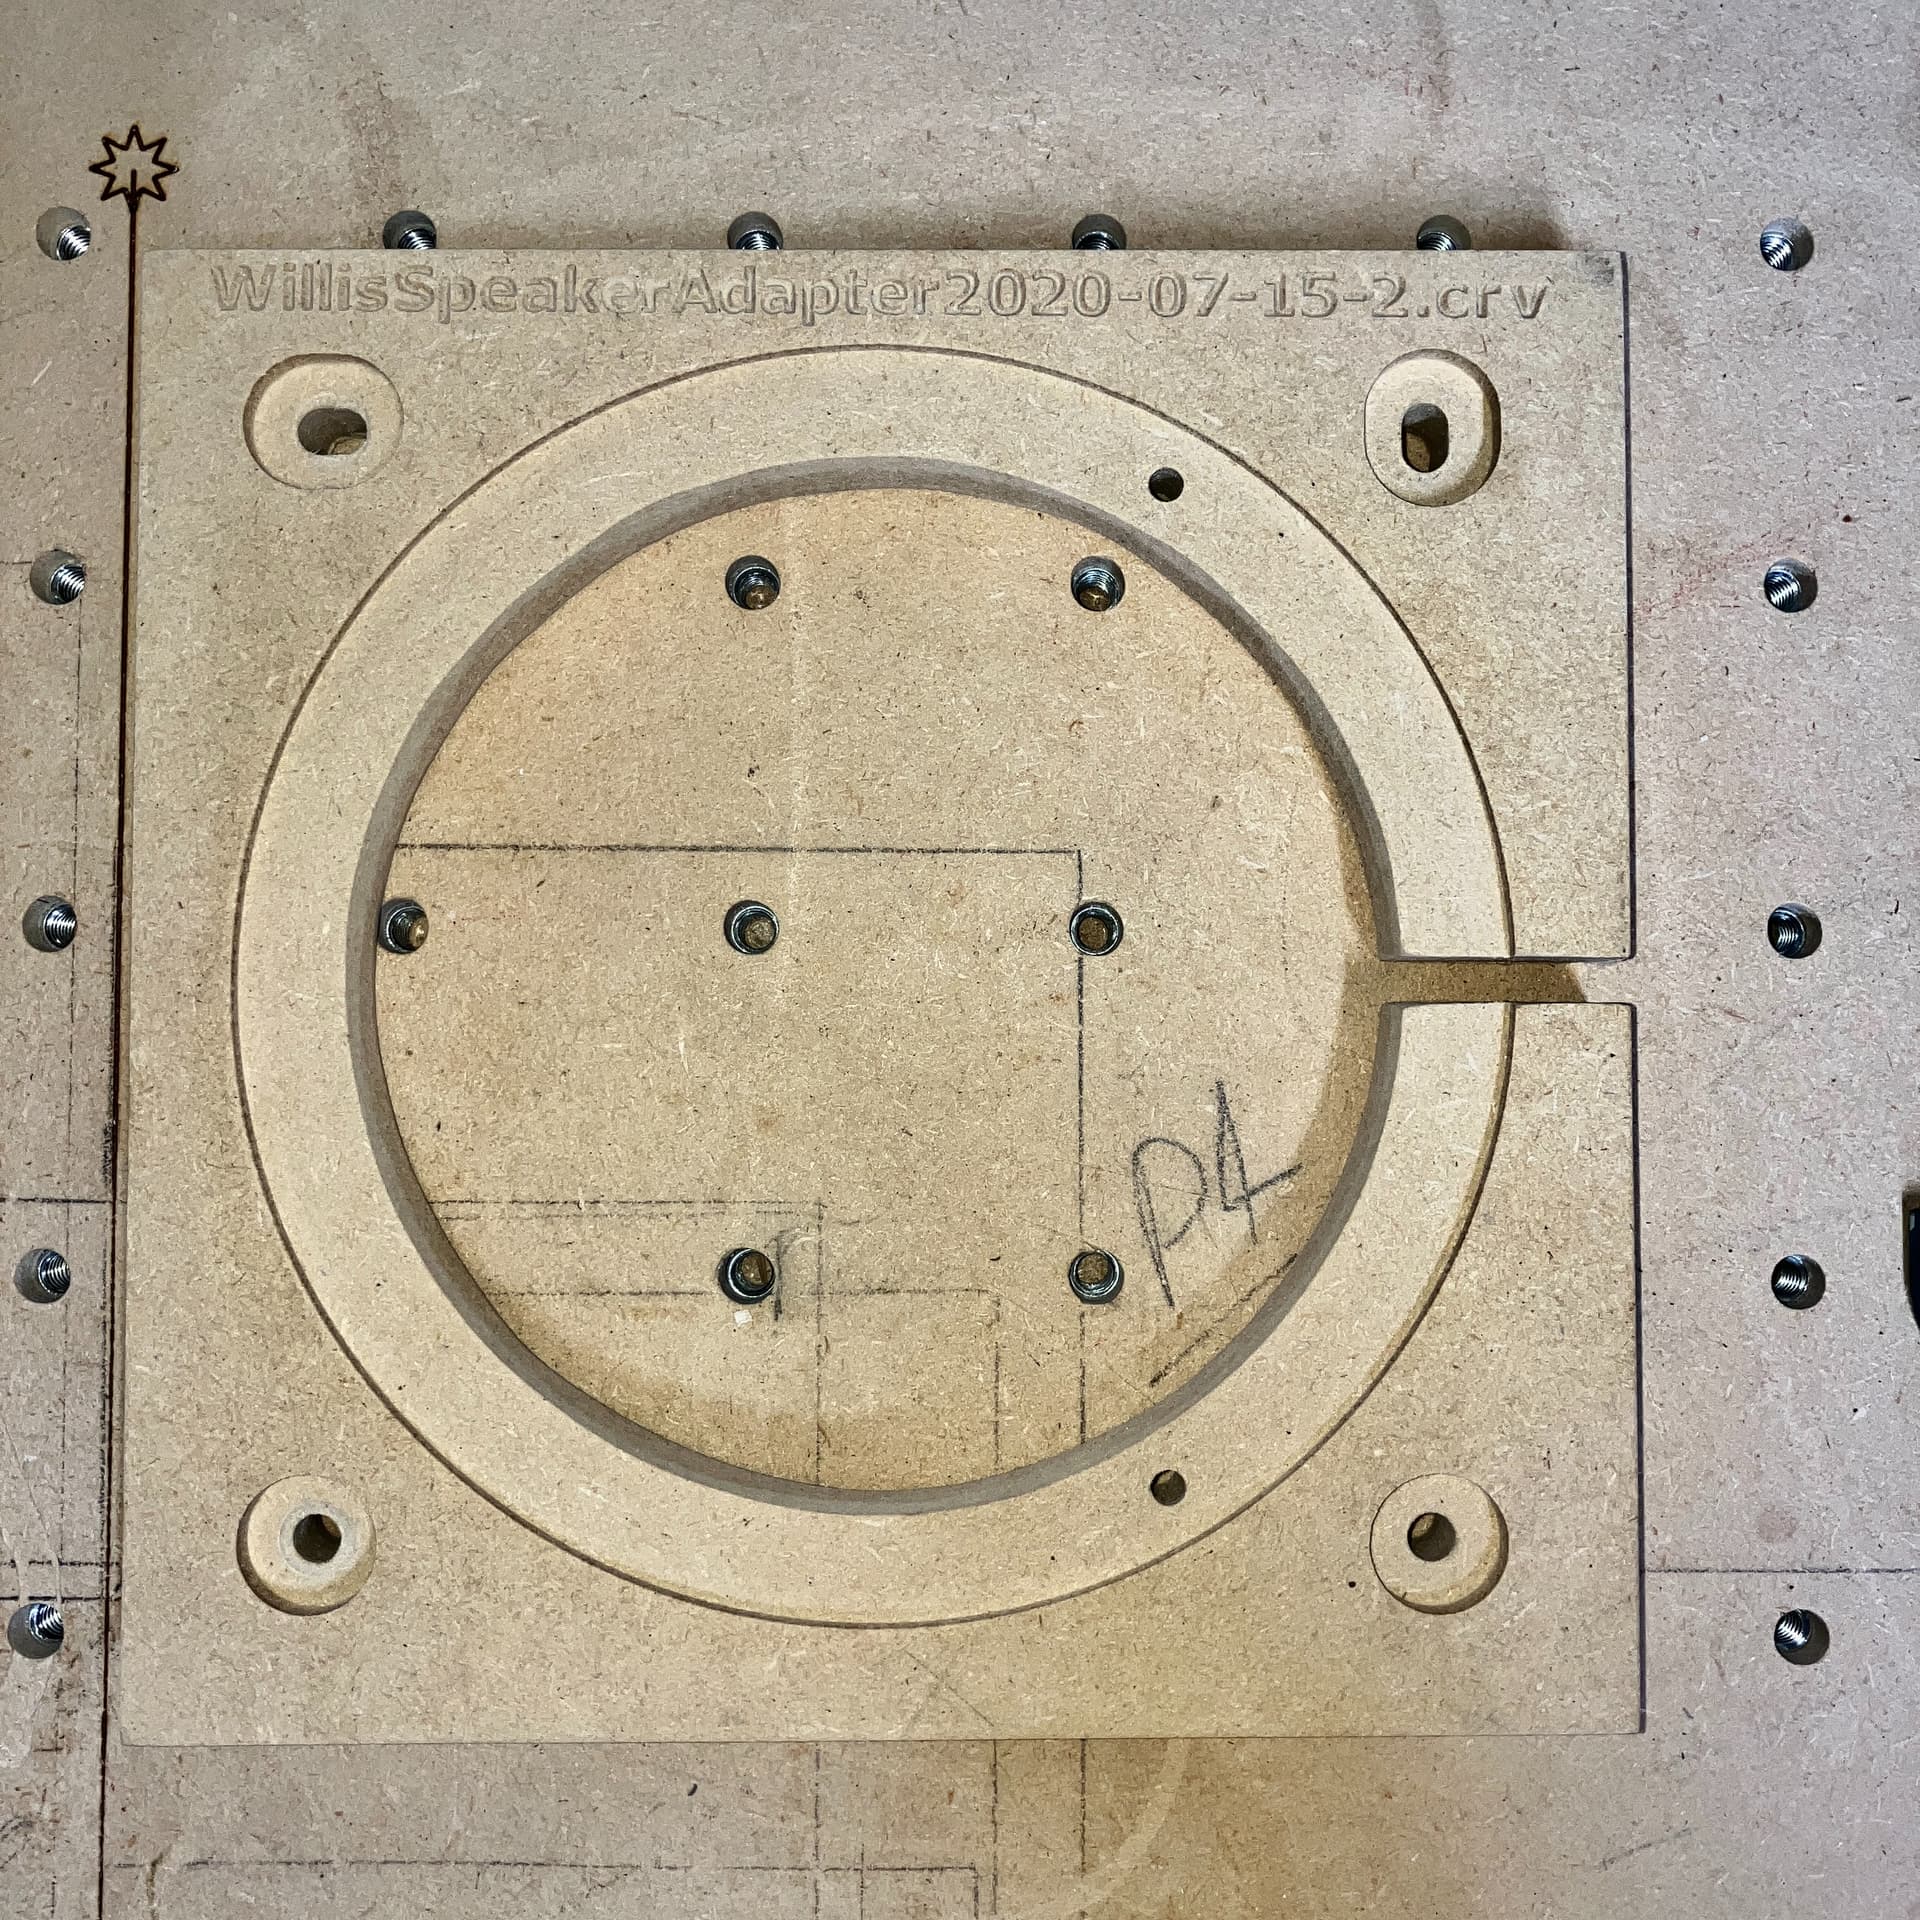
My inclination for odd shapes is to mount a piece of MDF of a suitable size, then cut a pocket in it to accommodate the blank, then secure the blank in the pocket and cut it there w/ that origin.
Bonus points if you set up the MDF as a fixture which can be removed and then replaced in the same position repeatably and if one sets up the origin for the cut to be one of the rapid position points — then cutting such work is just a matter of:
mount MDF fixture in correct position
go to the correct rapid position point and set XY zero there
secure the blank in the fixture
set the origin relative to the surface of the blank
I do what @WillAdams suggests with the additional concept of XY zeroing on the corner of my fixture. So, my design carries all it needs to cut with it to check the zeros.
Yep, that’s an even better idea and more repeatable. If the pocket in the PDF is super snug maybe put a hole in the bottom to assist in removal after cutting.
I do basically the same thing as @WillAdams and @CrookedWoodTex mentioned. I have a piece of MDF thats located with dowel pins to the spoilboard, basically to keep MDF square with X and Y travel. That MDF has pockets for other other projects cut into it.
If the fixture (cutout in the MDF) is snug enough that should do. You don’t want the fit to be too loose. Of course it also depends on what operations you are doing, but just engraving/v-carve in wood I wouldn’t be too concerned. Just make sure you have either a finger pocket on one side or a hole on the bottom to remove the piece from the fixture.
For Z, I would set it off the actual piece once it is in the fixture.
Use Drill Center Dowls to mark the location of your jig on the wasteboard. Make some pocket holes on your Jig, and insert these Drill Center Dowels into the bottom of the pocket holes. Put the Jig onto the wasteboard centered on your selected rapid position point. Push the Jig into the wasteboard to mark the locations.
Drill the locations and install a Threaded insert into the waste board.
I’m glad I’m not the only one that makes overly pretty hugs and fixtures complete with Vcarved instructions to myself.
Side note: I’ve been doing a bunch of slate projects recently, and the dimensions of the blanks vary too much for me to be able to get away with a press fit on them. Pocketing in a threaded insert and a C3D compact gator clamp on one edge has worked well.