I am about to embark on a new project in Fusion360 I have never attempted previously and not sure exactly how to begin.
My wife has asked I make her a wooden plate as a decorative aspect in our house.
10" with a 1 or 2" center. I want it to have a top and bottom.
I have never used register pins but I’m not sure I need them for a round object? (Except for centering purposes?)
This will be run on my SPXXL.
Yes, like that.
I have something drawn up in F360 but I do not remember how to link it to the community.
My bad here is my link. https://a360.co/3yooyHG
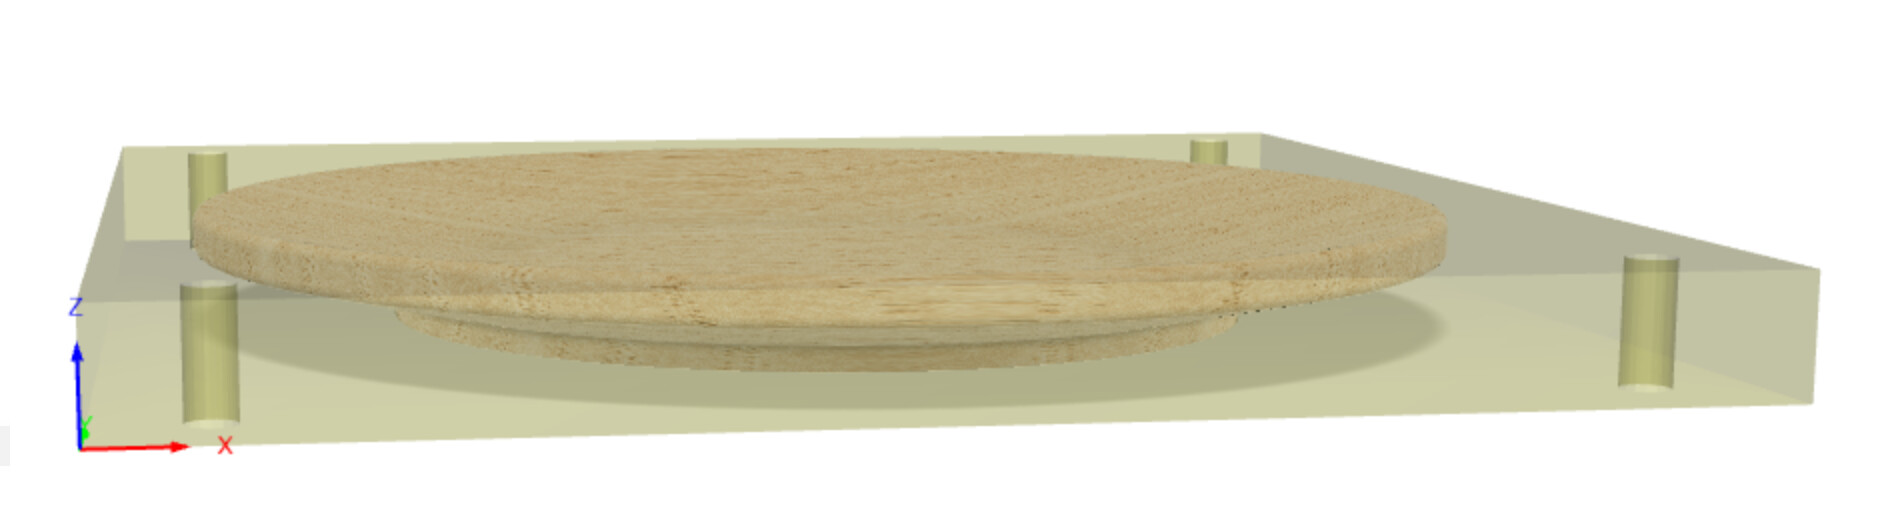
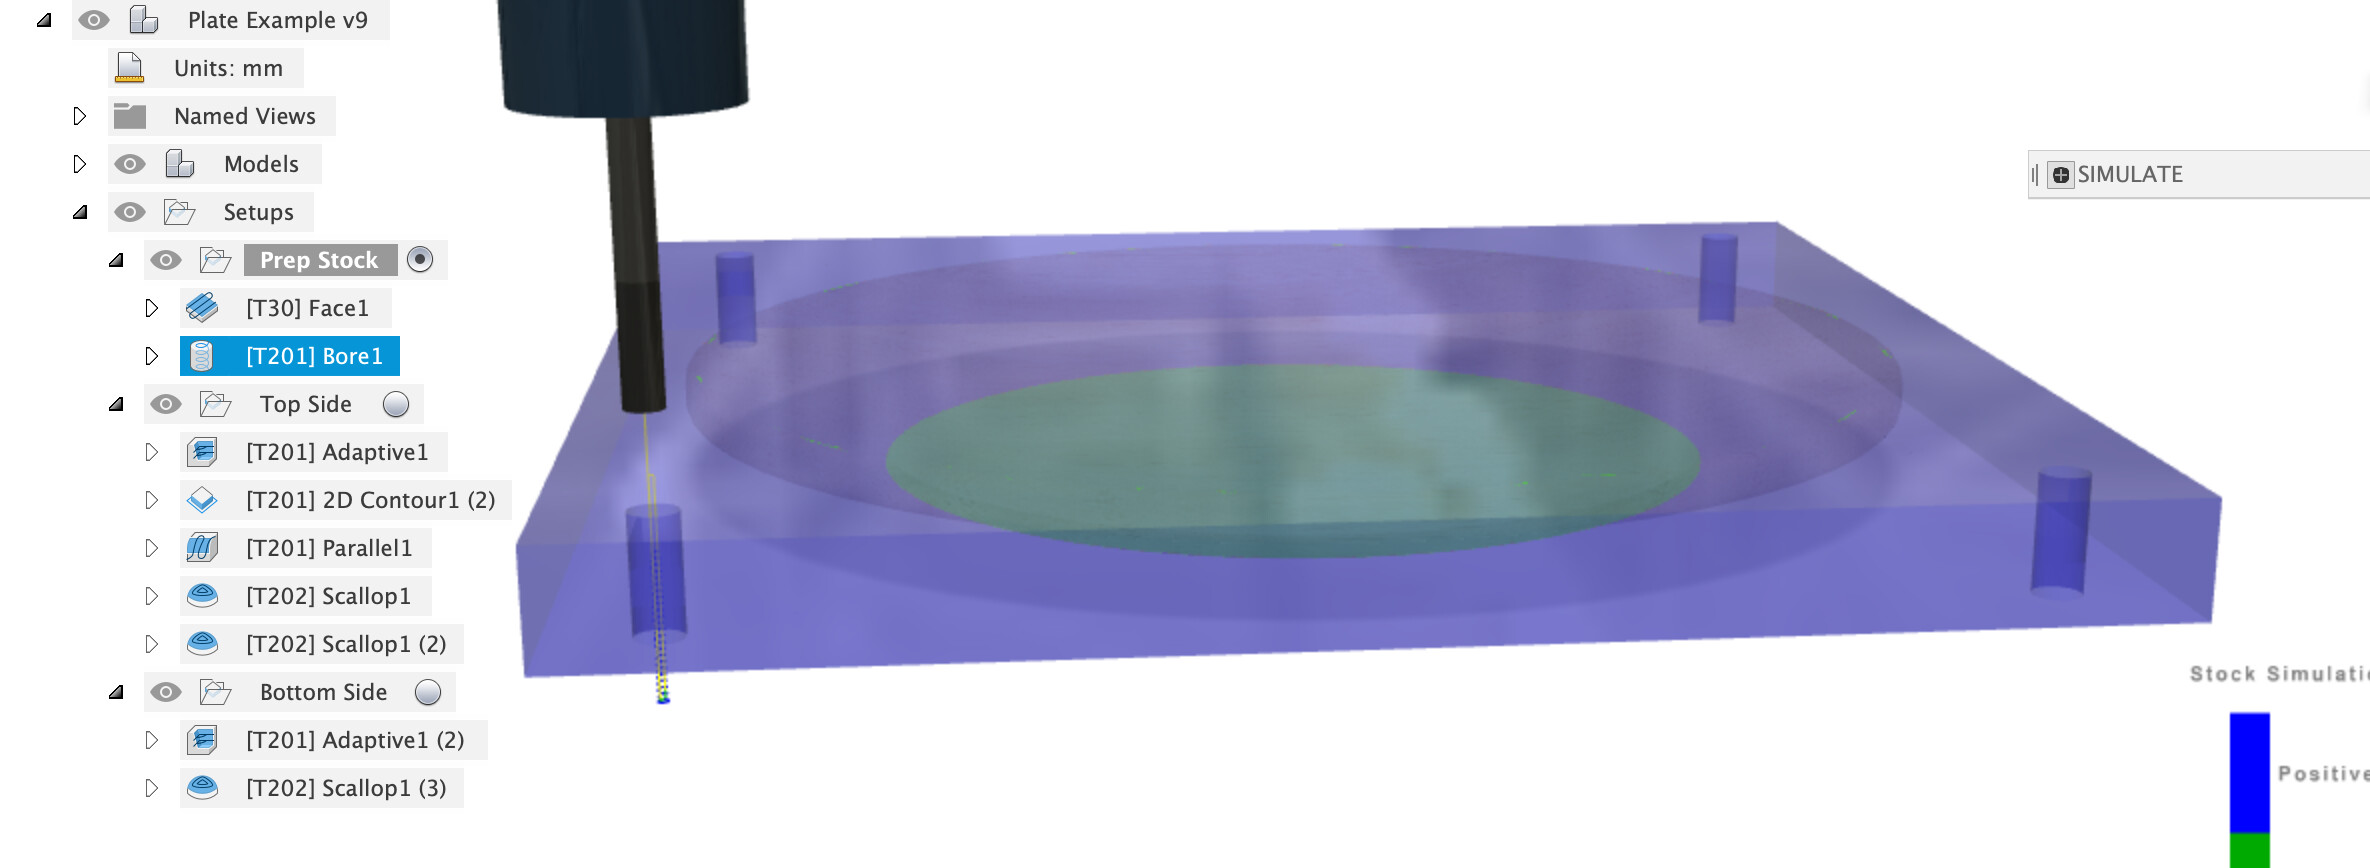
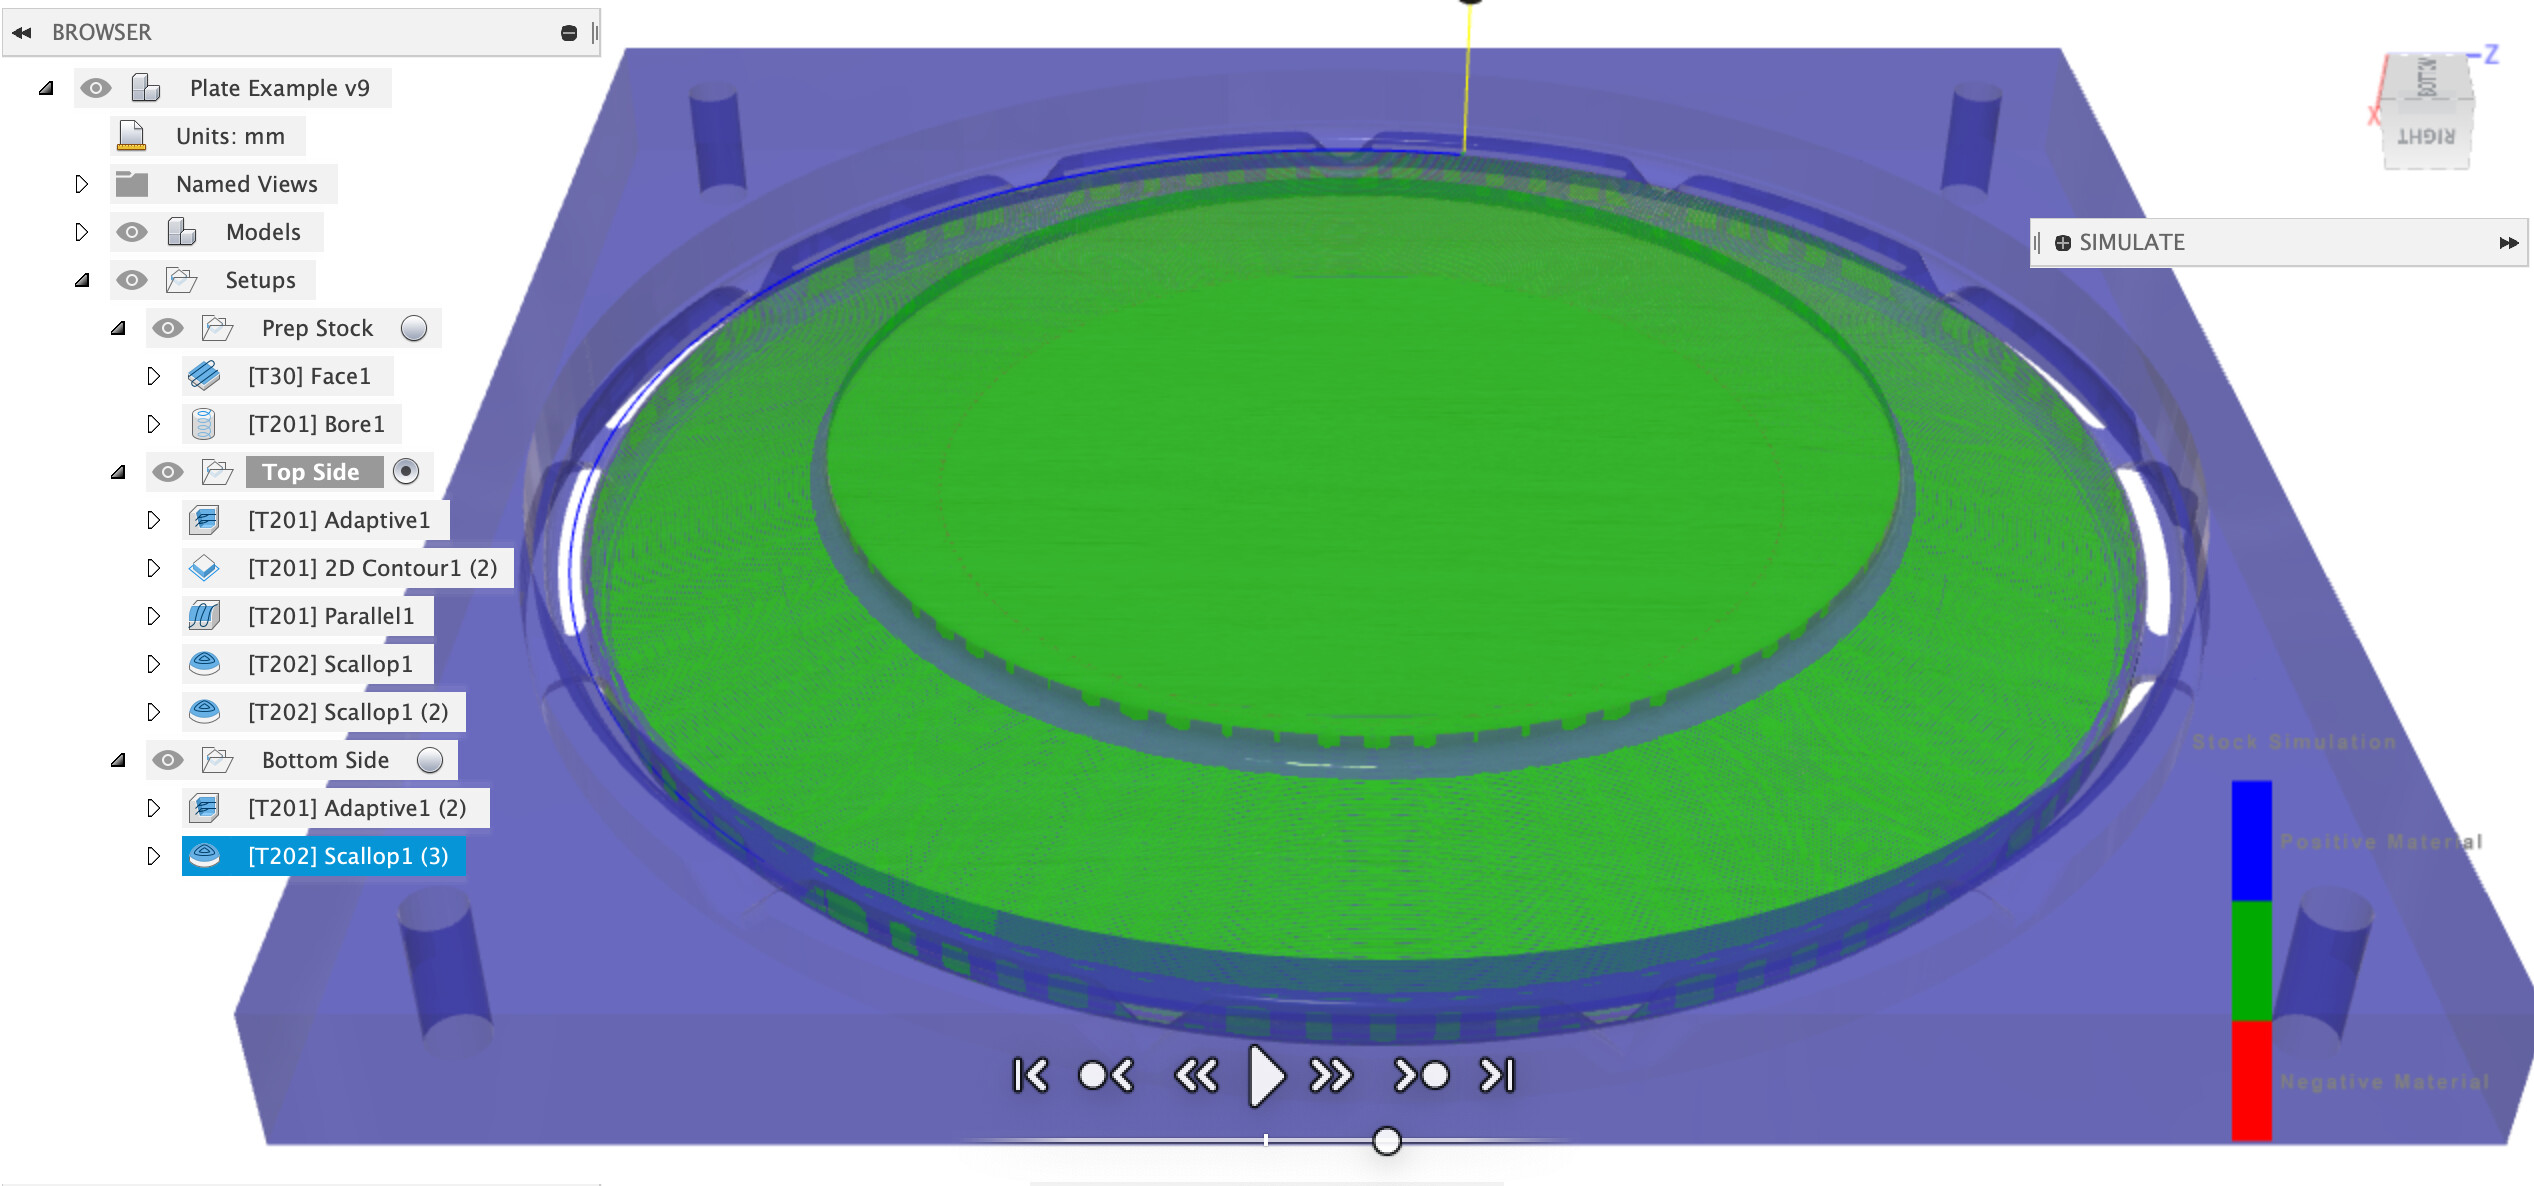
I knocked up a simple plate (it’s not exactly pretty but it contains the major features for machining) and then threw some toolpaths at it to see how one might go about double sided machining it.
This is not exactly a tested set of toolpaths, take it as an indicative suggestion.
The stock prep job faces the stock to height and then bores right through it into the wasteboard to provide locating holes for the pegs (make sure it’s just MDF under there). It also trims the outside of the stock to square to help with zero-ing after the flip.
Note this side is spoilboard Z zero.
Then the top side job (off the same zero point) roughs out with the 1/4" 201 cutter and finishes with the 1/4" ball nose, leaving big chunky tabs around the edge of the plate rim.
Then you flip the piece, locating it on the four pegs, this is where you find out how square your Shapeoko really is. The rim of the plate sits on the wasteboard, you could put a support block under the center if the plate body is thin too. 1/4" 201 for roughing and 1/4" ball nose for finishing again, leaving some of the tab depth in place for you to cut and sand off later. Note this job is top of stock zero.
I’d just use a corner stop, assuming your stock is cut square.
Carve the top.
Flip it with the same corner against the stop.
Do the bottom and through cut.