Zeroing the stock on the Nomad was one of the things that I was most worried about, since I wasn’t quite sure how it was done. Turns out, it’s not that difficult!
I documented the process that I use in this video. Enjoy!
Zeroing the stock on the Nomad was one of the things that I was most worried about, since I wasn’t quite sure how it was done. Turns out, it’s not that difficult!
I documented the process that I use in this video. Enjoy!
@darren,  on the video. Very detailed and nicely presented. And the way you coordinated the Jeopardy music was great.
A suggesttion–when your cutter is 1.59mm to the left of X0, you can go into Set Work Coordinates, click in the X box and enter -1.59 directly instead of physically zeroing the cutter and hitting the Zero button. Saves a little time and counting button presses…
as long as you do the right math. somehow i keep doing it wrong lol
might be the 20 hour days …
Where Darren uses a feeler gauge, I use a cigarette rolling paper. (It is strange buying them becuase I don’t smoke…). Rolling papers are about .001" thick, so when the tool pinches the paper against the workpiece I take it as the tool touching the workpiece itself. The offset is half the cutter diameter then.
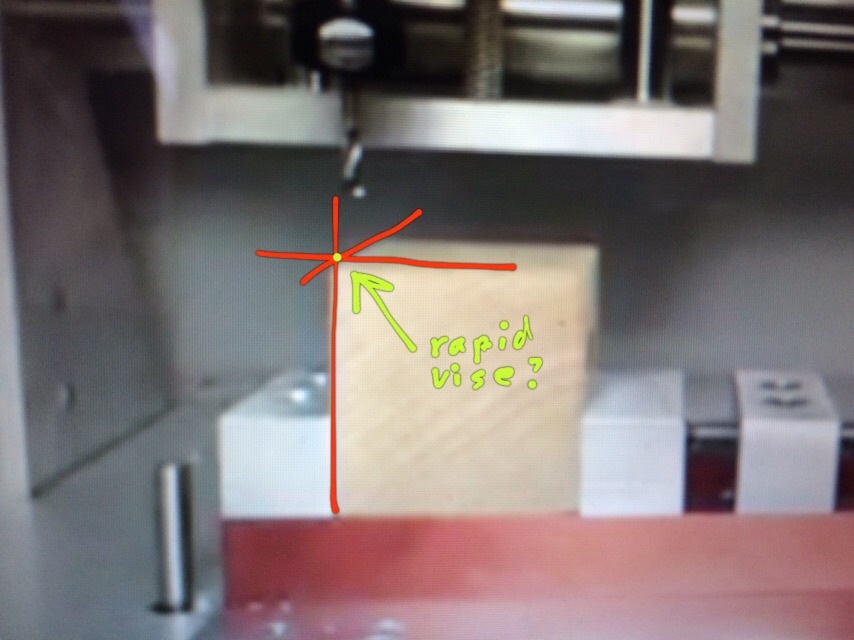
Great tutorial! Question: could there be a rapid position point in the software for that spot on the vise, at least in terms of x and y? Assuming the left aluminum block was always aligned with the end of the vise and the stock was always aligned with the front, I assume z would be the only setting you’d have to change?
best thing to do is figure out the offsets from a rapid point
Thanks for the in depth video. My husband and I have a finite amount of time to learn this material - and having to ask the forum for answers kills the learning curve. Please make more. Without this info the machine is worthless to us - and I have a budget to buy two more.
Any chance someone will take the time to progress these tutorials into a learning path?