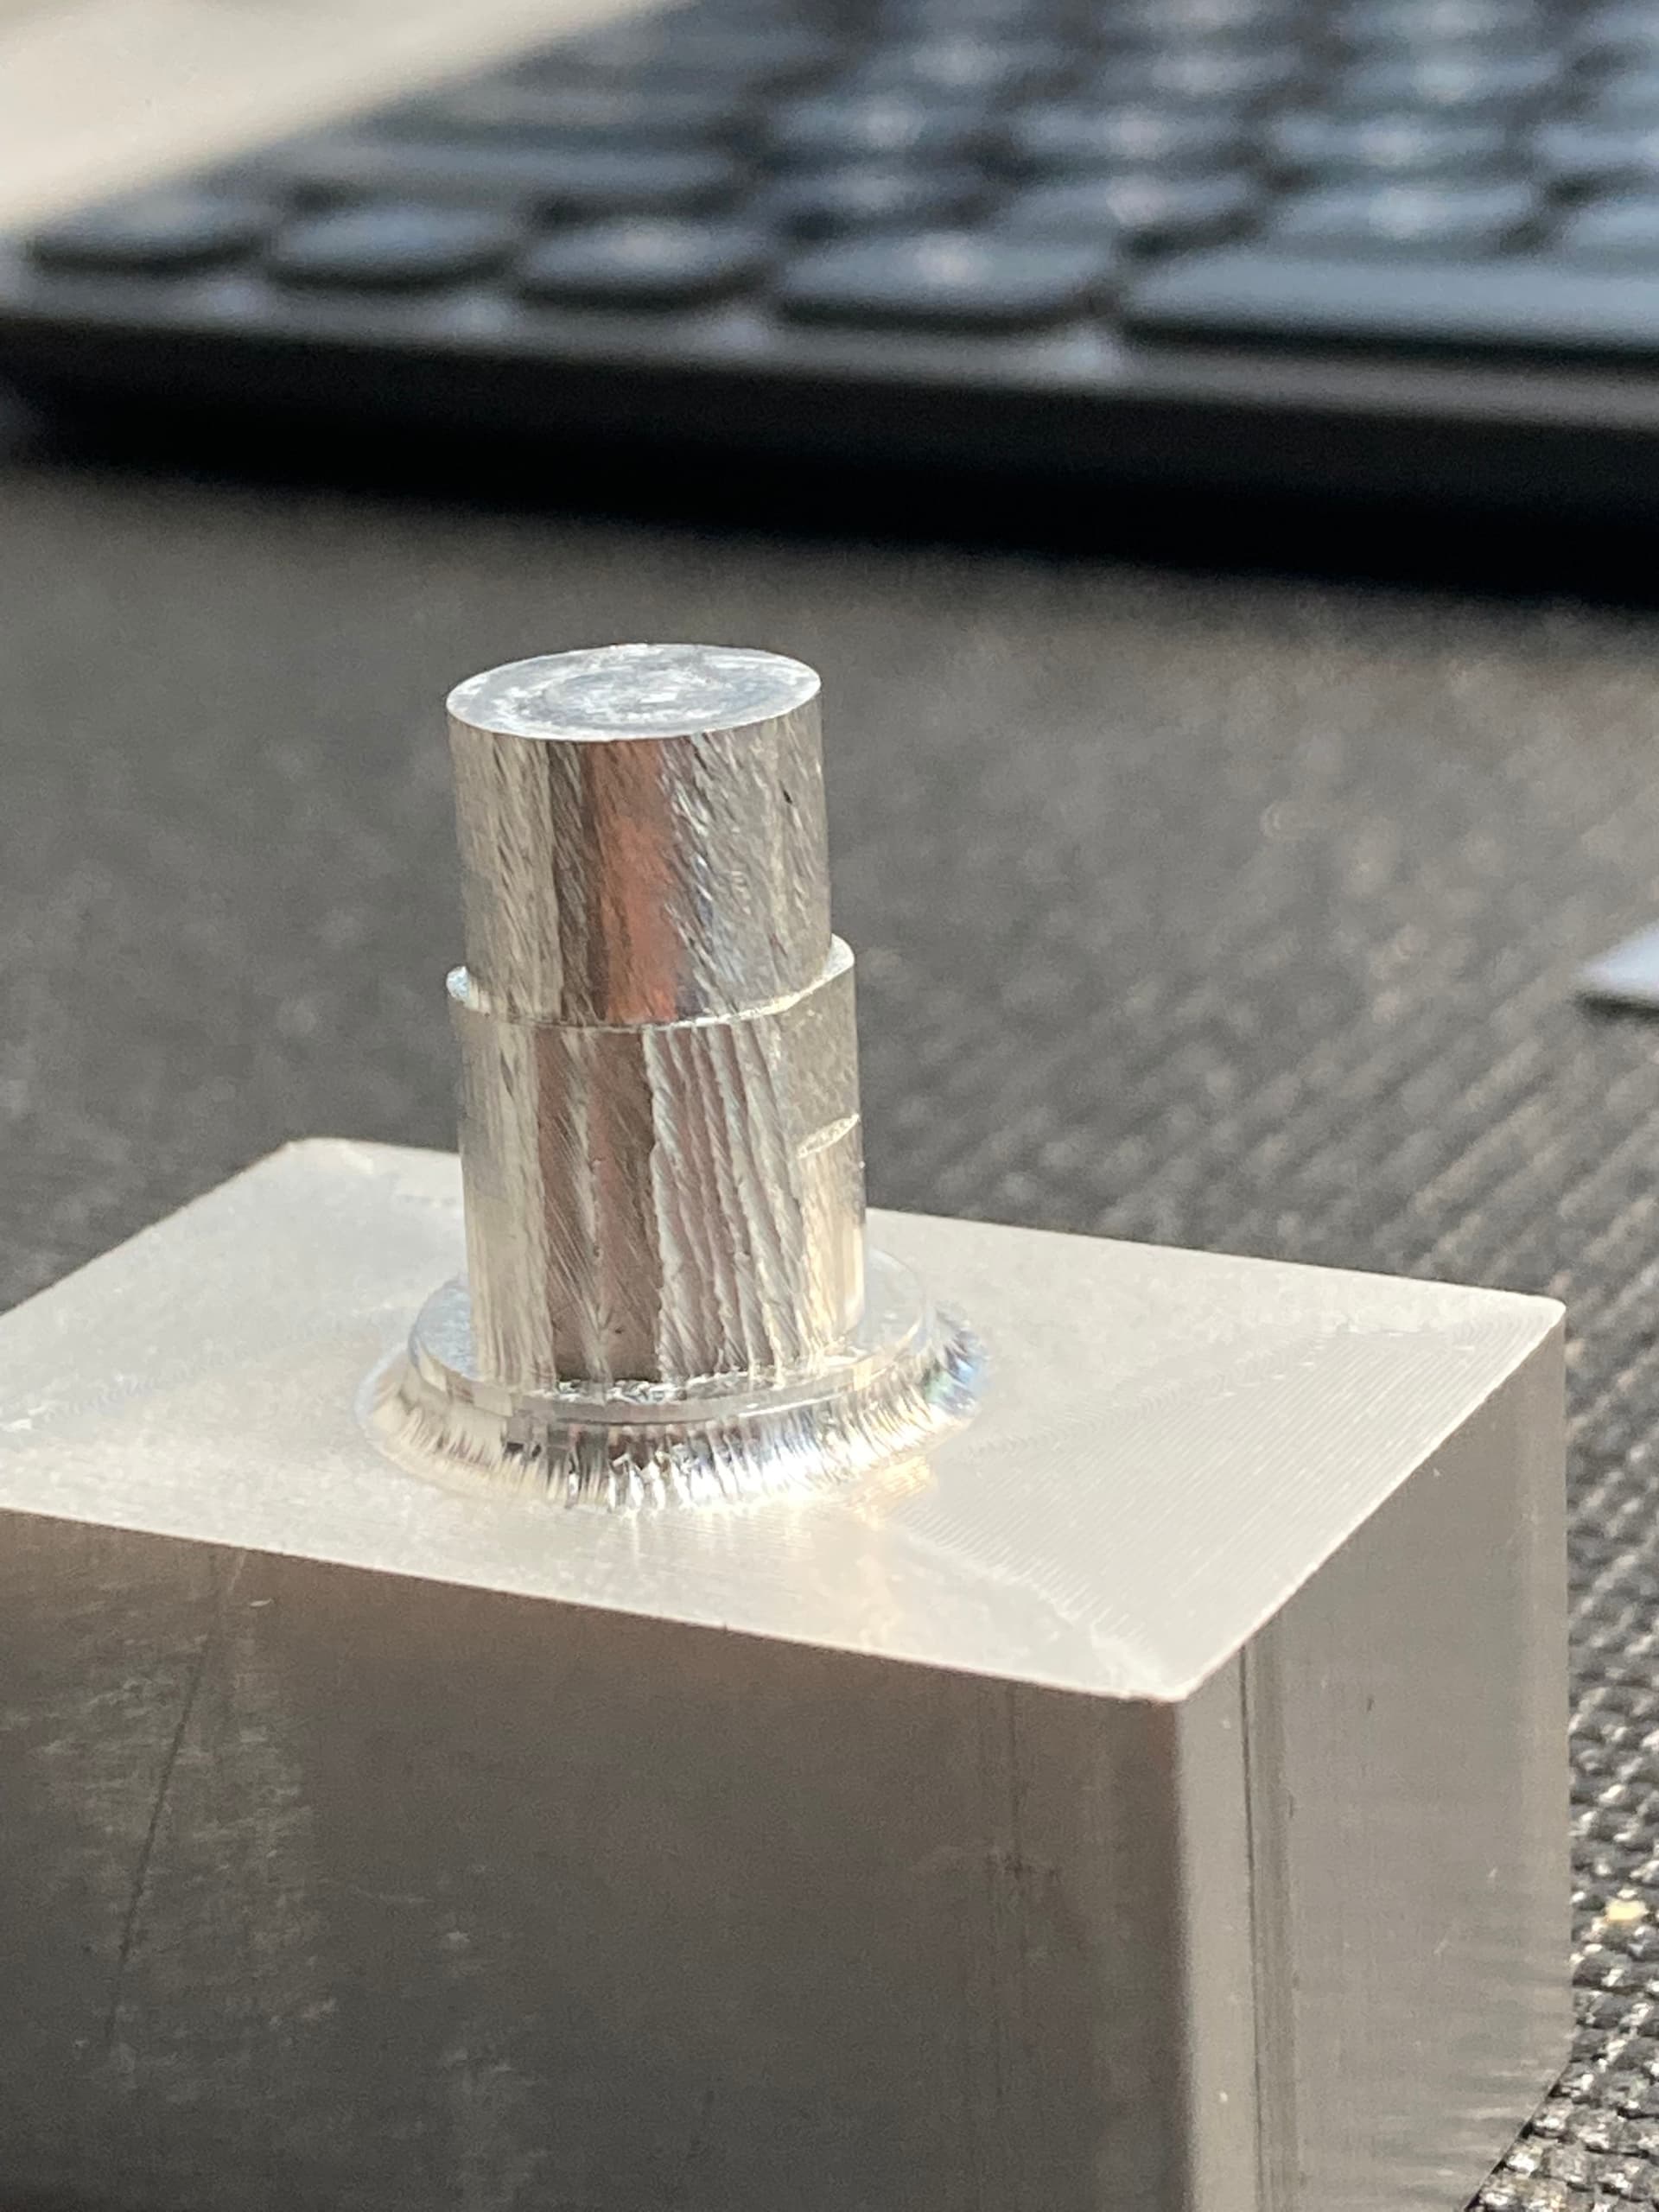
I recently got my Nomad 3 haven’t really had much trouble with wood and plastic but aluminum surface finish has been a challenge. Below is my I’ve lost count attempt. Aluminum stock is 6061.The roughing pass left .01 of stock to leave
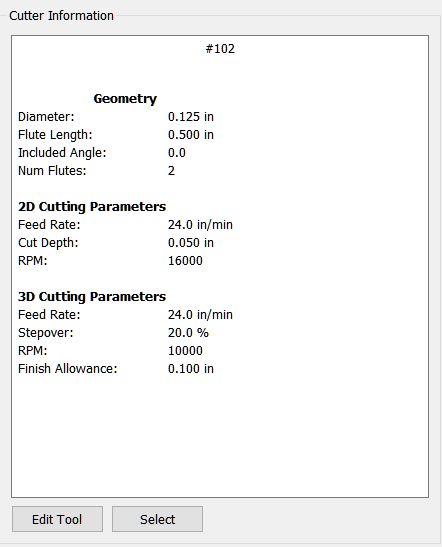
tool being used is a .125 2 flute square endmill with a .5 flute length extended to .85 below collet (could probably shorten the extension by .05 but not sure if that would really solve the issue
RPM was 22000
Doc was .075
Woc was .005
Feed rate was 20 IPM
I’ve tried running spindle at 24000 with a feed rate of 10 IPM and had essentially the same results. Also tried running multiple finishing passes at 15000 with a 2 IPM with woc at .0025 Doc at.075
Any help would be greatly appreciated. I’m open to trying just about anything I have access to a very wide range of tools to choose from too so if anyone has good tool recommendations for aluminum in the nomad 3 that would be helpful too. I’ve watched every video I can find online about aluminum feeds and speeds which helped for roughing but finishing not so much.
Unfortunately I don’t have any advice to address that kind of extreme issue. Other folks here will have recommendations for you I’m sure.
What I will say is that once you get your feeds/speeds dialed in, the best thing I’ve found for surface finish has been coolant. A fogbuster with ipa was a game changer for me when cutting aluminum.
(Single flute coated endmills have also been really nice though I’m not sure they apply for the depths you’re attempting. Hopefully others can chime in on this point as well)
Good luck, I’ll be watching this thread to see what advice other folks offer
I am getting ready to run another test for finishing will post the results. Any chance you have a picture of your set up? are you running the fog buster in a nomad or shapeoko?
I am running a fogbuster mini on a nomad 3 that I’ve taken the enclosure off of. I used the tapped holes in the side of the spindle block to attach a piece of steel. I use the magnet mount to attach the nozzle to the spindle.
(I saw Julien was replying, if he contradicts anything i say… believe him and assume I’m wrong )
On a two-flute, 20 IPM @ 22000RPM is a 0.00045" chipload, which is near the danger zone of “rubbing rather than cutting” (I try to stay in the 0.0005" to 0.001" chipload for aluminium). So it’s possible that feeding 50% to 100% faster will improve the cut (by letting the endmill bite into the material and make nice little chips, rather than half-cutting flah-bouncing off the surface.
Severe toolmarks like those tend to show that the tool deflects/oscillates/bounces off the surface. A too low chipload can do that, as well as a dull endmill, or excessive stickout.
Another consideration is: finishing a “mostly vertical” piece is hard. During roughing, there is lots of material and you cut from the outside in so at all times the place where you are cutting is “supported” by all the remaining stock underneath, if that makes sense. Once you have completed roughing, you end up with that “tower” that you will run a finishing pass around. If you consider the endmill stickout, as well as the tower height, you end up pushing a somewhat-flexible endmill around/against a somewhat-flexible tower of aluminium: it’s easy to end up with the two resonating/oscillating, therefore chatter and very poor finish.
Does the same poor finish happen if you use the same feeds and speeds, but on a flatter & wider cylinder?
No I ran a test run with a boss .5 dia .25 height prior to running this part and it came out with acceptable finish i don’t have a picture of it at the moment. Hence why I used it as a starting point for this one.
It makes sense that im doing more rubbing then cutting just by watching what the endmill is doing. On this next attempt ill try feeding 50% faster and see how it turns out. The end mill i was using was pretty new i will swap it out to cover all my bases. Thanks for the help ill post again with how it turns out.
Another thought along the line of stabilizing the cut by having more engagement: since the radial engagement/WOC is so small (as it should be for a finishing pass), you may want to try and run that finish pass at a much greater DOC.
I don’t know how tall that part is, but if you were for example to run a set of two finish passes 0.005" to shave off 0.01" remaining stock, maybe running those passes at full depth (i.e. full height of the tower) would stabilize the cut too.
What did the wall finish look like on the roughing pass? (Assuming you removed all the stock from that block except the post in the middle, one layer at a time)
I have an aluminum impeller to machine, and decided to rough & finish the sides of the fins together when cutting that layer, rather than rough to the bottom then try to finish a thin fin standing up.
That way each finish cut will have full stock below it & support the fin.
I didnt take a picture of it but the roughing pass was defintily a rough finish but significantly better then the final result.
Roughing pass using a 3d adaptive
.125 ball
2 flute
24000 rpm
40 IPM
.0008 feed per tooth
Doc .08
Woc .01
I dont have a nomad but for my shapeoko 6061 recipes I’m usually leaving 1-2 thou (0.001-0.002) stock to leave for a finishing pass, not 0.01. But those are also deeper passes as well .25-.5 DOC depending on the tool/stock.
Depending on iyour work holding the material could also be deflecting out of the way of the cutter if it isnt rigid enough.