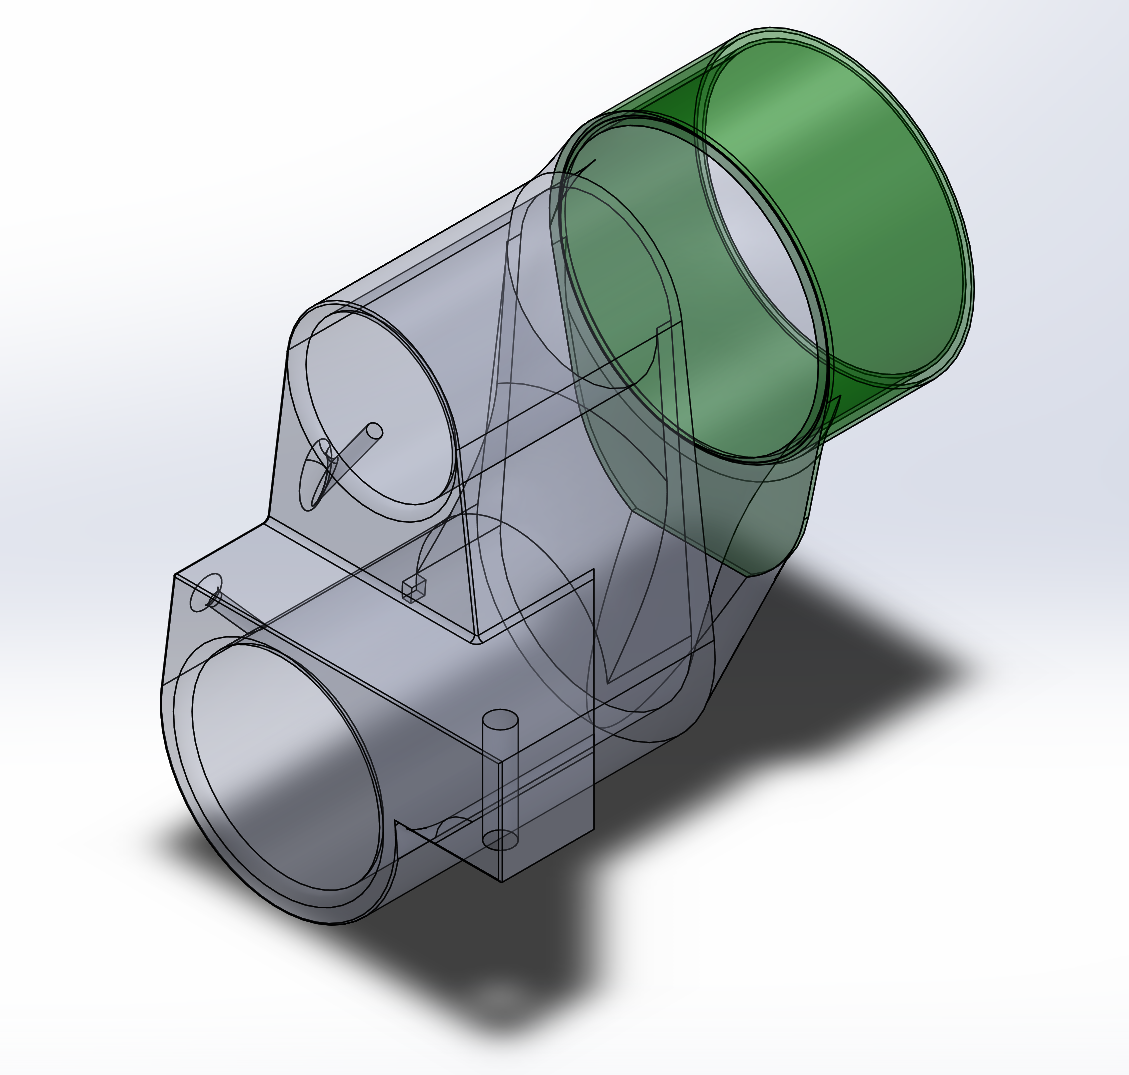
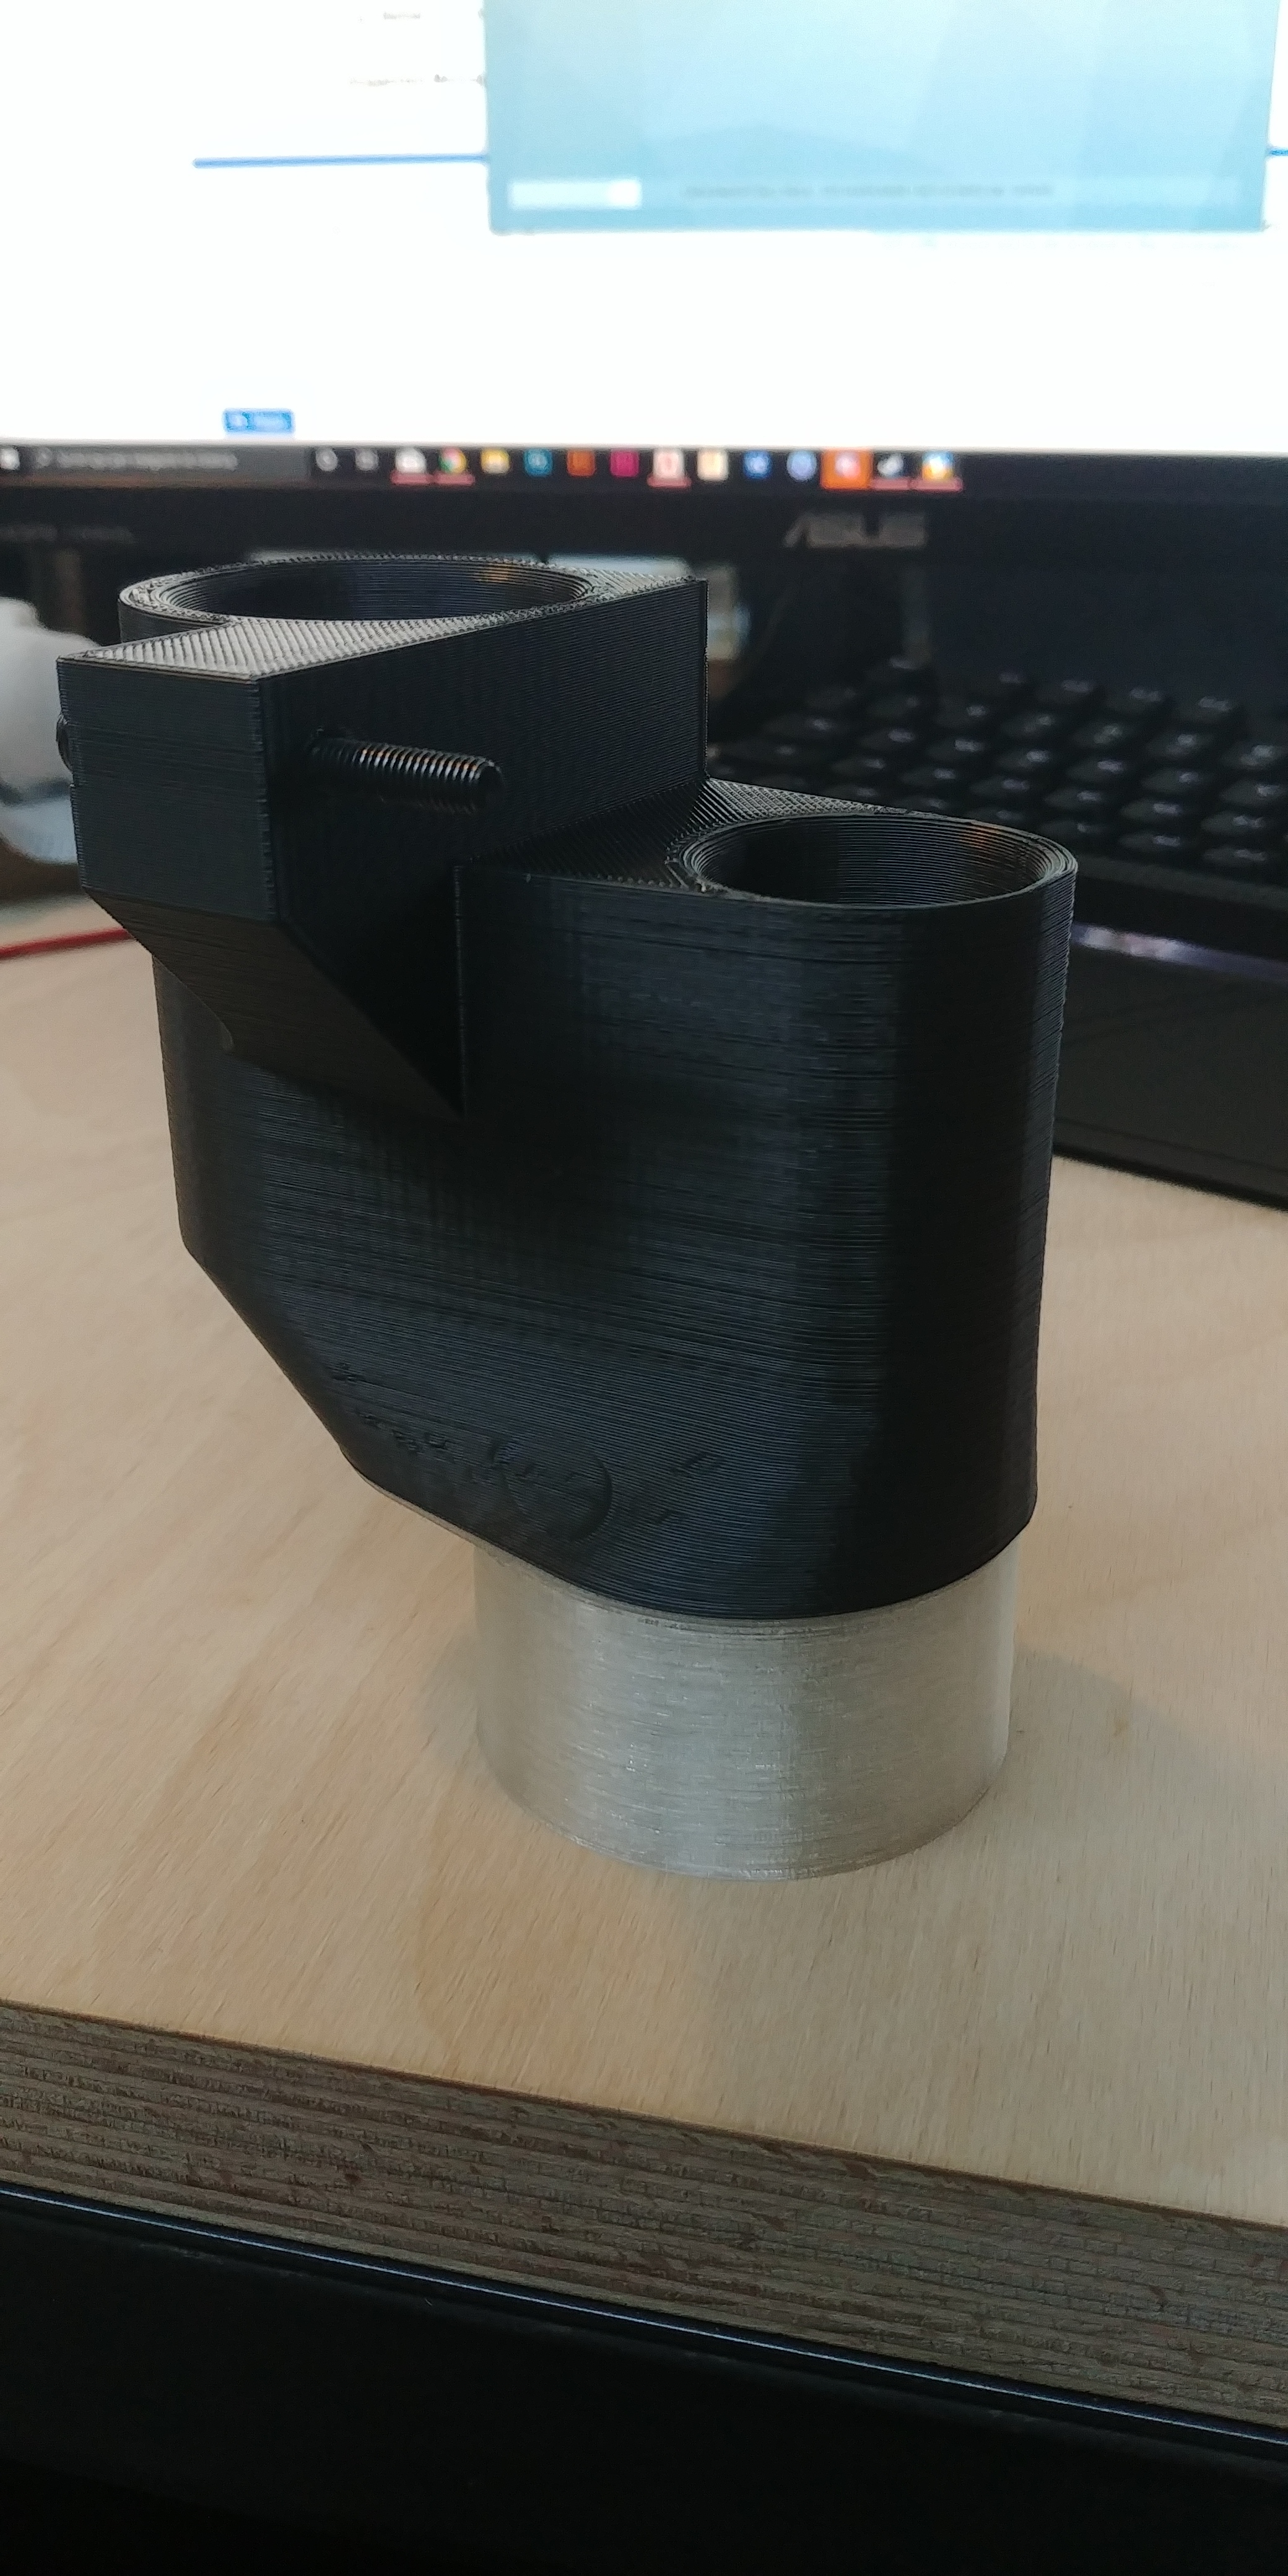
I 3D printed this vacuum head. It is meant for the Nomad 883 Pro, I think the non-Pro needs different dimensions.
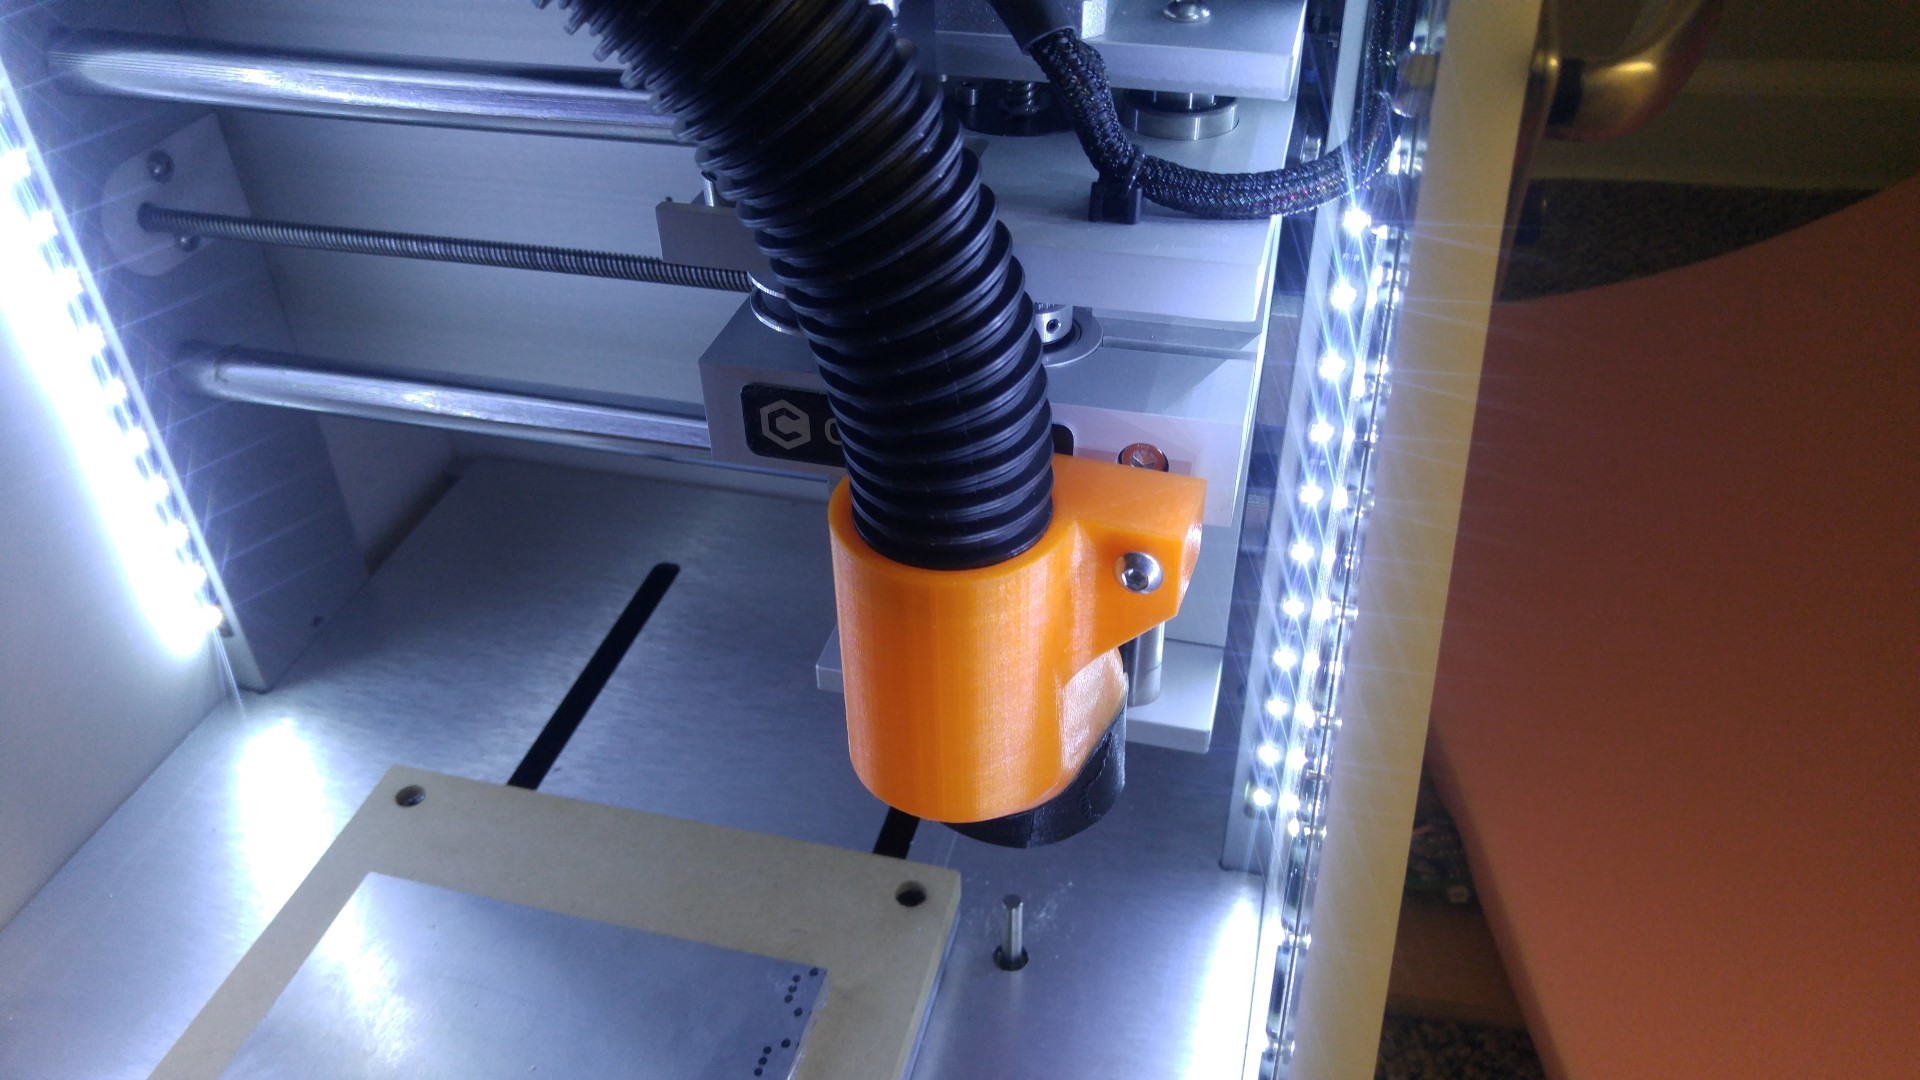
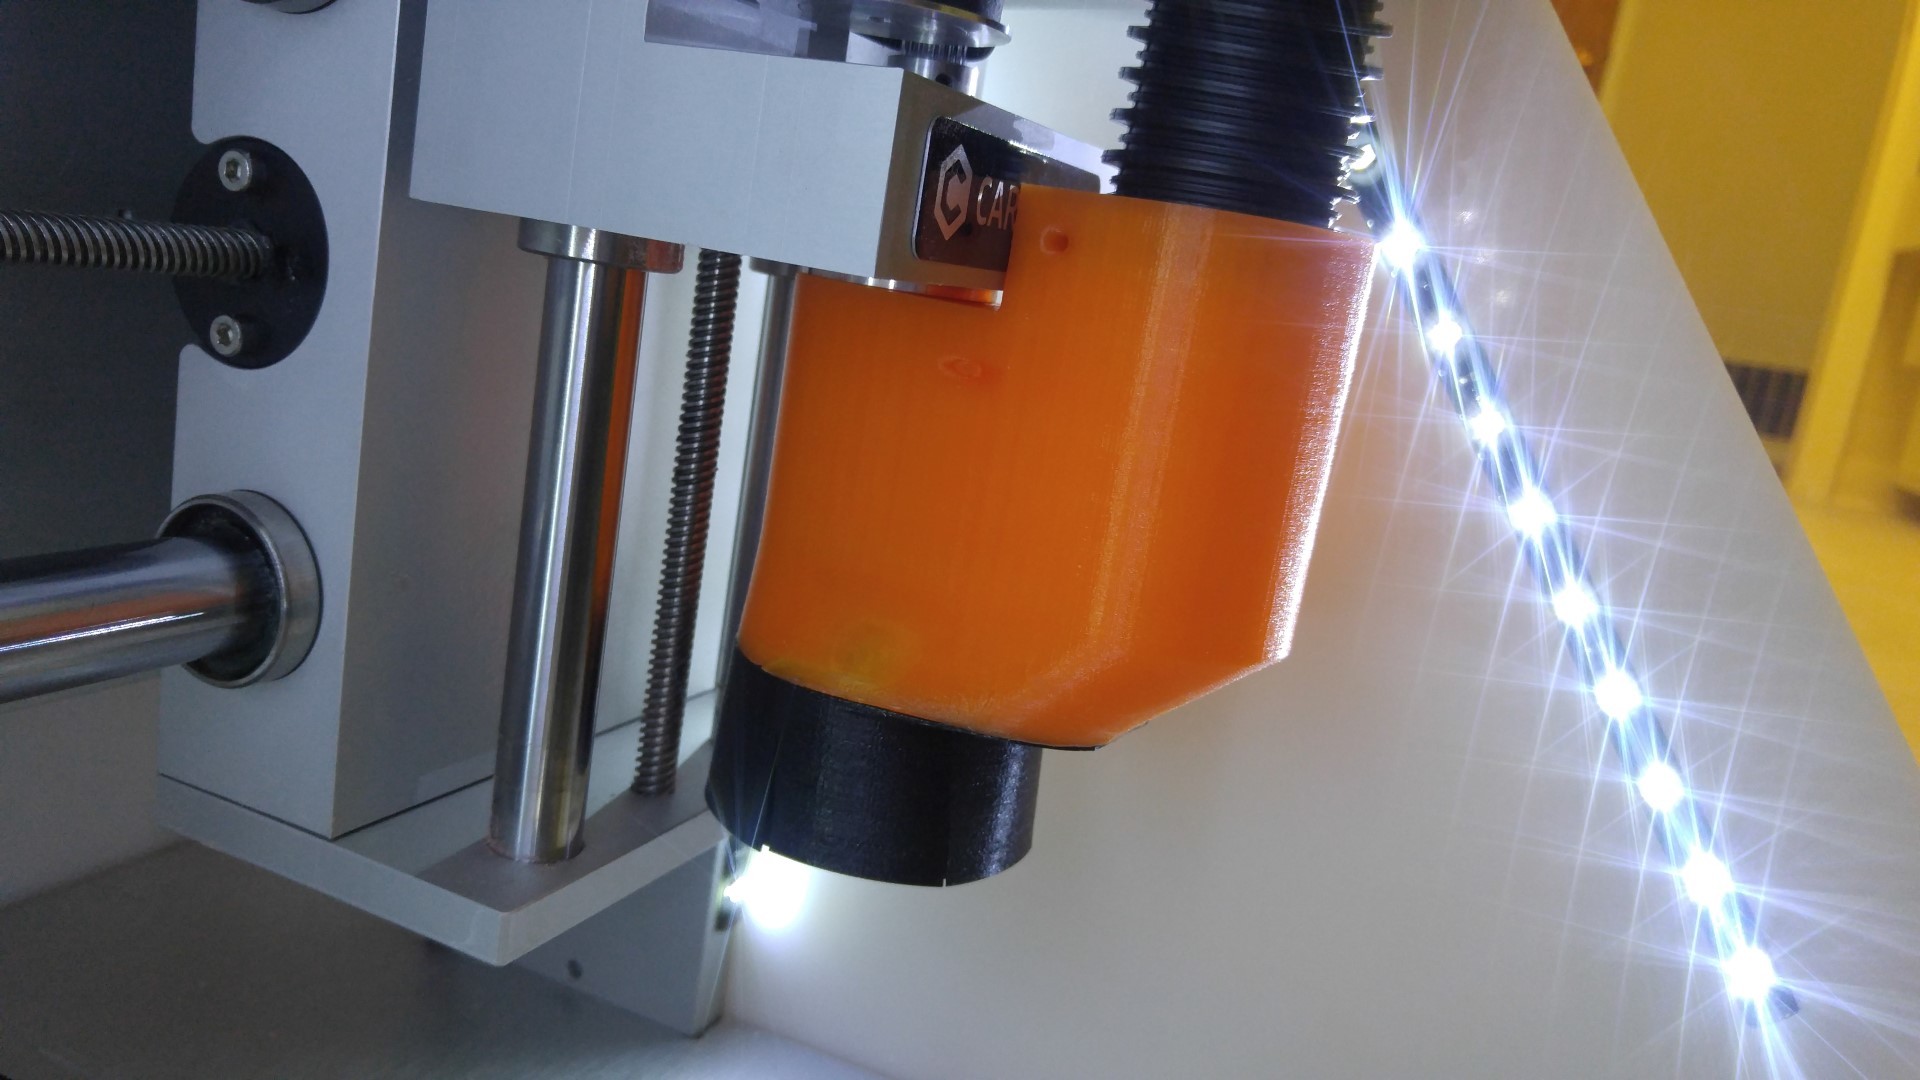
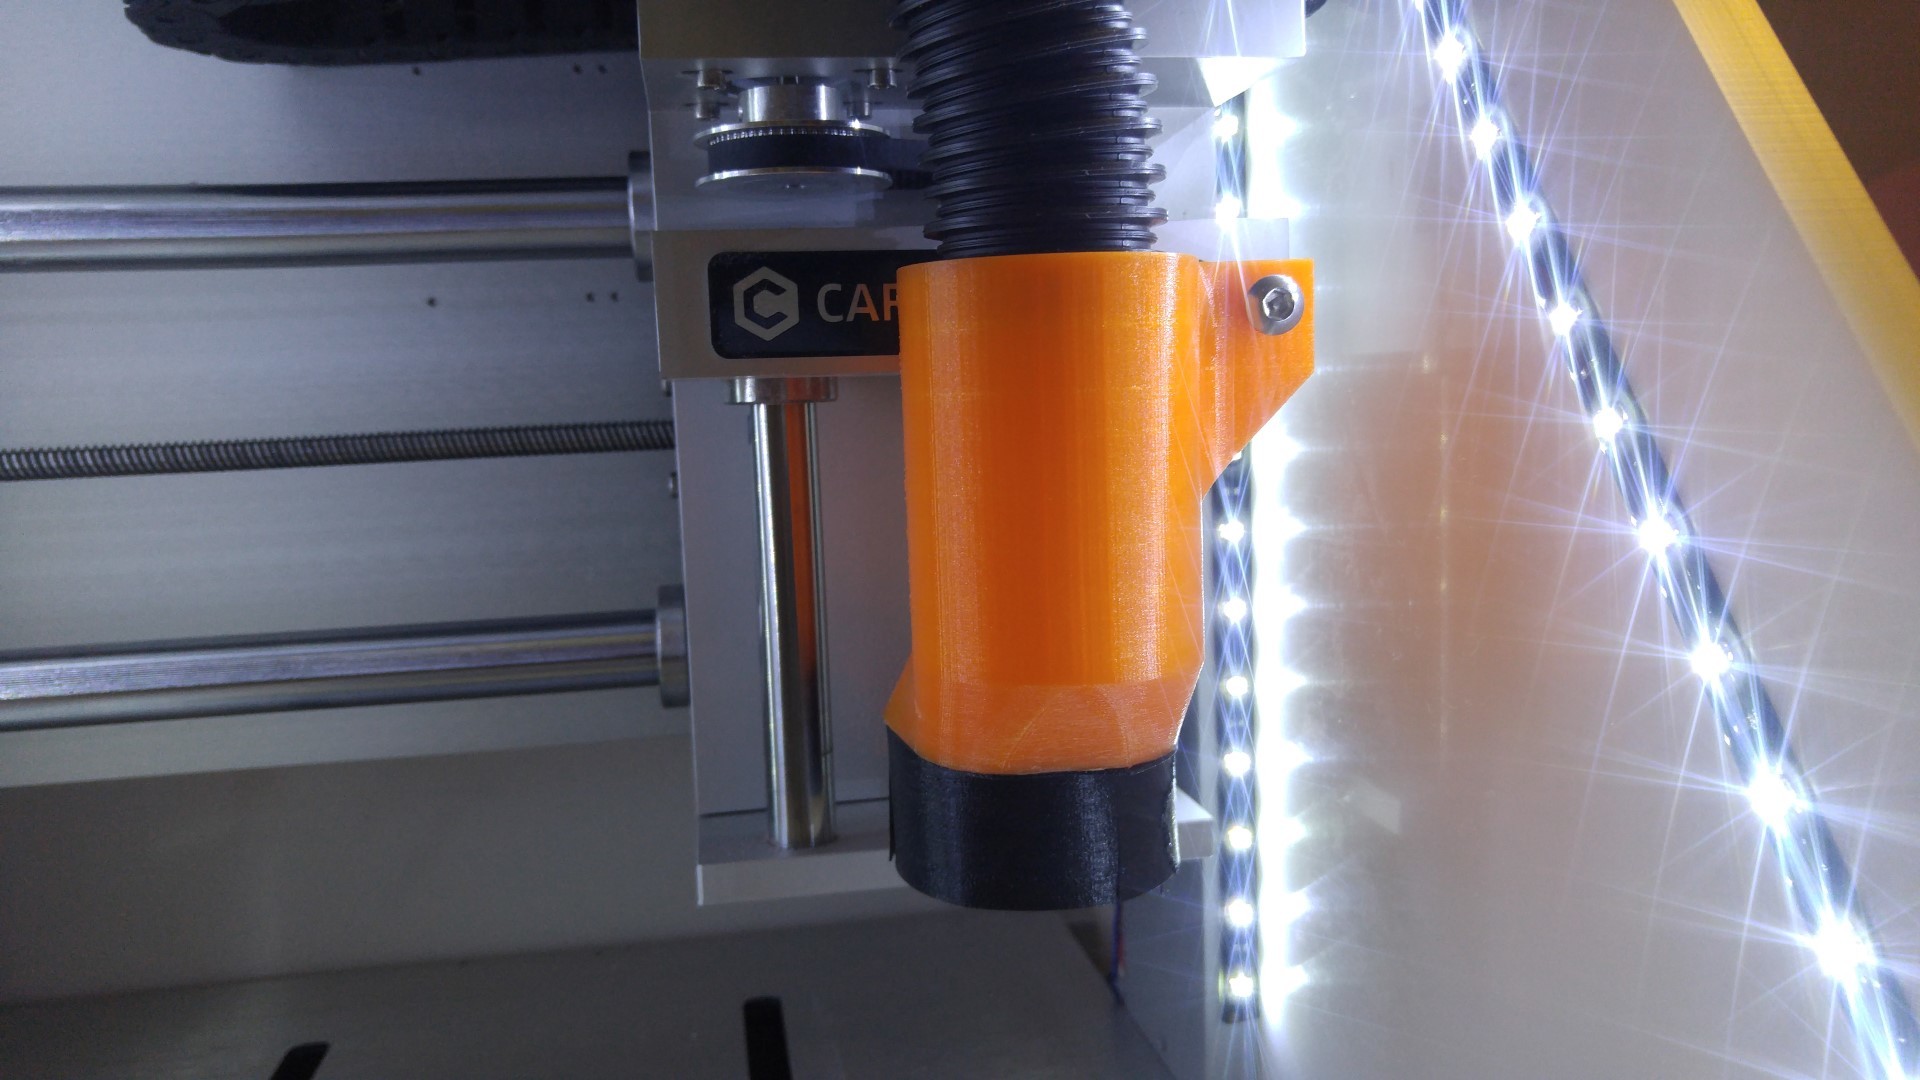
The main body is PLA, the skirt is a flexible TPU filament, basically 3D printed polyurethane. Two parts super-glued together. The main body attaches to the Z carriage by a screw that applies tension against the carriage.
Since 3D printing was used, it takes about zero effort to build one of these things. I did normal post-print-processing, tapped that hole for the screw, superglue the two halves together.
The hose is 1.25 inch diameter, fits perfectly, just shove it in there.
Nicely done! Can you post some pictures with the door closed and where the tubing enters?
Yes, the Nomad Std. is different than the Pro - almost a mirror image, there is no “box” containing the Z axis guides and threaded rod, the spindle is much closer to the Z axis…
I’m working my Pro dust head and I found that touching the spindle block works well - looks fine from here.
I do have one concern with the design - the skirt. There isn’t much space behind the spindle and the bottom plate. I’m concerned that it might catch the bottom plate and cause a problem. It’s also quite close to the tool, when it get dragged the opposite edge might get “eaten” by the tool. Please let us know your results over time!
The hose doesn’t bend enough for me to get it to the back, I just leave the door open lol
The hose for my prototype seems like it will be able to go out the back. It took me 2 weeks of measuring, CAD and motion studies to get to the point that I’m ready to machine the parts.
3D printing a dust head is a good idea.
An open door is not ideal but you’re so close to the tool the vacuum should be very good.
Now let’s see how the skirt holds up in hard use…
It clears the bottom plate, trust me… this is the third one I printed and it finally cleared
Love it! I’ve just printed now, I scale it to 102% for a perfect fit!
The Tpu model was reeeeeally good, and i respect your obsession about step or iges!
2 H and I let you know how it work