Scroll down a few paragraphs to skip the back story and jump straight to the HDZ 4 rebuild walkthrough.
(My machine is a Shapeoko 3 XXL with HDZ and 2.2kw water cooled spindle, but the walkthrough in this specifically relates to any HDZ 4.)
Firstly, thank you incredibly to the Carbide3D Support for their amazing efforts to assist me with this problem. The problem was that all of my 3D carves were failing catastrophically due to undesired changes in Z height. This was a newer problem, as I’ve done many successful 3D carves before the issue arose, but it’s been getting worse and worse over several months. There was absolutely no obvious physical interference that I could just move out of the way, so I thought it had to be a digital issue. With Carbide3D’s assistance, I ended up replacing in this order and in short succession with just a little testing in between, the Z stepper motor, the entire HDZ (I bought a new 4 to replace my old blue HDZ), the Shapeoko control board, and finally the Z motor wiring harness. Nothing fixed my problem.
In all honesty, I had likely worn out my blue HDZ, or at least not properly maintained the bearings well enough for the environment, so the entire issue was probably the HDZ. But with a brand new HDZ 4, it just didn’t make sense why the issue wouldn’t go away. I’m unsure if the new HDZ 4 was assembled fully within Carbide3D’s tolerances before shipping, but some initial measuring caused me to believe that the linear rails were not parallel and that was causing some binding, specifically on fast accelerations. The binding and skipped steps (like if the carriage had just hit a solid object and wouldn’t stop skipping steps until the causing motion command went away or was reverse) happened randomly up and down the range of the HDZ, without much regard to whether it was traveling up or down, and was even happening during manual fast jogging. It is important to note that this minute non-parallelism likely would go unnoticed with a lighter spindle, but with a 2.2kw spindle, the mass and leverage made it more susceptible to binding on non-parallel rails.
The HDZ 4 does not allow access to all of the linear rail bolts without completely removing the carriage. So to start, Carbide3D was gracious enough to walk me through a strip down and rebuild of the HDZ as far as could be done without removing the carriage from the rails. This basically meant loosening the linear bearings from the Z plate, cycling up and down a few times by hand, and snugging them back up. This ensured that the bearings were aligned to each rail, but didn’t resolve the issue that the distance between the rails was not consistent. But after this attempt of bearing alignment didn’t correct the issue, I went on to a more complete rebuild on my own, to which I’ve documented below.
Walkthrough starts here!
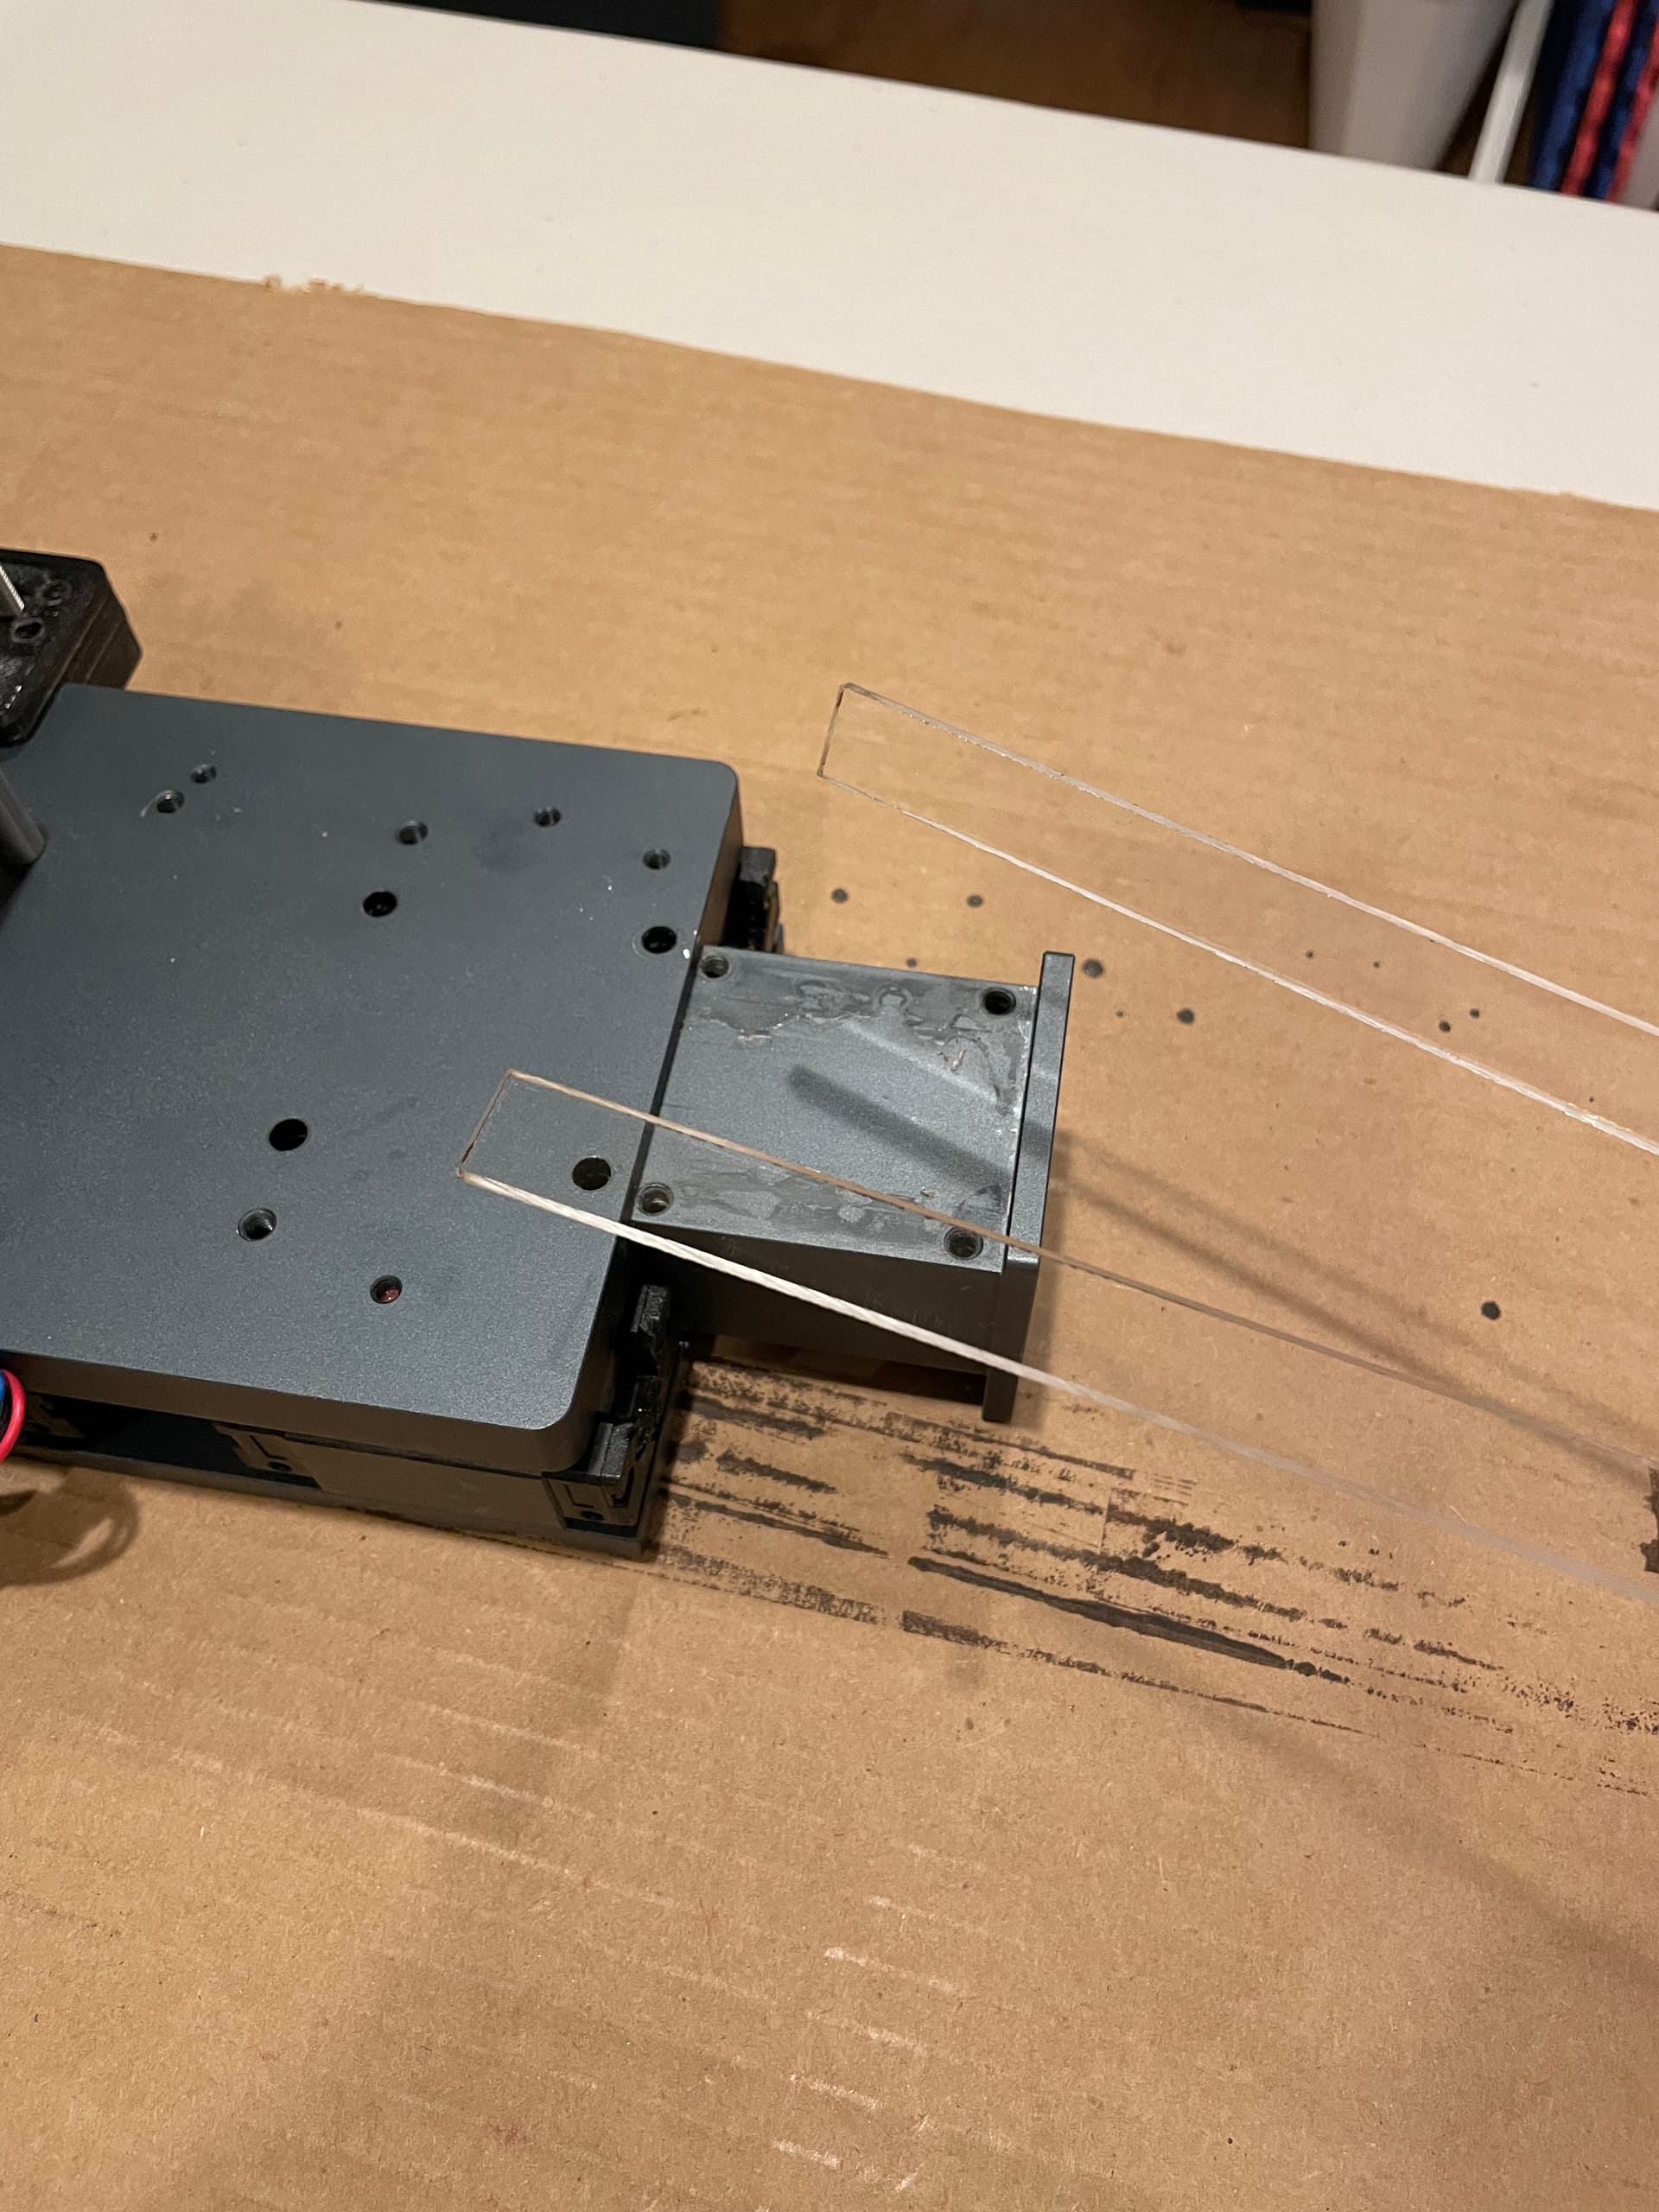
Disclaimer: Simply sliding the linear bearings off of the linear rails will cause a mess of loose ball bearings to fall out and probably cause many expletives to come out of your mouth. Use some sort of a carriage loader/bearing retainer. I tried to 3D print one, but wasn’t successful in finding the exact profile for these linear rails, so I just ripped some 1/8" thick polycarbonate down to about 15mm wide and used that instead.
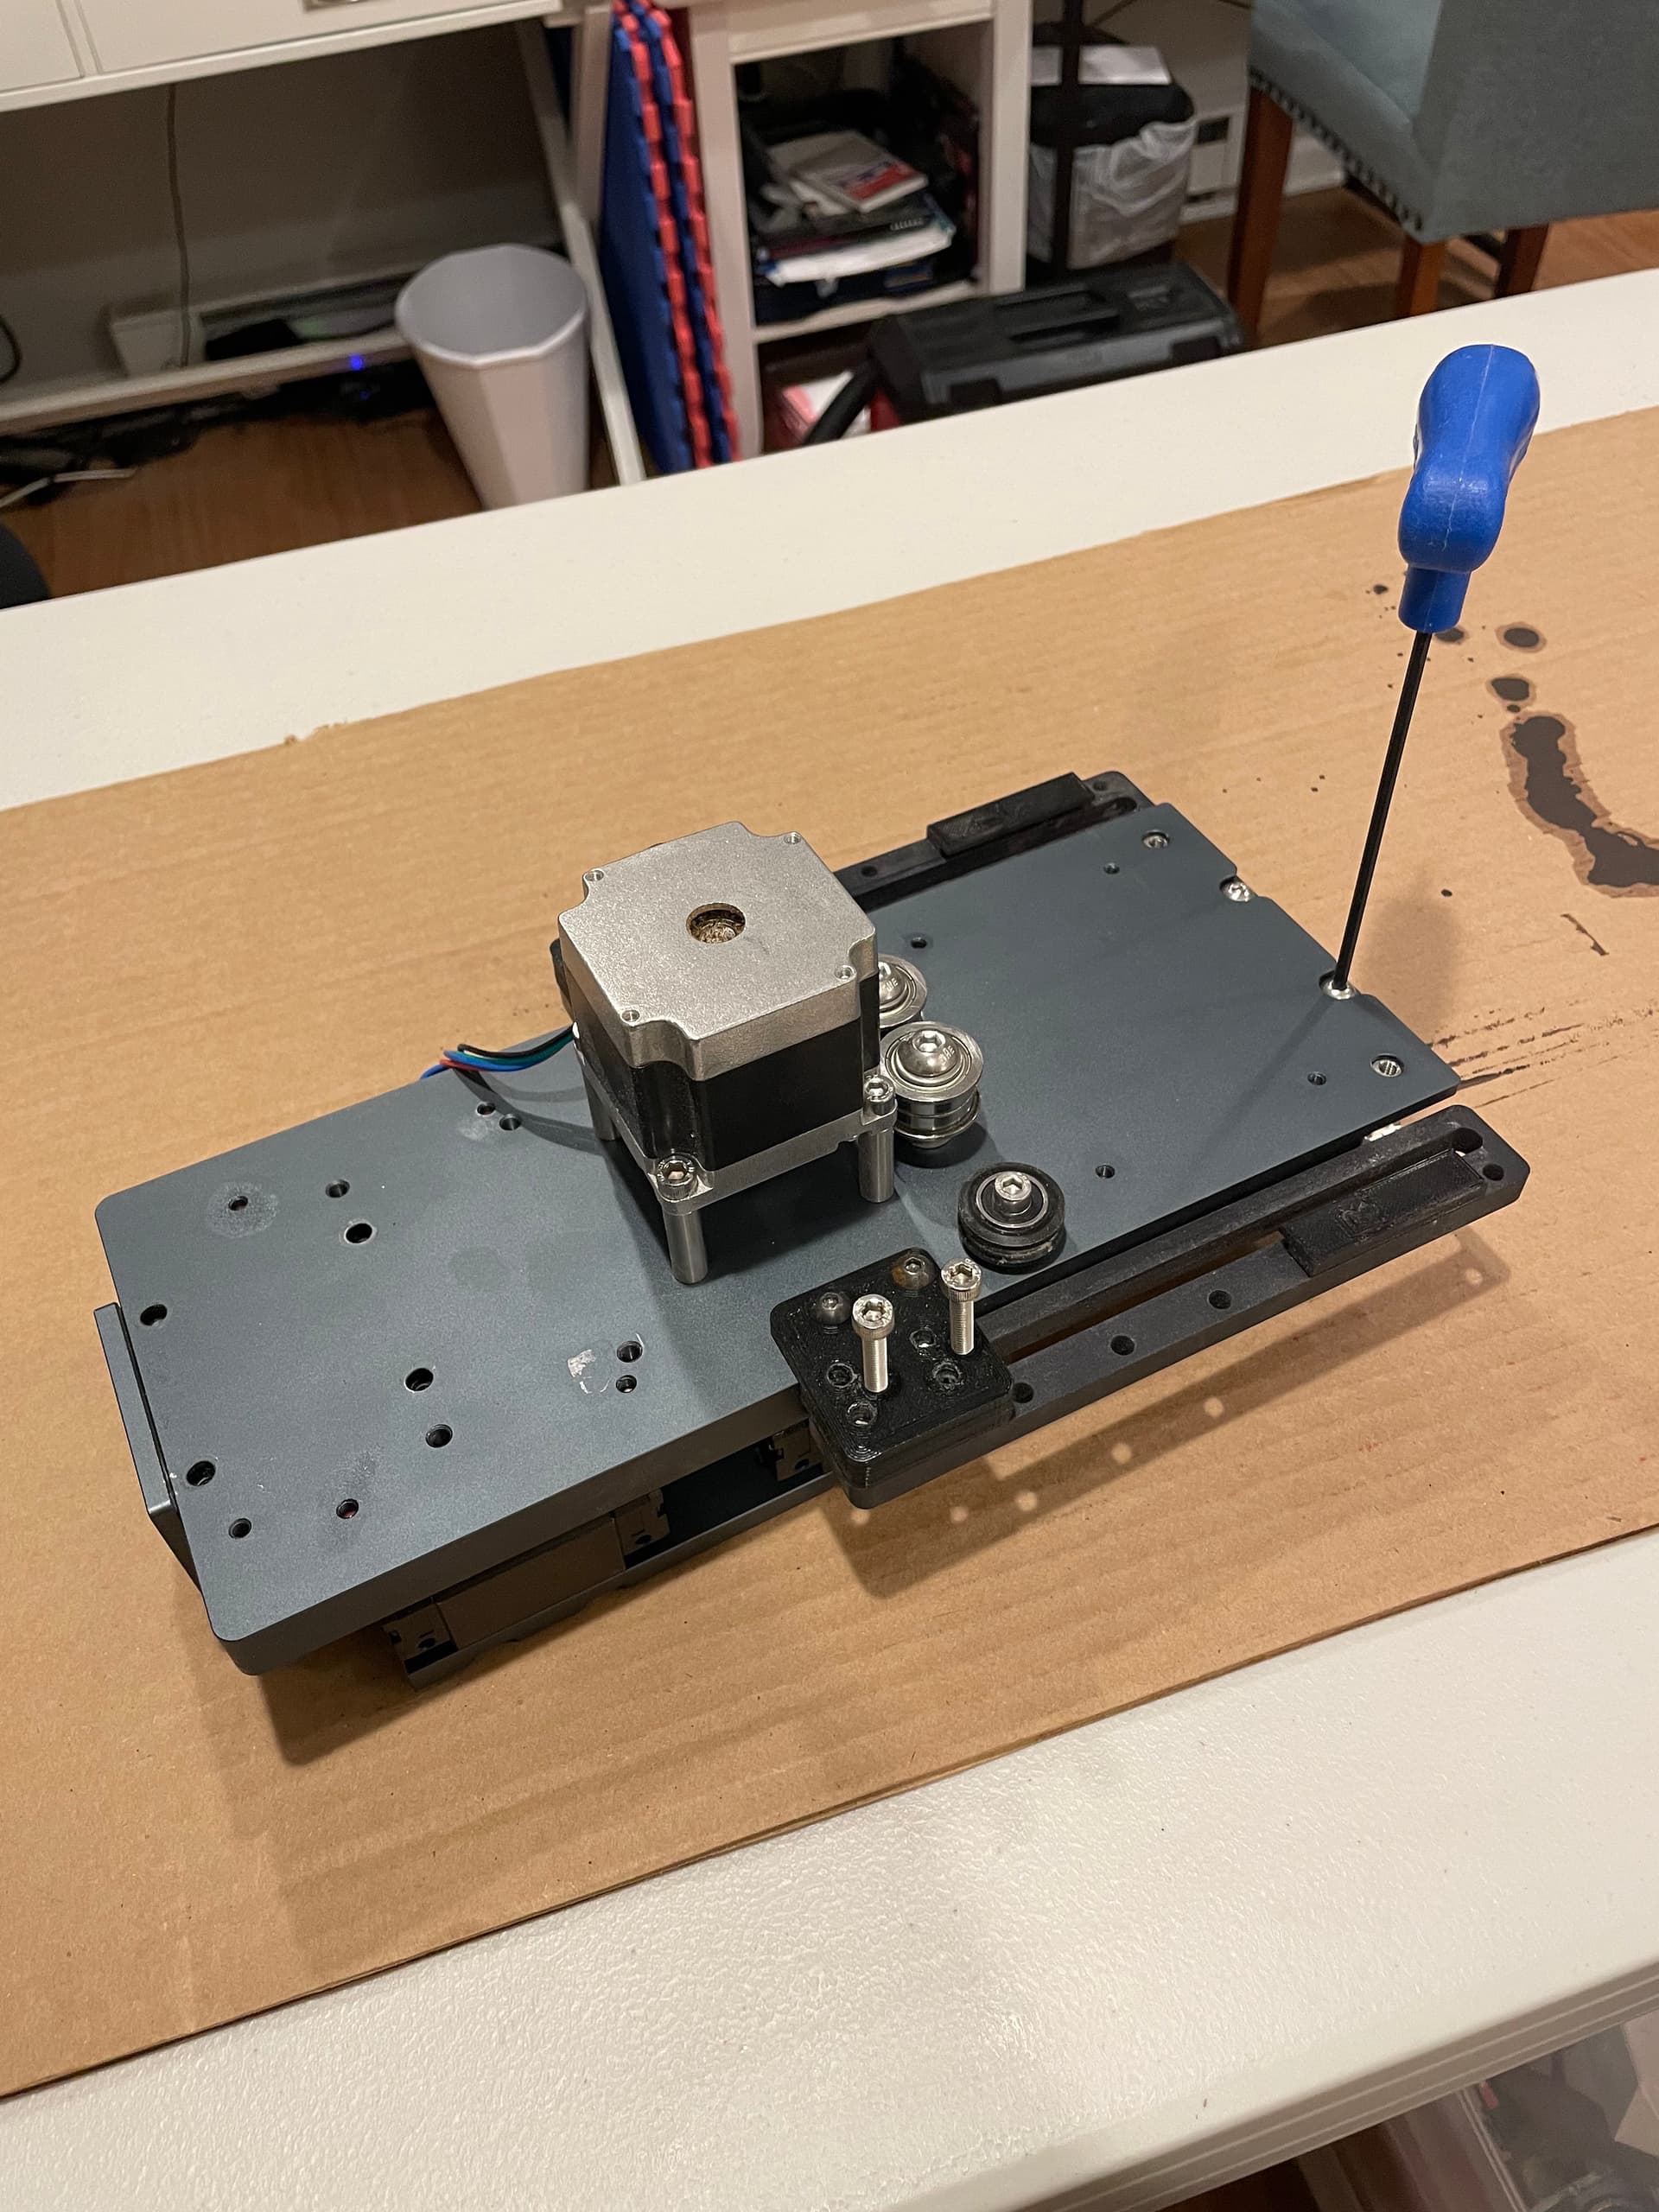
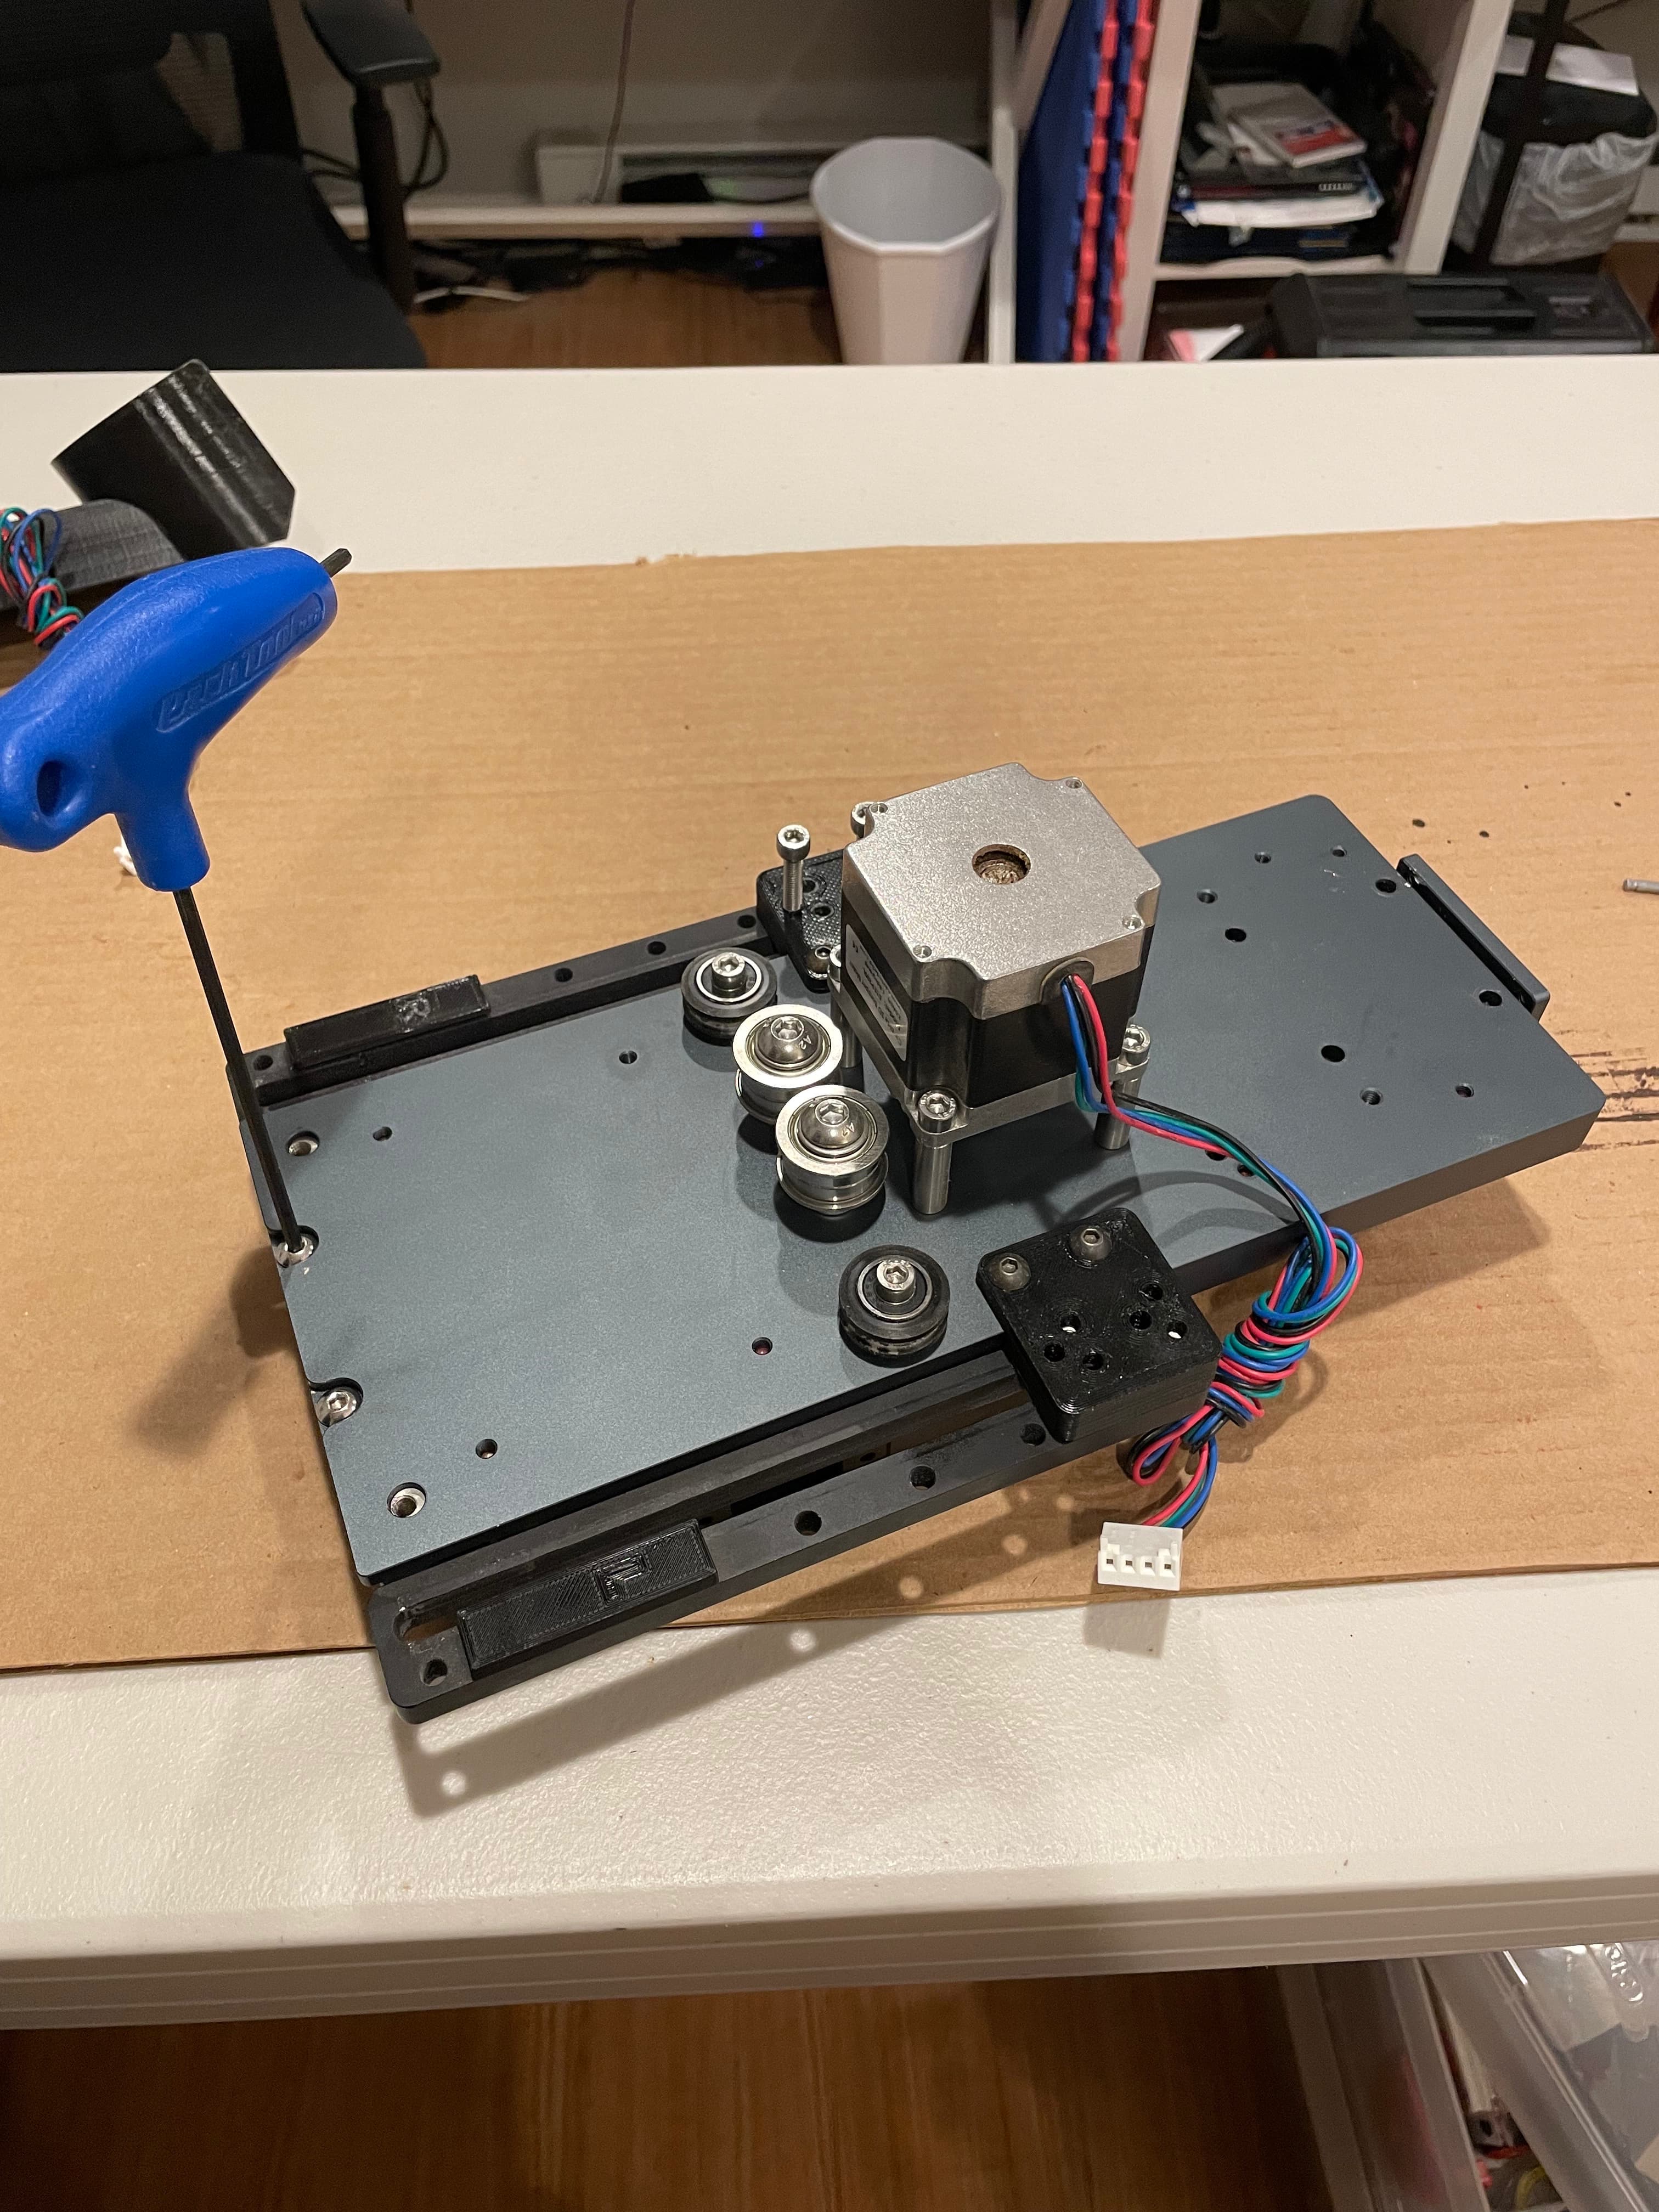
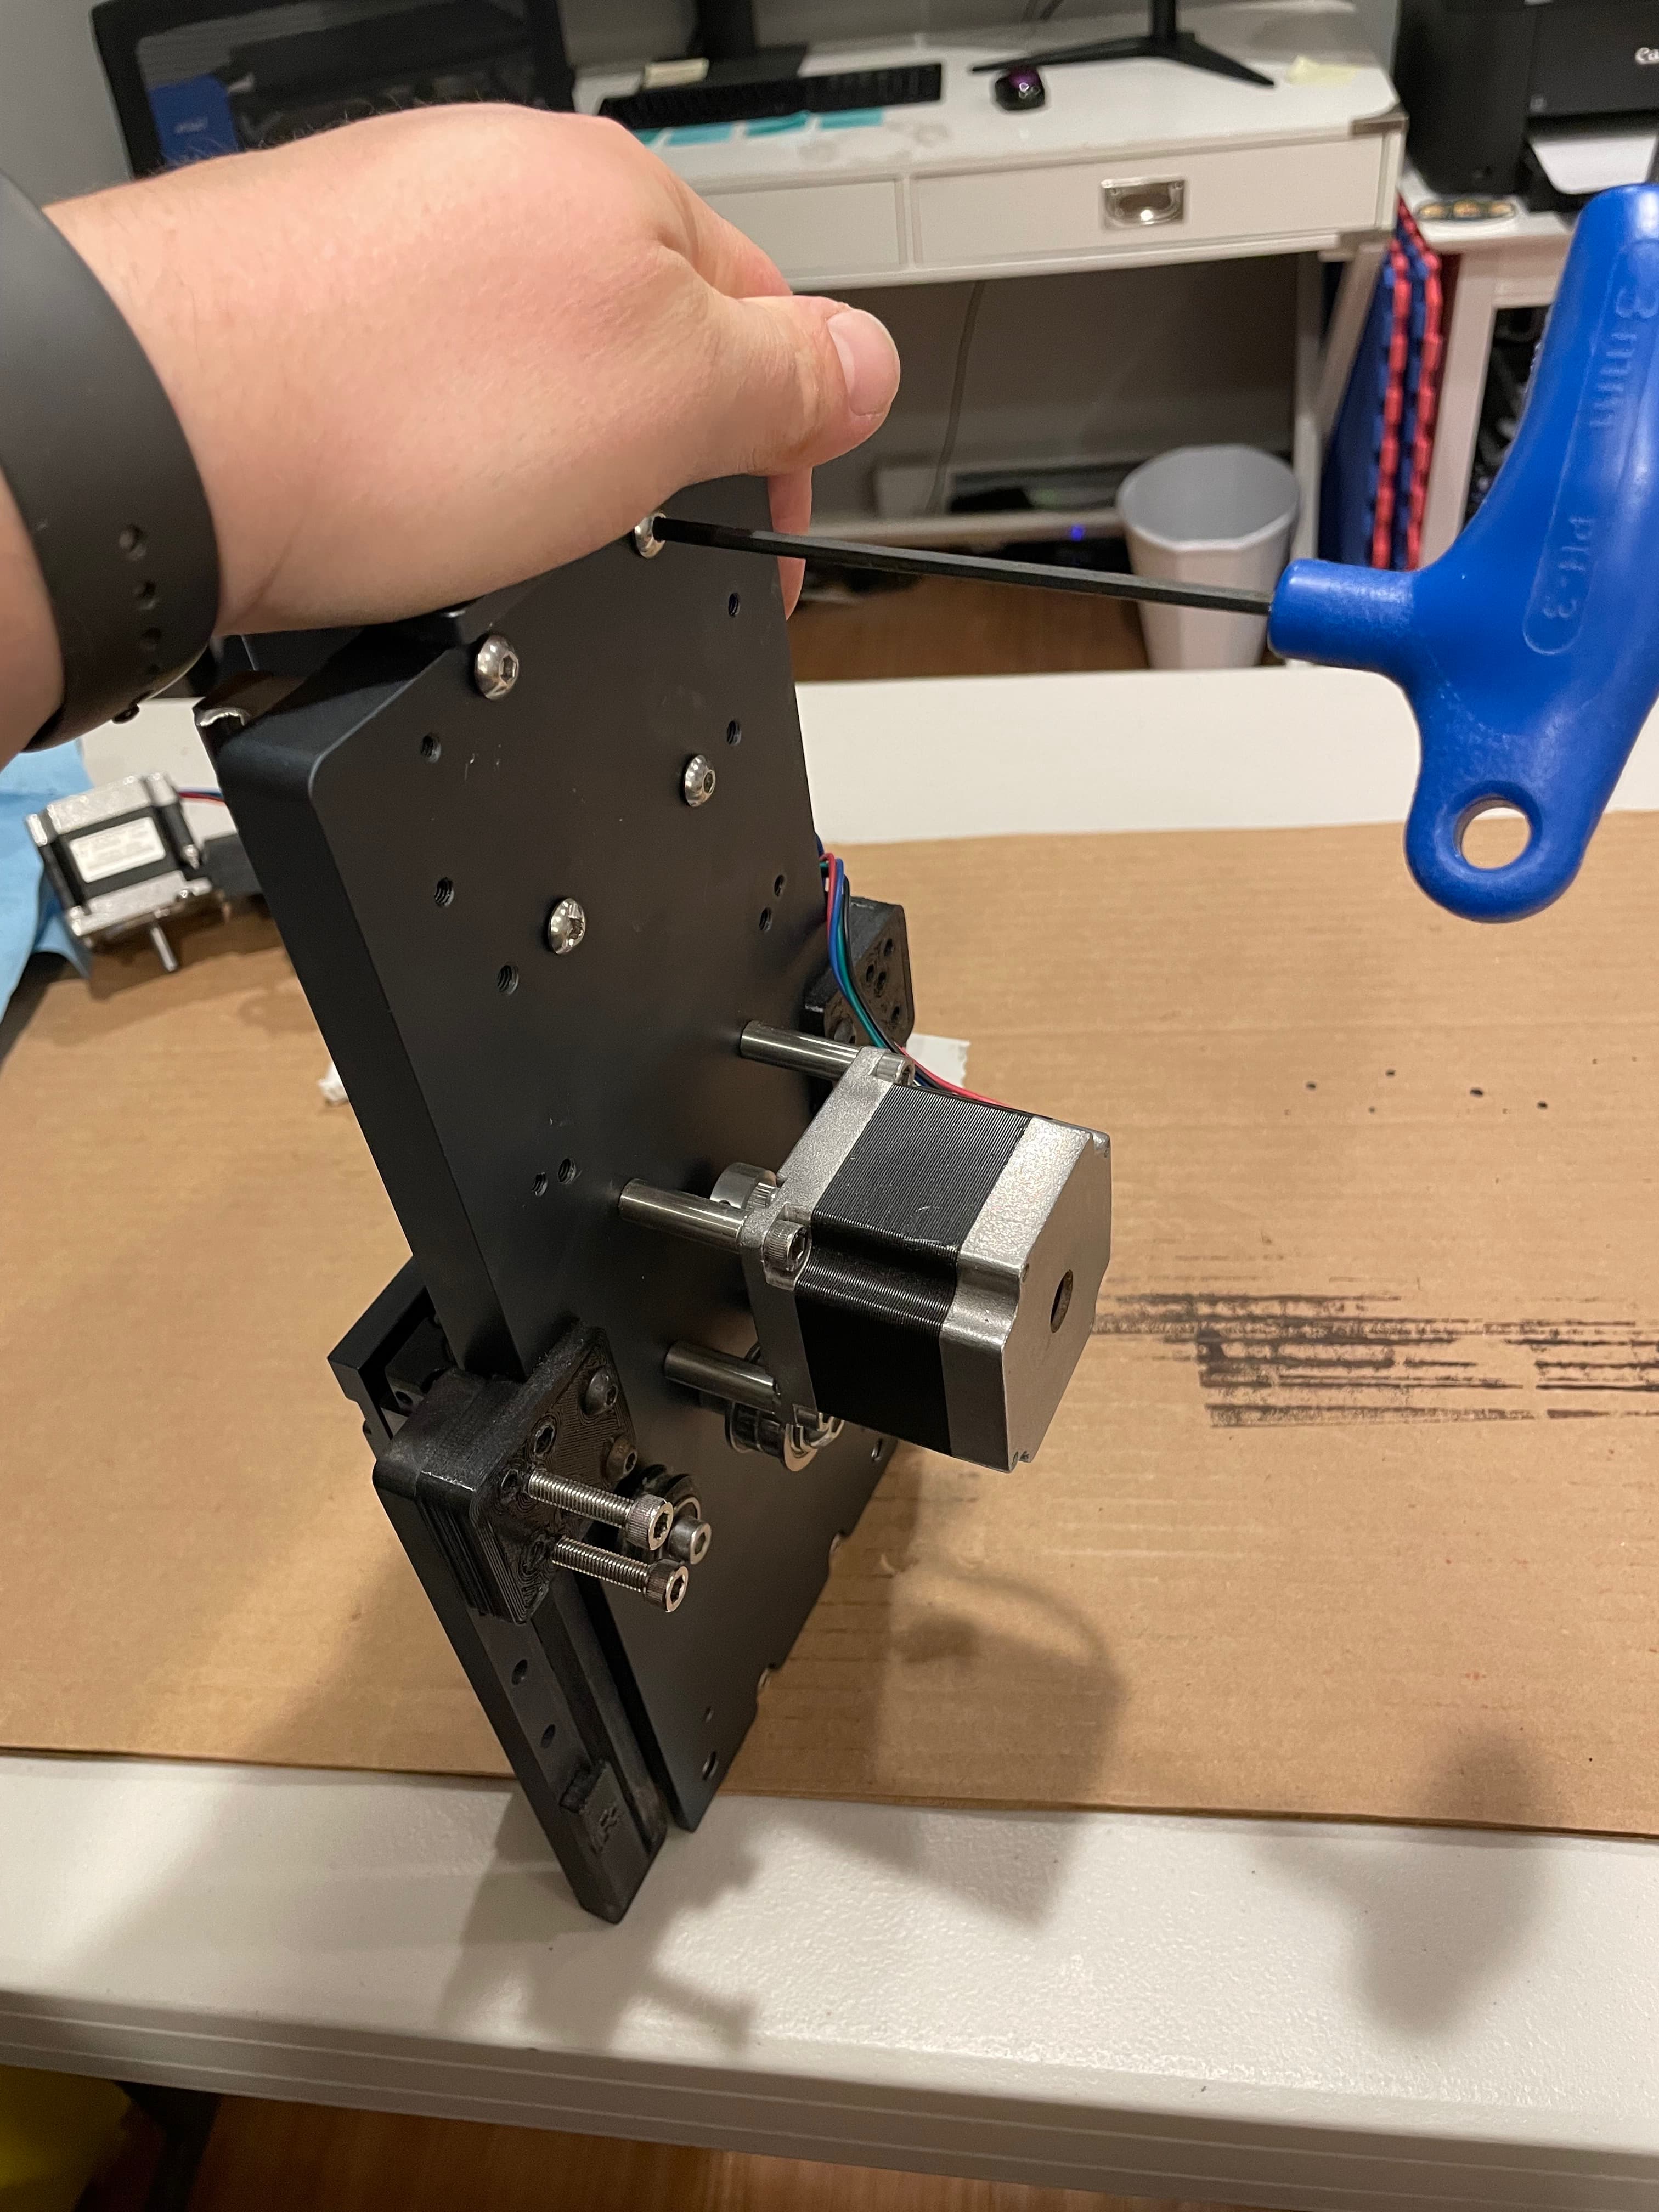
The first step is to completely remove your HDZ from your machine and also remove the spindle and spindle mount from the HDZ.
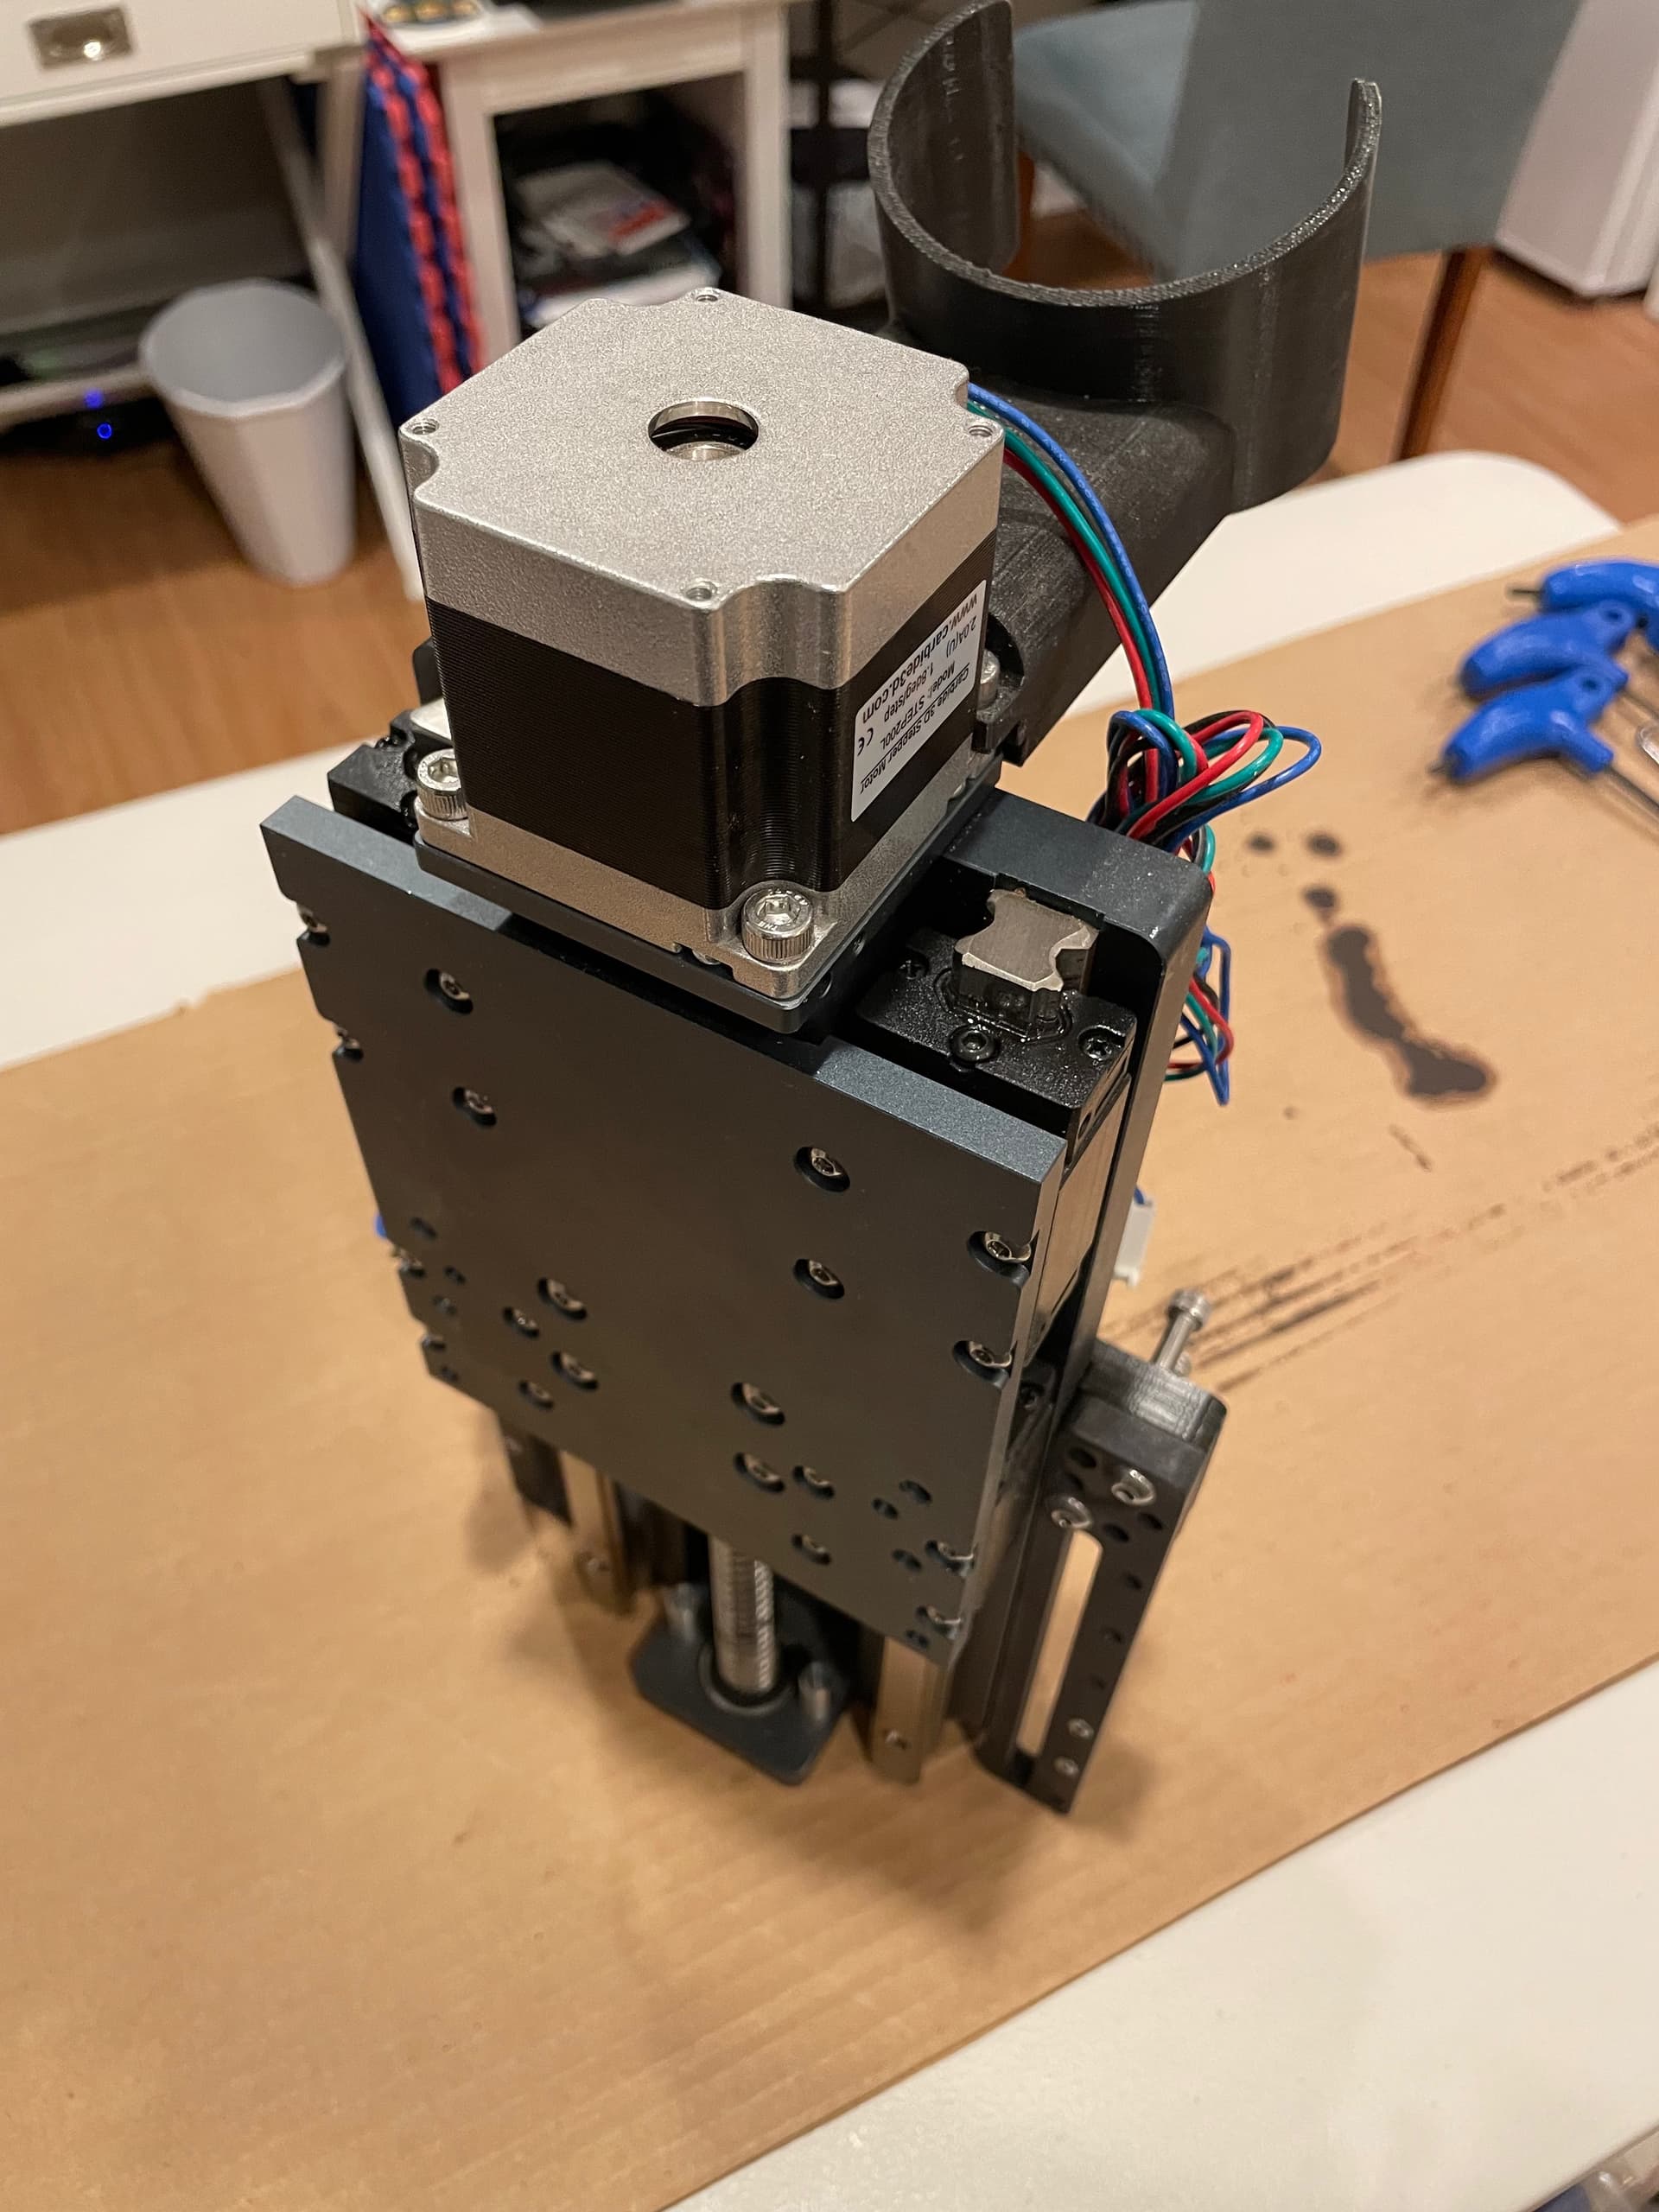
Next, hand spin the ball screw to slide the carriage down (if required) and reveal the shaft coupler. Loosen the top clamp screw in the shaft coupler.
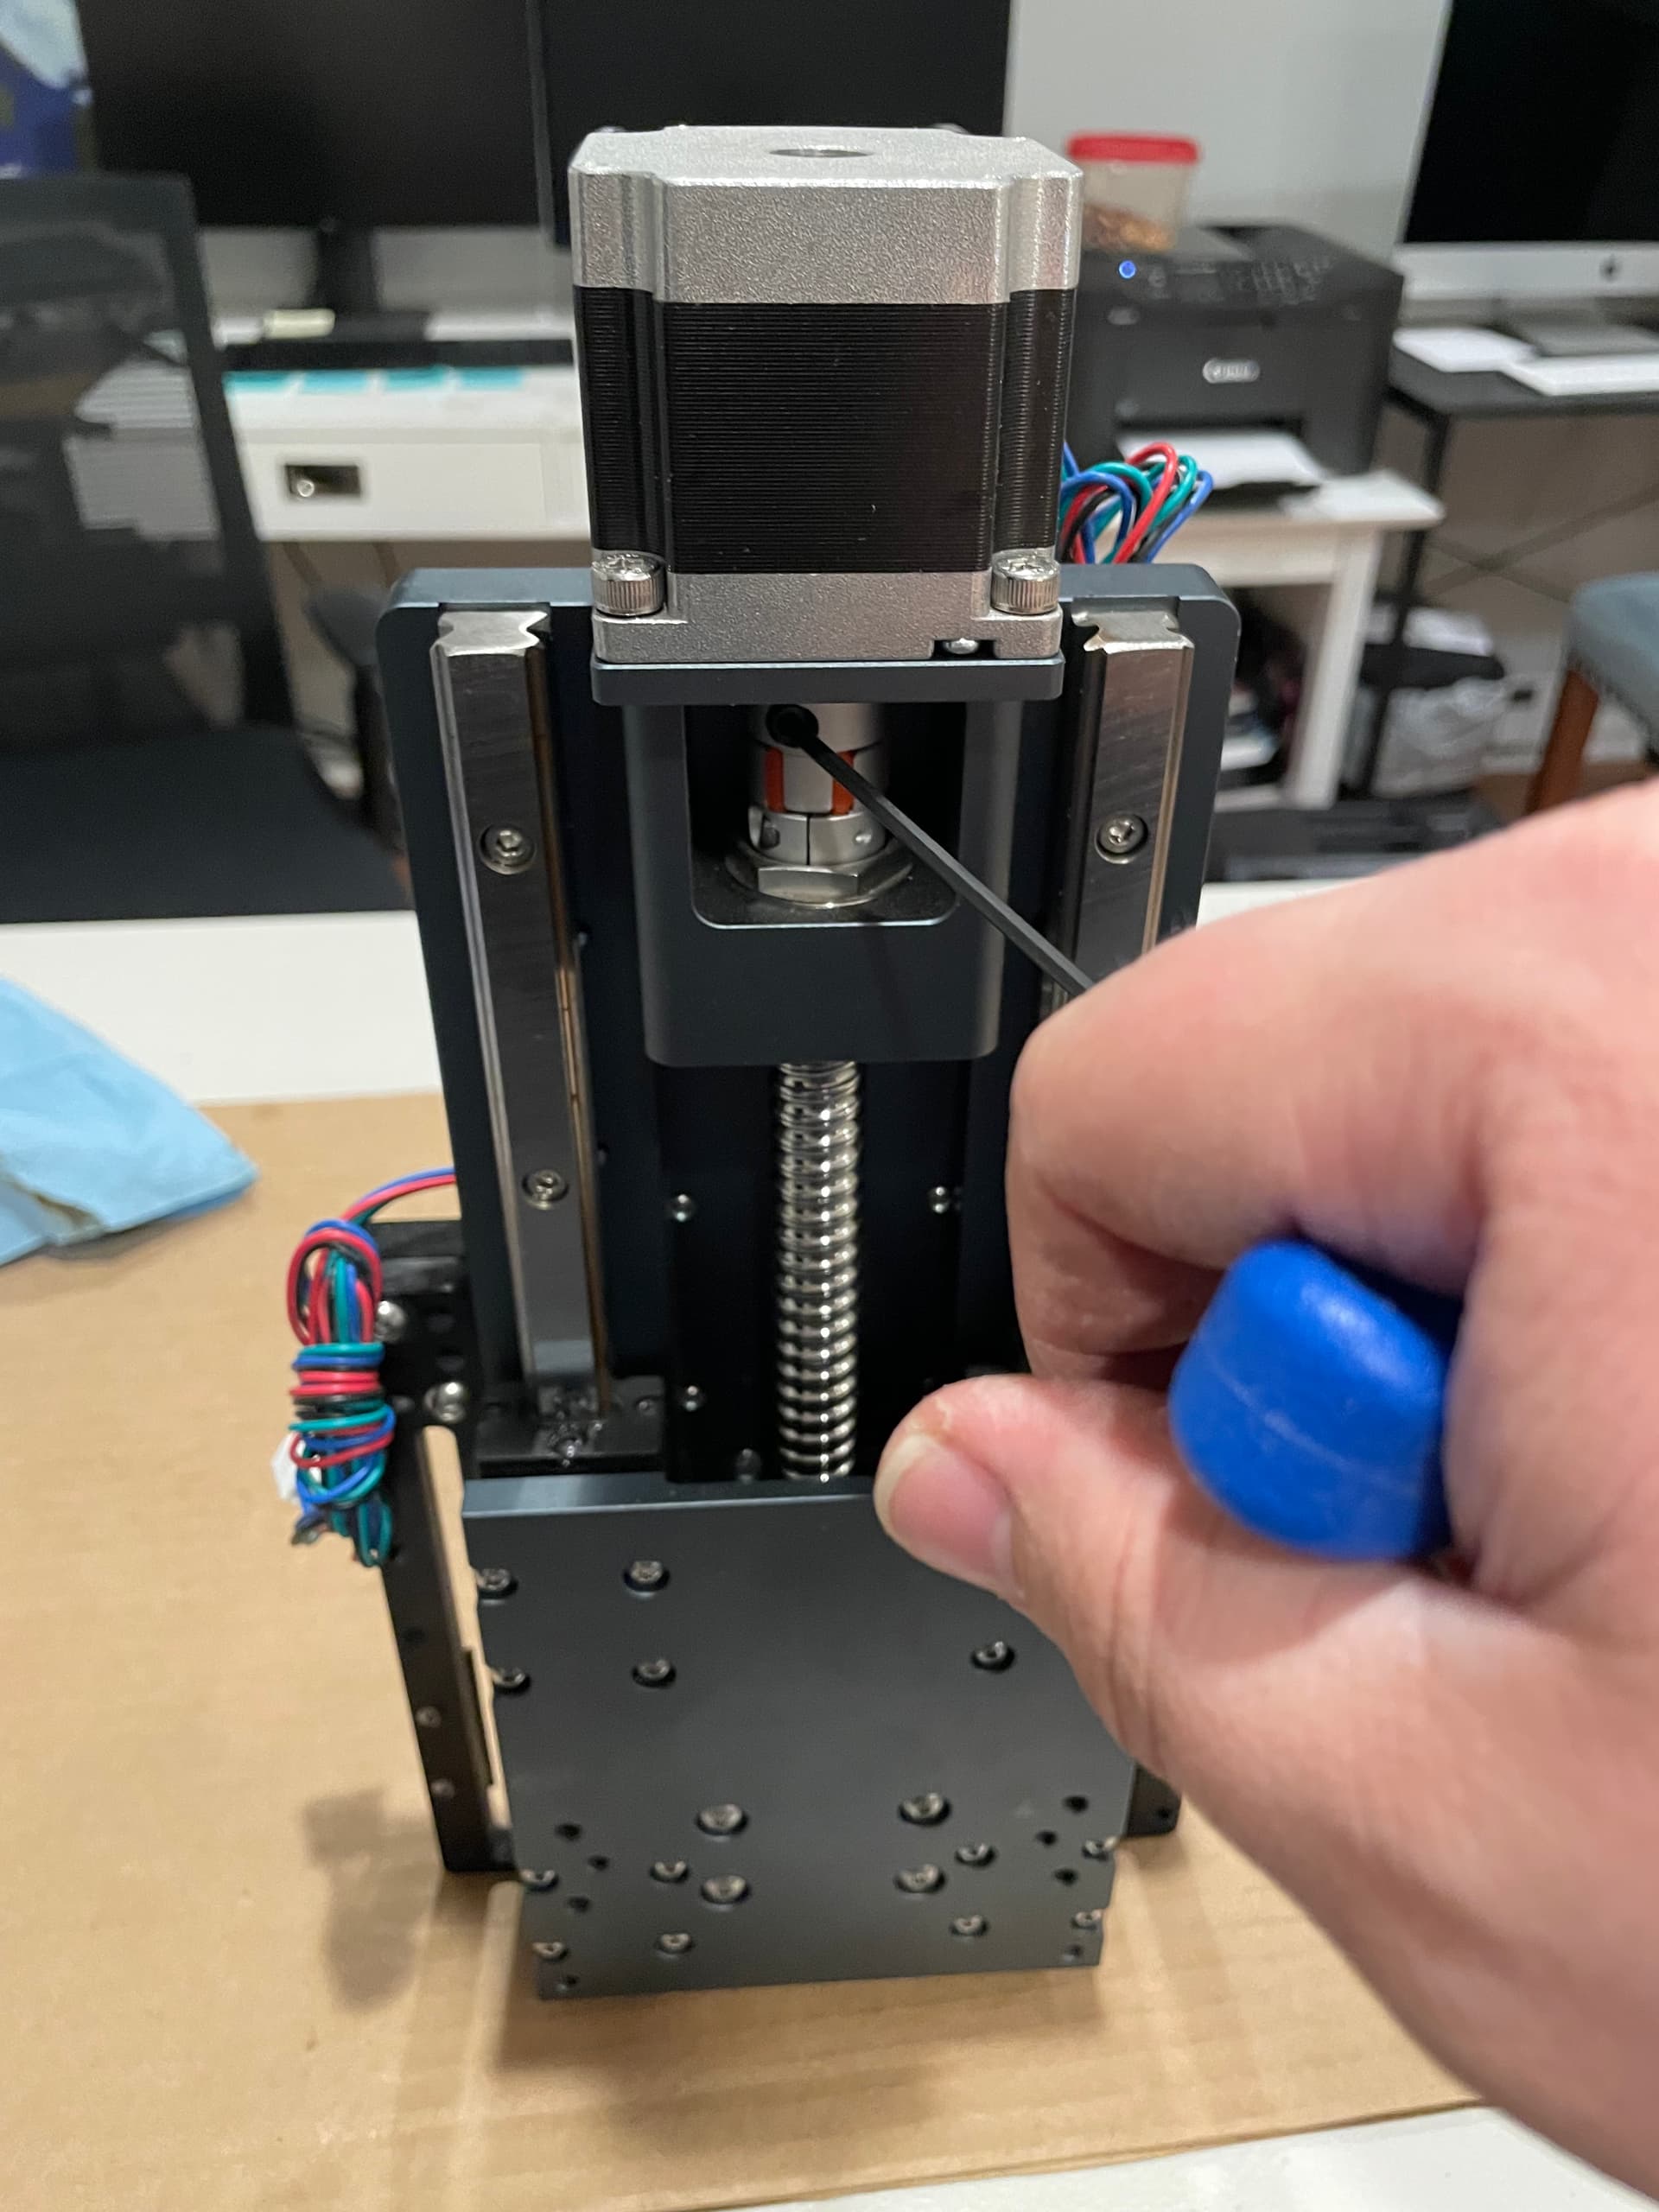
Now unscrew the 4 screws and remove the Z motor. (Technically removing the Z motor isn’t required, but I was gearing up to get everything out of my way.)
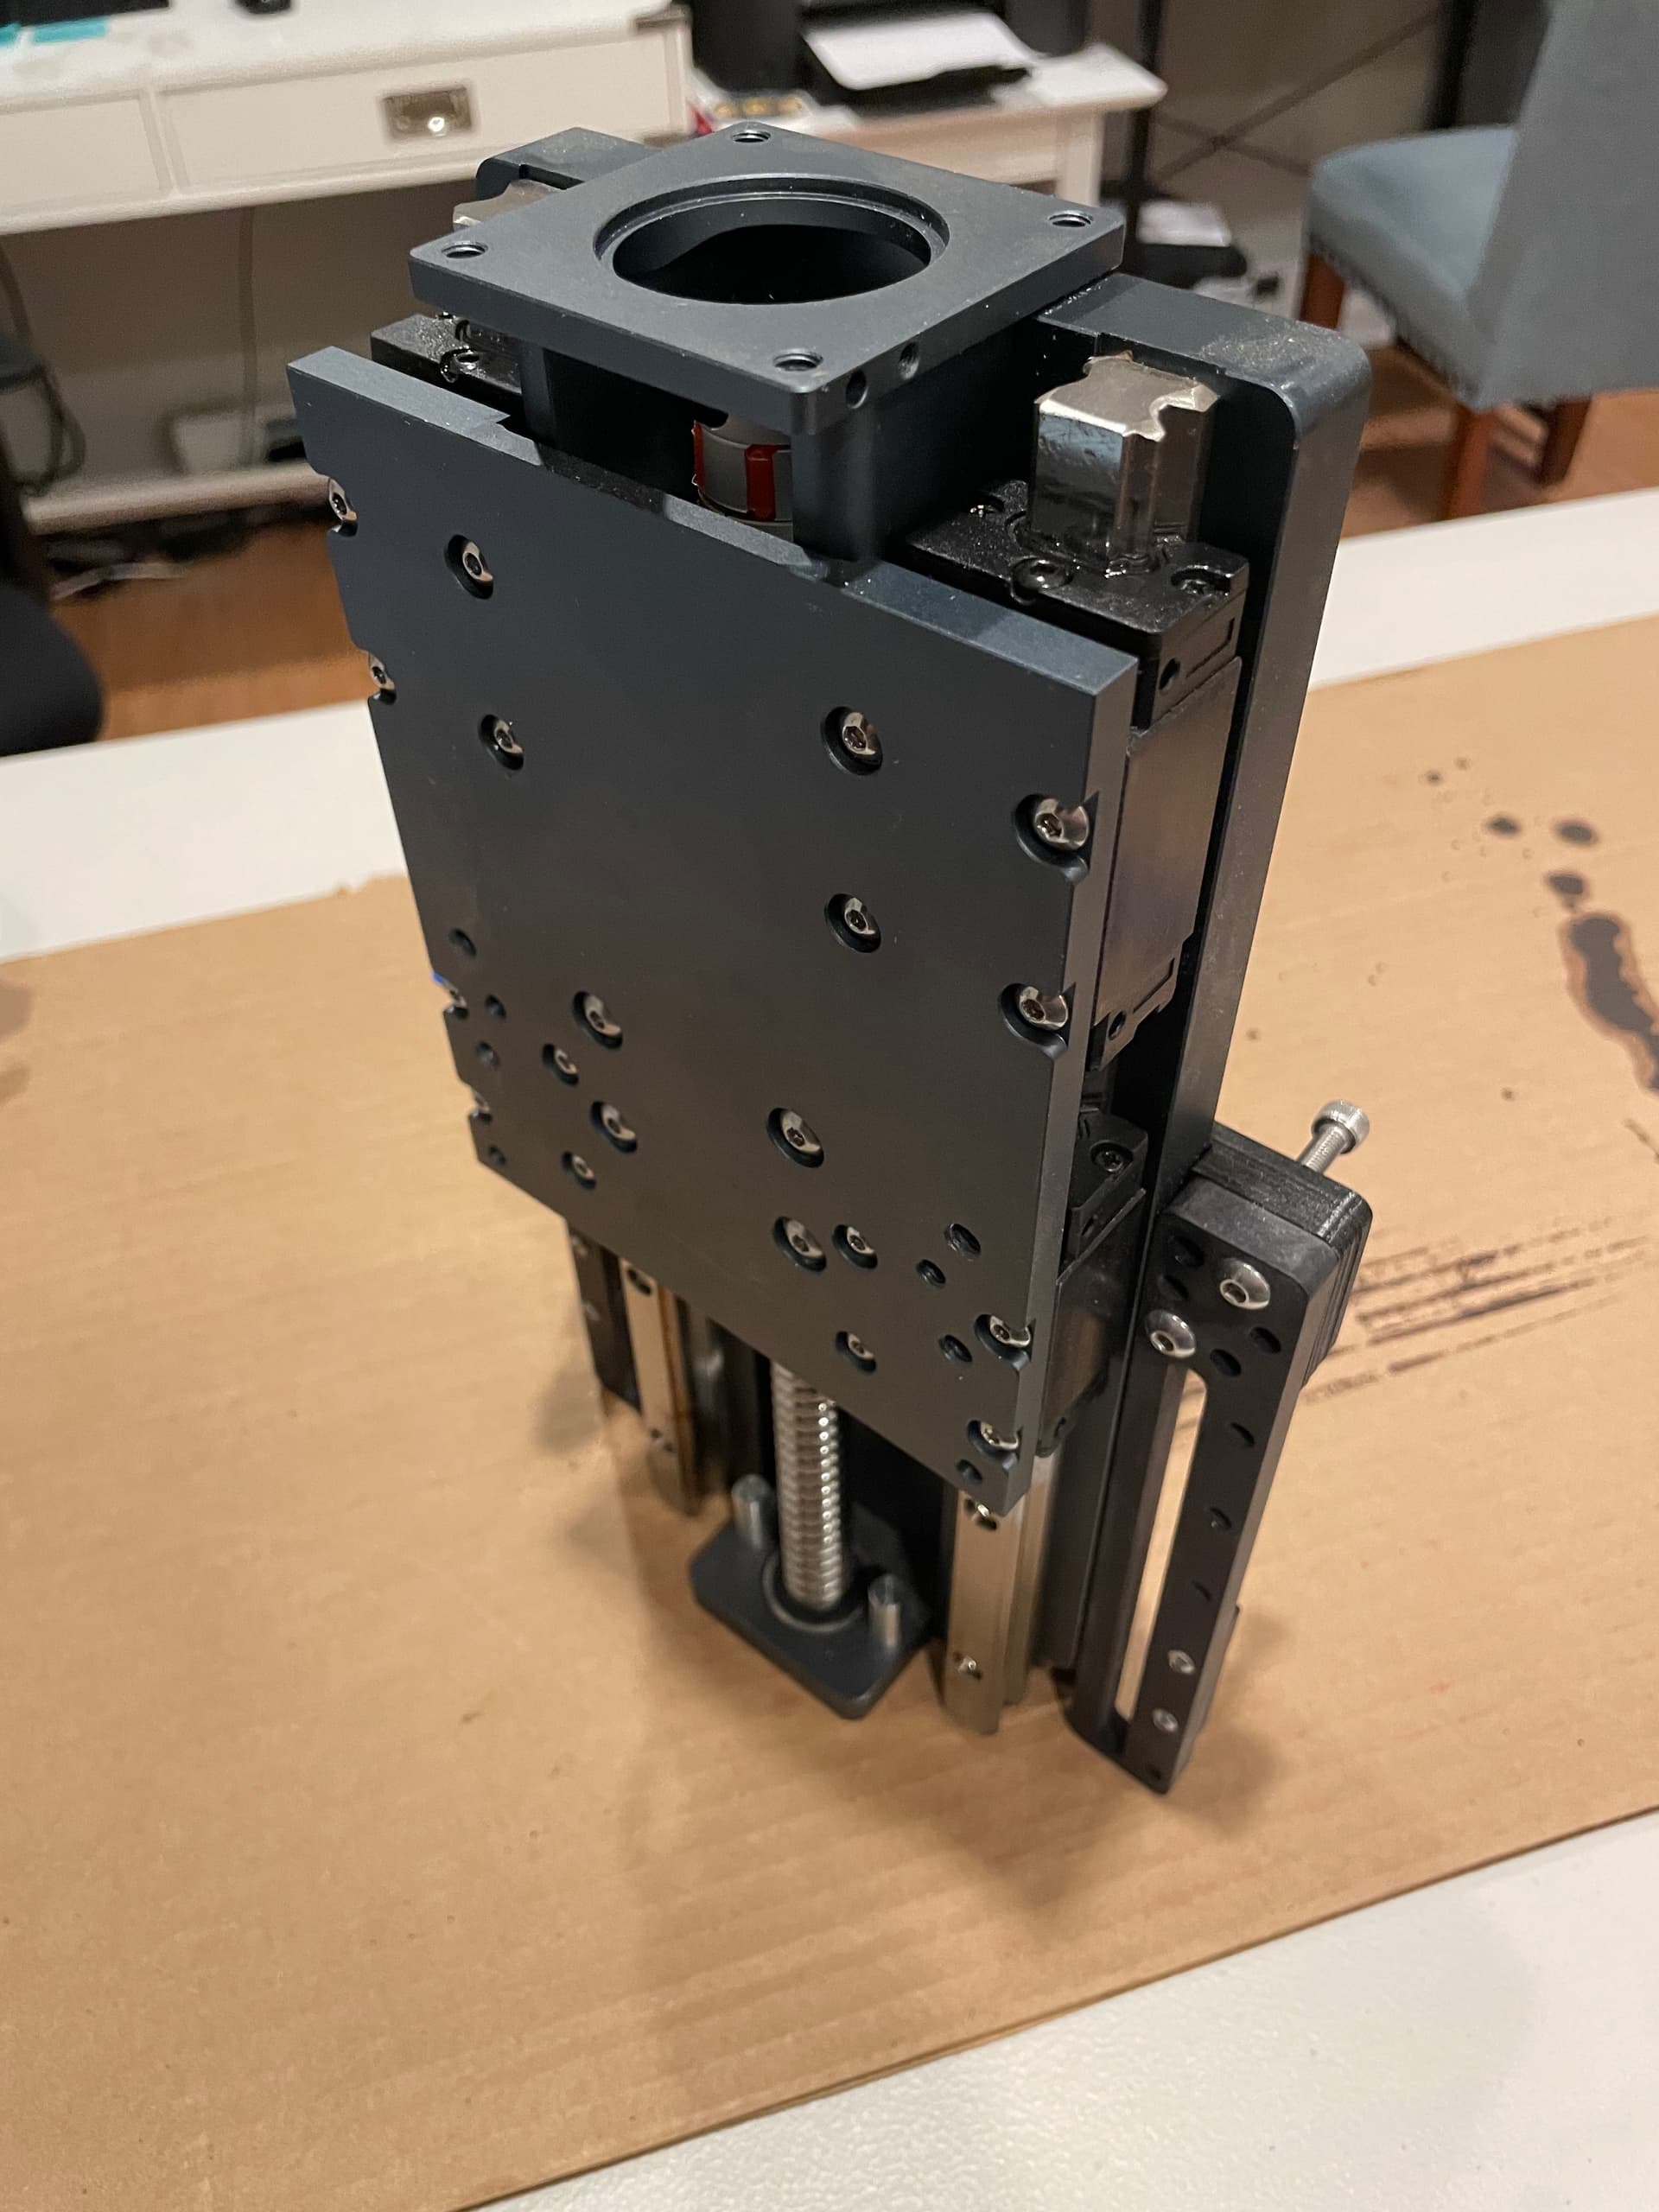
Next, remove the 4 screws on the back that are holding the shaft coupler cage to the HDZ.
Then remove the 2 screws which hold the ball screw lower bearing retainer block in place.
Remove the bearing retainer block. The first time I did this I had to tap it off with a piece of hard wood and a mallet, but it came off more easily the second time.
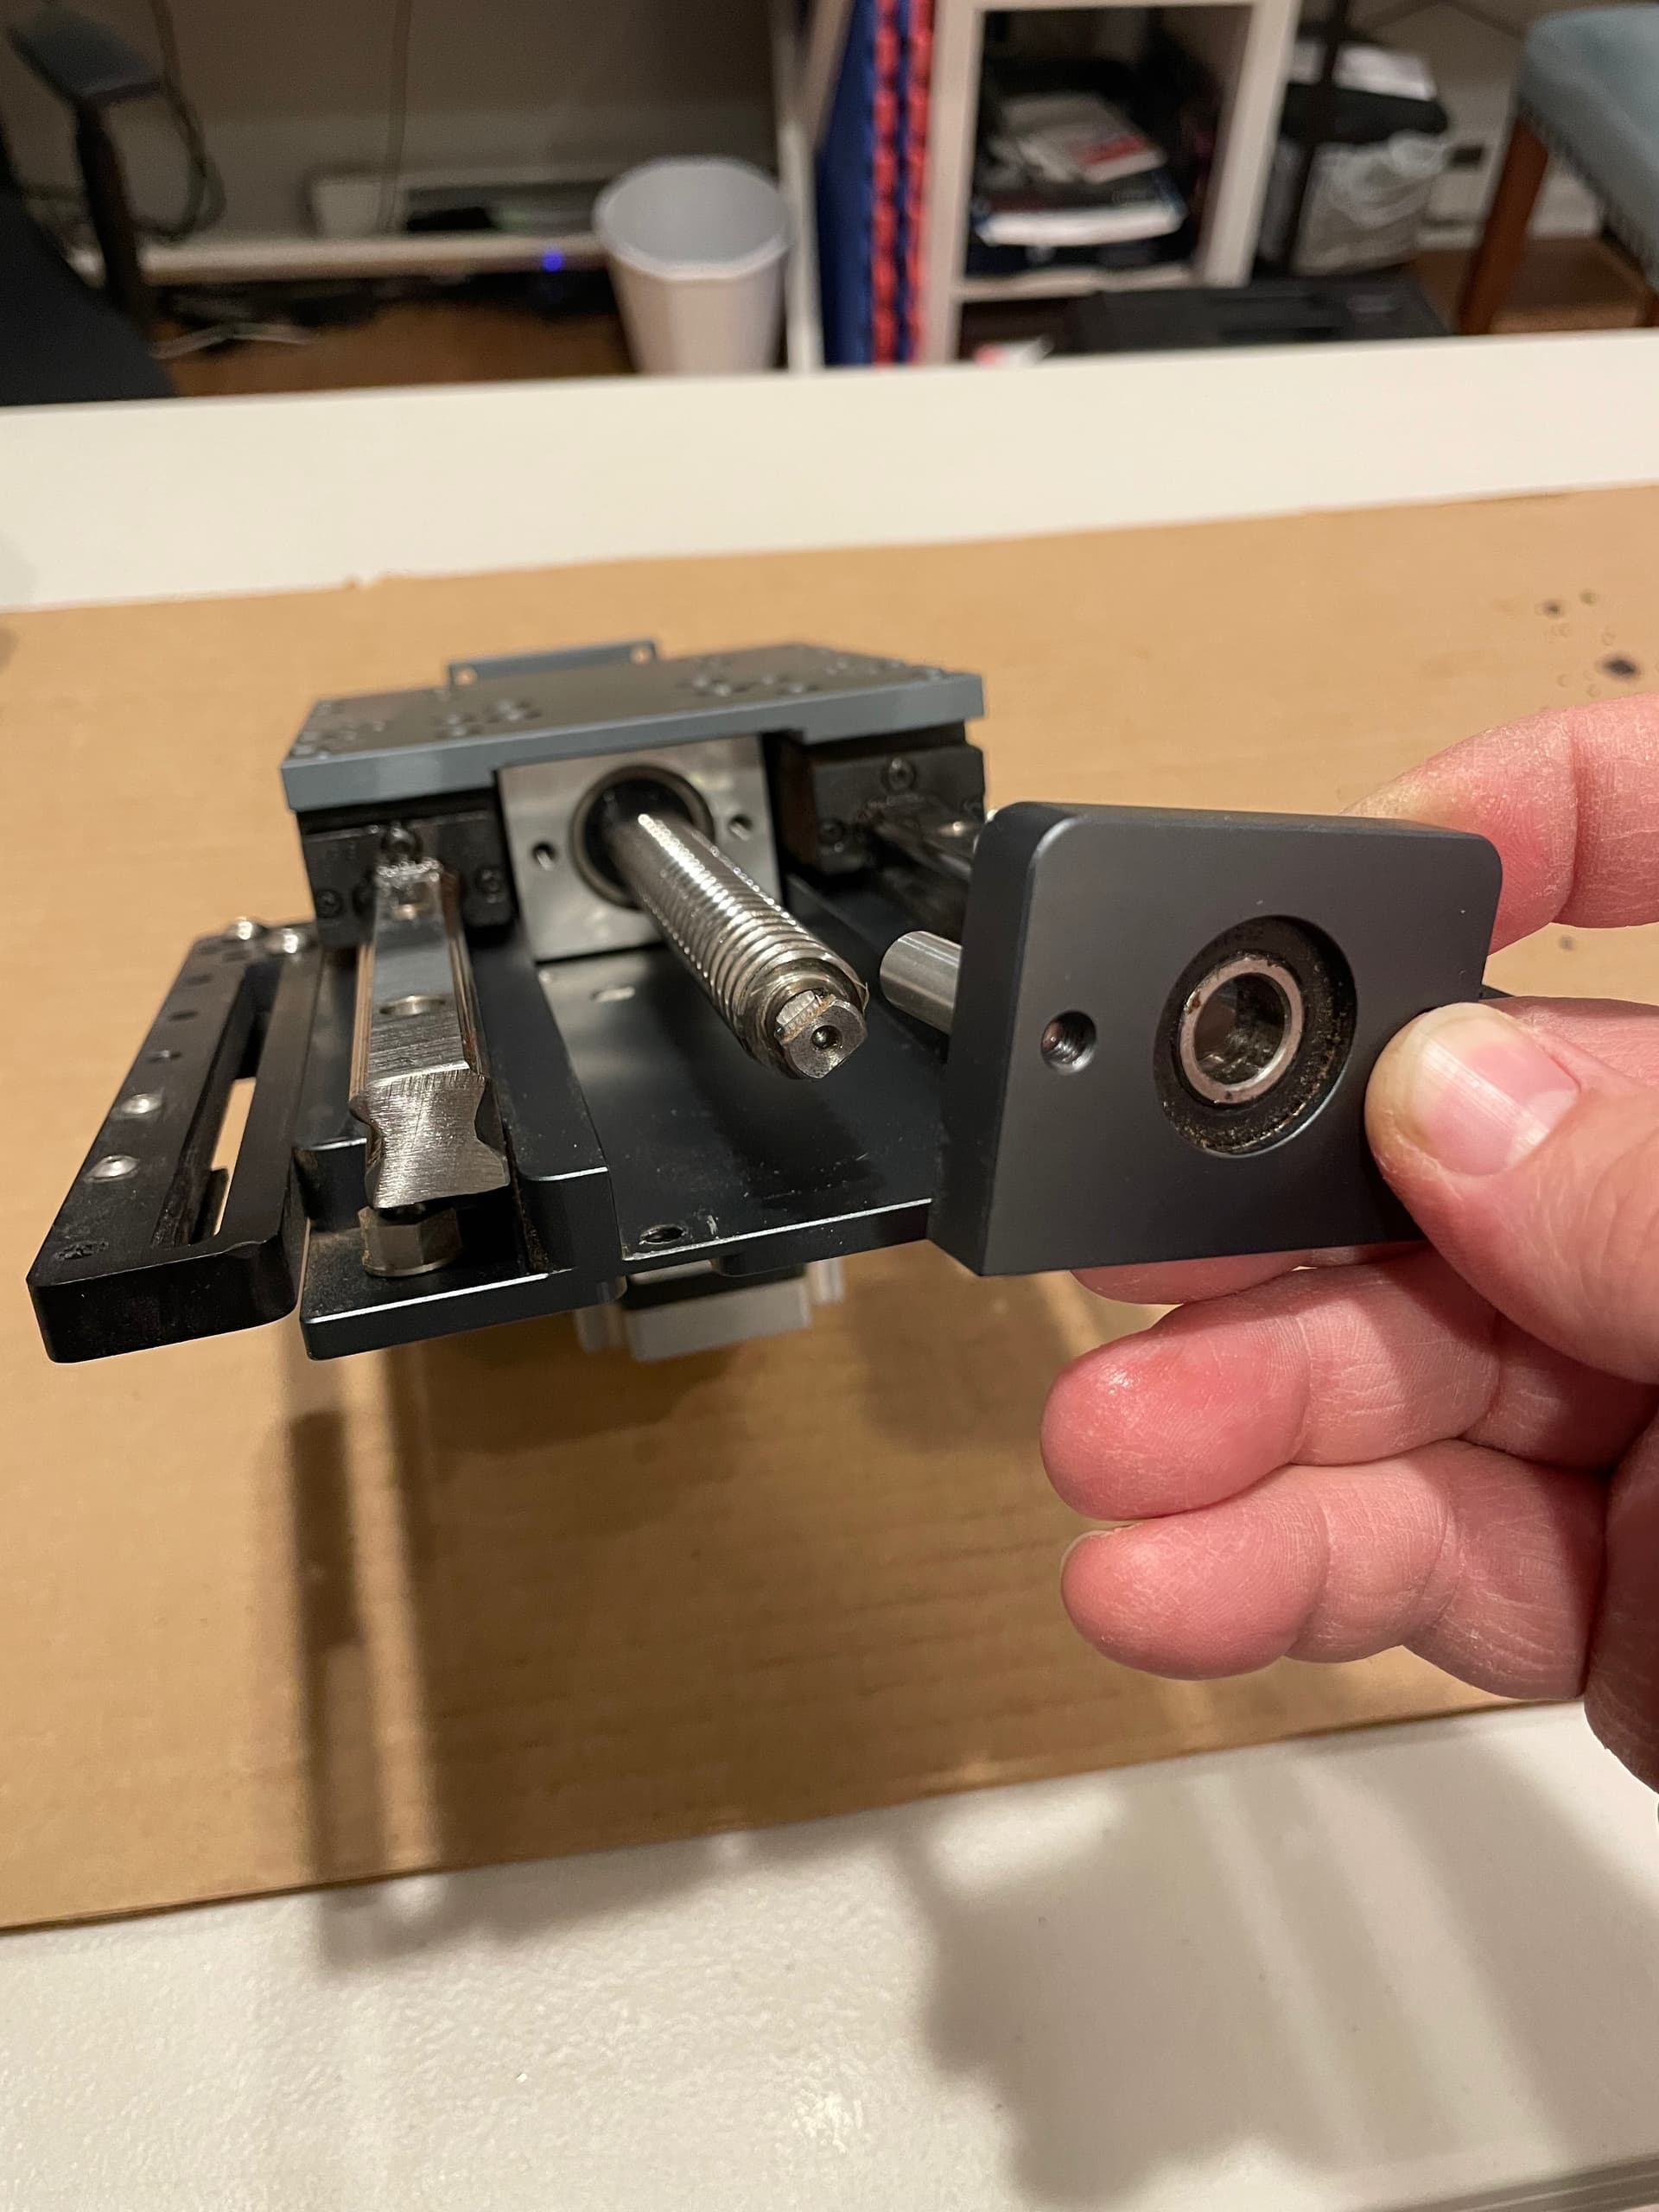
The shaft coupler cage should also move freely now. Note that the coupler cage, ball screw, and carriage are all still attached, and that is ok. If you desire to separate them, just undo the 4 screws in the middle of carriage plate that hold the ball nut onto it. There should be no reason to unscrew the ball screw from the ball nut for any of this walkthrough.
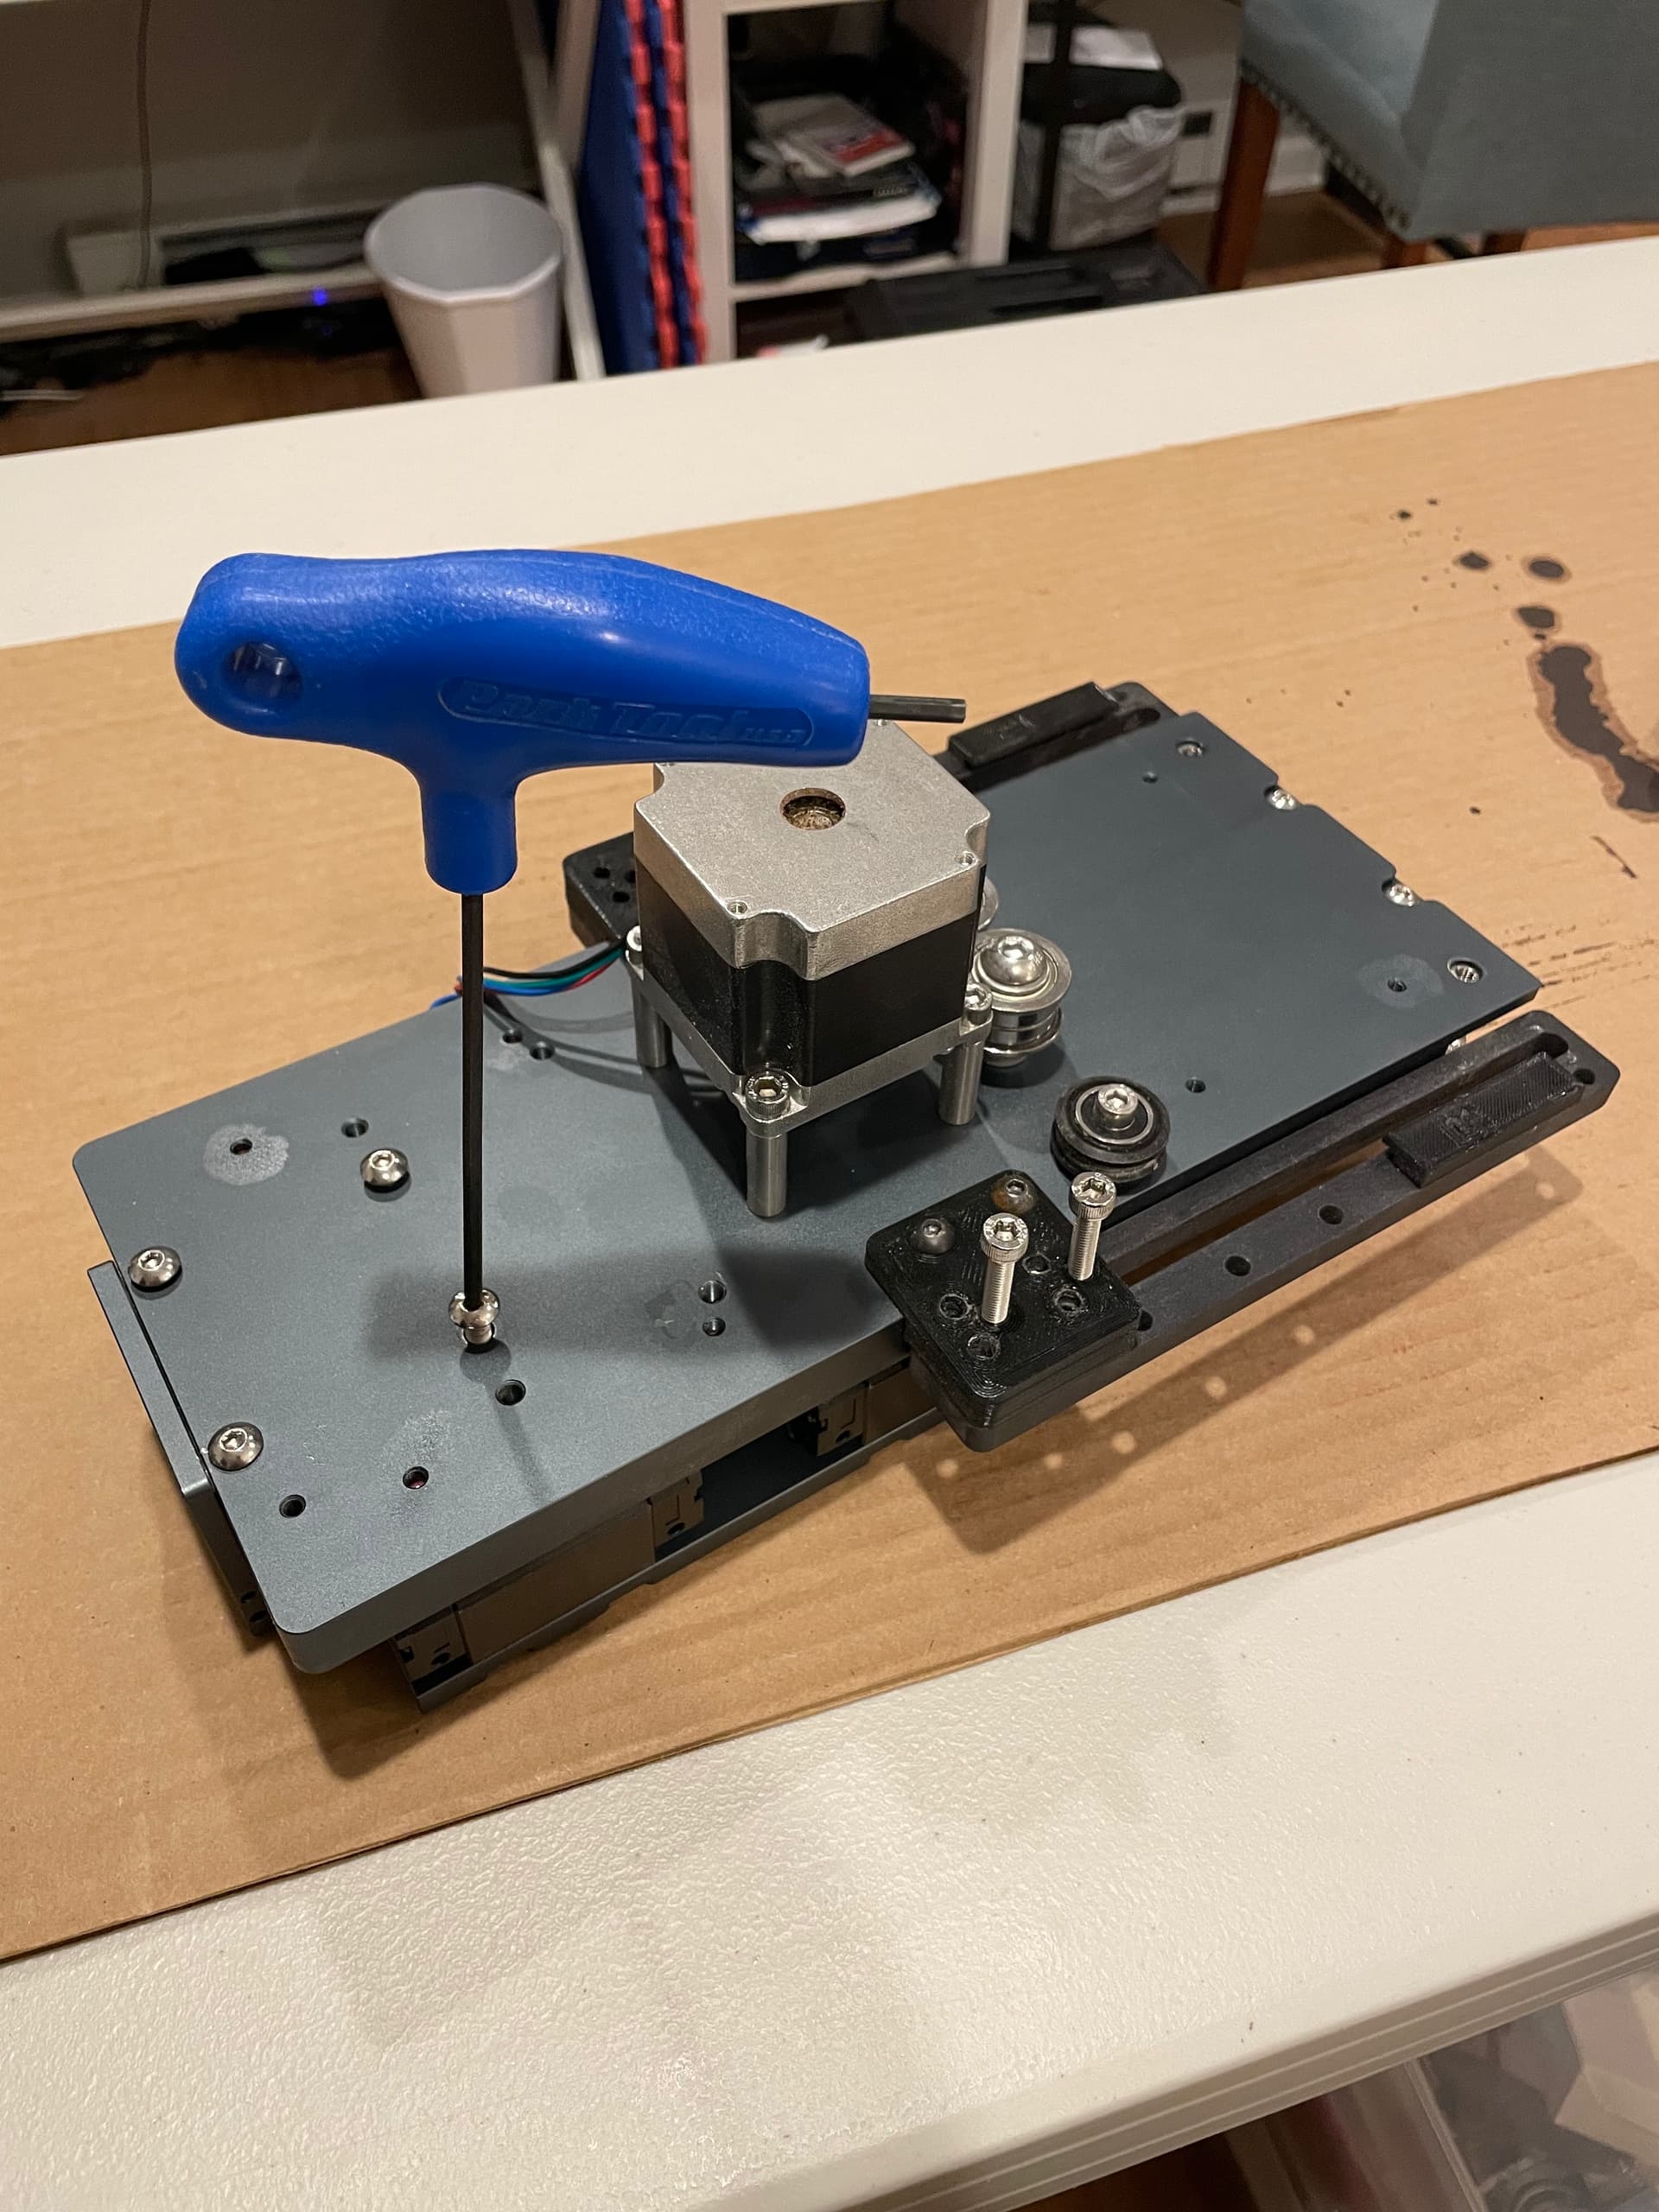
Use whatever bearing retainers you have, and carefully insert them into the linear bearings at the exact same time that you slowly slide the carriage off the top of the linear rails. Failure to continuously keep something inside the bearings to retain the ball bearings will make you regret waking up this morning. Note, I found this easier to do with the carriage plate laying flat against the table.
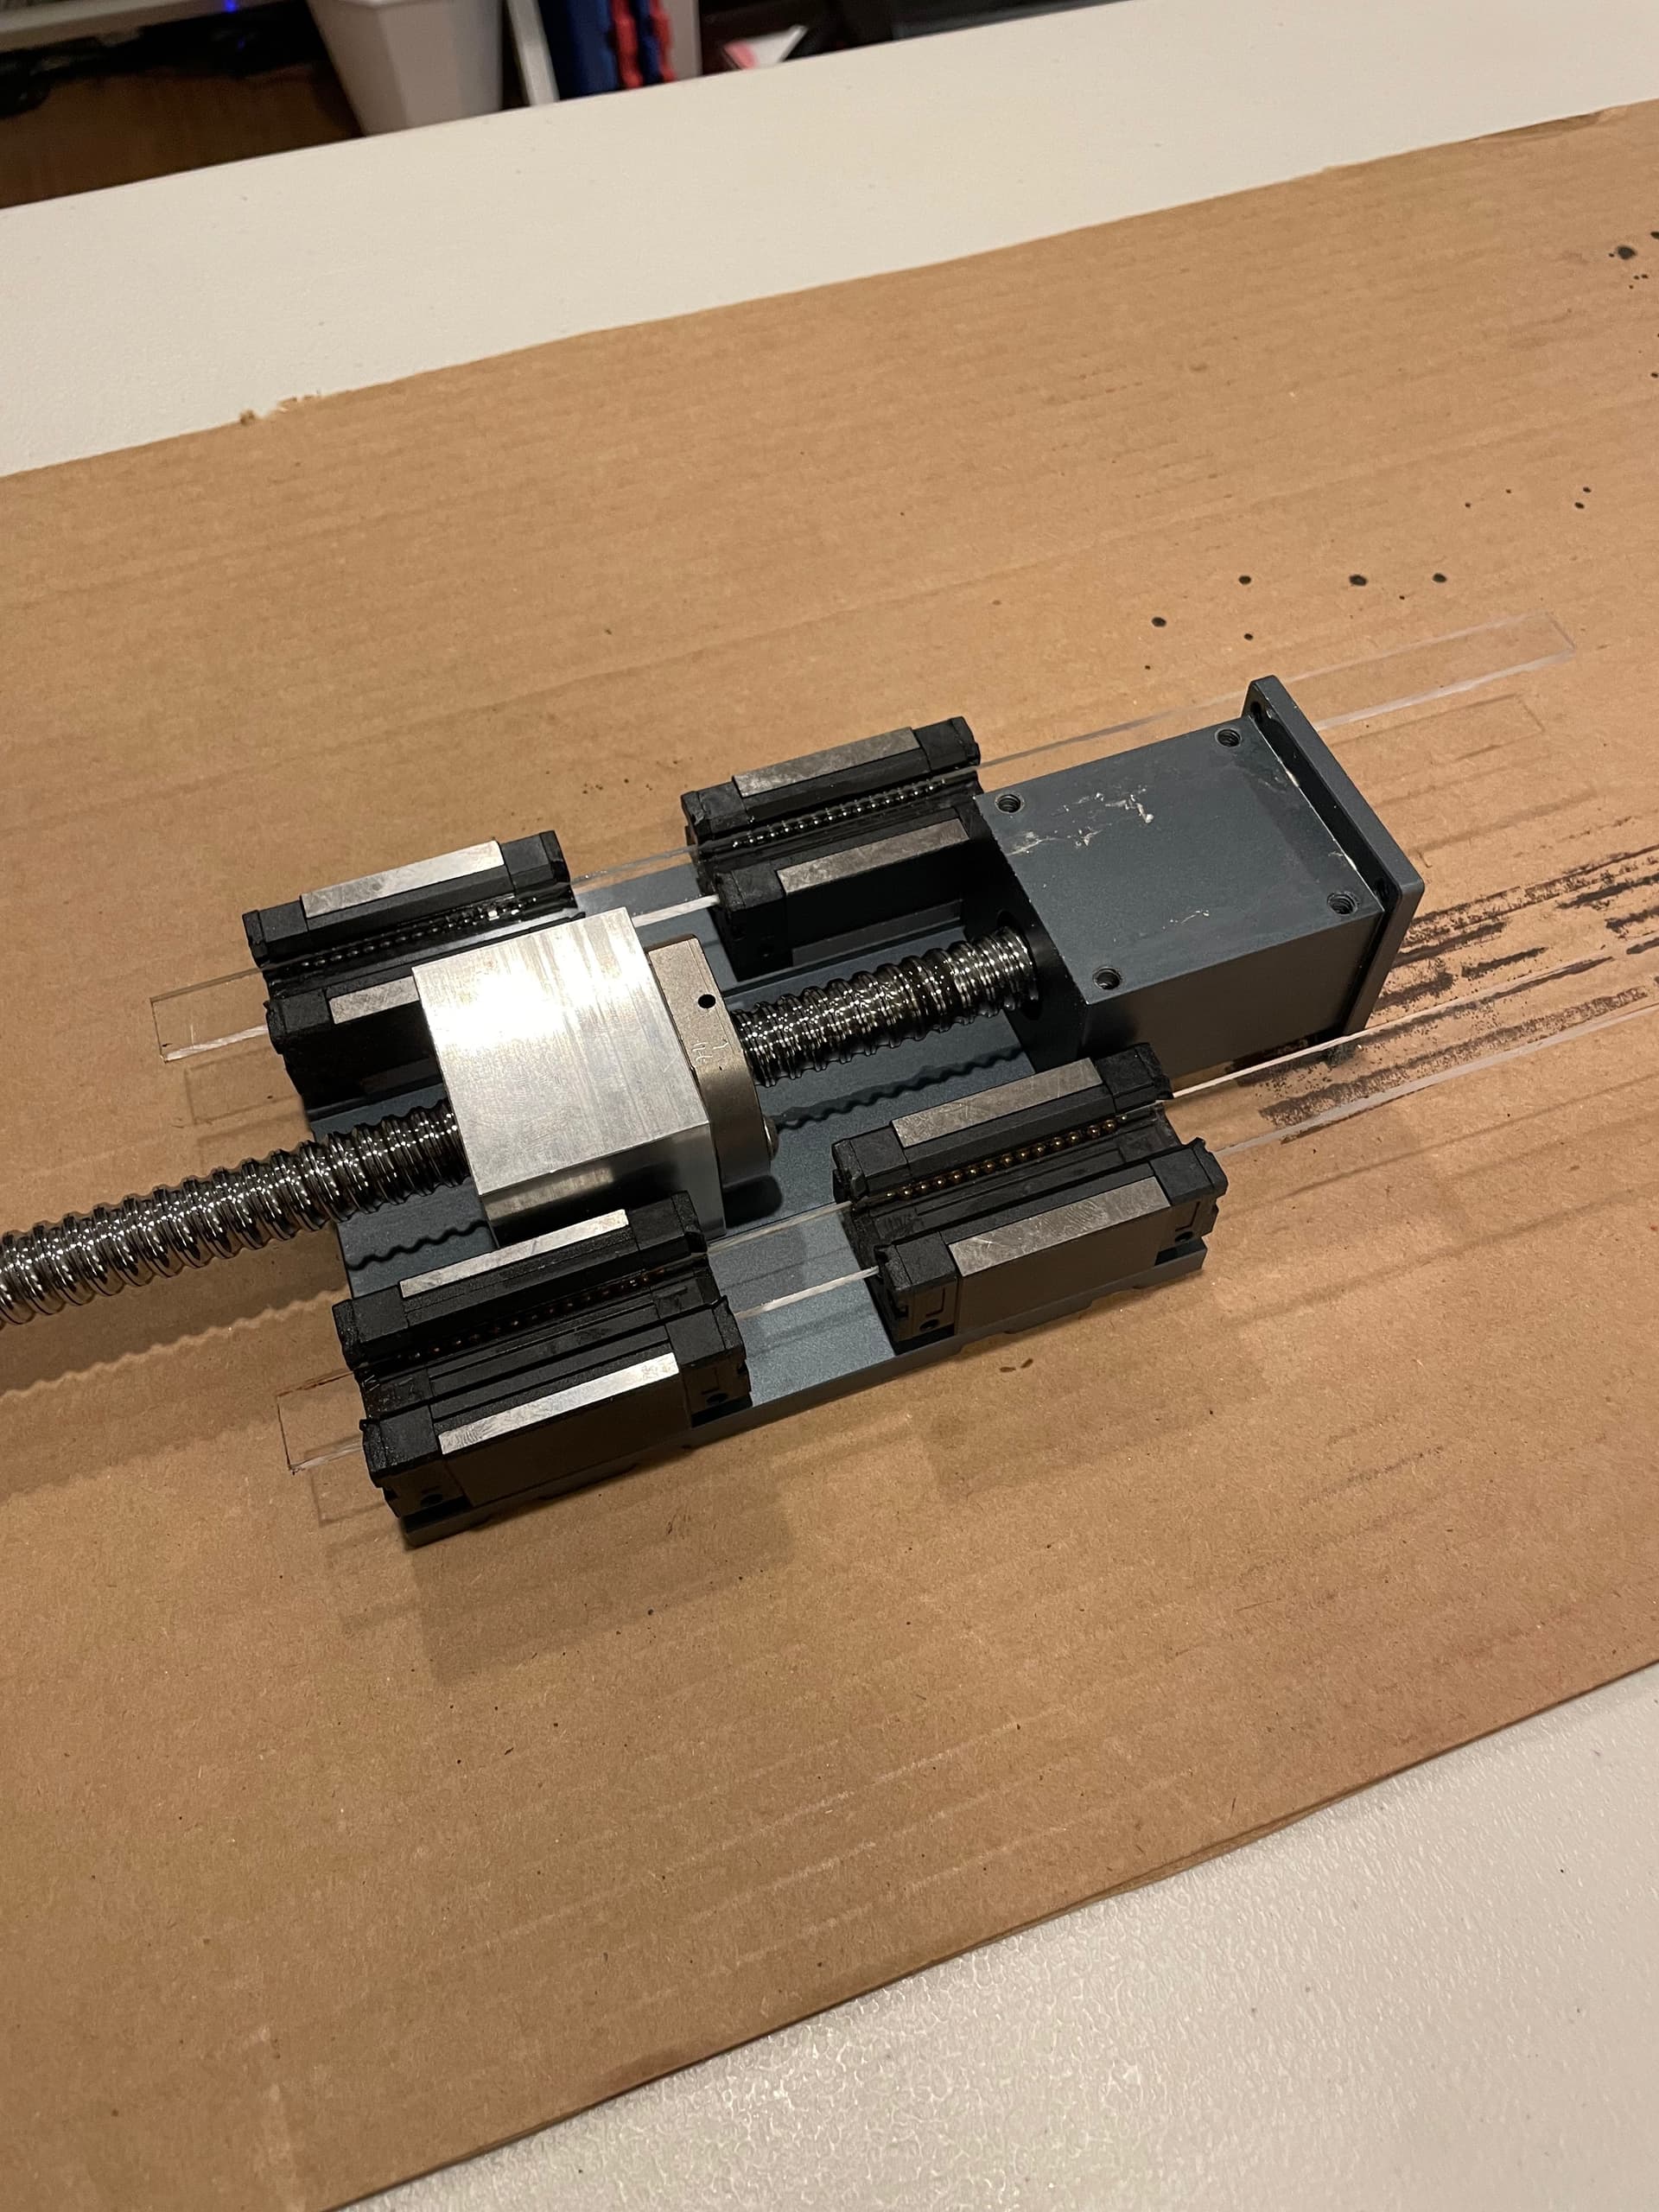
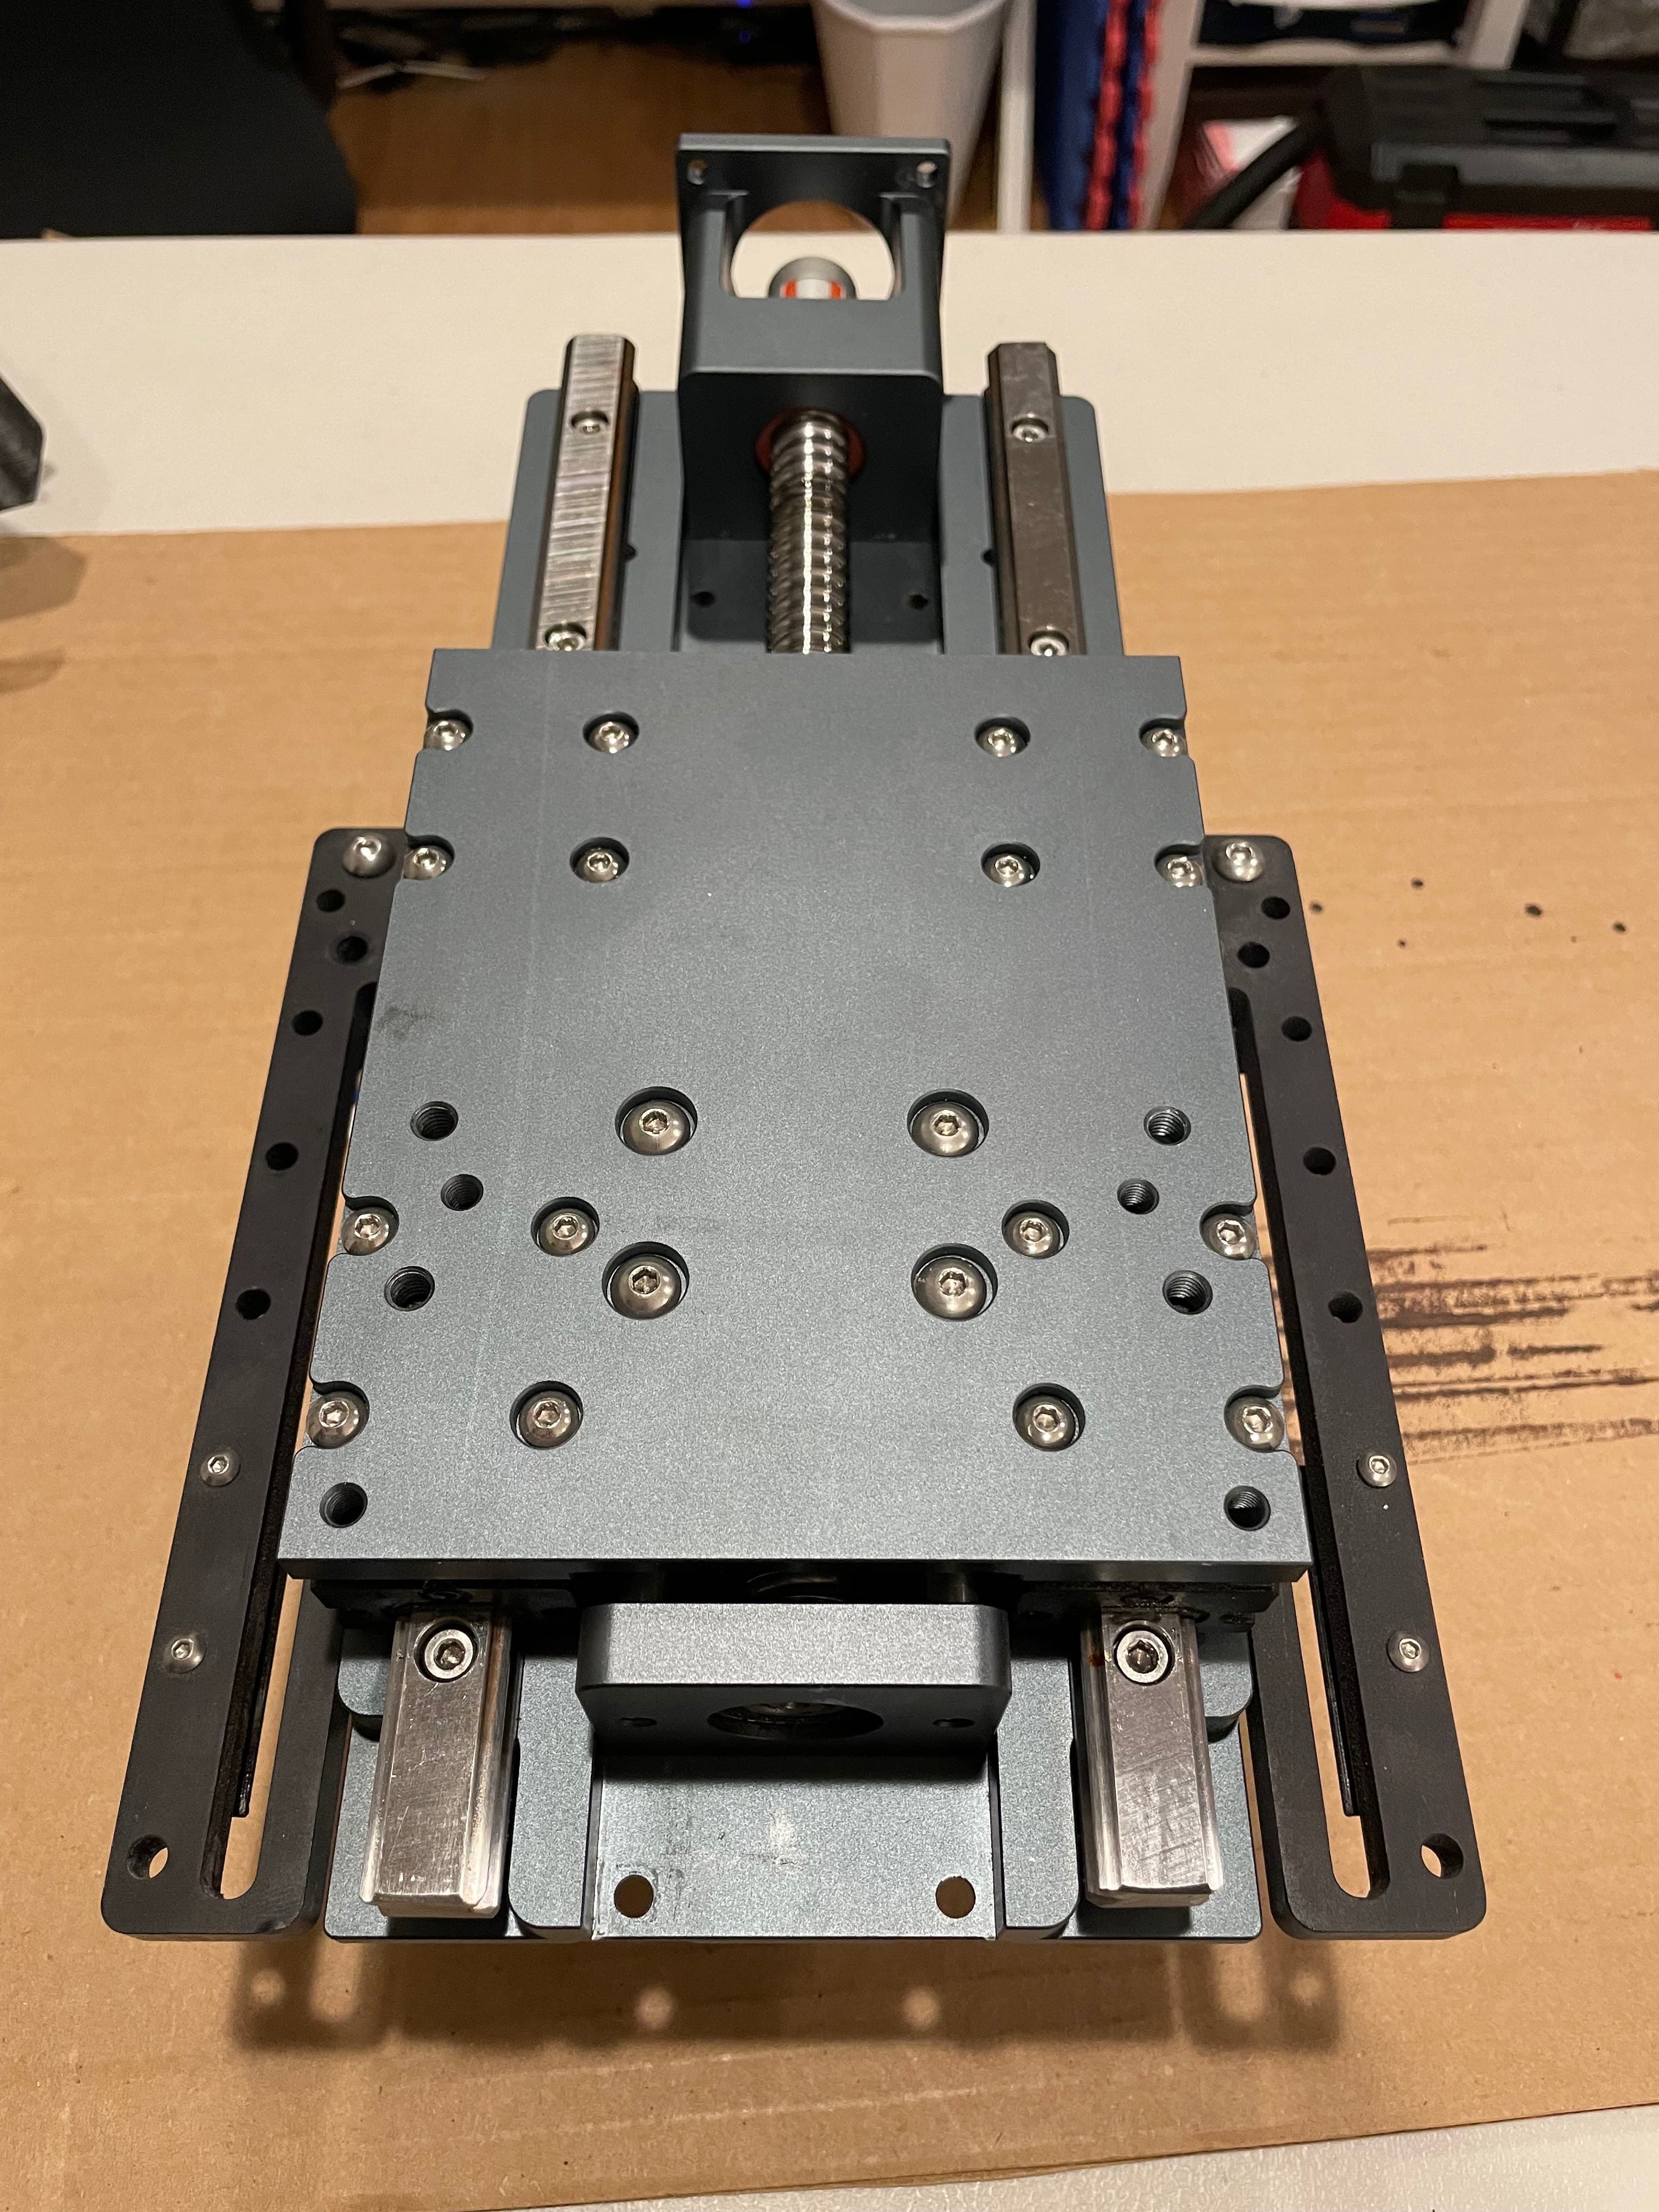
Here is what your removed carriage should look like. Now set it off to the side.
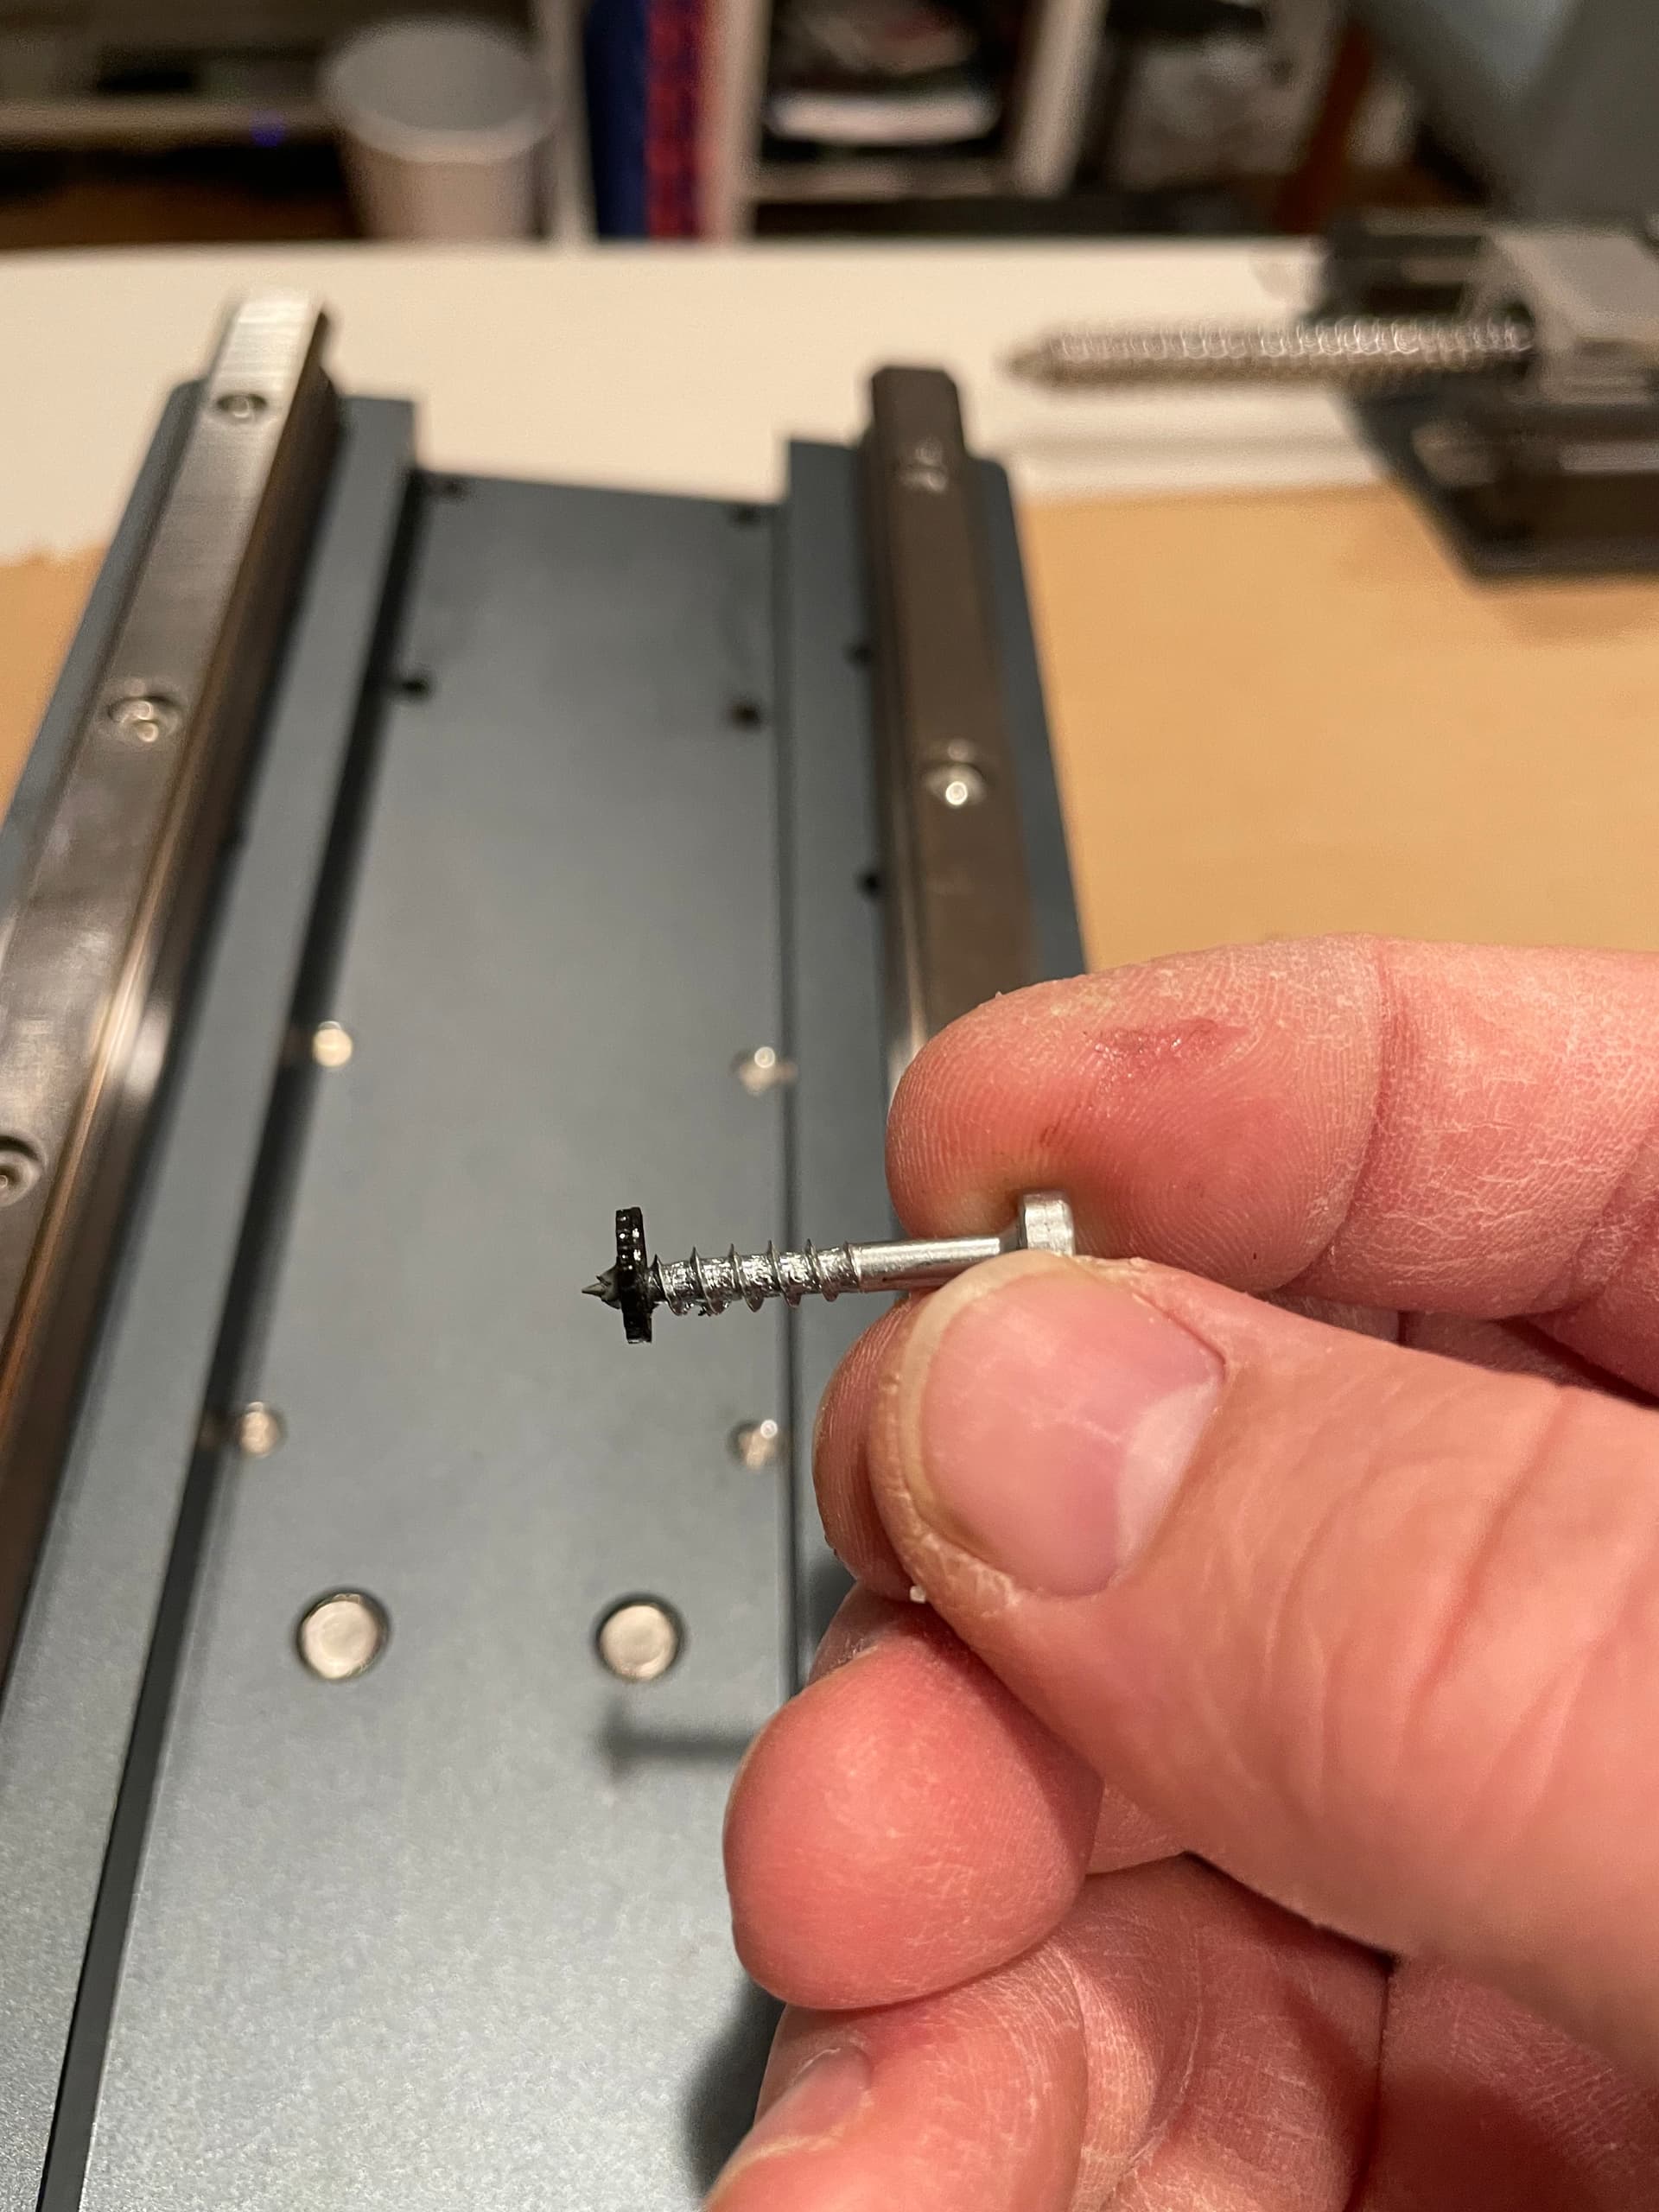
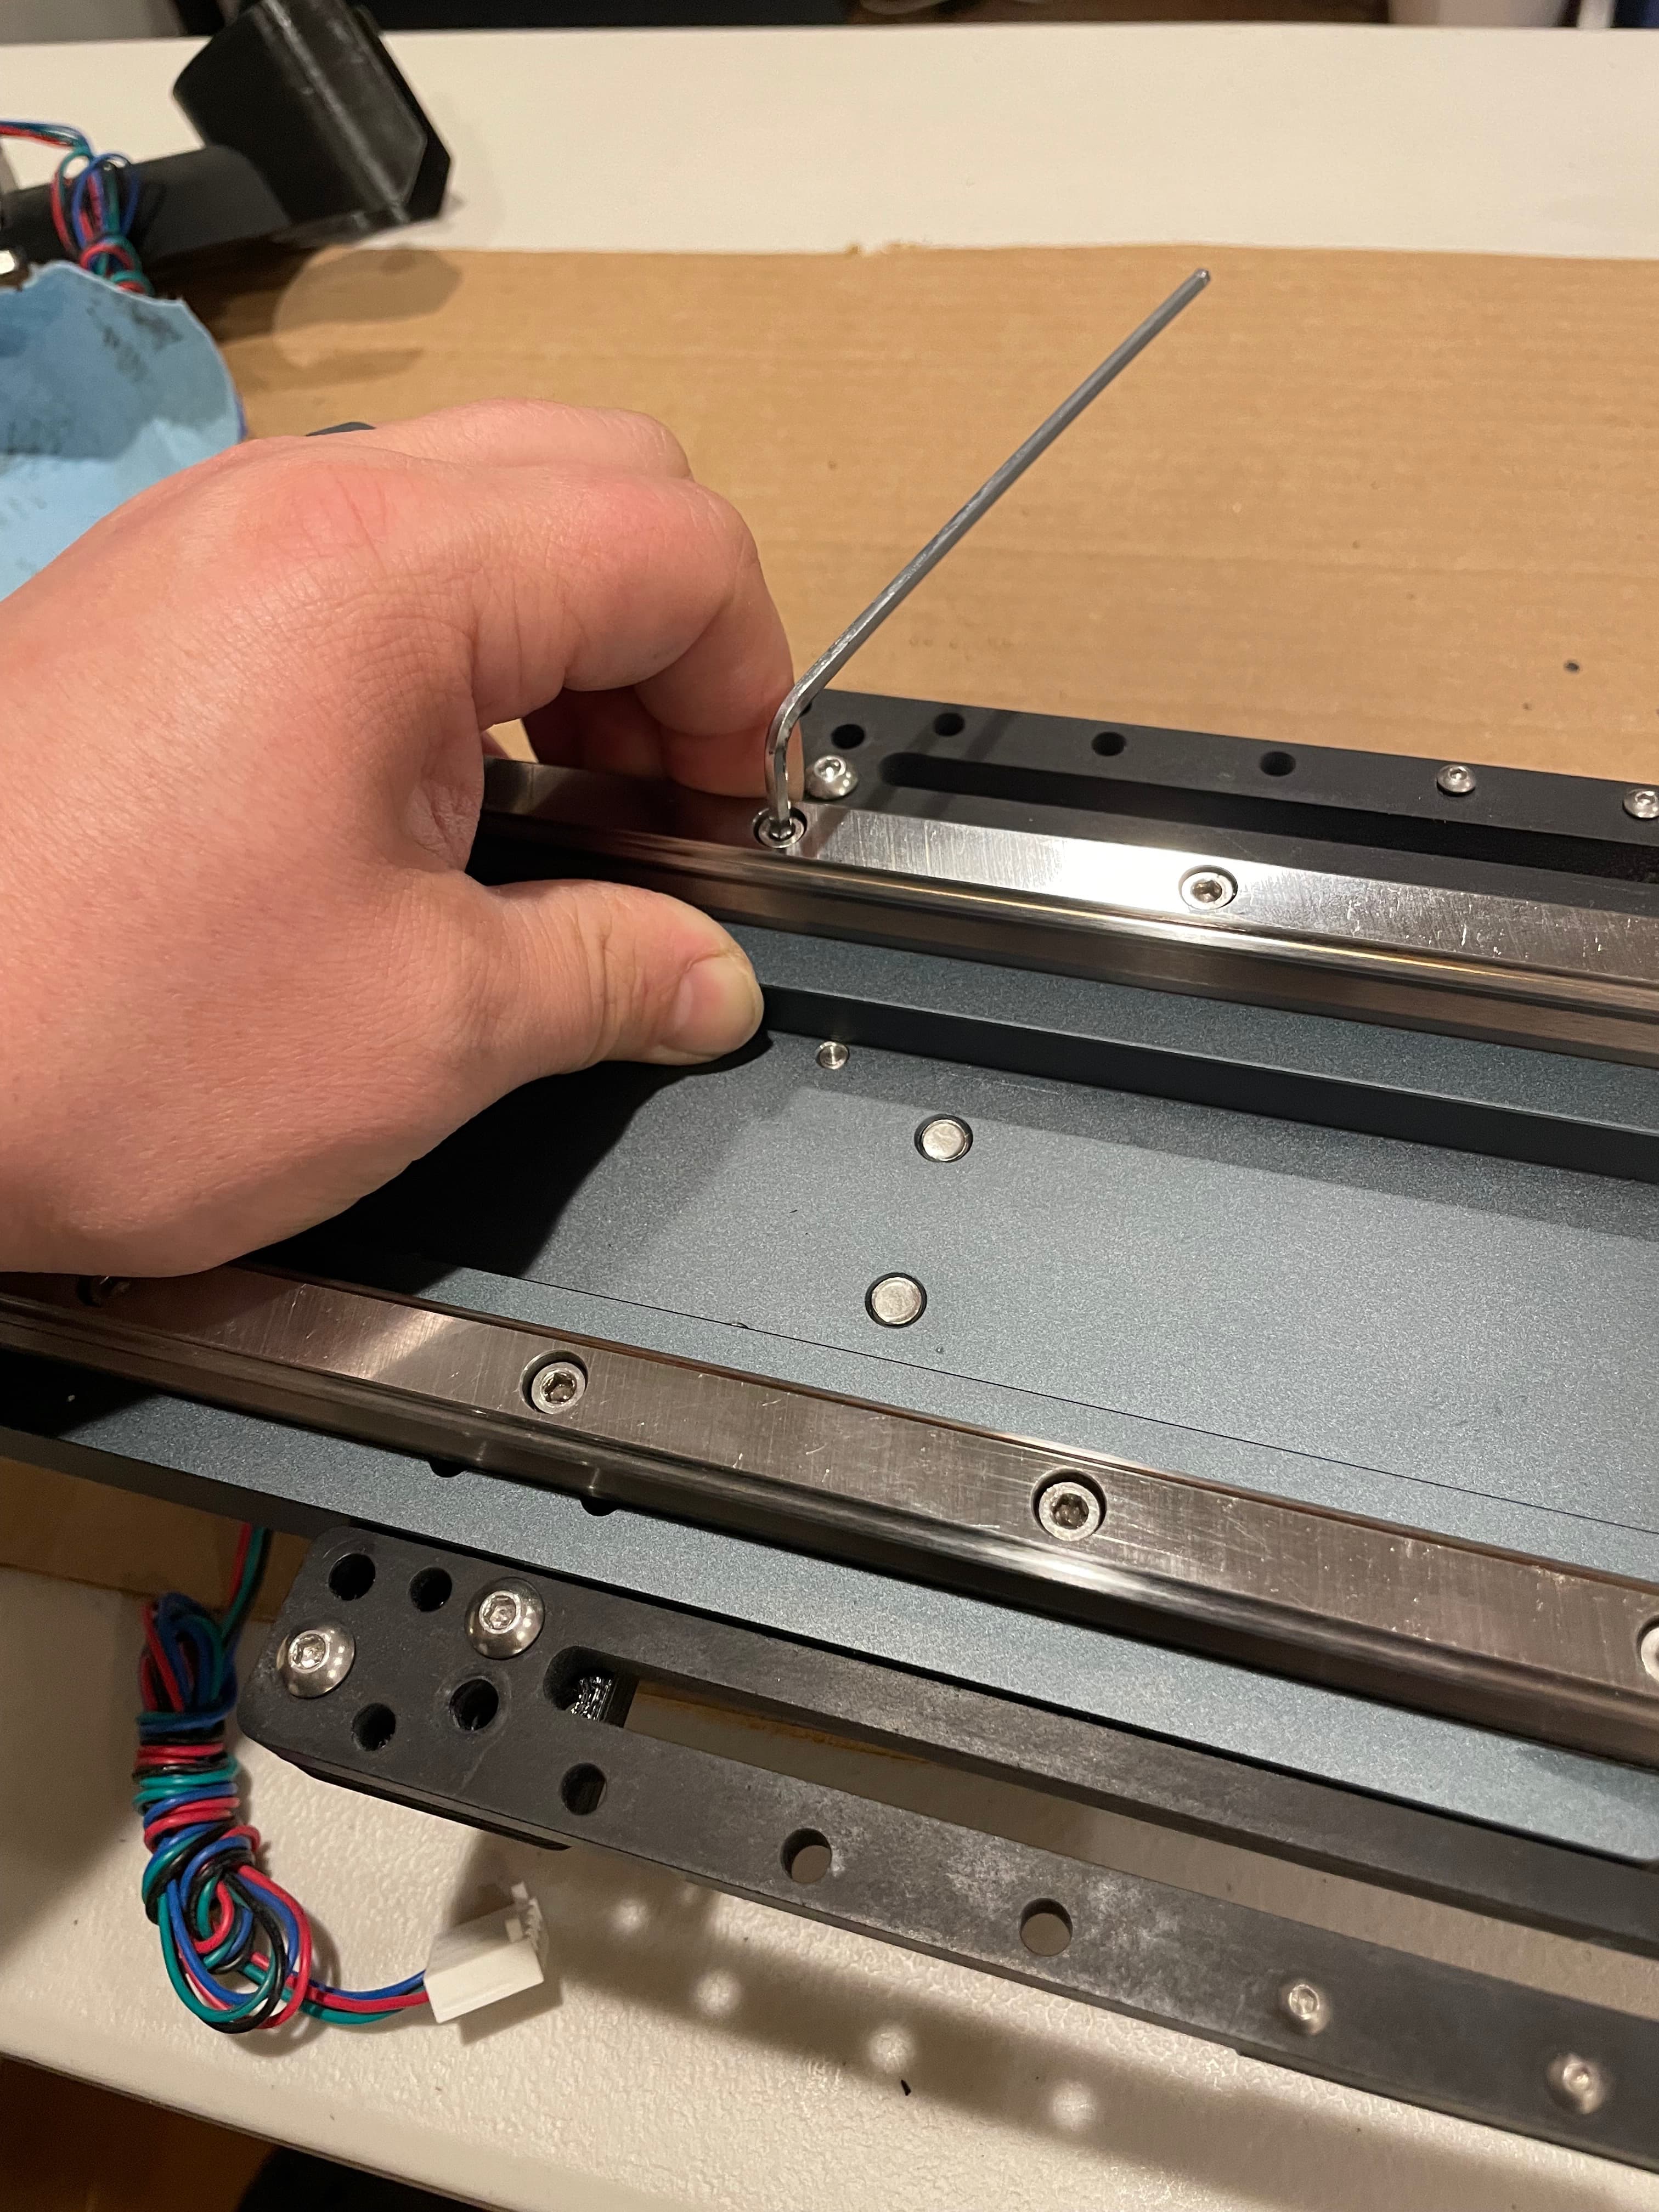
Next, use a wood screw to carefully penetrate and then remove the linear rail plugs. This essentially destroys them, so if you want to reinstall them, you will likely need to order some new ones.
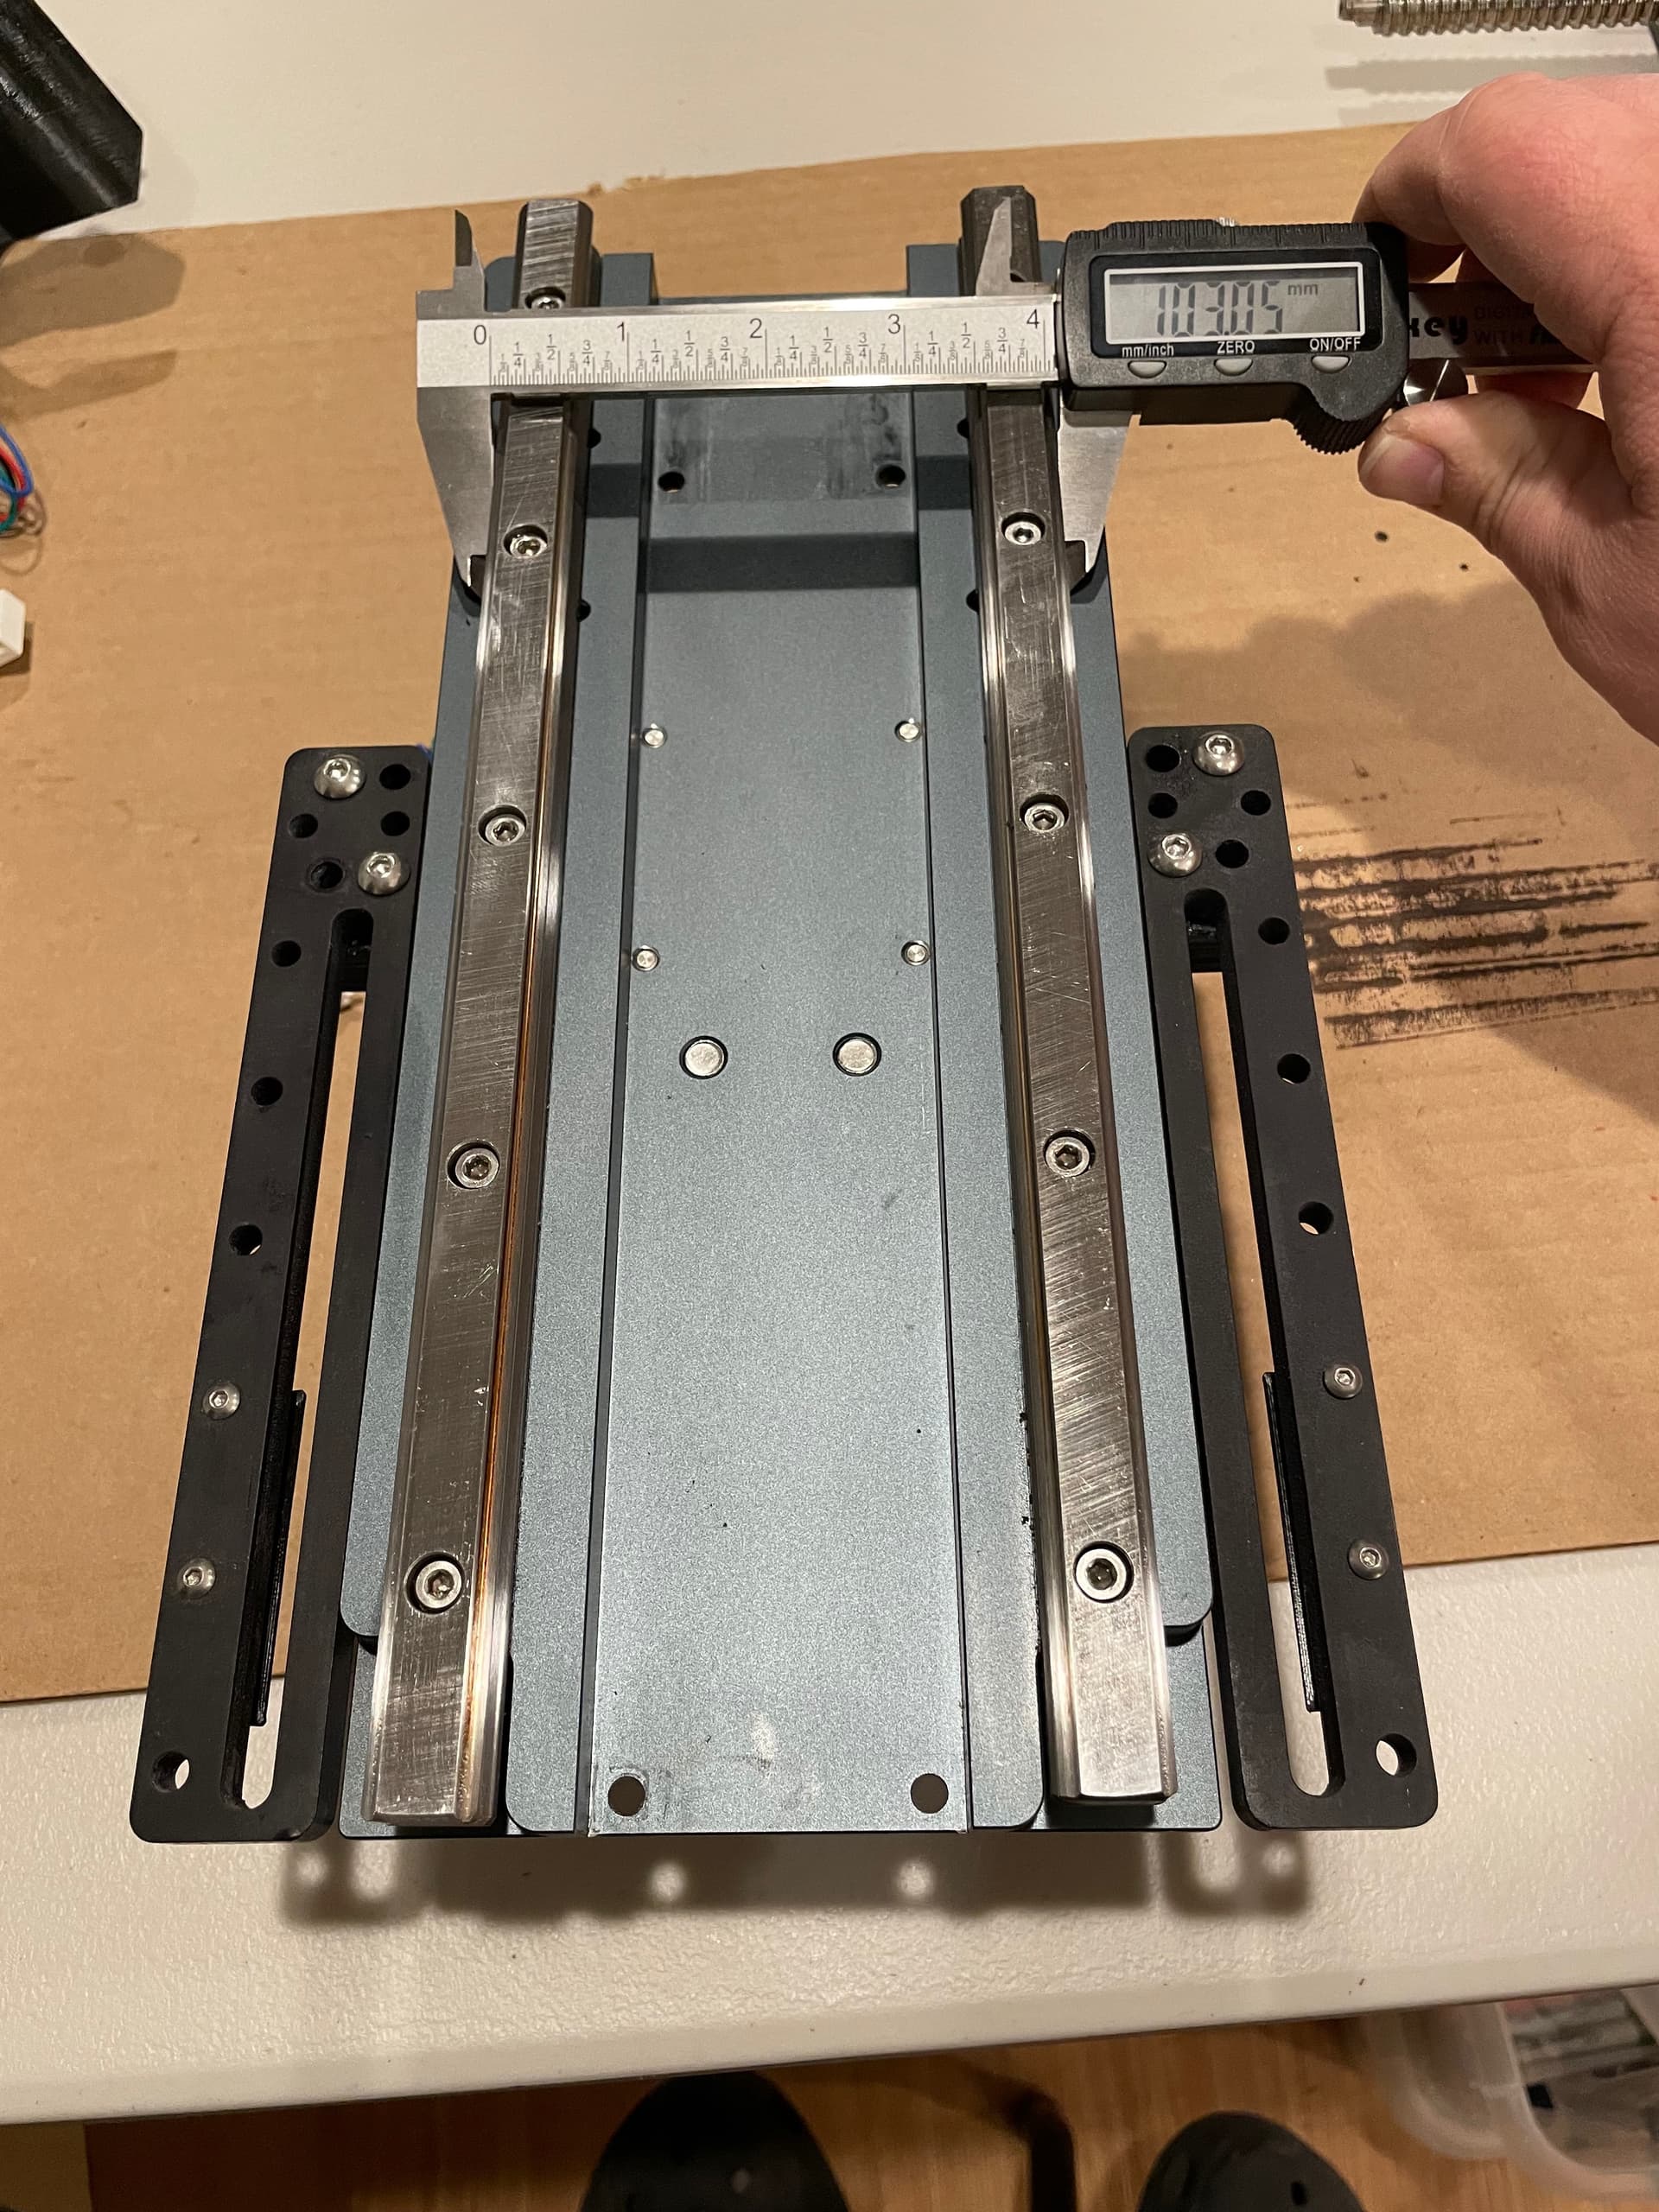
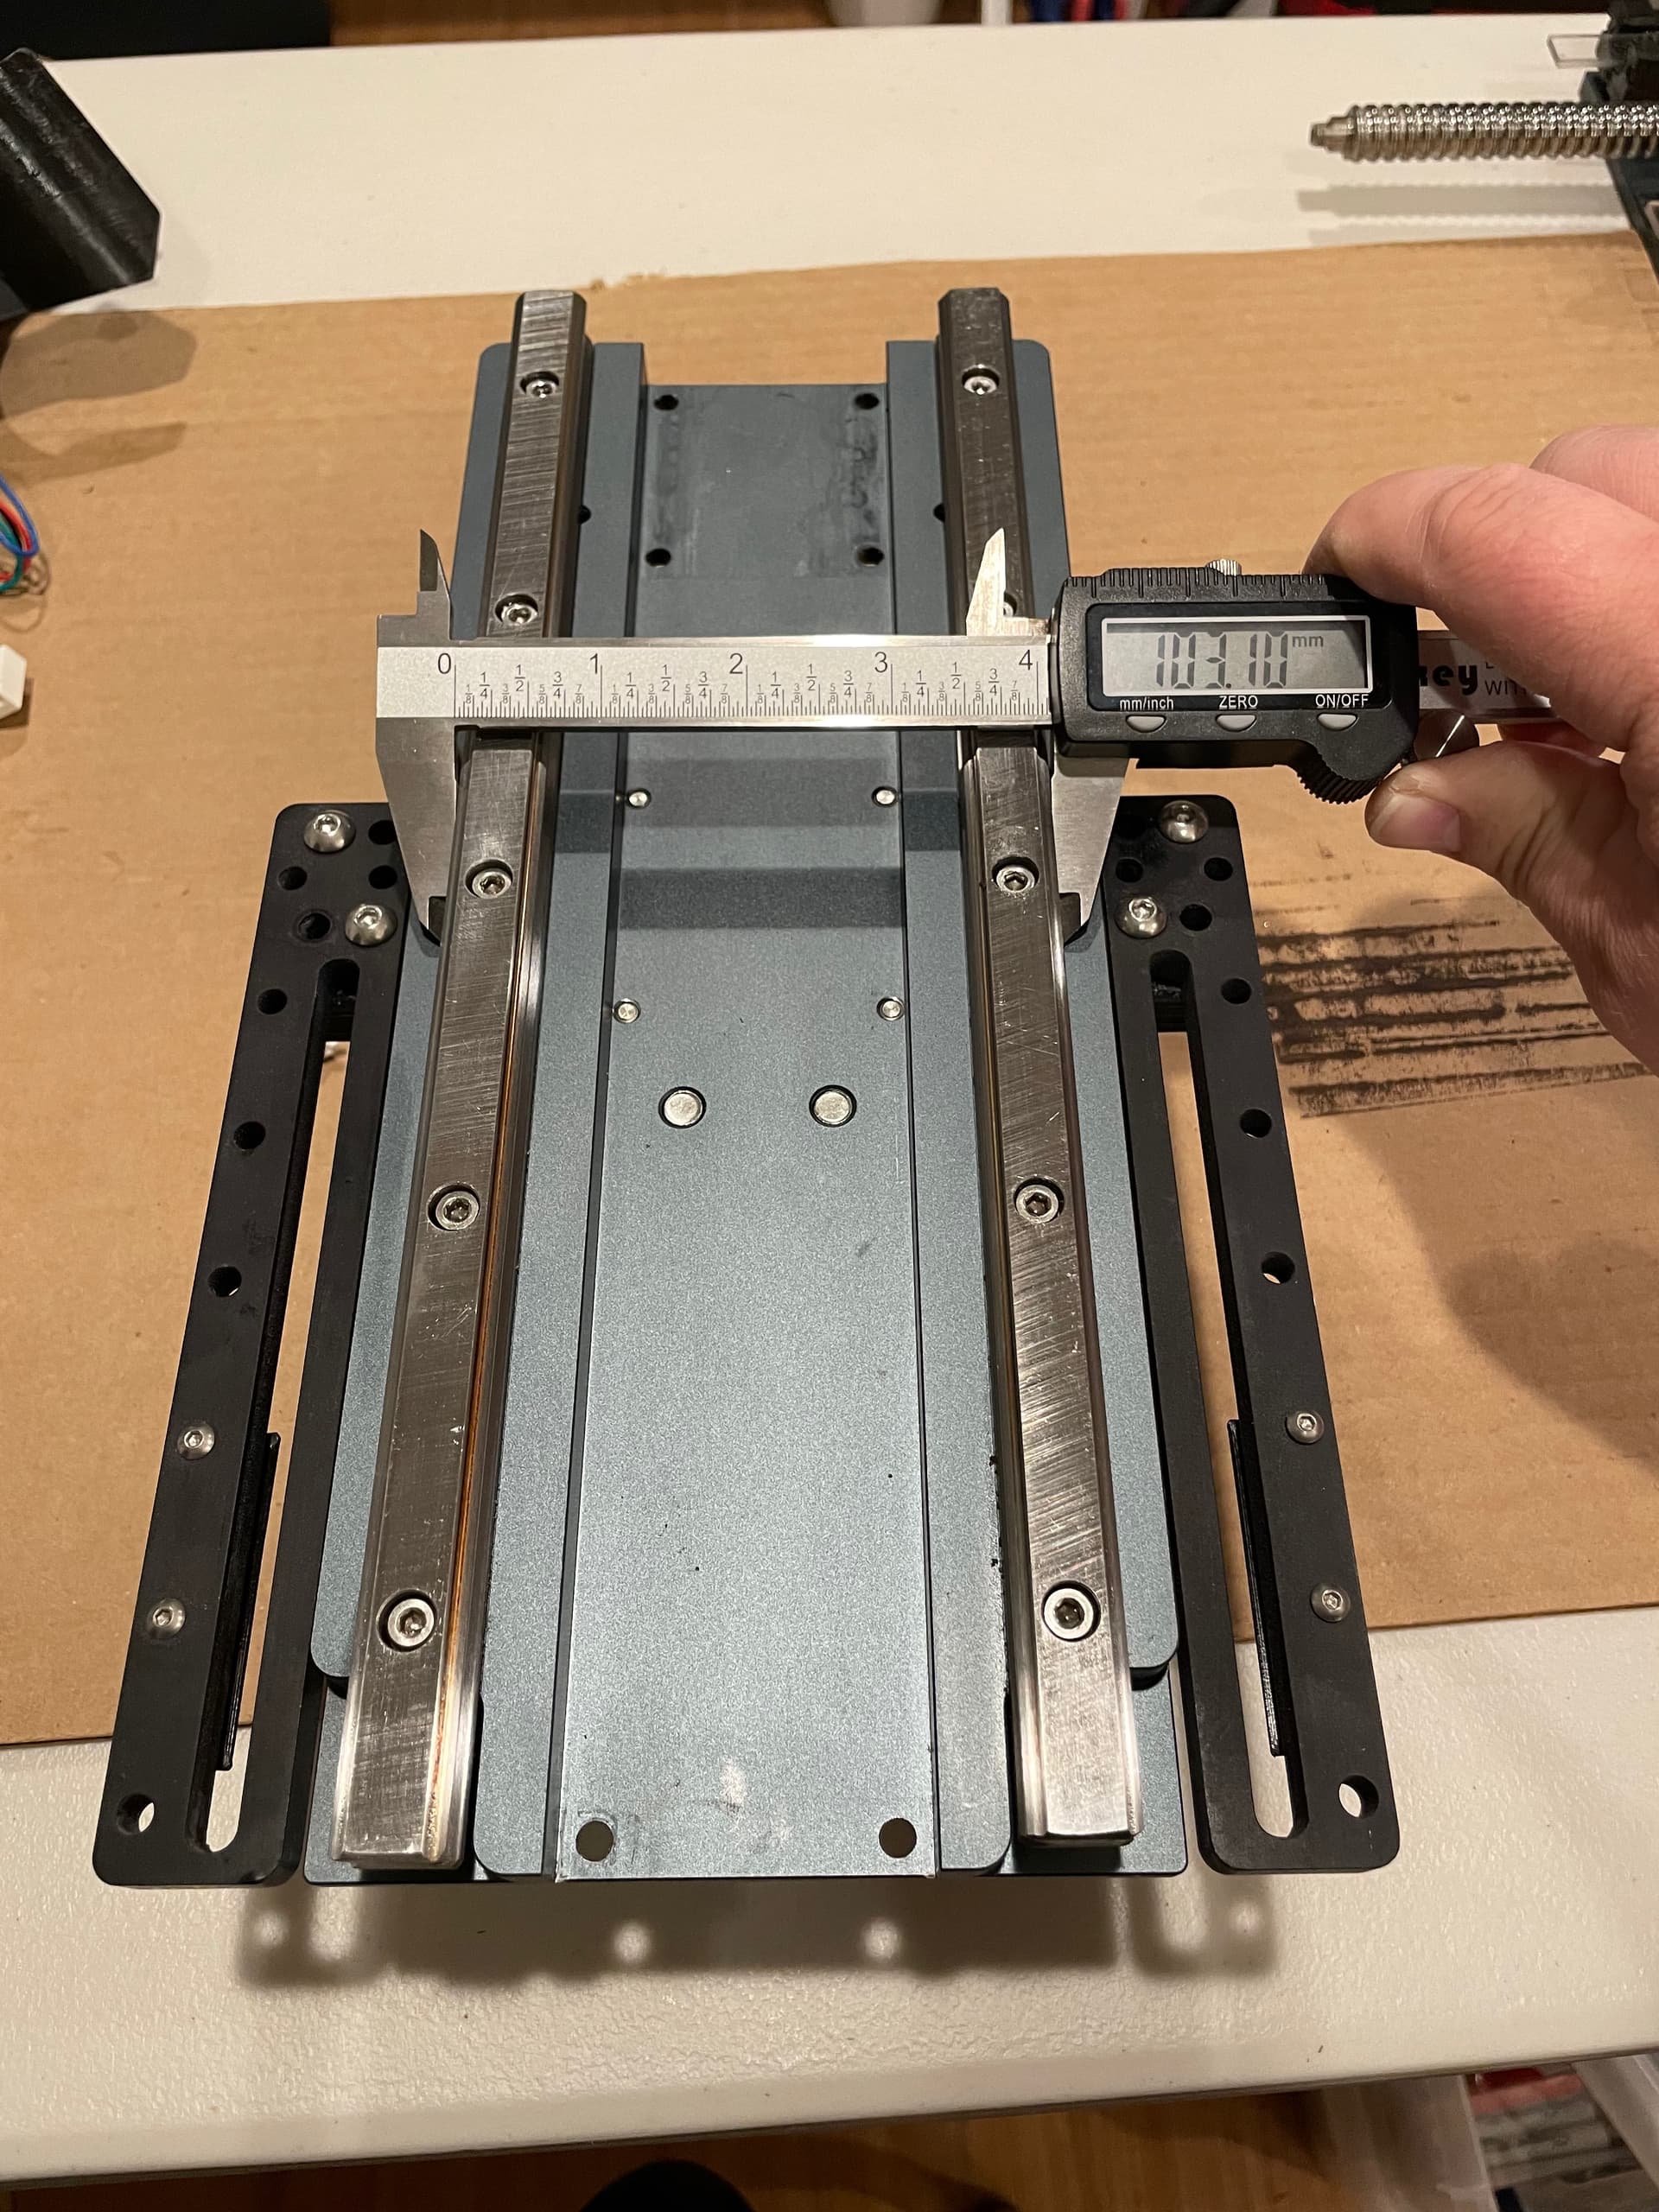
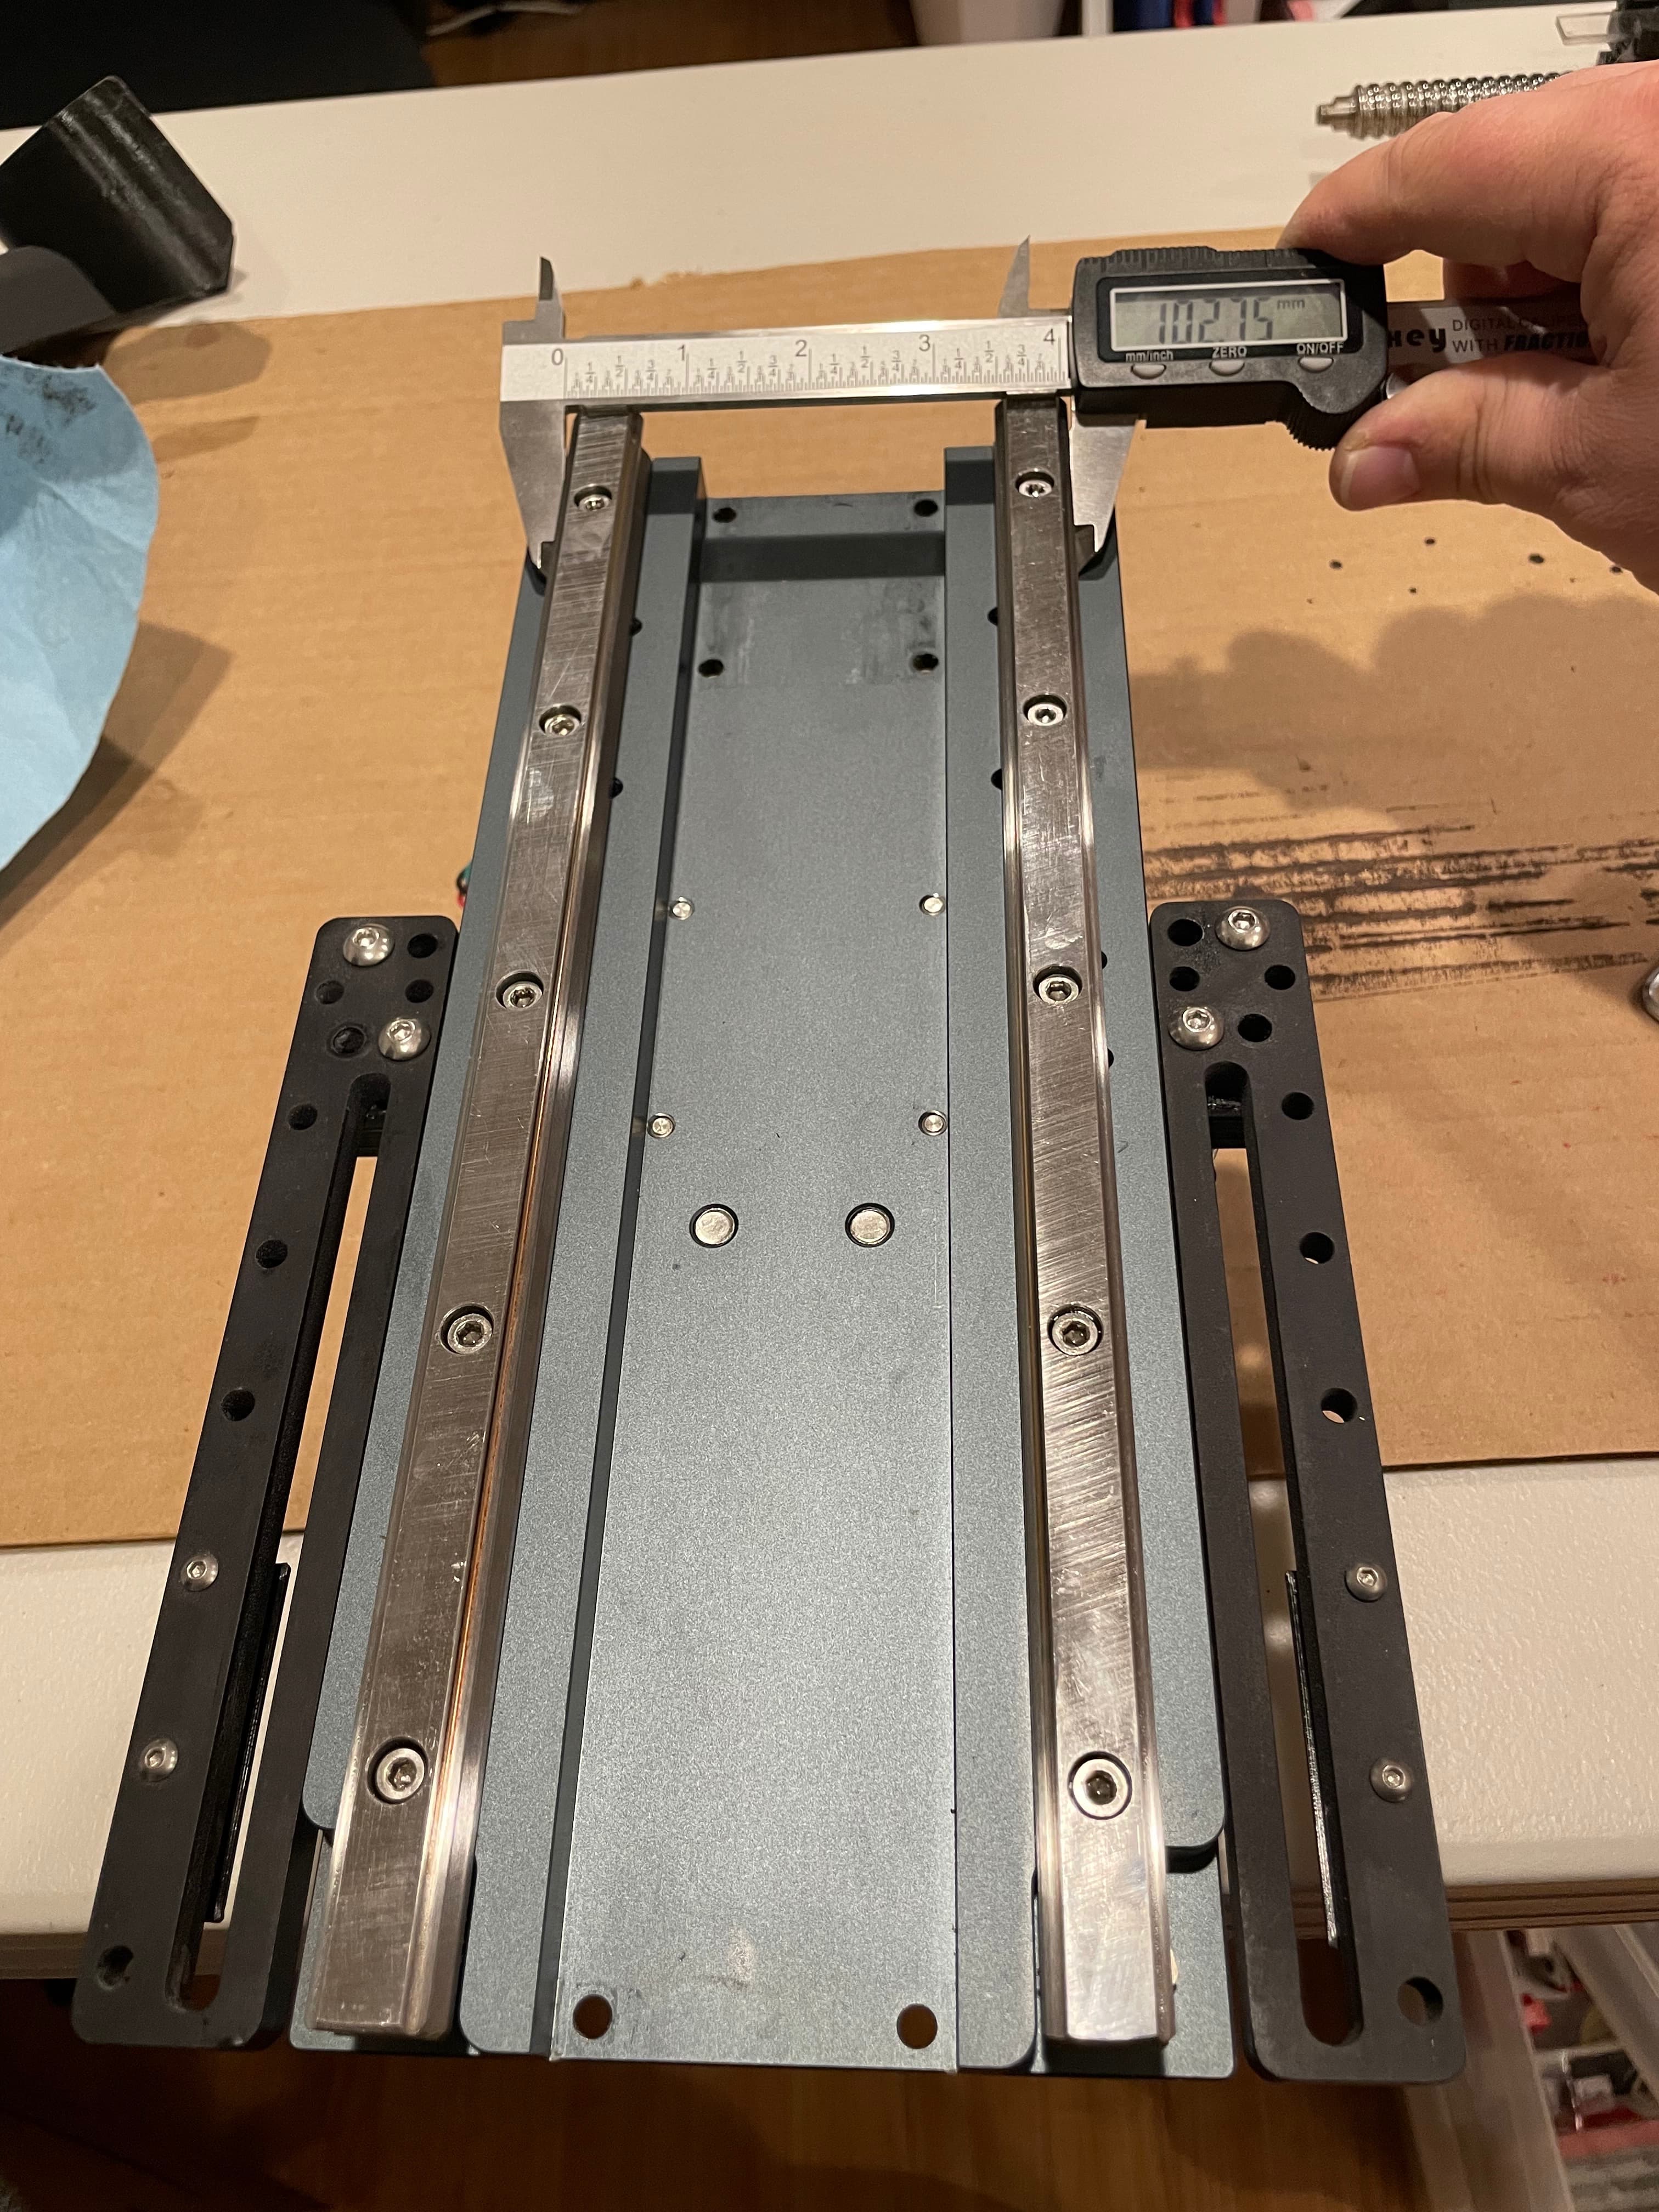
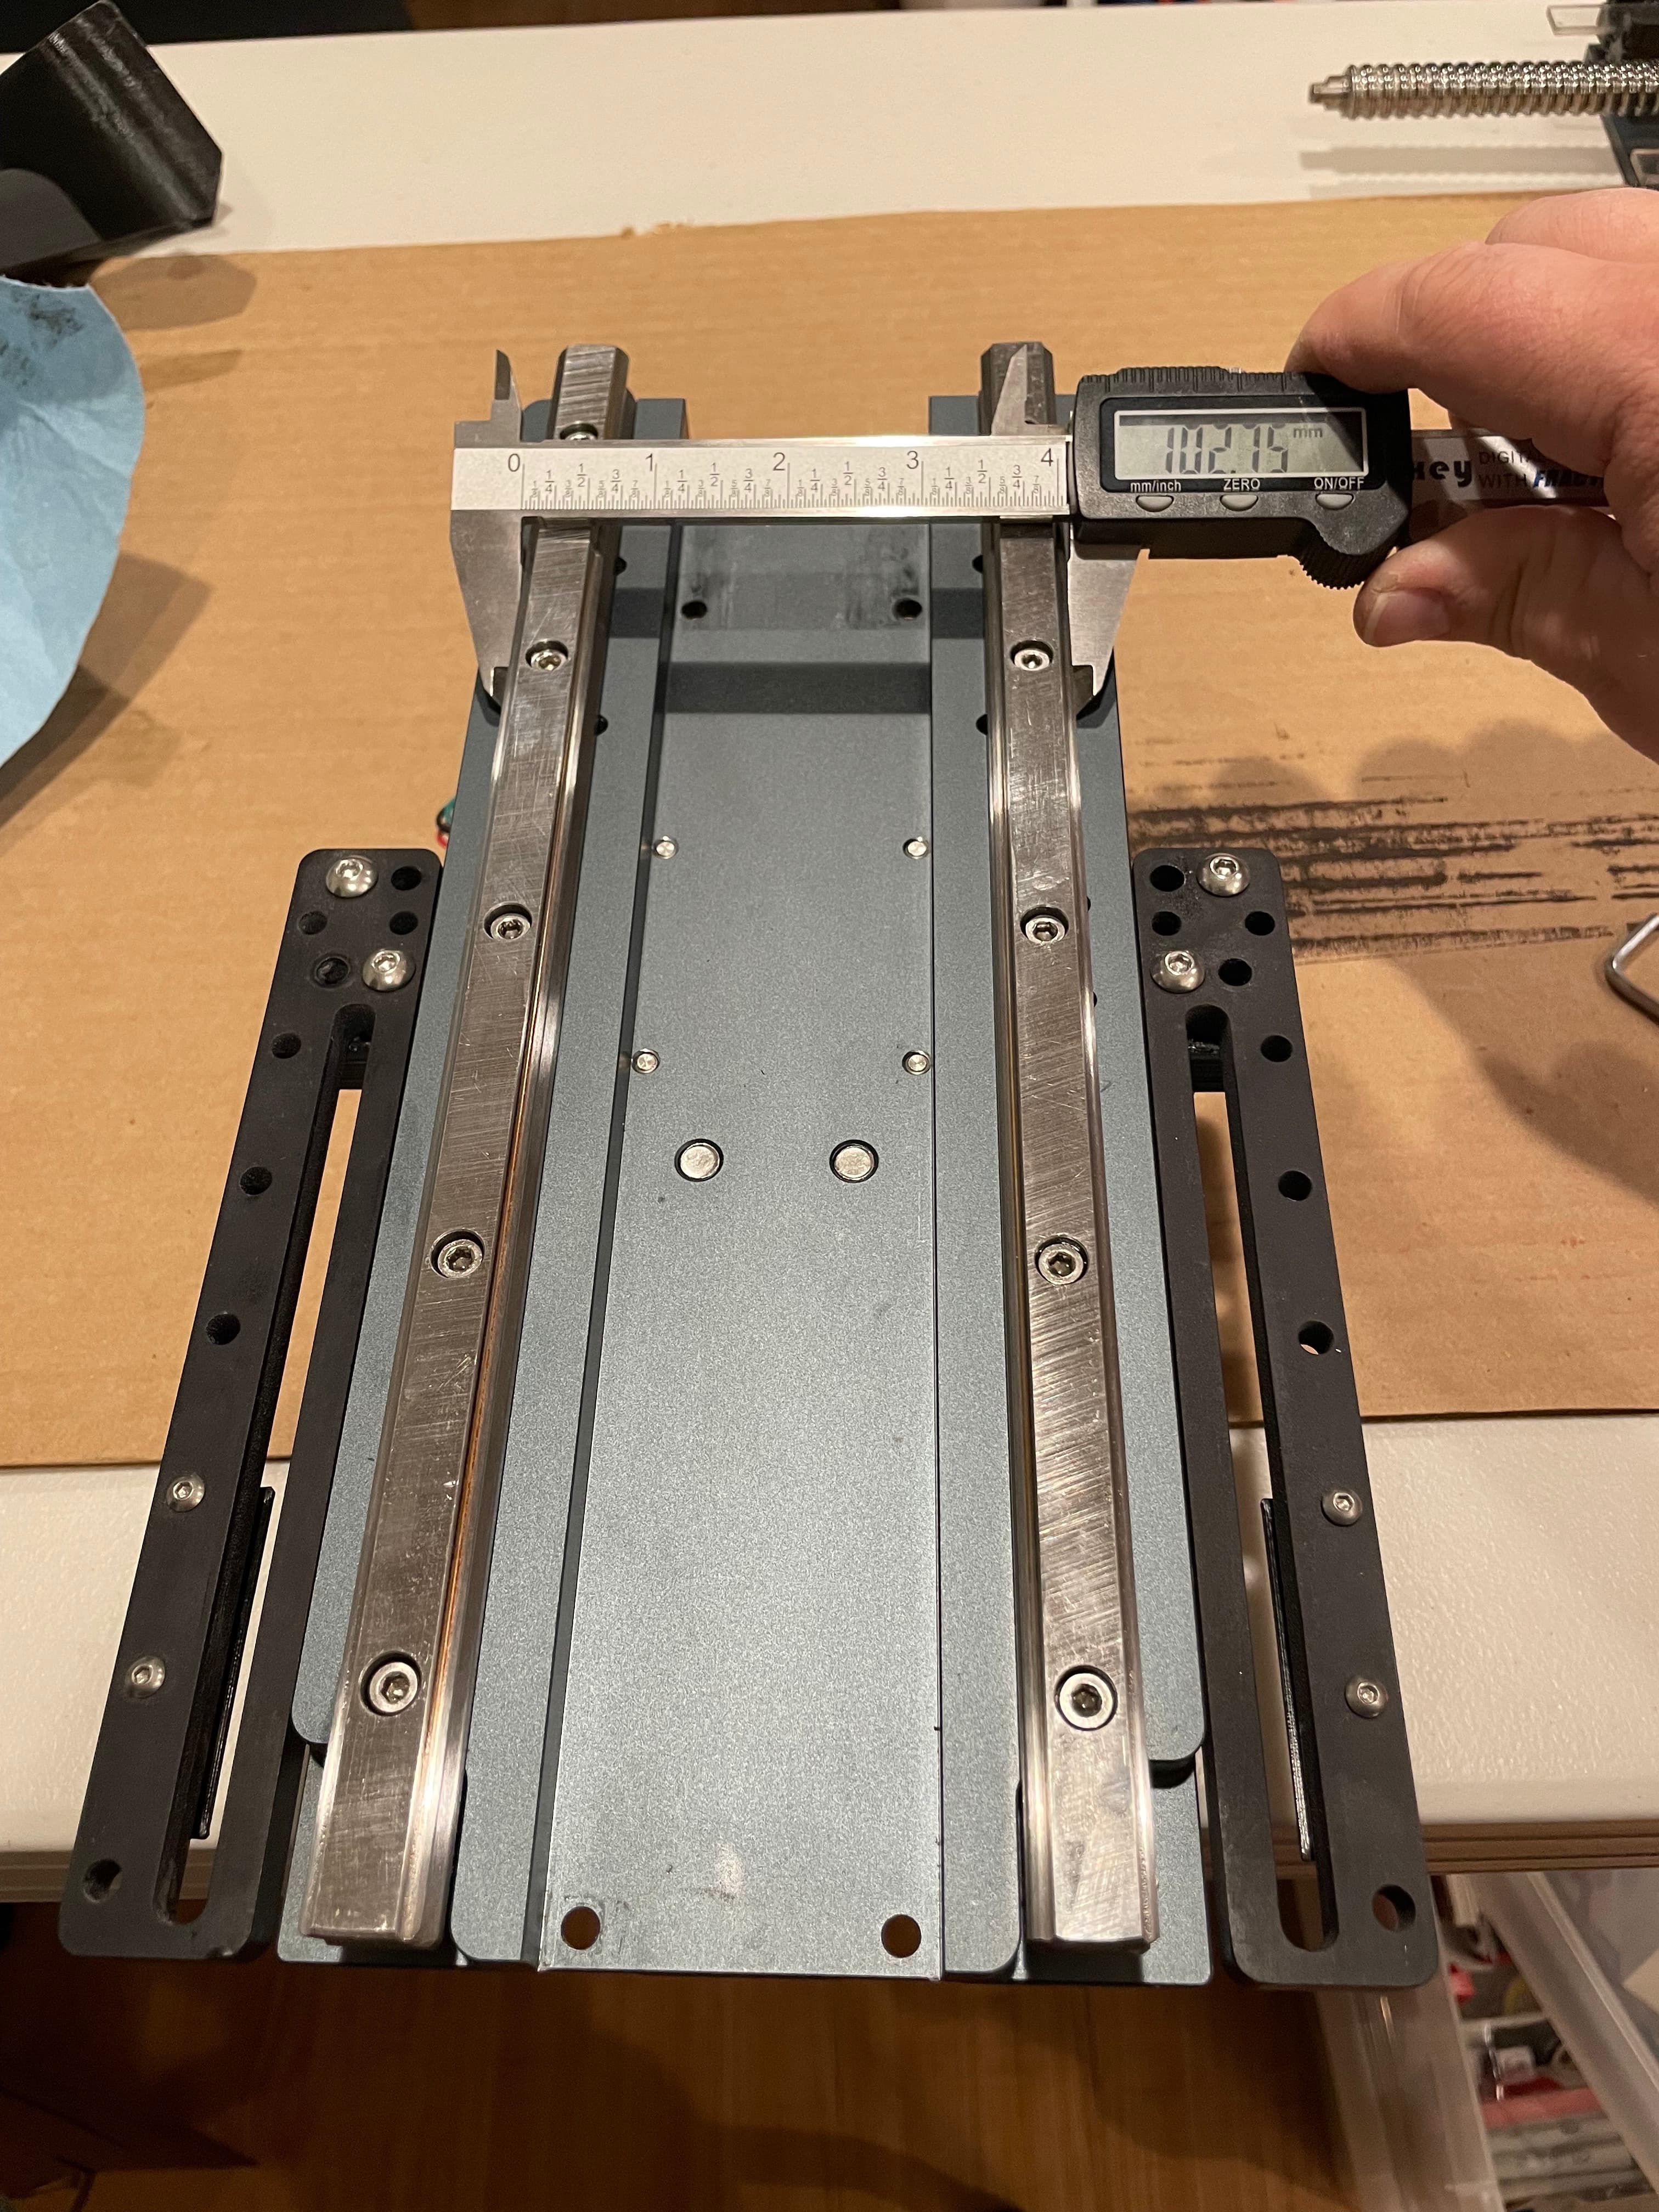
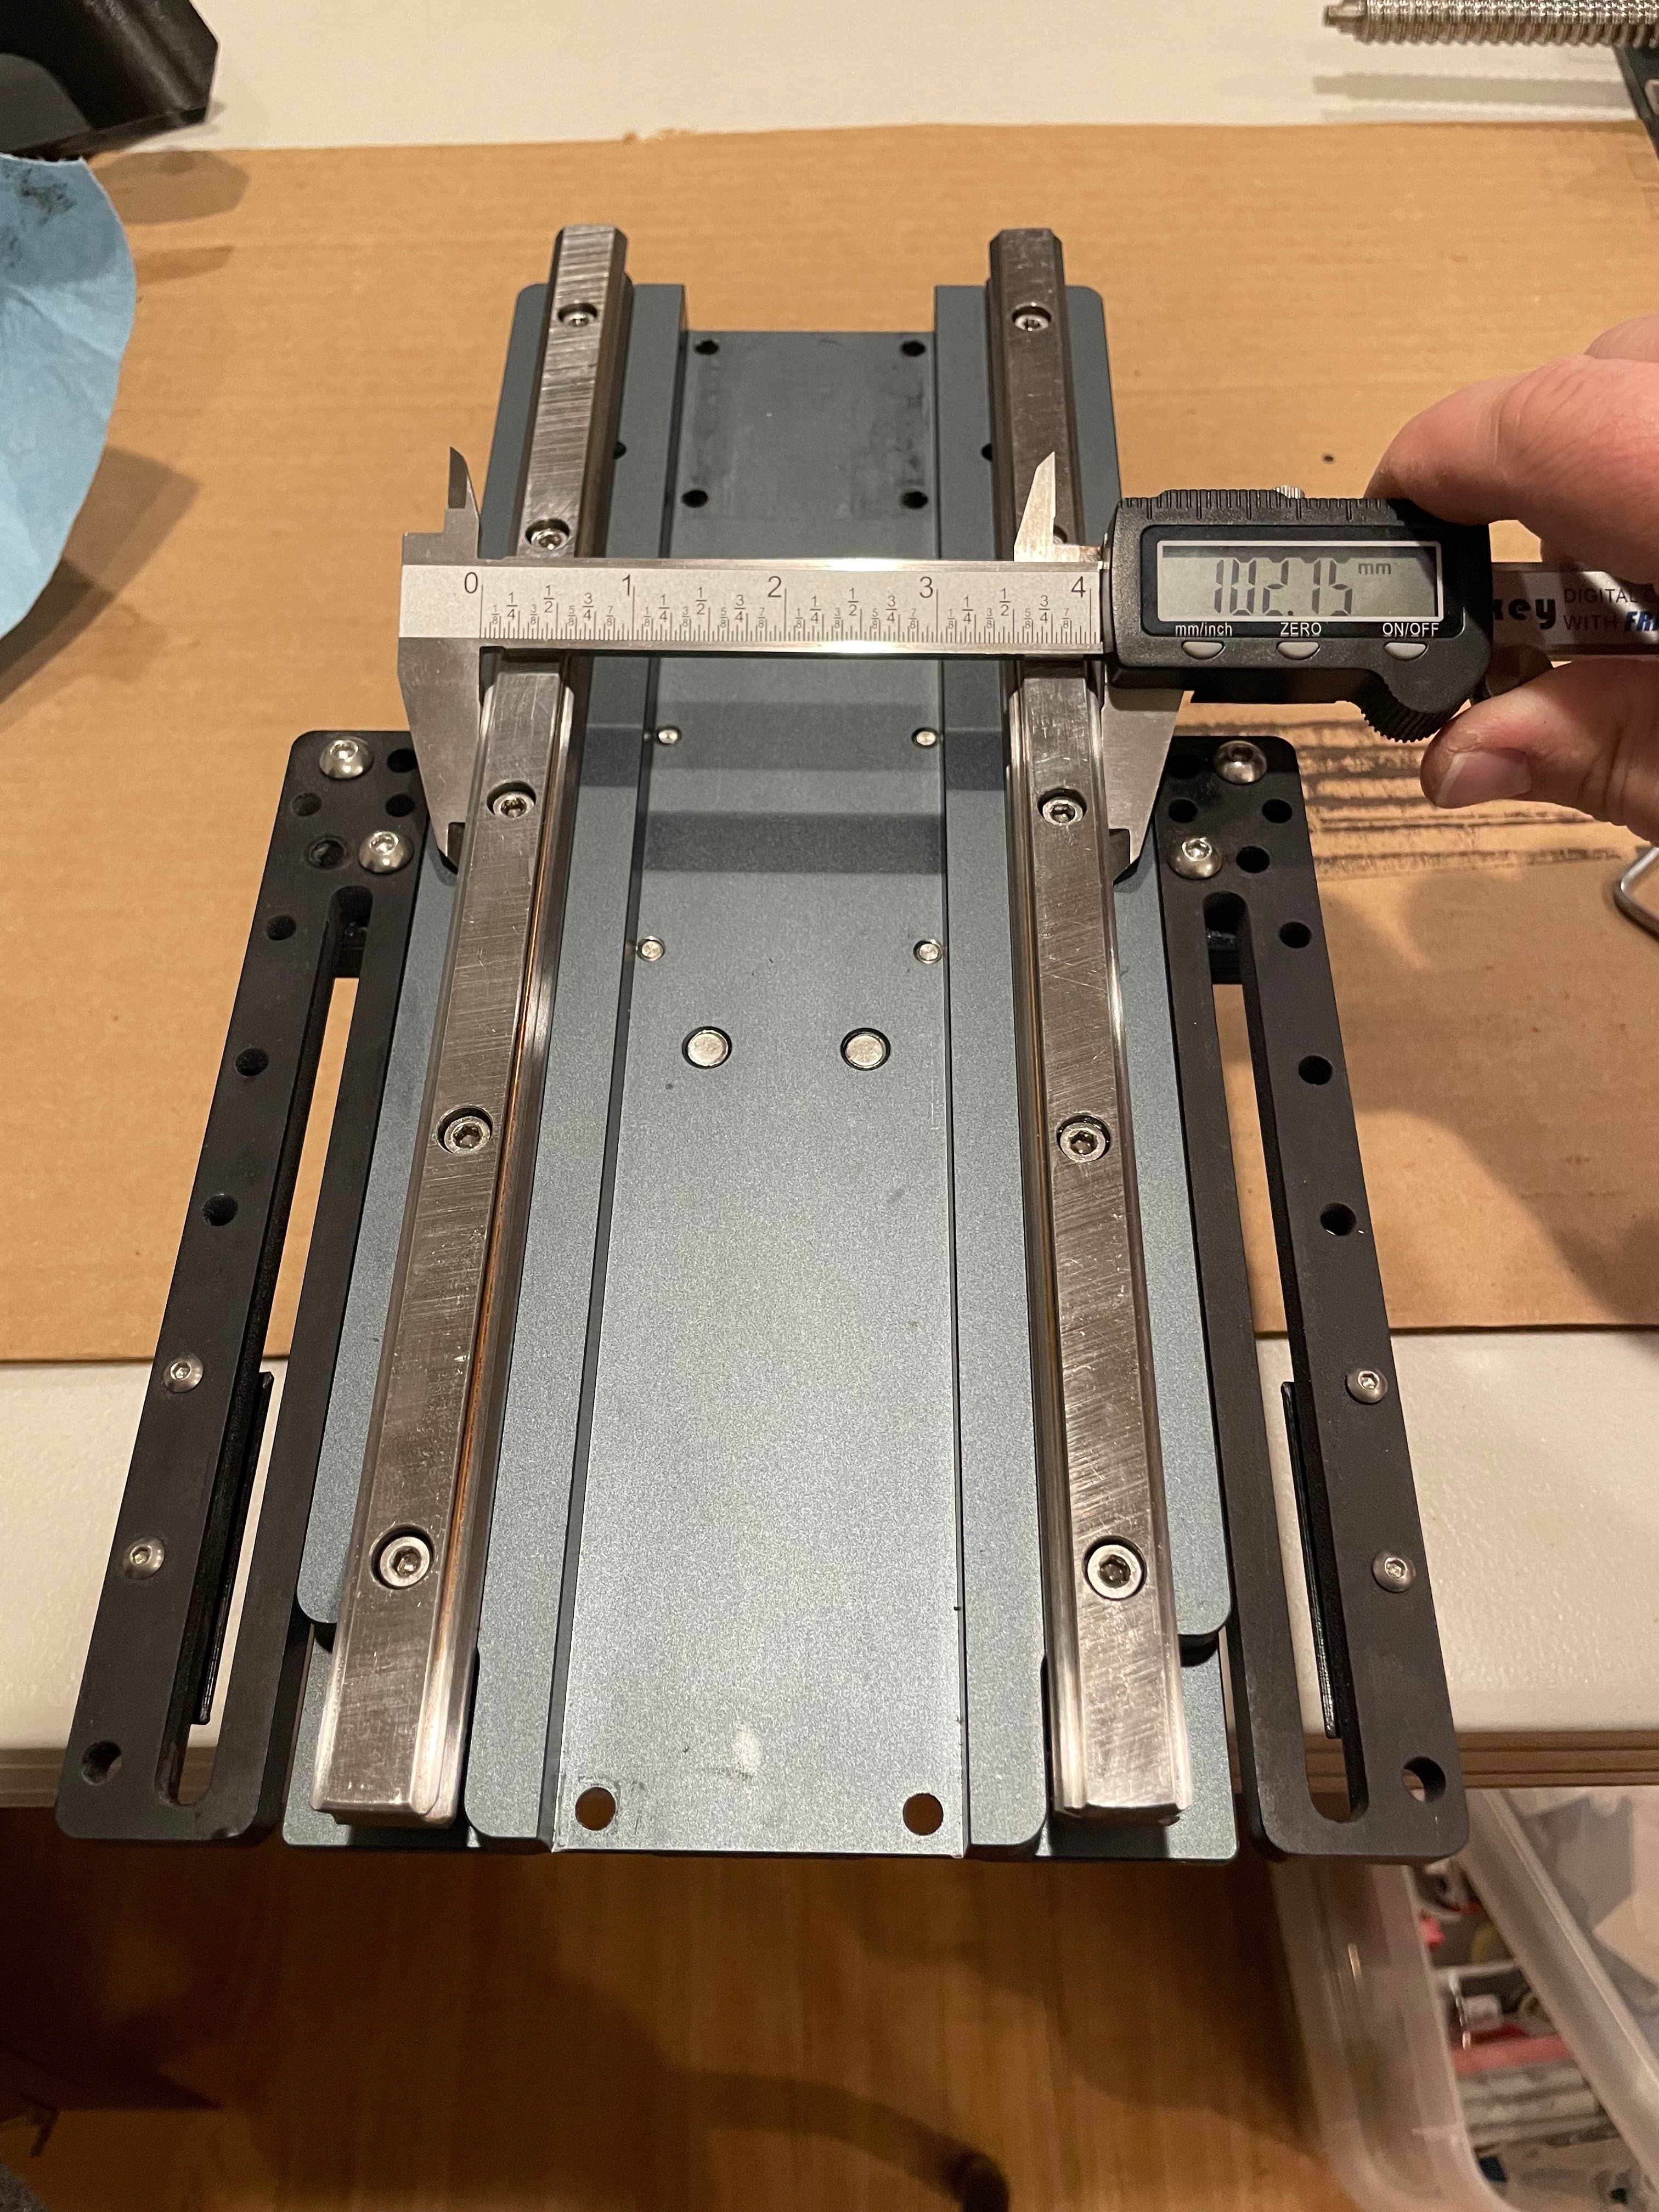
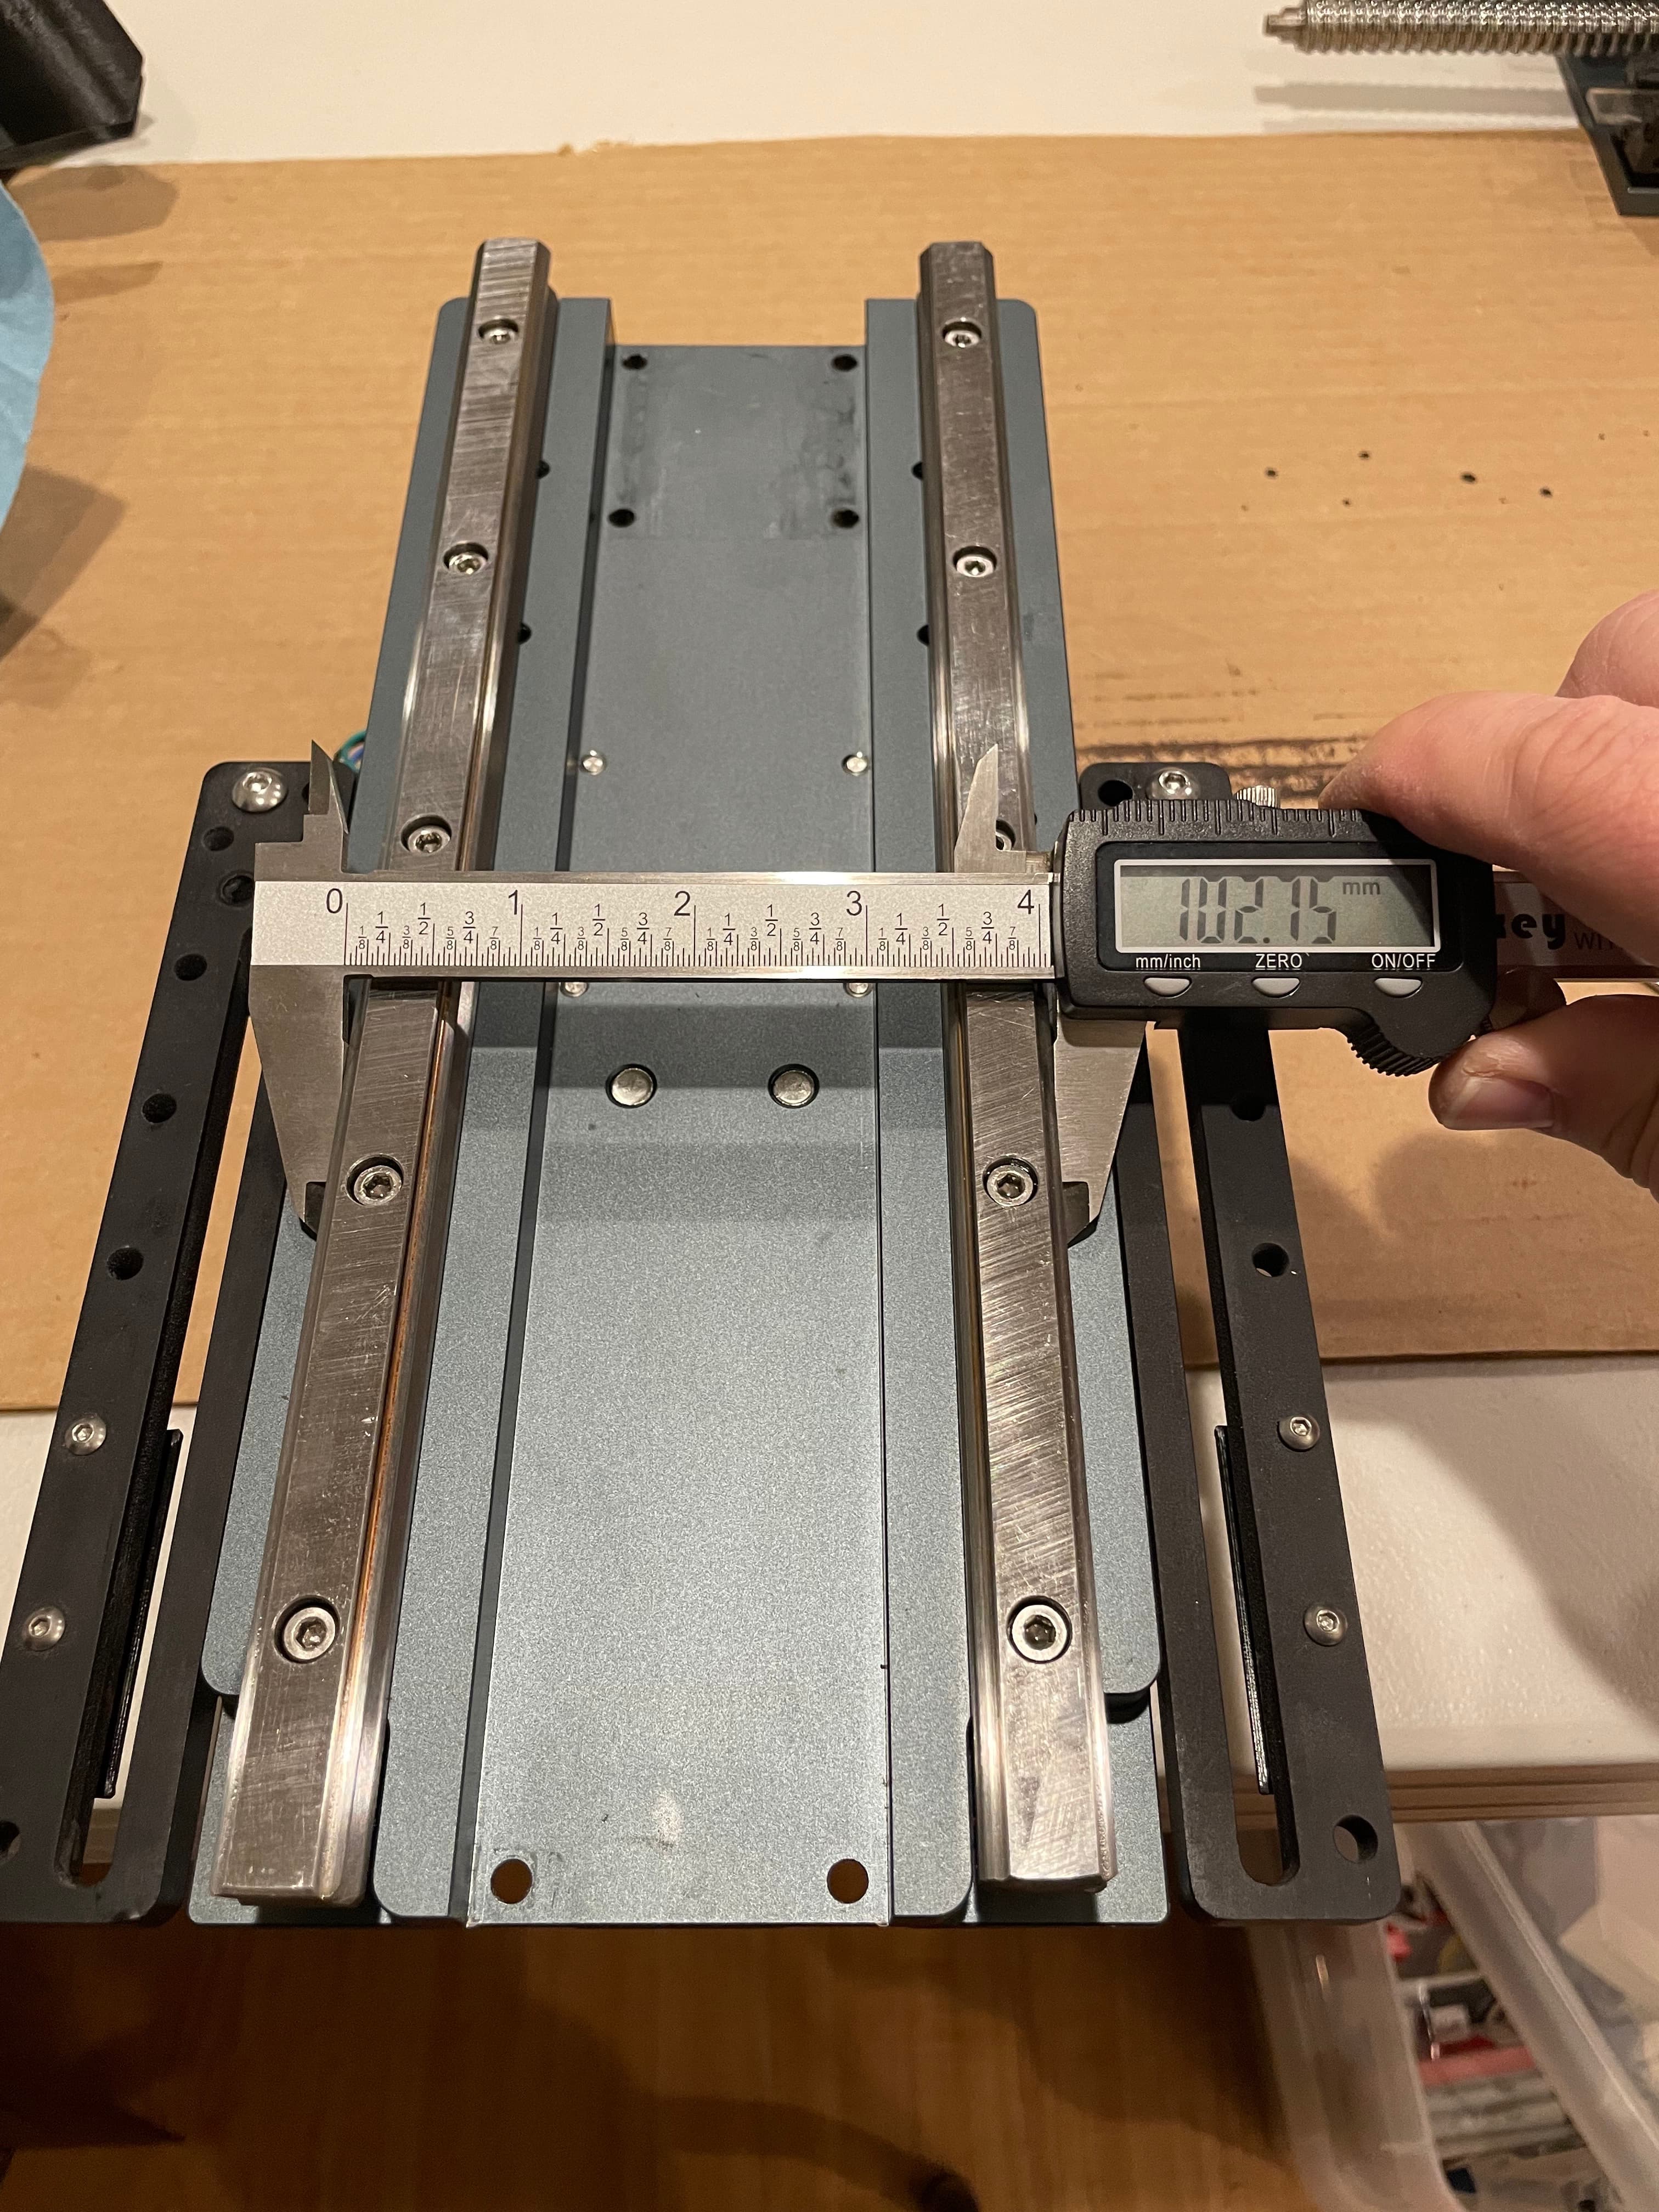
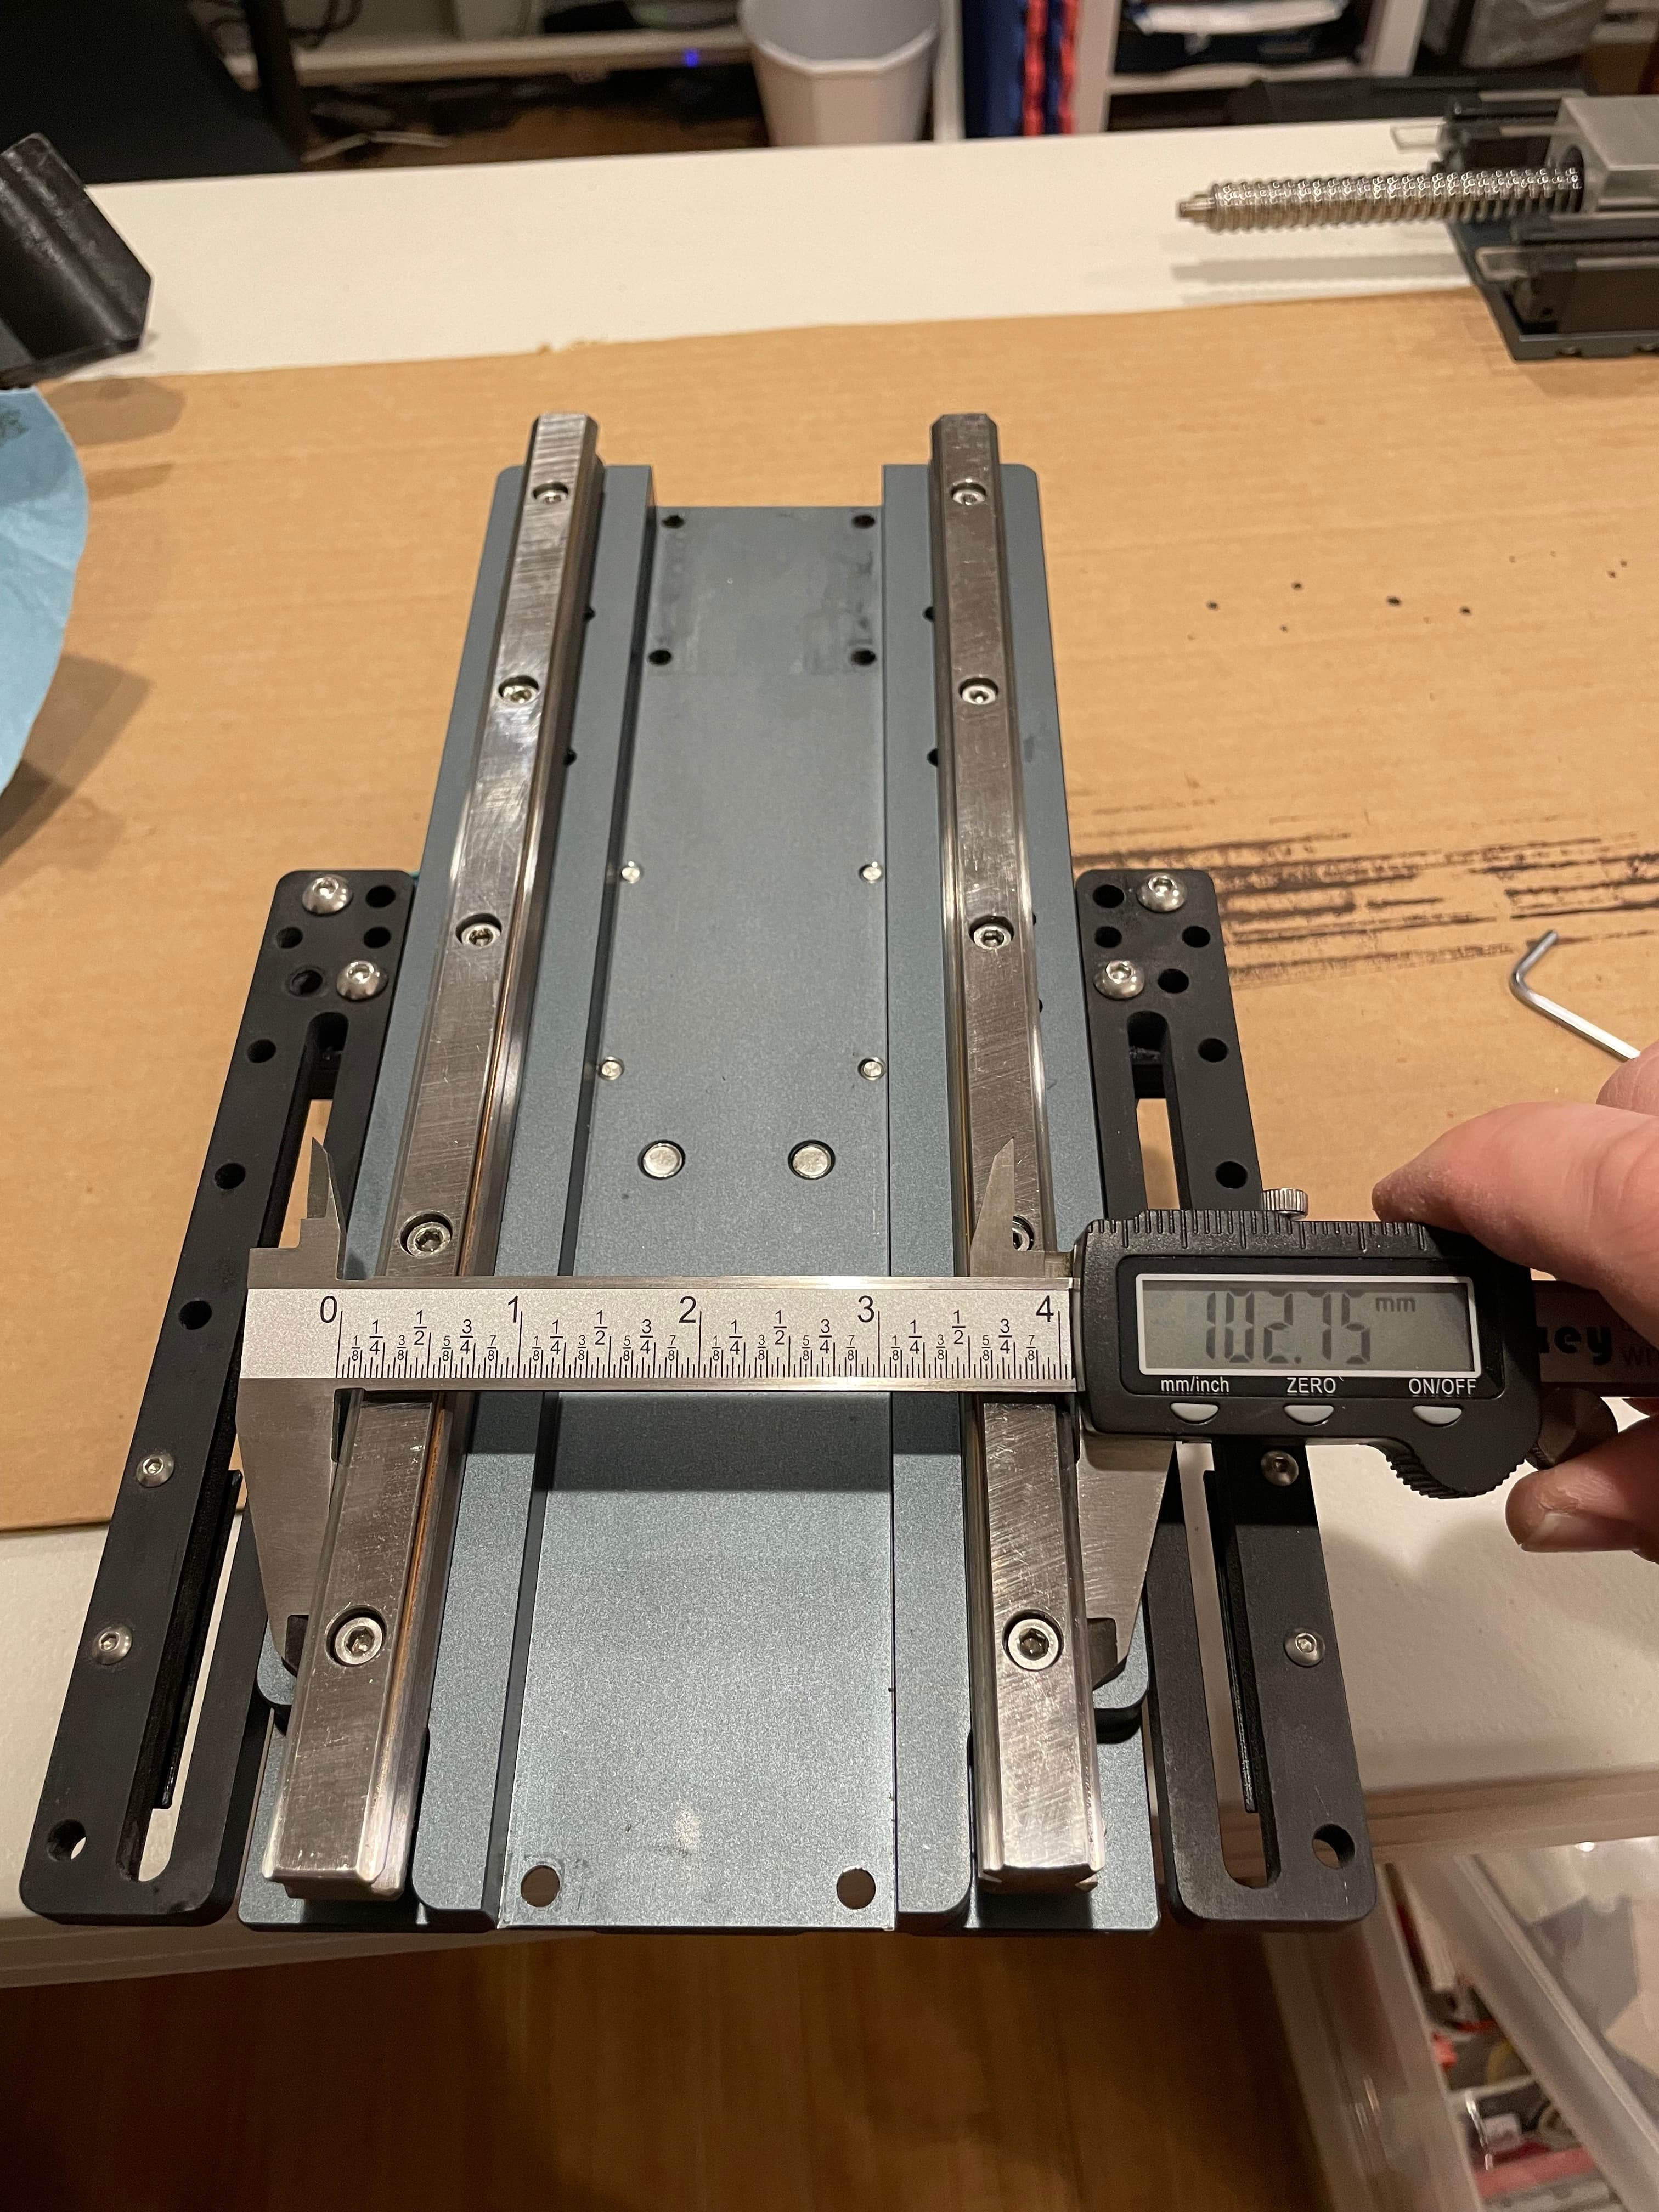
The next 5 photos (I measured at each bolt hole) show my initial rail measurements. This is how it was installed at the factory. There is a deviation of 0.35mm from top to bottom, getting wider as it goes down. This doesn’t seem like a lot to me, and I’m unsure of the lateral tolerances of these linear bearings, but apparently this was just too much askew for my setup (once again, I think the weight of my spindle is a contributing factor to possibly tighter tolerances being required).


The rails are set into machined grooves, so I slightly loosened the bolts of each rail and pulled it towards the center of the HDZ so that it was flush to the inside edge of the groove and then retightened it.
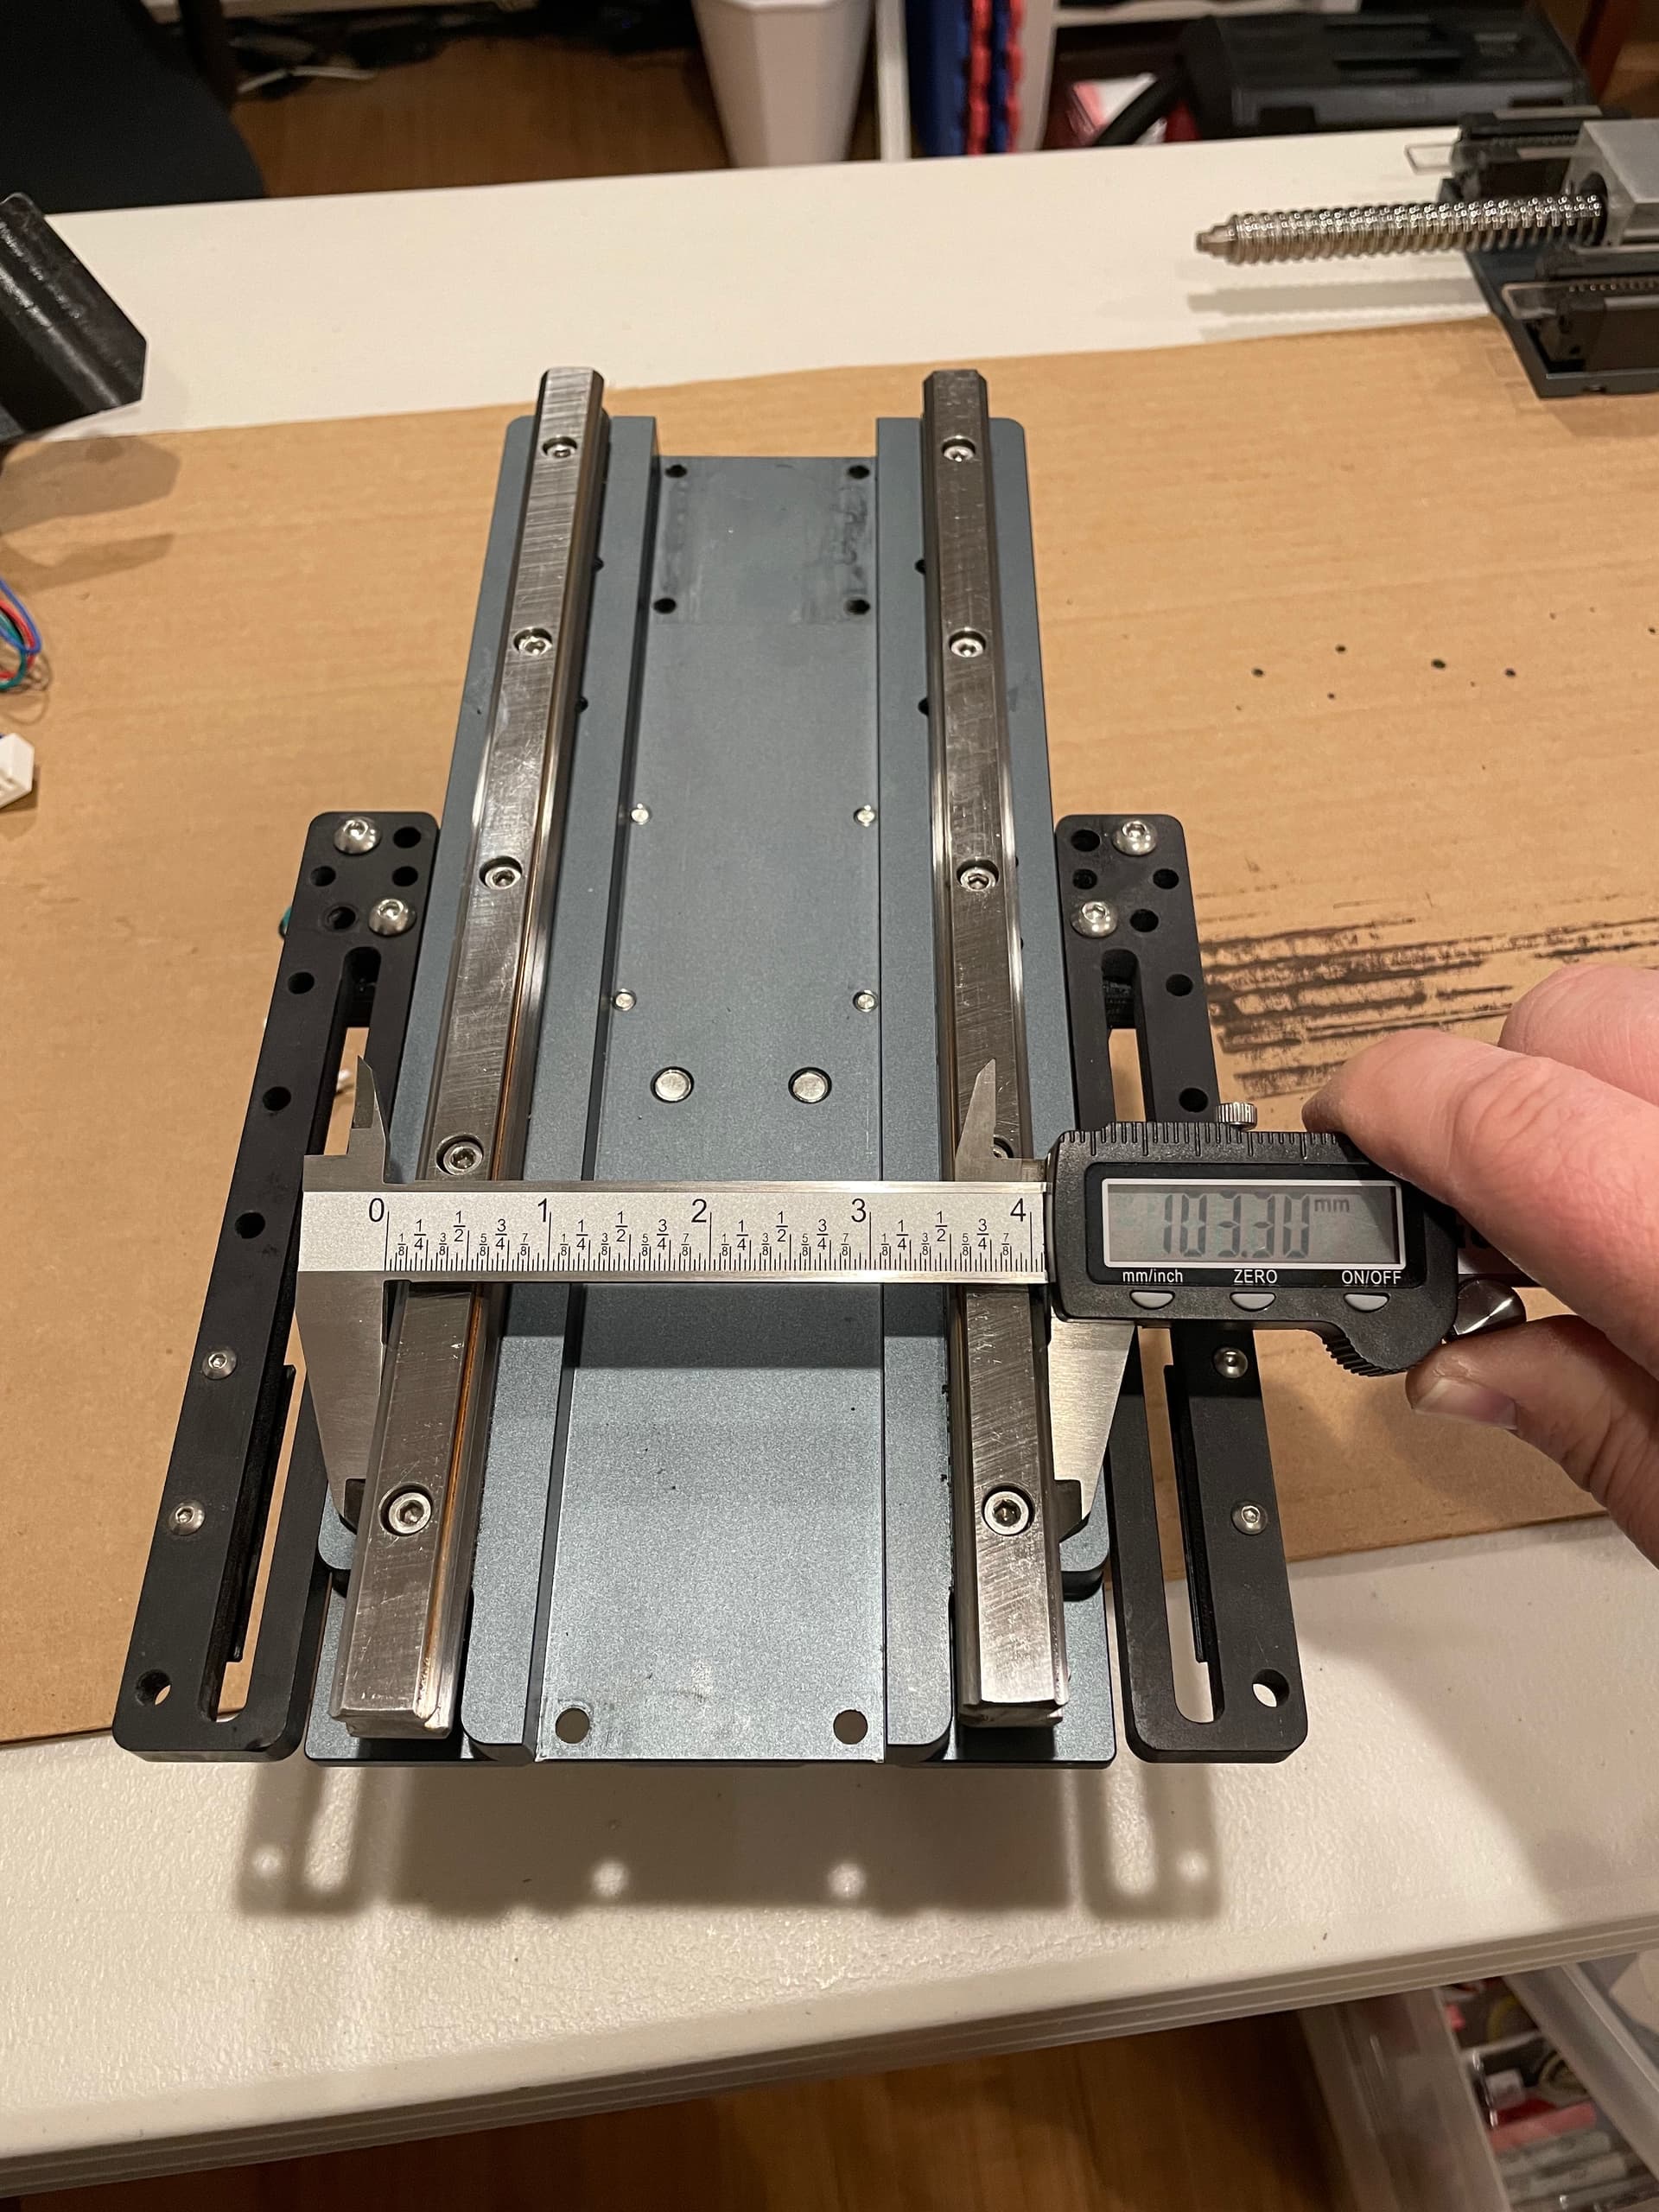
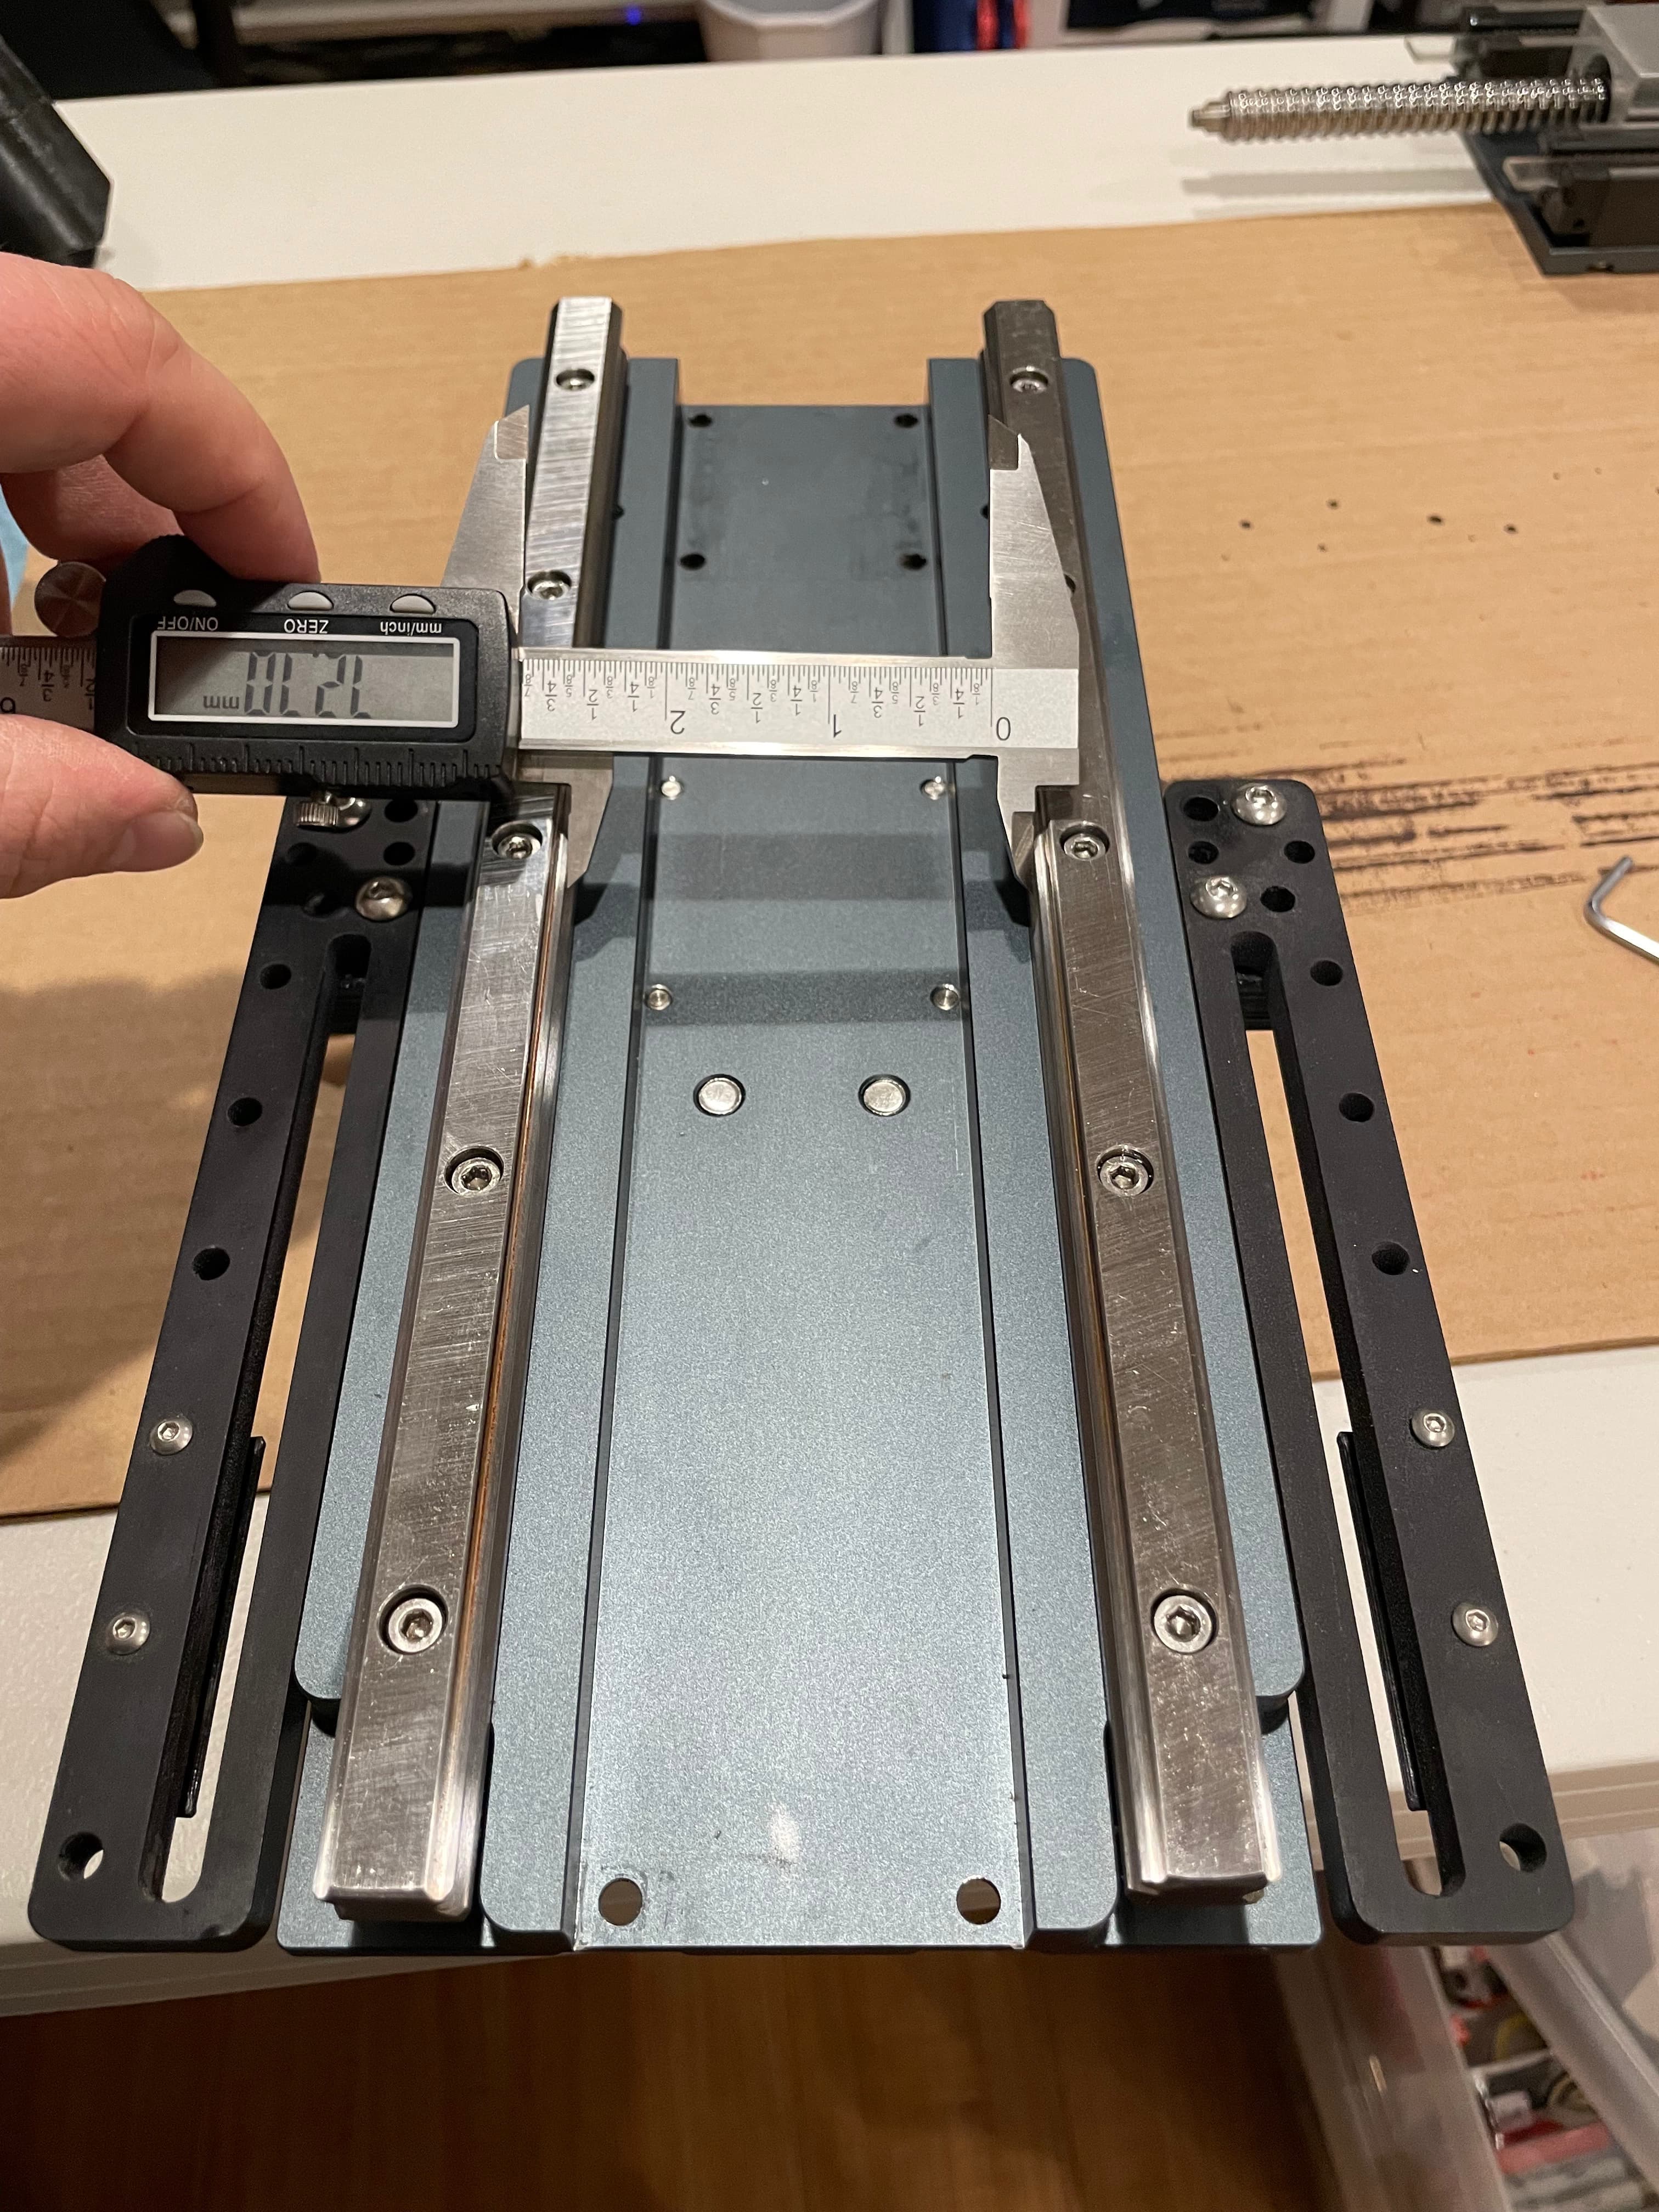
I remeasured after making this adjustment and got stellar results.
Just out of curiosity, I also checked the measurements between the insides of the rails. I only snapped one photo since they were all the same value up and down the rail.
Next, slide your carriage back onto the linear rails. Note, the entire reason you have to remove the carriage completely is because the middle bolt hole on each linear rail is impossible to access otherwise, and it makes measuring and positing the rails easier. If you want to put a rail plug into that middle bolt hole, now is your opportunity!
With the carriage back on the rails, slightly loosen the 16 screws that hold the linear bearings to the Z plate. Slide the carriage back and forth on the rails a few times and snug these bolts back tight. This ensures that the bearing blocks are aligned to your newly aligned rails.
Now place the lower bearing block back into position and slide the entire ball screw down so that the couple cage and the lower bearing block are where they belong.
Reinstall the screws into the back of the lower bearing block and tighten.
Then start the screws into the back of the coupler cage. Before tightening, use your palm to apply downward pressure against the coupler cage and then tighten the screws with that pressure applied.
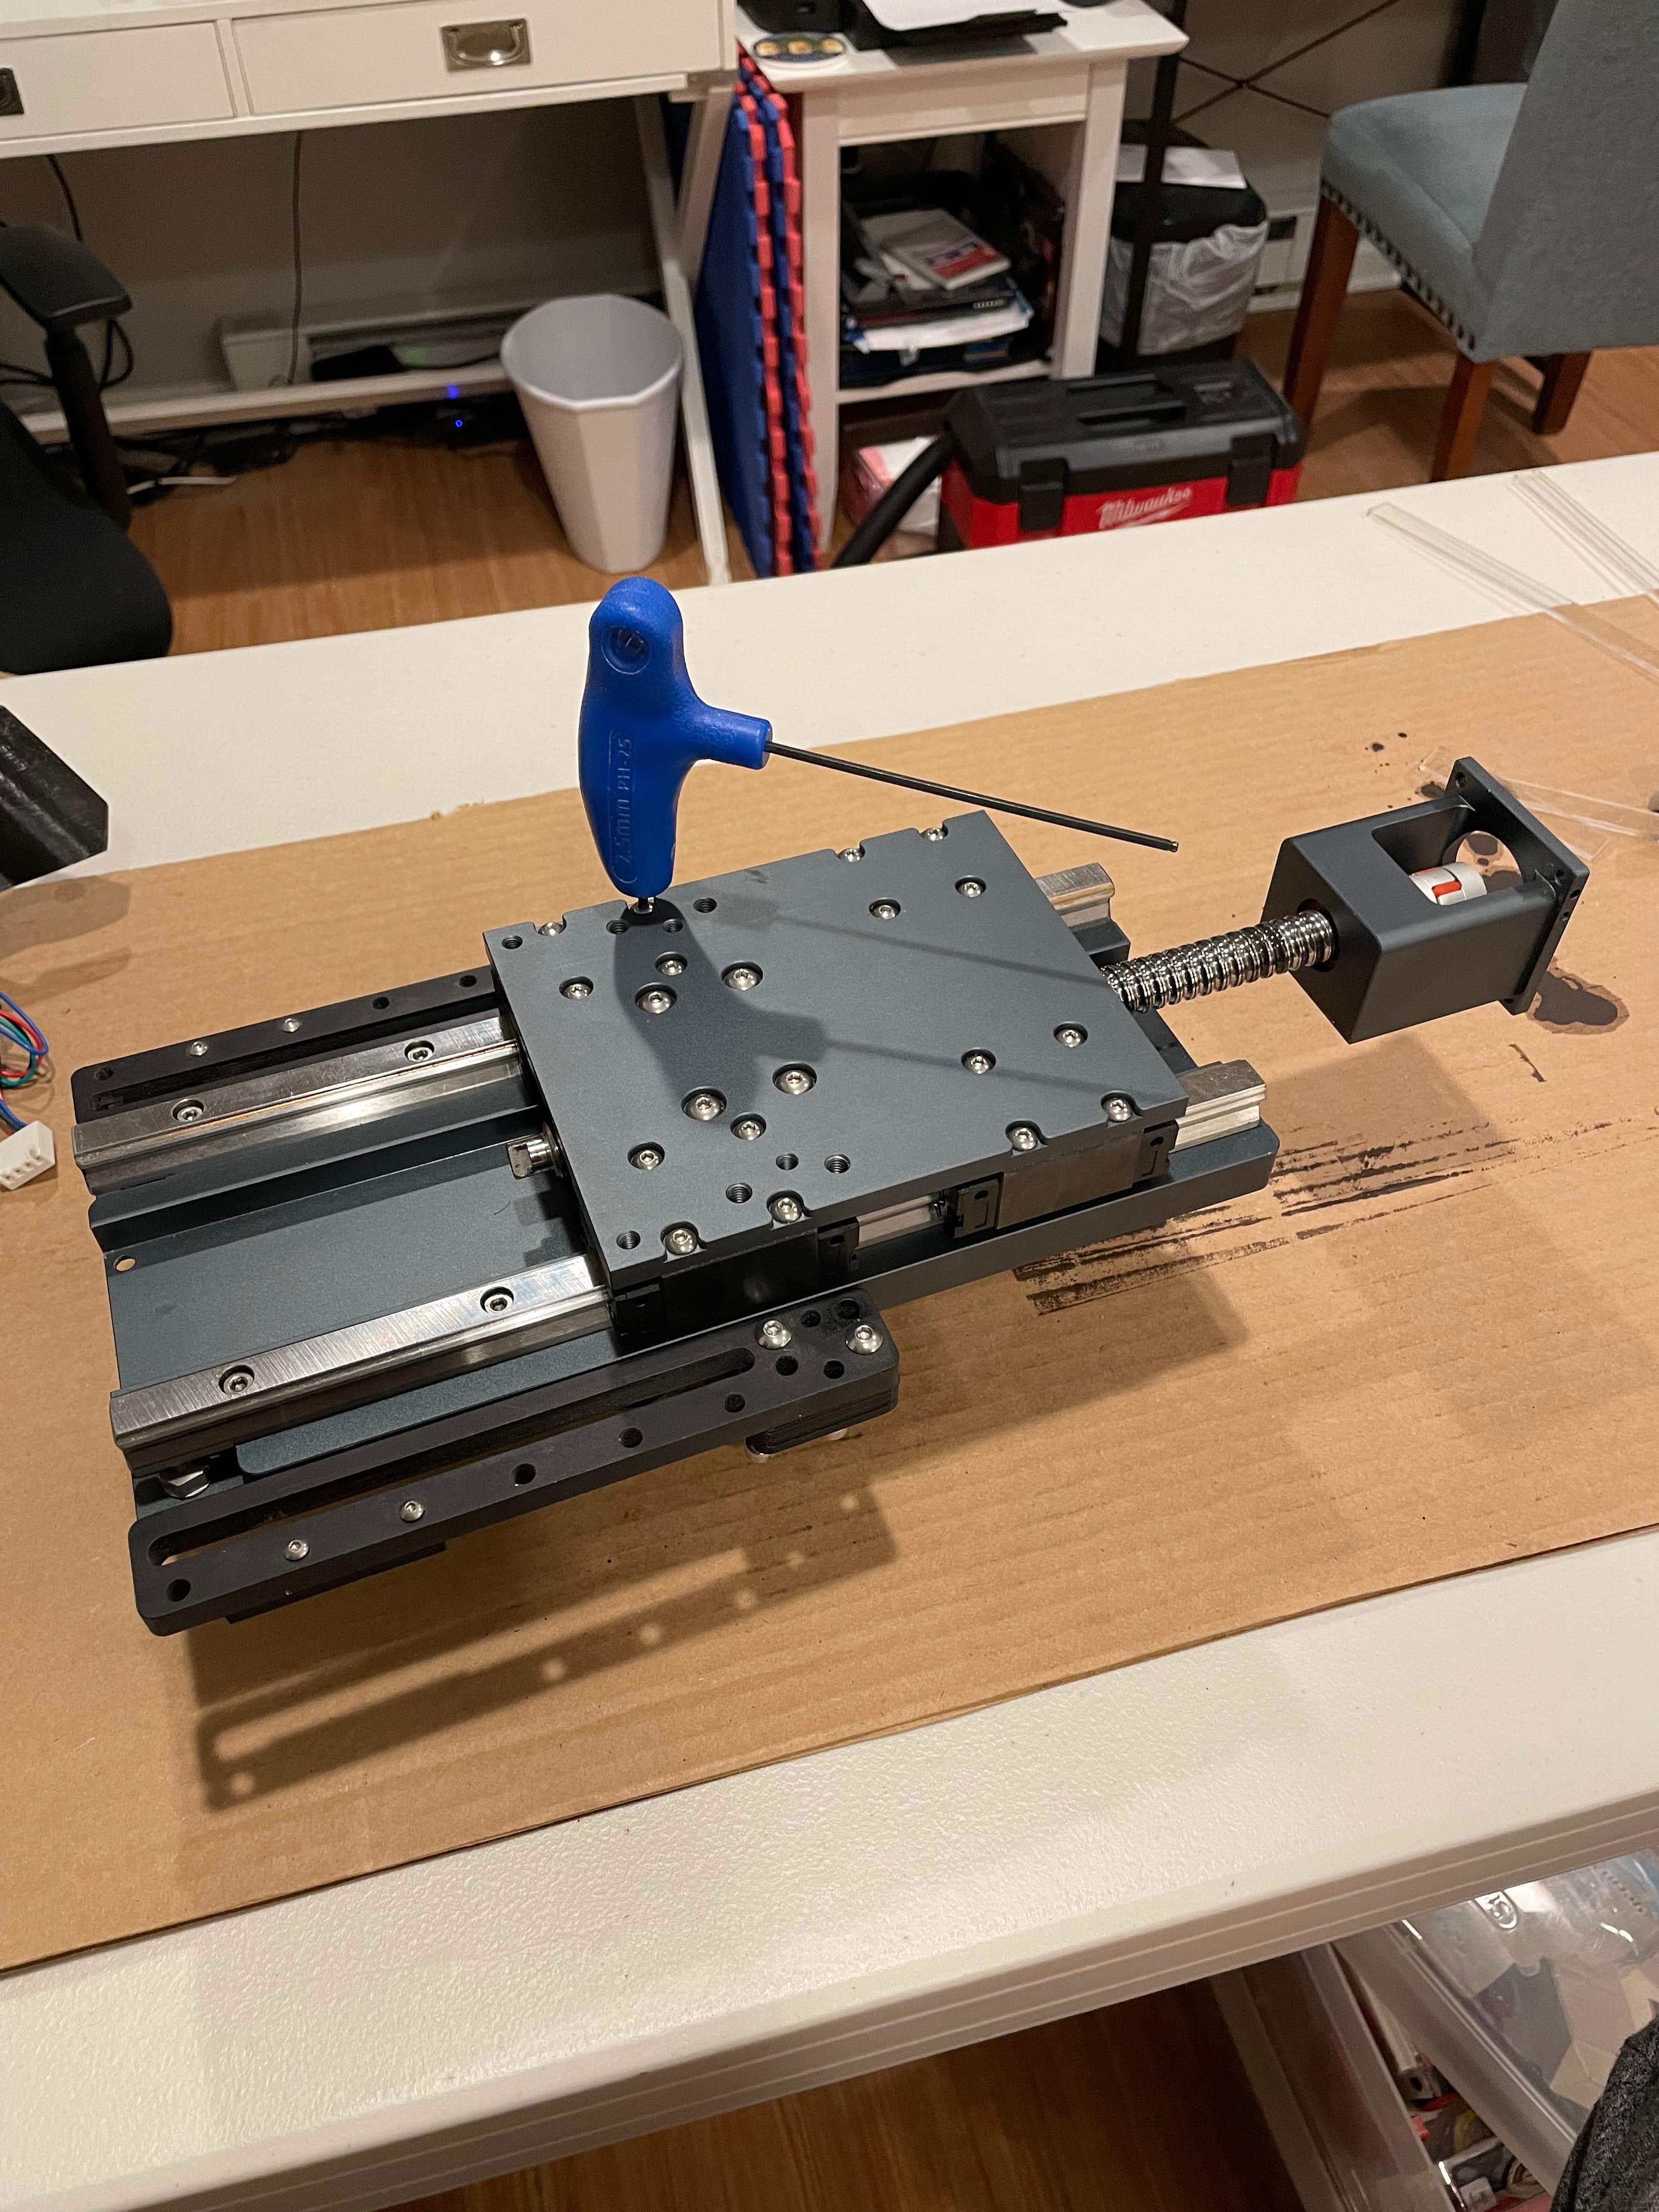
Now reinstall your Z motor AND tighten the upper coupling clamp screw. Put everything back onto your Shapeoko and give it a whirl!
My machine immediately sounded smoother (quieter) when jogging up and down. The final test was a 3D carve, which is running right now. It’s over 8 hours in and currently looks fantastic!
This seems to have been the problem with my new HDZ 4; non-parallel rails. I’m still not sure why exactly what failed on my old blue HDZ, but the troubleshooting was significantly complicated by this brand new part having alignment issues. However minute, they were enough to cause binding on my particular setup.
Carbide3D has great products and provides phenomenal technical support, coupled with exceptional customer service (my machine is well out of “warranty”, but that didn’t once cause them to hesitate when overnighting me parts and spending literally hours on the phone with me to walk through everything). With that said, the HDZ 4 is NOT typically a user-serviceable component. If you have issues with your HDZ 4, reach out to Carbide3D Support via email FIRST. If they direct you to align your linear rails, I hope this walkthrough helps.
