You should use your bitzero for the most accurate zero. Use it where your origin is so best is lower left corner of your material. That way your XY and Z will be done in one step.
No, the zero is set that the center of the tool on XY.
Try installing a V tool and use that for setting the origin. see:
I don’t have a bitzero, I was actually referring to the bitsetter that came with the 5 pro. Now I’m wondering if I’m zeroing incorrectly.
I’m going to order the bitzero
OK easy mistake to make when things start with “Bit” ![]()
Like Will suggested use a VBit to set your zero. Likely the easiest place to do that is center of your material. Put your origin in the design to center then mark the center of the material and zero XYZ there. Use the paper method to set your Z.
Watch this video to learn how to do that
https://carbide3d.com/hub/courses/running-shapeoko/movements-zeroing/
1 Like
When you zero with an end mill at the lower left corner, the left half of the end mill should overhang to the left and the bottom half of the end mill should overhang off the bottom of the material.
2 Likes
One trick I use to ensure my stock is parallel to my machine.
I install a 2 x .75 thick x 48 premium pine board as a fence at the front edge of my machine.
I then manually remove about .125 off the board on the side that’s facing towards the machine.
Here’s a quick video of how I do my work holding.
2 Likes
do you think the problem that I am experiencing is that my stock is not square with the gantry? I will try your method.
1 Like
Both of the pictures you posted look like the groove is square / aligned with the workpiece.
It’s possible the axes are not calibrated to actual size. That’s why I asked to measure the groove rather than the distance from the edge. Your vector is 11.25 x 15.75. If you’re cutting on the vector with a 1/4" tool, the outside dimension of the groove should be 11.5 x 16.
Be careful with the files/dimensions. OP has posted a file with the same name twice but the files differ by dimensions/tools, etc. This is when I open them in V7.
I agree with Tod1d that the issue is not related to squareness. However, I doubt it is some type of machine calibration issue. If it were, both of the juice grooves would be offset by the same dimension (unless the machine calibration was tweaked between cuts ![]() ).
).
1 Like
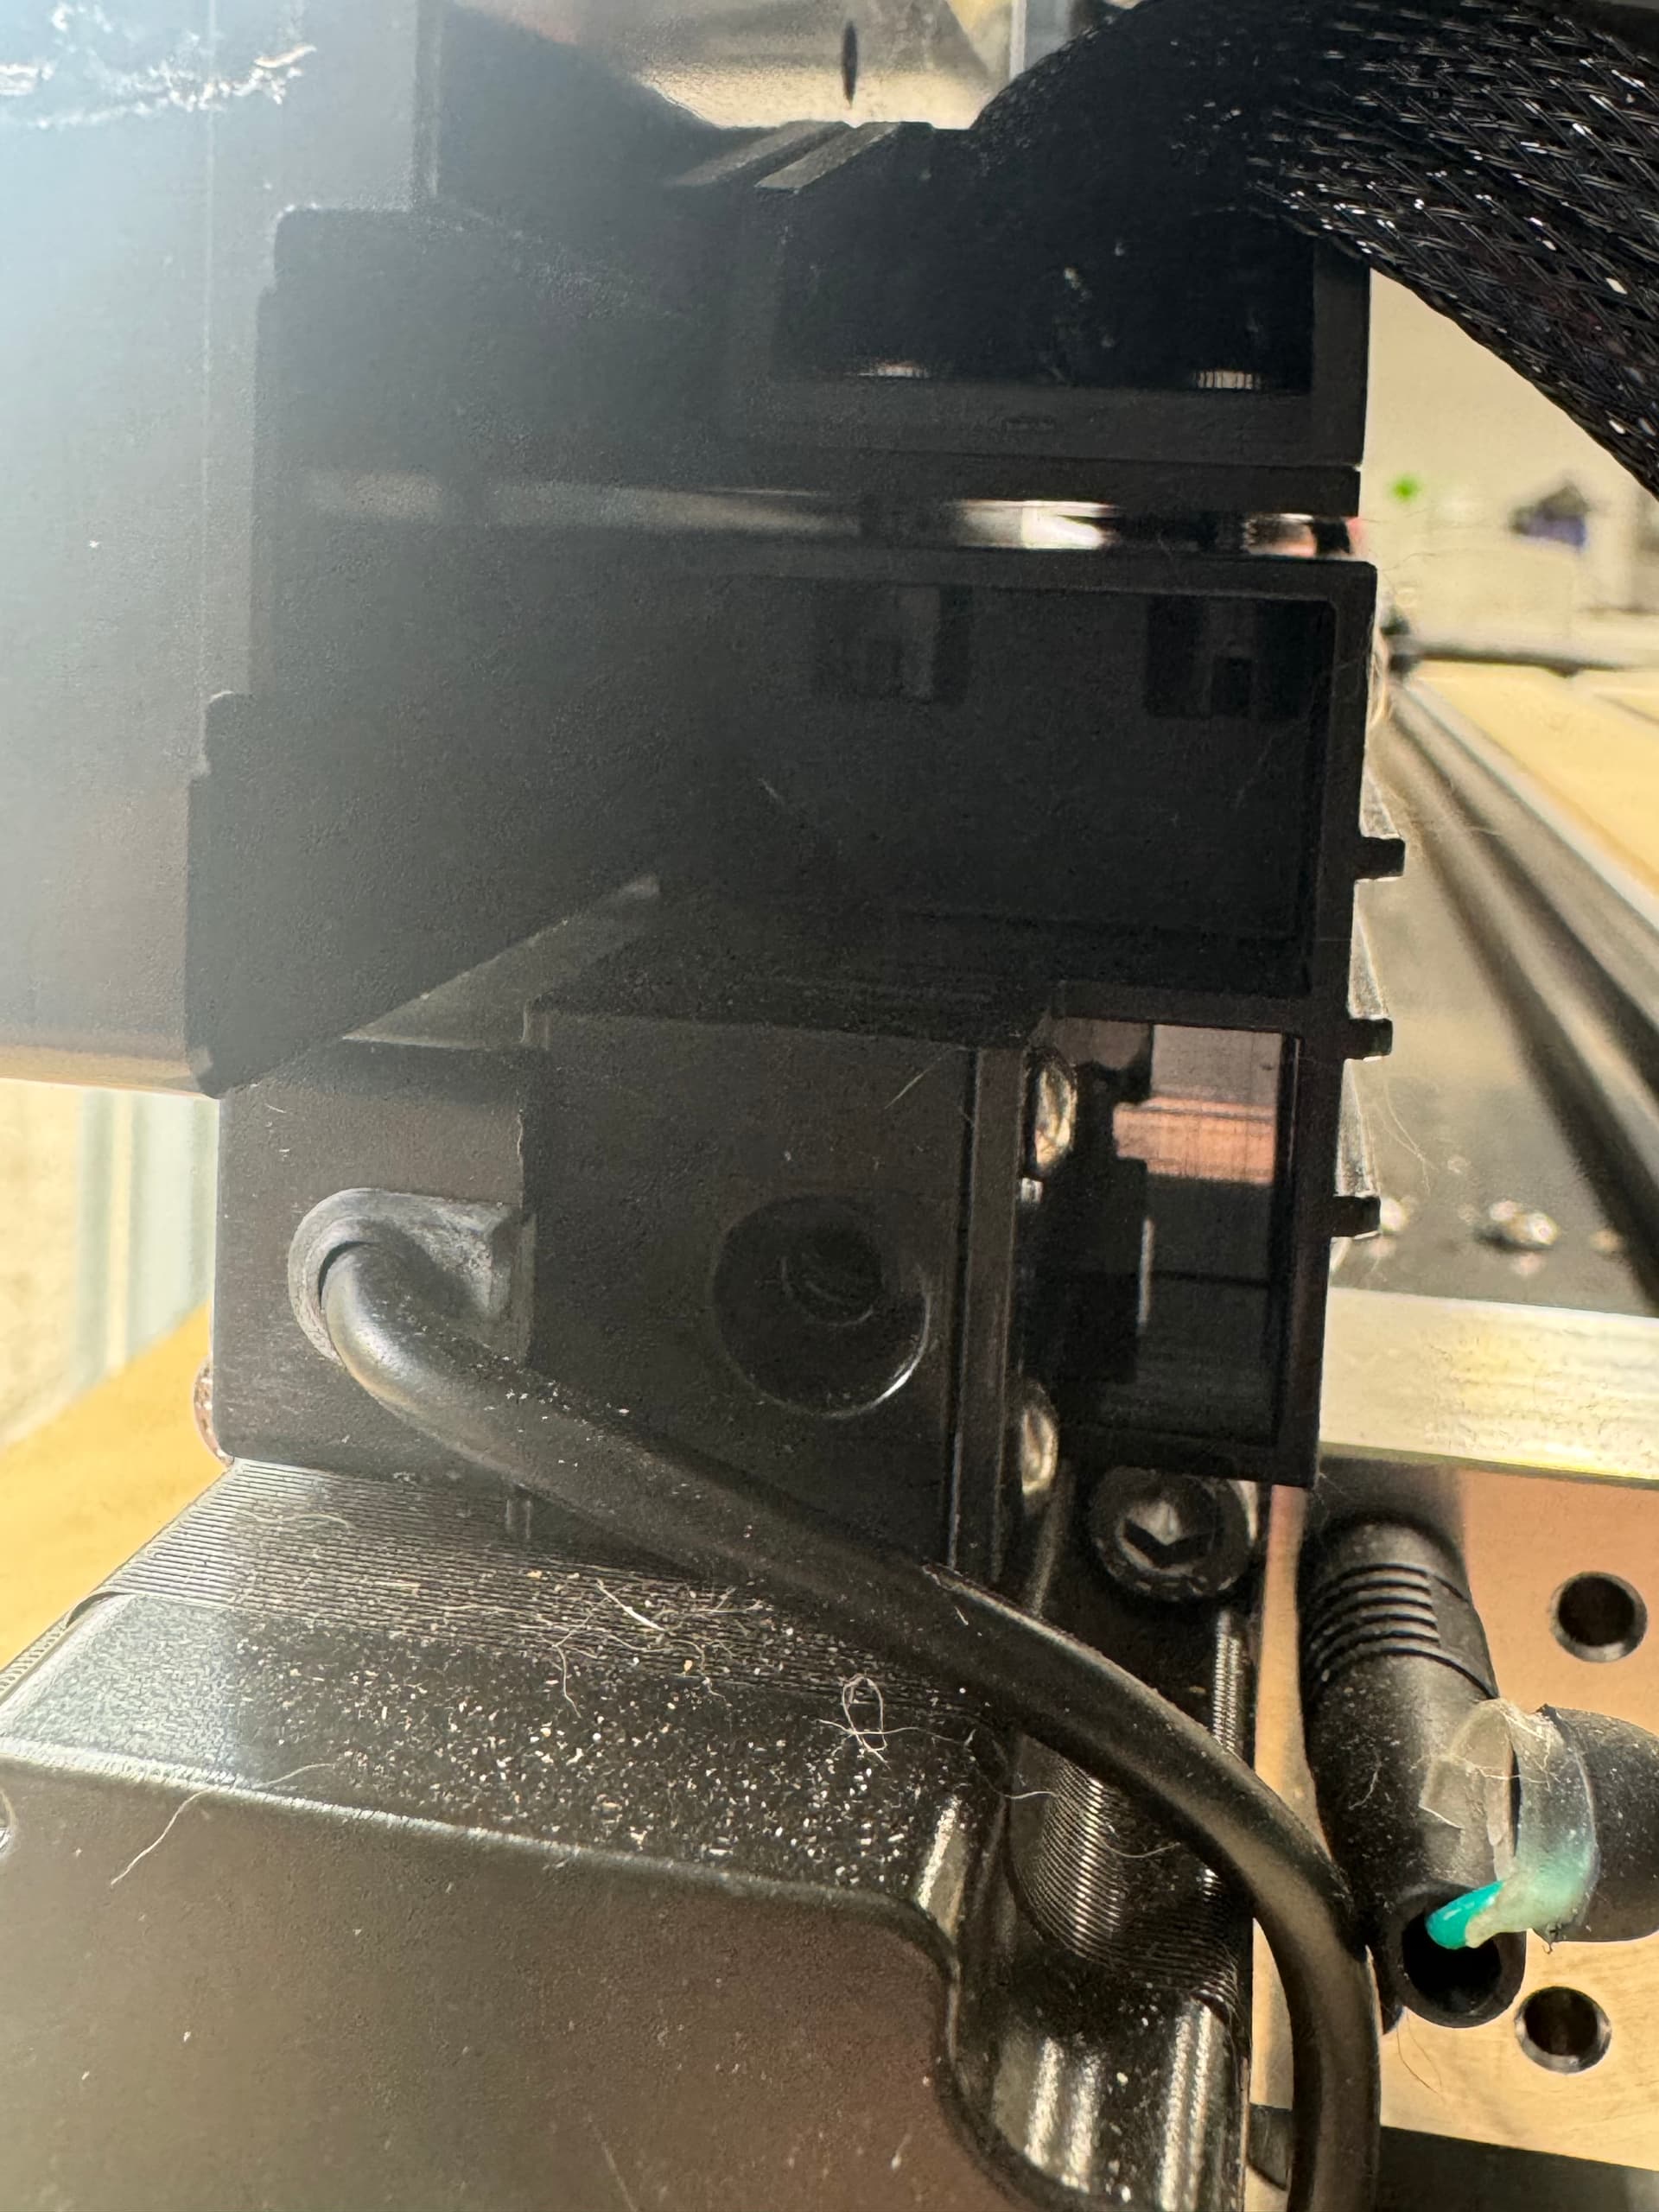
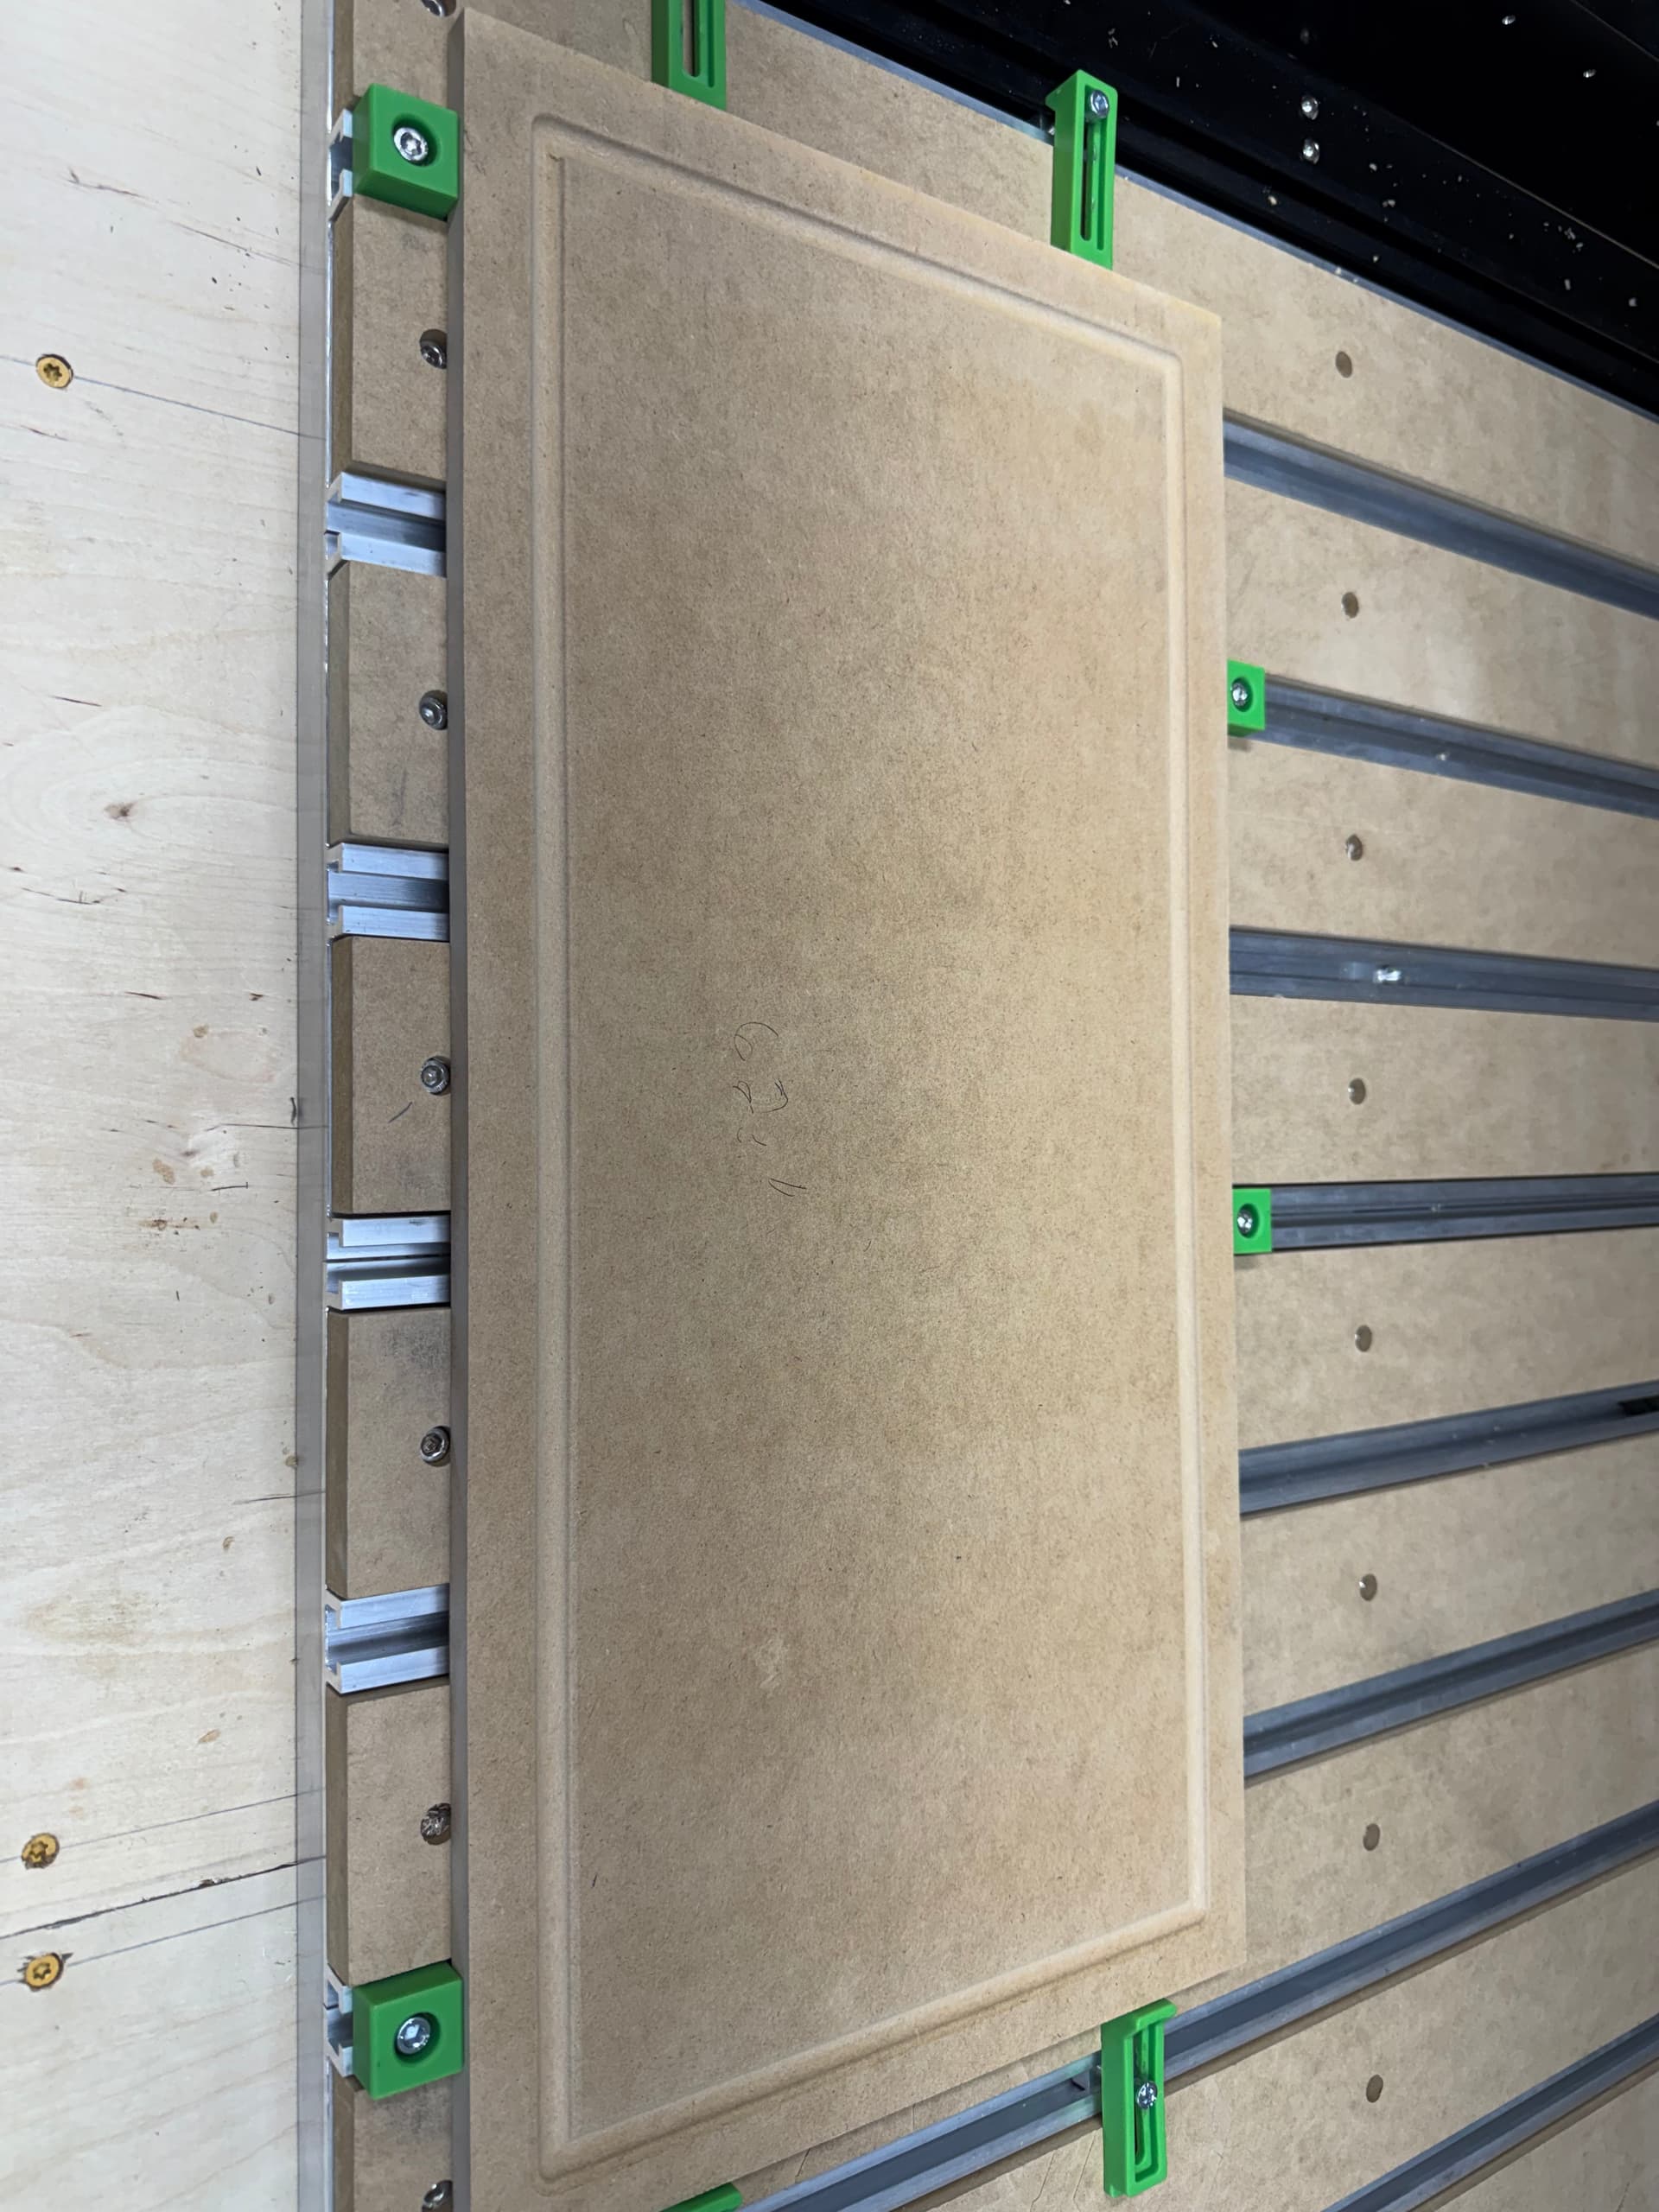
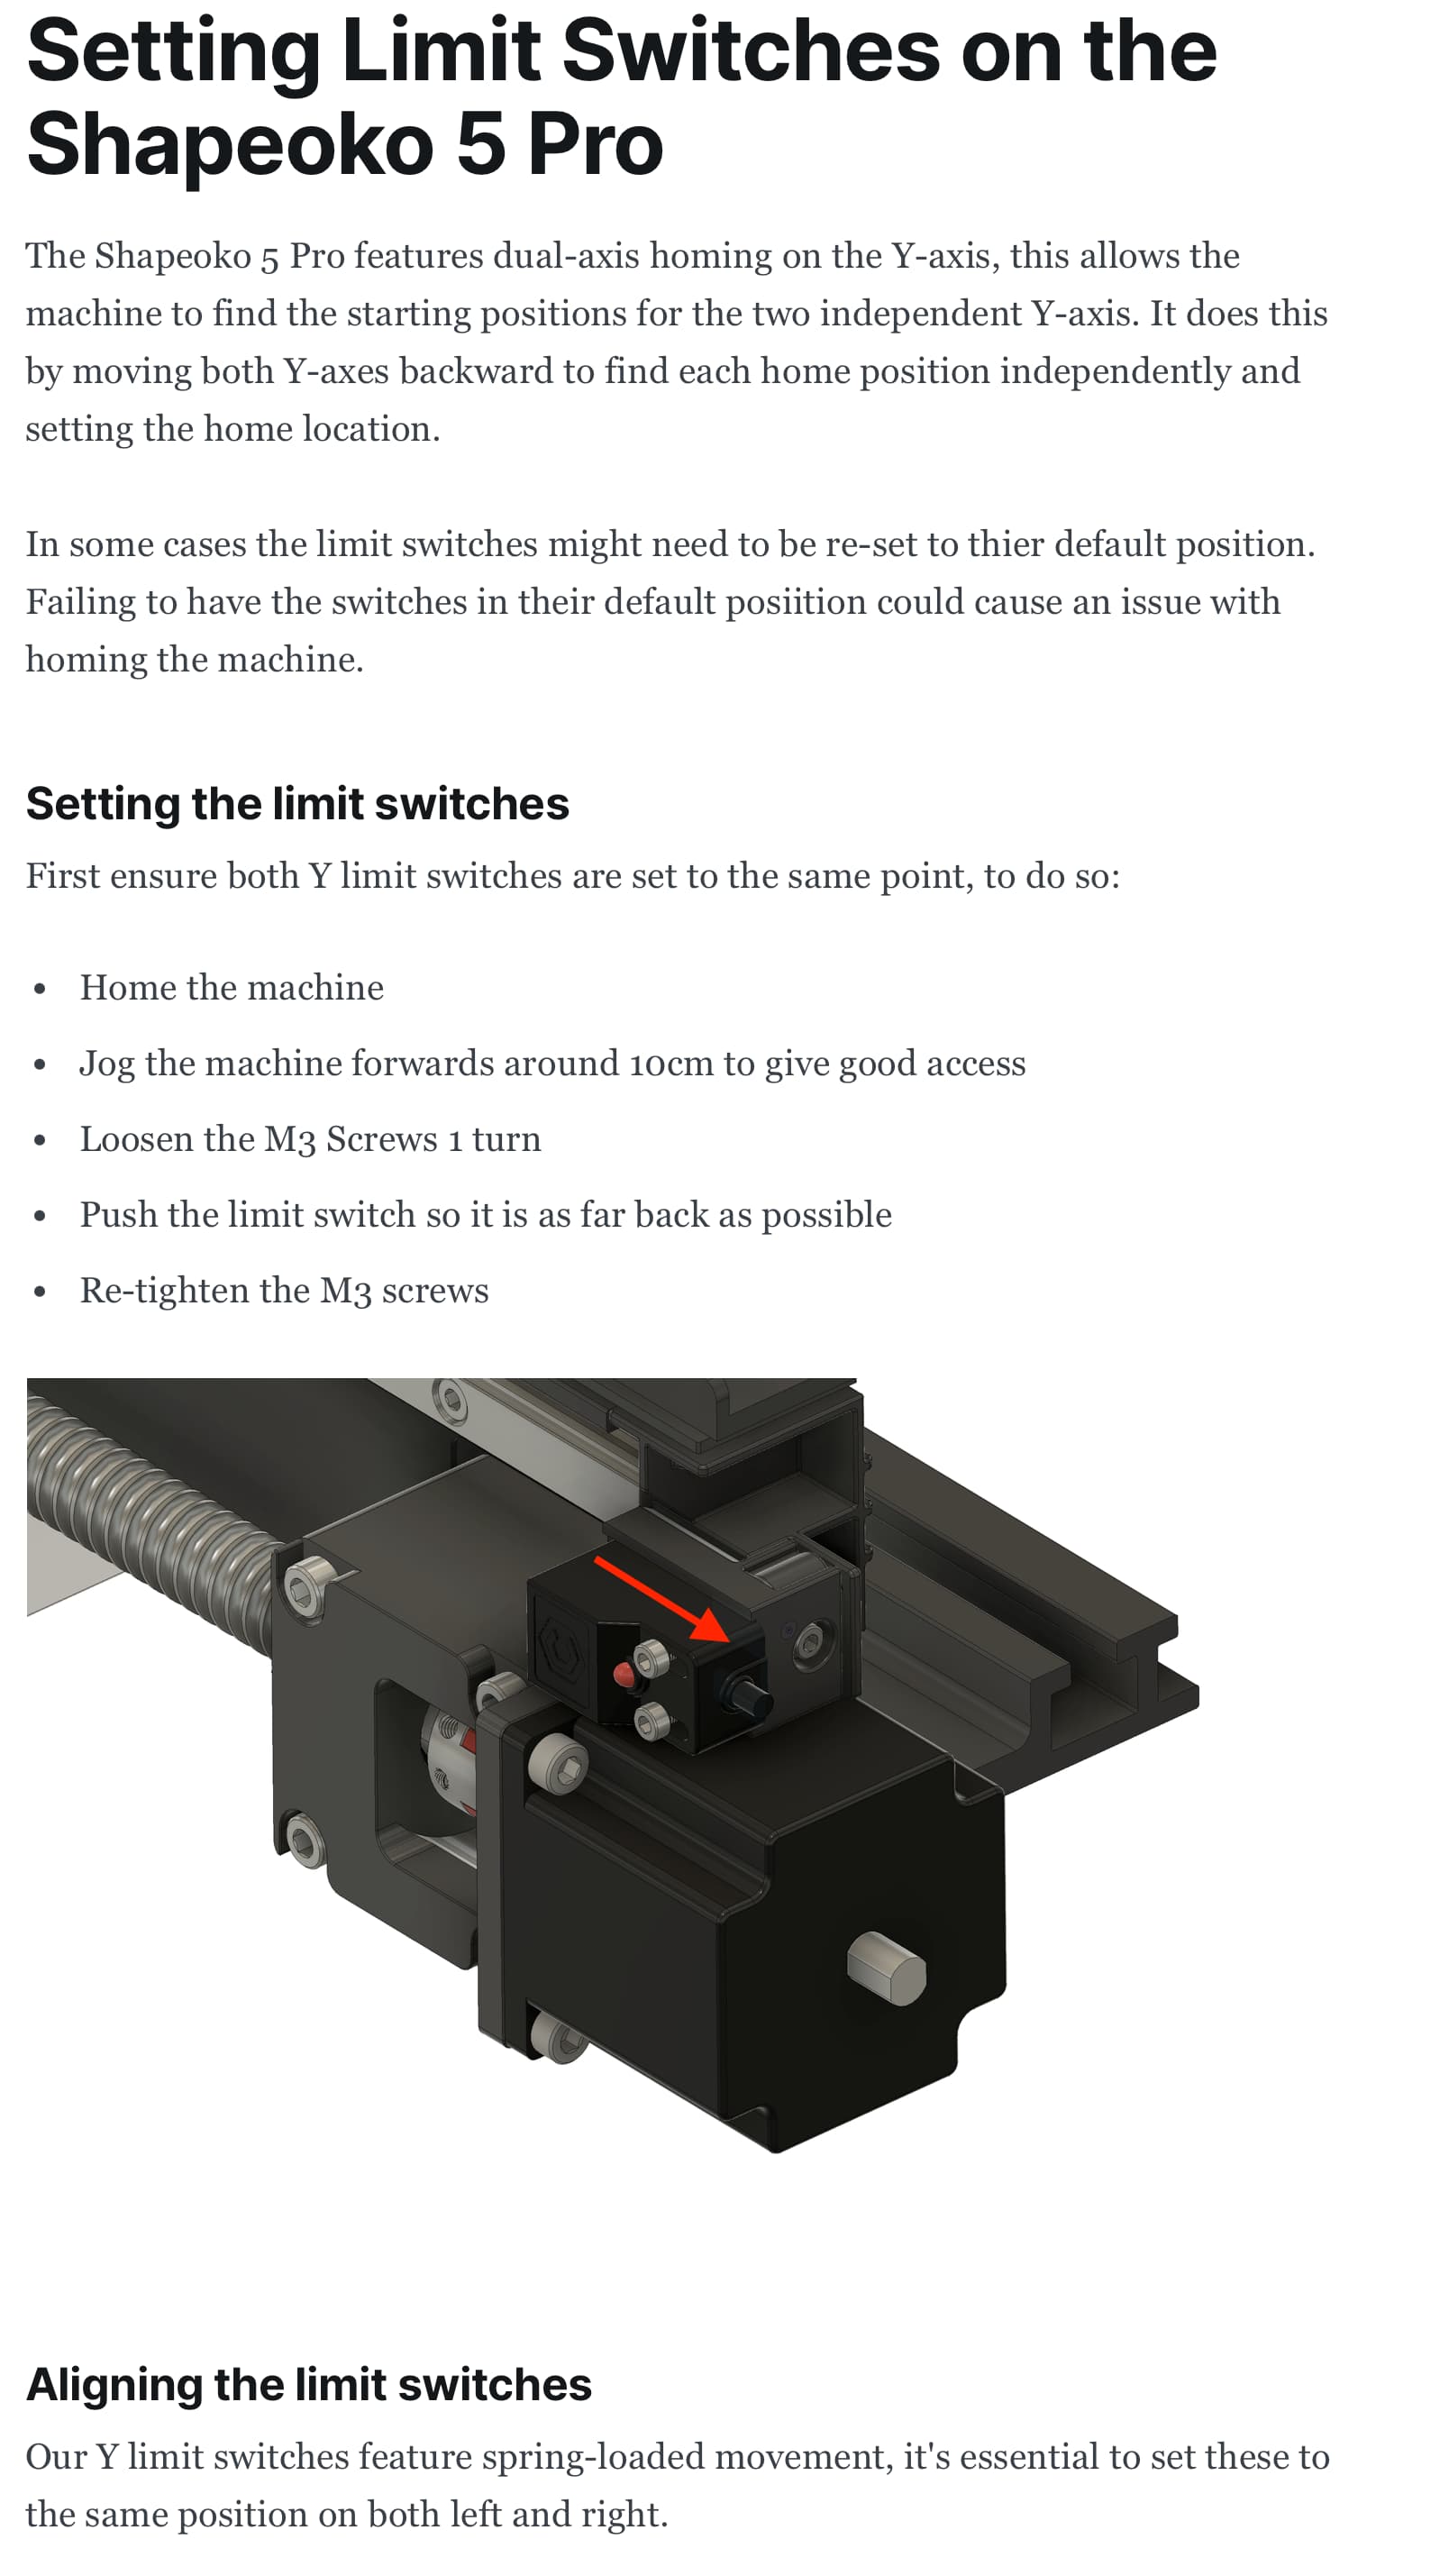
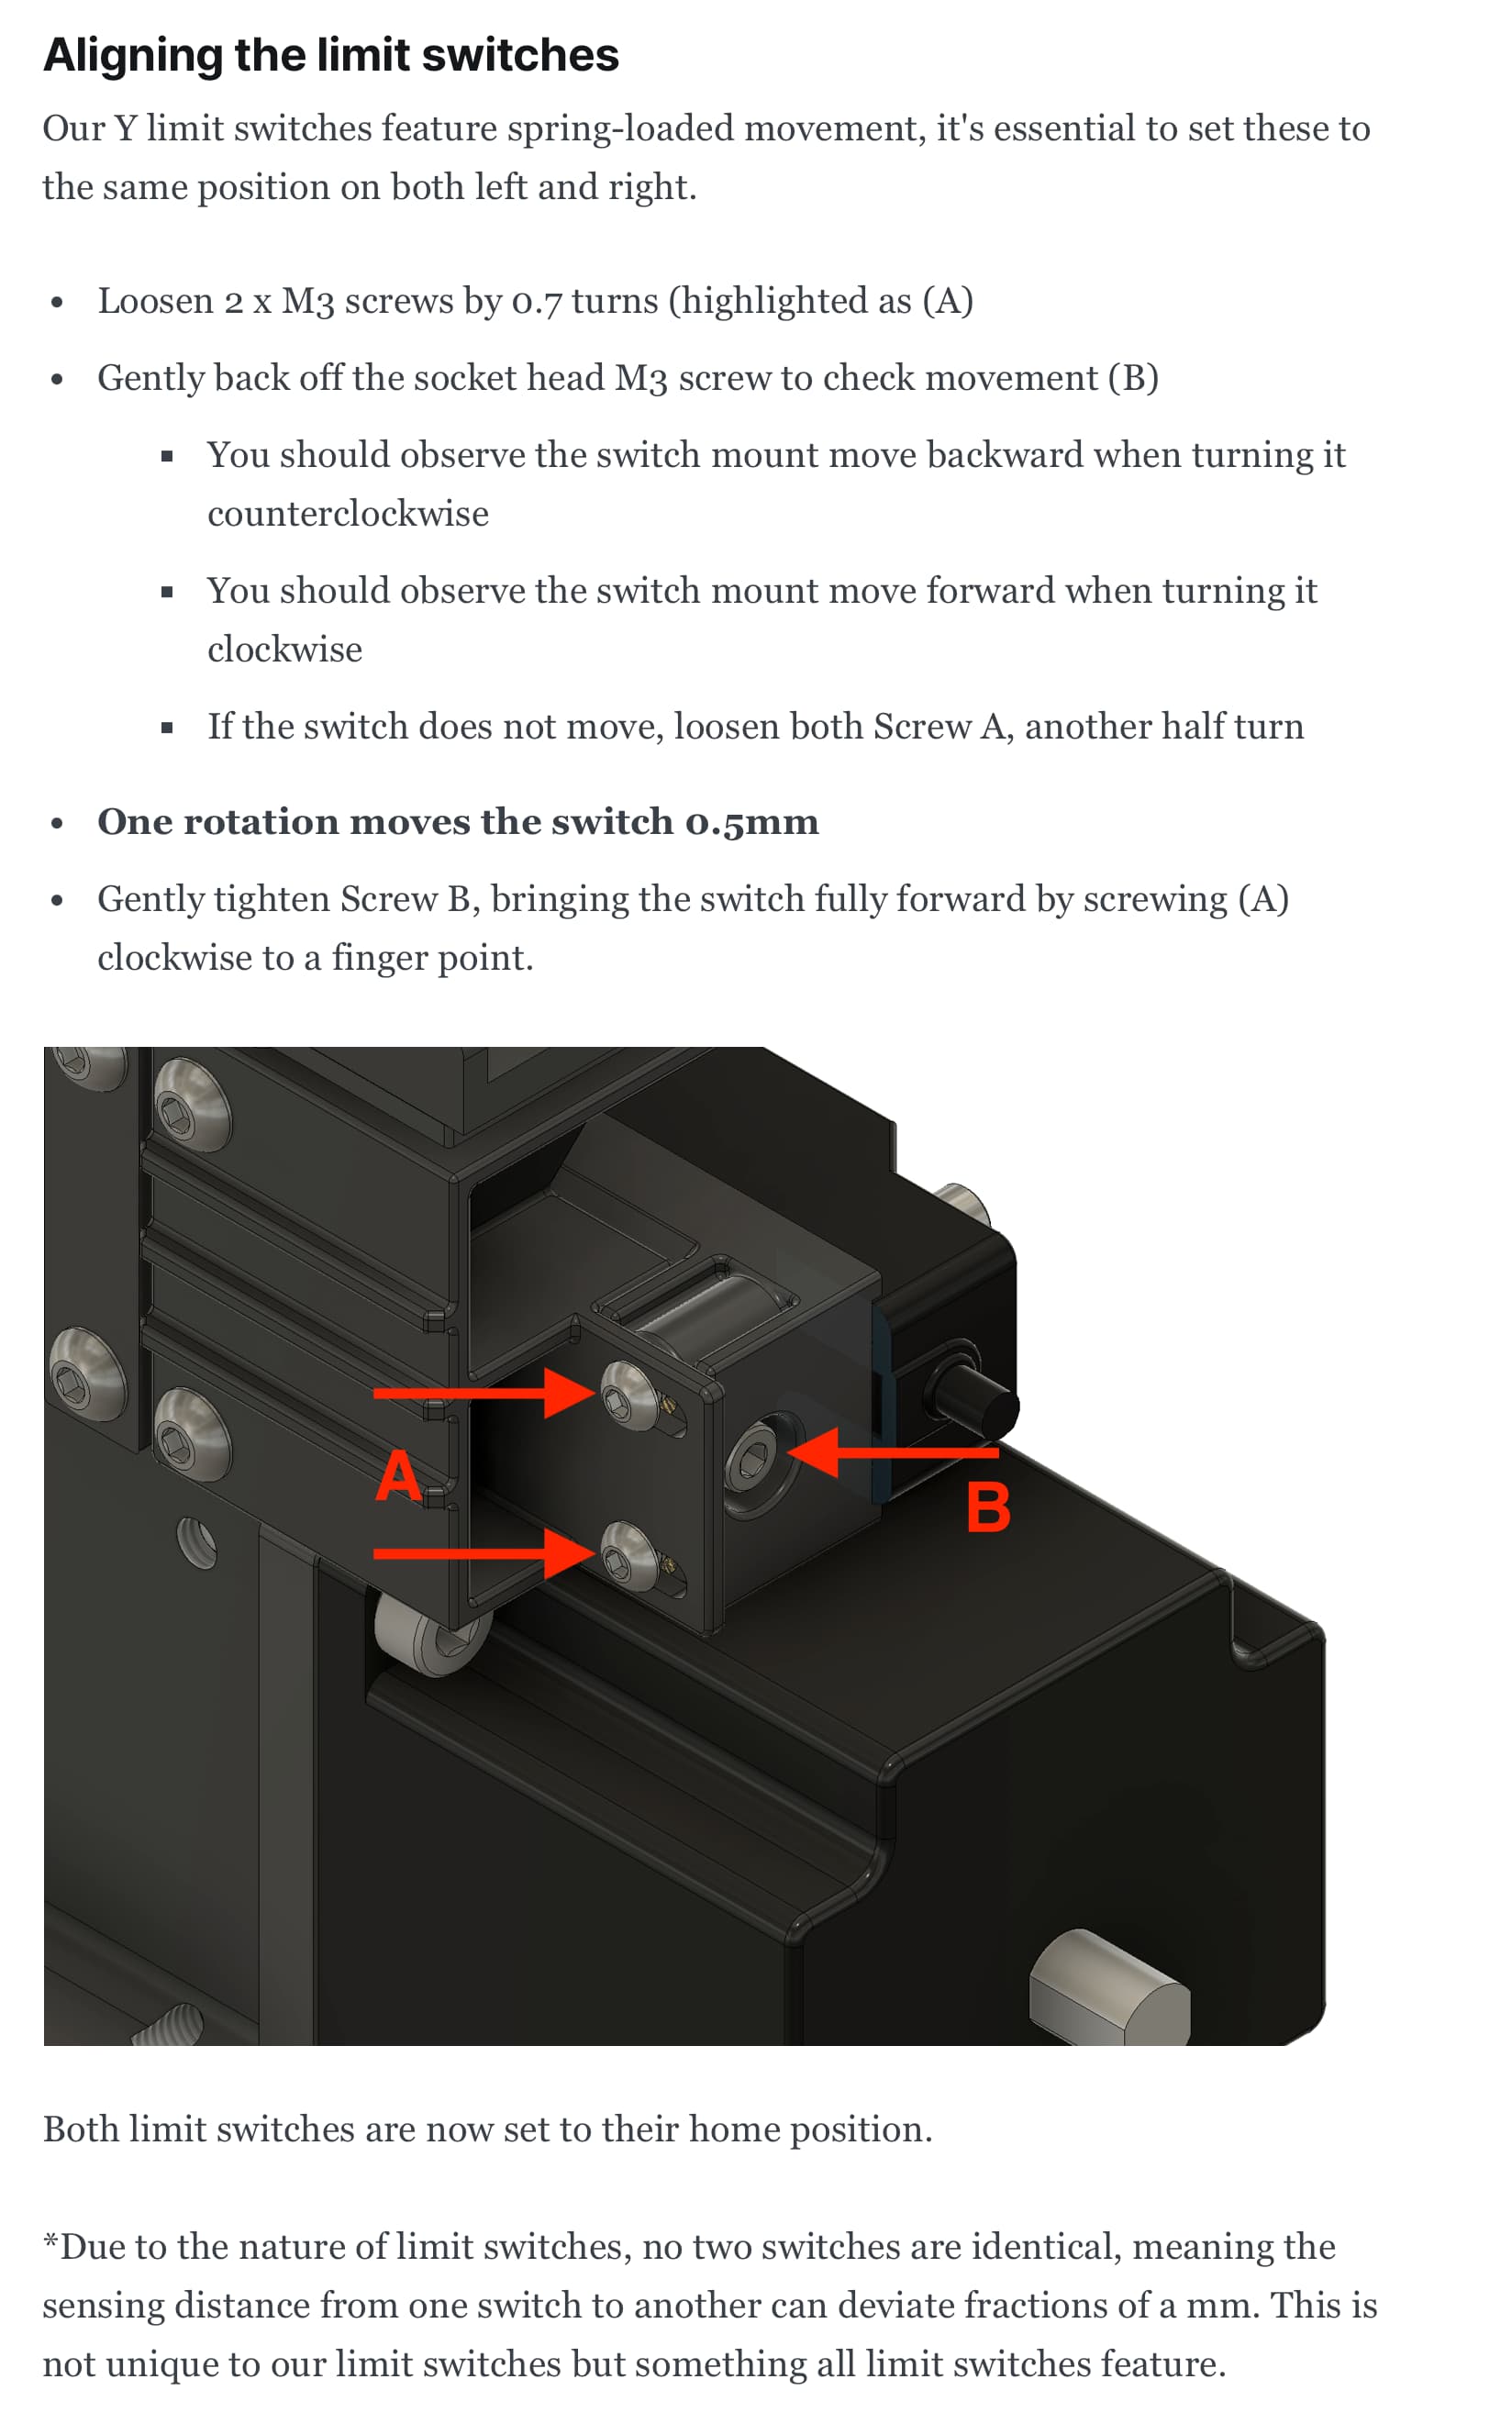
ok I think I have figured out what happened here. I was working with Fleming over @ support. I have to say, I know they are very busy over there but Carbide support is awesome and while recently it is taking time to respond, they do respond and are very helpful. It appears my issue is that the right side of the machine, the Y-axis limiter maybe faulty or a screw popped out. see picture attached comparing left and righ y-axis limiter. Luckily, last year during unboxing, I came upon a long screw that I couldn’t figure out where it fell from. I saved it and it just so happens this is the spot where it fell out from. I adjusted the y-axis limiter based on the instructions that Fleming sent to me (attaching it here too in case someone will have the same issue in the future).
I ran another cut while not completely perfect it is acceptable for my needs. all 3 sides where very close to one another with the left side of the cut slighty larger (I could attribute that to my measurement of the stock not being entirely precise during my test cut) It does pass my eye test however…

2 Likes
It’s a process of elimination. Start with the basics first—the mechanics of the machine and your process.
It could be a machine configuration issue, but that’s above my pay grade.
I find that my fence technique has saved me SOOOO much time over the years. I know my stock is square to the machine without measuring anything. There are multiple ways to ensure your stock is square. I have found this one to be fast, easy, and repeatable.
One quick note: notice how the fence is pushed a few inches inward on the machine. That’s so I “miss” the bit setter. Nothing worse than running a program only to get “hung up” on the bit setter and have the machine skip a step.
Here’s another technique I haven’t tried, but it looks like a great idea.
2 Likes
This topic was automatically closed 30 days after the last reply. New replies are no longer allowed.