I went through all the linear bearings today until I got to the Lower Linear bearings on the Z axis.
Hmmm… So I removed the upper linear bearing screws and slid the upper bear up until I could get to the top of the lower bearing oil screw with a 2.5 ball end hex wrench.
You need to be careful not to push it past the plate, at least I did not want to do that.
You’re more industrious than me. Waylube is fairly viscous, so I put a small tray under the Z axis and use a plastic syringe to push oil in the bottom port and quickly replace the screw. Very little drips out.
It was surprisingly simple once I committed to moving the upper bearing.
The bearing on the first side slid easier than the other. I almost pushed the second bearing off the plate because it required more pressure to get it started. Next time I will tap it instead of pushing.
A little out of my wheelhouse, but do they make a tiny 90° male-female elbow that will fit that port?
Then you could move the grub screw to the female end & access it without disassembling anything.
If you do find one, I think you will have to remove the linear bearing from the way in order to get clearance to screw it in. It’s around 1/4" from the center of the screw to the face of the way.
I bought a new standalone laser which has distracted me for a while. I was finally back on the CNC yesterday and noticed a few new grumbling noises so figure it time to clean and oil again.
As I was thinking about it, it occurred to me I have added oil to the Z bearings multiple times but never the for the X and Y other than wiping the rails down with a light coat of Vactra. Is there any other necessary maintenance for X and Y. And man, I wish the controller box wasn’t quite so close to that right Y rail.
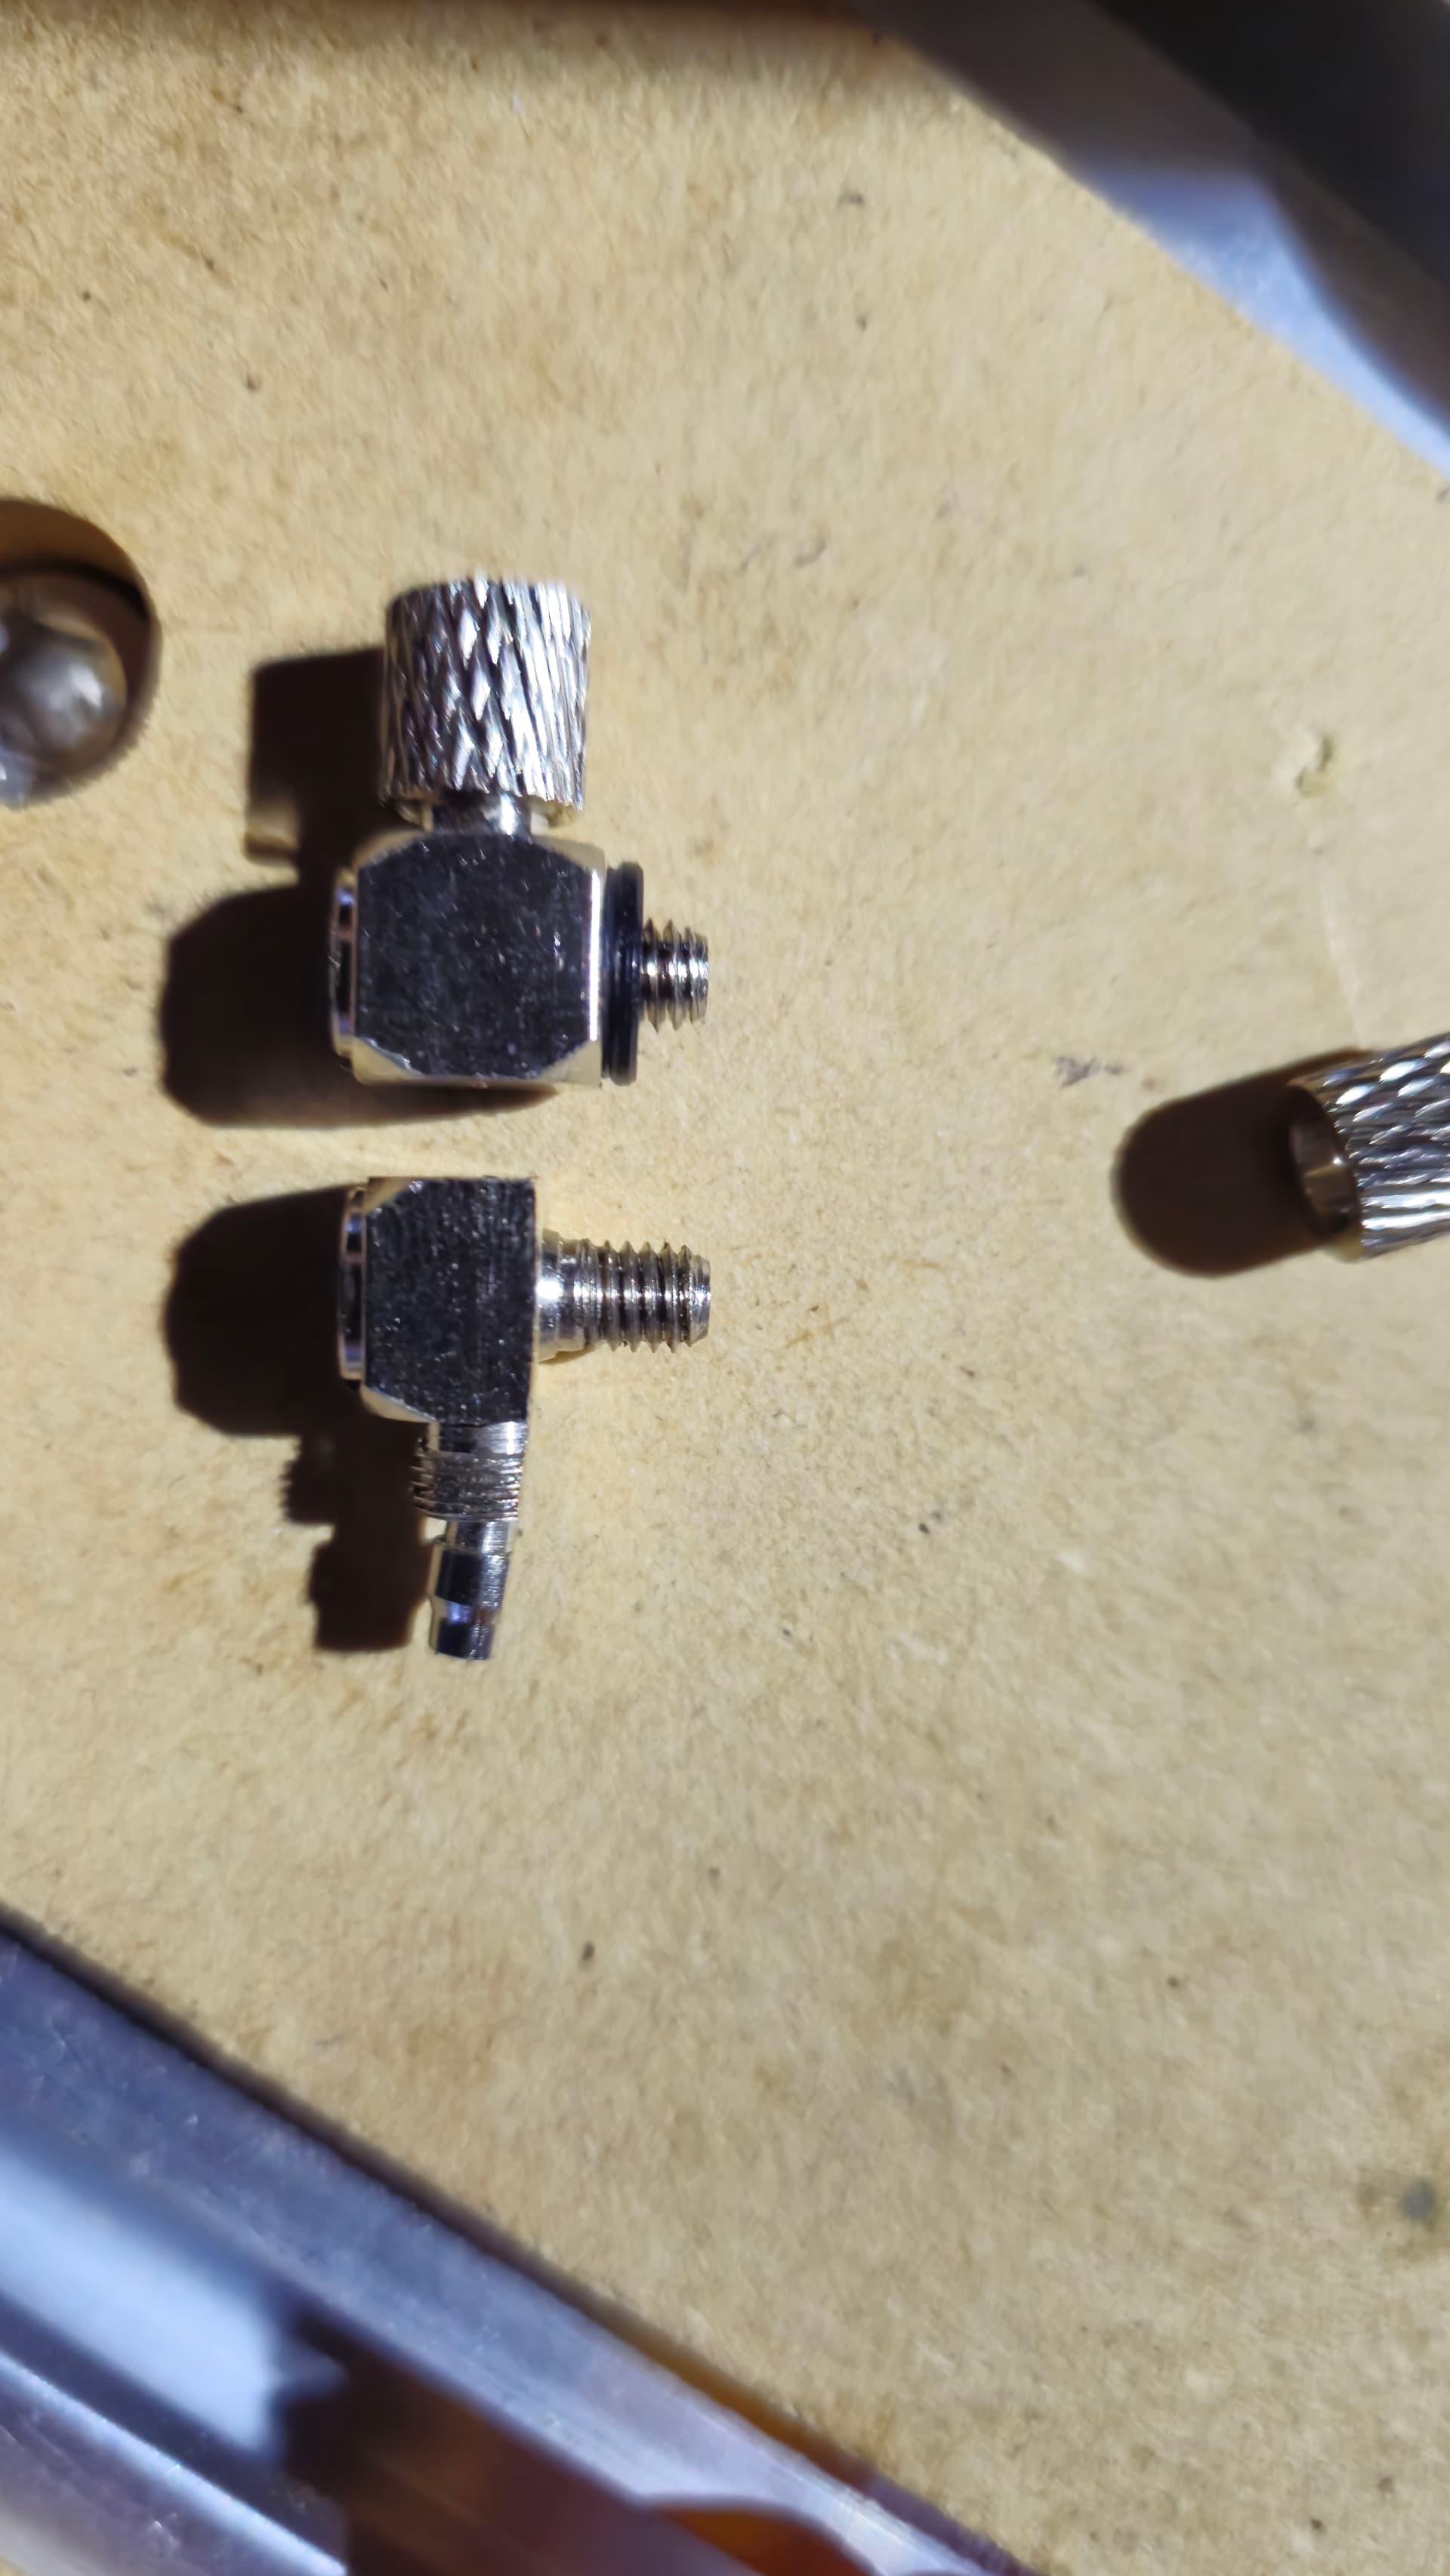
Bought some pnumatic elbows and made them work. Cap them with rubber. These are brass with banjo bolts, so no inference when installing, and softer than the rails if they do come loose. Been installed for a year with no issue. Much easier to do the weekly oil drops.
jtclose, Never remove the bearings from the rail! It’s a banjo bolt, so it turns free inside of the elbow. By removing the 4 allen bolts to the lower bearing block, you move the bearing to the bottom of the rail, Never leaving the rail. Remove your grub screw, position the elbow over the hole, and install the screw through the elbow. Zero interference. There are also swivel fittings that use a pressed o-ring in a joint. I choose the banjo’s because of the low profile.
TAILONZ PNEUMATIC 4MM Barb to M4 Thread Elbow Miniature Quick Release Couplings Brass Hose Barb Fitting PL4-M4 (Pack of 10) on Amazon. 10pk for $10. They will require some material removal from the bottom side to allow adequate exposed thread to install into the bearing blocks. They clamp down onto the rubber end-cap of the bearing, so just a dab of loctite (careful not to get ANY into the bearing itself) and minimal torque (don’t squeeze the rubber too tight). Again, they’ve been installed for a year of moderate use without coming loose. I also purchased a pack of assorted metric rubber caps. I have only installed these on the z, but you can install them on all bearings. Removing a rubber cap is much faster, but I don’t mind using an allen, since these aren’t necessary for most.