When you carve and fill with epoxy I always go at least .15" deep. I have tried .1" but sometimes in sanding off the epoxy you can get some of the design to disappear. That also has to do with the overall thickness of the material. Very thin material might not work well going too deep but if the material is over .25" the .15" depth seems to work well. After carving I like to apply dewaxed shellac to keep the epoxy colorant from soaking in around the carve making a halo effect. Sealing with the shellac will help prevent the epoxy color from soaking in to the wood fibers around the carve. I have found that beech is the worse about soaking up color and it requires a lot of sanding to remove the halo and can lead to sanding through your carving.
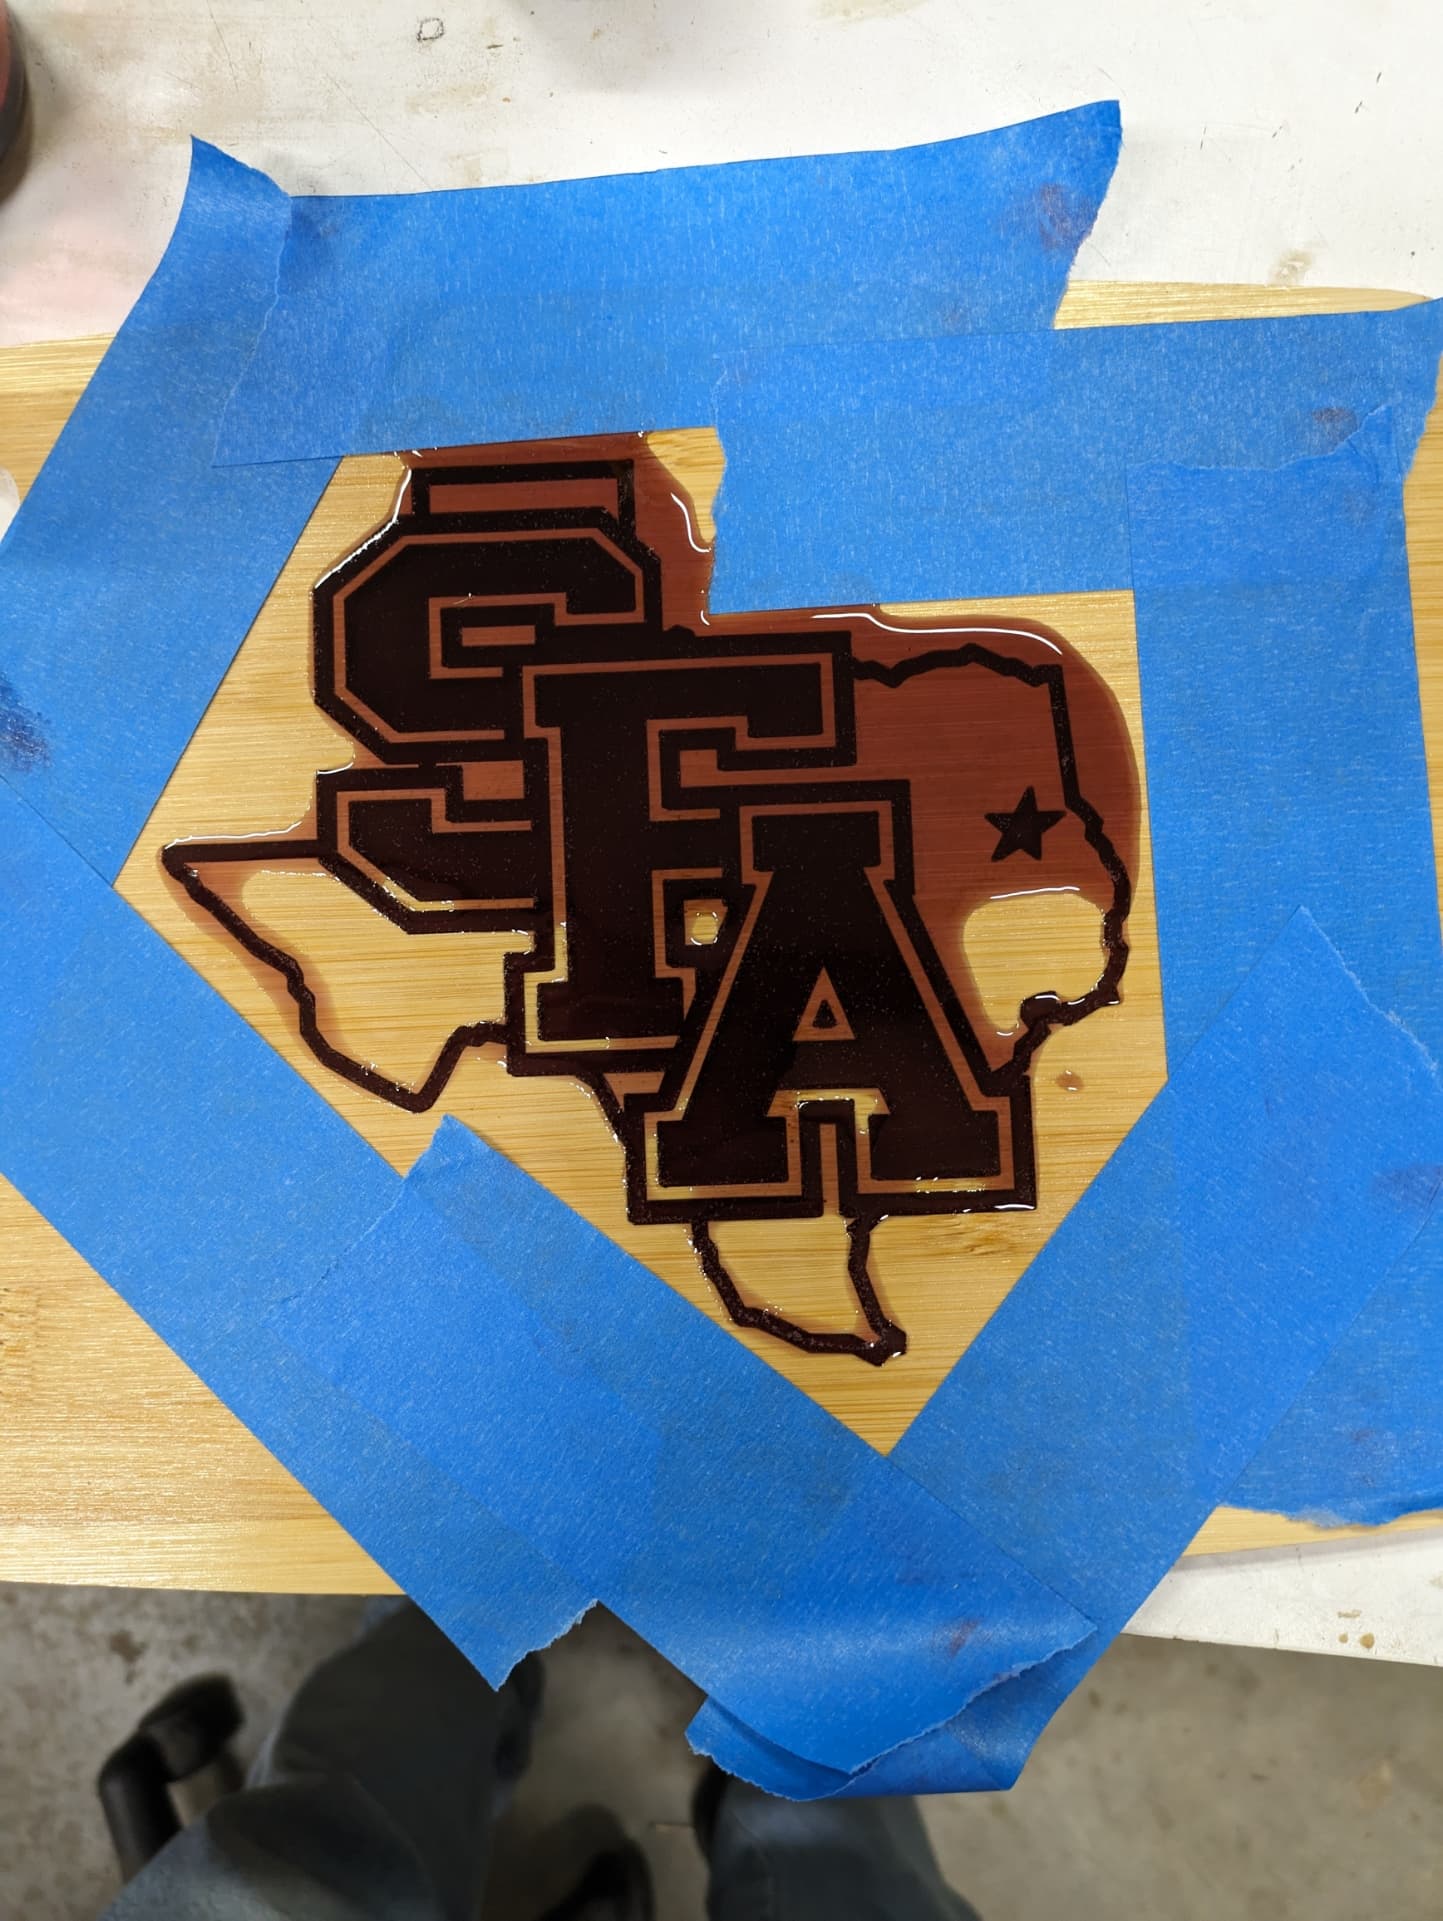
I put painters tape around the area to be filled to keep the epoxy from running into unwanted areas.
Some people use a thickness planner to remove the over fill of the epoxy. I have tried that and have ruined some pieces. The planner is very violent and can pull epoxy out and ruin your project. I have a 16" drum sander. I sand until there is just a skim coat and finish with a random orbit 5" sander. Just be careful when sanding with the orbital sander to not bear down on one side or you can over sand in a particular spot.
If you only have a random orbit sander start with 60/80 grit and get down to a skim coat and go to 100/120 grit. I usually finish with 220. The epoxy fill will dull as dish water but if you are applying a top coat it will shine up. You could just go over the epoxy fill with up to 320 grit but after that you are just burnishing the wood and the epoxy will not really improve its shine until you get to 1200 grit. I have used wipe on polyurethane and Watco Danish oil on epoxy and it shines up nicely and the dull appearance after sanding goes away with a good top coat. You can use water based finishes but the first coat of sanding sealer or waterbased finish will raise the grain of the wood and require additional sanding to smooth out the surface. For oil based finishes I use dewaxed shellac to seal the project (Zinsser Universal Sanding Sealer) Using the dewaxed shellac saves 1-2 coats of polyurethane. After applying the shellac and letting it dry I sand with 600 grit to remove any dust nibs. Then after each coat of poly I also run the 600 grit paper over the surface and that makes a really smooth surface. Just vacuum off the material after the 600 grit paper hand sanding.