Happy New Year!!

Trying to figure out how to pocket cut area within the pink boundry. Any help would be appreciated.
Happy New Year!!
Pink indicates that the vectors are not joined together, so even though they look closed, they are really just line segments.
Select just the pink vectors, then invoke ‘Join Vectors’.
In the future, anytime you are having an issue with a particular design, upload the file.
The vectors appear to be connected.
Air Force Emblem Final3.c2d (1.2 MB)
Sorry sent the wrong file
Air Force Emblem Final3.c2d (1.2 MB)
I would like to route the area inside the pink lines to be able to fill with epoxy.
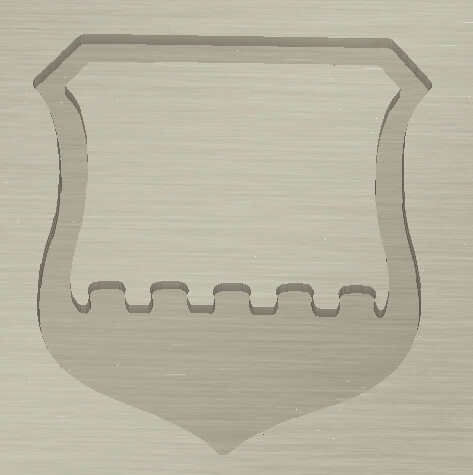
Seems ready for that:
Note that the sharp points will be rounded by the radius of the tool used (unless you use a V carving w/ pocket clearing option):
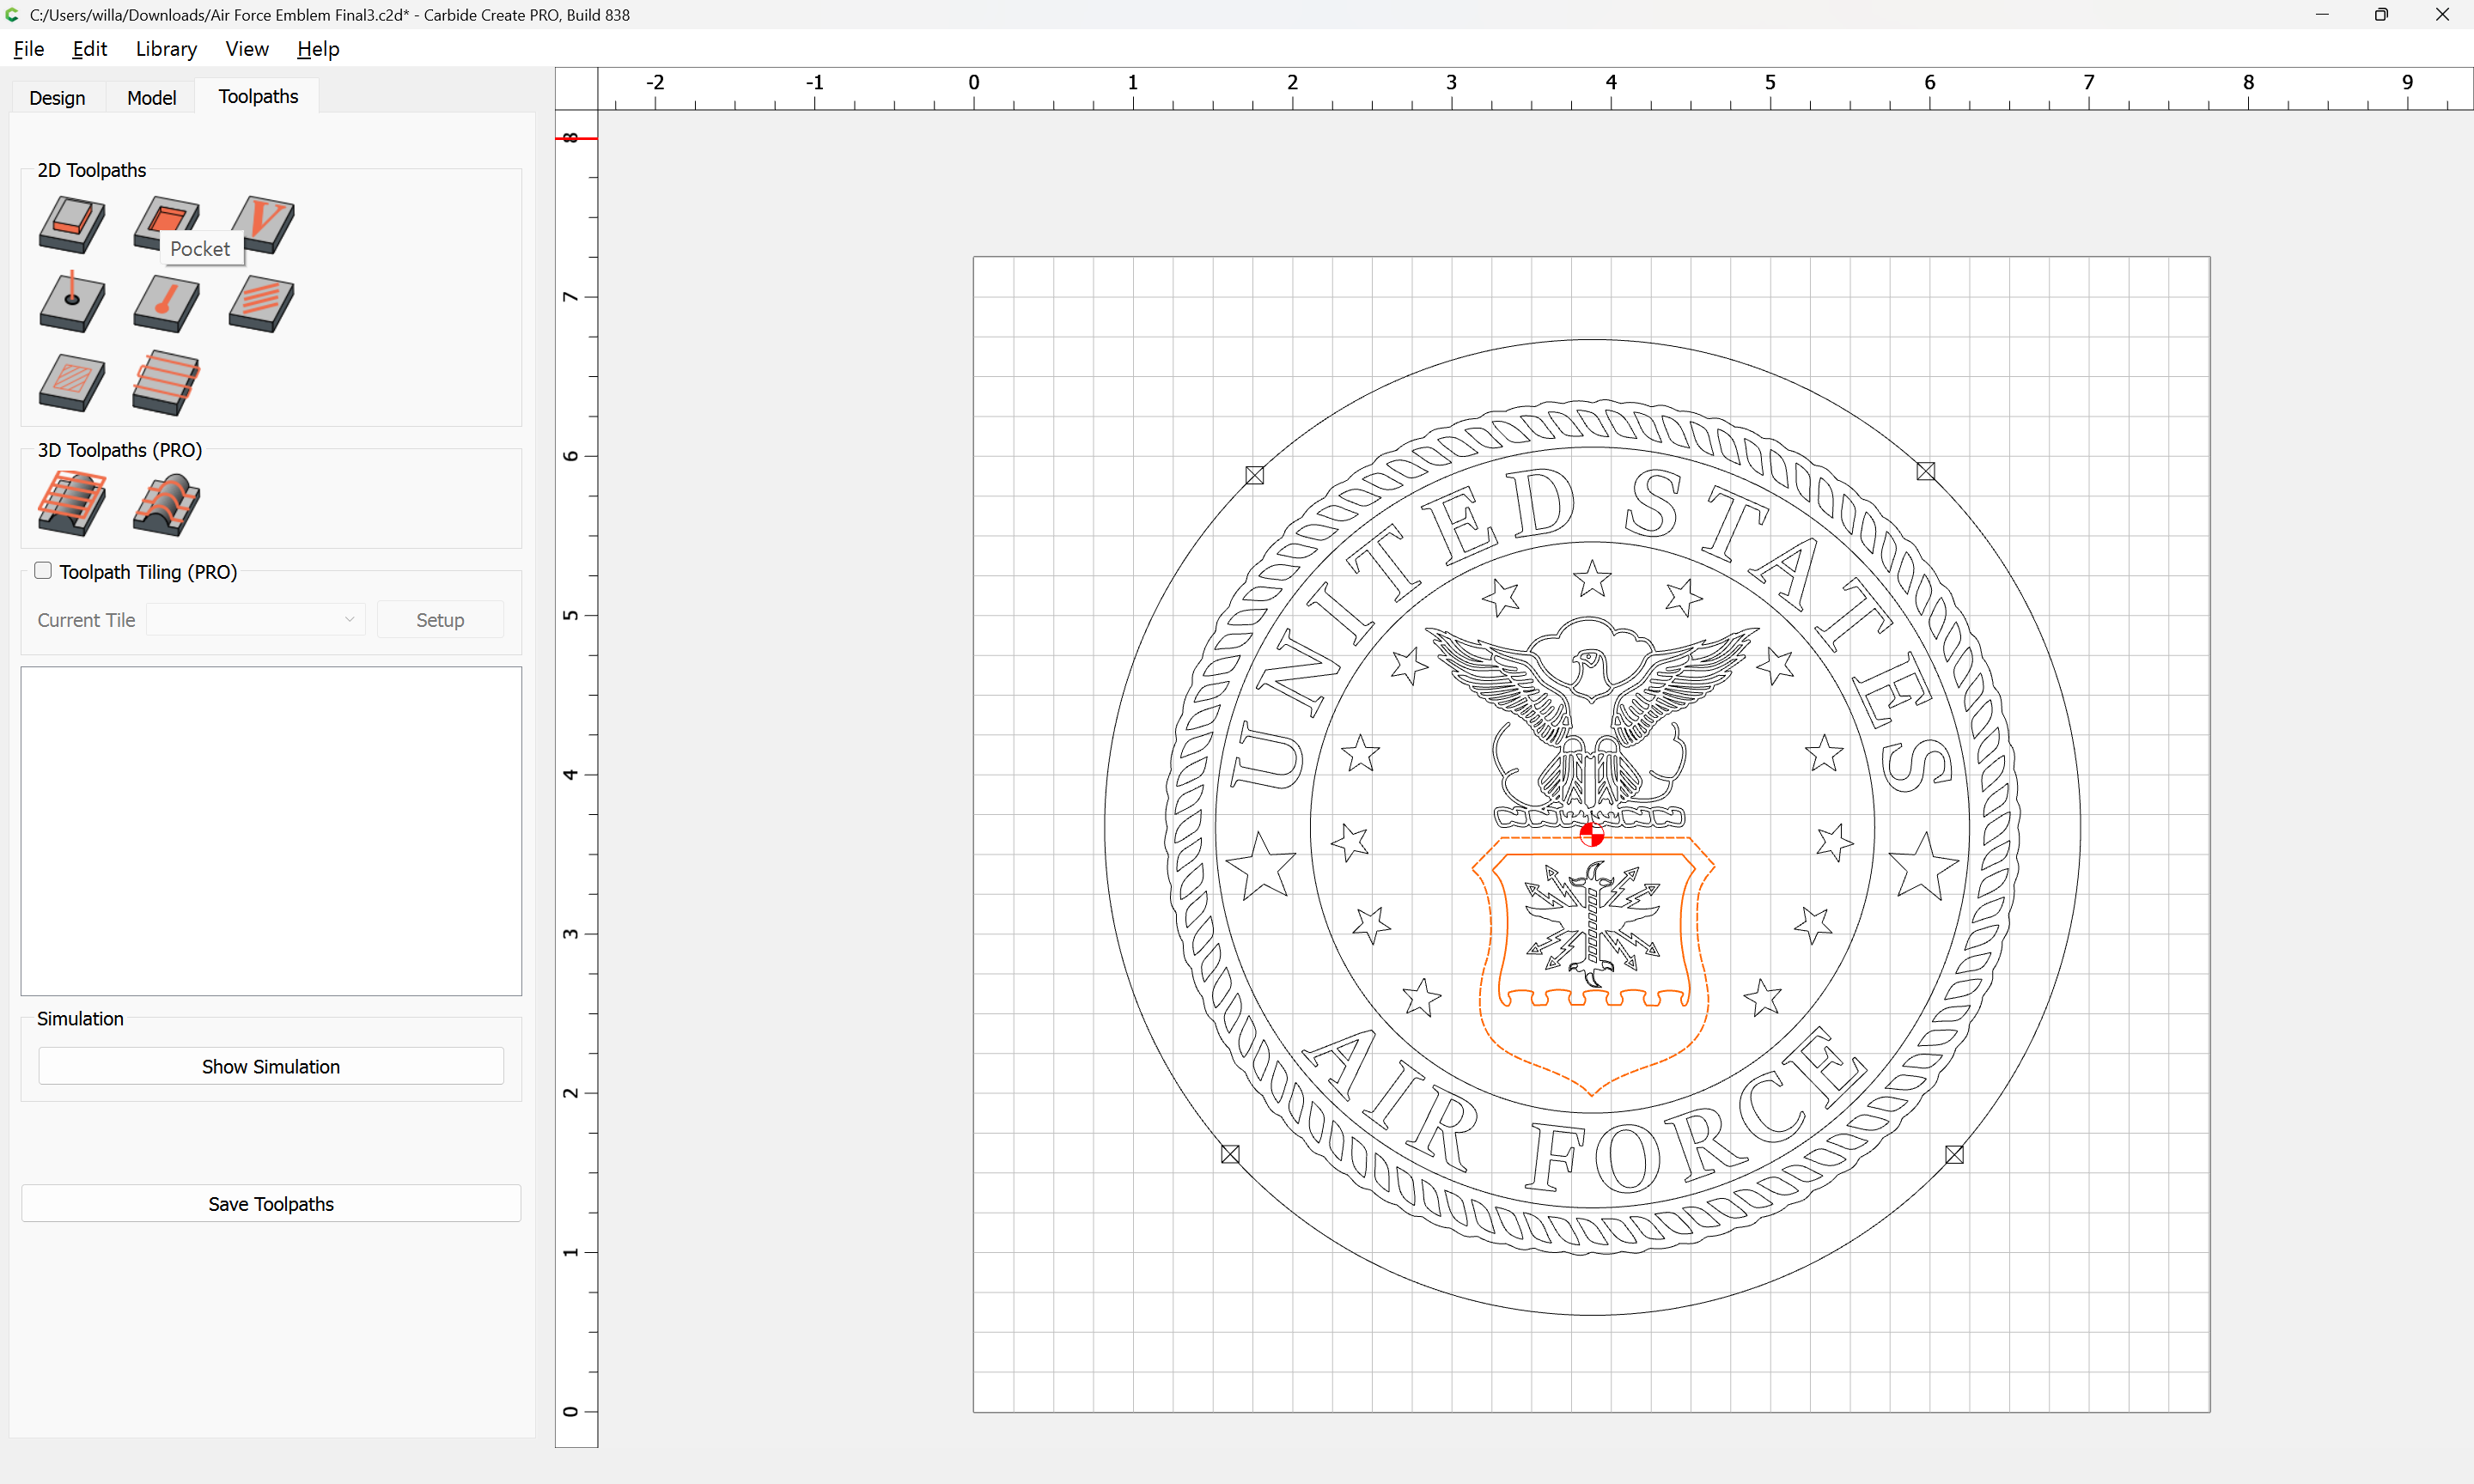
Hi Will, that works to clear the whole area, not just whats inbetween the red lines.
Thanks
If you wish regions to be excluded, add them to the selection — it then alternates.
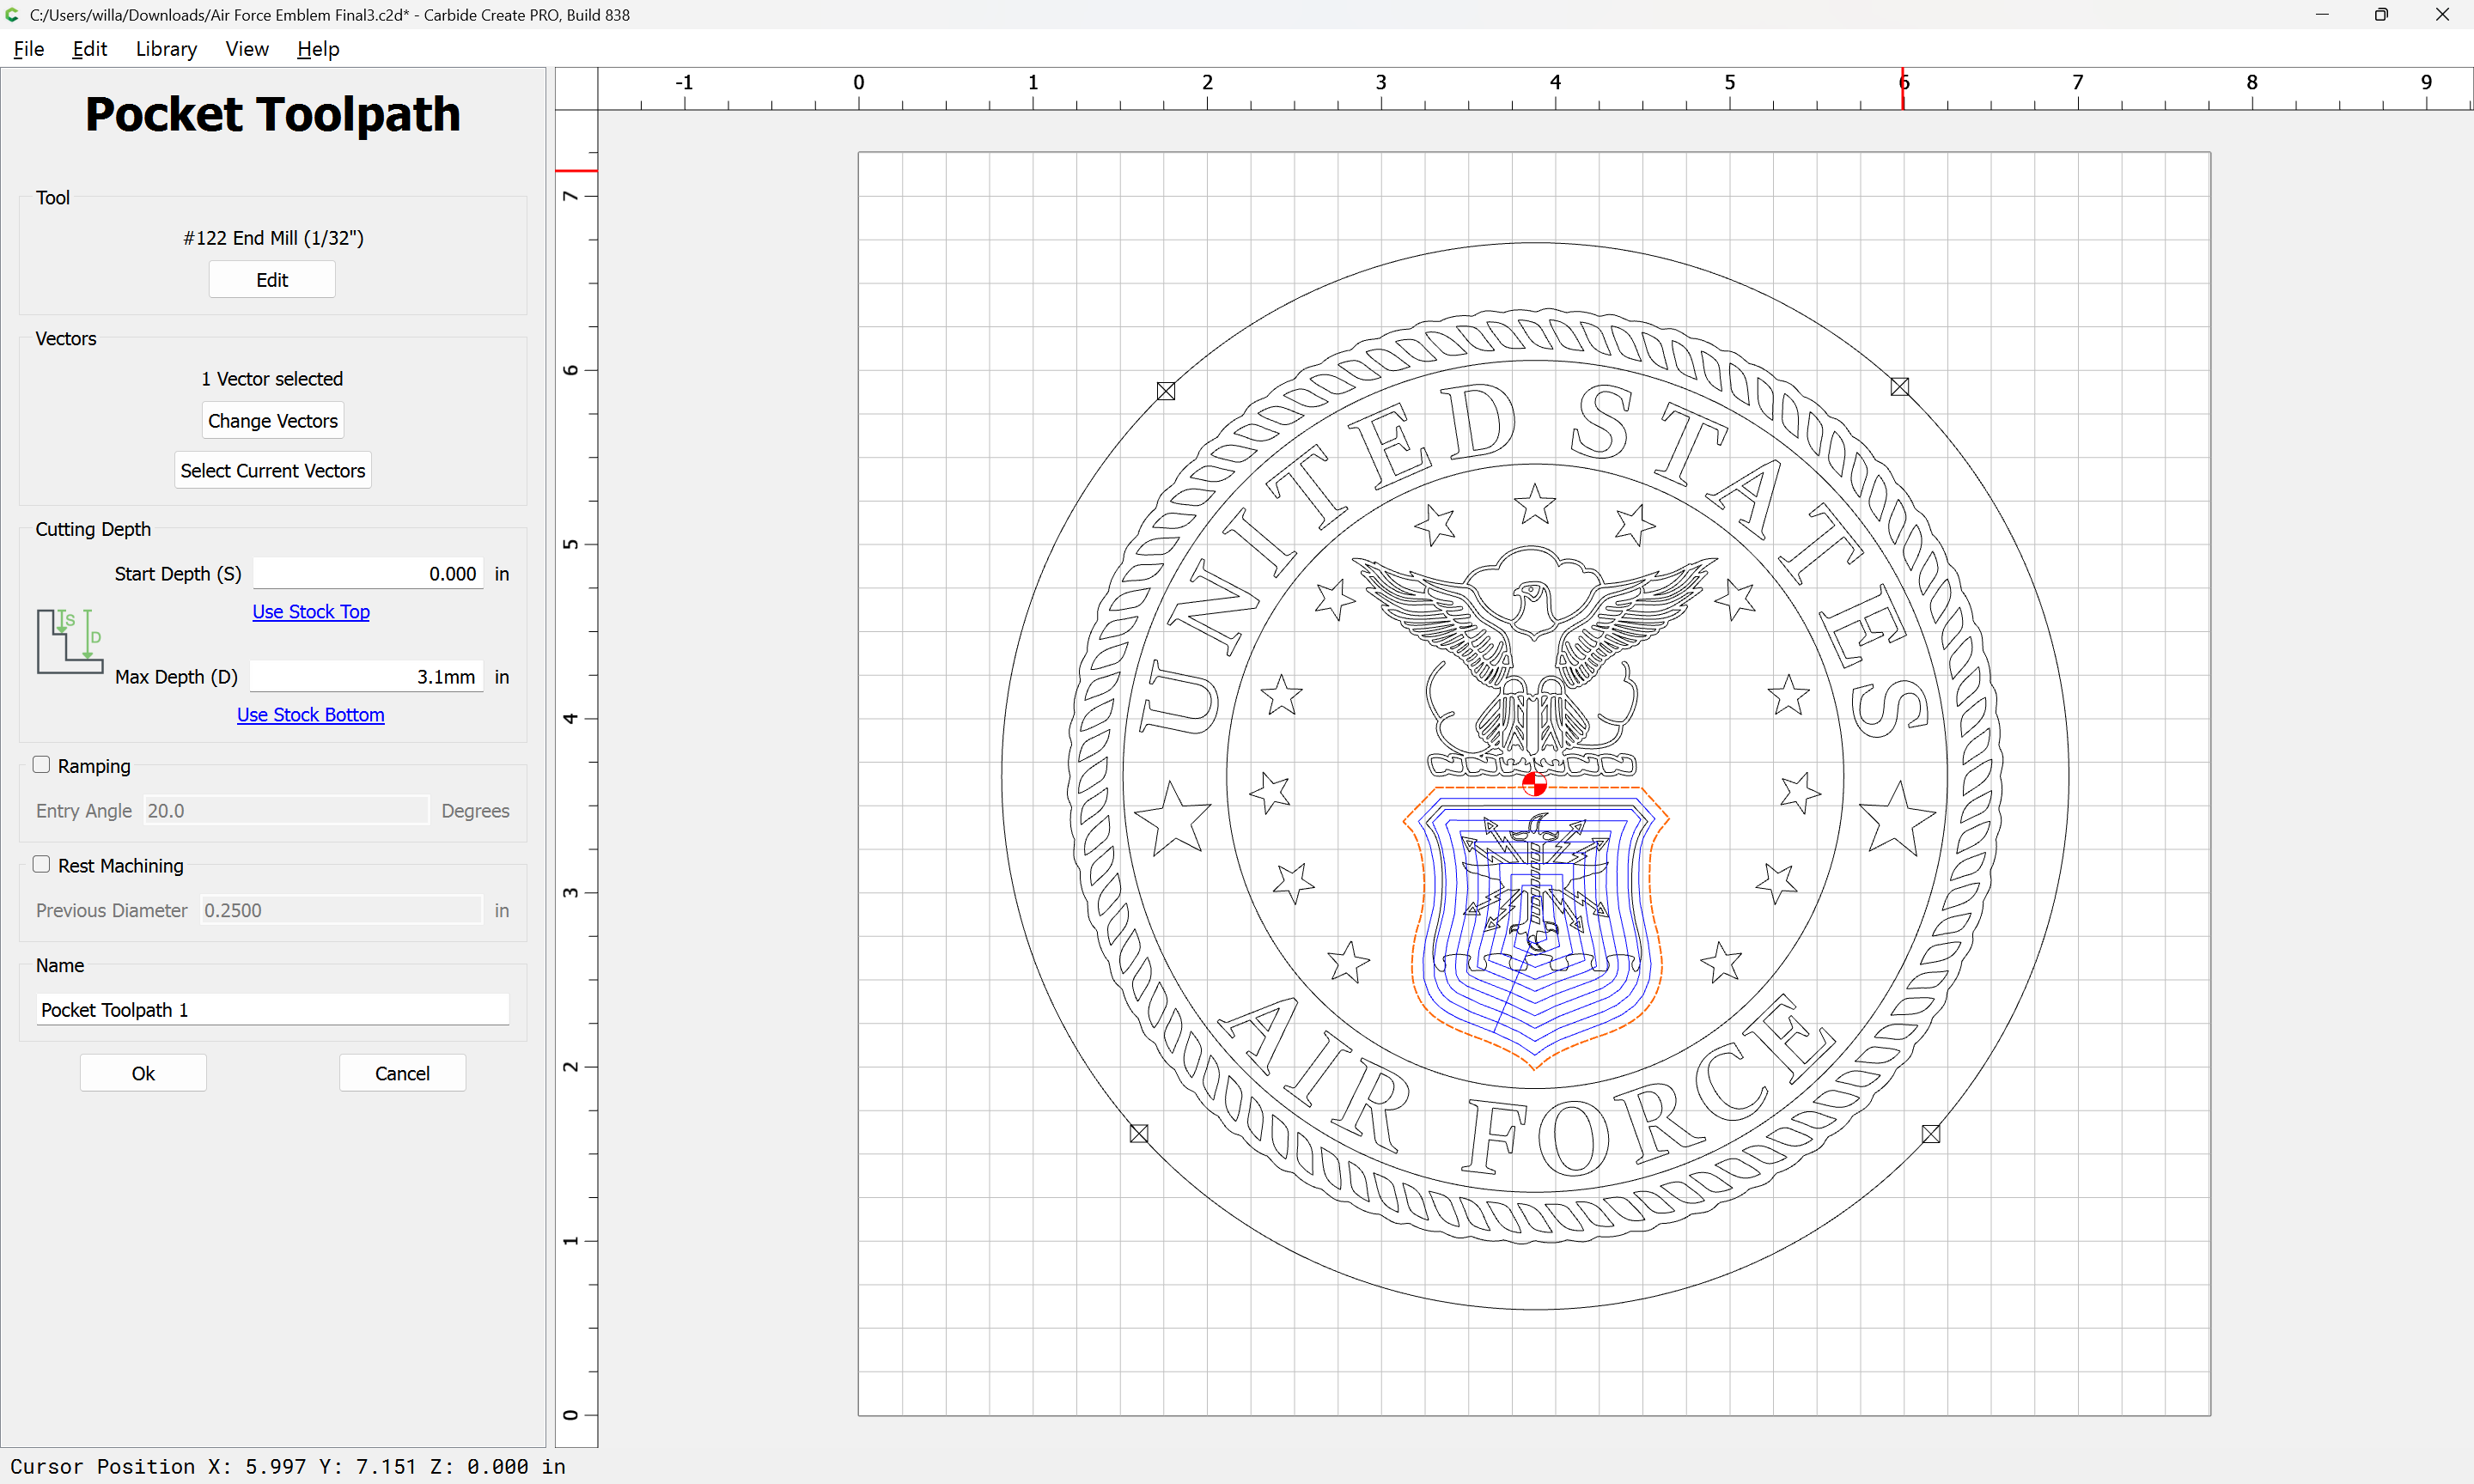
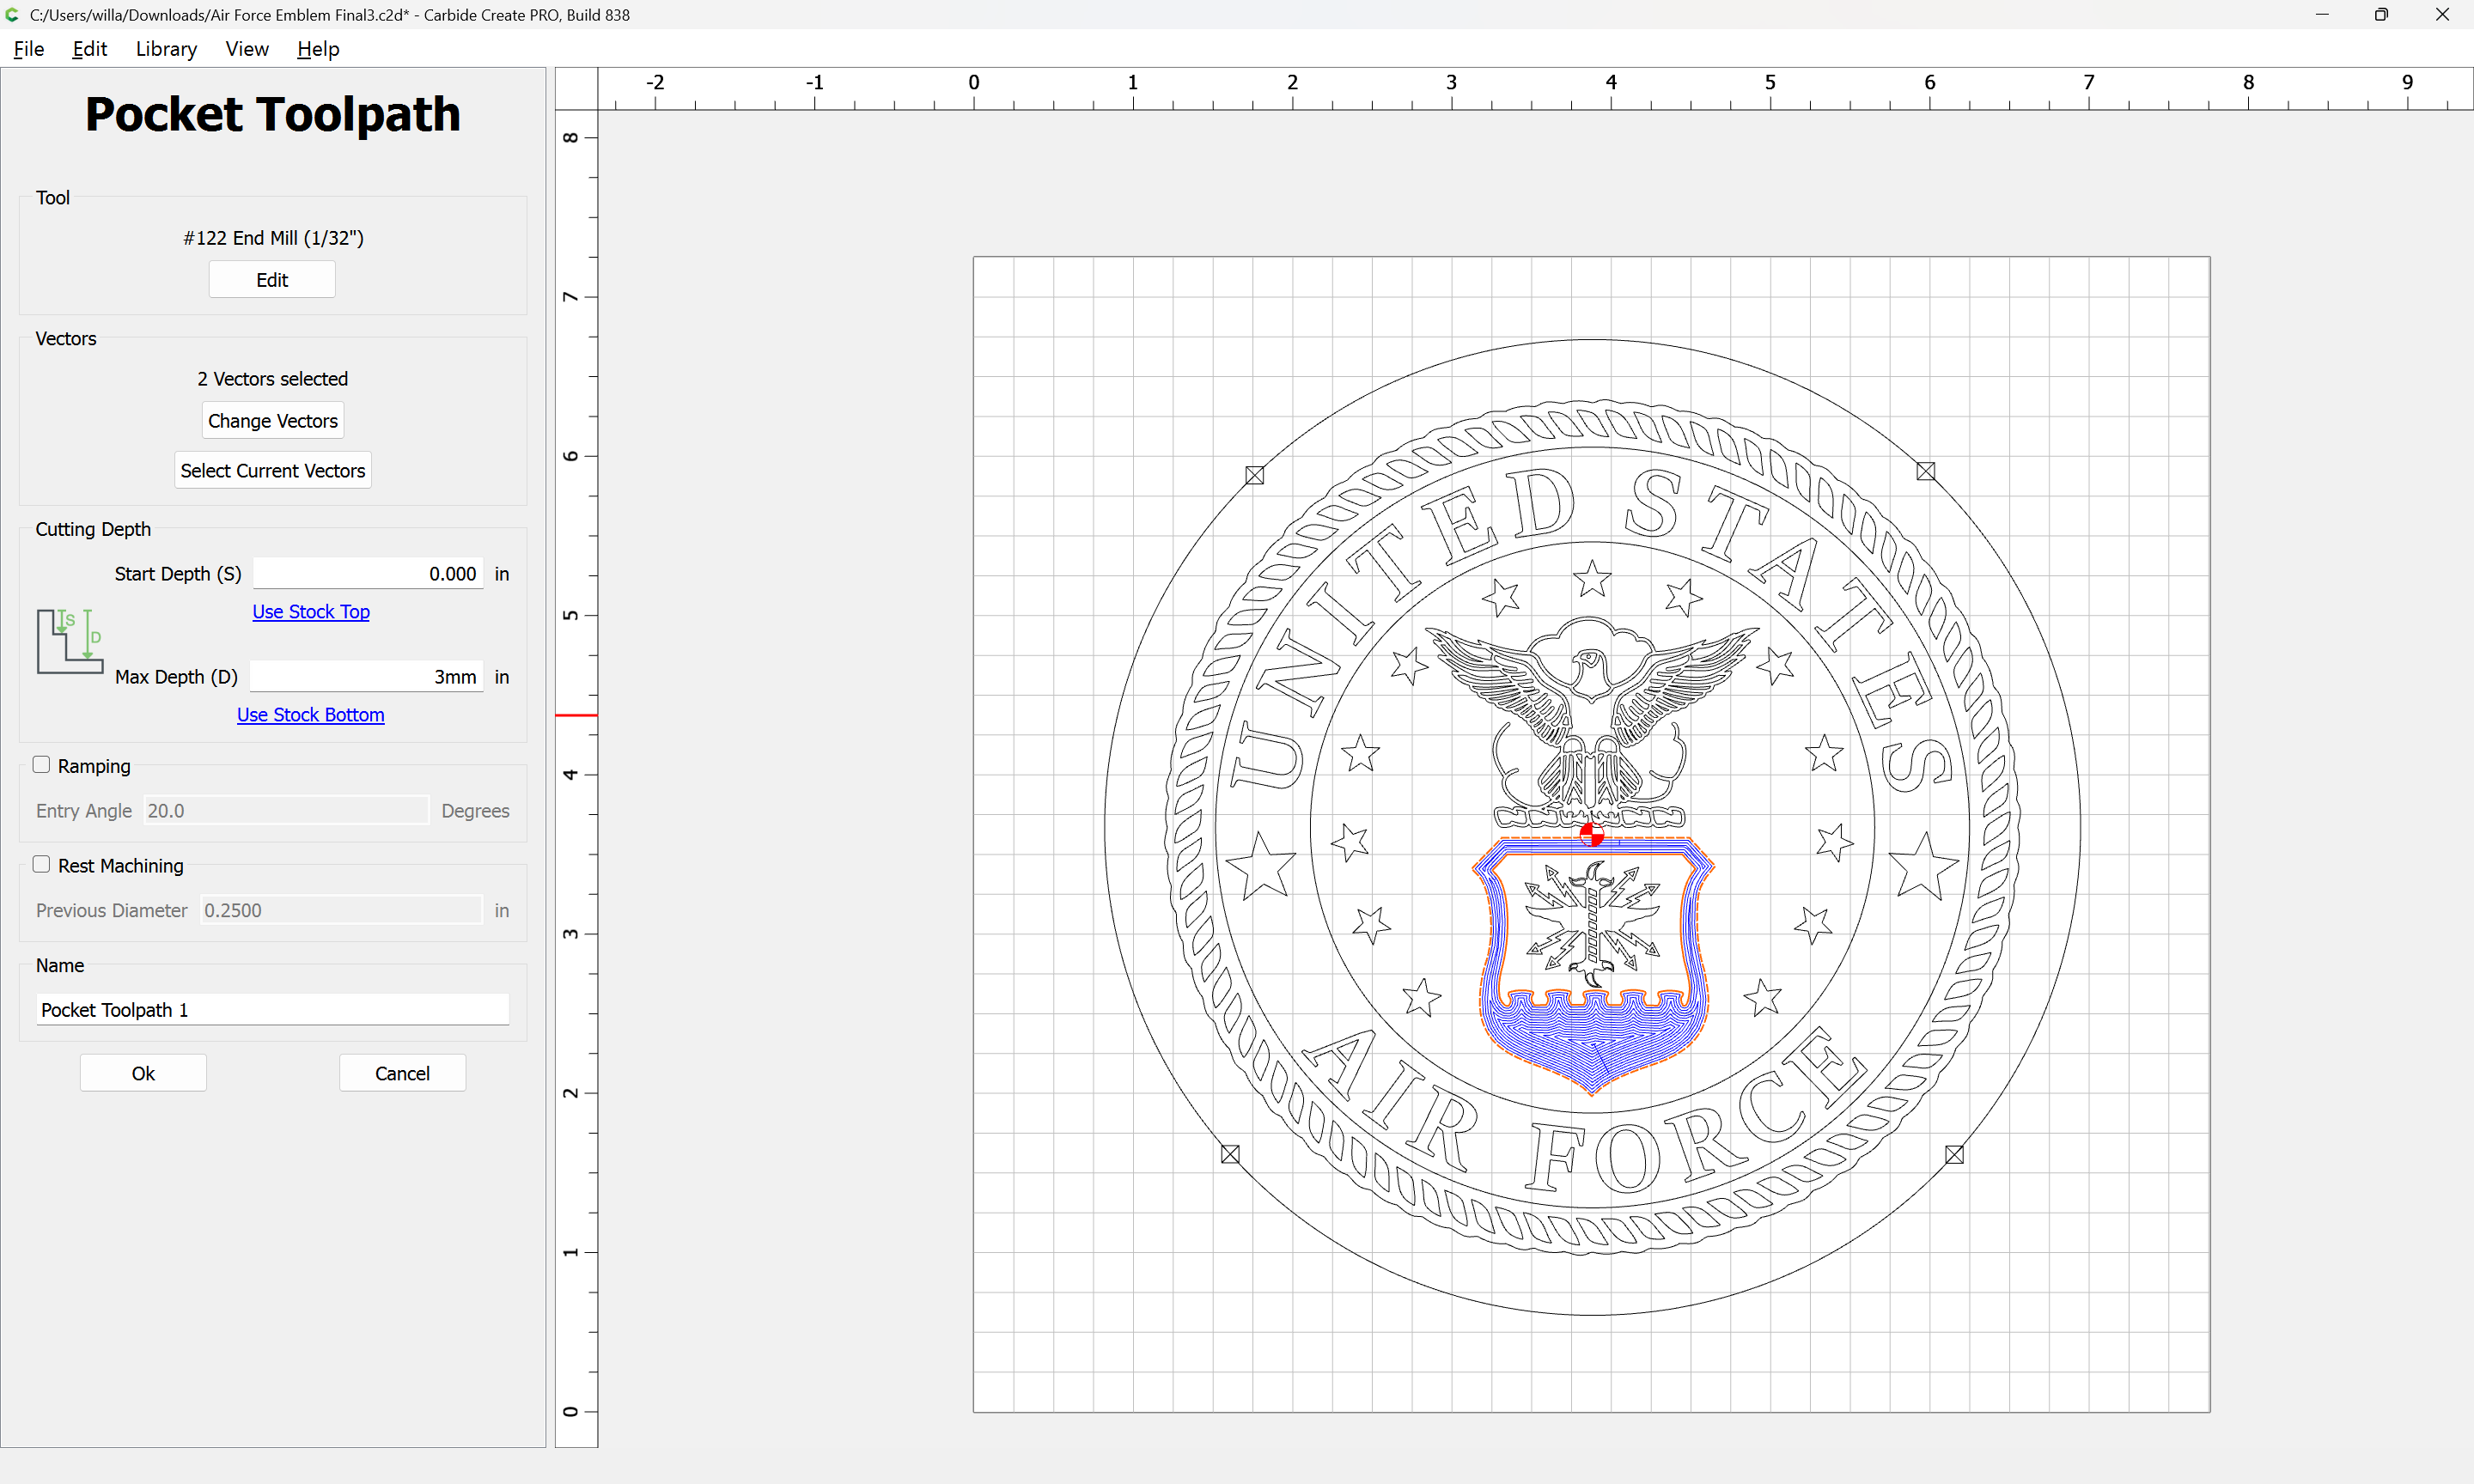
A pocket needs to be bound by two vectors as M. Hotchin is pointing out.
The tool path needs to have an outside boundary (vector) and an inside boundary (vector) to create the “pocket” in.
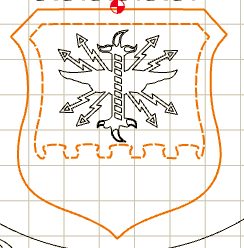
As noted, selecting two regions which are nested:
and assigning a pocket toolpath:
Cuts the area defined by the outer region, less an island defined by the inner region.
Attached as a v8 file.
Air Force Emblem Final3_v8.c2d (1.3 MB)
This topic was automatically closed 30 days after the last reply. New replies are no longer allowed.