was the motto for the Carvewright system and their software. A bit of an exaggeration but compared to the feeling I have had for the last month, it’s fairly accurate.
I literally feel like my head might explode with all these parameters I have to understand and set properly to avoid the risk of ruining a project or damaging a tool.
Sorry, I just need to vent someplace because I haven’t run a single job for well over a month and it’s because I finally realized just how much of the backend work the Carvewright software did for the user. Then the machine is loaded with sensors that know if there is a problem and it will automatically pause a job rather than damage something.
It feels like every time I have something figured out, well I find out that I don’t. If I had started my CNC journey with VCarveP and the SO3 I doubt I would have kicked out as many projects early on as I did with the Carvewright. It feels like I am back at zero when customers expect 99 when they see the work I have done in the past.
Just feeling a bit lost at the moment… especially since I have committed myself financially to learning all this. Unfortunately, I think I bit off more than I can chew all at once. I really thought at this point in time I would have been posting images of a job that I was so proud of and instead, I find myself still spinning my wheels in the mud.
I feel ya man. Had many moments (weeks) of similar feelings with grbl and my s3. Steep learning curve to be sure.Specifically frustrating when I consider myself pretty technically competent and a life-long woodworker already.
If you’ve got specific stuff you need an extra eye on, throw it on here and we’ll do our best to help you out! Hang in there!
Thank you, Adam I will post my first project before running… I think I am finally about ready to finalize it… It’s definitely not the easiest of projects for my first stab at this but it’s pretty typical of what I need to do on a job.
I am going to demo run at least one half of the project just to instill a little confidence ( I HOPE ) prior to laying down my oak blanks that have been ready for the last month.
Please feel free to send in any project or file which you are having difficulty with and we’ll gladly work up a step-by-step custom tutorial to get it done.
THANKS WILL. I am using VcarveP though so it’s not something I think Carbide would support with tutorial… ? I am suffering information TOTAL overload at the moment. I have just said “f-it” and I going out to cut a blank of MDF and just going to run a half of my project to see what happens.
it’s all these ZERO planes, GWizards and other nuances that have me throwing my hands up in the air . I have to break my initial jobs down into smaller stages. I’ve been trying to set this one particular project up as a two-sided one and I added a layer of complexity that I am not ready for by attempting that.
Break it down into simple, repeatable things, and start with something simple and build up from there.
FWIW, I do have Vcarve Desktop, so should be able to help to some degree.
Have you considered just doing some simple projects in Carbide Create just to get started?
If you’d post an example of a project and how it would have been done w/ a CarveWright, we’d be glad to work up the equivalent procedures for various software.
hmmm, that is interesting. I am sure once I have less pressure on me to start producing some projects that I would be able to show you how the Carvewright software works through some examples.
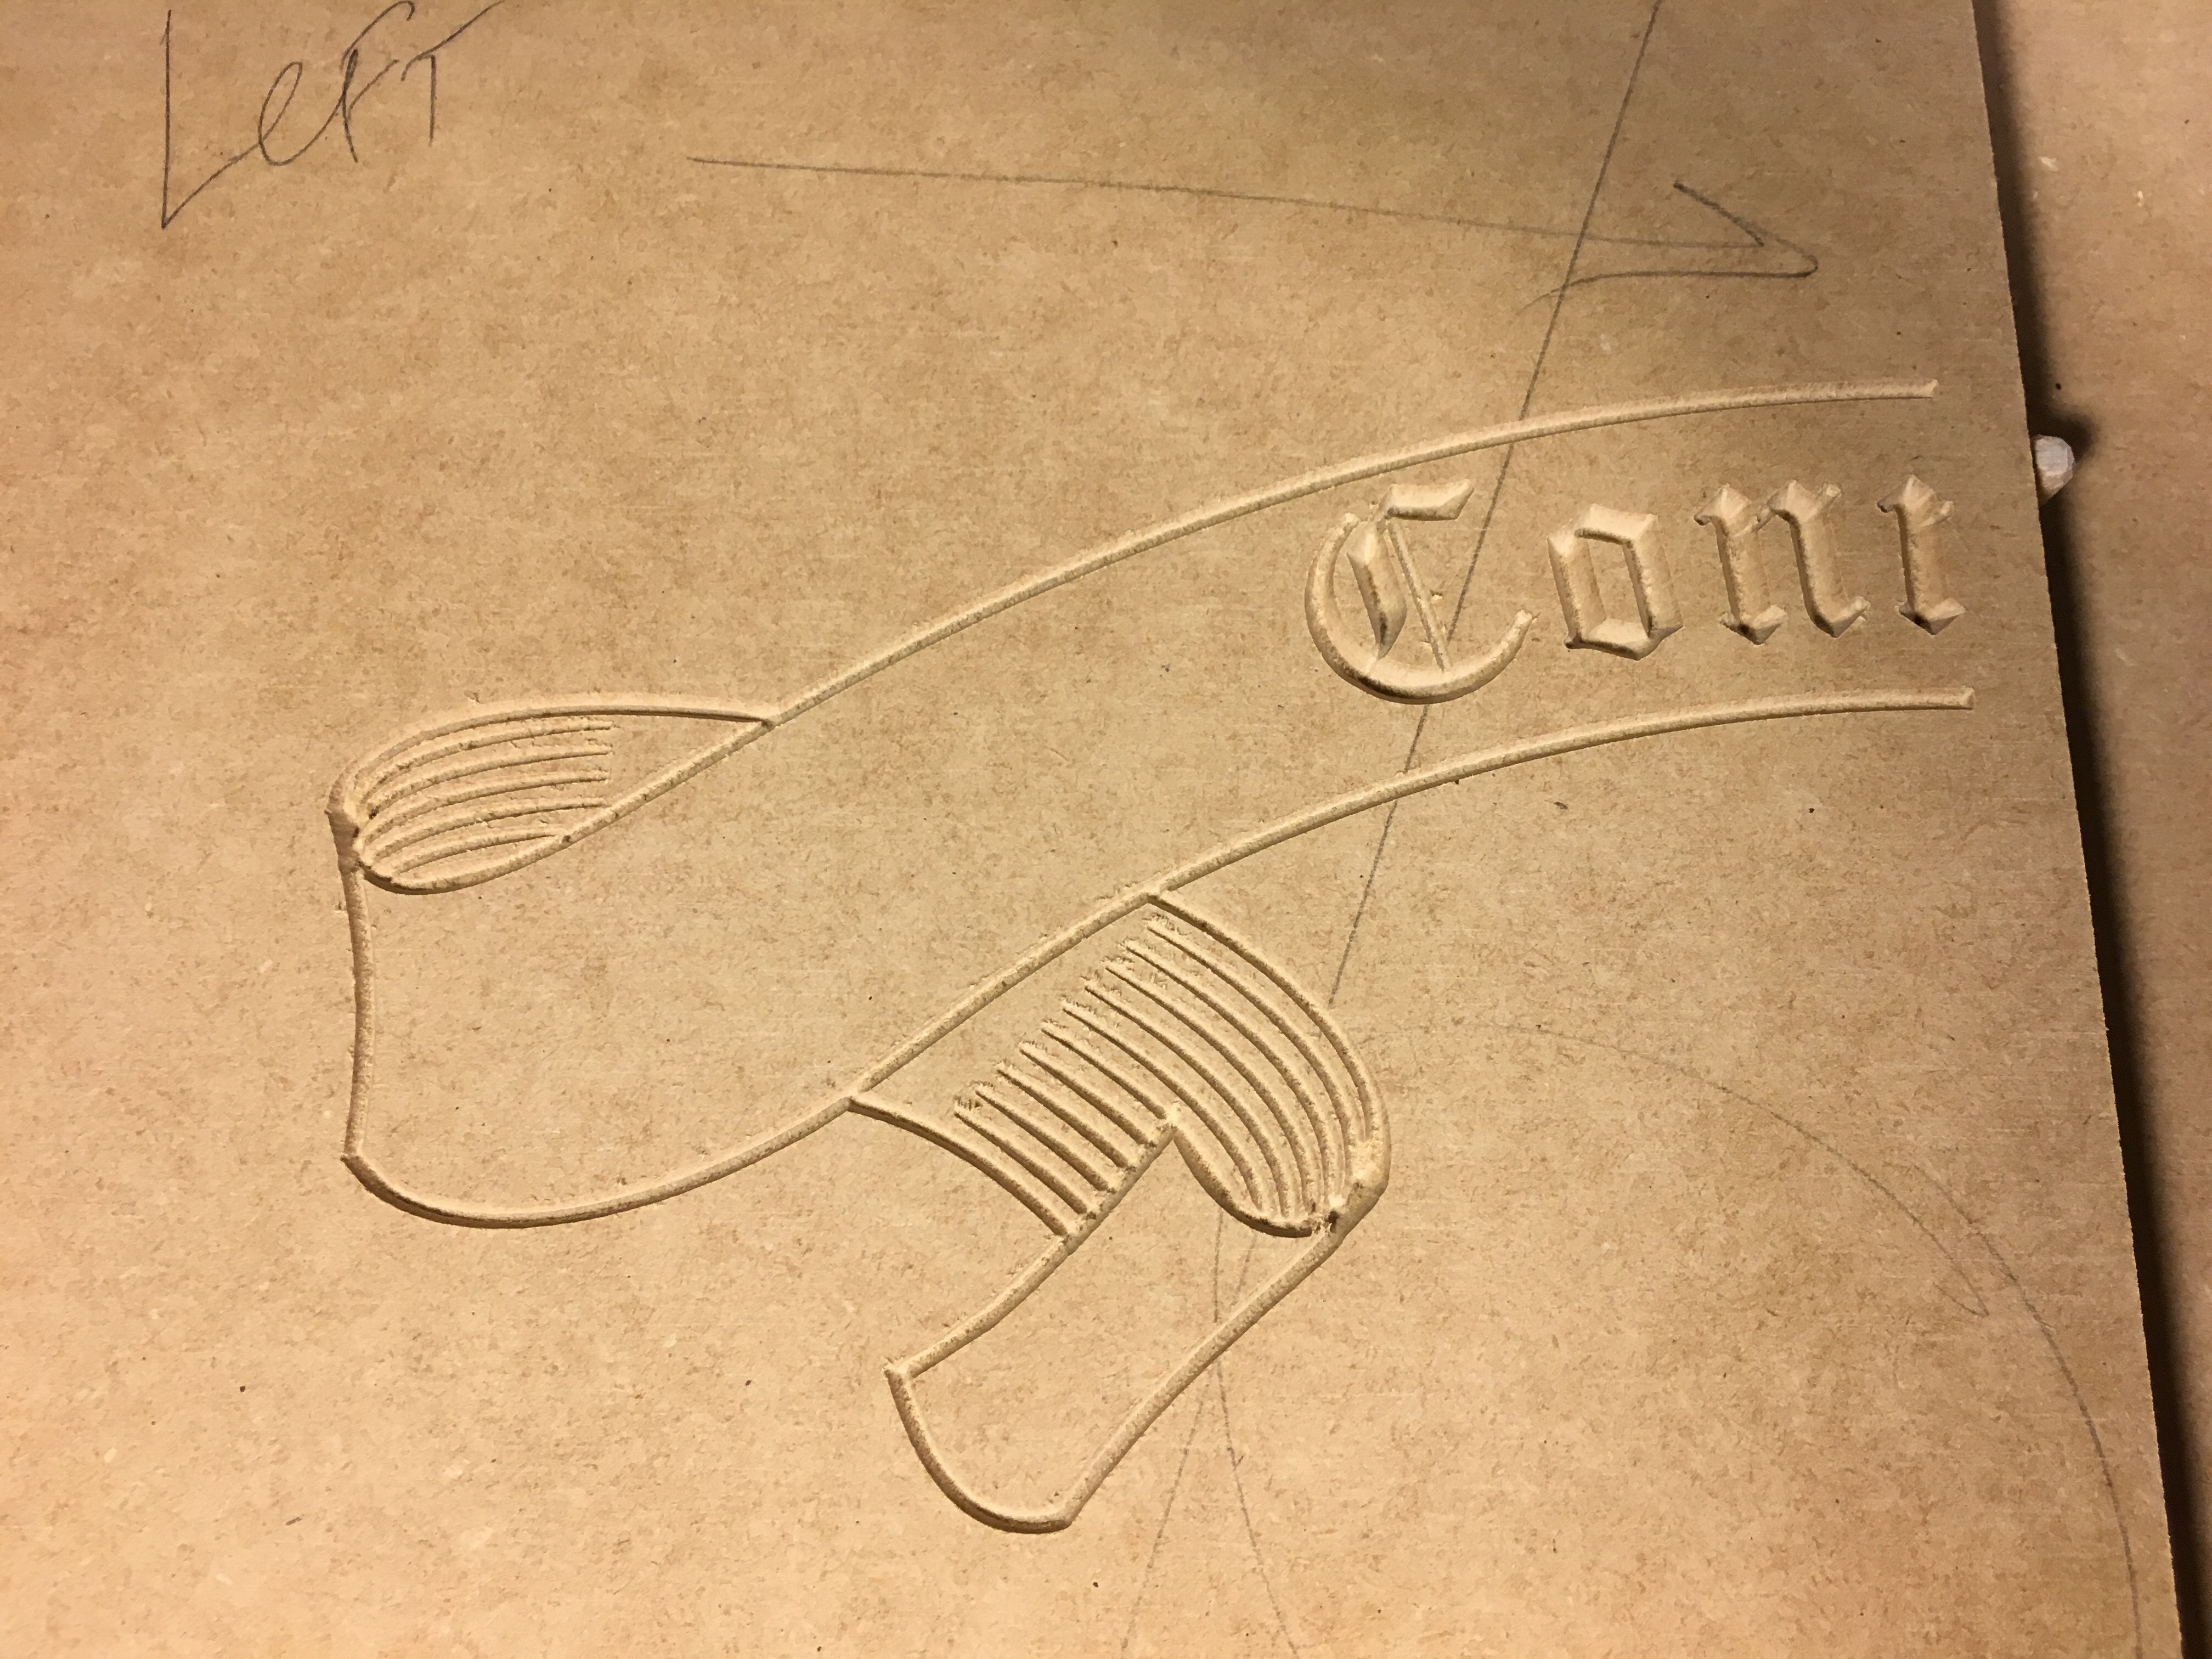
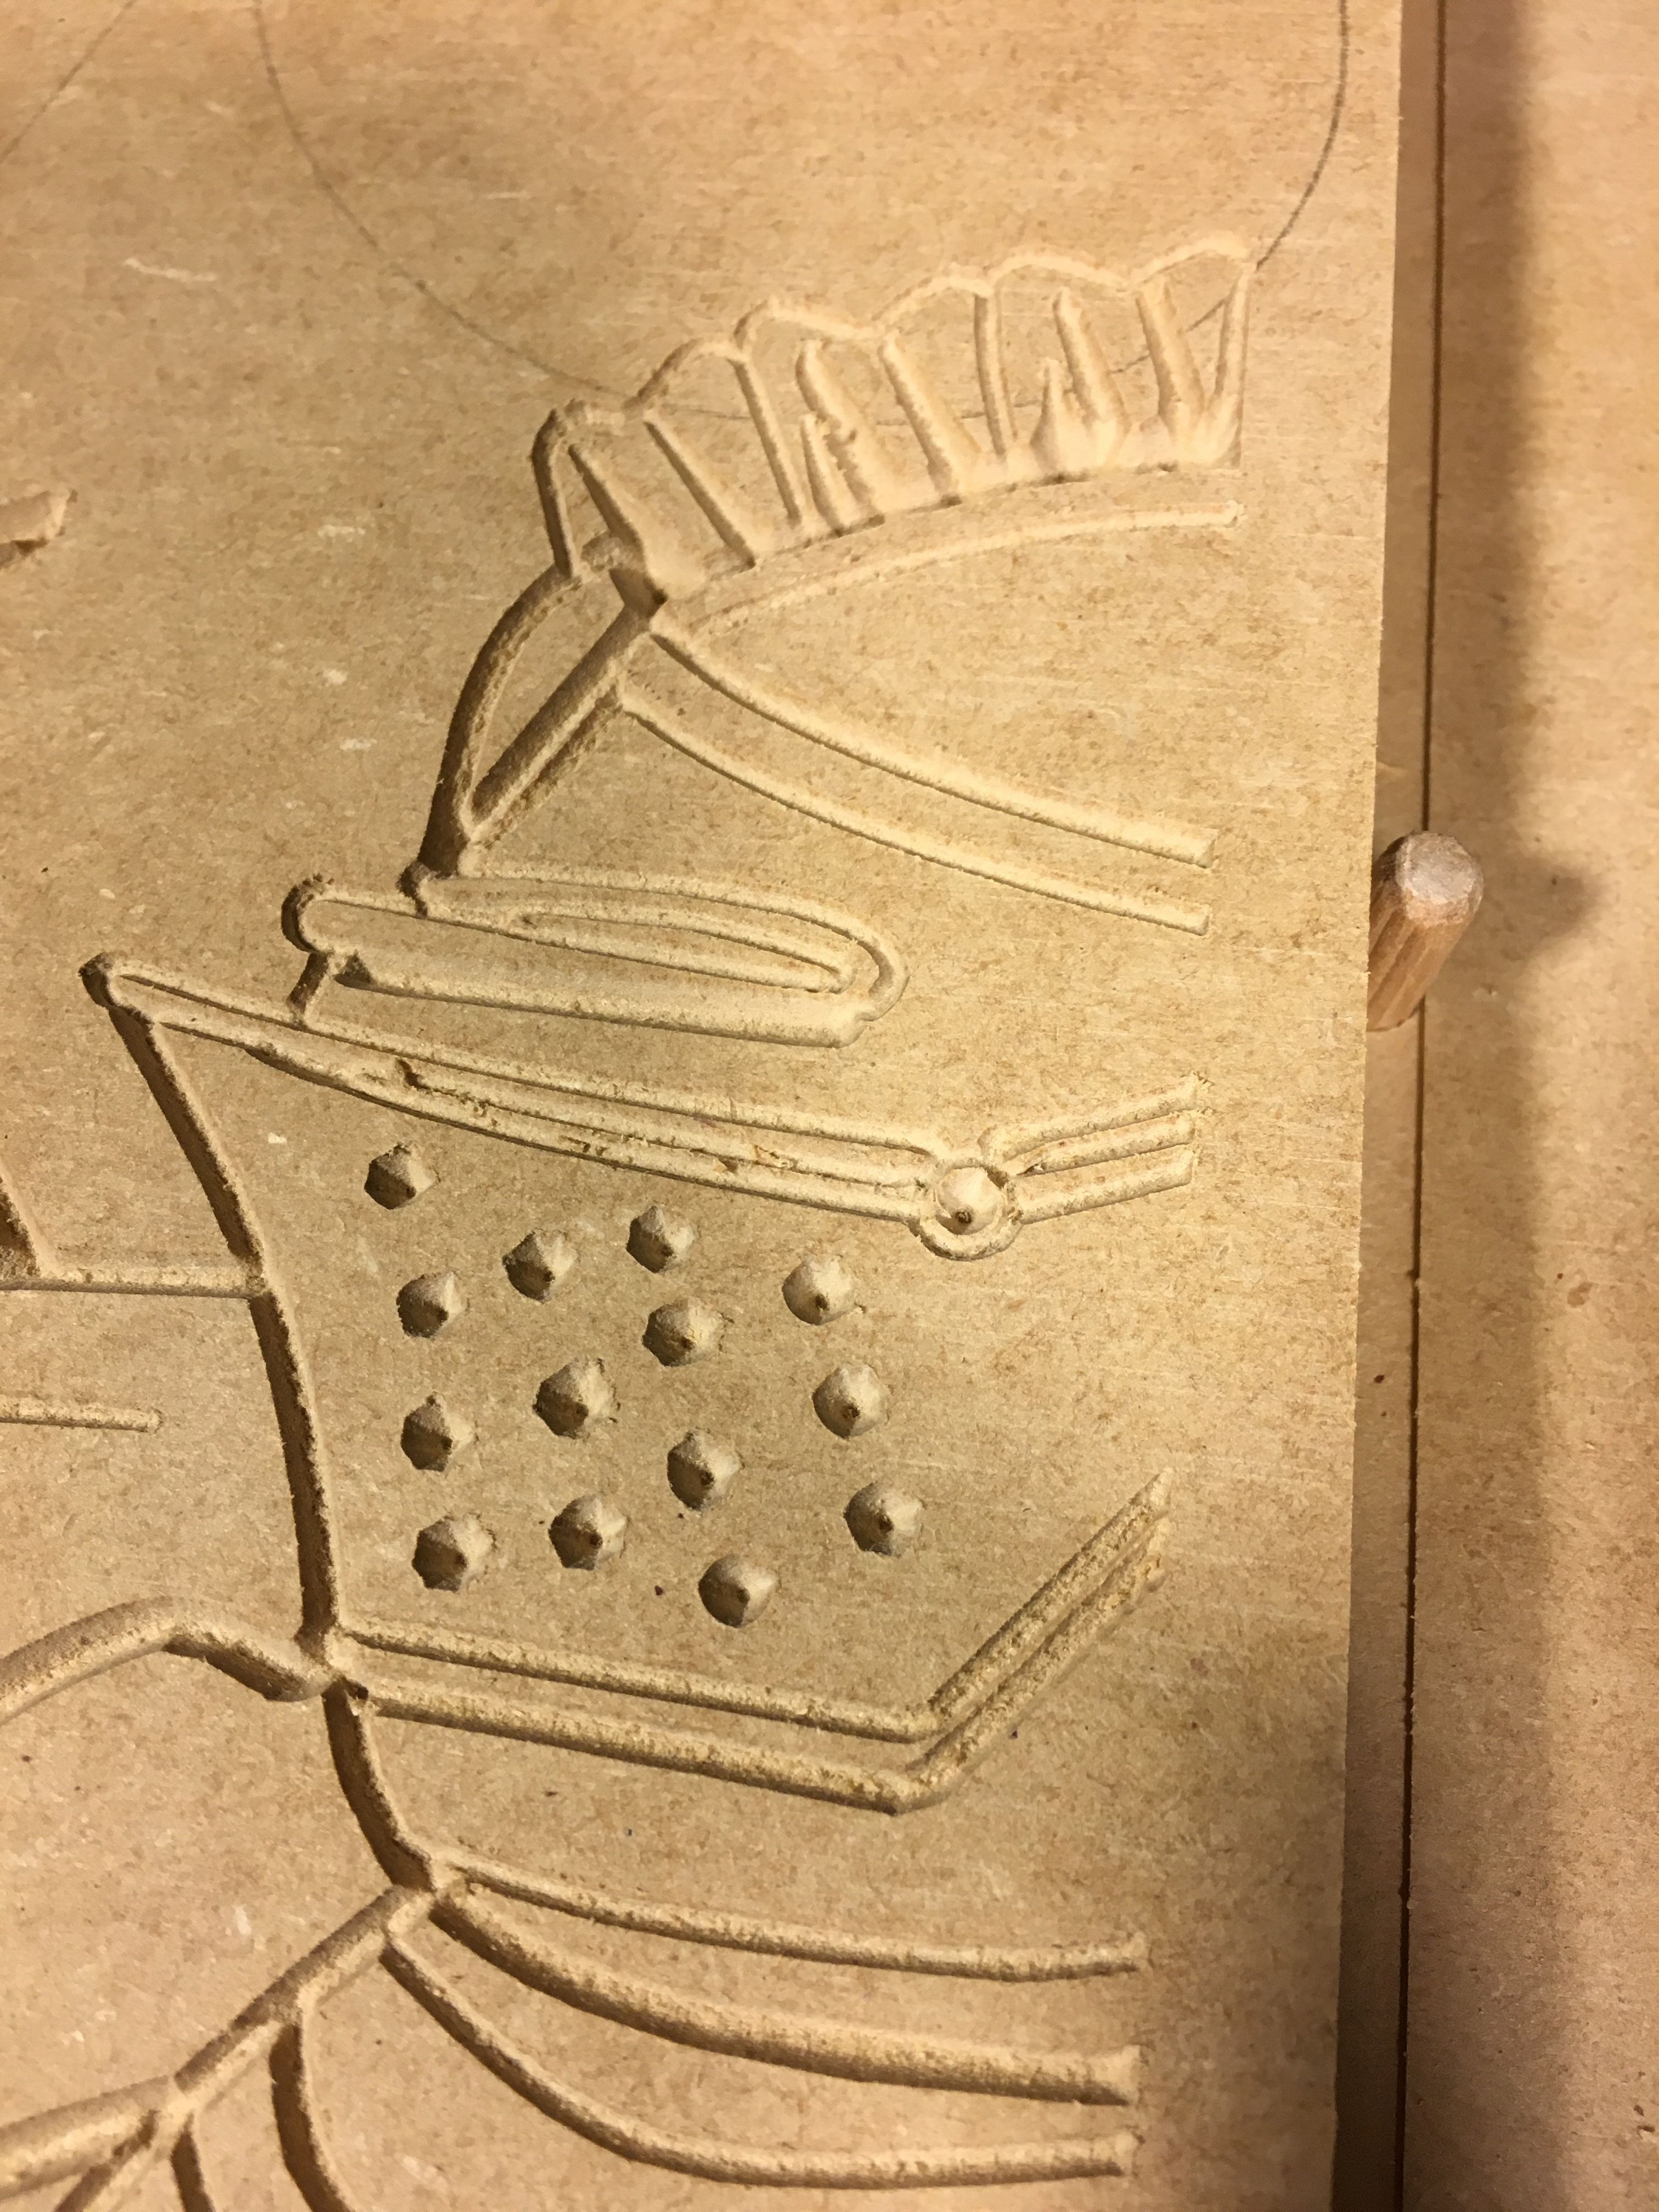
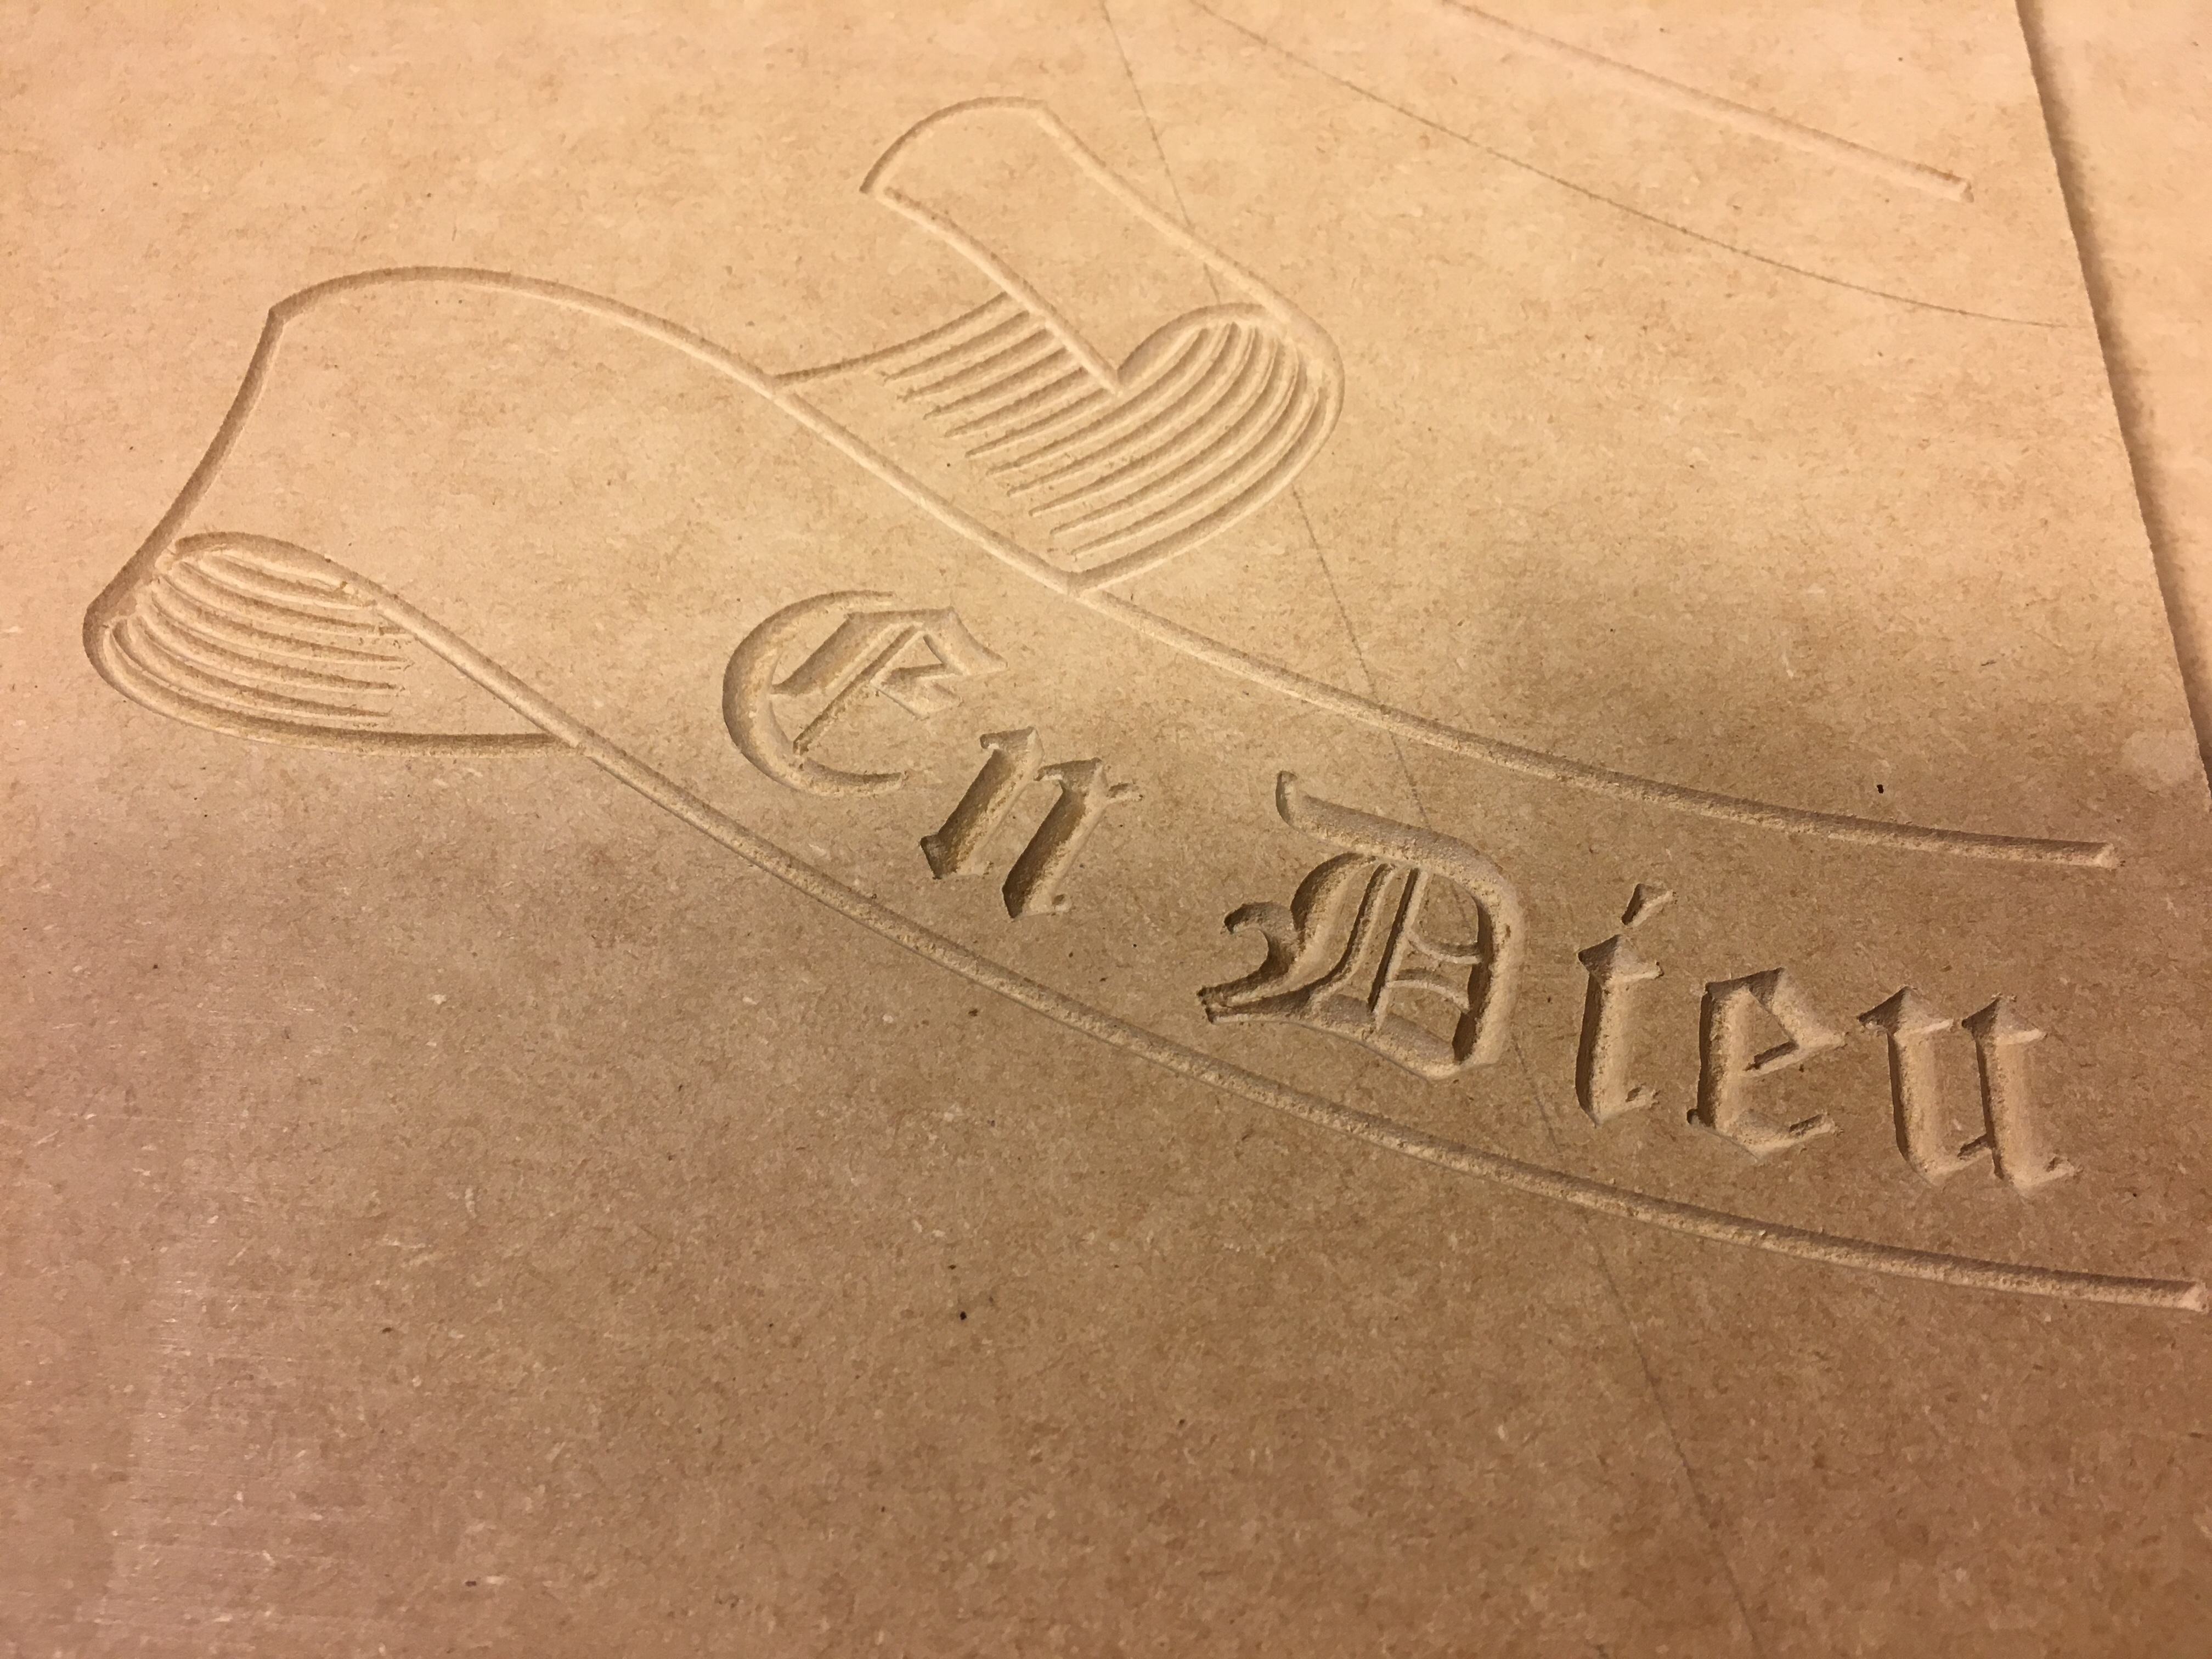
For now, I am attaching the project I am testing right now. This is a 4 file project ( based on two doors, both with an outside and inside set of requirements. It was originally set up as 2/two sided projects but I was having a lot of trouble with the 3D model on the inside… it wanted to carve way too deeply and some of the folks on Vectrics forum were talking about adding the zero plane… after a tutorial or two and several hours of messing around, I didn’t figure out what I needed to do.
The first file is for the LEFT door, exterior face. It is half of a coat or arms, V-carve strategy is being used. Here is a link to the Vcarve file with tool paths and the Job Sheet on my OneDrive. https://1drv.ms/f/s!ArVSbAnAHkVwhAeChvucGGTWISMj
I feel so much better now than I did a few hours ago… first off, thank you @Adam_Xett and @WillAdams for both reaching out and being supportive! I was really getting down on myself and how little I thought I was grasping from everything I was reading. I have a tendency to over think and over research things and send myself into a spiral of doubt as I keep seeing something either new or contrary to what I have already absorbed. I end up getting nothing done. Sometimes you just have to throw away the manual and go for it ;). The quick responses from the two of you gave me the little bit of a kick and encouragement that I needed to
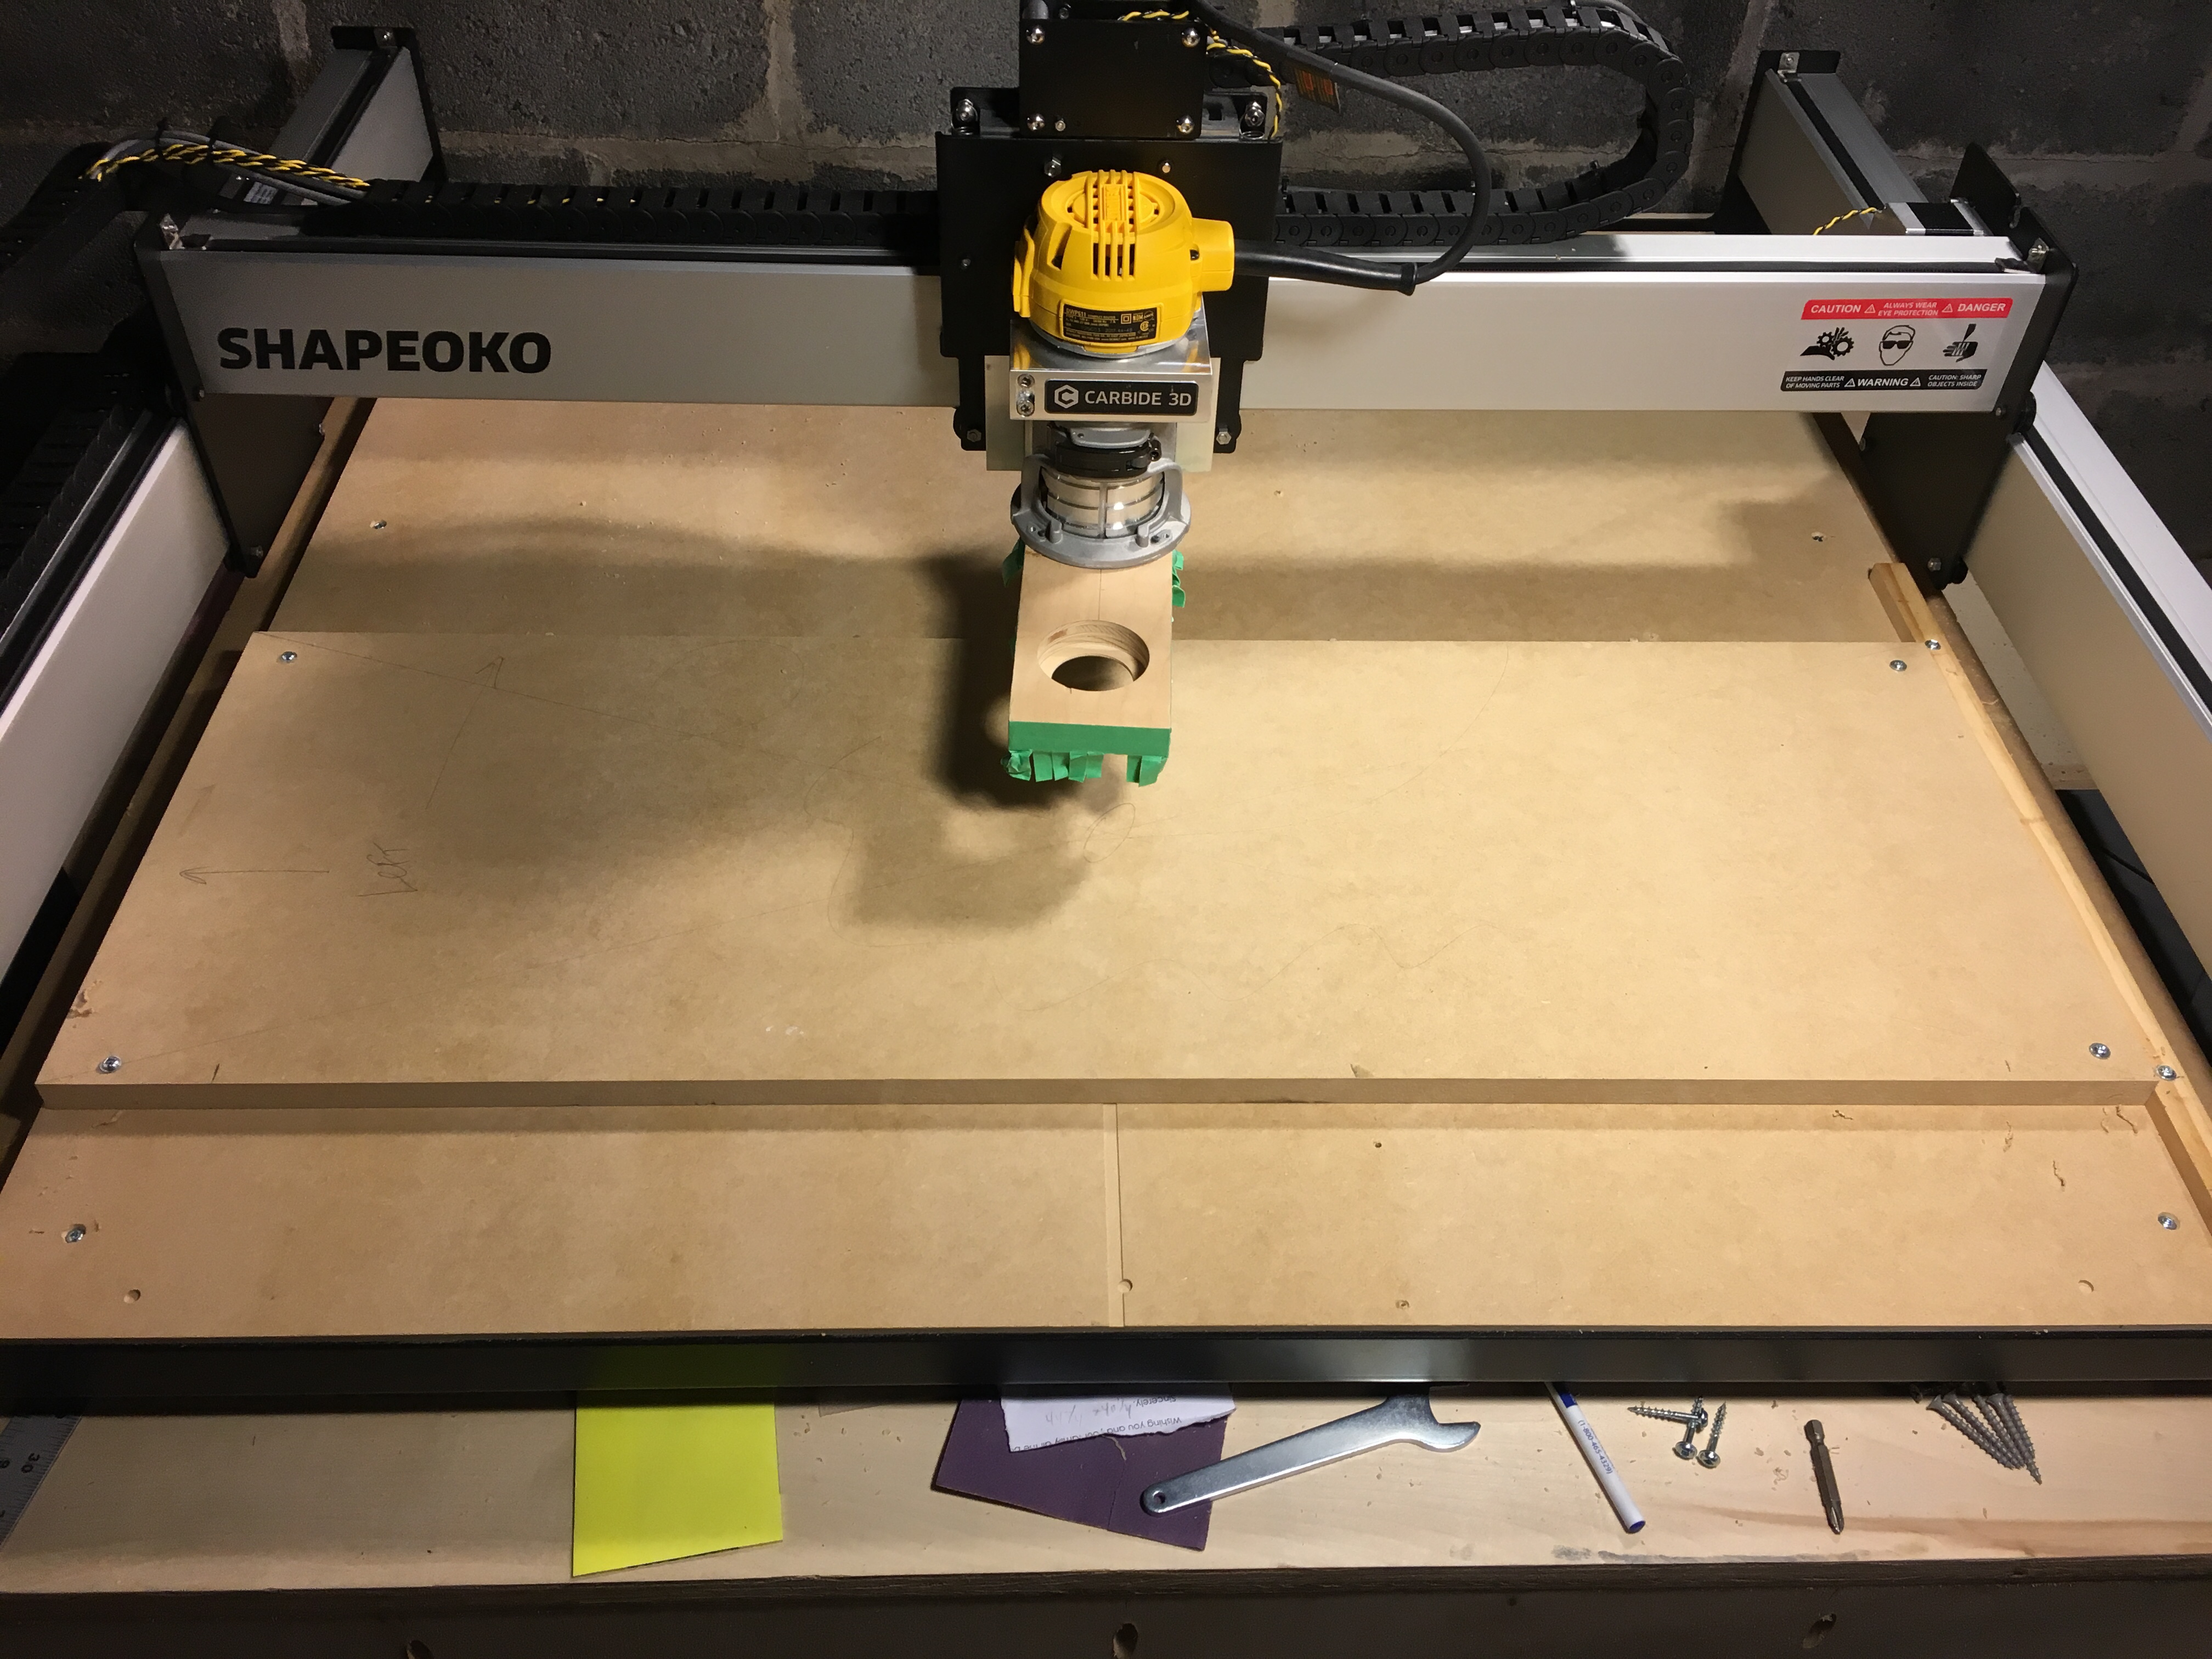
That is what I did tonight. I just went out to the garage and grabbed a piece of MDF, sized it the same way I do my wood blanks and went about the way I envisioned this working several weeks ago when I first got my machine assembled.
The first of 3 parts to this file have been completed. This is the one I have had worked up for a few weeks. Tomorrow when I get home I will hopefully have enough time to run the 3D model that is going on the reverse side of the project.
Some screens from what I did tonight… again, I REALLY FEEL so much better right now. Thank you!
I can say that the quality of the vectors and resulting carves ended up being far superior to the results I used to get from my other machine.
SO… it’s definitely more work assembling a project with VcarveP but once it’s done the results I saw tonight from VCarve and my SO3 reinvigorated me and confirmed to me that I made the right call to go with the software and machine combo that I did.
I still have a fair amount of doubt over the 3D modeling end of the project and it’s mainly due to all the manual entry of feeds/speeds I have to do. Messing around with Gwizard today didn’t help me any because it just added another layer to things I am trying to absorb all at once. I am looking forward to running the test of the 3D MODEL tomorrow. I will post that part of the file shortly.
I really am looking forward to completion of my first SO3 project and posting images in the gallery.
Nice work! Heck, I wish some of my first projects looked half as good as that.
I found vCarve seemed to add a lot of “process” to things that are easier in other workflows, but now that I’m used to it, it just makes sense.
On feeds and speeds; For woods and MDF; take half the bit diameter and use that as your maximum depth of cut. Start at 15-20IPM in hard woods and 30-40IPM in soft woods. Go from there and go by ear. Angry bits sound angry, a happy bit just sounds like spinning (scientific, right?)
Well, if you really pull your hair out on a specific file you might try building your project over in Easel-Inventibles and export you code from there. It looks like the Easel software is a pretty straight-forward set up for powering up a CNC system.
I must say that is a very good first project. The process from design to product will get much quicker in time. Once you have your tool library setup and a bit of experience in what works well and what doesn’t for your desired finish you will be cruising. The community here is a great one too with some very knowledgeable people who a willing and eager to help. This is what made my decision in purchasing a Shapeoko in the first place as it was my first experience into CNC machining. If you are interested play around with a few other CAM/CAD packages and find what suits you best. My personal use usually flicks between Fusion360 for intricate 3D parts and Vectric for artwork and V carving. I don’t think I would like limiting myself to one as sometimes what is near impossible in one is a walk in the park with another.
Thanks for the additional posts and support! This has been a more confusing change than I had anticipated. I have to start a notebook and keep some notes as I build each new project and record my steps and the results produced.
I did start my making a template for my most used set of doors. I also have eliminated the two-sided aspect from my Vcarve files. I just don’t do anything that goes fully through my work that requires dead-on accuracy in the layout. If something I place on the back side of the project is off by 1/8", it really doesn’t matter.
Where I need dead-on accuracy is the way my images/artwork has to split across the front of the doors. When the left and right doors come together, I need the artwork to line up. So far, it appears I have been getting this right through either using CENTER alignment and snapping to the grid, or I use layout lines and pay close attention to snapping the handles of the artwork.
I am onto my second project now and the first one is almost ready. Have two more elements to carve.
When I am done, I’ll post pictures. I also want to post my process in creating these projects to see if there are some suggestions. I’m sure I could make things a little easier on myself.
 I will post my first project before running… I think I am finally about ready to finalize it… It’s definitely not the easiest of projects for my first stab at this but it’s pretty typical of what I need to do on a job.