Any imbalance in the impeller or its mounting could - potentially - cause increased wear to the spindle and increased runout (the tool/spindle wobbles affecting the quality of machining).
Both @Randy and I are concerned about these impellers because of this.
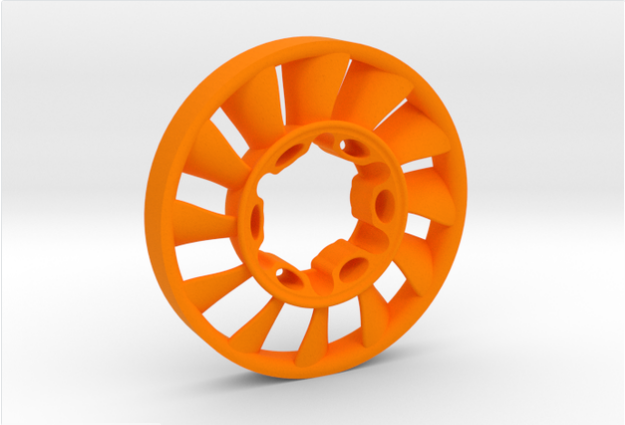
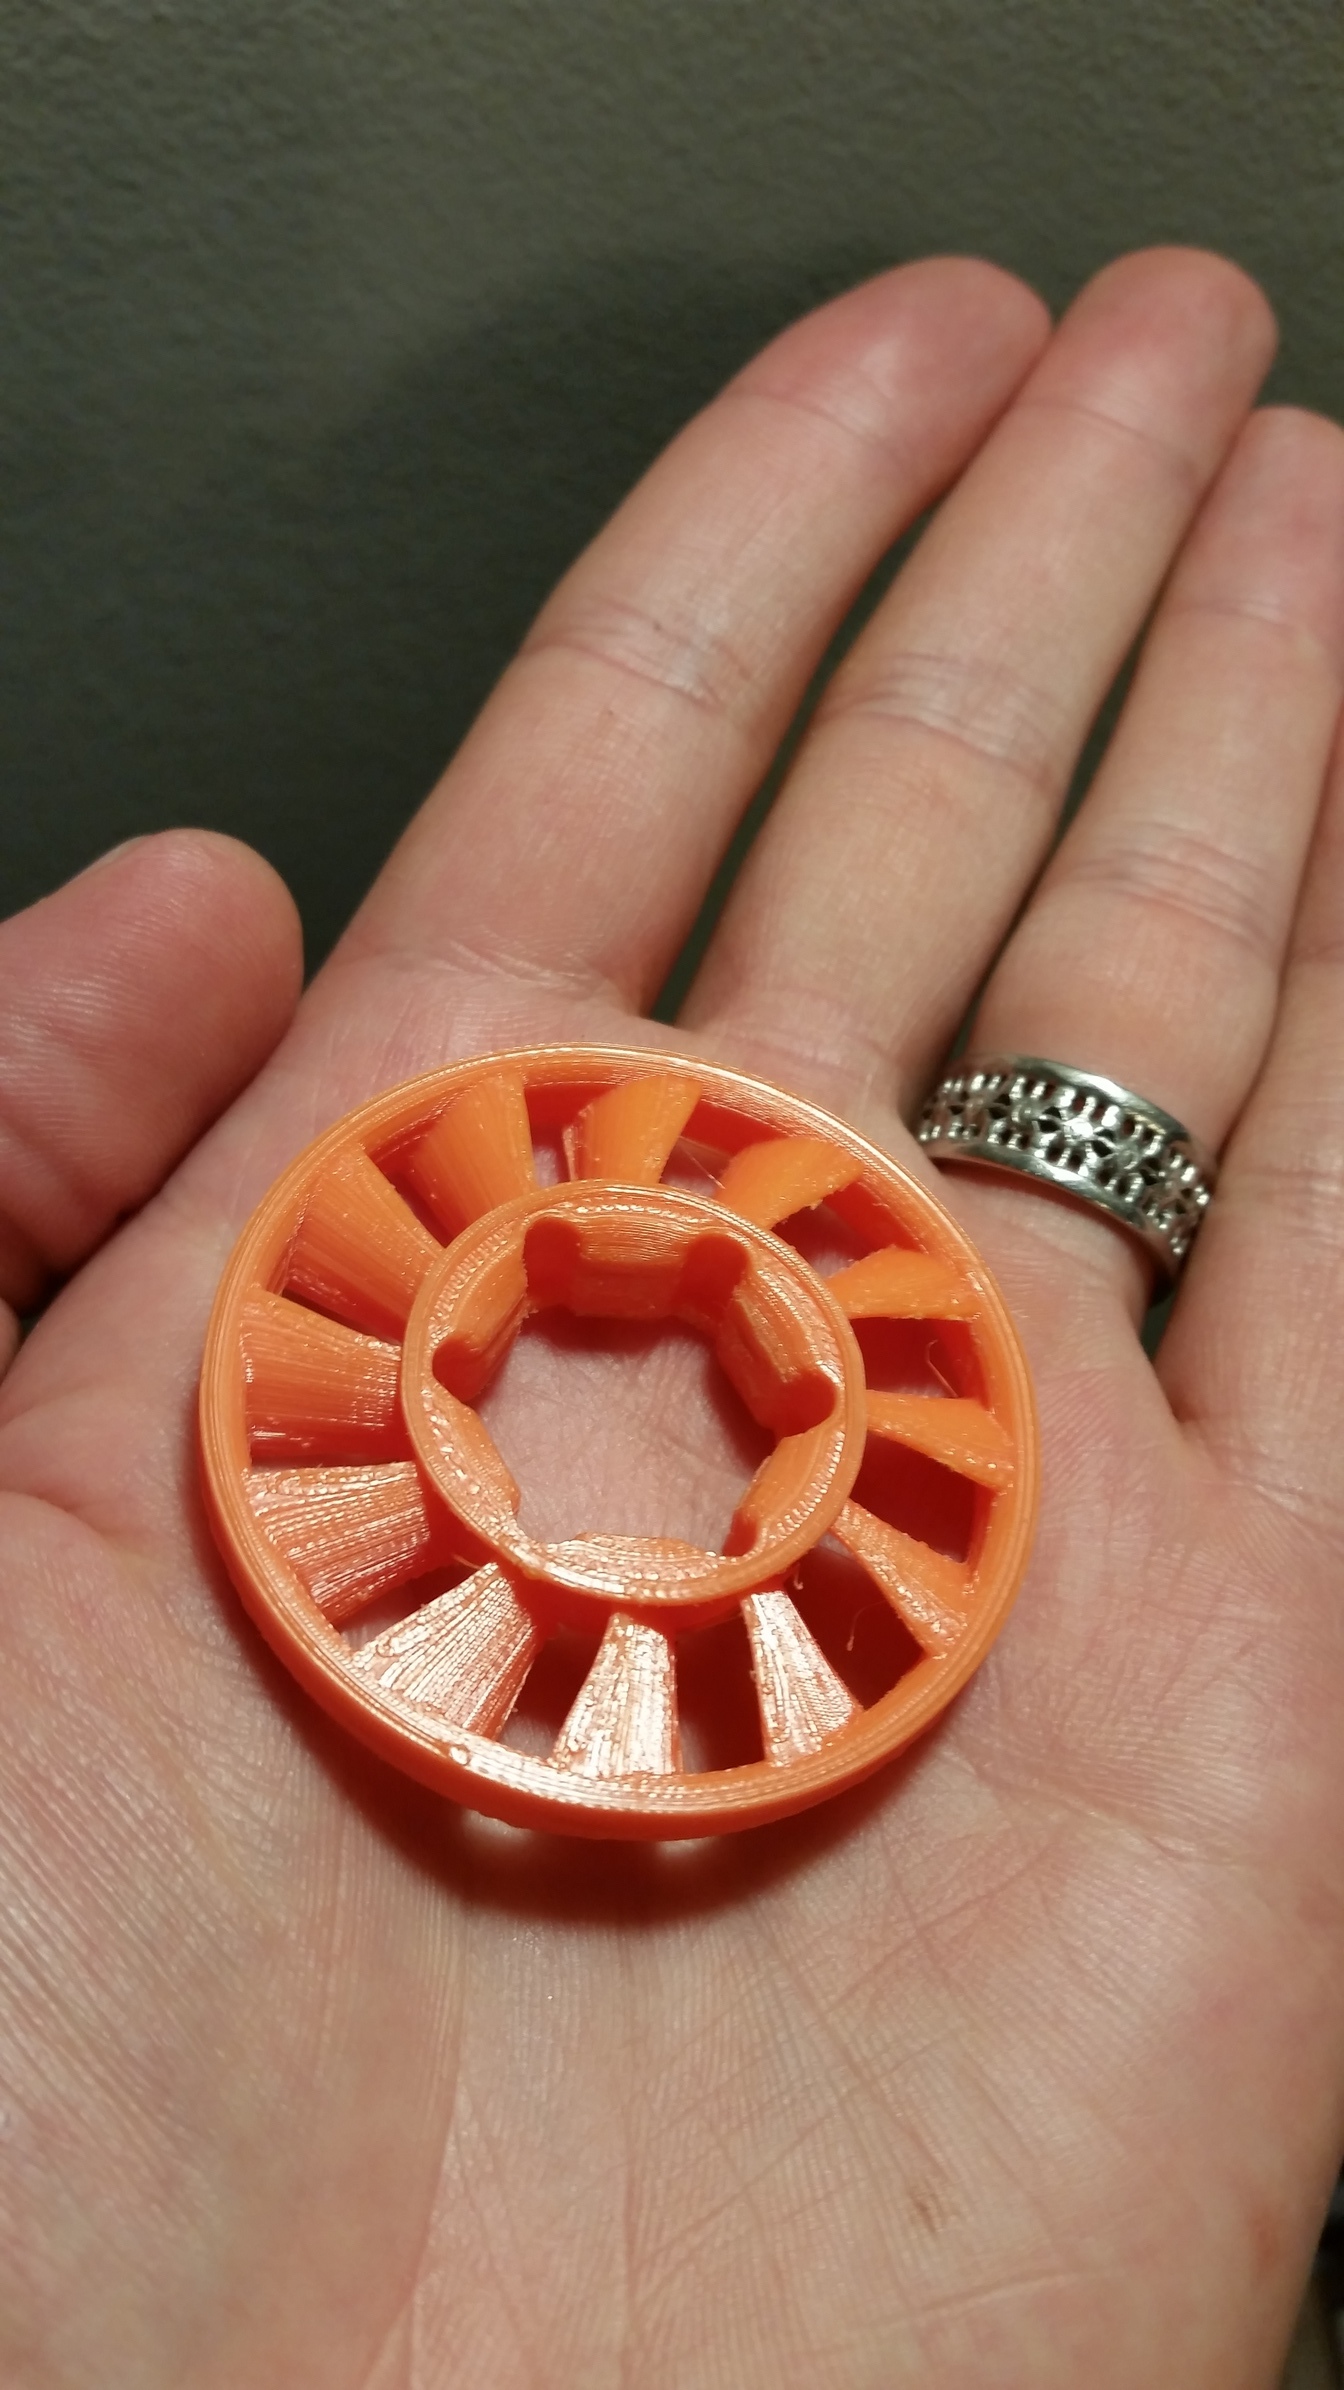
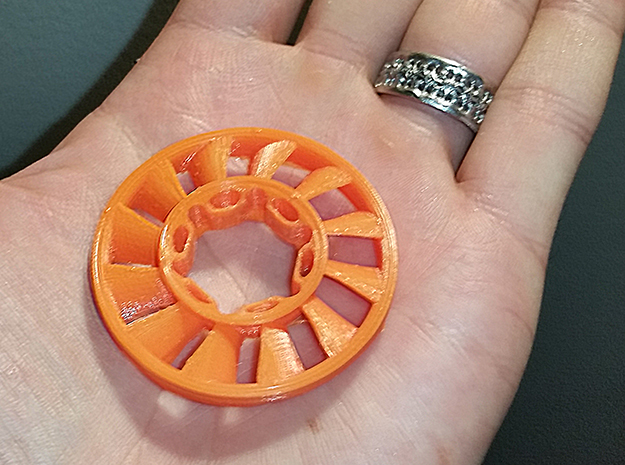
The risk of problems increases with the Moment of Inertia (MoI) of the impeller. The easiest way to dramatically reduce the MoI is not to have a ring around the outside of the impeller - just blades.
Ah but on the contrary, having a stabilizing ring around the outside prevents vibration in the blades that would come from the limited accuracy of 3d printing manufacturing tolerances, and also works like the “rim” of a bicycle wheel, distributing the stresses
I agree with you that the inertia should be kept to a minimum, which is why these need to be very minimalist, but at this scale and the force they exert, compared to milling forces, I highly doubt they’re going to increase wear in any appreciable fashion.
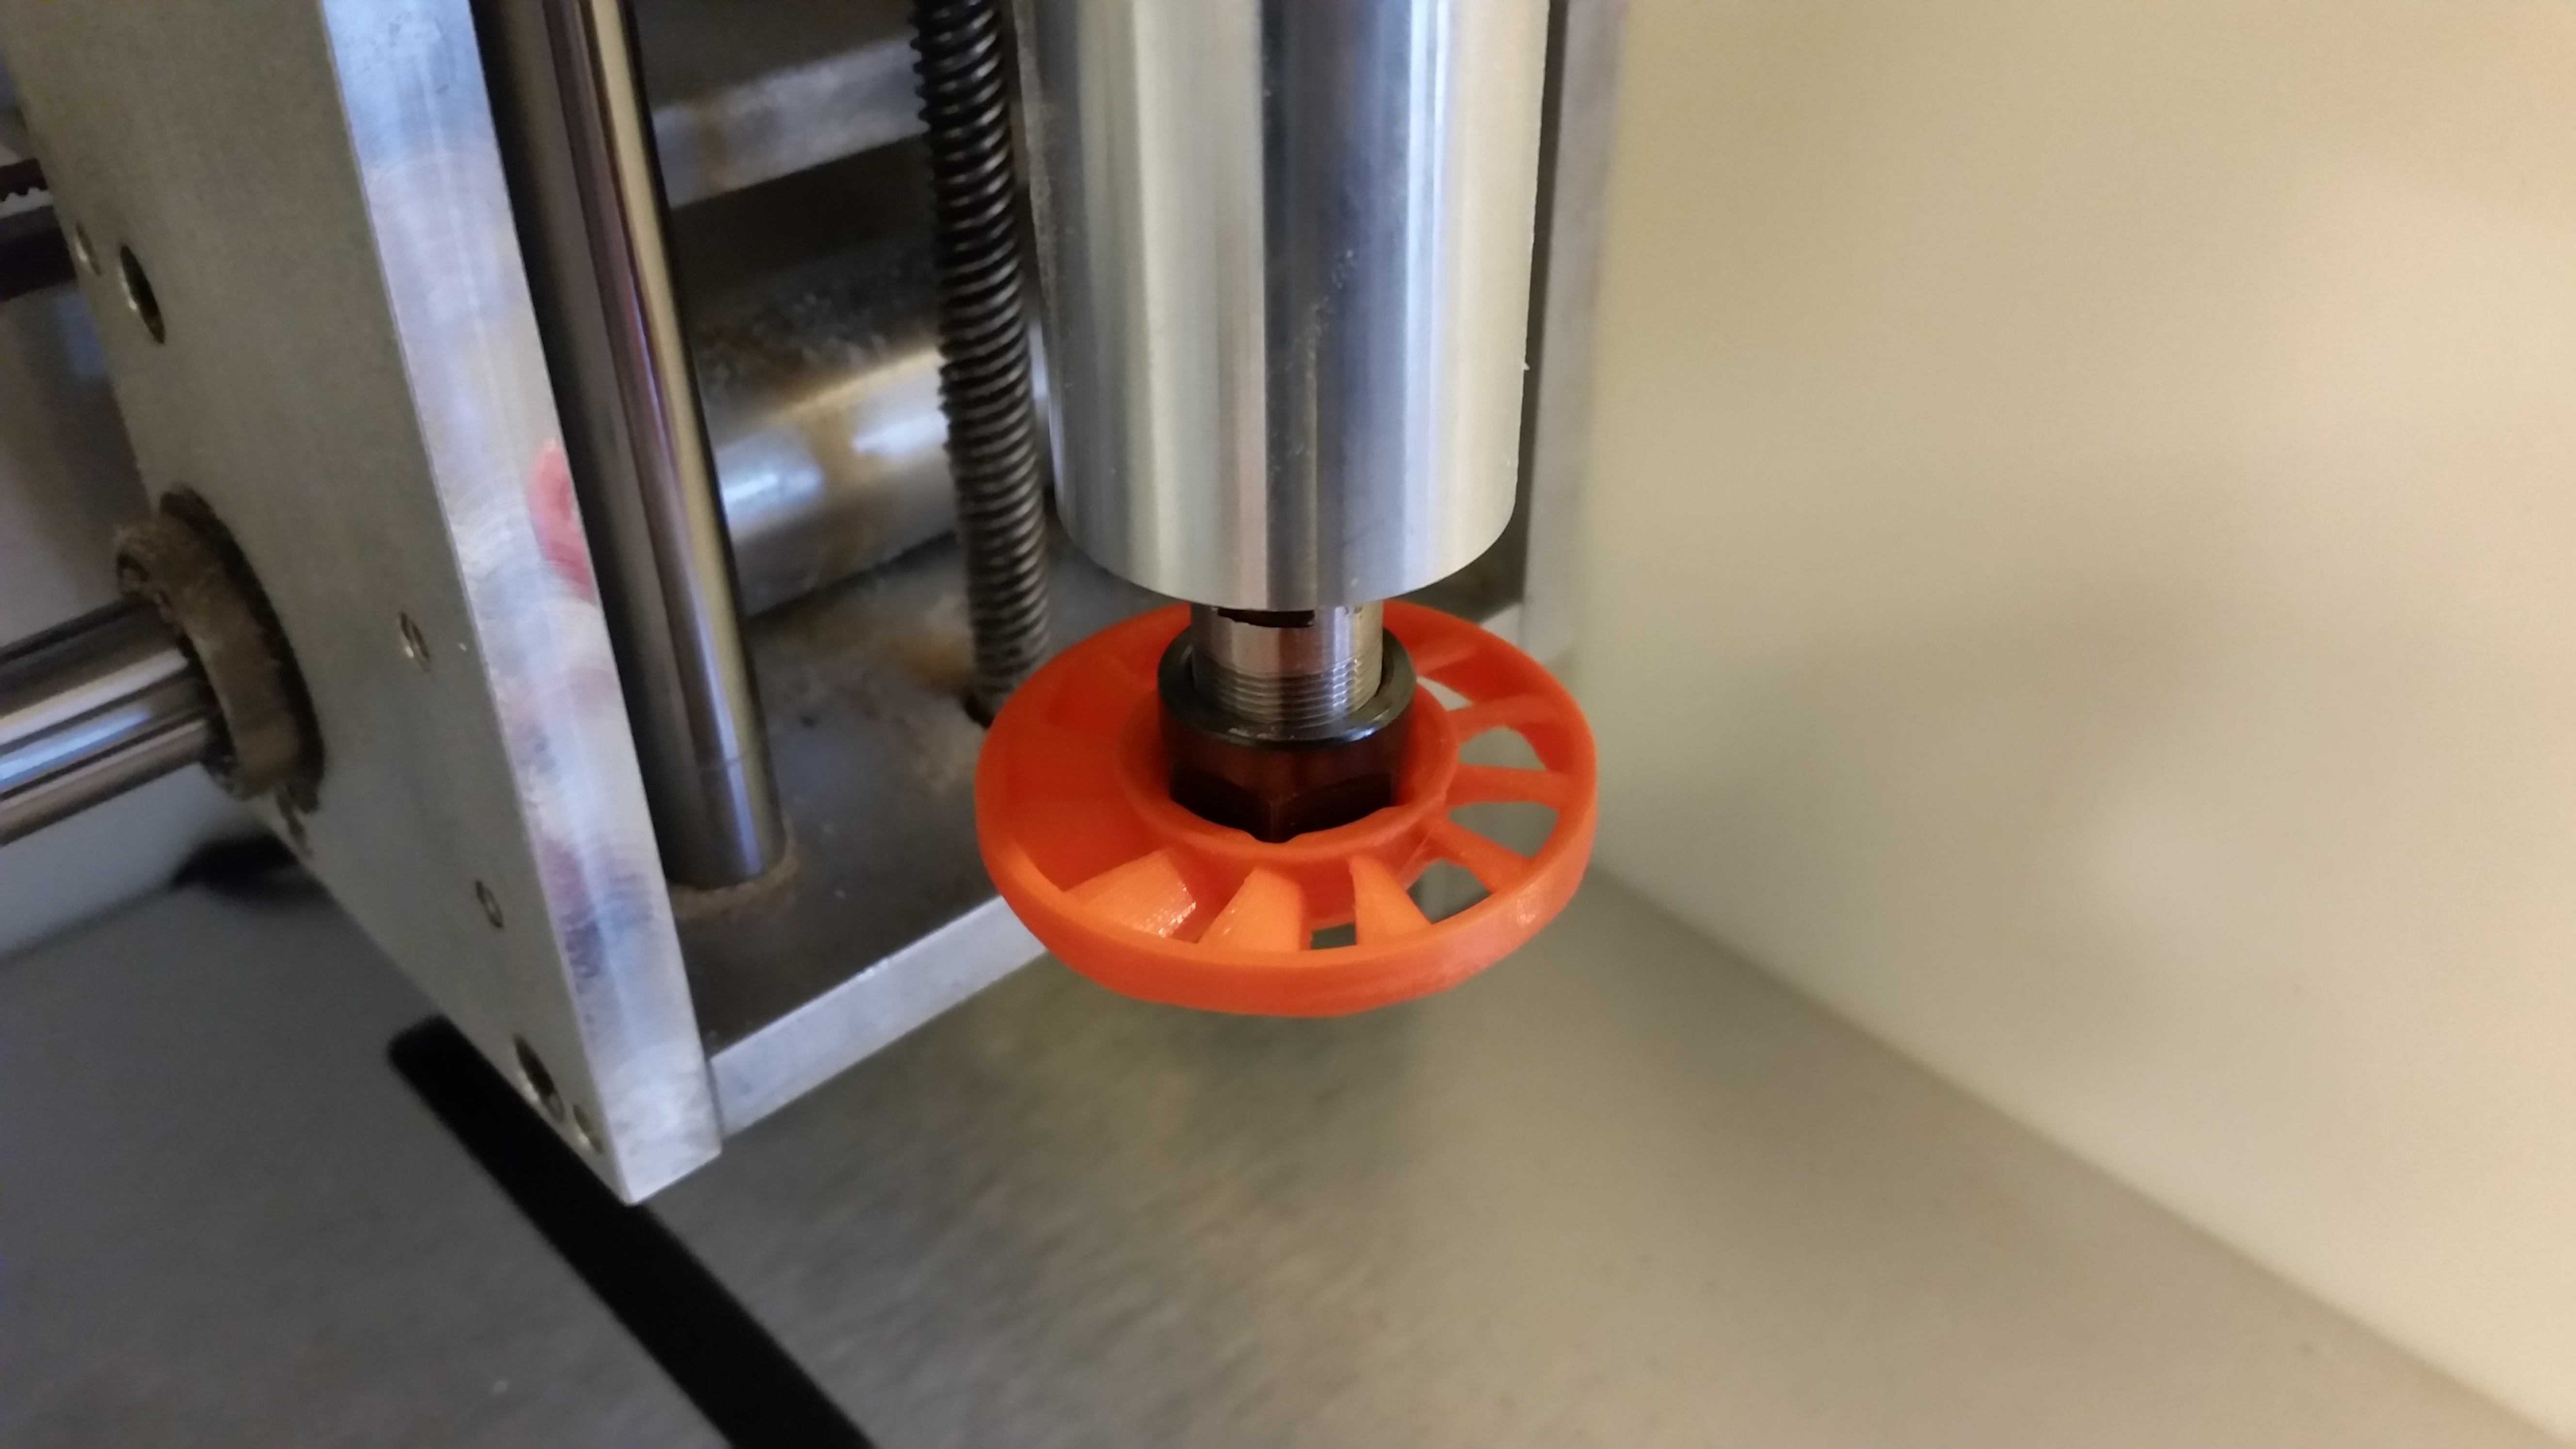
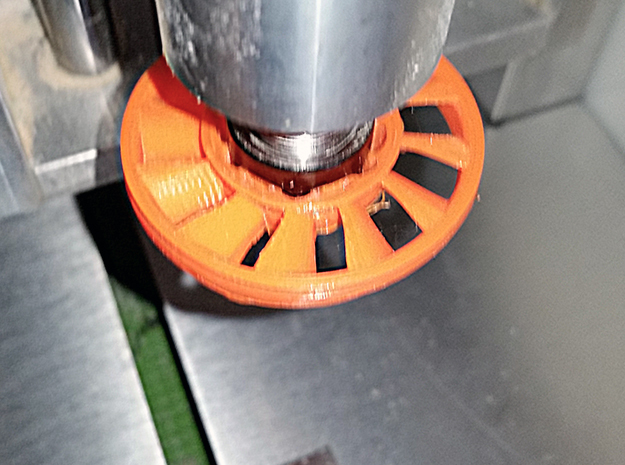
Updated version works, and is up again for sale It’s a bit of a tight fit, so expect some light sanding on the interior surfaces that engage the nut, as I’ve made them arched to provide a bit of flex and a compression fit, but it may still be a bit too stiff straight from the printer. Let me know how it works for you!
I am not sure if i may have missed it. but if I did, and you don’t mind, could you tell me what settings you used to cut the corian. i have some pieces that i want to try out but am having a hard time finding a good jumping off point for feed rate and plunge rate.
Corian is mostly Acrylic/Acrylate-based resins, with fillers depending on what the “look” is the designer was going for… so as a result you can treat it mostly like Acrylic and then tune from there based on how some test cuts turn out. Machines pretty cleanly if the variety you’re working with doesn’t have too many large chunks of different coloration in the fill. Good luck!
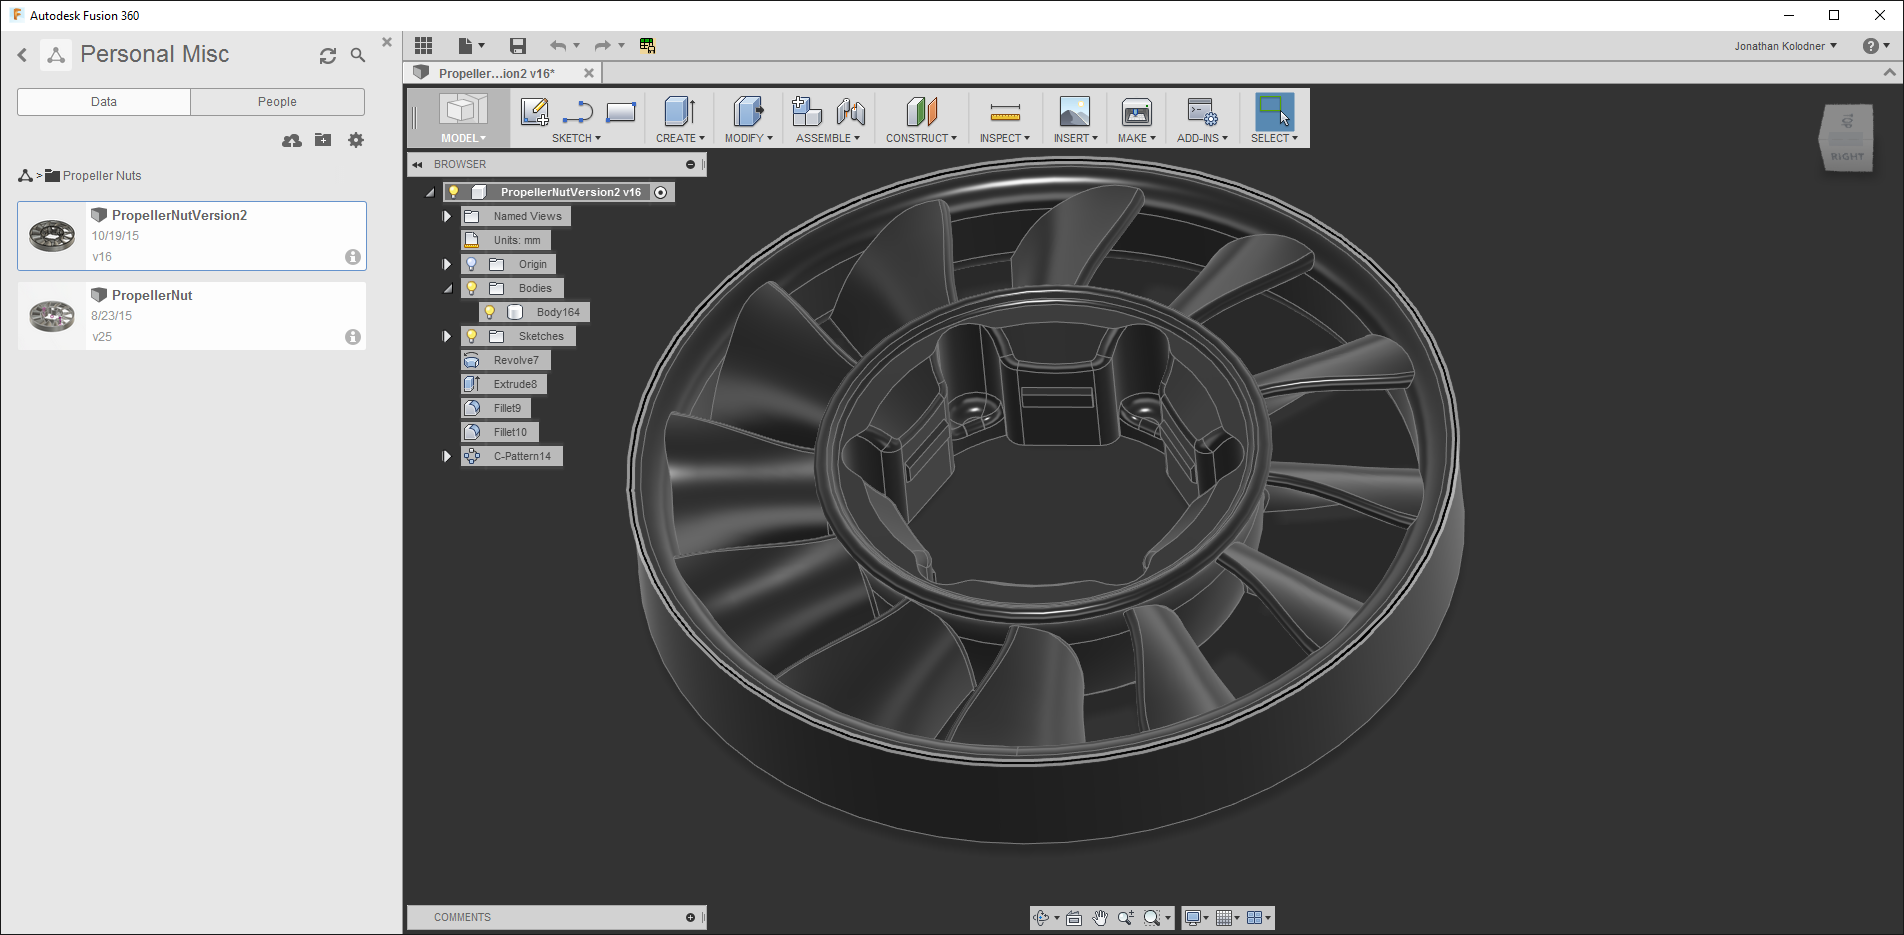
Somewhere on the forum there is the one I made for the Dewalt 611 out of HDPE. Here’s a link to the Fusion 360 project. http://a360.co/2uDDyAf . Its a three-blade fan. It works extremely well blowing chips out of the cutting area, but adds to the noise because it’s not perfect. I’m sure it will eventually cause advanced wear on the 611, but (a) I’m working in wood and don’t need extreme precision and (b) a 611 is relatively inexpensive as far as I’m concerned.
@Boothecus Awesome! Thanks for the link. Do you know if this’ll fit on the Nomad’s ER-11 collet nut? If it’s specifically for a Dewalt spindle I’ll probably need to tweak it to make it work for my machine.
I will note that I was fascinated by the idea of these things, and tried two pieces of blue painter’s tape as a fan and was quite distressed by how thoroughly it blew dust around the innards of the machine. YMMV.
Sean, I don’t know what the Nomad collet looks like, but I’m sure it’s not the same as the Dewalt so you would have to remanufacture it.Note that if you use my plan, please review it thoroughly. When I did the front side, I cut the center deep into the wasteboard. I then inserted a spare collet into the wasteboard cutout and flipped the fan to do the backside. That was how I handled aligned for the two-side cuts. You might not want to have it do that.
Will, it does indeed blow dust all over the place, but there’s none in the cutting path. I don’t particularly care about dust because the CNC is in its own room. And I have another “mod” that makes dust collection nearly impossible.
I made an adapter to mount a DeWalt random orbit sander into the spindle. Because I do a lot (and I mean a lot) of sanding of the same product going from 120 grit up to 4000 grit, it can take an hour’s worth of sanding to finish a surface. Doing that by hand leads to tennis elbow. So I built the adapter and mount the sander to the spindle mount. I programmed a nice spiral path to go around the round table top at a very slow speed. The sander starts from the center, goes to the outside edge and then back to the center and retracts so I can change to the next grit. No dust shoe is probably going to work, so dust is something I have to deal with manually. This turns the machine into a Sandoko or CNSand.
My wife absolutely loves to sand, she’s actually sanding right behind me as I type, but with this I could have two people sanding while I surf the web!
@koolatron I took it down because I needed to tune some details on it and I learned a bit along the way about how impellers work, and wanted to make an impeller version that would direct the air in a more concentrated stream at the tool.
The original press-fit design, while functional, had a fairly short overall life-span before it would eventually work loose and then fall down off the collet nut. I needed to make changes so it had some kind of proper no-load snap-engagement with the nut to ensure it was secure, and hadn’t gotten to designing that yet.
I’ll try to circle back to it in the next few weeks, and I can share the Fusion file if you DM me with your email (if you use Fusion360).
I assume you’re talking about the sander. If so, there’s really nothing to show in a pix. It’s in the prototype stage but basically it’s a piece of plastic plumbing pipe (pvc or one of the others) that is a loose fit in the spindle mount. That is afixed to the top of the sander with a bolt. I don’t tighten the pipe into the spindle mount because I want the sander to be able to float and use gravity to hold it down. As I work with it more, I’ll undoubtedly change the design and make it fancier.
You could start with a light spring-load & mount rather than only gravity-float
That’s what I’d do anyway if I were to build one for my machine… which I just might have to do since it’s a great idea. I’d want to use the thru-pad vacuum dust extraction at minimum that my Bosch sander has.


 It’s a bit of a tight fit, so expect some light sanding on the interior surfaces that engage the nut, as I’ve made them arched to provide a bit of flex and a compression fit, but it may still be a bit too stiff straight from the printer. Let me know how it works for you!