Do you have plans for a lead enclosure? 
More is always better, right? 
Hmm, I thought the idea of this thread was to try things to see and measure if they really made a useful difference to the performance… snarky is not good… supportive is…
Vince commented he filled his extrusions with 25lbs of sand without the stepper motors struggling with steel-cored belts. Let’s confine ourselves to quantifying that change before we discuss filling with more expensive materials like lead and uranium.
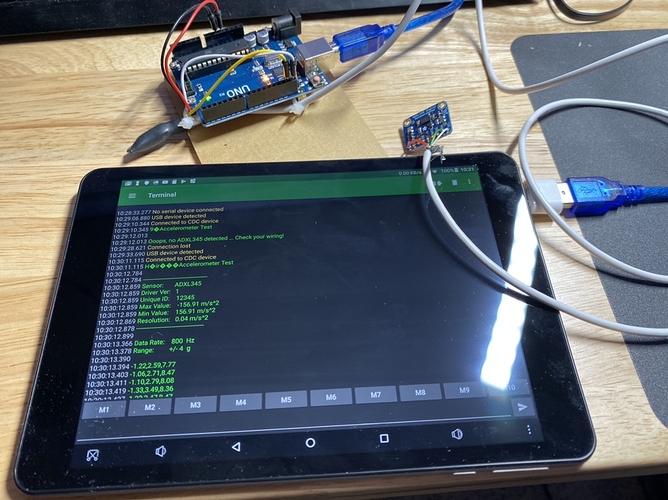
Life got in the way a little bit, but I made some headway in the vibration characterization department. Accelerometer seems to be working OK, but still working on the FFT analysis piece. Data capture even works out pretty spiffy on an android tablet with serial terminal, so I can go mobile.
Maybe I’ll get some time this weekend to work on the unbalanced motor exciter to characterize resonance sweeps. If that approach sucks, I’ll just look at frequency response as it cuts. So far I’m about $30 into the experiment with the ADXL345.
Immediate need is to 3D print or cut out a mounting plate for the accelerometer so that I can screw it into the threaded inserts on the table (and the threaded holes on the aluminum when the time comes). Unfortunately, my F360 startup subscription ended, so I need to wait 10 days(!!) for them to review and hopefully reinstate.
Hoping to. Need to put together an unbalanced motor setup.
Nuh. Not expecting to be, anyhow. We’ll see - I got maybe $100 and 20 hours of interest. Frequency stuff is a stretch goal.
Naw. One run at a consistent profile should suffice for my analysis.
Nope. Nexus to my objectives of determining direct improvements to good quality aluminum cutting is too distant, as far as I can discern.
Yes. This is the overarching theme of the exercise. The configurations vs cost table/script above is intended to be me read sequentially in order of implementation, which is linked to cost and difficulty-to-revert.
Wouldn’t you want to mount the accelerometer on the spindle since the excitation forces originate there and at the endmill? Wouldn’t varying the spindle speed and number of flutes on the endmill while cutting provide the required excitation frequency sweep range? Wouldn’t varying the MRR and workpiece vary the excitation forces?
There’s probably merit to both approaches.
I was more fixated on how astonishingly bad the bed resonance seems to be on the XXL. But wheels and linear rails would probably impact spindle resonance more. Extrusion fills strike me as more of a bed resonance impact, but that I can’t say immediately says…
FINE ILL MAKE ANOTHER MOUNT.
We’ll get through this together.
Could you please provide details for these (and other upgrade?) items (part numbers and sources)?
Limit switches work the same way that the yellow ones do that mrbeaver was selling. there’s a thread somewhere on this forum how to connect them. Had to 3d print my own brackets though.
So obviously the next question is “Can you share the STL file?” 
It’s surprising that you find inductive proximity sensors more accurate/repeatable than mechanically actuated limit switches.
@TravisGood I would but I cant seem to find them. If I do, I’ll post them here.
@gmack I’m not sure I’ve seen many cnc’s with mechanical switches tbh. Well, despite some light-duty routers. Remember seeing discussion about that particular topic either here or on the beavercnc forum (not sure if the site is still up) with much more technical info. All I know is they work much better and have no problems with repeatability anymore. I solely use cncjs but it crashes sometimes - luckily not during cutting be after finishing a job. Without proximity switches resuming work would be nearly impossible.
Has anyone actually measured the accuracy/repeatability of the stock switches vs the proximity switches?
i think it may have to do with the quality and resolution of the switches based on what others have suggested with their results
proximity is essentially the resolution of the switch itself, whereas the mechanical switches have a compounding effect of the resolution potential + the mechanism travel/trigger (gain/loss)
"Traditional limit switches, proximity sensors and photo eyes are somewhat limited in terms of accuracy and repeatability, typically in the 25- to 100-µm range depending on the device. However, there are some cost-effective and ultra-precise mechanical limit switches with repeatability in the 0.5- to 10-µm range, Figure 4. Considering a human hair is typically 50- to 60-µm in diameter, that’s precise sensing." Their “cost effective” is >$40 dollars each though!
wonder if there’s a drop in (e.g. just use the existing wiring, swap out the switch) limit switch that’s much better… because that would turn it into the “easy to do” column (similar to swapping the belts/etc)
The wiring for these should be the same (assuming the stock switches are normally open). But their mounting will change, and you’ll have to make sure the switch strokes aren’t exceeded by the machine/software.
One thing you are not considering: the mechanical switch can have a mechanical malfunction because there are moving parts while a proximity switch does not. I’ve had the switch stay depressed and causing issues I had to fix, ruining my project. I know from forums that I’m not alone.
Provided it satisfied my requirements, I’d be inclined to choose a mechanical switch with a specs. for things like contact life (over a million operations) and repeatability (<0.01 mm) over something with no specs., even if it is a lot cheaper and had no moving parts. There’s a big difference between $1 and $50 switches. That’s also why I’d never buy a HF spindle or VFD that didn’t have proper specs. to save a few bucks. 
