I am trying to follow the directions for the quarter blind box joint @WillAdams has posted at https://willadams.gitbook.io/design-into-3d/quarter-blind-miter-box-joints. I am trying to make an urn for a family member and thought this style joint would work well. I also plan to include some 3D carves into the front once I have the parts cut out.
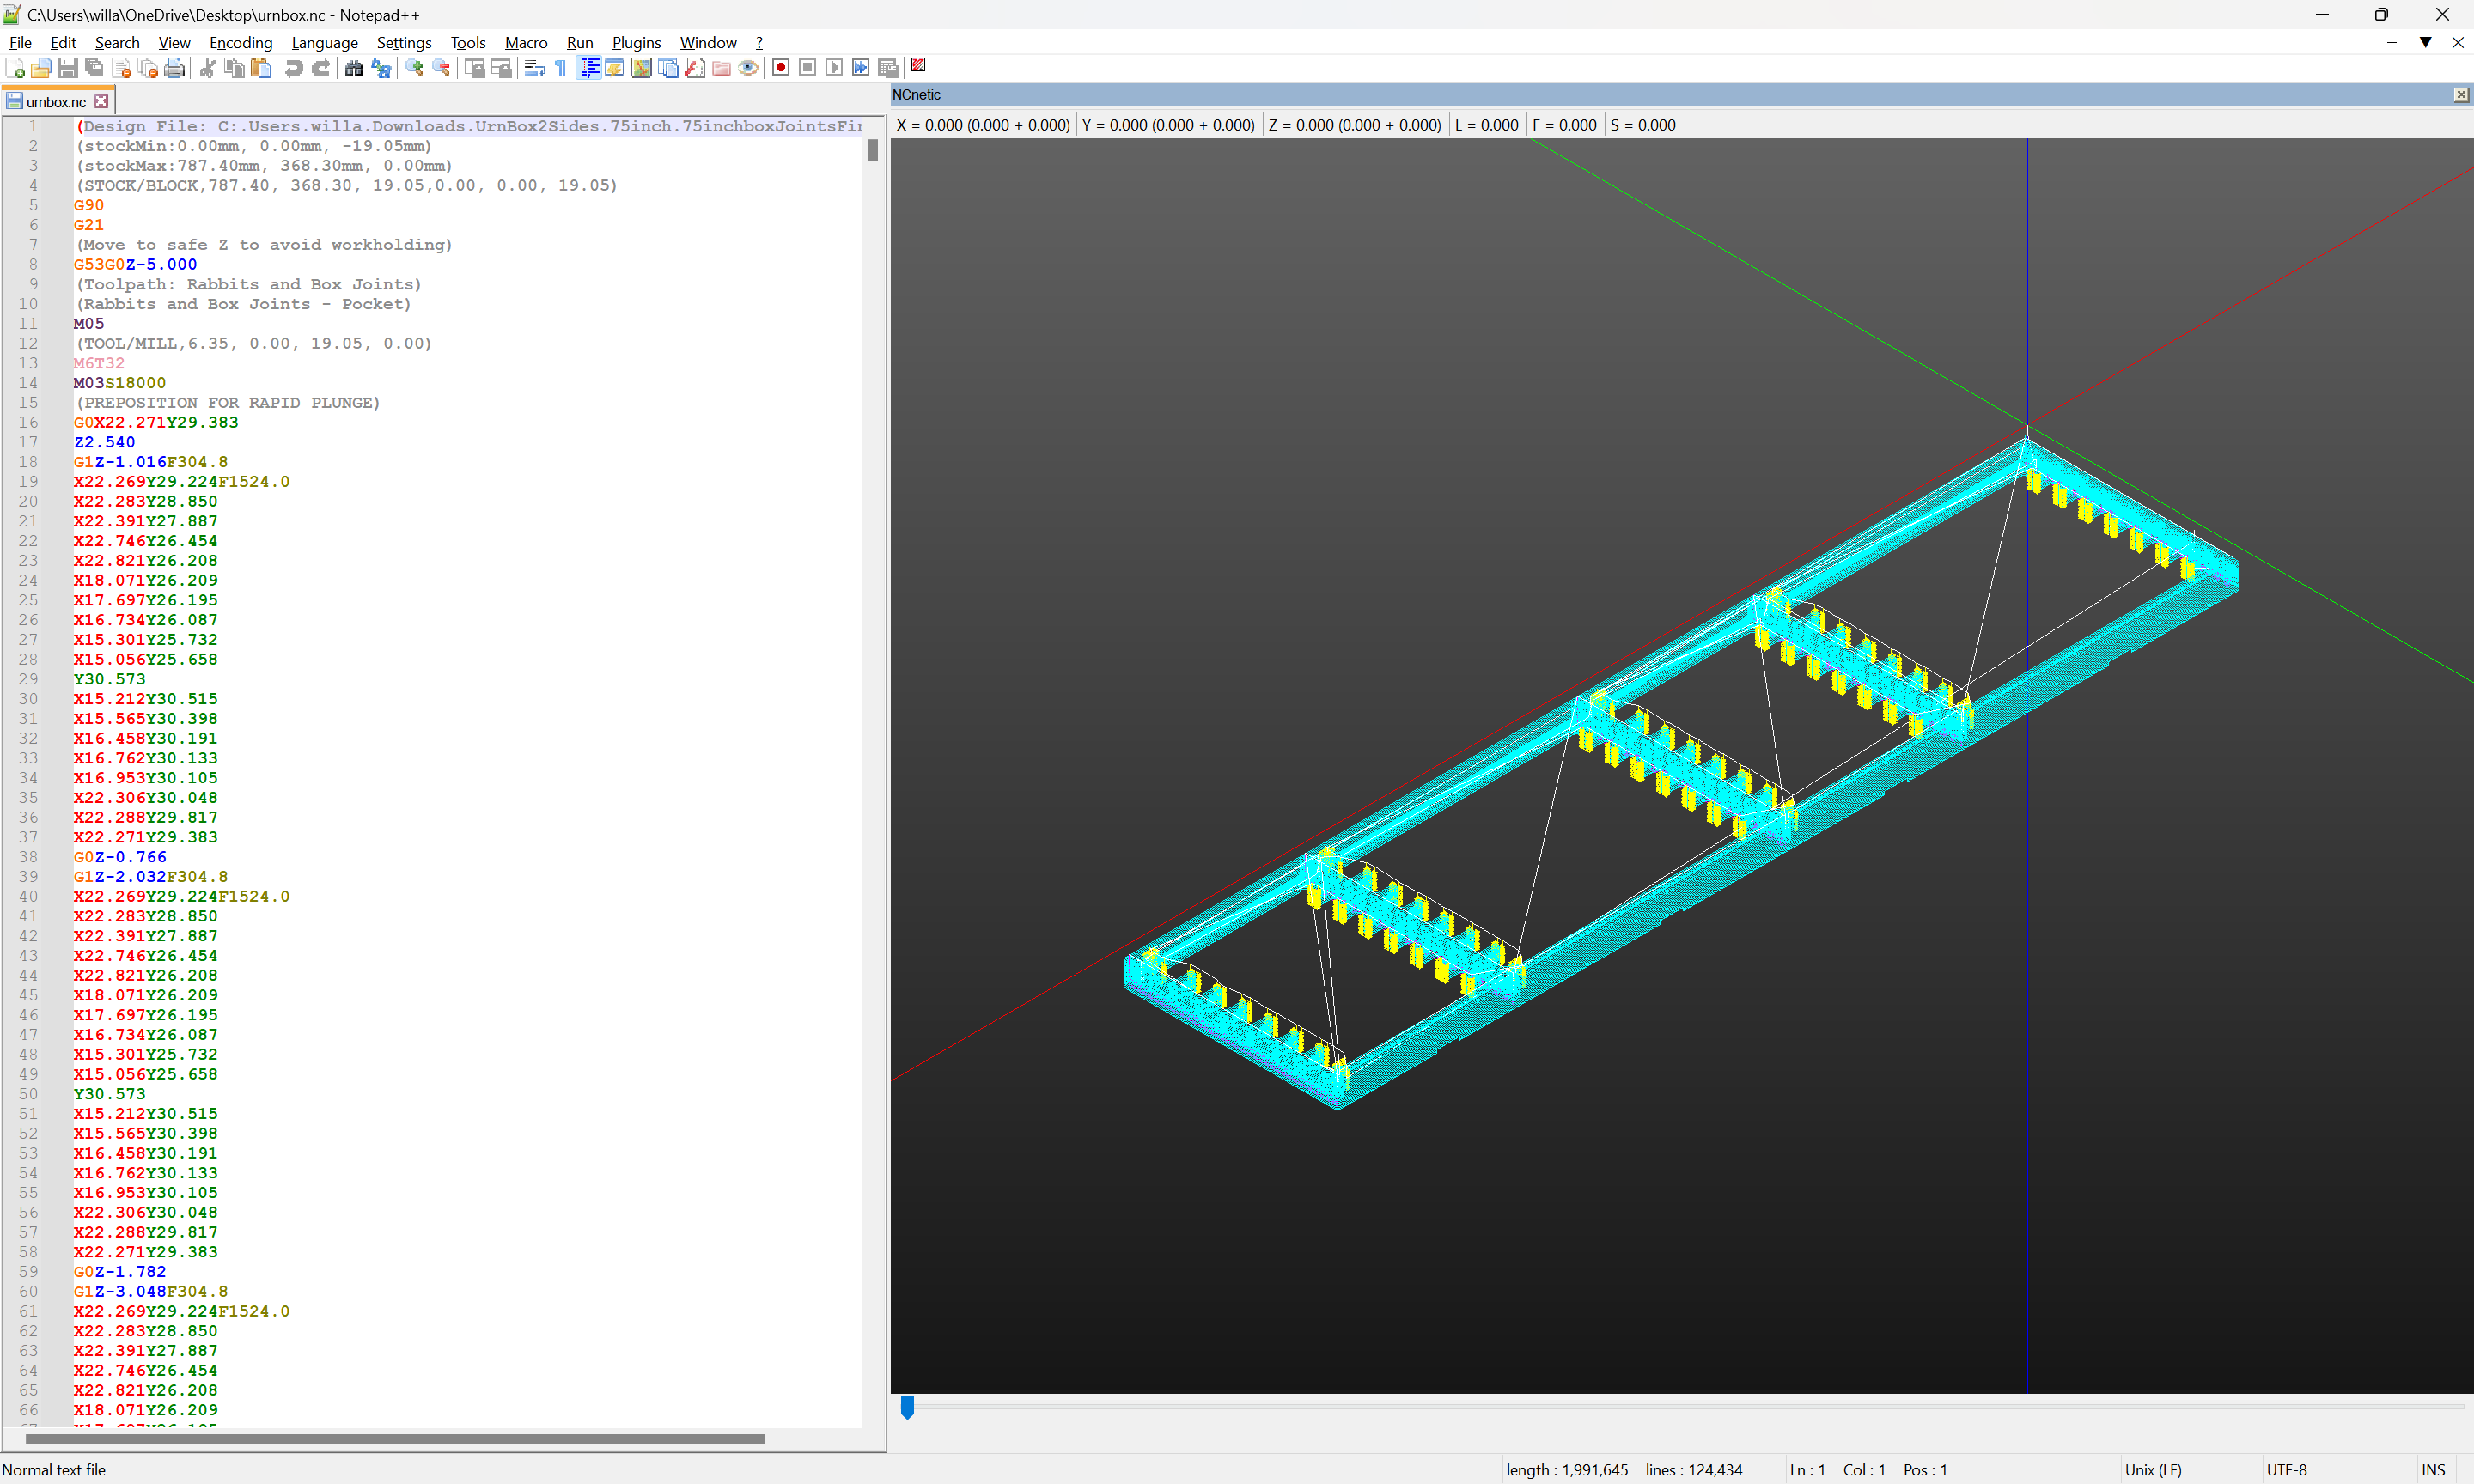
I have done a couple of test runs and made a couple of dumb mistakes in attempting to scale this up to thicker stock but I think I have it now. Was wondering if anyone could take a look and tell me if they see any glaring errors. The stock is .75 inches and I am using a 1/2 inch 90 degree V bit for the miters, a .25 inch down cut bit for the main roughing and a 1/8 inch bit for the dog bones. I have attached the file and I think it looks good but have already messed up twice on test carves.
Just to clarify a couple changes I made to Will’s directions as well. I have a rabbit for both the base and top. The top will be carved in another file to inset into the rabbit left along the top. I also have added some extra geometry for the rabbits so the corners fit together better. My initial test following the directions required a little chisel work to remove some extra parts that prevented it from coming together. UrnBox2Sides.75inch.75inchboxJointsFinal.c2d (536 KB)
I’ve been working on a simpler technique which instead uses a full-blind miter — but it requires either complex geometry (if cutting w/ the small V endmill) or larger tooling (which quickly gets expensive, and possibly scary), or some medium size tool, or very thin stock.
If you really want to check, you could preview the G-code in Camotics or some other G-code previewer (you’ll need to make a tooling library which includes your tools), then write out an STL of the preview of the cut, then isolate each part and rotate them and subtract them from each other and from a solid of the volume of the box.
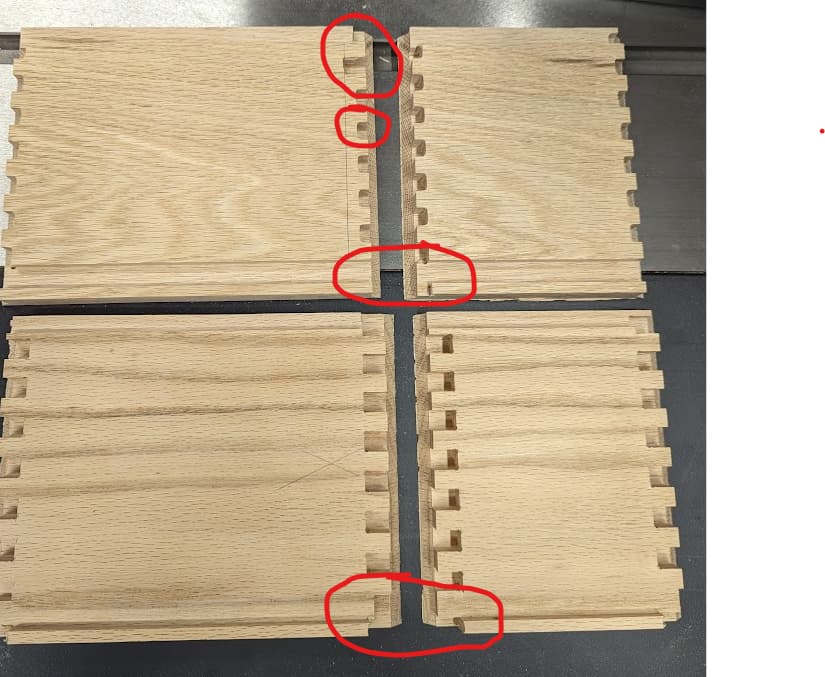
Here is a picture of the first two. On my first attempt which is the top one I circled where I chiseled out one box to show how big it needed to be compared to the others. I also circled how I did not clear any thing at the bottom to allow the corner to come together as well.
The bottom ones are my second attempt where I fixed the length of the box joints and increased the amount I cleared at the bottom but in this case I cleared too much. I have an open square. This would not be a huge deal since I could fill the open square with small feet but I wanted to make the boxes a little deeper as well to give a little more room for the box to come together. There was just a small gap on the miters.
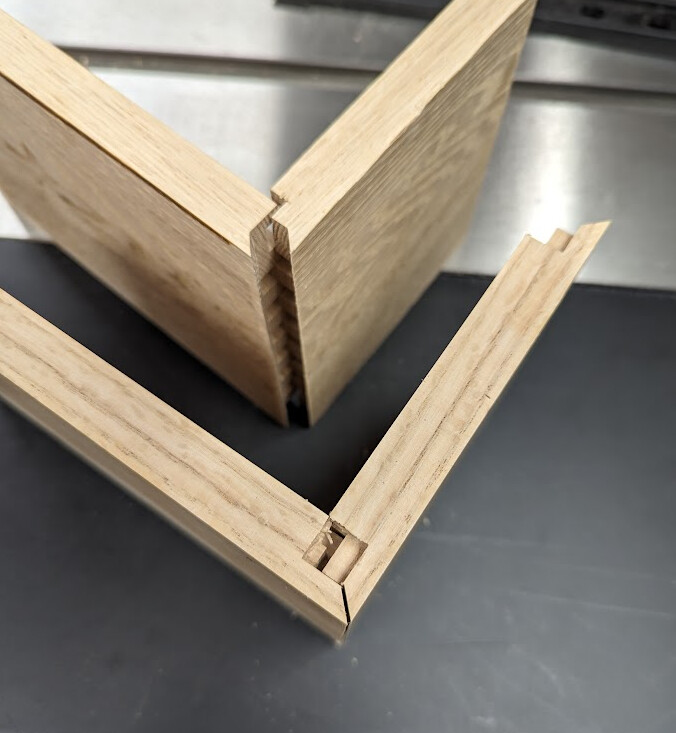
This picture is the same two attempts and showing how they actually come together. This is the view from the bottom.
The next attempt I have not pictured because for some reason I did not follow the directions or my adjustments properly and while it was the closest yet for the fit with depth of the box joints and cleaned up the base issue, it had the distance between the boxes too far. This prevents the parts from coming together at all. I don’t know what I was thinking on that one.
I will have to try that Camotics trick too. That seems like a really good way to make sure things fit.
Thanks for all the help you provide on here and your other sites @WillAdams. I know I would not be as far along as I am in my CNC without all the help and tutorials you provide.
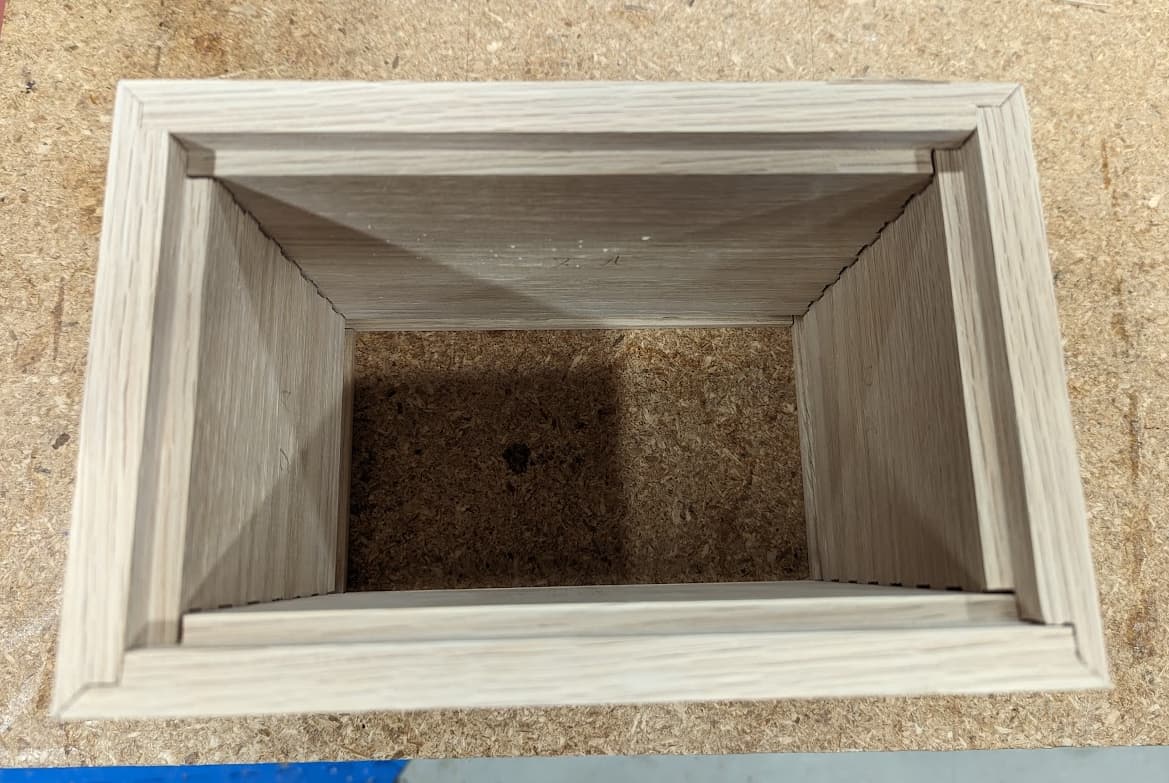
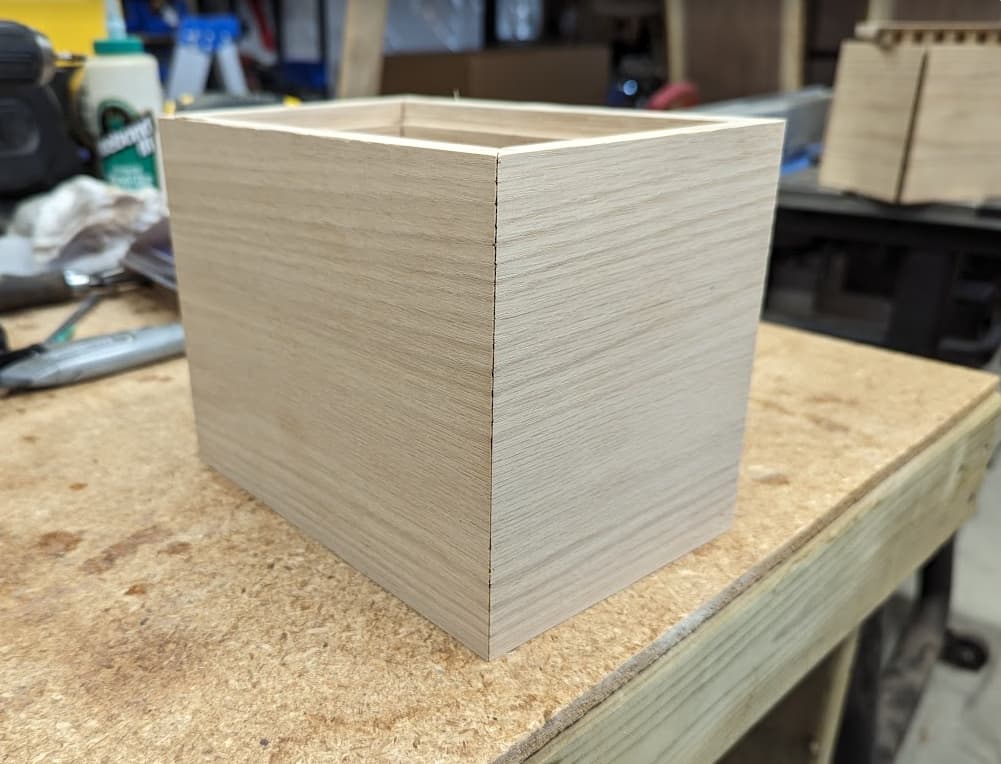
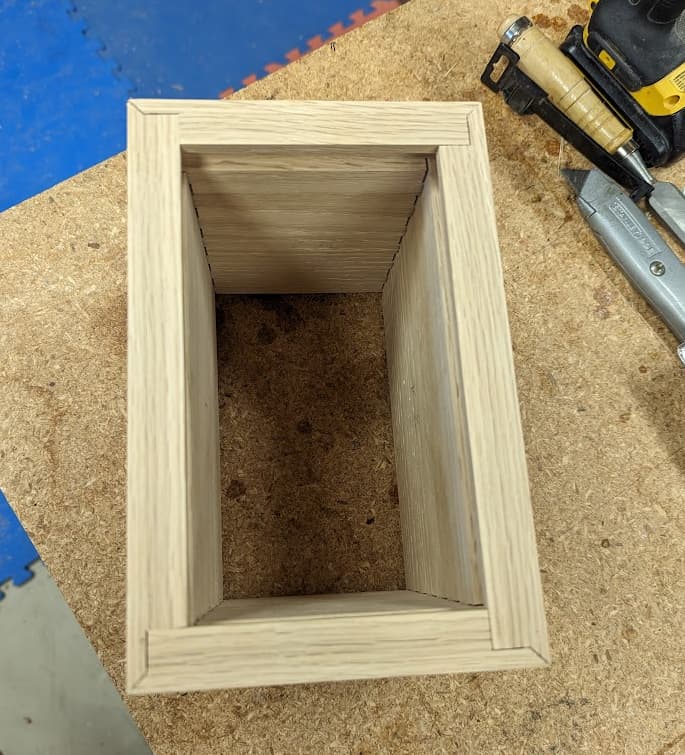
Thanks for the double check @WillAdams. I ran the carve this afternoon and it came out perfectly. here are some images of the box dry fit together. Now it is time to test carve my 3D carve for the front. When this is done I will try and write up a tutorial to augment yours with the few slight adjustments I made and the pitfalls I found along the way. On a bit of a time crunch for the actual box though and have a sale to prep for between now and then too so less time for write ups.
Top
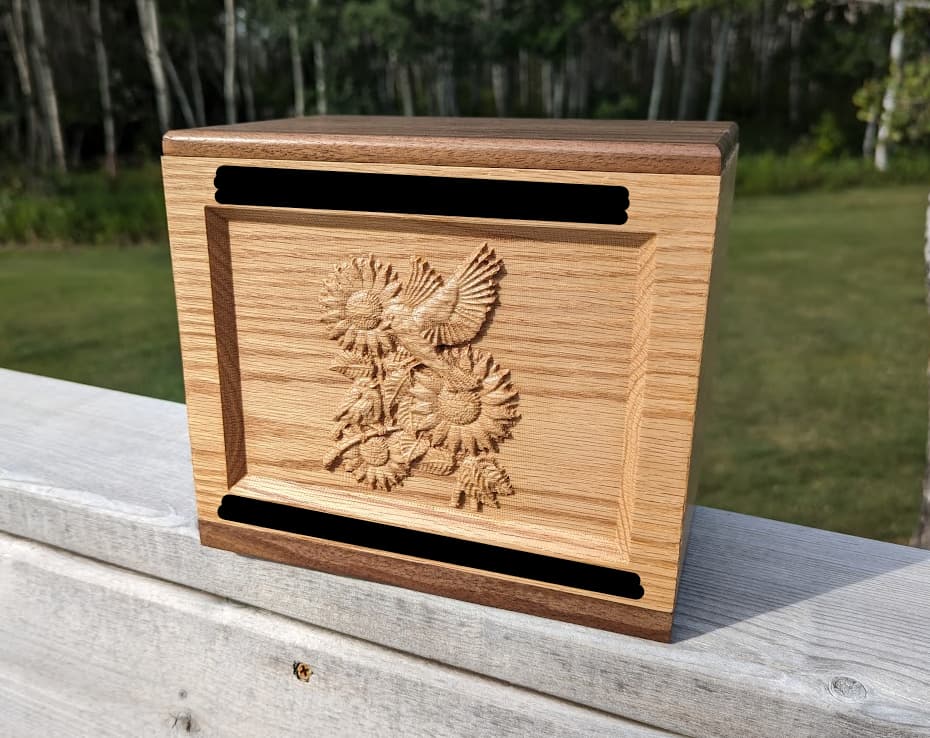
So for those who were following, here is the final urn that I made with the quarter blind miter box joint. I was asked by family to black out the personal information. This was an oak box with walnut top and bottom. My grandmother loved watching the birds at the feeder out her window and loved planting flowers so I thought a 3D carving that included both was the perfect option. Thanks @WillAdams for the help on this and I will definitely be doing up more boxes like this in the future so I will try and document my process better. Hopefully the boxes are for different purposes though.