Question for ballscrew users

I’m in the process of figuring out how to mount some ballscrews and in the interests of compact packaging it would be really nice to be able to flip the FK12 angular contact and FF12 support end bearings around like this

It looks to me from the CAD files, pictures etc. that these bearings would work either way around, does anyone who’s used them have a more informed view please?

1 Like

Works for me. I did it for two reasons, reduce the stick out required for the motor mounts (still longer than typical on .375" and .5" thick plates) and so the ball screw length can be at a common length (650mm) for the standard SO3.

The floating side is just a slip fit to hold the bearing at a variable length with-in the bore.


9 Likes

Excellent thanks Dan!

I should have remembered to go look in your thread for the details.

Did you go with your own inductive limit switches there? If so, how did they work out? Properly repeatable?

I haven’t actually shared the ball screw build/design yet, I still need to verify that I fixed a clearance issue in a design iteration before I upload these mod additions :smiley: but have been using the machine for about a year now with the ball screw supports orientated in this position no problem.
Were you annoyed as I to find that the bolt pattern and diameter are different between the FF and FK?

The inductive sensors came from Centroid’s recommended list (amazon special), I bought my SO3 before the inductive and Z-plus days and prefer normally closed (NC) operation anyhow. I can’t recall the repeatability I was getting but I can measure it soonish (my cnc computer went down and is getting repaired under warranty). I can say, as I use tool offsets that depend on Z home and tool probe, I would see less than 0.001" deviation (usually 0.0003-5") on tool offset measurements, this would be stacked repeats of the Z homing and tool probe trigger.

I would probably suggest a limit switch + Z/I pulse for a build like yours. Initial homing triggers the limit switch (inductive, mechanical, optical) and then the back-off movement looks for the first Z/I pulse on the encoder to stop and set machine home. Remembered wrong, that was Moded1952

3 Likes

How much adjustment and wiggle room did you need to leave to align your rails and ballscrews? I’ve put in some carrier plates which I can adjust about 3mm up / down and left / right. The ballnut has angle adjustment on the Y carriage plate.

I don’t expect to be moving the linear rail as that wants to be straight and parallel with it’s partner on the other Y.

Hah, I was lucky to sidestep that particular trap, the guys I bought my spindle from over here had the STEP models for the various ballscrew parts on their site for download so, having learned through mistakes before, I put those into my CAD and checked the fit.

https://www.cnc4you.co.uk/Ballscrew/Ballscrew-with-Fitted-Anti-Backlash-Ballnut-RM1605-C7-16mm

If anyone needs these in Fusion format let me know, I’ve converted from STEP and fixed some of the inconsistent surfaces to get clean bodies.

3 Likes

That sounds plentiful, I like the carrier plate for the FF/FK. With a combination of normal/standard clearance holes and slots I have about ±1-2mm of slop to help with alignment.

Something that really helped (in regard to the Y-axis linear rails and trying to make it coplanar with the 4 mounting points), as I replaced the steel frame to gain approximately another 1" in clearance, I dimensioned from the bottom of the rail extrusions to the bed frame to be 3" and placed 1x2x3 blocks on each end to become my “datum” for reassembly.

Yeah, I used automation4less’s CAD models, McMaster-Carr or Misumi can be other good sources to find CAD models for common/standard parts. I just like symmetry and reduced part counts. I ended up just using the larger diameter for the clearance hole and the FK is rotated 45deg while the FF is level. One part, for all four corners, just with extra holes :wink:

3 Likes

Thanks, nice simple solution there, I can do something similar, if I believe the parts are consistent.

I think I’m going to have to buy a straight edge I can trust to line up rails properly.

“The best part is no part”

Are those closed loop steppers or servos on your machine there?

1 Like

They are KL-5080H/KL-23-2N-1000 closed-loop 3 phase 1.2deg stepper and driver. They have been a great addition, especially for the cost and easy of setup (aka no tuning [software] required).

1 Like

What are you guys using for control boards?

I saw Masso Closed Loop Motors offering…

1 Like

UCCNC software with UC300ETH-5LPT controller and CNCRoom UB1 break out board.

2 Likes

Thanks, Dan! I haven’t built your plates for the Y-rails yet and I’m considering just joining you screw balls with your ball screws.

@LiamN - How far out are you from kick off?

3 Likes

@DanStory
Hi Dan,

If I recall correctly it took you quite some time to set up ATC spindle on your Shapeoko. I might be wrong but it seems like the UCCNC requires a lot of tweaking to get the tool changer setup correctly and is not as user friendly as other options available. Don’t you regret going with the UCCNC instead of Centroid Acorn for instance? The price difference isn’t as significant as when getting the Masso controller.

1 Like

I may have already started sliding down the slope :wink:

I have the extrusions on the way from Misumi and a big pile of Aluminium plate allegedly on it’s way from a local vendor. I’m presently tossing the coin between closed loop steppers or taking the plunge on a set of Delta servos instead. I’ll be able to do final drawings for Fred at BST Automation Store once I’ve stopped vacillating on motors and made a choice.

4 Likes

This is total derailing things, hope thats alright Liam.

A lot happened the year I got my ATC spindle in hand, first being I couldn’t take my CNC down at the time as I had batches of parts lined up, so that pushed things out which by that time my wife and I were expecting our first child, now 19 months old as of yesterday :scream: and as imaginable reduced my garage/shop time very considerably and still is today. So, the 2 years it took to get the ATC completely operational (not just as a manual quick tool change) shouldn’t be the expected timeframe with one with more dedicated time (and planning) :laughing:

Disclaimer:
I am not a professional, I do not have machinist or CNC operator background. This is still a hobby to me, and I am careful about any job I might pickup but 99% of the time the things I do is only of personal interest and the CNC only typically sees weekend use (less these days :P). I love software development (been my career for over 14 years) and mixing it with hardware electronics and mechanics just add to the satisfaction. So my choices are not always rational or align with someone operating a business, keeping profits, etc. Time is always money, but sometimes I sacrifice that for my joy in tinkering and knowledge.

TL;DR
I do agree, UCCNC doesn’t have ATC support baked in, it has bare bone example macros for it and some others have provided theirs that those inclined could stitch together to work for them. Masso is probably the easiest, Centroid CNC maybe next, and you do pay for that convenience, UCCNC you could walk away a bit cheaper (with their AXBB-E controller) but then maybe spend a little more time in the macros.
When it comes to support, you’ll probably get better/faster response from Masso or Centroid vs UCCNC as well.

Do I regret it? I would say more No than Yes, I wasn’t aware of Centroid CNC at the time but I am in the early stages of a Centroid Acorn build (for a bench lathe) so can share some very limited insights and opinions on that in a moment. I started from scratch for my ATC M6 (tool change) and M31 (tool probe) macros, as I had a workflow I wanted in mind and others didn’t satisfy it. You could easily use the included examples or someone’s shared version to get off the ground faster. During my implementation, I found UCCNC’s API to be … poorly designed and apparent limitations (I do however have high software development standards being a dev myself) that I had to work around as well as hit some bugs (I am running their beta version at the moment so take it with a grain of salt as I hadn’t verified if the bugs exist in the stable version).

UCCNC
What I Like

  • 6 Axis support
  • Plentiful of Inputs and Outputs
    • Different amounts of PNP, NPN, 5v, 24v supported inputs depending on BoB
  • Customizable Screenset
  • Plugins/Macros are in C# programming language (I have a lot of experience in C#)
  • Probe plugin is feature-rich
  • Default Screenset is reasonable - though little over crowded
    • There is some community Screensets that trim up the Default or complete re-skins that are nice (compared to Mach4 :puke:)

What I Dislike

  • Macros/Automation is limited to C# Macros/Plugins (sub-bullets are gripes that resolve to this)
    • Macros can only be in C# not G-Code
    • G-Code has no functional support for advanced scenarios (has to be written in C# macros)
    • #Vars are not first class, everything is stored in “Fields”, have to call “Buttons” to execute specific actions or check status/states with "LED"s which limits what you can do in G-Code vs C#
  • Plugin/Macro API is poorly designed (not to my standards) or incomplete
  • Probe plugin/screenset page is confusing and can’t call any of its probe routines in macro without calling the Screenset “Buttons” and changing “Field” values (:roll_eyes:)
  • Screenset rendering does not follow the global standards of UI layering/z-indexing
  • Screenset editor can be a little painful I would say it falls below Mach4’s

Centroid CNC - Acorn (I have very limited time with and the build is unfinished)
What I Like

  • PLC code runs on the Controller hardware
  • Industrial features and company’s background (i.e. ballscrew compensation)
  • Powerful G-Code/Macro support, everything (besides the PLC code) is in G-Code
  • Acorn Setup Wizard will auto-generate and snitch together the PLC code and Macros needed for most common CNC builds (i.e. ATC)
  • Plugin/addon support (and in .NET/C#!)

What I Dislike

  • Very limited Inputs and Outputs - you have to buy expansion boards for more ($300)
    • Couldn’t have gotten away with the 8/8 IO for the CNC router, I barely get away with it on the lathe by stacking the homing and drive axis fault inputs (which IMO don’t care for)
  • NPN only (at least for the controller based inputs)
  • Free CNC12 software is too limiting and might as well add the Pro license to your initial cost
  • 4 Axis* (not a problem for my lathe build but would be for my CNC router - I have plans for a 4th rotary axis while keeping my independent Y axis pairing)
  • “Screenset” customization is very limited (just the “Virtual Job/Button Panel”)
  • PLC code would be a little harder to write (vs having C# experience - so little bias :P)
  • Acorn Setup Wizard will no longer work in some areas when you start customizing the PLC code or Macros it would otherwise overwrite

*They have shared in the forums a 6 Axis is in the works, maybe with more IO … but more $ than Acorn

MASSO (absolutely no experience, never held it in my hand :stuck_out_tongue: )
What I Like

  • Probably the fastest way to get going
  • Tool changer support with setup wizards plus other baked in features easily configurable
  • No computer required
  • Reasonable amount of IO (Compared to Acorn)

What I Dislike

  • High price of entry plus getting charged extra for each axis, touch screen (I think they used to charge extra for the wifi too :roll_eyes:)
  • All-in-one (no computer) doesn’t fit my workflow well and would need one anyway by the machine
  • 110Khz pulse rate, this barely meets my 300IPM on the CNC Router and would severally limit the C-axis RPM when I was outweighing it for the lathe build.

In summary, I probably like UCCNC hardware (due to IO) more but UCCNC vs Centroid CNC12 software is still in the air. I have yet to actually run a program in Centroid CNC12 or write macro for it yet.

Edit:
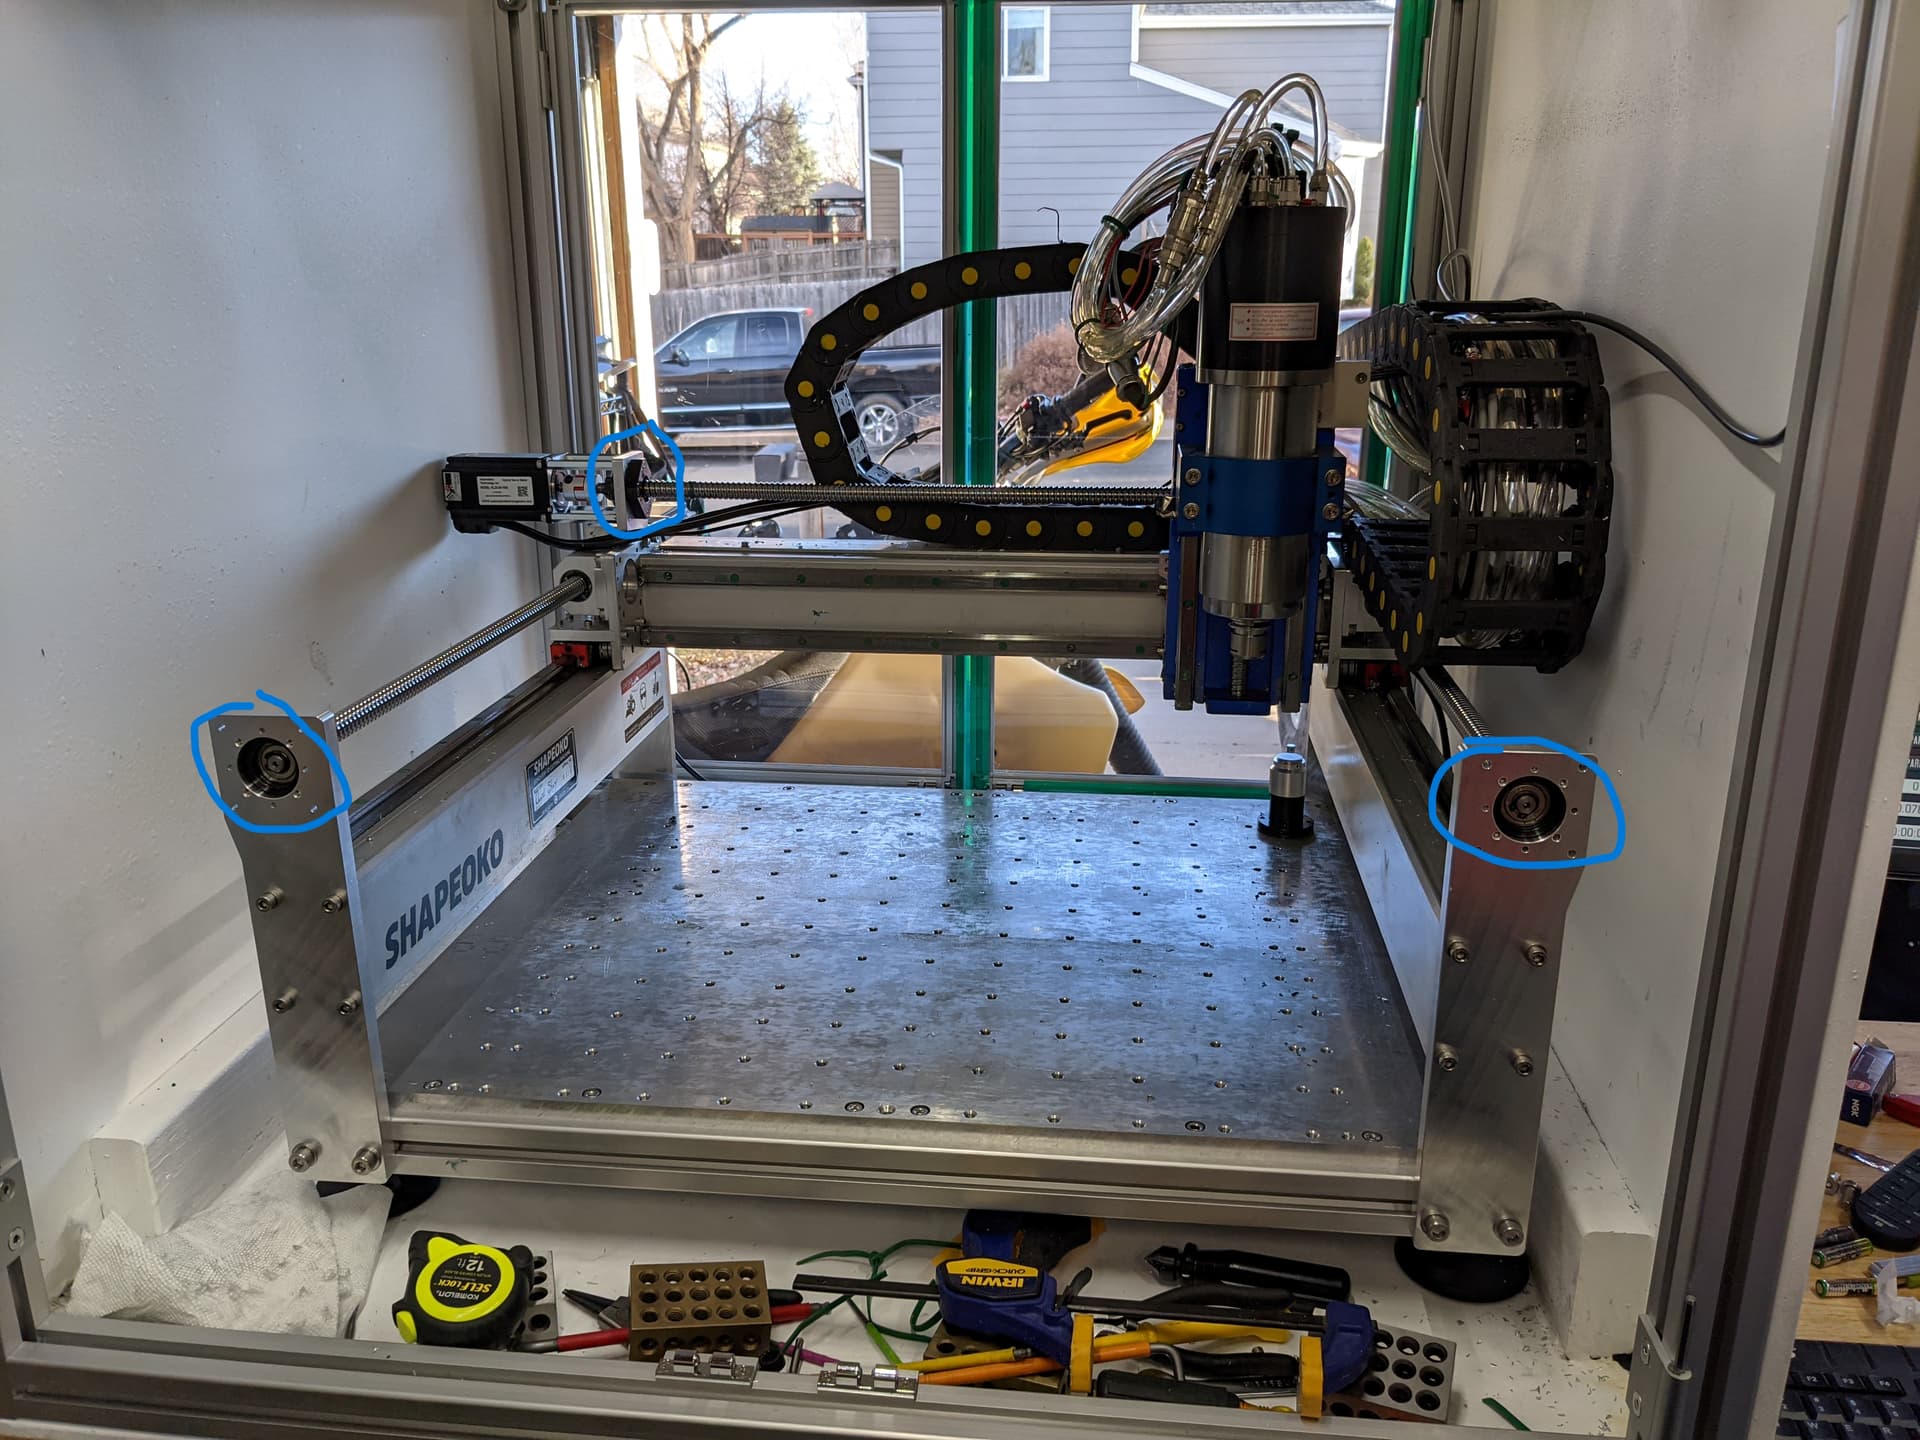
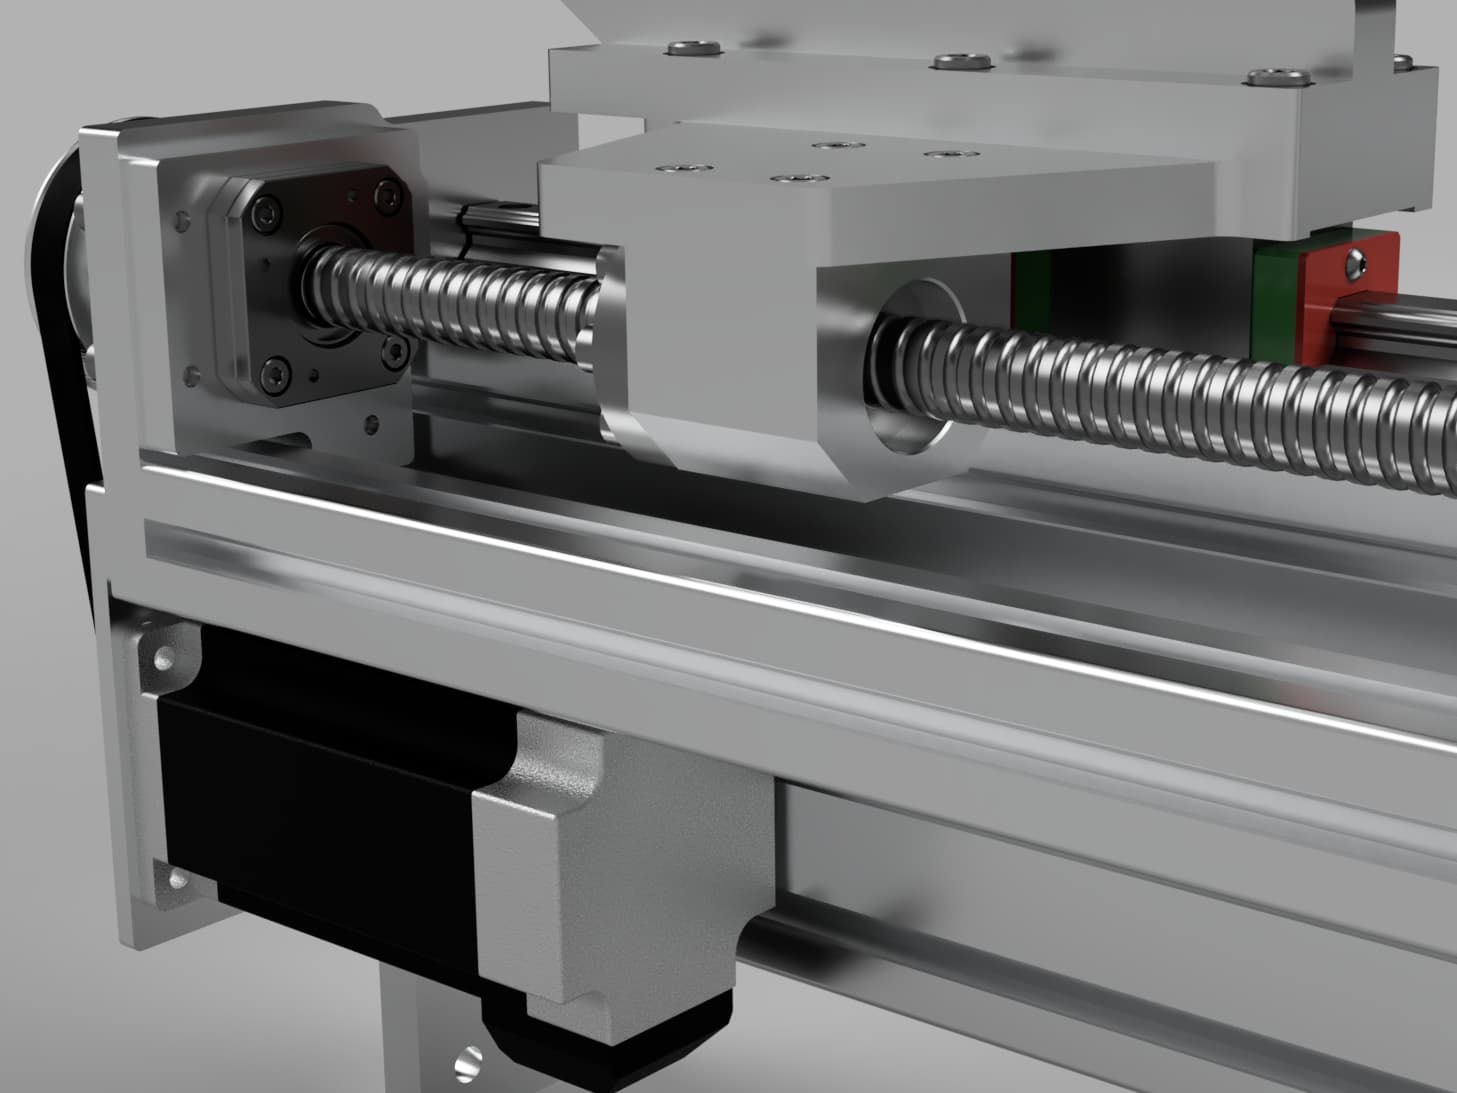
I will also note, I incorporated both ATC sensors in my macros, one detects if the drawbar is in the clamped position (tool holder in spindle), the other detects if the drawbar is fully actuated (petal is open). Using both sensors gives you a lot of feedback that can prevent damage or worse, a dangerous situation in an automatic tool change.
Masso’s documentation suggest only the clamp sensor is used, same goes for Centroid’s docs.

With documentation, UCCNC’s is fine though some things are out of date or require just experimenting to get a better grasp, if you don’t have programming background I could see Macro’s being a huge hurdle. Centroid CNC has some pretty good documentation with example schematics. Their docs can just be a little hard to find/navigate being spread out across several pdfs and the main docs are based on their original/industrial controllers and which you then have to account for the differences outlined in Acorn specific docs.
Masso’s looks pretty good as well, I haven’t had the experience of using it for a build so unsure of any shortcomings.

9 Likes

Quite alright, as ever, most informative diversion it was too.

Congrats on the little one.

I note you didn’t mention LinuxCNC in that list?

2 Likes

Also forgot to include, that my customizations to UCCNC, I have published in a GitHub Repo here GitHub - StoryTechShop/uccnc-shapeoko-mod: UCCNC macros, gcode and scripts for modified Shapeoko 3 with ATC spindle

I didn’t look into it as much as the others, I think it has probably the hardest entry to get up and running (for the first time user). I was a little lost with the hardware section at first glance and I have heard configuration is probably the biggest pain. I have used linux as my workstation in the past and I currently develop server software to run on linux (in a container engine) but my linux knowledge does not match my Windows expertise and the common applications I use on my CNC computer(s) either aren’t great on linux or just don’t support it (i.e. Fusion 360, VFD, Stepper and Servo configuration software). So it was a bit harder to put on the list to dig deeper into.

I have also heard however over the past year or so, that a particular group of people behind the Probe Basic screenset (and probably others) are working on lowering that bar as part of updating and streamlining that specific screenset. I have 1 or 2 more builds long down the road that I hope one day to get to and might have to take a more serious look at LinuxCNC.

Thanks!

4 Likes

To get back to the original question, it sounds like you haven’t discovered the wealth of information at the SYK site:

They have technical drawings, spec sheets and CAD models. They explicitly show both mounting orientations as supported.

FWIW I’ve worked through all that, both for a Mesa Ethernet card and for EtherCAT and I’m happy to help out if I can.

You’re definitely right that it’s hard though. It was a massive pain in the butt.

2 Likes

Thank you for taking the time to express your views on the popular controller options. This is honestly way more info then I expected and it will make it much easier to make an informed decision, once I decide to finally upgrade the controller on my so3.

Just as Dan mentioned, LinuxCNC seems to have the steepest learning curve and is quiet confusing at first (but I’m sure you know that), that’s also a reason why I didn’t even mention it in my original question. However, when researching controller options in the past i found this guide by Dr.D-flo, which explains in plain words how to start with linxcnc.

3 Likes

Forgot to ask. So, you’re currently not using using the 2nd Y-axis motor as a slave but rather as an independent axis? Any reason for doing it this way, other than automatic gantry squaring? Unless I’m understanding you wrong?

1 Like

It is still considered slaved, just in software vs sharing the same step/dir signals. Yes, this gives the benefit of auto squaring - I feel is much more repeatable (and easier to calibrate) vs trying to manually force the gantry by hand - which in my case is near impossible with 5mm pitch on the X/Y, 10mm is more likely easier to back drive.

Think I mentioned in another post, I use the homing back off setting per Y axis to get the X motion perpendicular by test sweeping a (0.0005") dial indicator on a granite square that is parallel on the other edge to the Y motion.

Clough42 is building an AVID Benchtop Pro with Centroid Acorn, this video at the end shows it’s homing cycle with auto-squaring

4 Likes