We just posted an update to CC to include ramping in Pro. Right now it works well in contours, and it’s a little wonky in pockets. We’re in the middle of a big update to the pocket linking code that should fix this, and, hopefully, make the normal pocket linking better in many cases.
If ramping is enabled, the feedrate is 1/3 of the feerate, or 100% of the plunge rate, whichever is higher. It’s conceivable that we’d add a dedicated ramping rate field in the tool database in the future.
Check it out at:
If you poke at @KevBarn14, he might post some of the before and after videos of his aluminum test cuts using ramping. They look pretty good.
I love the “Ramp on shape” pattern used in contouring.
The ramp starting right at the part surface could become an issue for those who aren’t super precise in setting their zero, or if the stock is not perfectly flat.
I can see this replacing the “Make the slot just a hair wider & use pocket instead of contour” solution for a fully embedded tool when cutting a slot.
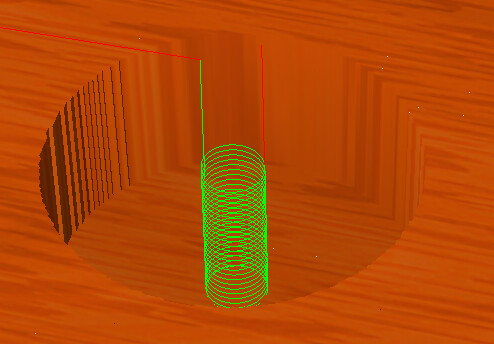
The picture above is a typical use of ramping to essentially rough the shape down to the final profile at the bottom. In which case, I would want to use the full cut feedrate for the ramp.
Although for that path I could set the plunge feedrate the same as the cut feedrate, it might be nice to have a separate ramping feedrate.
Can also be used for “hole milling”
Pocket path does some strange things, so I will wait for the next development to get critical.
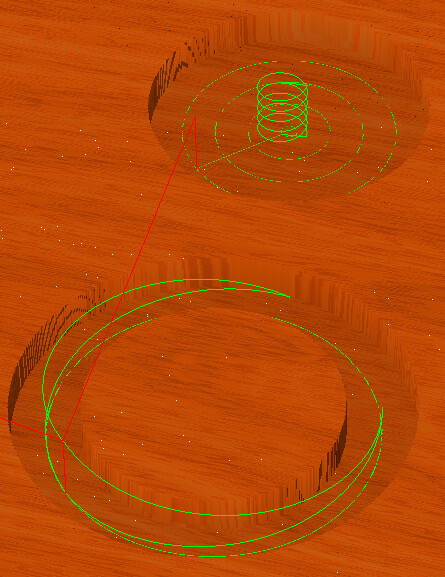
How does it decide the diameter of the spiral in the top example? Would it make sense to make this diameter the same as the stepover? Then you are essentially “hole milling” like the example above where you’re not doing much, or any cutting with the center of the tool.
I think in both of these cases the “Ramp on shape” like the contour path would be a better option.
Nice addition!! This will open up a lot of possibilities.
Pocketing prefers to spiral if it’s far enough away from the edge because that’s easier and more reliable. (Also, Winston and I always prefer a helical plunge rather than a ramp when pocketing so we went with that). The helical behavior also ensures that if you have a pocket with a very tiny central vector, the ramp doesn’t devolve into a plunge if there’s room for a helix.
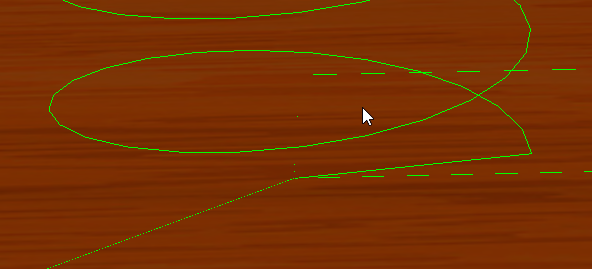
If the path is close to the edge then we have to zigzag (instead of a straight ramp) to end up in the same X/Y location that we began. If the X/Y location changed, then everything would have to relinked, maybe in a less optimal way, or we’d have to add retracts to get back to the start for the next layer.
It looks a little strange because it makes the path as long as possible and then reverses back. I can see changing it to a length that makes it look better, probably based on a multiple of the tool diameter.
The helical bore should be 75% of the tool diameter right now. We could make that a little bigger to create more clearance for chips but 90% would probably be the upper limit.
I assume we’ll also add a little extra height for the initial plunge prior to ramping but we kept the current behavior to make sure we’re not making too many changes at one time.
Understood. 75% sounds about right for chip clearance on the helix.
The zig-zag is totally OK.
The last linear move in this engage, I think will leave a ‘chatter ring’ on the part when it reaches the final depth. Would it be better to spiral all the way down to the final depth, then move in just XY to get to the start point?
P.S. These all look backward to me because I’m so used to mostly climb cutting.
P.P.S. I find myself when looking at simulations trying to determine where the tool starts & finishes.
Possible to make engages a different color, and retracts another color???
I’m not sure, I had the same thought. I ended up settling on the idea that it’s still ramping at the defined angle so it “should” be OK. it’s not a big deal to change so we’re open to feedback.
Climb/conventional options will likely make an appearance. The helix should be flipped in the mean time.
Very possible. I think the simulation view would benefit from a number of updates but it’s a big undertaking so it’s probably a V8 thing.
(NEW) New pocket linking code looks for more opportunities to connect the pocket sections.
(NEW PRO) Linear ramping in pockets tries to keep the x/y length of the ramp shorter to look better. (There’s no functional value.)
(NEW PRO) Flipped helix ramp direction.
That new pocket code could be a big win for a lot of files, with or without ramping, but it’s a big change. Please let me know if you find any part of a pocket being dropped or dangerously linked (it shouldn’t happen, but you never know).
We just reset all of the prior trials for Pro so if you’d like to play with the new ramping feature, you should be able to get a trial code at Carbide Create Pro , even if you’ve had one in the past.
(NEW) Reworked scale command. Now allows editing width and height separately and undo during command.
Normally, we’d queue this up a build with bigger updates but it’s the weekend, and we know a lot of you are going to be in the shop. Maybe this will help someone out a bit.
I noticed the scale factor doesn’t update when you change the width or height.
And greys out when you uncheck “Keep Proportions”.
How about “X scale” & “Y Scale” when non-proportional?
If I change the scale factor & hit tab or enter, the width & height update, and the scale factor goes back to 1.000. This also seems odd.
I’m kinda missing a Cancel button on that function too.
Nope, it doesn’t change because the new size takes effect immediately, making the new scale 1.0
We generally try to keep options as minimal as possible because more options makes things more confusing for folks.
What you can do is add " *1.5 " to the end of the current size if you’d like to scale that dimension by 1.5 on it’s own. This is functionally identical to a separate scale x/y field.
We did have a build that left it at the prior value (1.5 for instance), but it wasn’t immediately clear how to scale by that same value again. You could either go back and just hit enter or add/remove a 0 and hit enter. Neither were intuitive.
Since the changes take effect immediately, there’s no need for both Ok and Cancel. They’d have the same effect. The current “Done” ends the command just like cancel would have.
Seems inconsistent with other features that “Apply”, “OK”, “Cancel”, where if you cancel it returns the feature to it’s original state before the dialog appeared. Sure, I can “Done” then Ctrl-Z to undo.