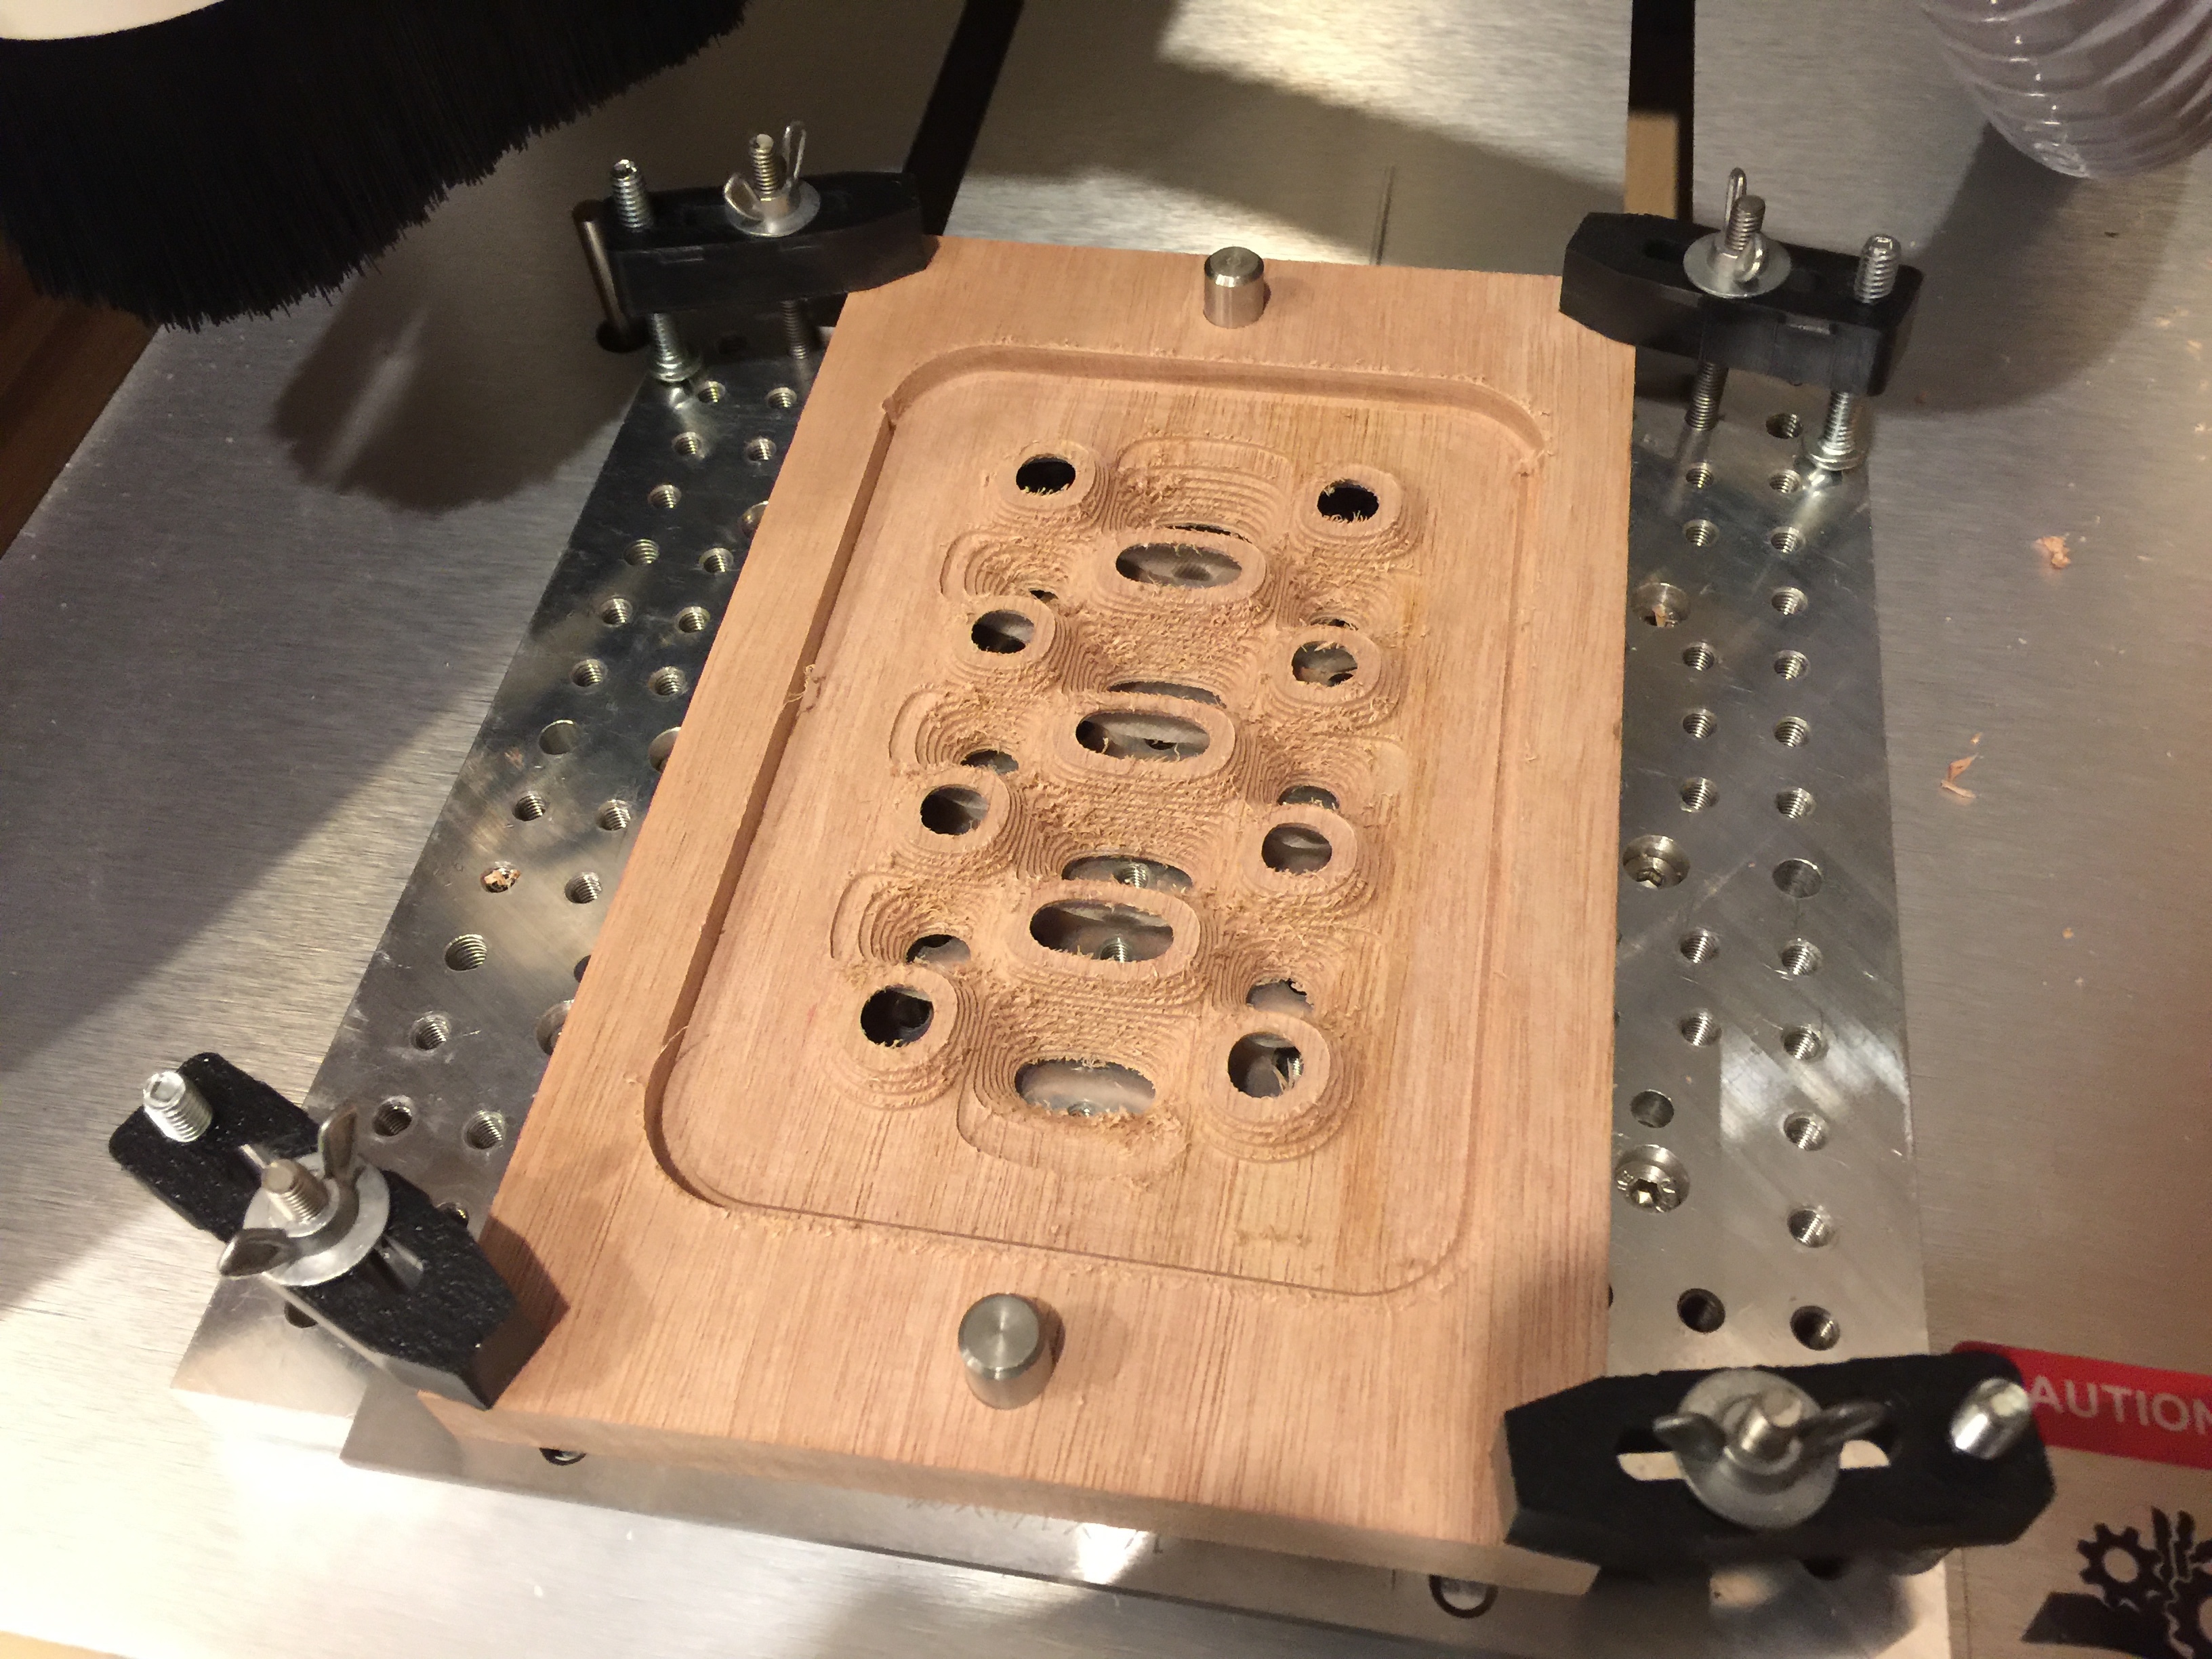
I wanted to share a way I found to be very effective and simple to do a flip job on a sea of holes bed. I found threaded pins in McMaster Carr to fit my 10-32 threaded bed. I use 1" threaded rod and two pins to create the registration pins needed for a flip job
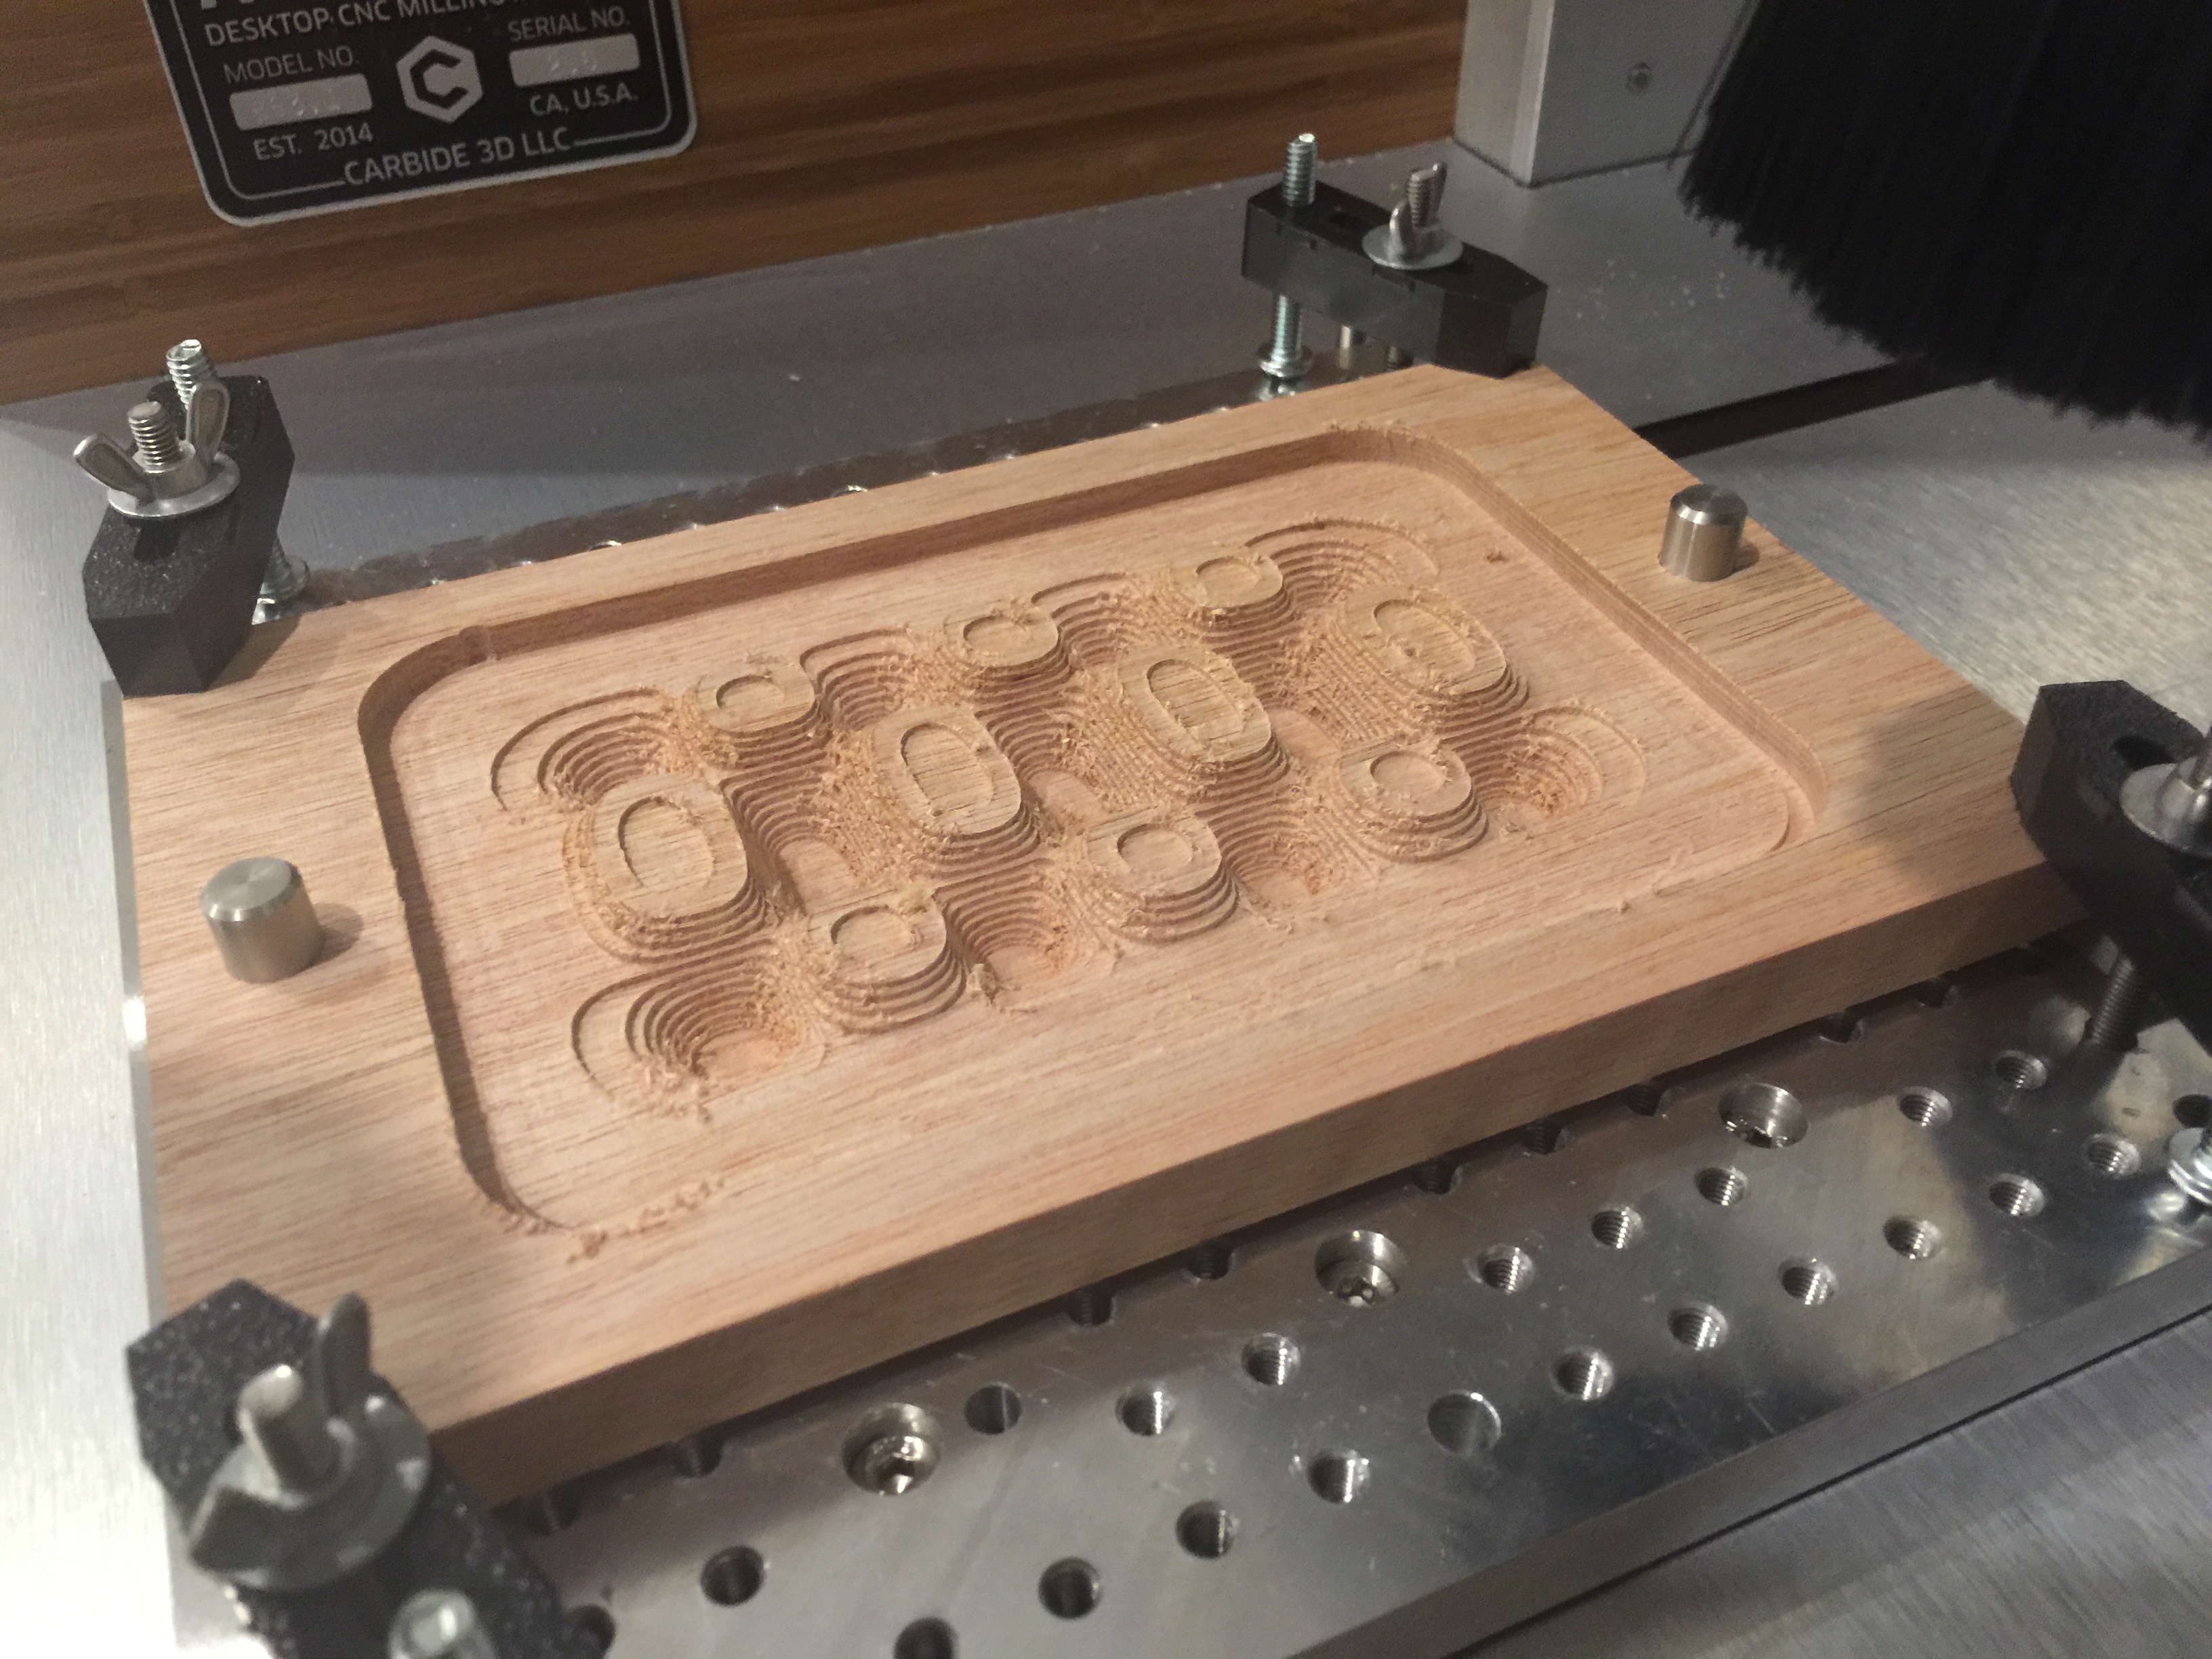
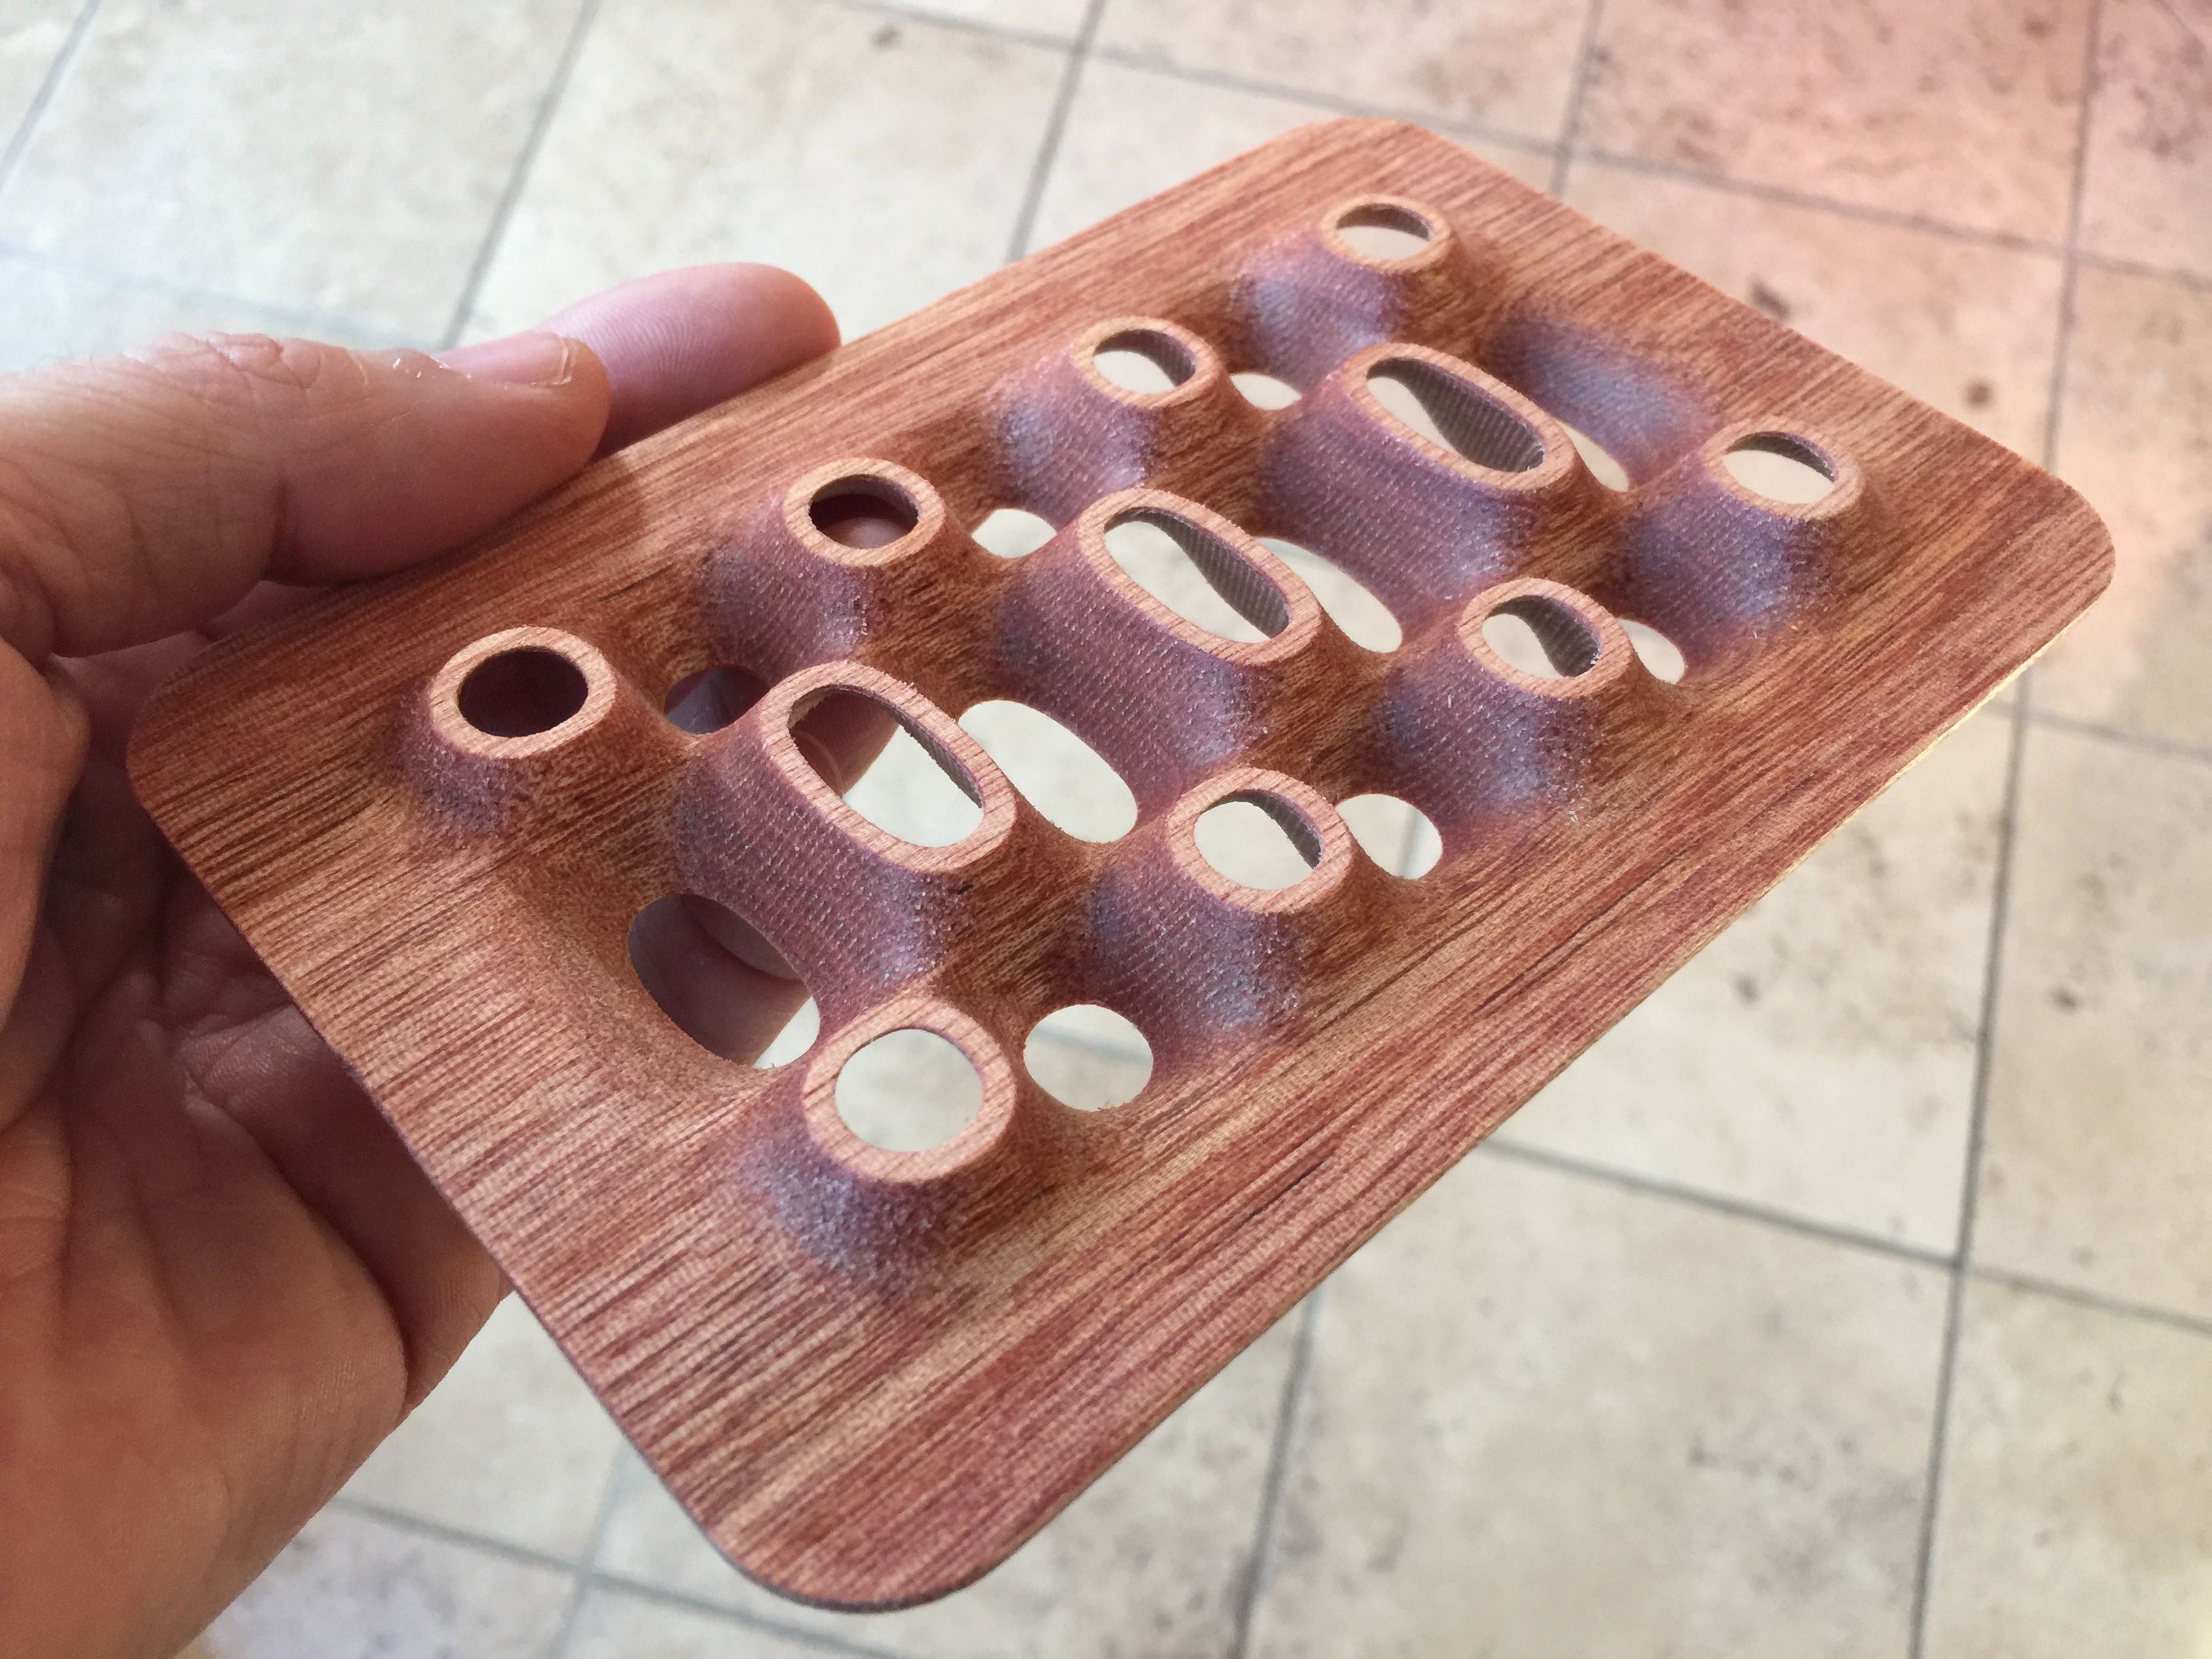
Very simple solution and perfect registration. I can now use any two co-linear holes down the Y or X centerline to use as flipping axis. Flexible and simple. This was my learning first test and I feel it was very successful. Would love to know what you guys think. Also getting very proficient at getting a very good finished surface. Fusion 360 makes it so easy to test strategies before committing to any plan. I love it. It has made my learning path so enjoyable and exciting to continue because it has allowed me to get positive results from the get go.
@mikep I also got shoulder bolts but like the idea of attaching the pins anywhere on the bed (which you can too) and slipping the piece in and out without taking the pins out. Not a big deal though.
One other question, I just looked on McMaster, but I can’t seem to find the pins you’re using. Do you happen to know off hand the name McMaster calls them?
Yes. I sent the file to John asking him for help and he decided to make it into a video. Very interesting approach although I think his parallel strategy won’t have a good finish. I tried it and ended up changing the strategy to have a smoother finish. His suggestions on plunge speed and bullnose end mill are very good and probably something I will implement.
At the risk of asking a stupid question: how do you get the two initial holes (the ones that fit the dowel pins) into the stock, with sufficient accuracy, in the first place?
But… from the photos, it looks like the holes are in place before the first pass through the Nomad. If that’s the case, that would require either drilling out the holes first (with a jig), or running an initial pass with the Nomad, atop a spoil board, to place the dowel holes.
@SkyeFire There are no stupid questions. The registration holes are drilled first using a corner of the stock as zero. Model your stock, use its center as reference and make the holes. Once they are done, these become your new reference for zero. I use the quick position center as my new x, y zero. The holes are equidistant from the center of the stock.
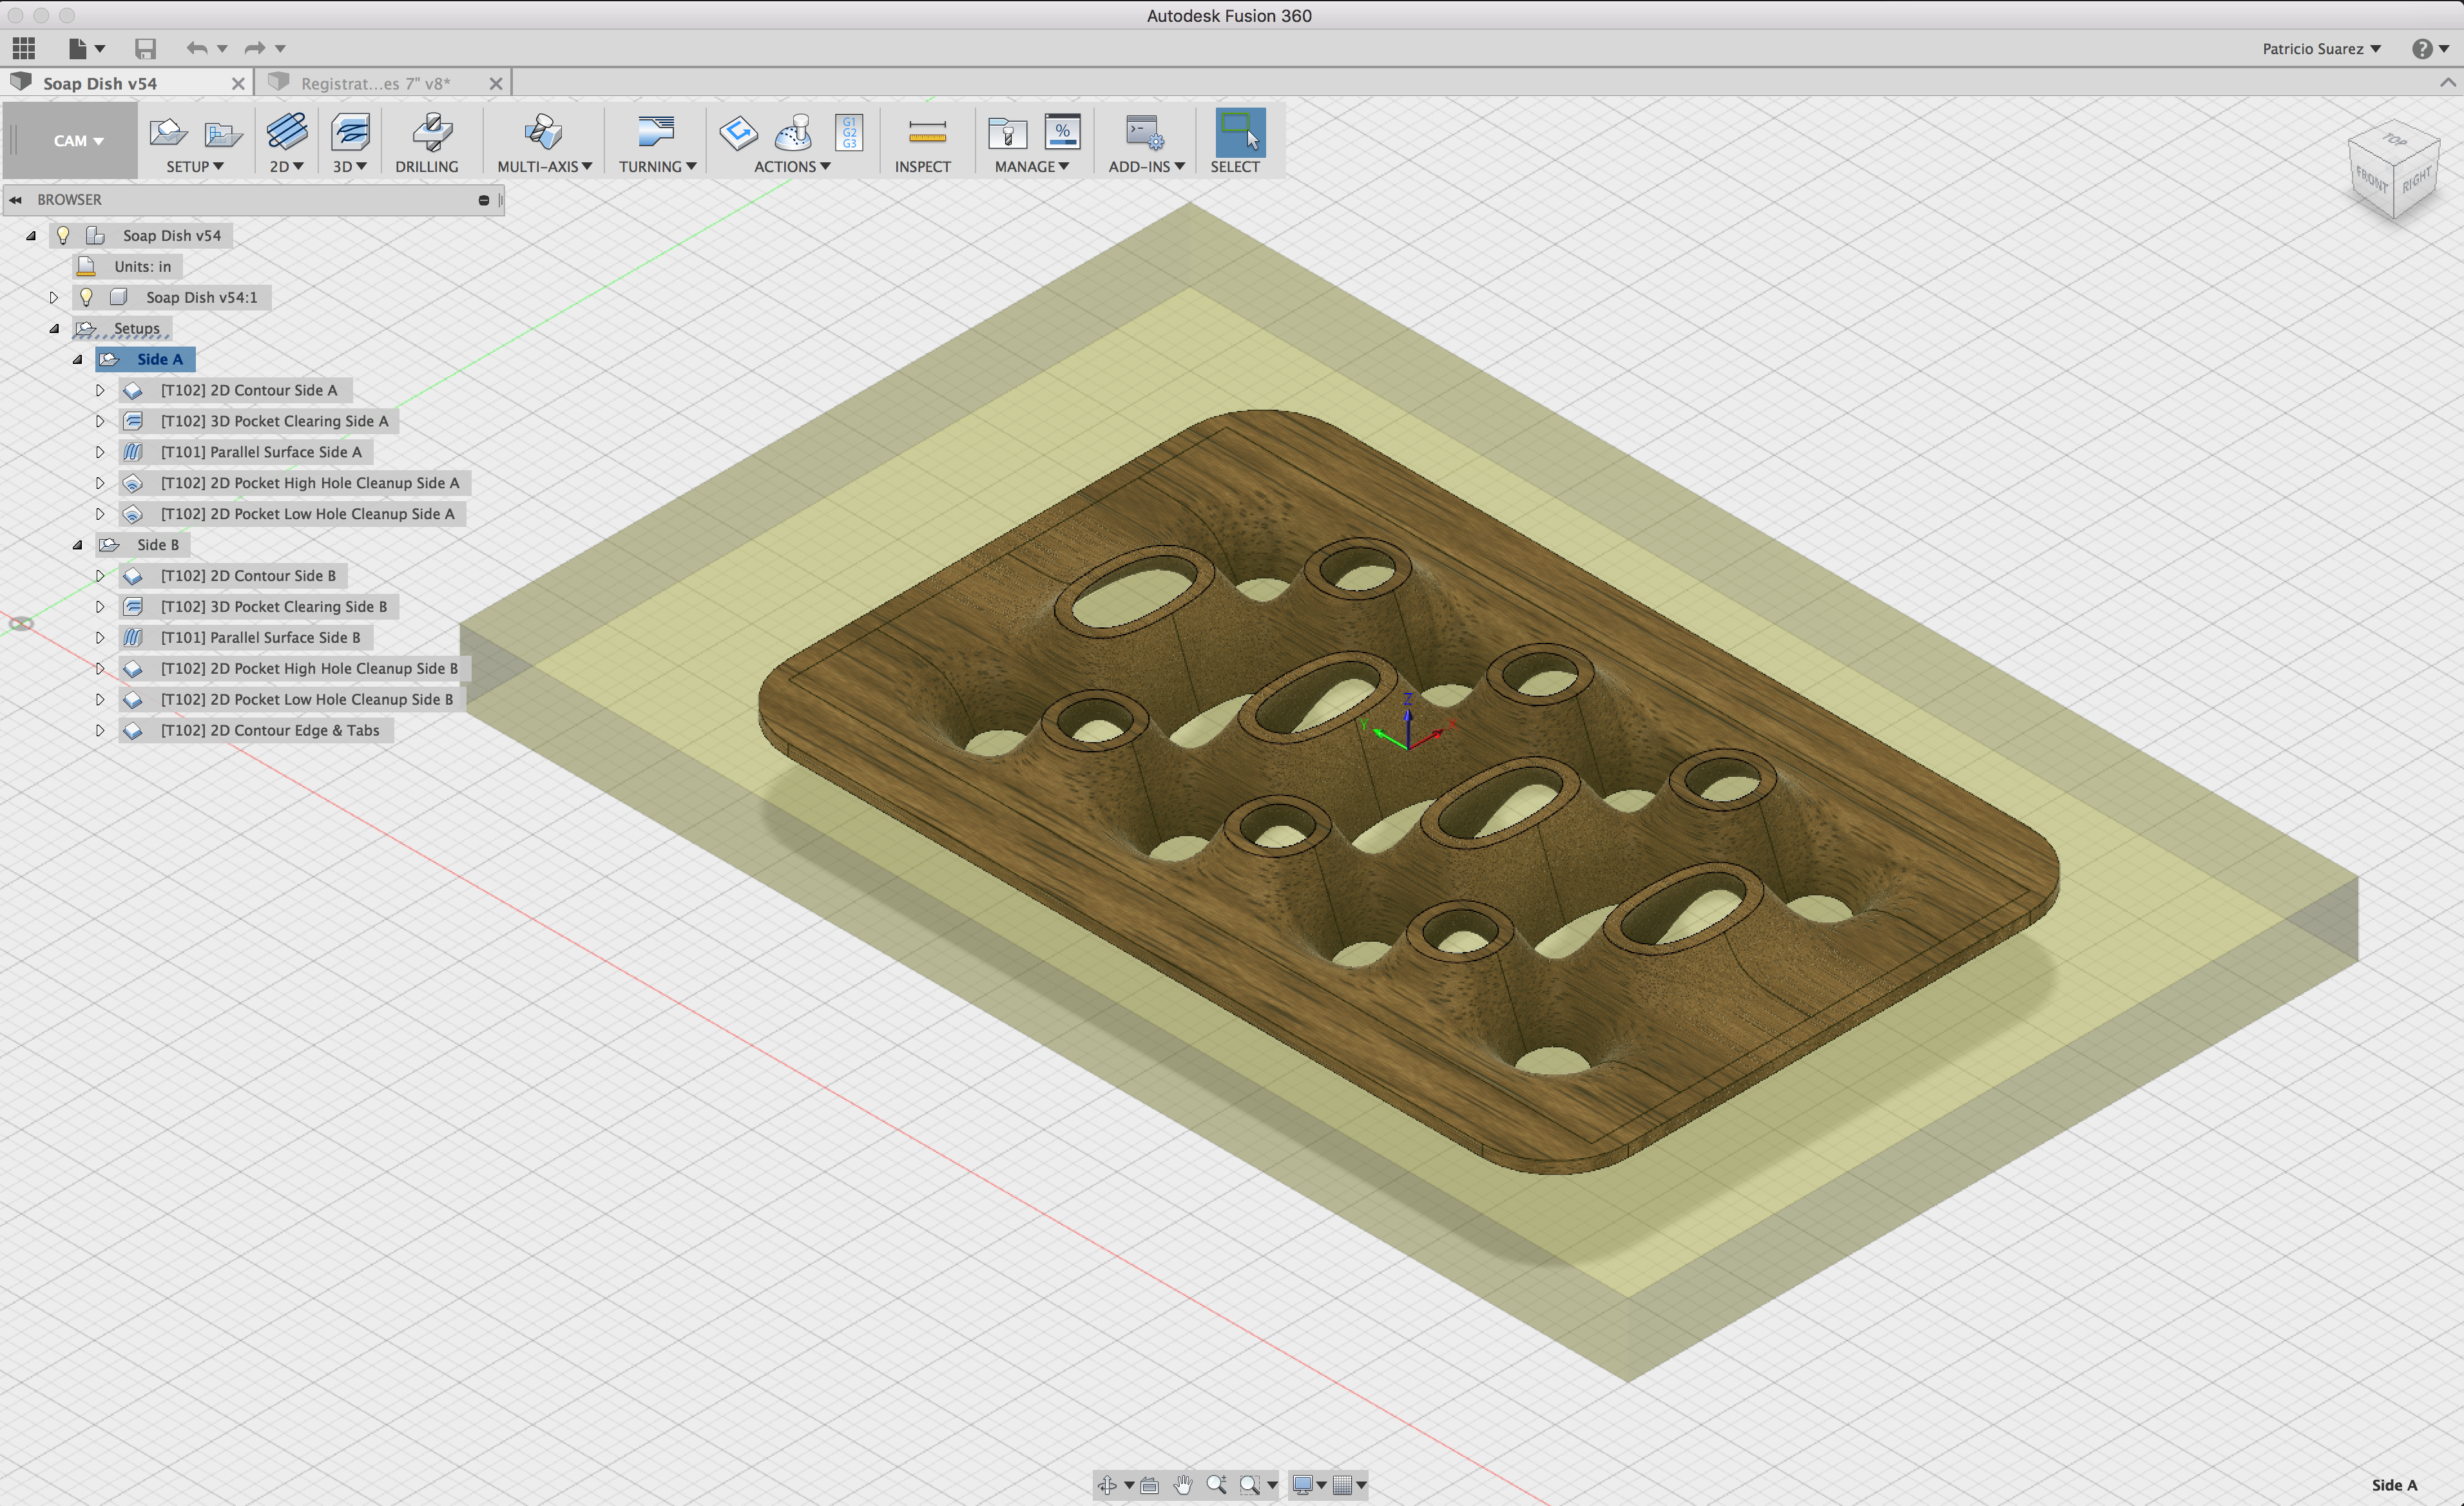
I learned a lot with this project. Being able to simulate jobs has allowed me to study different strategies and see their impact on time and quality. I highly recommend learning Fusion 360. It’s free and very powerful.