Requesting help with V Carve inlay

@Lookin4help the tip I got, and I did it pay off when I ran about 20 experiments to get glue gap tight, was to use mdf. It’s cheap (I happened to have a load from a pantry renovation). It doesn’t really tear out (but it does break off fine detail easy).

The other tip I got from one video or another was on feeds and speeds. I settled on an Amana 30°, 0.01” tip width after not being able to get a tight “glue gap” with a 15° bit. The tip was high rpm, low IPM instead of trying to hit a particular chip load. I run 20k rpm and 40 IPM.

Last tip I discovered that really saved me time post processing was to run another single V pass at full depth after completing the carve. Not only did it help with spring back of the wood but more importantly it got rid of almost all of the fuzzies.

Hopefully something in that will be helpful to you.

Here’s what I was trying to dial in before committing to $100 worth of walnut and maple plus hours in glue up time.

5 Likes

Mitch: I just happen to have a 30 degree bit from Amana. I will run this again with that bit at the RPM and IPM settings. Your project came out real nice. Thanks

1 Like

I use Fusion360 so probably won’t be of help for your CC endeavors, but I’m interested in this as I want to try the v-carve inlay technique myself.

I did want to comment on the wood price, though. If you’re buying big box store hardwoods individually wrapped in plastic, I agree with your sentiment. Do you have a true lumber yard near you? Even better, how about a cabinet/flooring shop? I go to Forest Products Supply in MN.

They have “real” lumber they sell by the board foot, but unadvertised is the fact that when you walk in there are huge wood “cubbies” with all of their cabinet and flooring off cuts. More oak than you could imagine, and a fair amount of walnut, maple, jatoba and cumaru. I’ve stacked up enough wood to make like 10 cribbage boards and been charged $10. It’s waste to them and they just want it gone.

Anyway, just tossing out that trick. Find someone working with nice woods and you’ll probably find a great source for small things. The stock I work with 90% of the time is precisely worthless to them because they’re too short to become any part of a cabinet or stair tread :slight_smile:

2 Likes

Go to youtube. Search for vetric and inlay. Lots of instruction videos. IDC woodcraft is a robust producer of these types of help videos

John: Thanks for the information about wood sources. I am going to look into that. I don’t know if you saw one of the other replies about IDC on YouTube. There is a good video there, step by step, that you might find helpful. I did my first inlay using the information from there and it (a much simpler design that my current one) worked out just fine. Lots of luck with your project.

Tom: Yes, I have been there. I made my first inlay, which turned out great, based on the instruction there. My current project is a bit more complicated and applying the same settings hasn’t given me similar good results. Thanks for your efforts to help me. Blessings to you.

@jwhendy definitely want foot stomp buying from a real wood dealer not a big box store. Even with better prices there’s still an amazing amount of walnut in a 2+" end grain cutting board, nearly 7bf.

Also, I do most of my design, even non-cnc ones, in fusion360. I have not found or been able to get a good v carve inlay recipe in F360. CC advanced V carve (once I did a ton of experiments to get the geometry right not to have gaps!) is pretty straight forward to use for inlays. I used to use CC for simple things. Now I use it exclusively for its advance vcarve.

1 Like

@Lookin4help in the fwiw category, here is the recipe I settled on.
Female/pocket:
start depth 0
flat depth .22"

Male/inlay:
start depth .16"
flat depth .27"

bits/feeds n speeds:
1/8" whiteside downcut stepover 0.06", depth 0.125", plunge 80, feed 160IPM, RPM 17,000
Amana V 30degree 0.01" tip, stepover 0.007", depth 0.2" (its a sturdy bit for lateral cutting even if the tip might be fragile :grinning:), plunge 20IPM, federate 40IPM, RPM 20,000.

I even though I am comfortable with 0.2" DoC, I run 2 advanced v cave paths for the male. The first pass with the start a 0" and flat depth at 0.16" to get the groove down to where the real V path thinks it starts. The second one set as above. Additionally, I run just the V bit path a final pass as I mentioned in the post above. I use a code splitter (GcodeSplit - Split gcode files by toolpath) to get just the V part to get rid of the fuzzies as a final pass. It takes a bit more time (since these are not fast runs on a complex carve) but way less than using an exacto blade and fine grit sanding wheel to get rid of the fuzz. In my head it saves time (I have not measure the difference so it may just be in my head) but it saves endless frustrating cleaning the inlay which is measurable in the amount of swearing.

As a side note, splitting the gcode also lets me run the V path first on the inlay. One of the videos I saw suggested this to prevent tear out of fine detail so it is more supported during the V. I don’t know if the 40IPM/20KRPM fixed it or doing the V first since I changed them both at the same time in an experiment. It worked so I stopped tinkering.

This gives a “glue gap” of .06" and .11" above the surface for bandsaw/margin. I have glue gaps in quotes because my experiments where I’ve cut a cross section has it at either unmeasurable or in the single digit thou with a feeler gauge. For cutting board, any large gap (like 60 thou!) would eventually trap moisture, encourage mold and bacteria, etc. I find good clamping pushes it closed both on the sides and the bottom. You can be less aggressive and have a bigger glue gap if your use is more tolerant of gaps under the inlay.

Also, I am going for a robust inlay since a cutting board will take abuse. No need to go .22" if it is decorative.

Sorry for the long post. Hopefully that helps you dial in what you are trying to do.
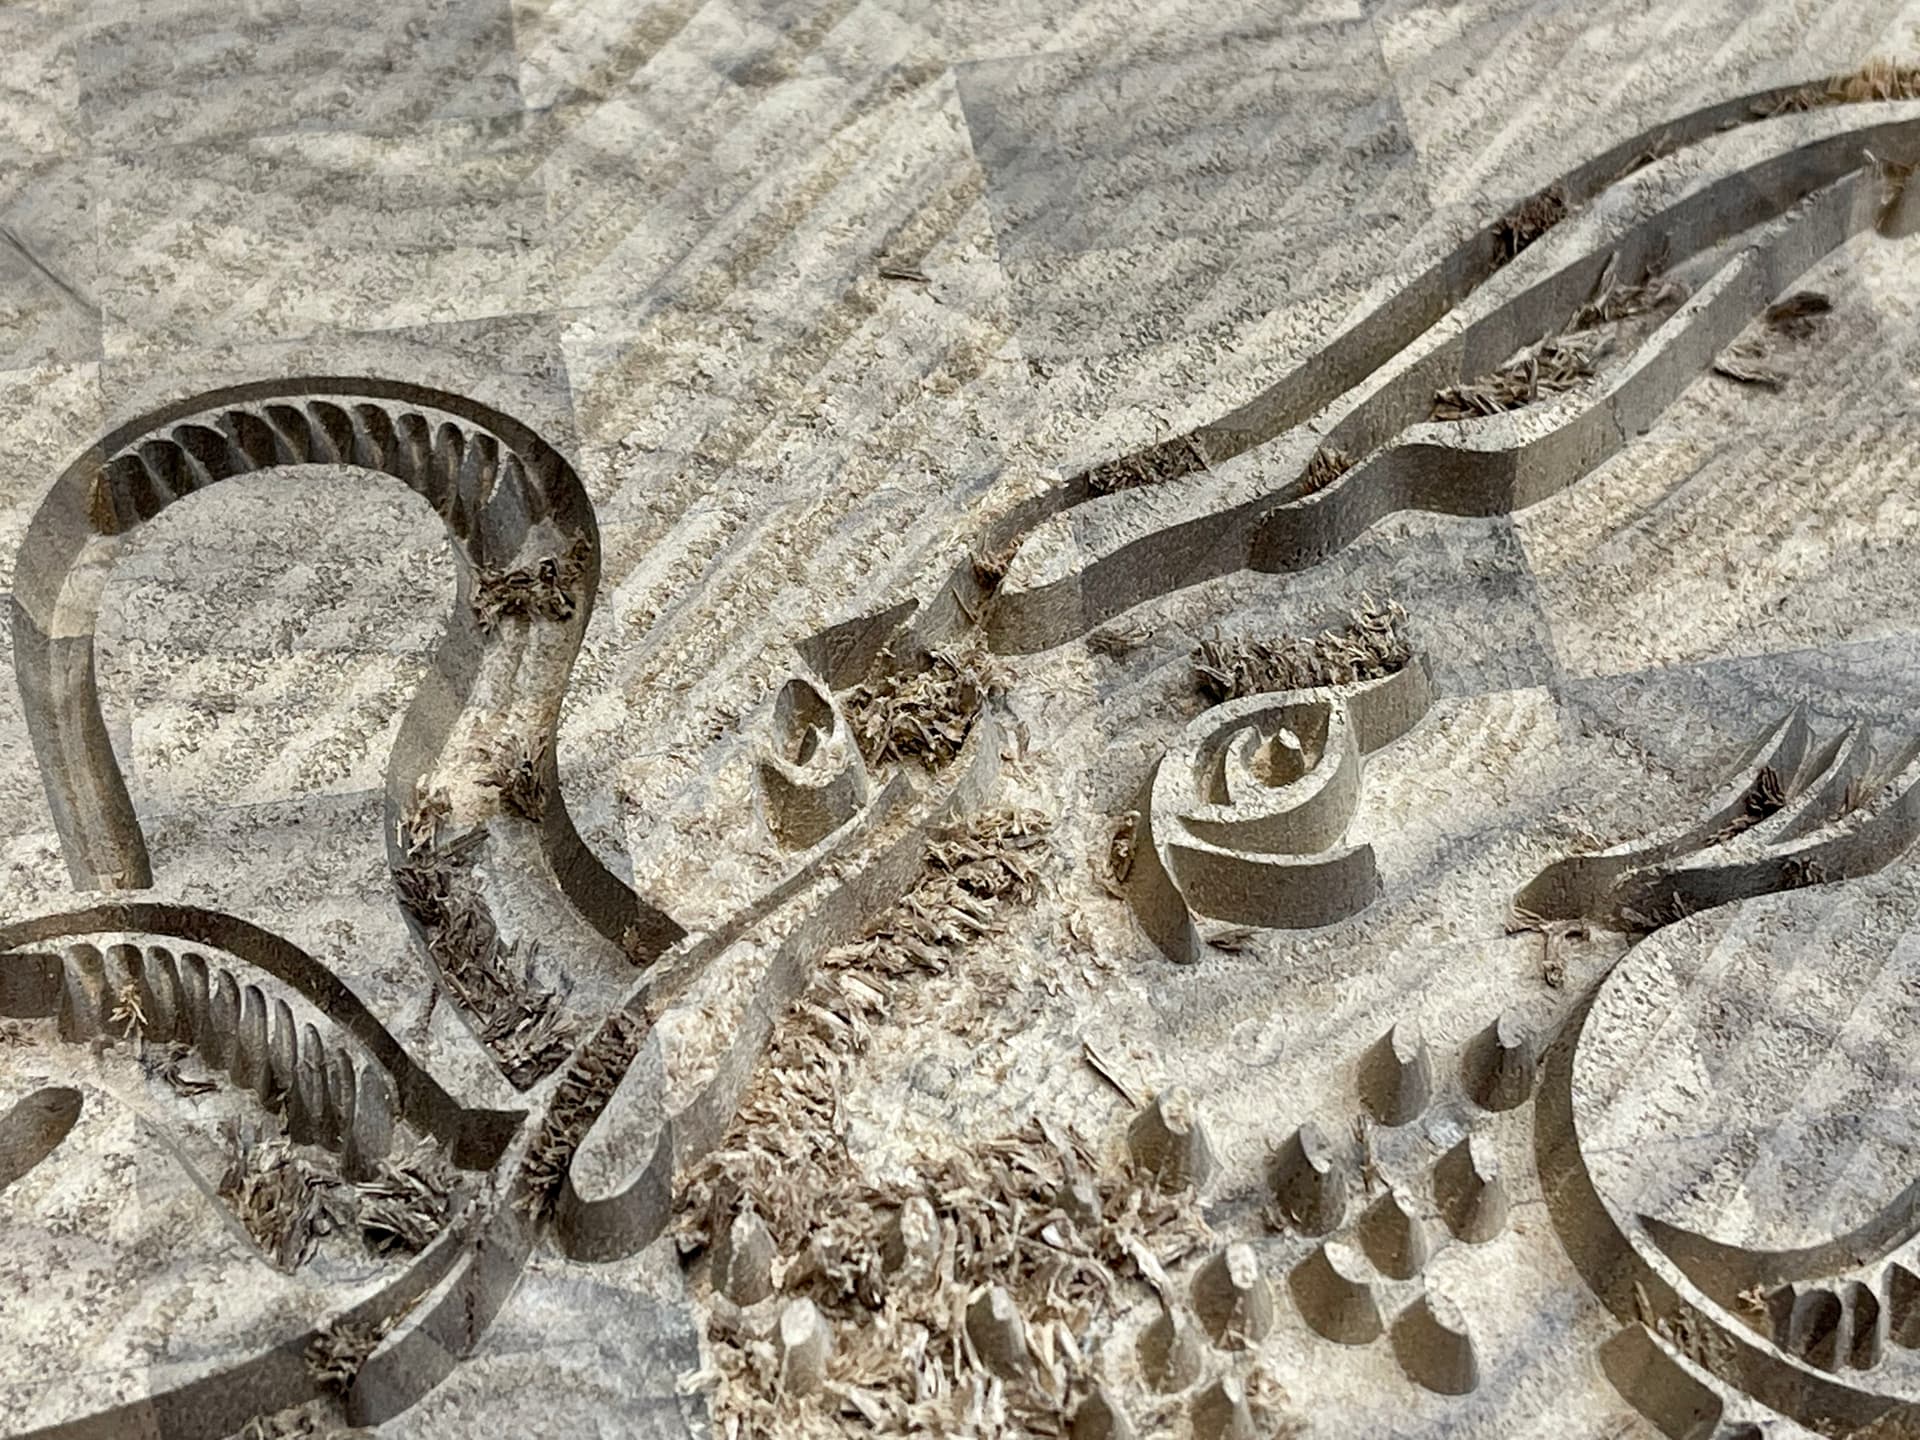
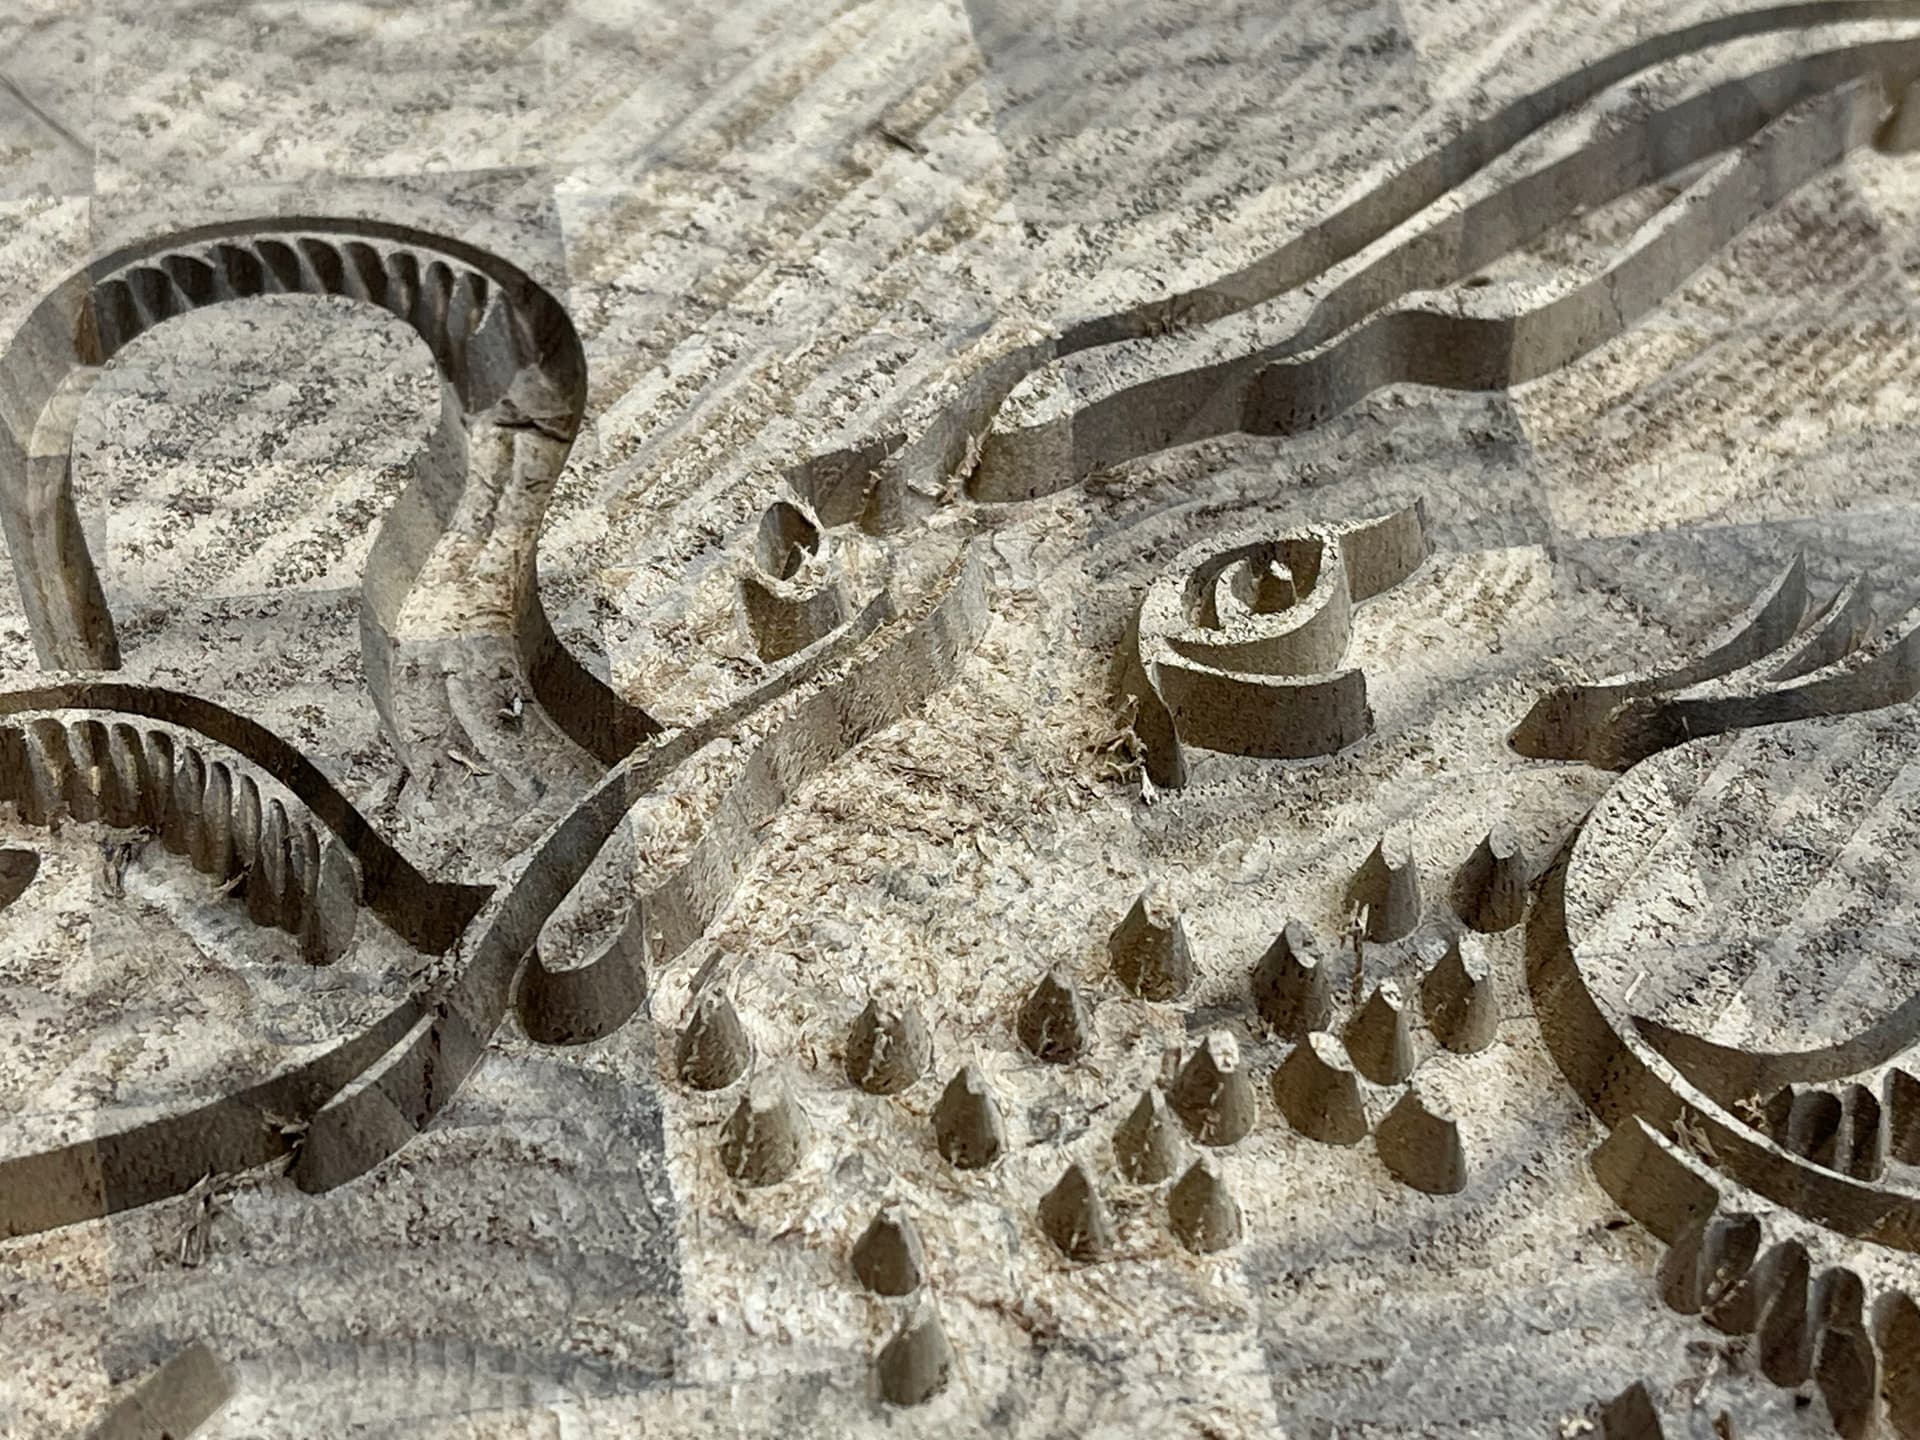
Fuzzy photos
Before

After an extra V pass

[edit to add 0’s dropped from rpm 1700->17,000 & 2000-> 20,000]

4 Likes

I apologize for the delay in responding, but I’ve had a number of issue that demanded my immediate attention so that I am just now getting around to responding.

First, I’ve changed my layout to make the letters and art design bigger in the hopes that some of the issues with letters “a” “e”, “i”, “o” don’t happen.

Laying out the project isn’t hard. I can change the feeds and speeds event the male and female start and finish depth I can do. However, the gcode splitting is way over my head. If I were to send you a copy of my file would you be willing to doctor it according to your specks?

Even is you cannot doctor my file I am very appreciate of the help you’ve give me.

Blessings

@Lookin4help
First, happy to split for you. At the beach today. Will be home tomorrow and can do it.

Second, you might want to give it a try. The website is straight forward, and will get your splits in three clear steps.

  1. Open the page GcodeSplit - Split gcode files by toolpath. (There are two check boxes for options. I leave them unchecked. )
  2. Drag and drop your file onto the “choose file” button on the upper left (or you can click the button and navigate to your file location with a standard file open window that pops up. )
  3. Your splits will appear under the choose file button. Click each one to download. They will be named something like “OriginalFileName-BitNumber.nc” where bit number is whatever number your clearance bit and V bits have from your g-code, not the manufacturer’s name.

Simple three step process! Give it a try. If it doesn’t work, I will do it Monday night if you post your g-code here, send me a link, etc.

Finally, this is not necessary! Splitting out the V bit cuts let’s you change the order as well as have a final cleanup pass…and to emphasize, is not required to get a good v carve.

One last point, @fenrus’s splitter takes g-code, not carbide create files. Assuming your using CC version 6 or earlier, output your g-code as you normally would and share those, not the CC design file itself.

If you are using CC7 (which I think is still in beta test versioning) you won’t be able to export g-code unless you have the pro version.

Mitch: You are very kind, however, I think this project may be just too much for me. I was told the letters and logo might be too small so I went back and redesigned things. The cut time was going to be around 4 hours so I did some more design work and got it do to about and hour and a half (for the male side). Went to my workshop to test cut in some MDF just to see how it would turn out. Was using an Amana 1/16 down cut end mill to do some clearance, ran it at 18,000 rpm, and 35 imp, at a depth of .3 inches. It made several cuts just fine and then suddenly snapped. Bottom line is the project is getting a bit expensive and stressful so I think I am just going to junk it. You have been a consistent help and I can’t tell you how thankful I am for that. It’s been the bright spot in the project.
I hope you are having a great time at the beach and not getting sun burned.

Blessings,
Mark

This will extract your G-Code from a V7 .c2d if needed. CC PRO not required: https://my.carbide3d.com/extractgcode/

Mark-

Happy to help!

You’ll get there. I found that there is a tremendous amount to learn no matter one’s background before getting into this. It can seem daunting at times. Taken in bite size chunks, we all get better with time and experience.

I snapped three bits in my first three days.

I’ve been doing wood working for a few years, digital design longer, and the only bits I ever snapped were tiny drill bits. Before using my cnc, I recall reading about people breaking bits. I could not imagine snapping a bit in either a handheld router or at the router table. Something have gone seriously wrong for that to happen. I wondered how they did it? Must be user error. Did they not understand what they were doing? Total ego on my part. I was doing something very knew and assumed I knew better. My first bit snapped before I had completely set up the machine. While I was trying to find the perimeter to put in my wasteboard, I set the bit to just touch the surface and manual drove at full speed into a hump in the low quality plywood I used for a surface to mount the MDF. Second bit, zero’d off the wasteboard on a previous project. Did not rezero off the stock for the next. Drove it an inch and a 1/16 into the stock and snapped it. Third, same story but did not reset x-y between projects and drove it into a stainless steel screw holding my fence to the wasteboard.

All vivid reminders that this requires both an understanding (books, videos, forums) and hands-on to improve my skills. While you may see the snapped bits as driving up the costs of a particular project, I offer an alternative view. It has been a part of the cost of learning to operate this machine and make my designs come to life. Bits have been a consumable for my on-the-job training…when I look at it as an investment in my education and less like a stupid mistake driving up my project costs, my stress goes down. The stories we tell ourselves are important. Here’s toast to our parallel paths of learning and making.

I look forward to seeing your next project!

Thanks,

-Mitch

PS the beach is a delight and no sun burn!

1 Like

Similar advise is “How to eat an Elephant, one bit at a time”.

1 Like

Mitch: Thanks for the encouragement. I also want to let you know that the maker of the bit I broke explained that my IPM was too slow (can’t figure that out), they are sending me a free replacement an a chart that should help me computer chip load, etc. so that hopefully I don’t break the new bit. So, I do feel encouraged. I am glad there is no sun burn and the days are good.
Blessings,
Mark

You’re rubbing away stock rather than cutting it. All that rubbing heats the endmill. The heating of the metal weakens it, so it breaks.
Almost always better to machine faster while taking less material per pass.
You’re cutting a depth almost 5x the width of the endmill… Without fine control over toolpaths, the typical recommendation is no deeper than half the diameter of the endmill. In MDF, with a 1/16" cutter, I’d probably start at a .08" depth with a feed of around 100mm/min.

1 Like

Neil: I just posted a question that I should have probable directed to you, but I’ve got so many irons in the fire that I’m having trouble keeping track. The title of the post is feed, speed, plunge, etc.

This topic was automatically closed 30 days after the last reply. New replies are no longer allowed.