I am a bit hesitant to ask for some help, but I’ve reached a point where I have nowhere else to go so I am swallowing my pride. For the past 3 months I have been attempting a V Carve inlay project that I just can’t seem to get right. Oh, the preview mode looks marvelous, but the actual cuts have turned out nothing like the previews.
I’ve sought out help on this project and these are the three responses I have received:
You are attempting a project far too advanced for where you are. You need to work on project at your level of competency. (I have done one V Carve inlay that turned out wonderful. This project may be over my head, but if a person doesn’t reach up, he never moves up, and sometimes you need a hand up).
Your chip load is quite aggressive. By this I presume my feed/speed is too high. (If so, where should it be and how would I find that. I can only say that I am using the feed/speed that manufacturer of the bits recommends).
I’d be glad to help . . . at a rate of $95.00 an hour. (If I was working and I was making as much as a physician or an attorney maybe I could afford that, but I am not).
At this point I am wondering if there is someone out there who has been where I currently am and would be willing to take a look at what I am attempting do to and give me some very specific recommendations on what I need to do, changes I need to make, i.e. different bits, different start depth, flat depth, feed speed or anything else.
I wish it were possible and don’t understand why it isn’t possible to attach .crv files so that people could look at thing intelligently and make comment. I am more than willing to share those files if someone is interested and knows a way to do it.
I can tell you are frustrated but what exactly is the problem. You replies in your post dont explain what is wrong or how to fix it.
If you are trying to do an advanced vcarve and coming out with ragged edges or something like that we can help.
Please define your problem so you can get some help.
As a primer for a advanced vcarve inlay you start with the female pocket. I have had success making the female pocket .20" deep. The Male part of the inlay should start at .1" and maximum depth of .20 inches. The reason the male part starts at .1" is that makes the male plug slightly smaller than the female part so you can get the male part to go into the female part deep enough to be glued but have a small space at the bottom for excess glue to go.
When you get your parts cut you apply glue and put a board over the male part of the inlay and clamp it down very good. After the glue dries some people use a bandsaw to remove the material that is proud but I just use a fly cutter and cut it down to the surface and then about .001 below the level of the female part of the inlay.
Please define your problem and ask any questions you want. The forum is friendly. The replies from above done sound like they came from this forum but if they did sorry.
Attached is a project I did a while back. The project was a bench with someone’s name carved and inlayed. See if downloading these and looking at them help. This was saved in version 652 of Carbide Create.
We’ll need to know what you’re currently doing to recommend changes.
The typical solution is to simply add the file to a compressed zip file and upload it. You could also just change the .crv extension to .nc or some other allowed file type.
Did the inlay you were asking for help on a couple years ago work out?
If you have a google account you have access to google drive. Open the google drive and upload your file. then right click on the file and share to everyone that has the link. At the bottom of the dialog box hit the “Copy Link”. Then paste the link in a reply and your file will be available to anyone that has the link which is everyone on the forum.
If you dont want the entire forum to see the link then send a private message to a particular individual on the forum. Paste the link in that PM.
In addition to posting your crv file (as a zip file as Neil mentioned), also tell us what material you are using for the job. Some woods are just not suitable for good v-carve inlay work (I’m looking at you, pine!), and sometimes success boils down to using a different material.
The pitfall there is that endmill manufacturers don’t know what class of CNC you will be using their tool on, and they tend to provide values for industrial-grade very heavy and rigid machines (i.e. they tend to spec the highest load their tool can support, assuming the CNC can support it). On a Shapeoko, sometimes you need to dial down those recommended settings, so this is probably what people were commenting about. A good starting place for adequate feeds and speeds is CC’s tool library/recommended settings, and then experiment to push them further. Or ask here.
Once we can get a look at your file (also, please post an example of the poor results you are currently getting, don’t be shy we won’t judge) I’m sure there will be many folks here who will advise.
I’m also generally interested in the advice on this one. I have not attempted a v-carve inlay yet but it’s definitely on the todo and I’d rather learn from your mistakes than my own
To all of you who replied, thank you. I will try to respond to you all here.
Someone asked if I had any success on a previous project and the answer to that is yes. I made a beautiful chopping board out of maple with and inlay of a sailboat silhouette made of walnut. I watched a YouTube video on making drink coasters with inlays to learn this. I used the same cutting tools, the same feed/speed, and cutting depths for the male and female on the current project that does not turn out.
Someone mentioned cutting in pine. If I had unlimited resources AND could find maple and walnut I would do my test cuts in those. Wood is getting to be like gold it is so expensive and that forces me to do test cuts in pine and afterward if they come out I then move to the wood I want my project to be in. For the current project I am wanting to use maple and walnut again.
Someone asked for more detail. The way to do that would be to give you the files so you could open then see exactly what I’ve attempted. That person also suggested changing the file extension to one that could be attached and I have done exactly that. You should find to files with the extension .zip, but they are not zip files. To open them you will have to change the file extensions back to .crv and there you should be able to see the design, the tools, the setting for the male and female cuts and preview what the software says things will look like (but it lies and if you’d like to see what the actual outcome looks like let me know and I will upload actual pictures of the results.
It’s a set of VCarve (crv) files with their extensions modified to “.zip” (as Mark mentioned in his post), renaming them to crv works.
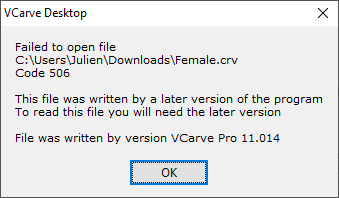
I wanted to have a look, unfortunately they are VCarve 11 files, and my VCarve 10 version won’t open them
Someone who runs VCarve 11 will hopefully be able to take a look at them.
That said, coming back to my earlier comment on pine:
I fully understand the financial constraint, my point was that by doing so you may be creating problems for yourself that would not exist in the final wood (maple/walnut) due to the tighter grain. Similarly, feeds & speeds that would work for pine may not work so well for harder woods.
Based on the size of the piece of wood I am working with, to make things any larger would mean two lines of text and a larger image. The look that produces isn’t very good.
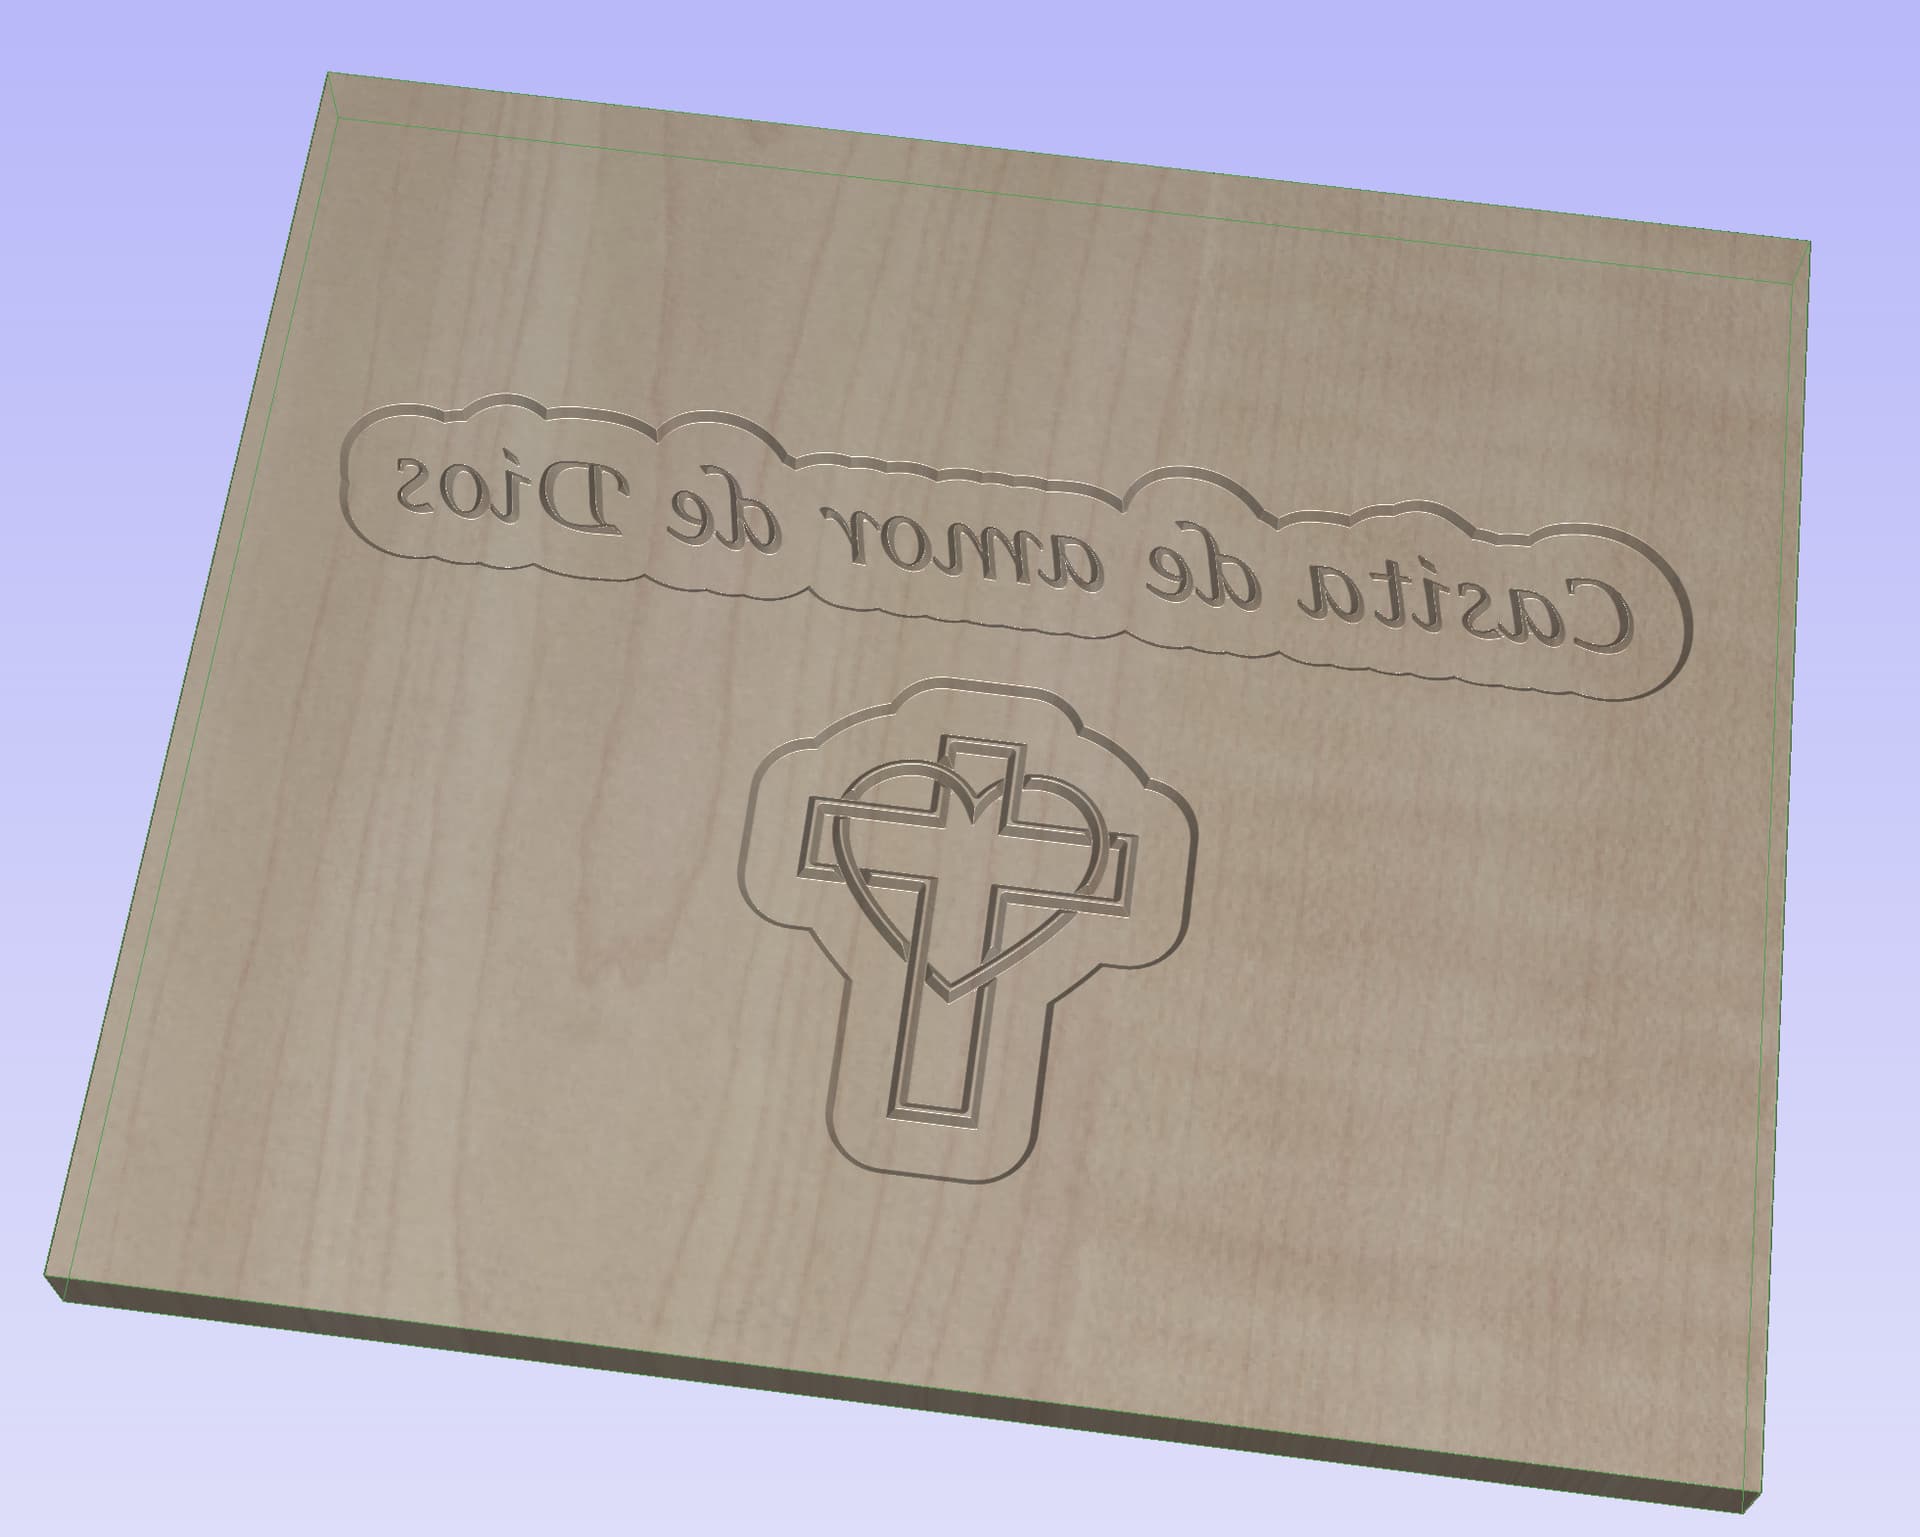
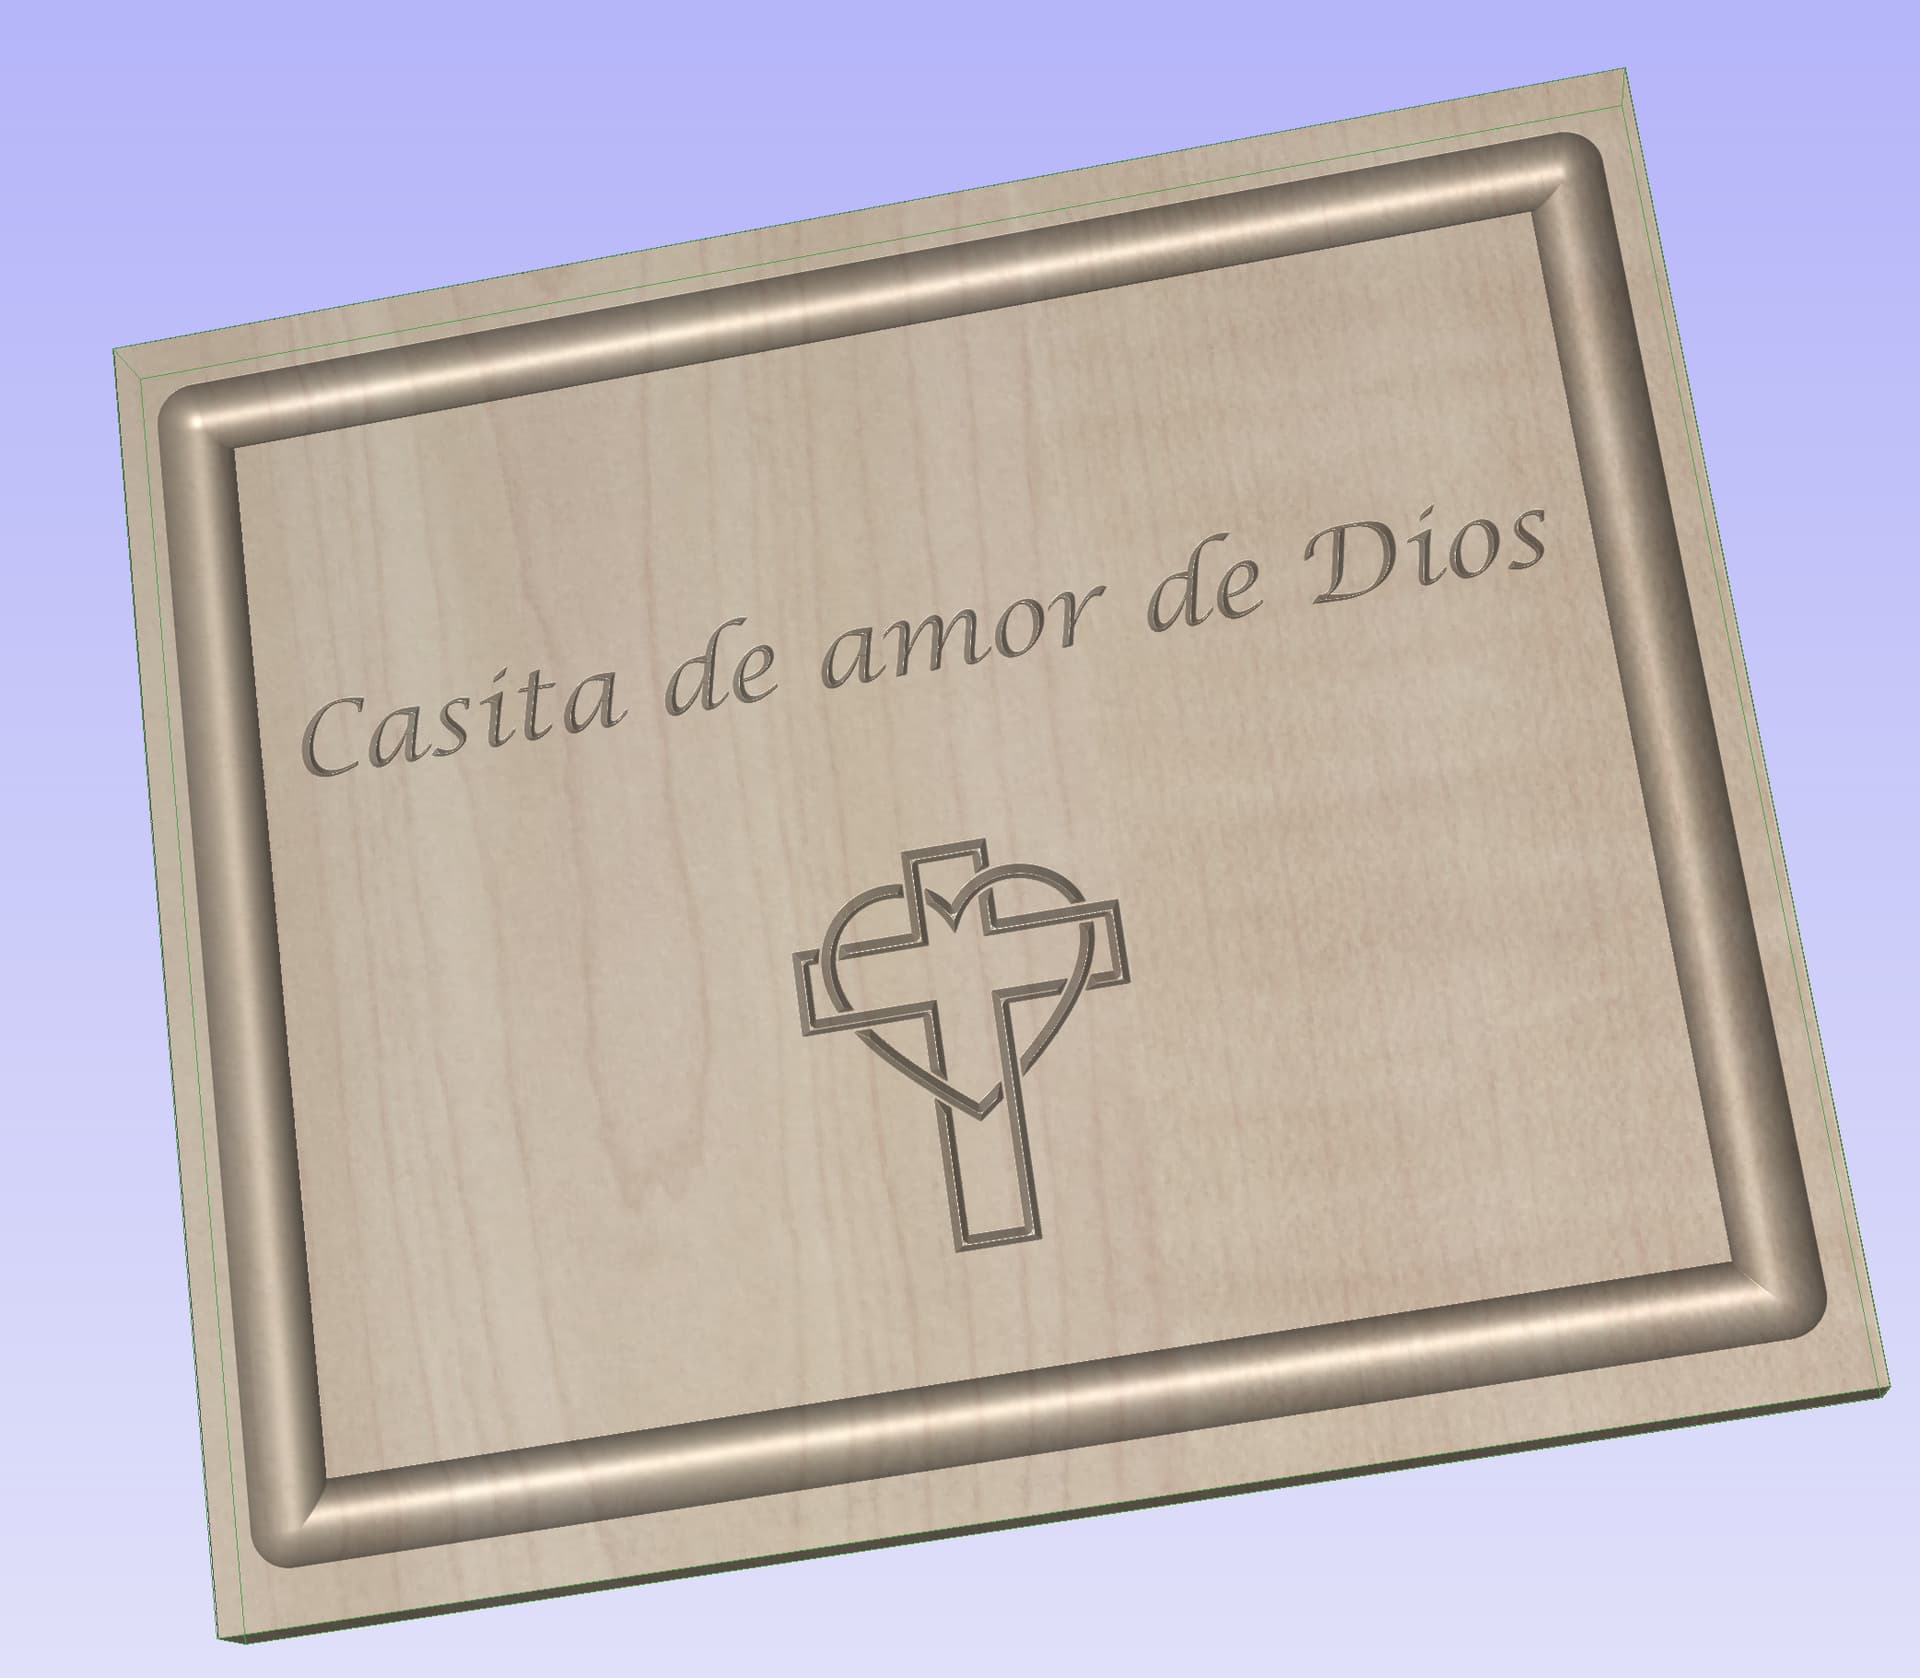
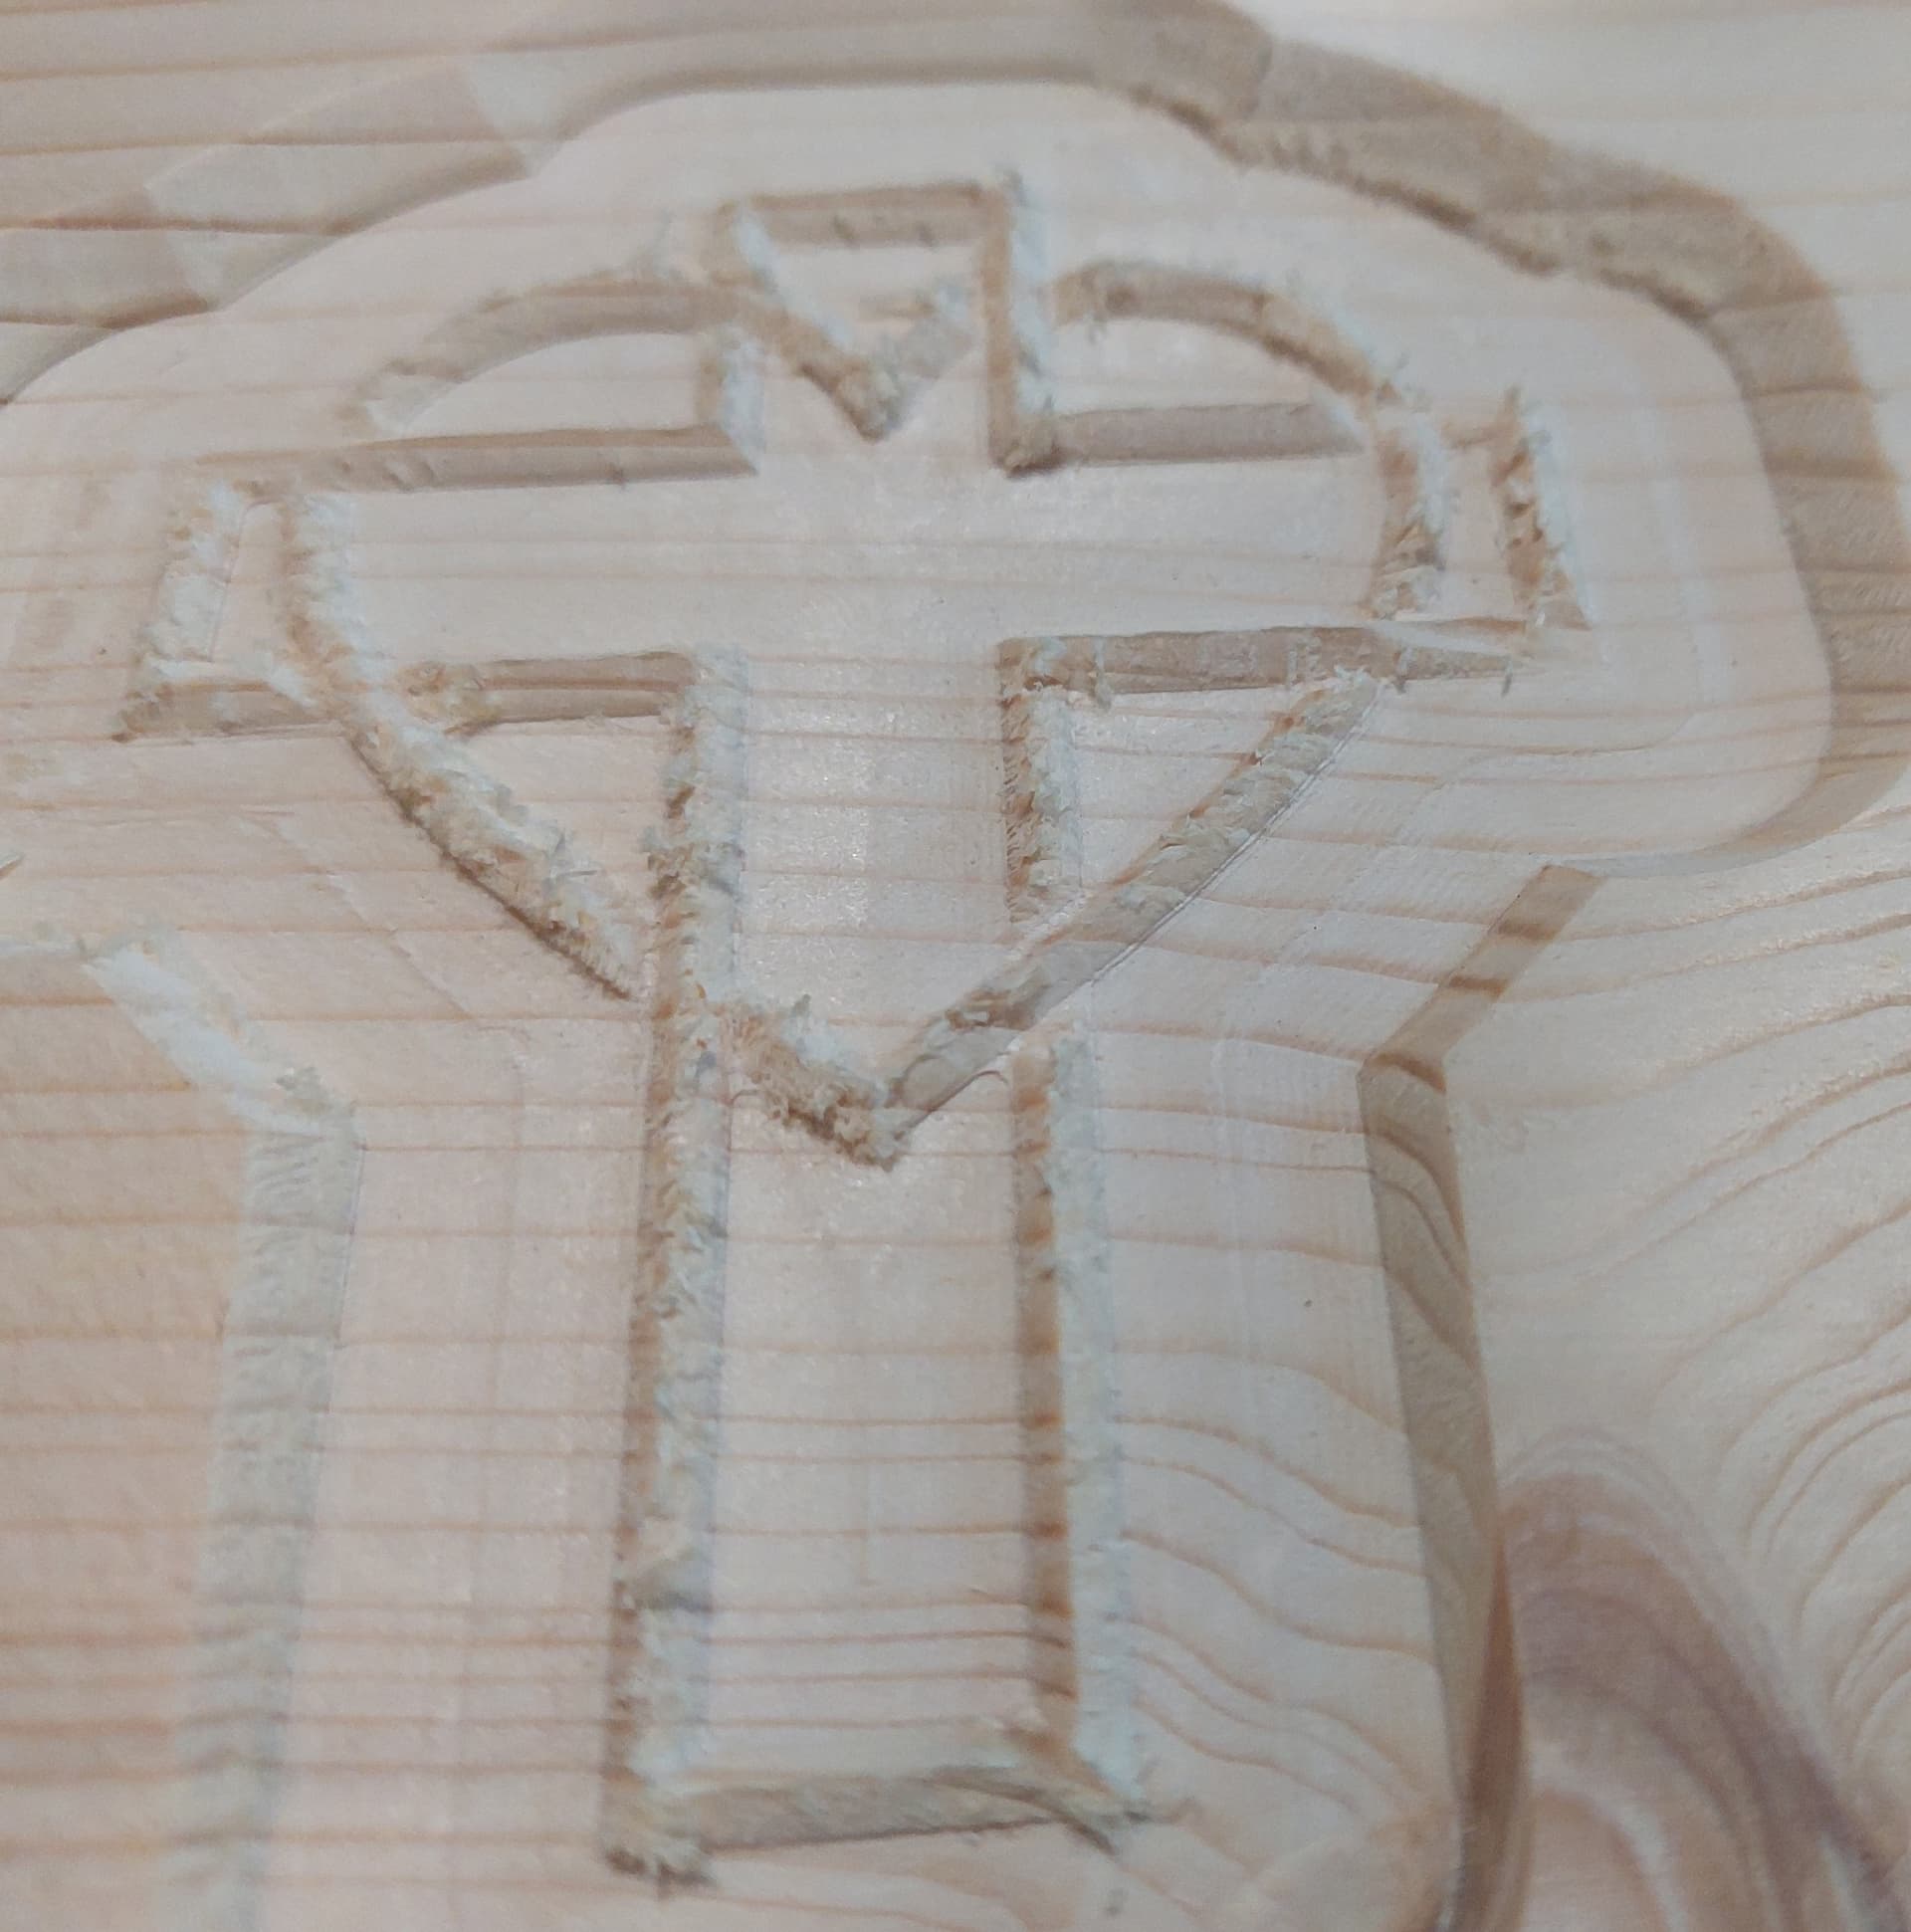
You asked for images of what is produced and I have attached pictures. Originally, I had pictures taken after the clearance took and then after the V bit. Both of the pictures taken after the clearance tool looked great, After next running the V bit the quality definitely went downhill. The words are almost completely obliterated. The cross and cross, are they usable? Not too sure. The words clearly not. Again, these are only done for test purposes. If I were to get a good cut I would then do everything in maple and walnut.
That’s because this isn’t a zip file. I had to change the file extension in order to attach it. If you want to open the file you will have to change the extension to .crv
After seeing the pics I stick to my initial hunch: you cannot get a decent vcarve with small details in pine, and you may end up chasing your tail on that one, you should really pick a different test material.
The only thing I notice is you don’t have any room for the glue.
Also on the male side, the wording SVG is missing.
I have only tried one time to do a detailed carve in Pine and it did not turn out well.
It also looks like you are making a cutting board. Pine will not hold up very long.
I order scrap walnut boards 1x2 to make cutting boards.
I certainly am willing to give that a try. Would you give me a recommended font size and how much you would increase the size of the image? I’ll try it and let you know the outcome.
I agree about the wood type. I am using pine only to test cut. I fully intend to cut this in its final form in hard maple and walnut. I also have to say that finding these woods was like hunting for hen’s teeth. It seems that no one, at least locally, has any hardwoods and as a result when you do find them the prices are astronomical. Even the cost of pine is going through the roof.