There appears to be two ways that F360 toolpaths handles REST machining:
You specify the size of the cutter used previously.
It determines what wasn’t cut, either because the previous cutter was larger and/or because you did a Stock To Leave.
The first is straightforward enough.
However, I’m having trouble identifying which toolpaths support the second and just overall what my best sequence of operations is.
For example, I’m machining a small aluminum part and my first operation is an Adaptive Toolpath (could be 2D or could be 3D, not sure that matters here), where I have Stock To Leave set to 0.25mm (0.01").
Now I want to run a finishing toolpath. I don’t want/need Adaptive anymore - I just need to skim the edges and bottom. But, when I choose a Pocket toolpath I only see option #1, which doesn’t work since I’m using the same exact cutter for both.
In general, what’s the best choice of toolpaths for roughing and then following up with a finish path? For now, assume side walls are perpendicular, no angles and no complex 3D curves.
In CC I just use pocket tool paths. Offset the first vector for the amount of stock to leave and the second tool path to clear amount left for the finish tool path.
Right right, it’s on you to account for that. One method would be to set the top height to just above your stock to leave. The 2d toolpaths will gladly crash your tool if you don’t account for the previous material yourself though.
Wouldn’t those usually be two different tool paths? Pocket with a small offset so you don’t touch the walls, follow it up with a contour to finish the walls?
I suppose it depends on the geometry but that seems a pretty straightforward approach.
Typically, I’ll do an Adaptive Clearing, where the Stock To Leave option has both axial and radial values. It’s good to do both so that one can finish up both later.
So, yeah, I could do:
• Adaptive to clear quickly
• Pocket to finish the bottom (use same radial Stock To Leave)
• Contour to finish the sides
The problem is that Pocket will think it’s milling the whole pocket, so lots of air cutting.
Yeah to avoid the air cutting try setting the heights to narrowly scope the tool path.
For geometry, select the bottom of your pocket. In heights, your bottom height should be selected contour and the top height should be whatever your axial stock to leave was from your adaptive clear.
It should plunge through the air of your previously cleared adaptive and straight to the final depth cut. There should be virtually no air cutting. Make sure you check the simulation just to be sure it’s not crashing previous material for some reason.
I was thinking that this is such a common thing to do that Fusion 360 would have something set up automatically. Like, run Adaptive the STL and then run this and it’ll remove the Left Stock and leave a nice finish.
It sounds like you might be interested in the Steep and Shallow tool path. It would be a general finishing path that covers all of your geometry with the most appropriate path. Pretty sure it’s also able to automagically account for your previous tool paths, true rest machining without faffing about with heights and offsets.
Unfortunately, it’s behind a plugin so it’s probably really nice…and they know as much so they squeeze a bit extra.
But generally speaking, I don’t think fusion has a simple adaptive-type finishing tool paths
If proper Optimal Load, max DOC, etc. could this be considered a finishing path?
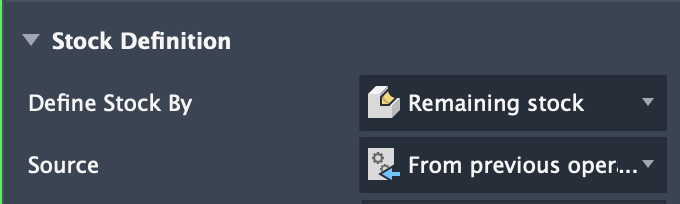
I suppose another question is what other toolpaths have this “Define Stock By Remaining Stock” and “From previous operation(s)” option? Seems like any of those could be potential finishing toolpath candidates, right?
I think it just depends on ones definition of finishing toolpath. Is it for aesthetic or dimensional purposes.
For aesthetic reasons.
I probably wouldn’t use the adaptive as a finisher. It would leave any tool marks in a bunch of directions and I imagine it would engage with your wall multiple times, each with an opportunity to leave a little mark.
Dimensionally the part would probably be pretty good though.
Man, I should have just searched for this video earlier. It covers everything I’ve said pretty much verbatim
I’m still hoping I live to see the day where AI chooses and configures the toolpaths for me. I love the design aspect, but then I just want to specify what machine and bits I have, answer a few questions on surface finish/tolerances needed, and then let the AI do the rest.
Well, to answer my own question: The 2D versions of the Pocket and Contour toolpaths do not have the REST option to be based on prior toolpaths, but the 3D versions do. From watching some more videos (and the NYC CNC “Fusion Friday” ones are pretty good), what I’ve learned is that the 2D toolpaths are not just for 2D profiles (floors and walls), but that the 2D toolpaths require you to choose what to be milled. The 3D toolpaths, by default, determine on their own what to mill, and then you can remove areas/walls. The 3D process re-constructs your model as a whole bunch of tiny triangles and builds the toolpaths off those triangle (hence the tolerance and smoothness options), AND it’s that triangle building that enables these 3D toolpaths to also perfom the “from previous operation(s)” REST machining.
TL;DR - Using 3D toolpaths gives me the Adaptive followed by Pocket and Contour toolpaths without air cutting that I want.