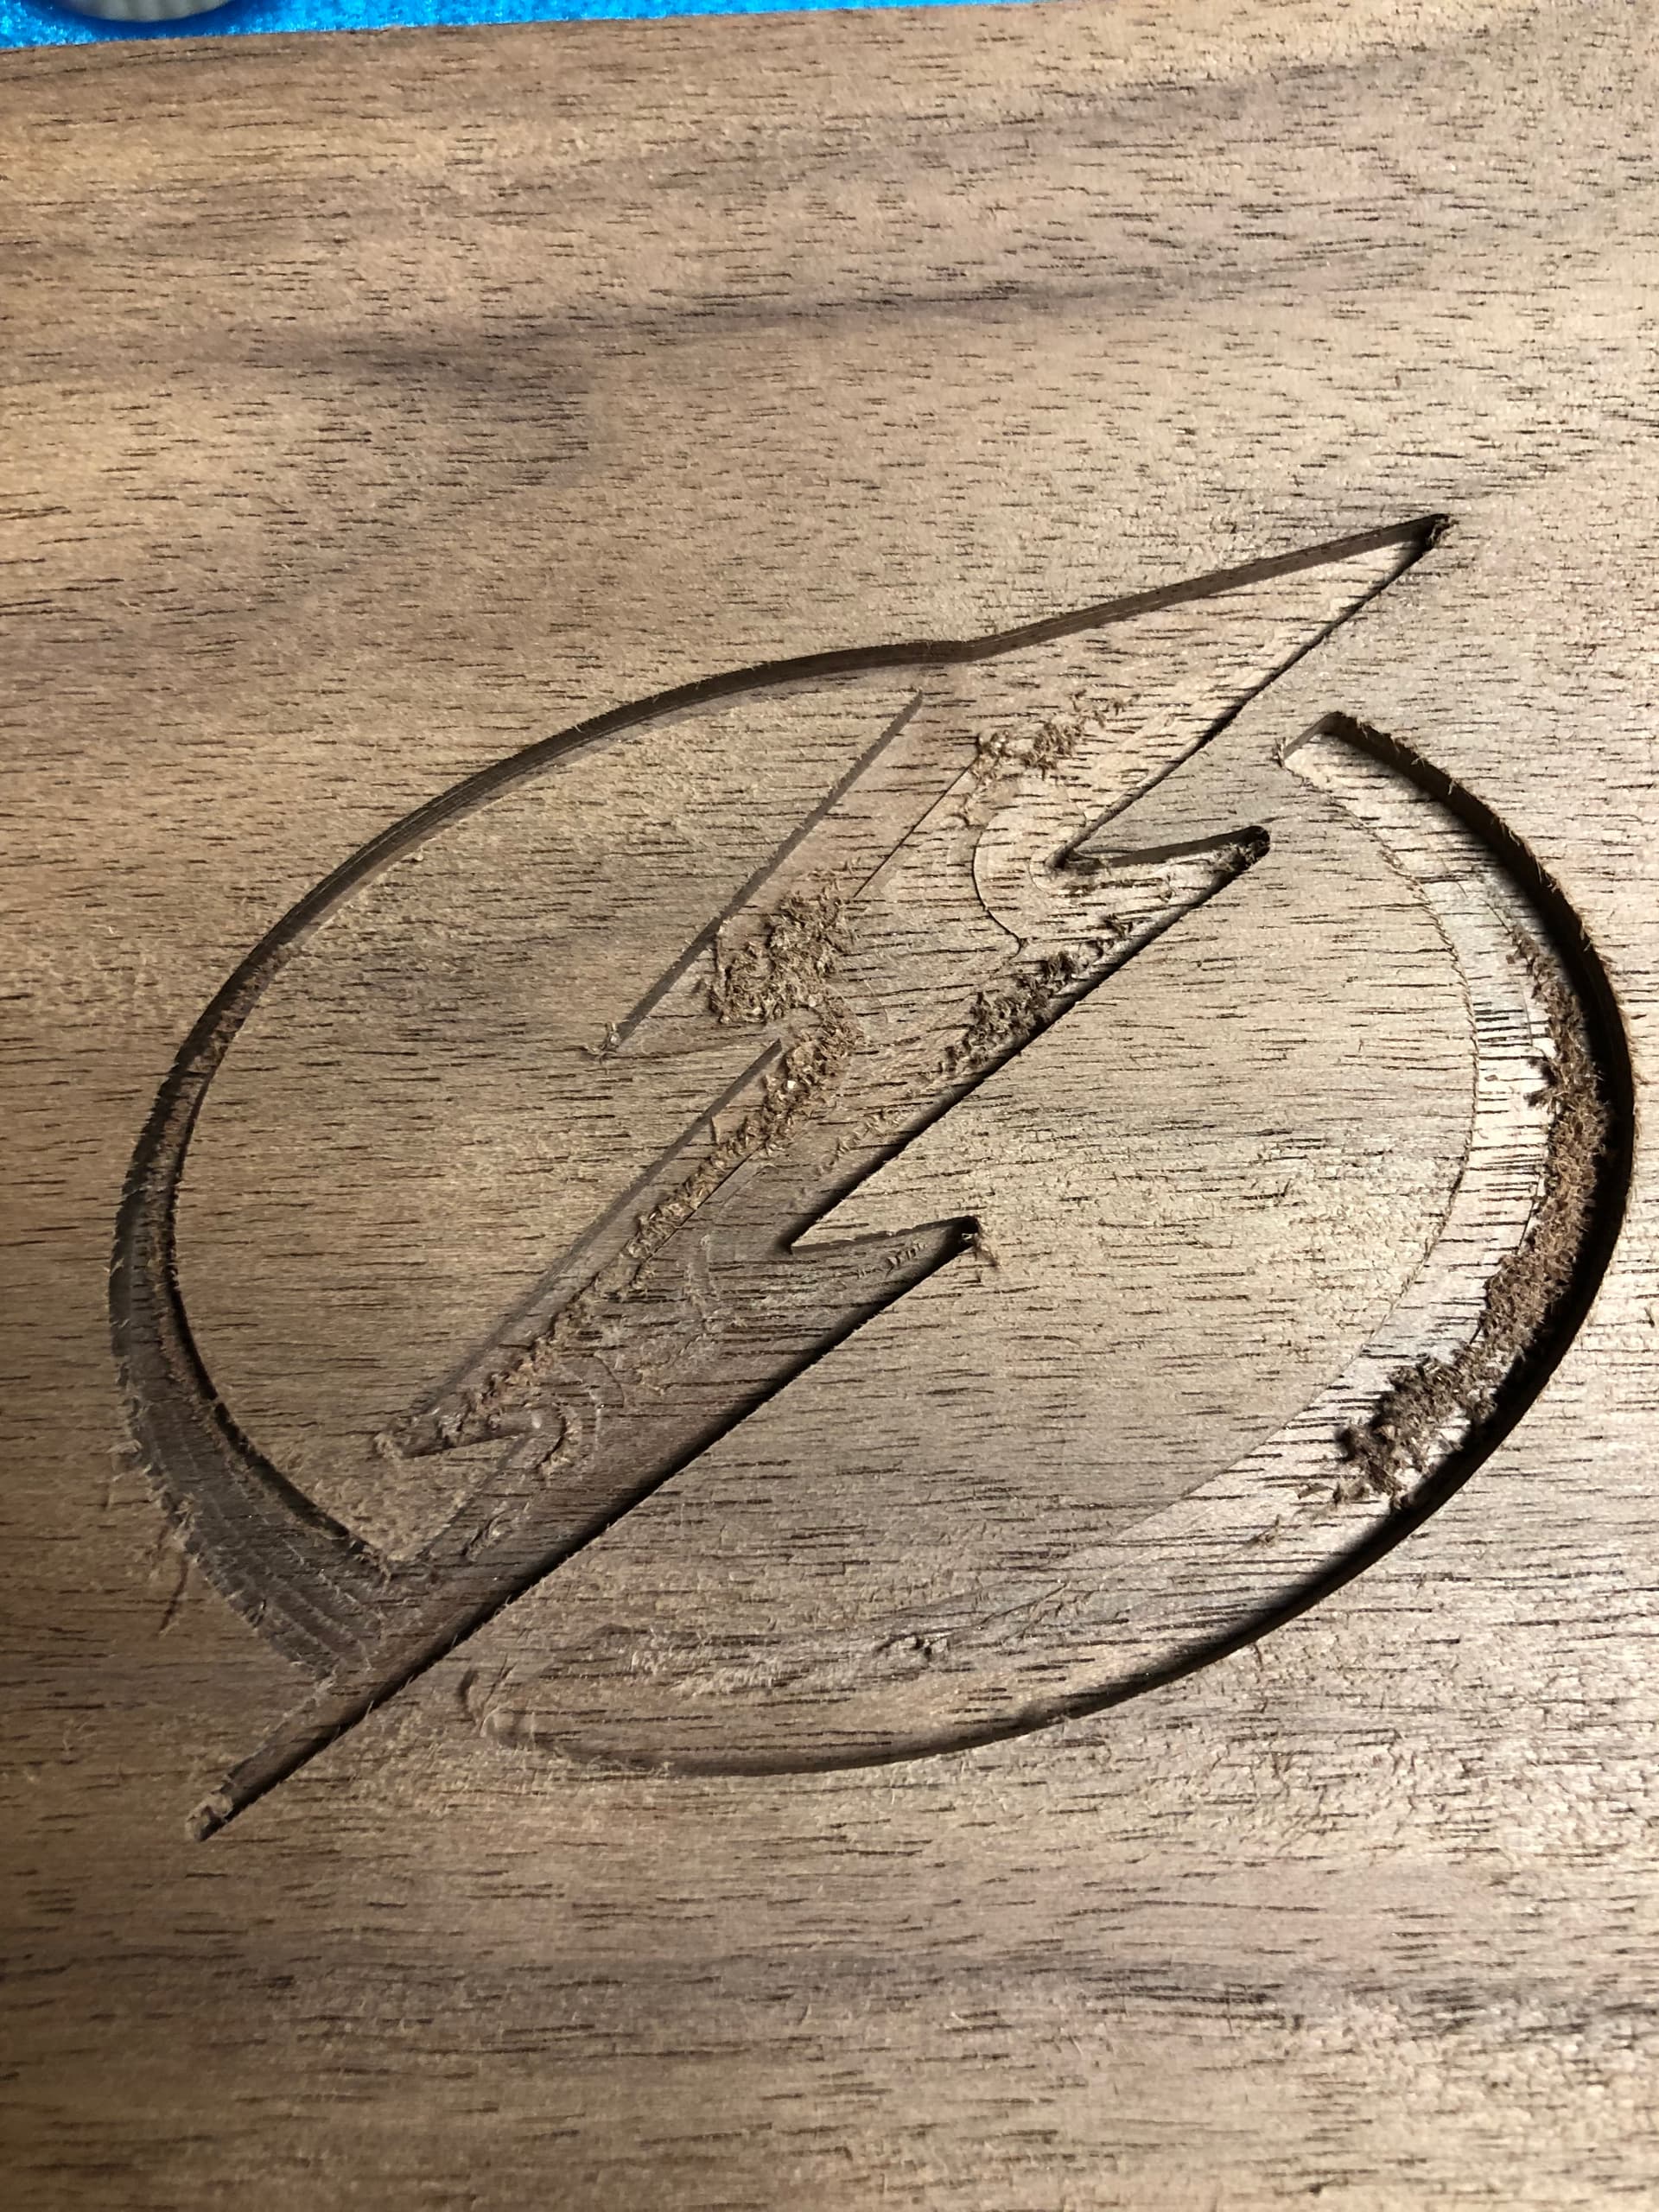
I don’t use my Shapeoko on a regular basis but it’s that time of year to get it working again (for Christmas presents). I’m experiencing issues that I never had before. See attached picture regarding the results I am having. The last time I ran it things were fine. Any guesses as to what is going on.
Besides this and related to a different project I’m running the final results are not coming out even. Basically I’m cutting a rectangle out of wood with half inch thick walls however what I actually get is a slight difference in the thickness of the top and bottom walls.
If you have not been using your machine check all your v-wheels. If any of them are loose you will get variations like this. However some of the fuzzies are in the cross grain and that is what happens when you cut across grain. But check your mechanical systems first and see if any of your wheels need adjusting or have gone flat by sitting. Not likely the wheels are flat but check them.
I checked the wheels, pulleys and belts and everything seemed to be fine. I’ll give it another once over. I don’t know if this is relevant but I didn’t have any of these issues when running the last versions of carbide create and motion. The version where you could save the gcode in cc as a separate file instead of in the project file itself.
I would also suggest slightly changing the stepover (fiddle w/ it until the line spacing in the 2D preview is as even as possible), and also adjusting the depth per pass so that the final pass is as shallow as is possible — for example, if you wish to cut to a depth of 0.5" and your Depth Per Pass is 0.125" the machine will make four full-depth passes — but if you reduce this to 0.124", then the machine will make five passes, w/ the last removing only 0.004" of thickness.
I had the same thing happen to me on the last board I did. I figured it was the grain. My stepover is set to factory settings, so it is doing 50%. I recently read a post regarding finishing cut and did not get an answer yet on how to set that up unless you do a new toolpath, suppose that would do it.
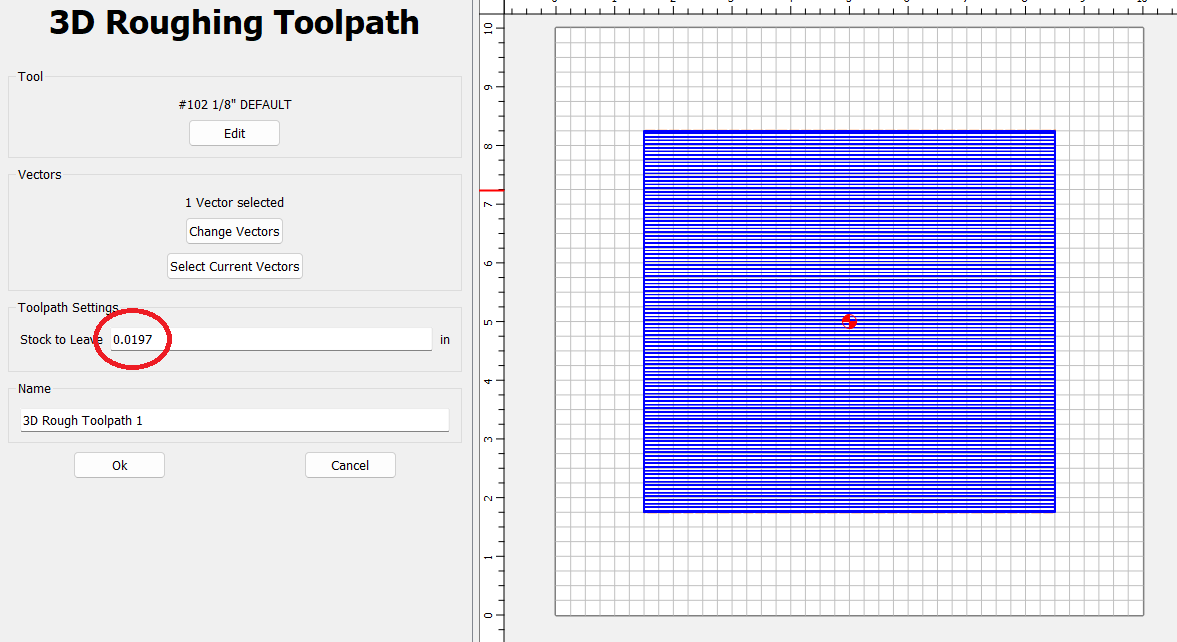
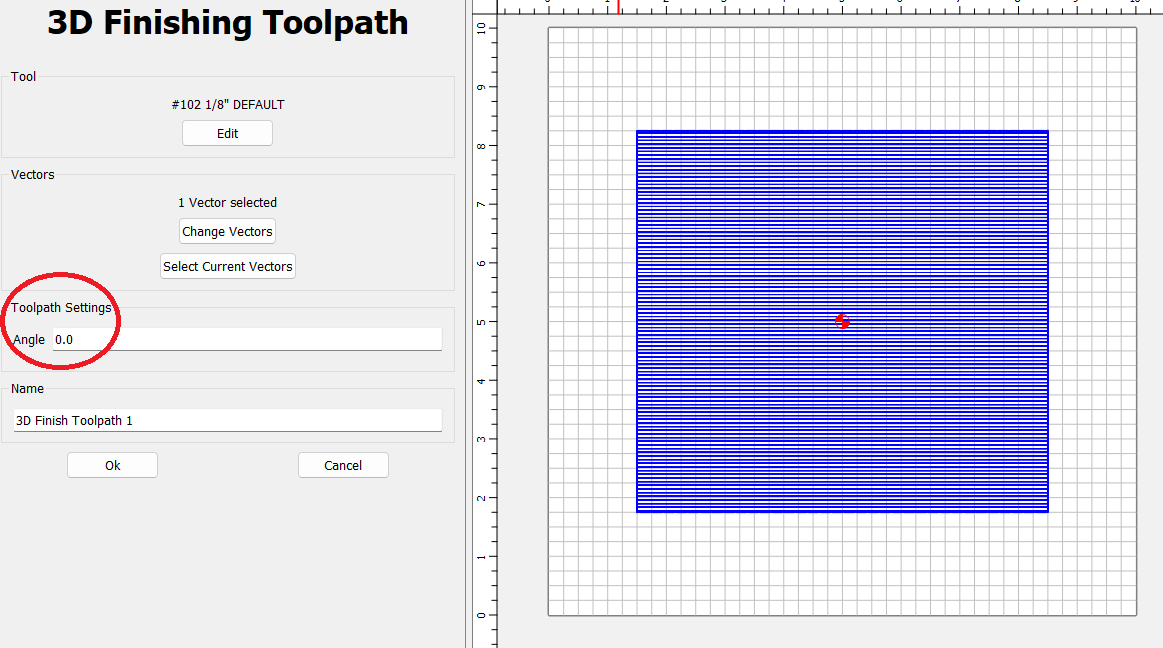
Yes there is a roughing pass tool path and you set what to leave. Then you do a finishing path and only the amount left is removed. You sometimes have to run the finishing path a second time to get a really smooth finish. Roughing and finishing fall under the 3d umbrella.
The roughing and finishing work on 2d as well as 3d tool paths. Here is an example of the roughing on a simple square 2d path.
This is still a good article to read and it should help with end mills.
I really like the idea of planning for a very shallow cut on the last pass. For 1/8 bits if you cut too much wood or move too fast a bit actually bends the bit and does not give you a smooth cut. Helps for side scalloping as well. All this does increase cut time. You call of course.
Quick safety note. I have small kids who like to watch me run the CNC. Best to get them ear protection. Maybe glasses too. They thinks it cool to have them on as well.
When my grandson was little he used to like to help me fix cars. I would always make his wear safety glasses. Later I got him a BB gun and would make him wear safety glasses to shoot it in the backyard.
Now he is 29 and still wears safety glasses. So train them early and it will become a lifetime habit.
I had cataract surgery in Jan 2022. For years I had to wear either distance glasses or up close glasses and I had ANSI safety rated up close glasses with side shields. Since I dont need to wear the distance glasses I have had a hard time adjusting to finding clear safety glasses to put on for general working. However I still need the up close glasses for fine work and I have still got the ANSI safety rated ones with side shields.
Okay, here is a second try after lowering the stepover. It is set to approximately 1/5th the width of a 1/16 bit. The result is better but still not as good as I’m used to with previous projects.
On the edges one thing that might help is masking. Some use Oramask and I use Easy Liner Adhesive Shelf Paper. You apply the mask and press it down with a j roller. When you are done just peel it off. It is also helpful if you are going to paint. The masking can come up a little in tight areas but sanding a little over paint is easier than sanding a lot of the project. The masking helps support the fibers along the cross grain cuts and helps eliminate tearout. I buy my adhesive shelf paper at Walmart and I think Lowes caries it as well. Well worth the small investment.