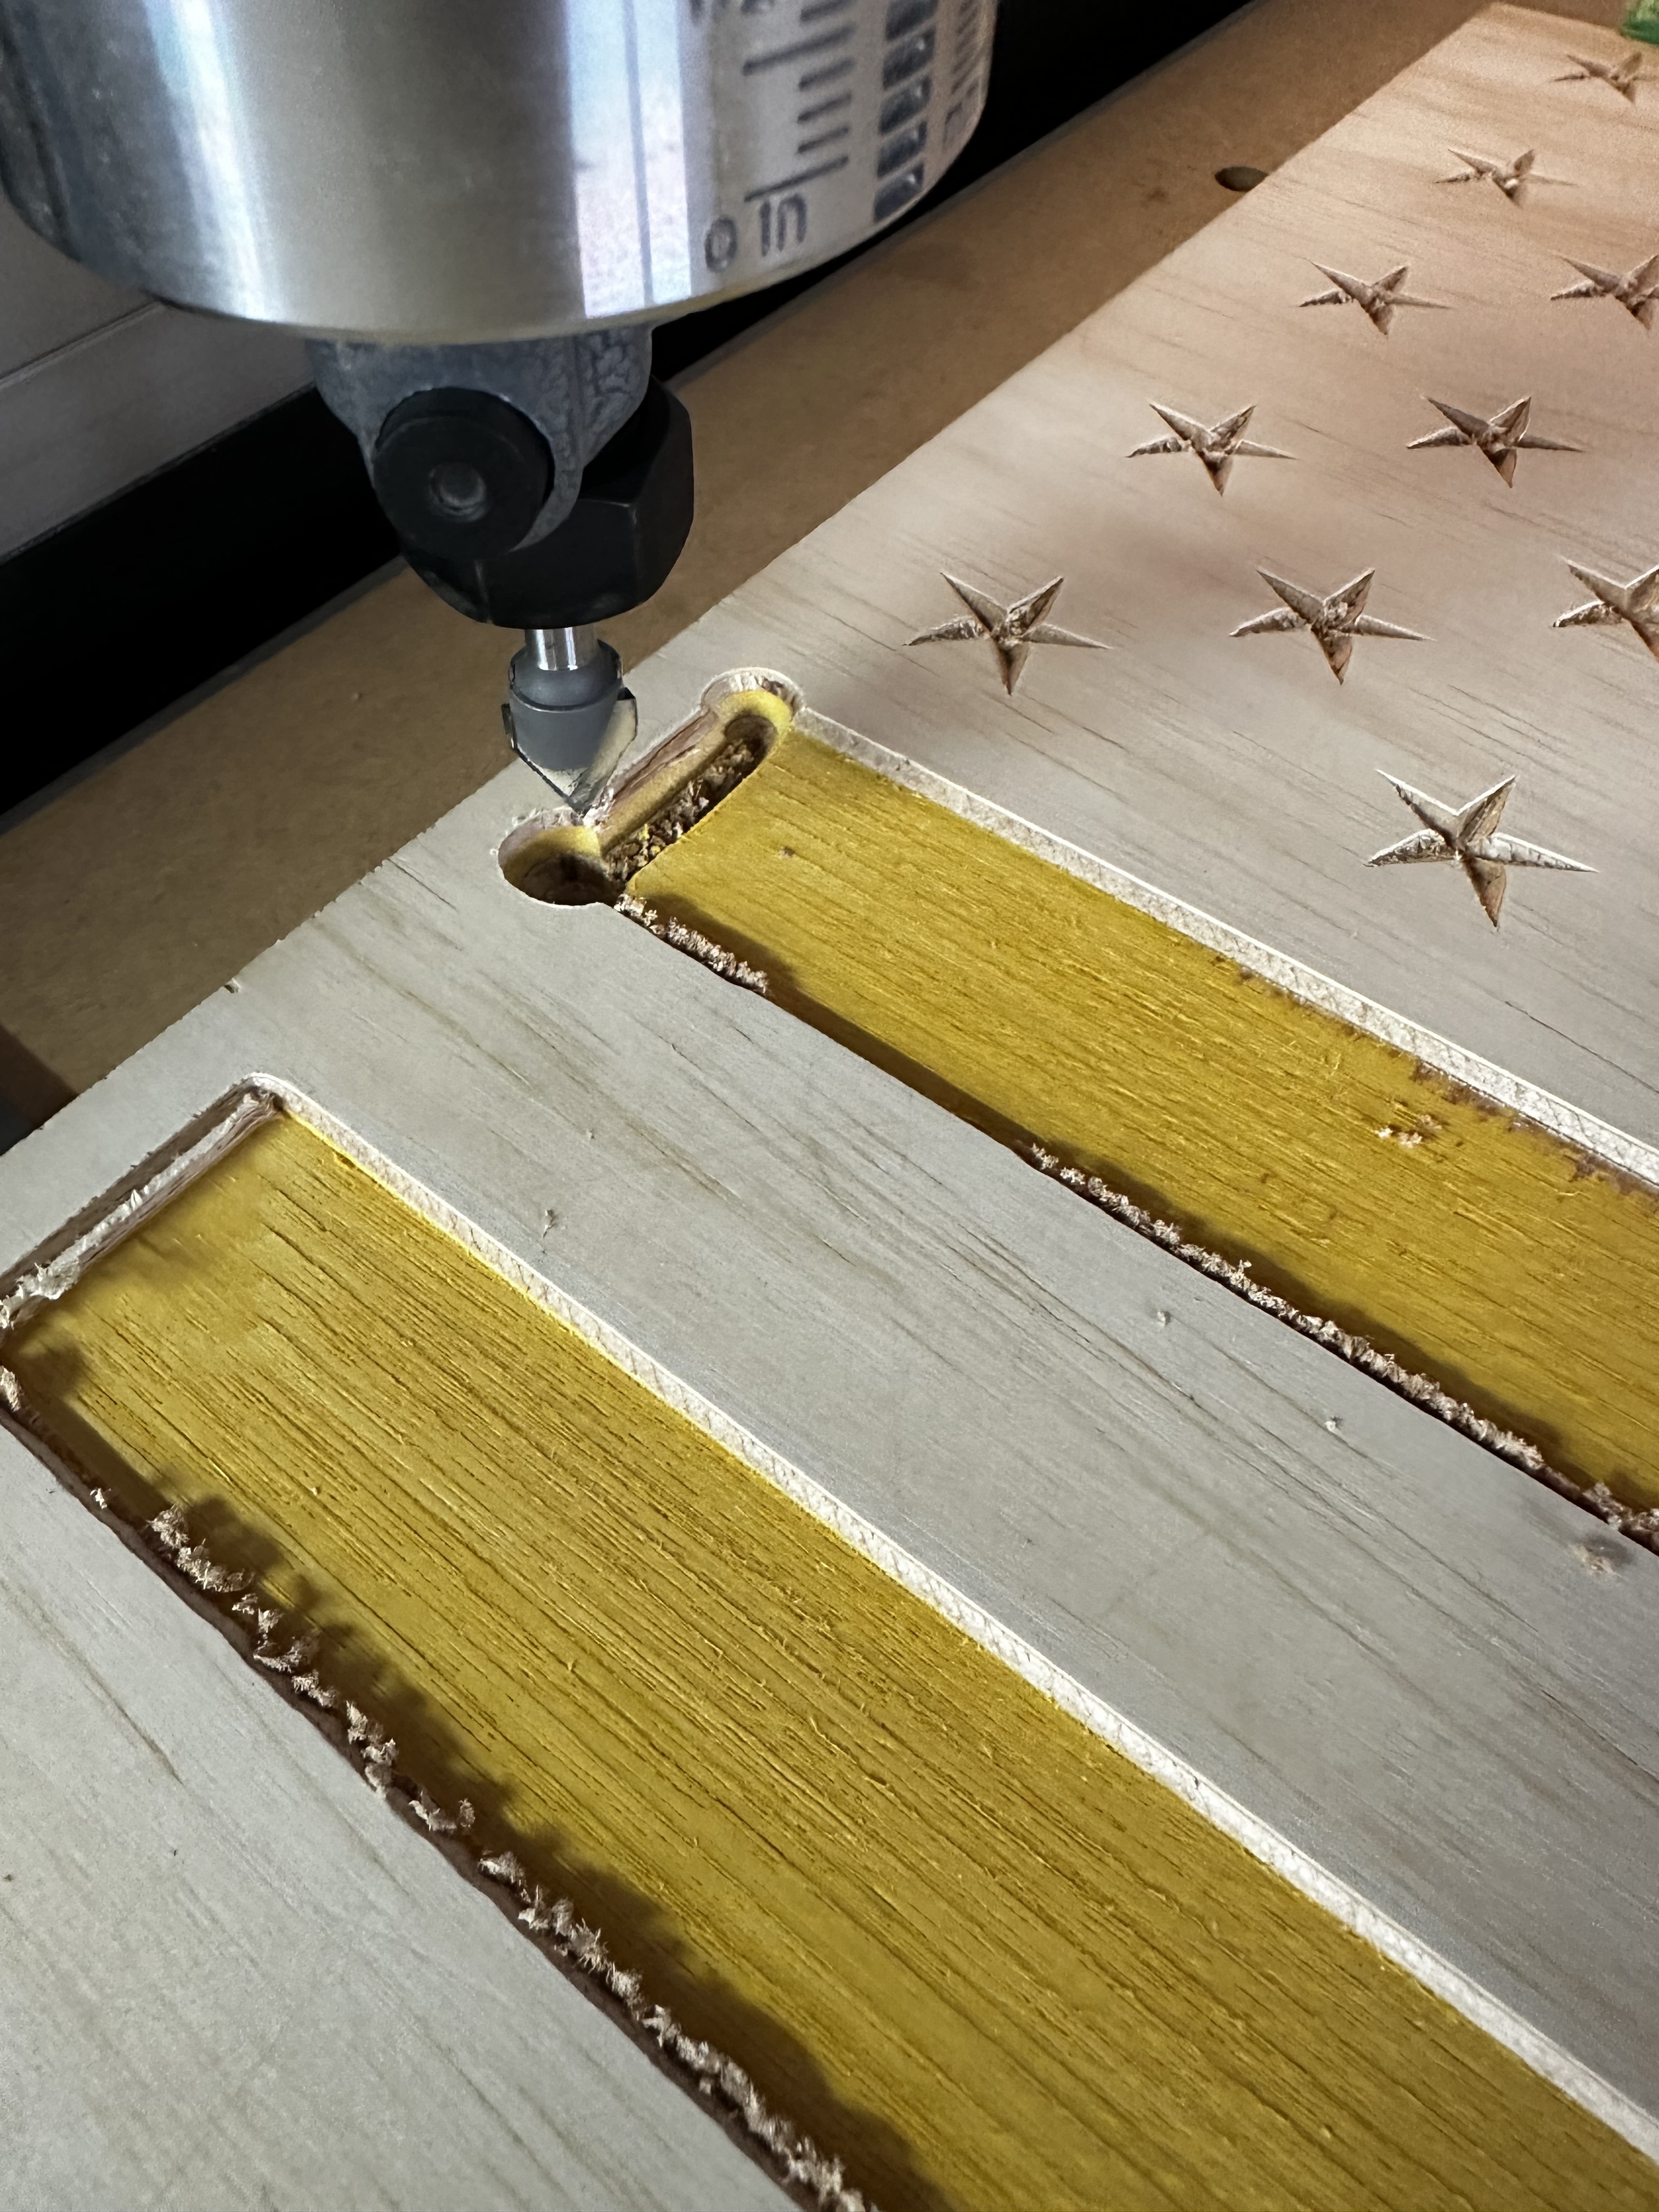
I was doing a test run on my new flag project. When I was in my advance vcarve toolpath and almost done the router went too deep and I had to do an emergency shut down
Please post your file. It is hard to help without the file to look at. The pictures are good but dont tell us anything about the tool paths.
1 Like
Looks like the Z-zero got messed up - so the end of the V-bit tool was lower than what the G-code called for. Looks like your retract height is quite a lot at 0.75" - possibly hitting the top of Z-carriage & losing steps.
Another possibility is that the V-bit was moving in the collet - unlikely I think here, but always ensure to tighten the collet with 2 wrenches, especially as V-bits tend to have short shanks.
3 Likes
Yeah the bit is tight and not moving. What to you recommend retract height be? I wanted to make sure clamps were cleared.
When I look at the simulation and am worried about hard clamps, I turn on the rapids display. I know where it is starting, I know where it will go when finished, and go from there. Most times I have a retract of .125 to save time.
You can make your retract height as high as you want within the limits of the mechanics of the machine.
I avoid cutting pieces that require clamping too close to the cutting paths so I can set a retract height within 1mm of the top surface - provided that’s good & flat. I have become fond of Painters tape & crazy glue hold-down as it means few/no clamps & also no tabs needed in the toolpaths.
The Z axis is the slowest movements made during a job, so excessive retract height can really extend the time taken for a job.
Another possibility is that your Z-axis is binding on its rails & causing loss of steps - I would check to ensure the Z-axis can move smoothly/easily.
1 Like
Setting retract height is trail and error. You want a minimum because everytime the router makes a rapid move it retracts to the prescribed height you set up in the job setup. So that takes time to retract and lower back down and that adds time to your job. I use inches and set mine to .125.
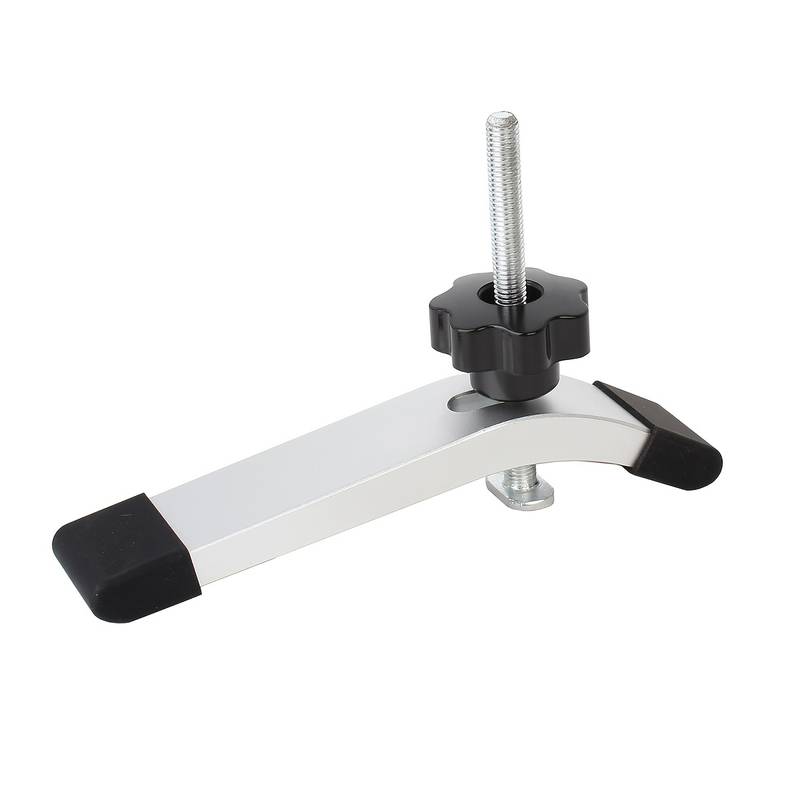
The retract height also depends on your clamping solution. I have an SO3 with an mdf spoilboard with 2" spacing with 1/4-20 tee nuts. I use cam clamps. Those with newer machines have the hybrid tables with the tee slots. C3D makes a lot of different clamps but you want a low of a profile as possible. The tee track clamps that sit up high are more problematic for rapid movements that you router might hit.
These are the clamps I am talking about:
The c3d clamps are a lower profile and are good for not hitting them. You want your work secured so it does not move. Also many here on the forum use painters tape and super glue and clamps are never in the way. I use an L bracket to place my material on the spoilboard square to the router and remove it if I am going to cut over the edge of the material.
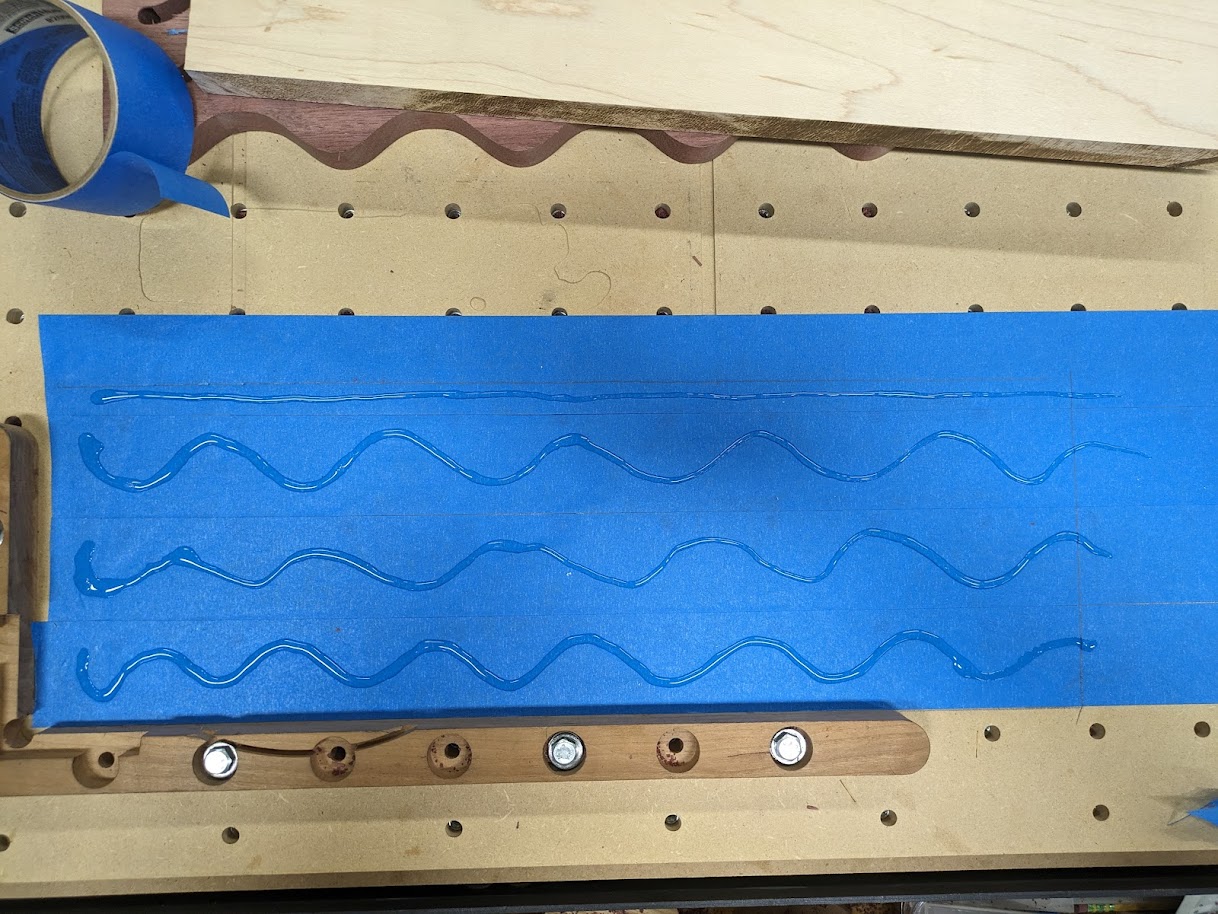
Here is an example of painters tape and super glue on a rather large project.
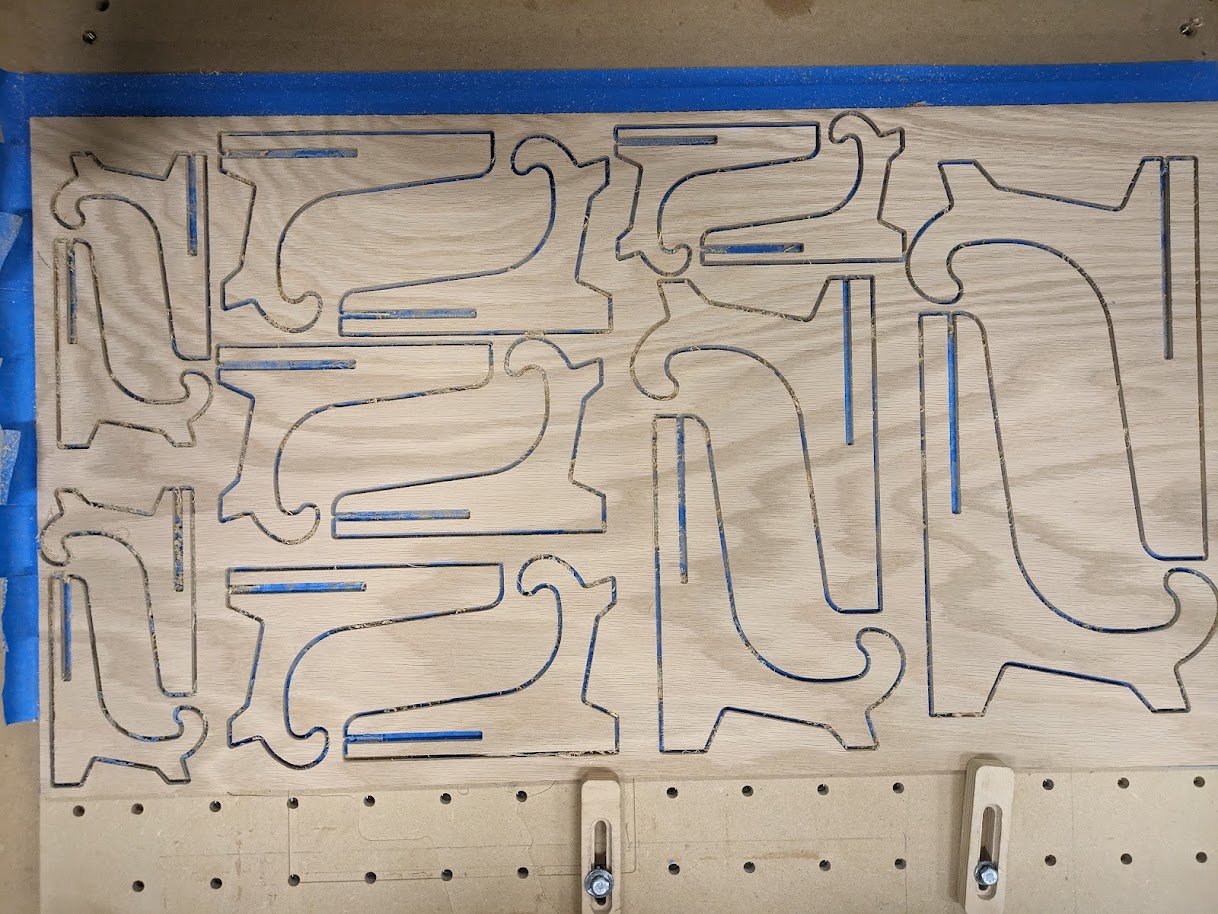
Here is my L bracket that I line up the painters tape and super glue to get my project stuck down and remove if required. Because plywood can be warped I put some simple clamps on the edges to take the warp out.
Here is my c2d (v7) CC file for a long L bracket. You can design your own and change the spacing to hold it down on a hybrid table. This one is for 2" spacing on my mdf spoilboard.
long_L_bracket.c2d (296 KB)
If you use my file be sure to edit because I often use the center and the bottom of material when I cut through.
1 Like
This topic was automatically closed 30 days after the last reply. New replies are no longer allowed.