S3 New Vacuum Attachment - I think a Good One!

I recently obtained a couple of Vacuum attachments to test and evaluate from “burgchevap” aka Andrew. These are now available to order from http://www.ev-guide.com/3d-printing-products/shapeoko3vacuum , and the first orders start shipping Sept. 12th. Feel free to contact him directly.

First off, the quality of the 3D print is solid and it’s a good looking piece. You can order it in black, silver or blue, but I think a really nice benefit is that for an additional fee (if you are so inclined) you can order it in a custom color that may match your system. It matches very nice with the blue parts on my S3. In real life, it look almost iridescent.

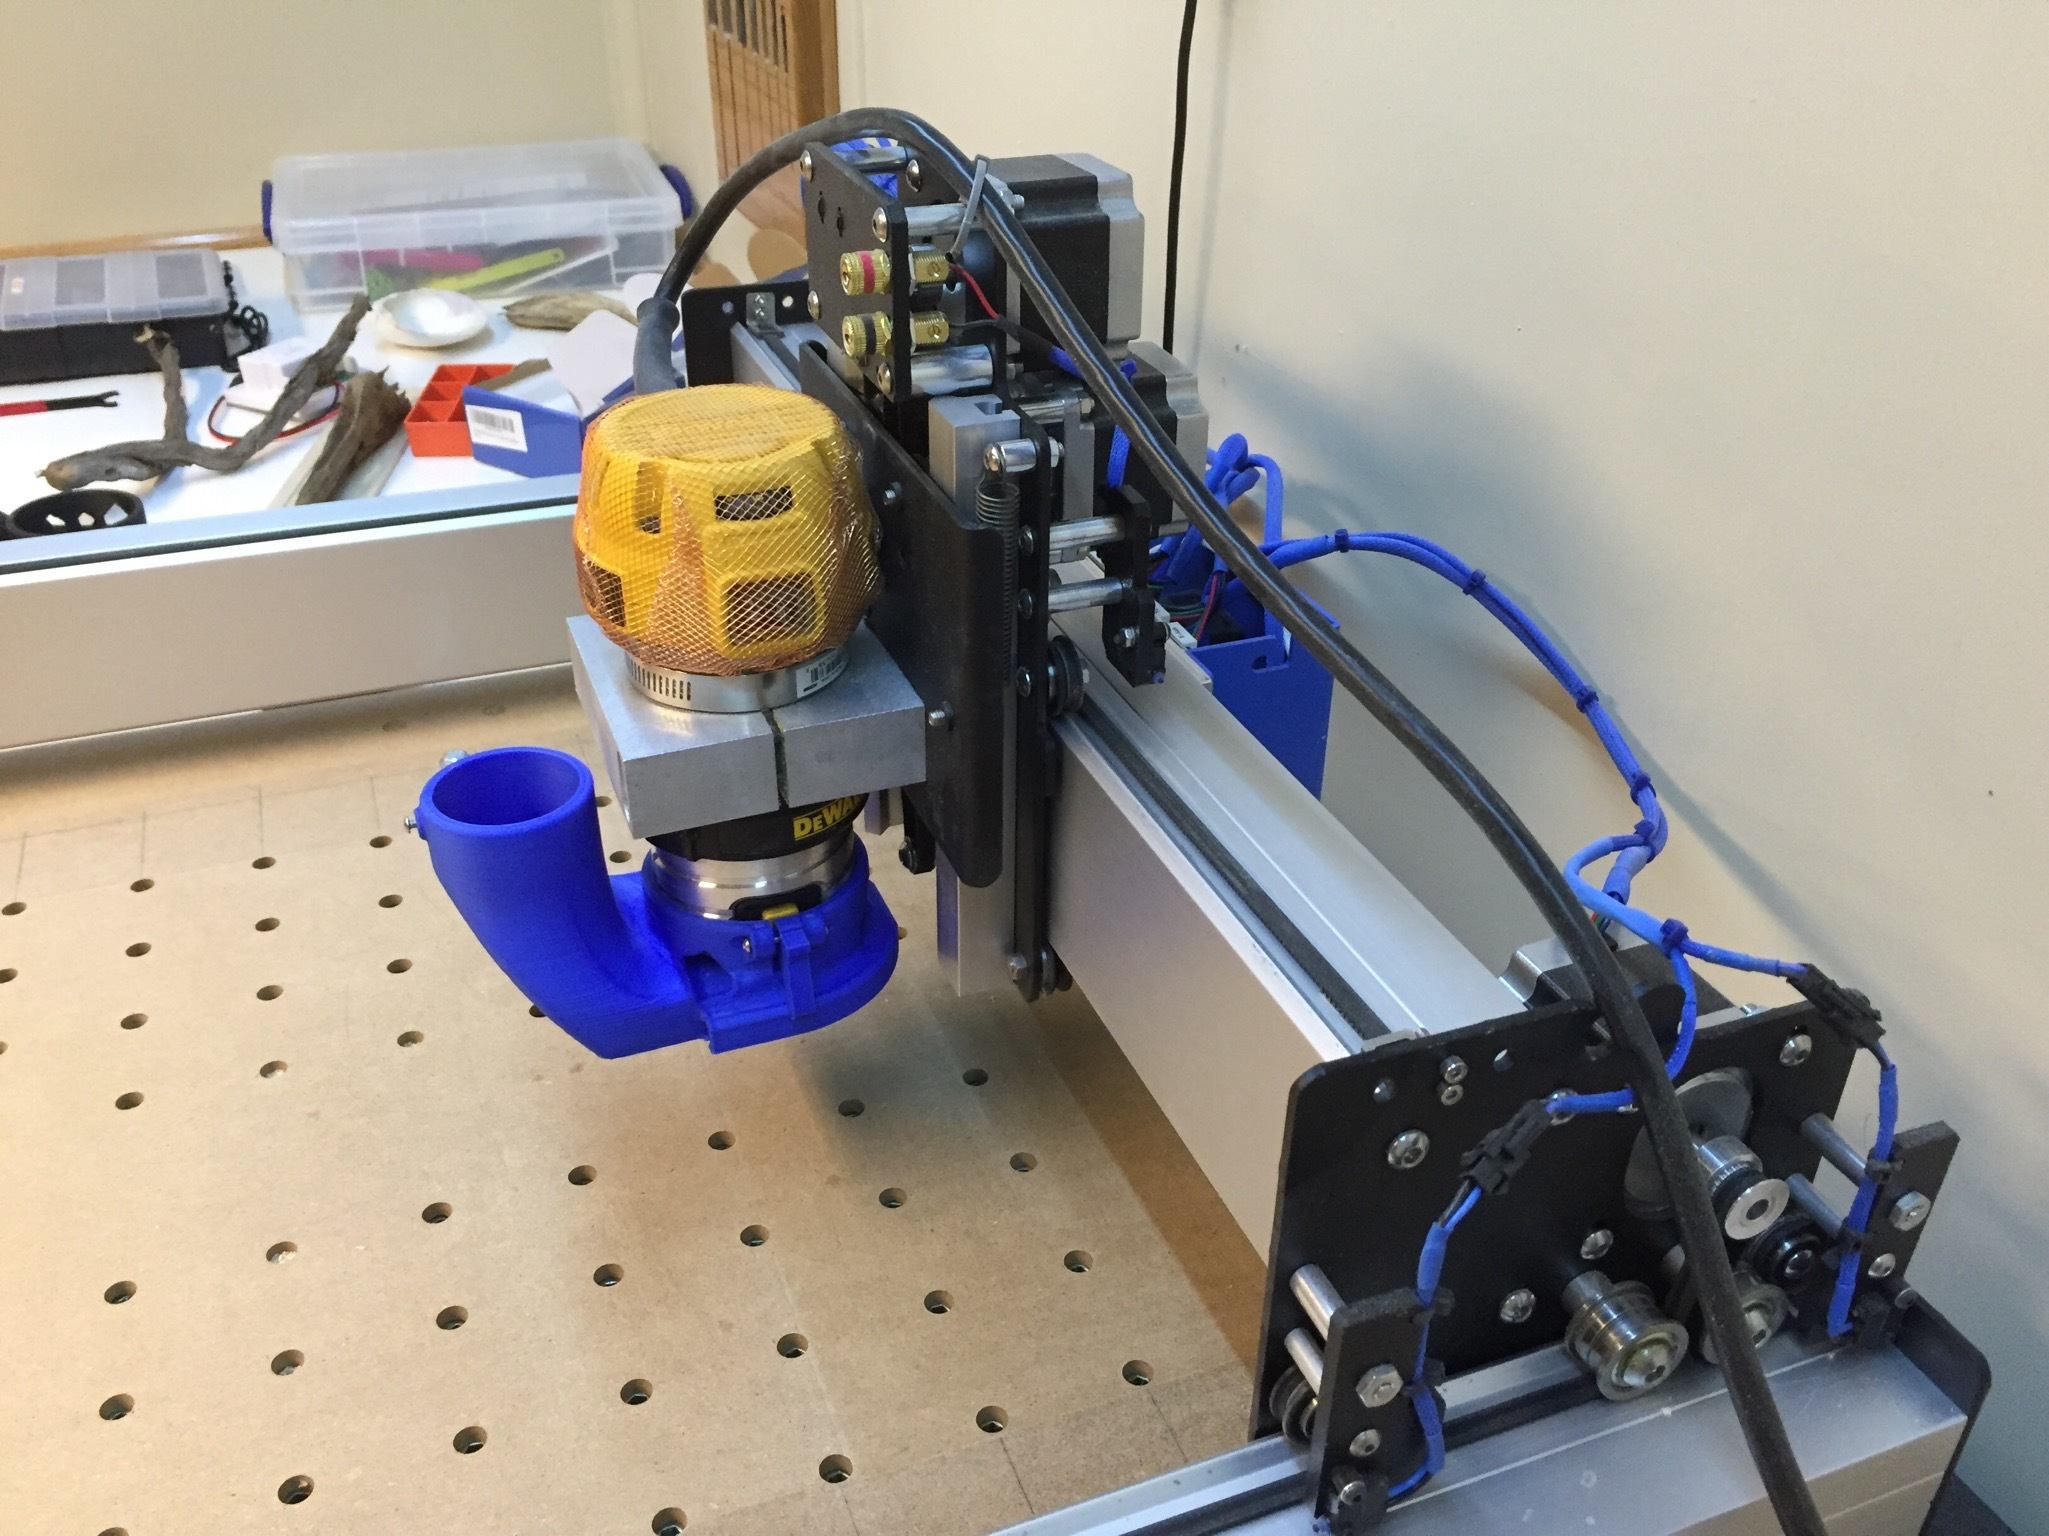
It comes with slide out brush, and there may be some of you out there that don’t what to use a brush for various reasons. Most of my pictures will be without the brush (more later on this).

Here is a close up of the top of the attachment with some features.

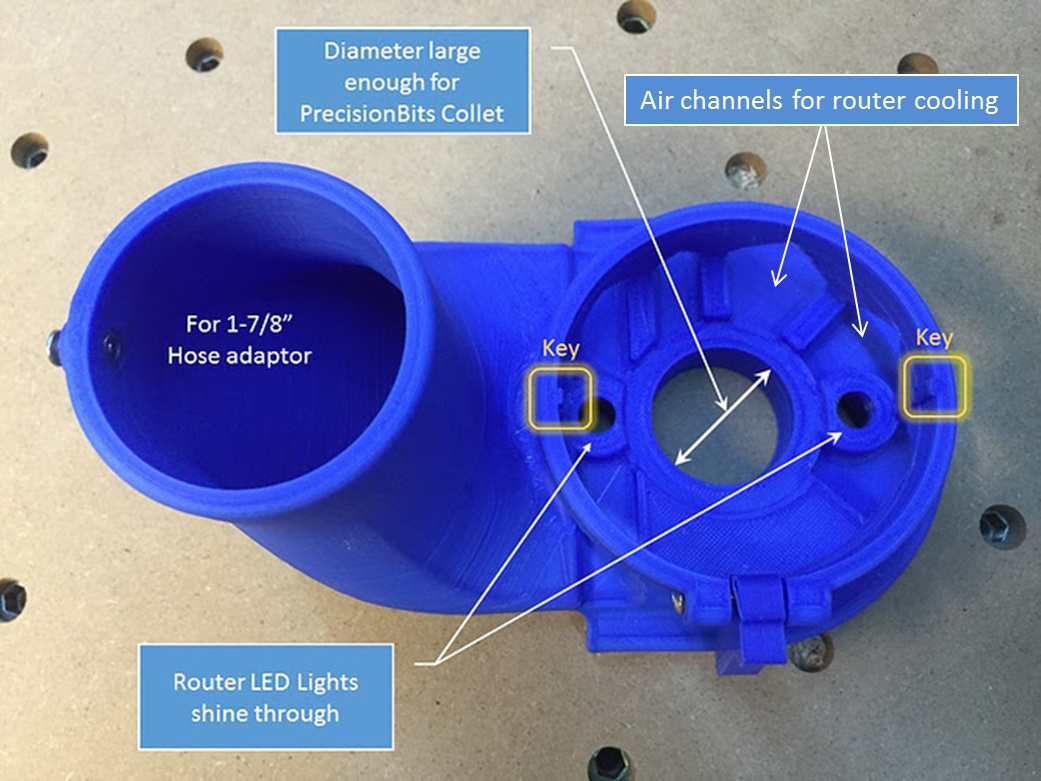
Note the opening for the LED lights, the keys for a very satisfying mounting on the Dewalt Router (not sure how it would fit any other type) and a secret lever on the right side. (I had to flip my router 180 deg., but no issue for me.)

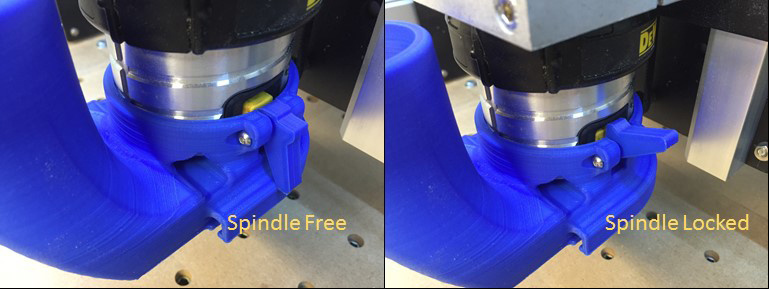
The spindle locking feature is enabling technology to make this a very convenient and easy to use attachment. It works with the old and new Z-Axis plate.

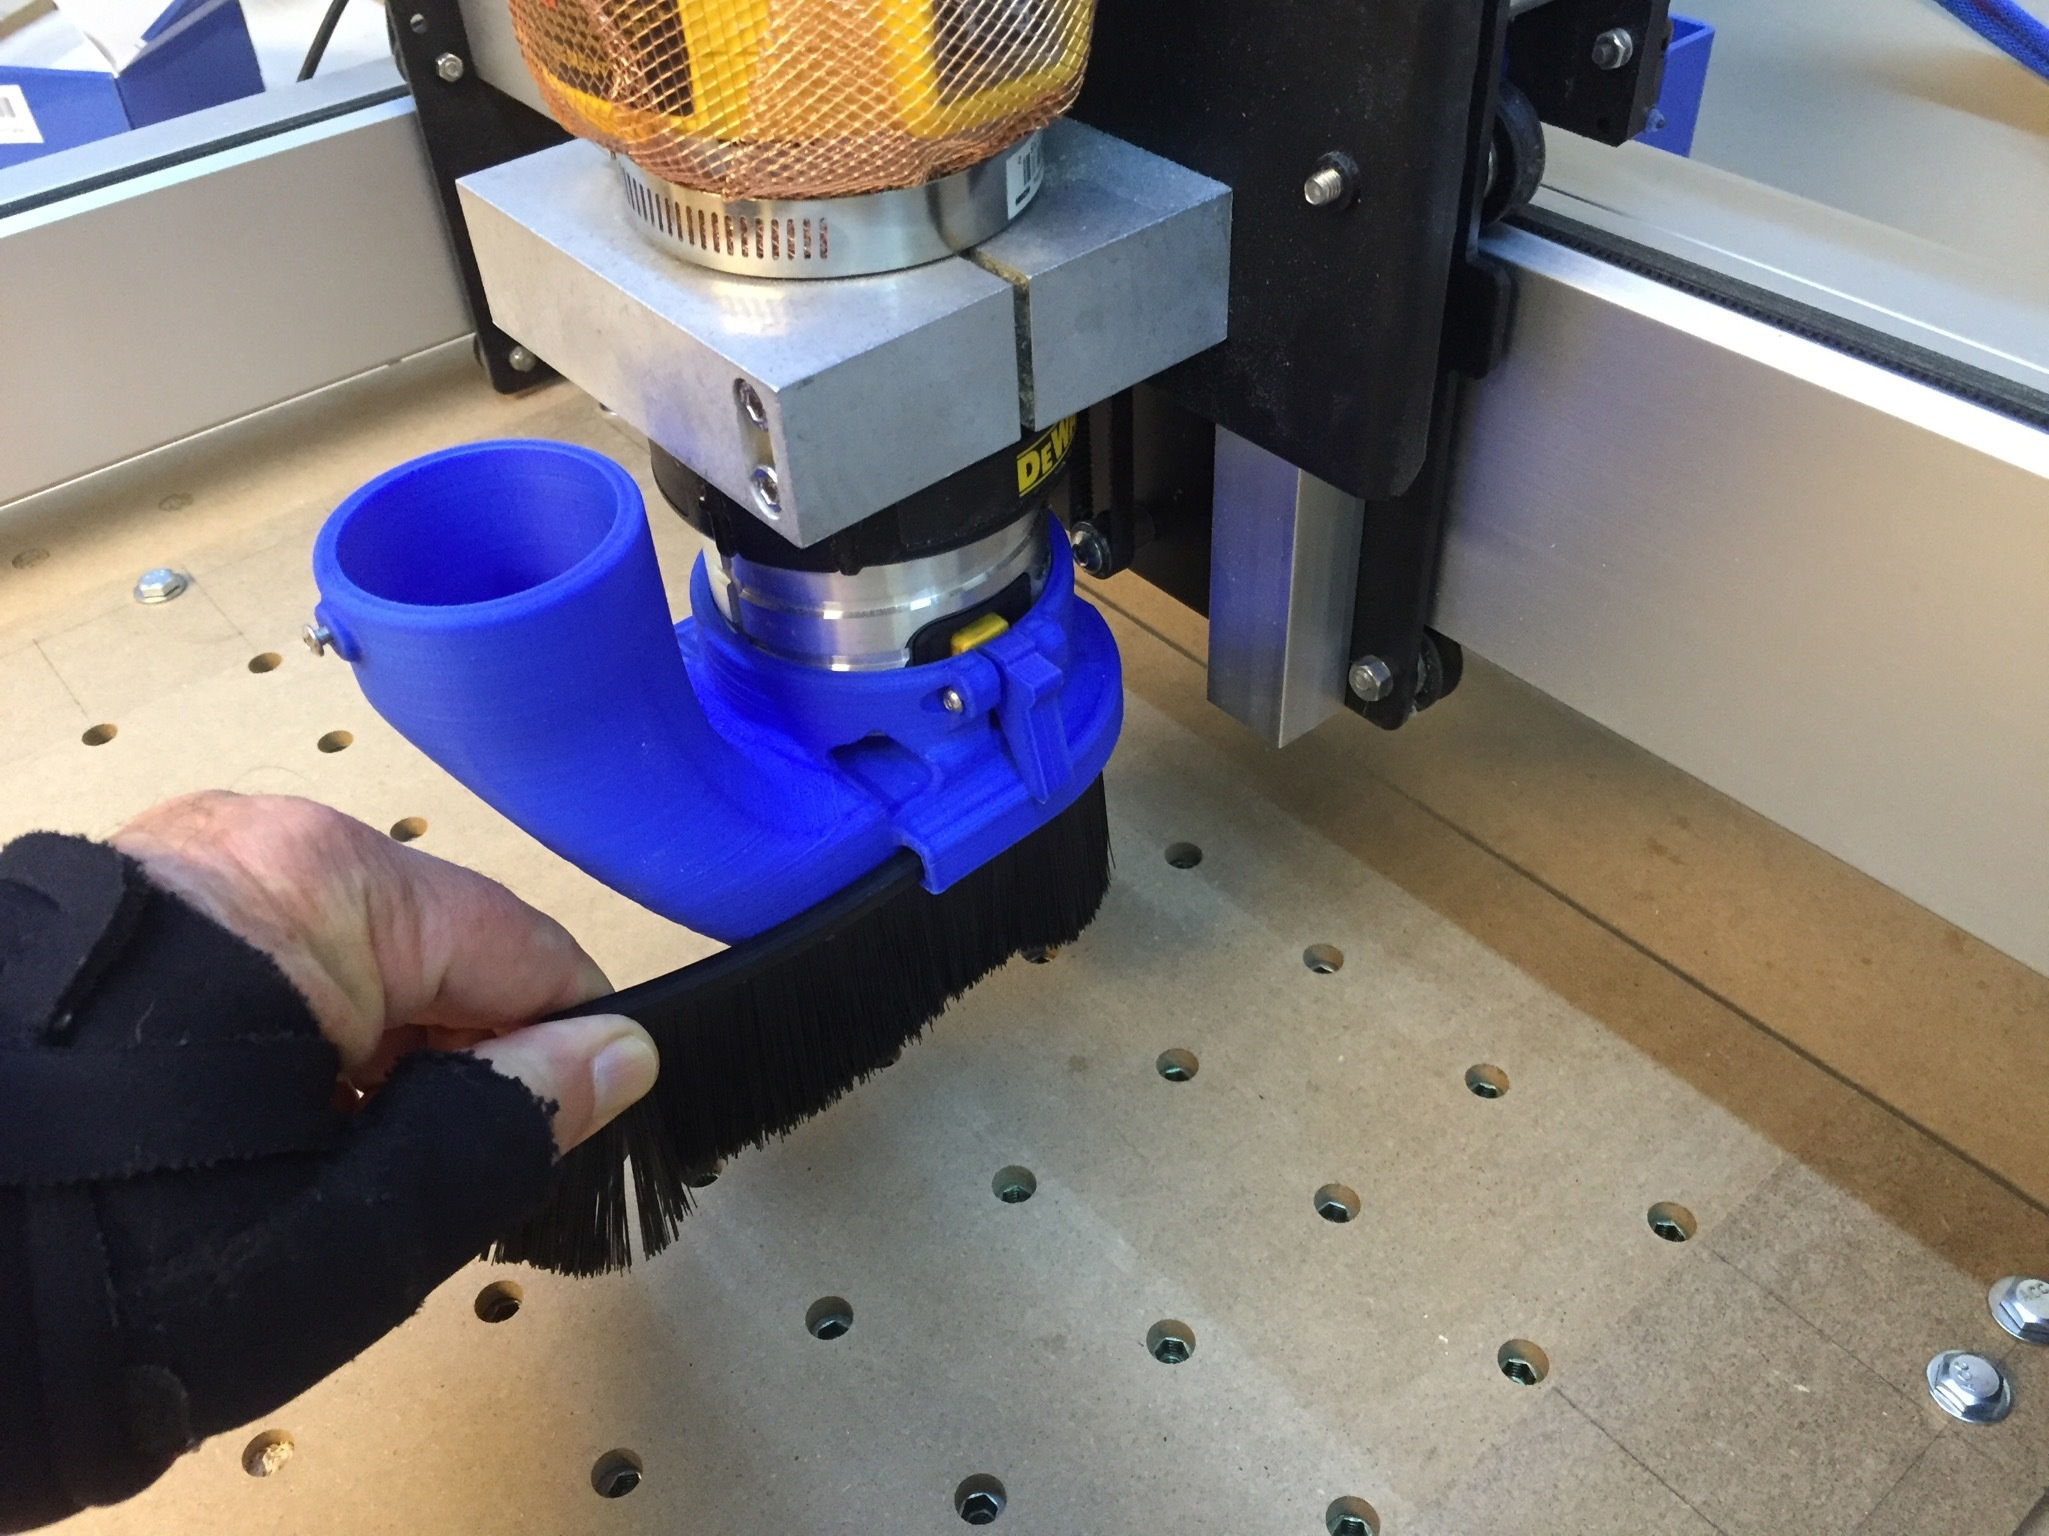
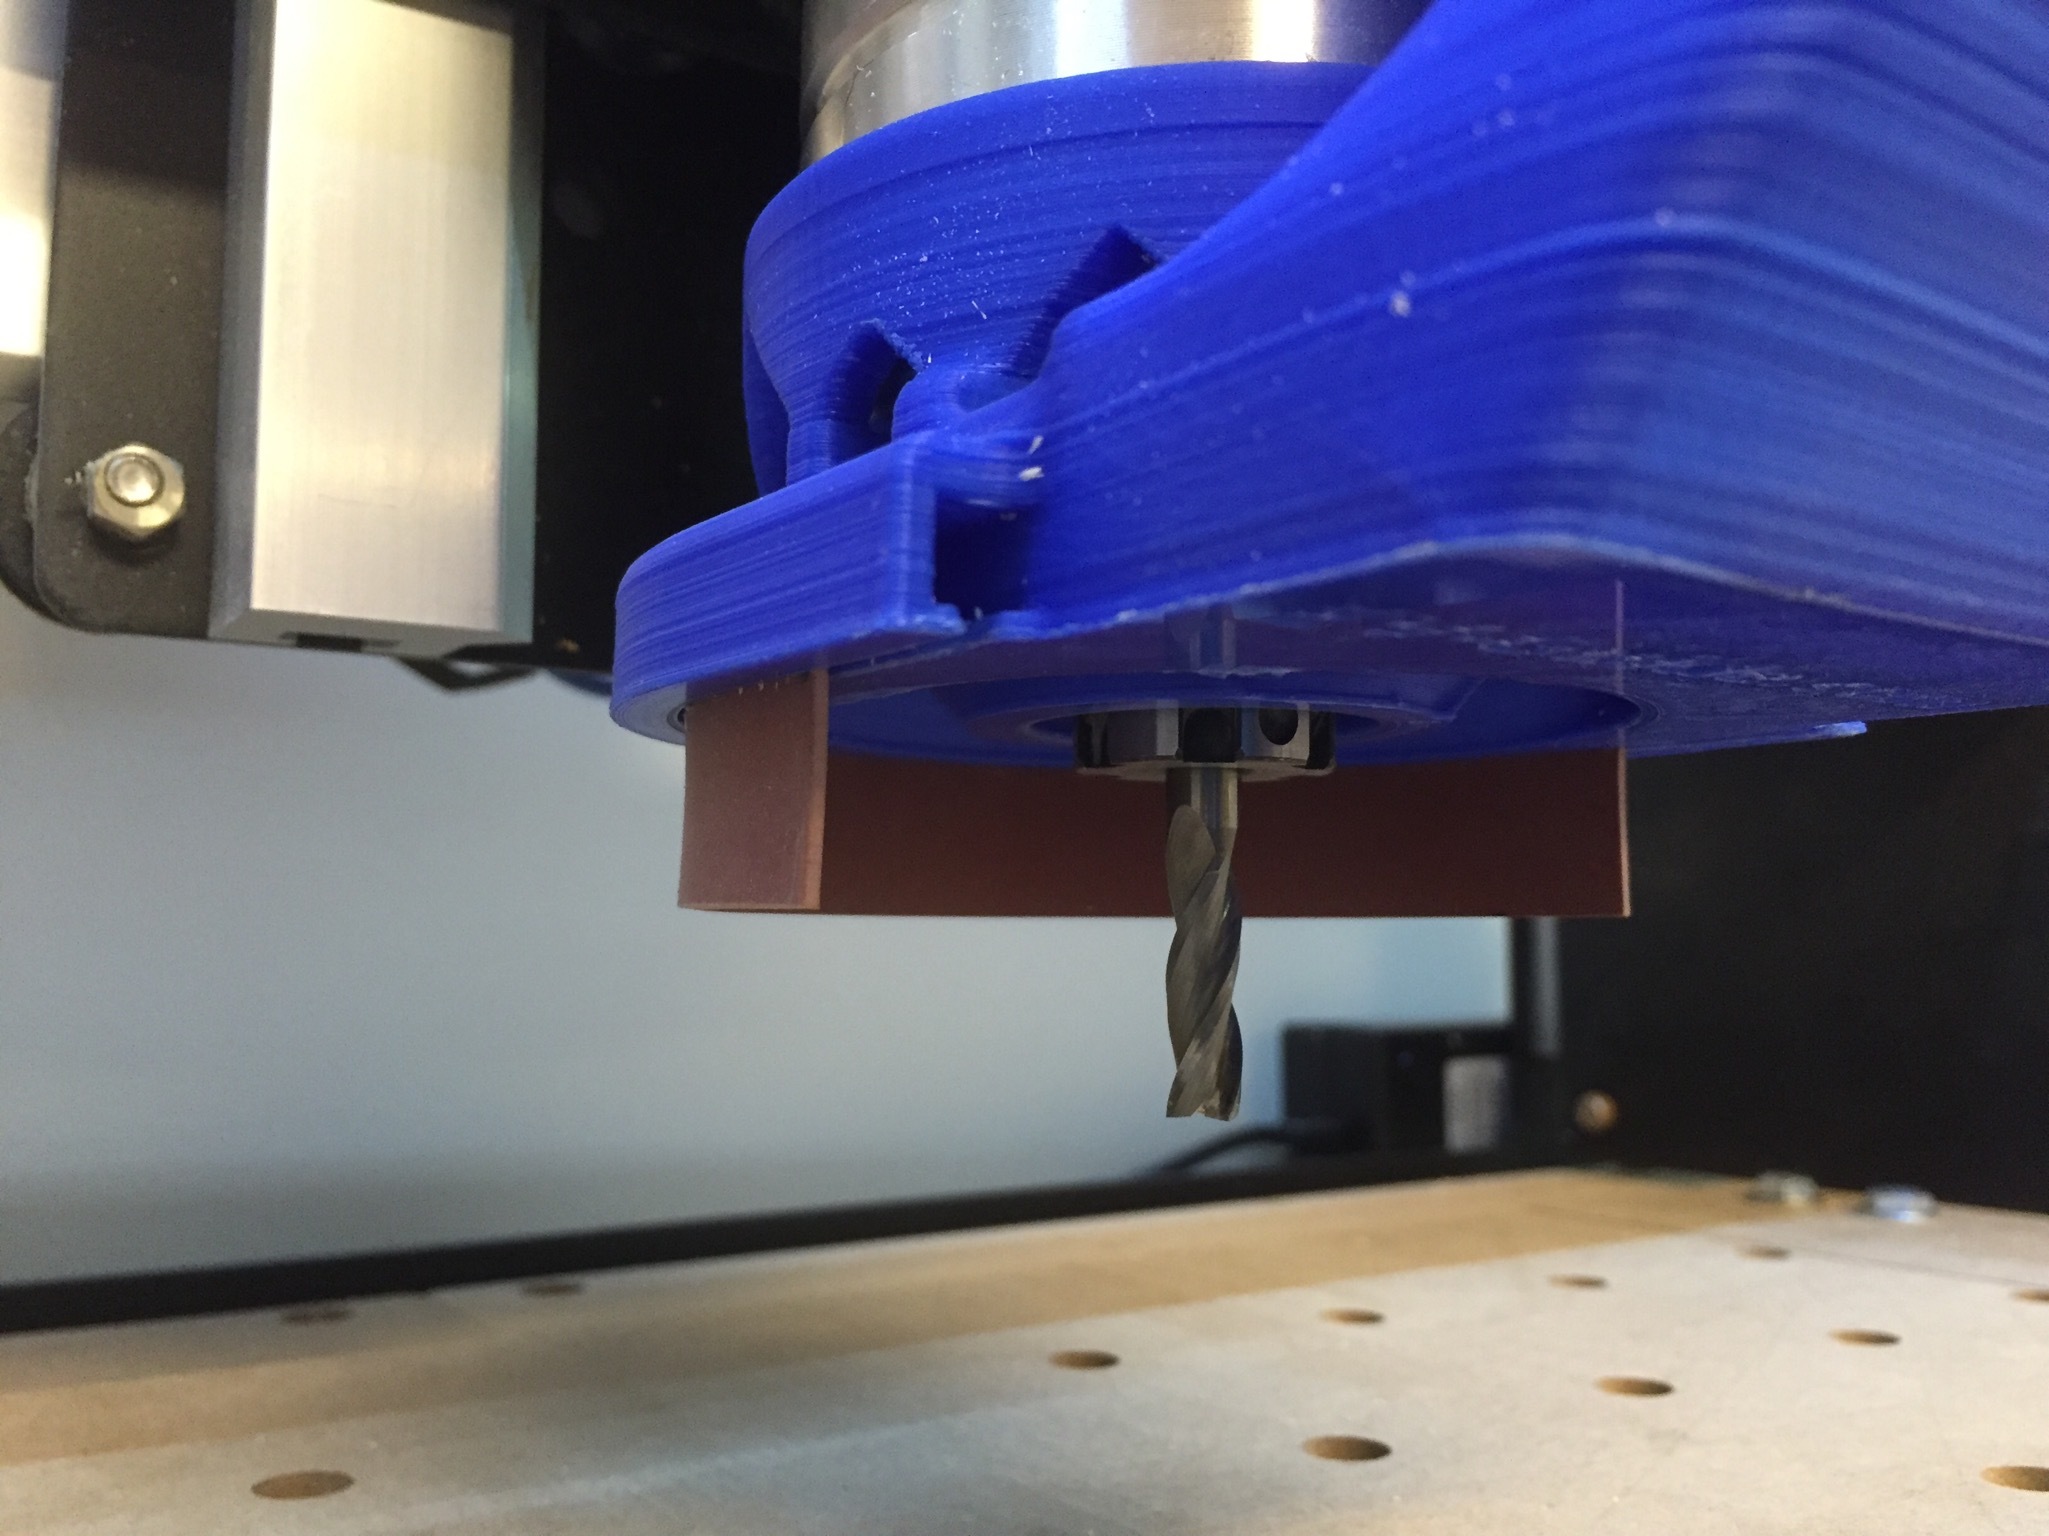
My first concerns were; Does it work with the PrecisionBits Collet? And can you change a bit using the collet tool while it is installed? The answer to both is YES! The diameter is large enough and there is just enough room to use the PrecisionBits special wrench. (The vacuum attachment does comes with a wrench to accommodate the stock style Dewalt collet)

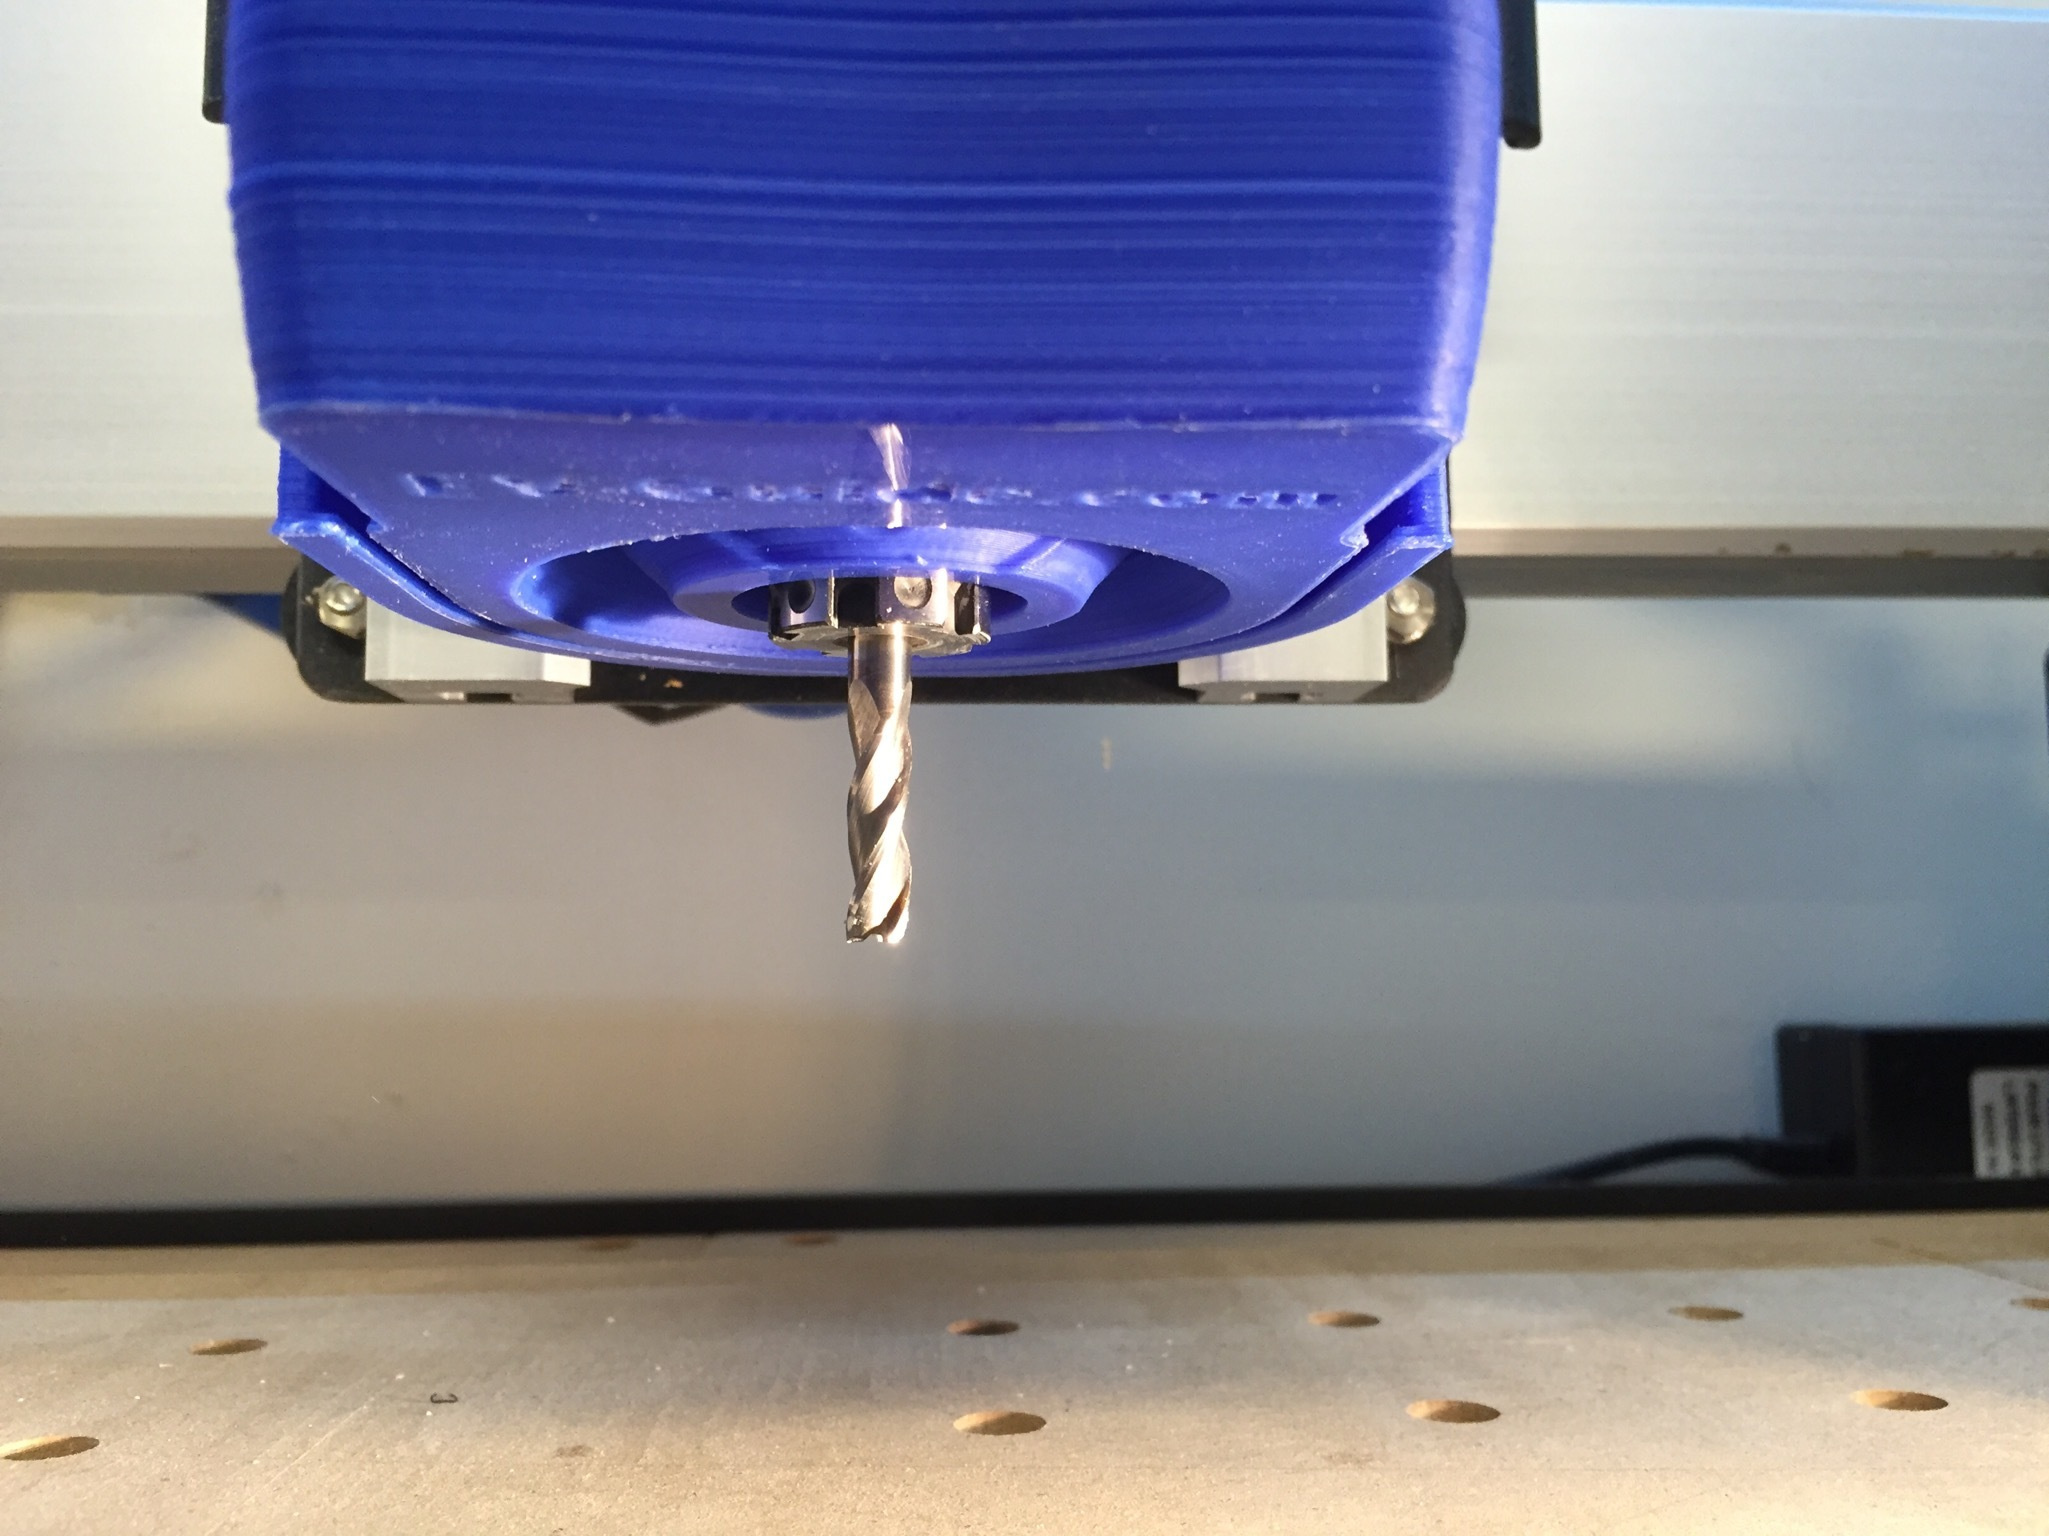
I know it looks tight, but PrecisionBits wrench does work and using the Spindle Lock feature, I can use it without looking. Now the brush might make this action inconvenient but I haven’t tried this out yet. I took the brush out mainly because 90+ percent of the wood chips are captured without any brush. The below picture show a piece of maple with a rectangle hogged out as a “Pocket” cut, meaning doing it the long way and creating a lot of chips. You see the total amount of remaining chips and most were thrown back. It is possible to make your own custom skirt to suit your needs.

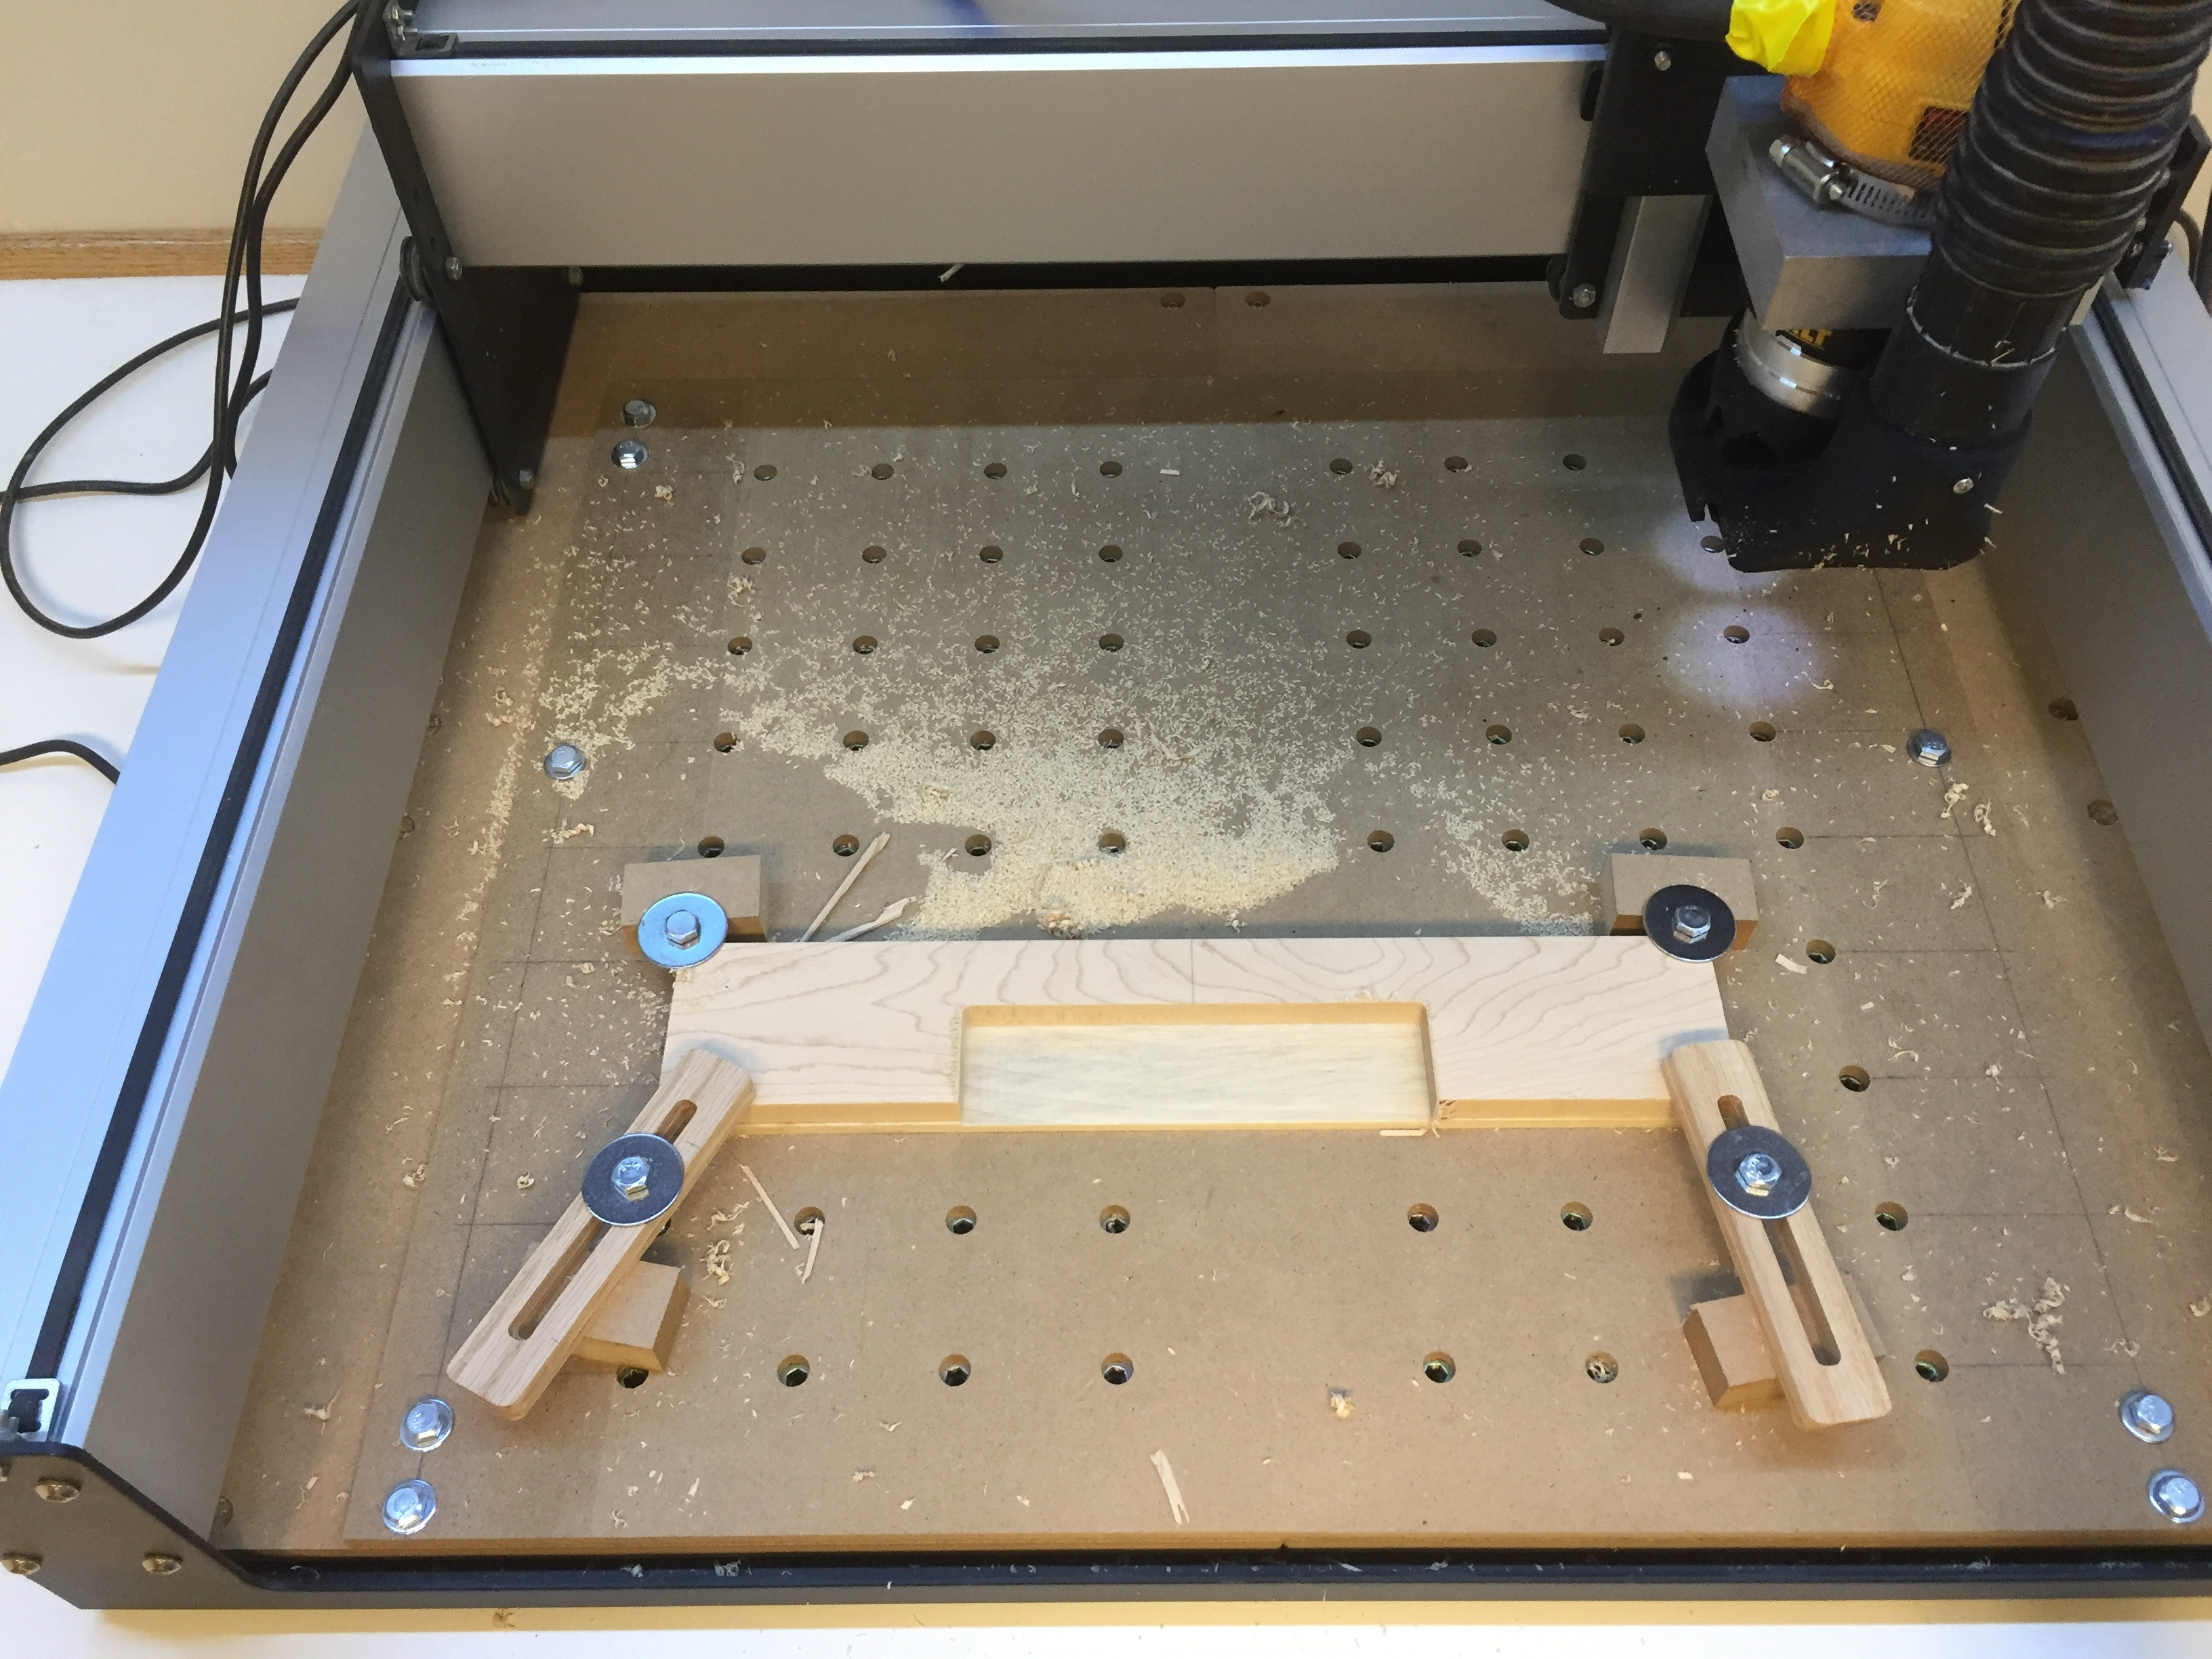
I am not sure about deep groove clearing and other materials, but I am happy with what I saw. I think a just a section of brush around the backside would also make a big difference and still enable easy use of all the features. What I observed was the immediate area of the bit was pretty much vacuum cleaned for the duration of the project.

I have been waiting some time for something like this. If you are looking for a good and cool looking vacuum attachment for your system, I am sure you will find this one pretty darn close to ideal.

4 Likes

Thanks for this post. I liked what I saw and ordered one myself. Mine has a 2" hose port. I connected it today and will try it out as soon as
I can, but I can feel it has better suction than my old dust shoe, and it gives me more clearance. I will update once I have a change to cut with it.

I’ve ordered one as well a couple days ago, eagerly awaiting shipping notification :blush: I looked at many of the make-your-owns and 3D-print-your-owns as well as designing one myself, but this one had several merits(spindle lock, viewing my work, removable brush) that made this design stand out amongst the others. I’ve only had my machine built for a week now and really just want to get running on my own projects without reinventing the wheel. I’m kinda surprised that there isn’t a C3D add on for free or purchase, or “first project” that addresses dust collection or more specifically the dust shoe itself. With one of my 3D printers the first included project to print was a fan shroud for cooling prints, the printer came with the fan and instructions as well as the needed files for printing and completing the project, I thought that was really cool, test the machine and get a useful part at the end, much like the hold down clamps provided by C3D. This one however looks like a winner, at a reasonable price, we’ll see when it gets here.

Dan

1 Like

I do not have the Dewalt router I Bought the Makita. Do you know if it will fit ? I have looked on their website but can not find a contact link to send them an email.

It is 3D printed for the Dewault, so I doubt it would fit other trim routers since it has holes that line up with the LEDs, slots that align with the air vents, etc.

I tried it out last weekend. It does a good job. Not perfect since the front edge is not covered some chips do escape. But overall I like it. Great fit, and I love the spindle lock for tool changes. I wish it had a channel that went all the way around so you can use a brush to keep all the chips in if you are not worried about seeing in. It is a little easier to clog than my previous shoe since the opening is narrower, but then again it also has better suction.

I’ve been dealing with Brian Thompson at this email - bsthomps12@gmail.com.

Since I personally don’t like a full brush, I’ve been working on some options. This Vacuum Attachment gives me a lot of flexibility to try different things. Here is one…

I am trying out some 6"x6" - 1/16" thick rubber gasket material (Lowes had it) to make a rear shield. I sewed a 3/16" wide strip to various skirt heights. Using my Dremel, I pre-drilled some small holes for easier sewing. Here is one for example.

It slides in VERY easy so you can move it out and back in quickly without applying much pressure.

I have made 2 different lengths thus far, mainly because the 1/4’ bits are much taller than 1/8" bits. Although in this picture I show the shorter one with a long bit. Took the picture before I made the long skirt version.

I may decide to slit the skirt into the traditional multi-flaps, but only if I see I need to from using it.

Performance: For me, I would estimate it is picking up 99.9% of the dust and shrapnel created on a few small projects in the last couple of days. I don’t mind doing a after completion vacuuming, but I didn’t even do that the last 2 times. The simple skirt made a big difference from nothing (about 90-95% pickup) to what I get now. And it doesn’t need to be in contact with the workpiece.

If you are set on have full 360 deg coverage, I can visualize that the current slots along the sides (where they are straight) could be used to insert a forward brush assembly. If I really wanted that, I could make it, but I don’t think it will make a big difference.

It is interesting to me what you guys think of it also. So please keep posting.

NOTE: Sometimes it is easy to forget that your have the spindle locked, then you realize you F’ed up when you turn on the power. It didn’t damage anything on my unit, just startled me.

1 Like

I ordered one on the 7th still waiting for it to get shipped :stuck_out_tongue:

Hi, I live in Canada, and I would like to buy one of those.
But it looks like it doen’t ship to Canada for unknown reason.
The credit card will give him the money required in USD.
He can send it USPS with a little extra that he can put on the card.
I don’t understand this.

Jean Boulanger

Hi everyone,

We thought the best way to keep in contact with everyone would be to setup a forum account. We’re here to answer any questions that you may have, listen to design suggestions, announce new products, and generally keep in touch with the Shapeoko community.

We first want to thank everyone for all the great responses so far. A lot of time was put into the design and testing of this vacuum nozzle and we’re really happy with the final result.

To address the topics above:

  • Great suggestion Valentin for the shorter brush, we’re actually now shipping the nozzles with both a 1" brush and a 2" brush included because of your suggestions. It seems to work really well and allow you to adapt to the current machining project at hand.

  • Sean: We answered this through email, but for everyone else’s knowledge this is designed specifically for the Dewalt router. (Thanks for the order, your unit is pretty high up on the queue and ready for the printer!)

  • Alex: Your order is actually next up in the queue and we’re hoping to have it shipped out tomorrow. Sorry again about the lead times, each nozzle takes about 16 hours to print and we’re trying our best to keep up with the orders. Right now we’re floating around a 1 week lead time from order placed to shipped out.

  • Jean: We originally looked up international shipping costs and figured it would be cost prohibitive. We listened to your feedback though and now offer international shipping to Canada (unfortunately this is quite pricey, but now available!) Feel free to reach out to us if you have any questions or experience any issues with your order.

We’ll be launching a hall effect end-stop kit and an LED lighting kit soon as well so stay tuned for those updates! Details are on our Products Page.

Just wanted to mention here that I have gotten my dust boot and it works great! Brian from EV-Guide and myself have exchange a bunch of emails and it’s been a great customer experience. I have also been beta testing the LED light kit and it works really well (some of the customer images on the EV-Guide website are from my setup). The LEDs are super bright and make working on my machine much nicer than just my garage lighting. It gets the light right where you need it, it’s like I got a new set of glasses!

Thanks again!

Dan

Did you ever make that yellow locking tab?

Hey Valentin,

We’ll try to squeeze that into the print queue and see if we can get it out to you either this weekend or early next week.

Btw, if there are any other requests for additional colors we’re open to expanding the color options from the available black, silver, red, and blue for any of the available products.

Thanks everyone for the continued interest and orders! We put together a marketing video to help highlight a lot of the unique performance advantages of the design and we’re excited to officially share it with everyone.

www.EV-Guide.com

@EV-Guide can you do one in yellow?

I ordered one of these. I put my router in backwards from most folks apparently so I had to ask if Brian could print one mirrored for me. He could and it seems to work fine. I’ve only used it for one small job so far but there was no dust when the job was complete. It connects to the bottom of the router perfectly. I’m very happy with it, much better than standing by with a shop vac!

1 Like

Word of Warning about the EV-Guide…

First let me preference that this product is well thought out and does an excellent job.

The warning I will give you is that due to the products design, the volume of air being moved through your dust collection system is considerably restricted when compared with other dust boots. That being said, it is much like putting your hand over the end of a vacuum cleaner; it will stress the motor. I am running a 1 1/2 HP dust collection system. I was running a large project for several hours with no other dust ports open. This caused my dust collector to over heat and come very close to bursting into flames :fire:. Had I not been in the shop to stop the system it would have been a disaster.

Having your shop fill with smoke very quickly is an experience I would not wish on anyone.

Now (lesson learned), whenever I use the EV Boot I open additional dust ports on the system :thinking:.

4 Likes

I have a 1650 CFM dust collector. I run a 4" hose to a spot near my machine then it splits into two 2" hoses. One is connected to the dust boot and the other is just loose. I still get plenty of suction at the boot and the second 2" hose keeps me from starving the dust collector. It also is handy to do some clean up around the machine without disconnecting the hose from the boot.

P.S. I have that same dust boot and it works very well. The only issue I’ve had is that the wrench they include has to be able to slip over the bit. Normally that’s not a problem but if you’re using something with a larger head like a v-bit you have to remove the boot to be able to use the normal wrench. What I like about it is that you can easily see what’s going on while the CNC is running.

2 Likes