Decided to experiment with kerf bending so this is an experiment still in progress for me and never done anything like this so thought I’d post my adventure along the way and hopefully someone with experience can maybe share some pointers/personal experience.
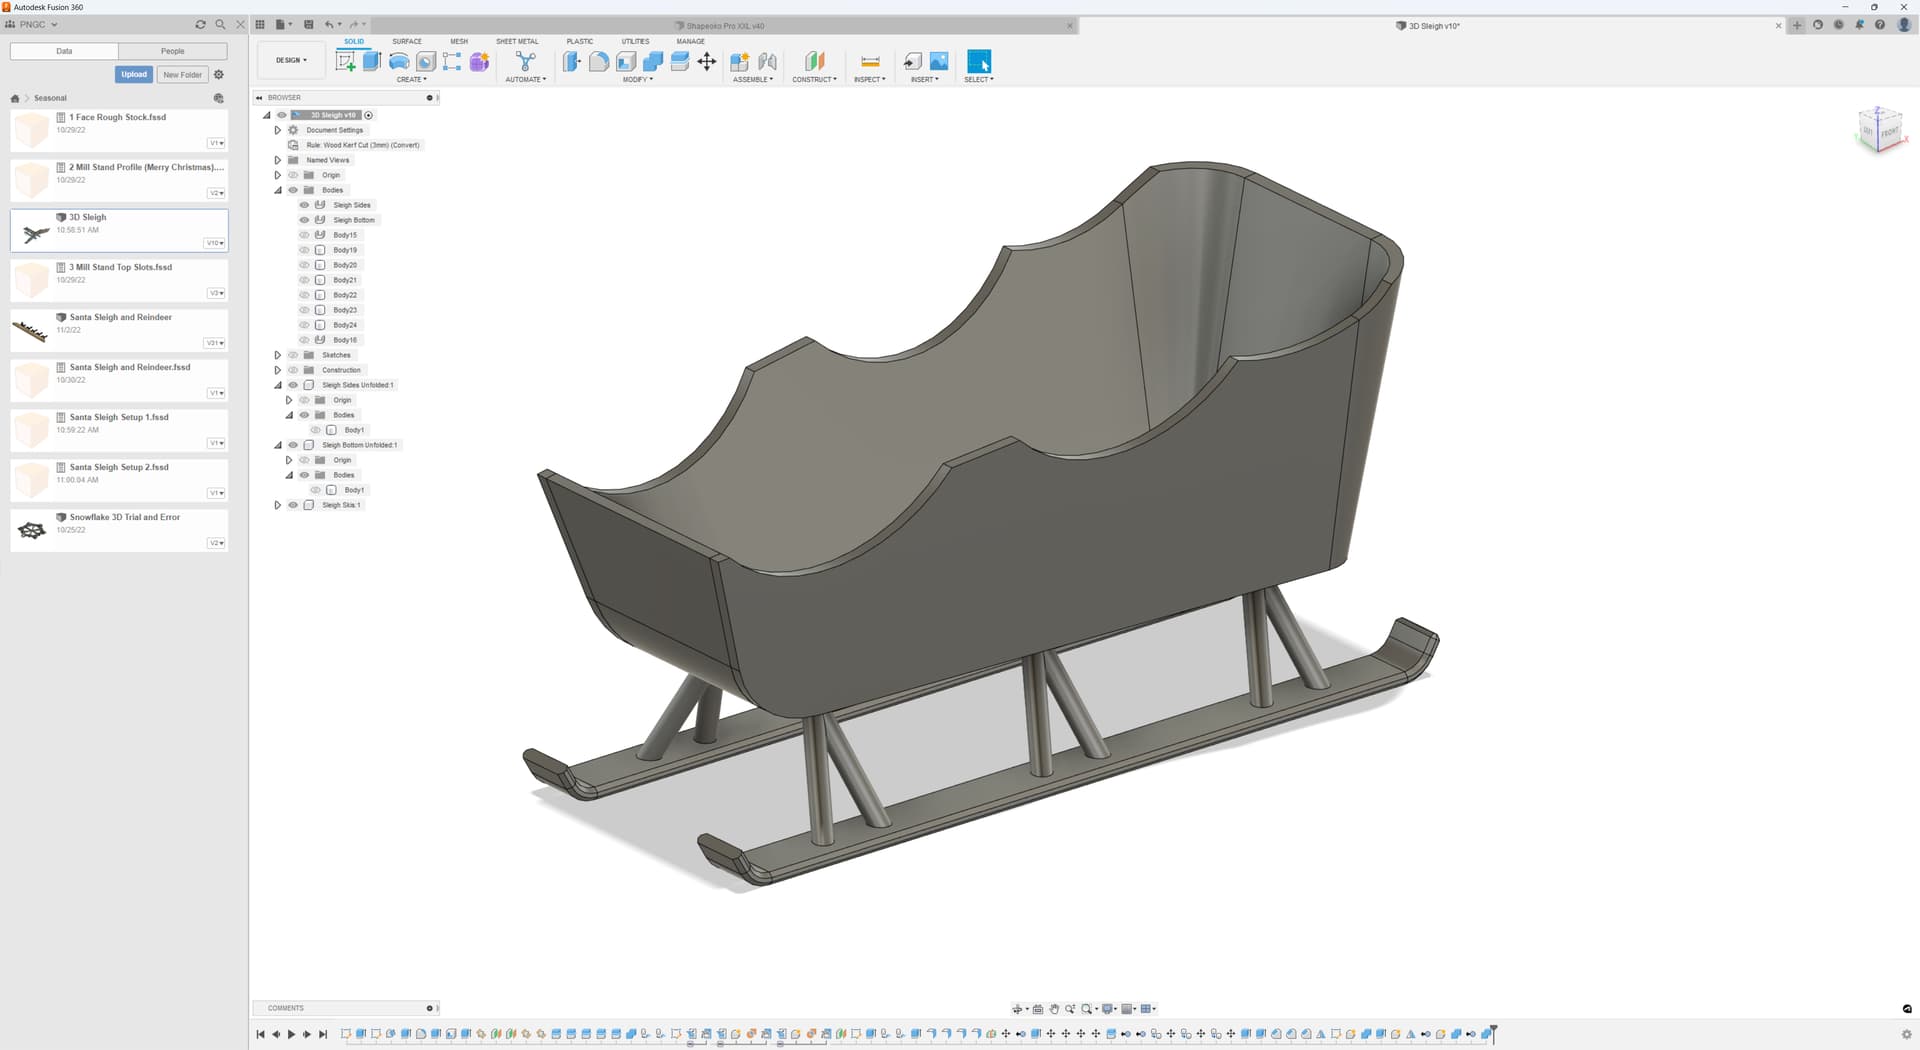
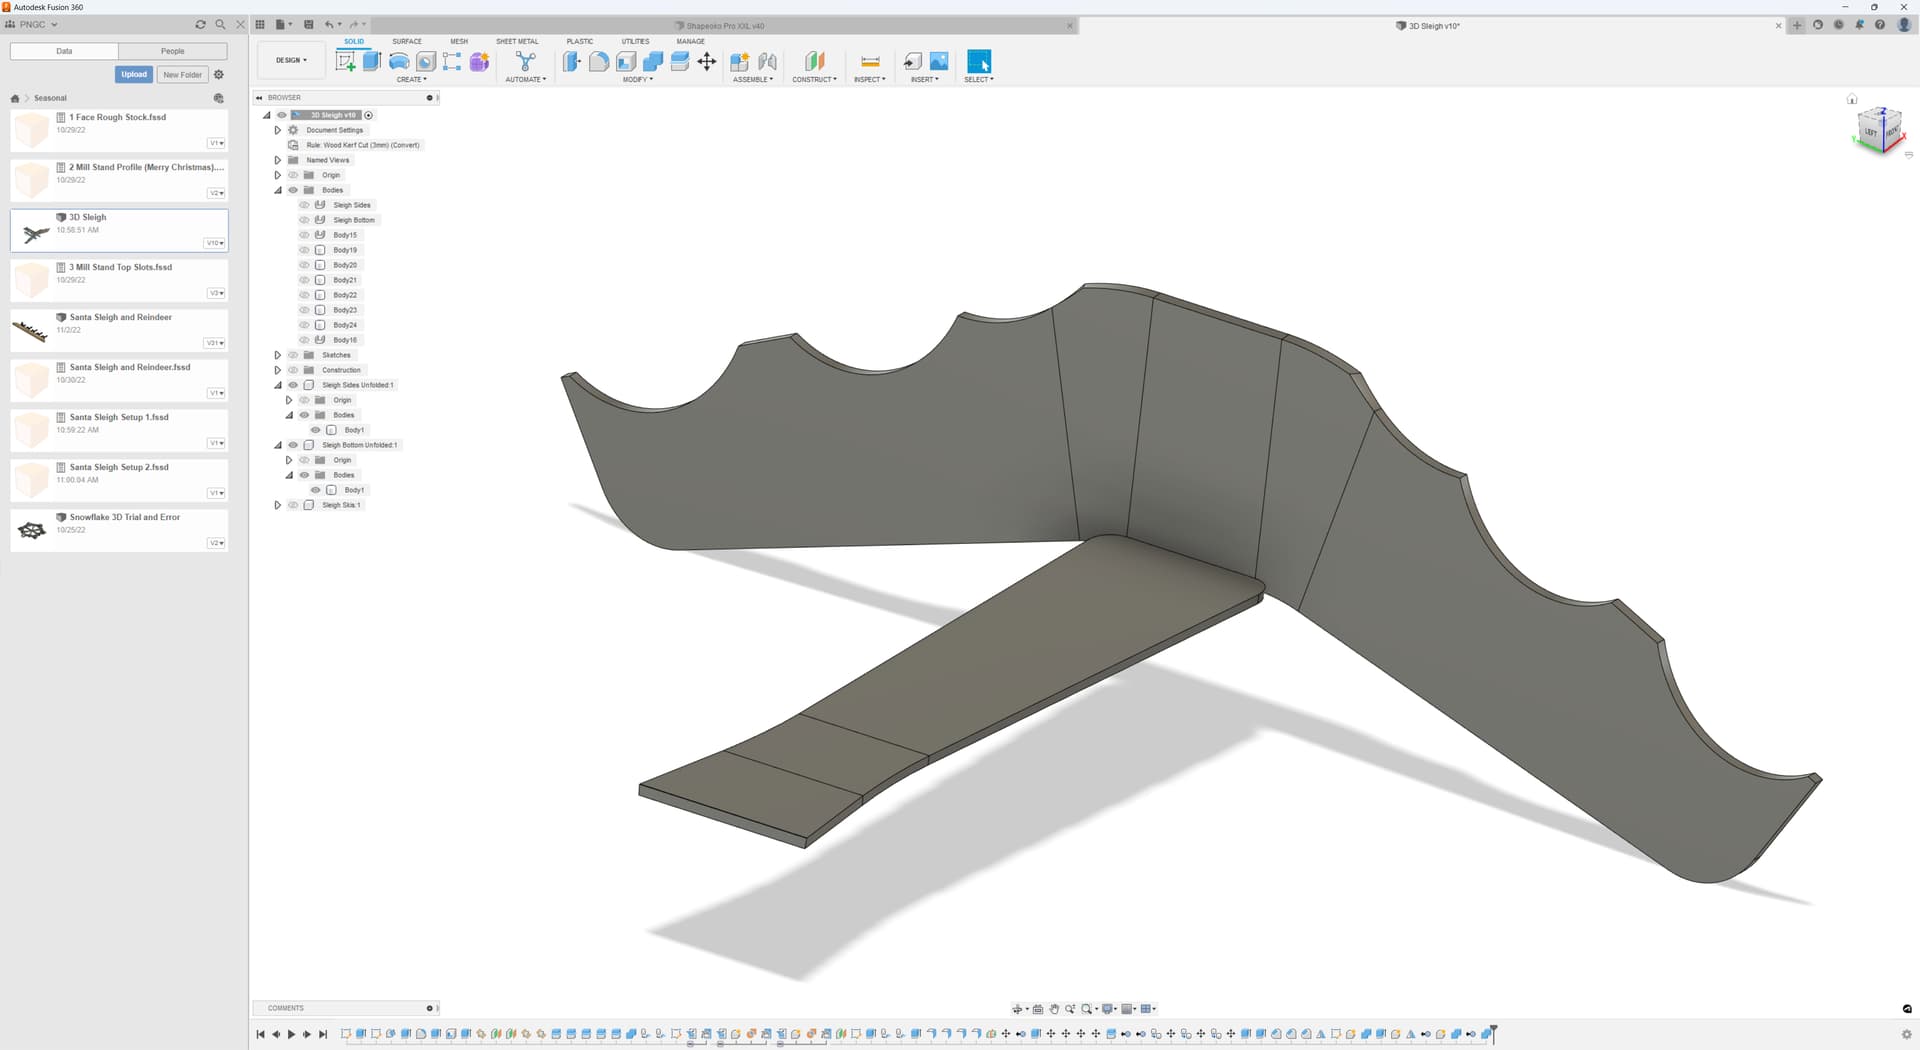
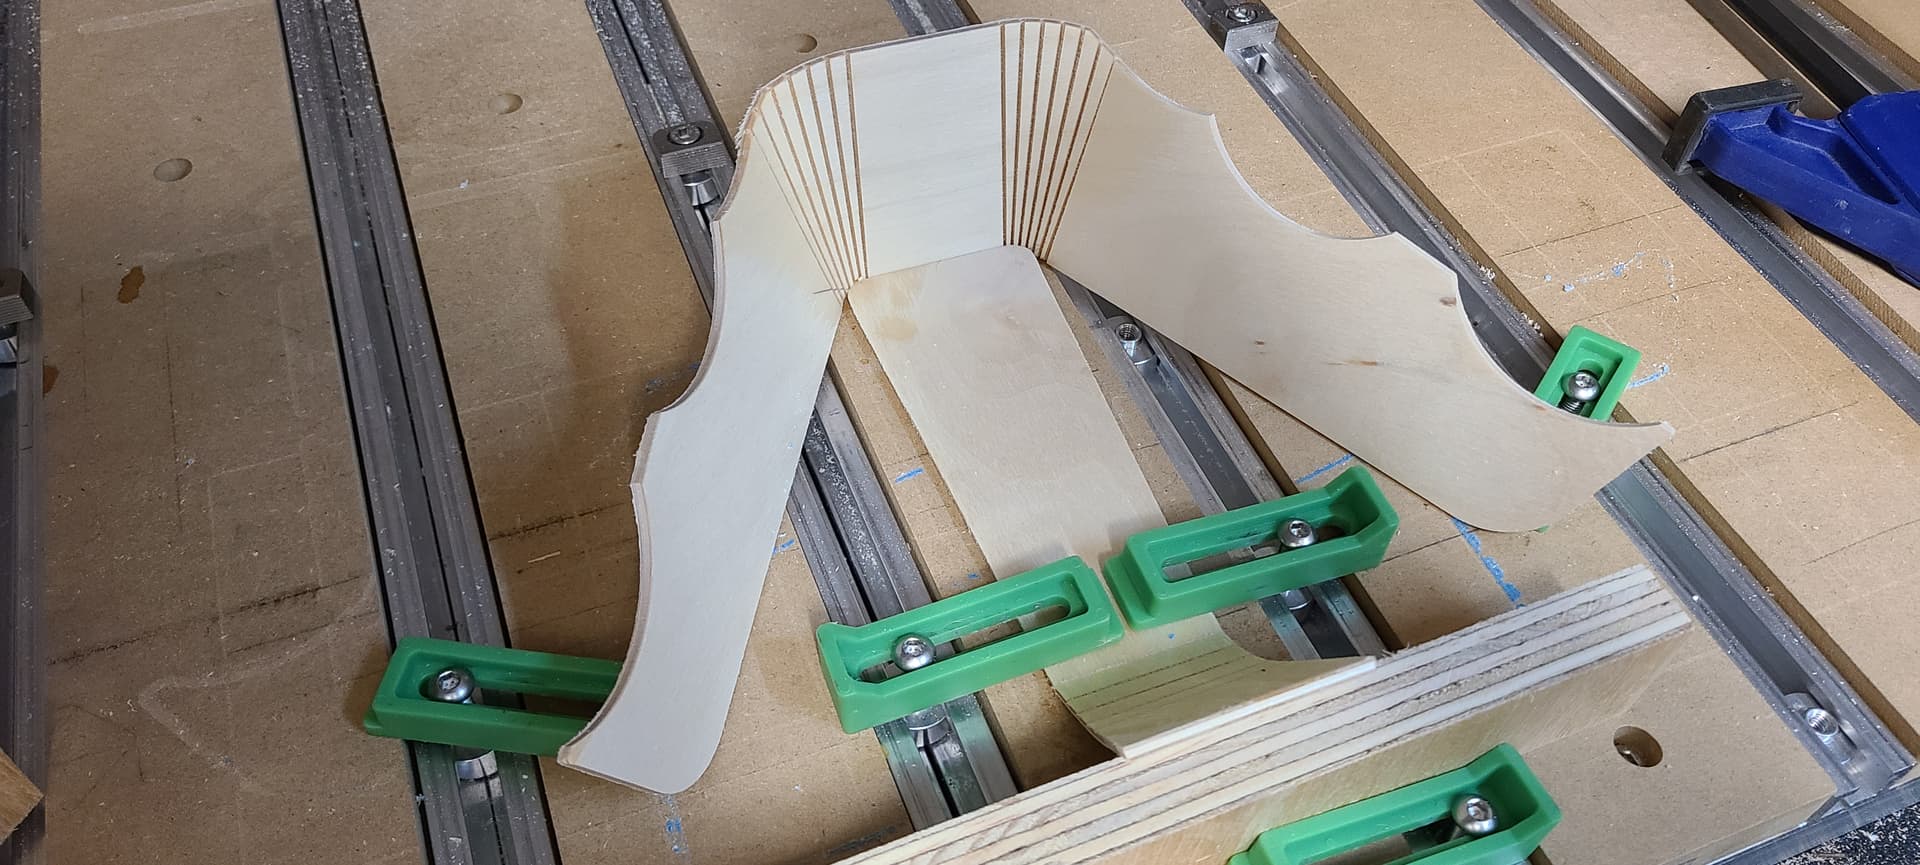
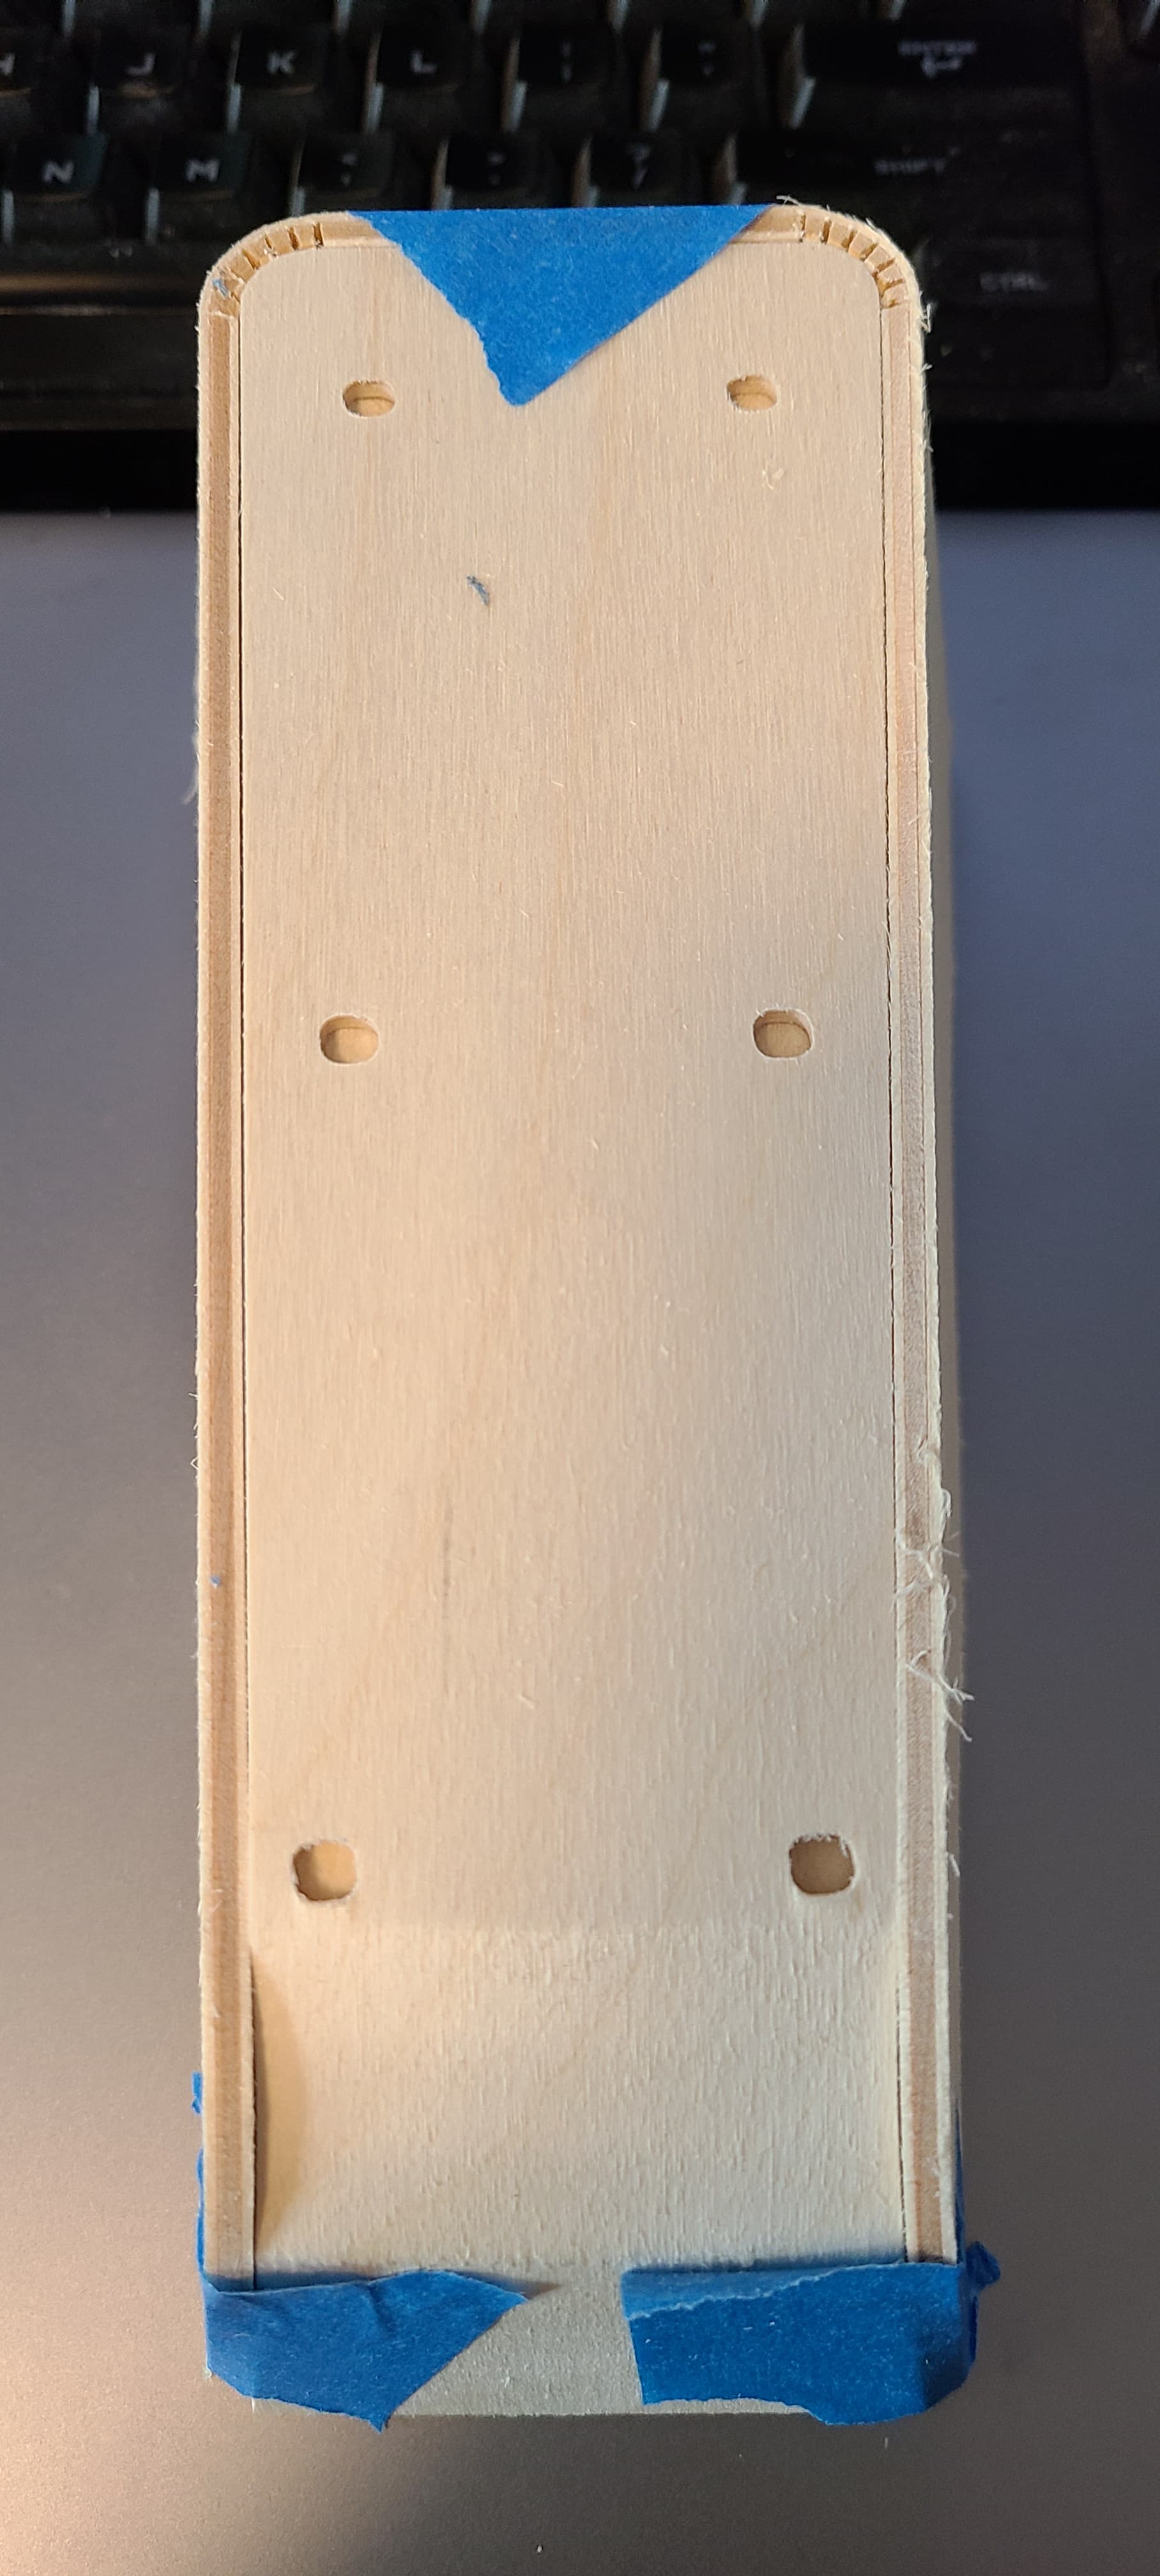
In Fusion 360 I modeled my Santa Sleigh which I cut out some parts in 3mm baltic birch plywood and the skis beneath I’ll 3D print them later if this experiment works out for me.
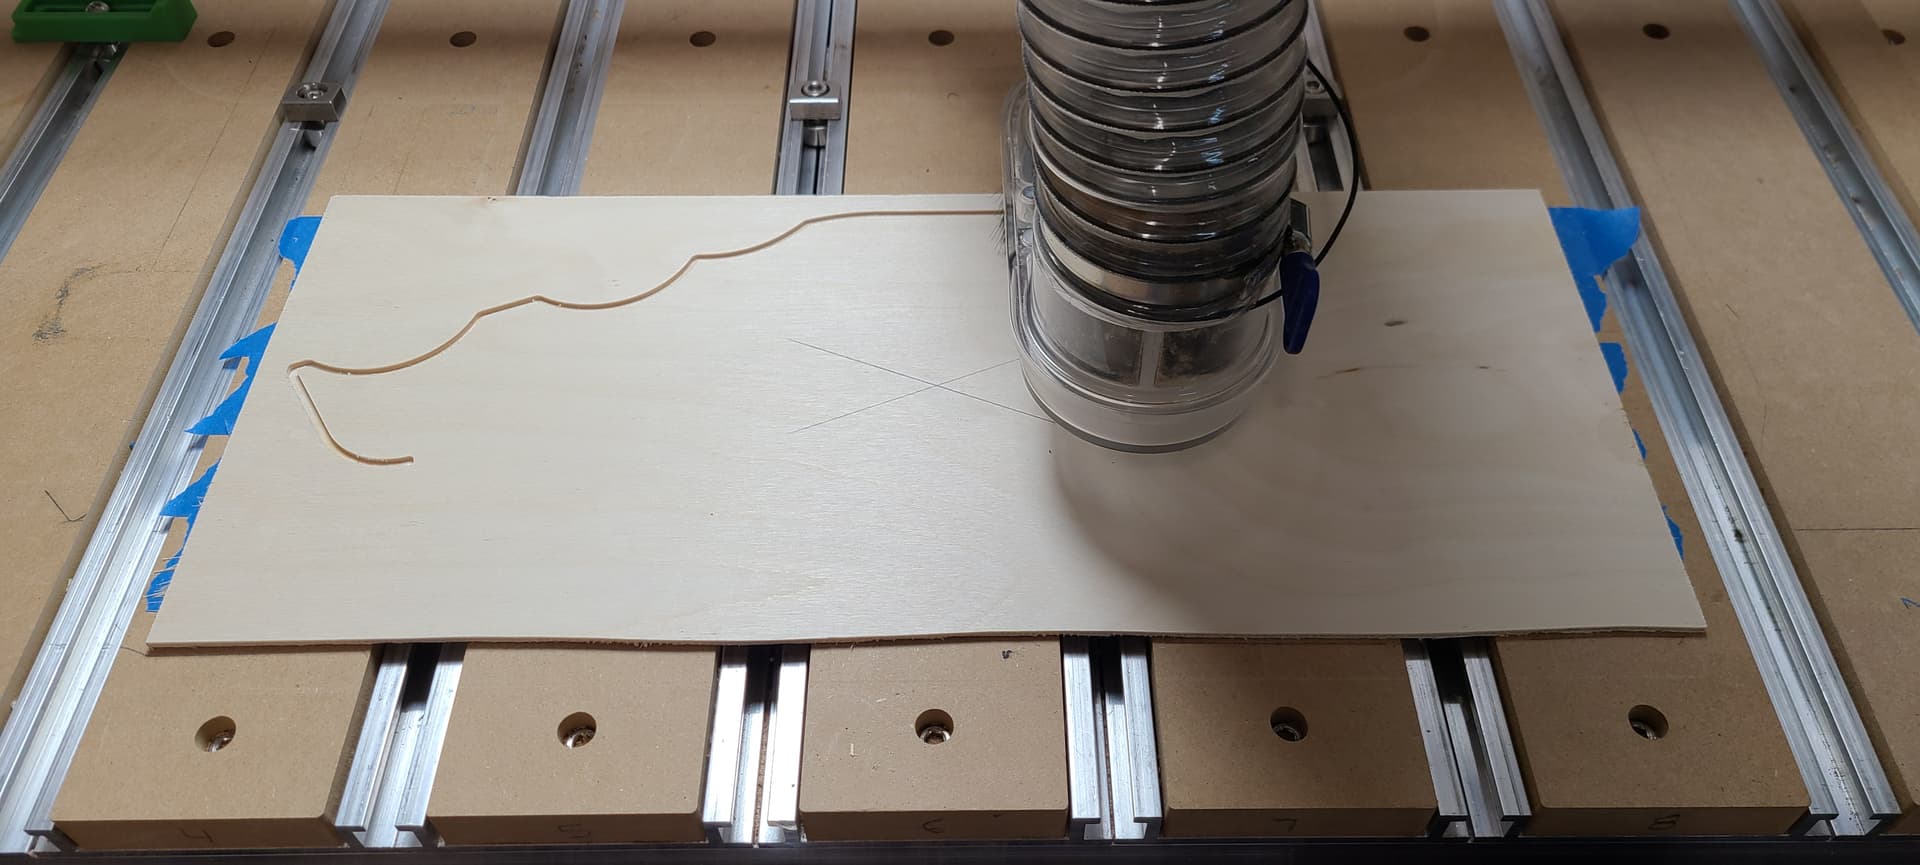
I’ve now run the job on the CNC so the easy part is done and now it’s time to get them to bend without failiing/breaking the parts… I’m only going a little at a time hoping it’ll work but it’s very likely that the bend radius is just too tight not to mention to top part of the sleigh the bend is also on an angle… Now it’s time to do some research/reading to figure how to get the most out of the bend (ie. mist some water on the bends, steam the area, …). Fingers crossed
I succeeded with a similar project once by wetting just the bend area(s), waiting for the water to soak through and then bending. Important to have good clamping and not getting carried away with the water to prevent warping of the flat surfaces though.
Looks like you’re off to a great start!
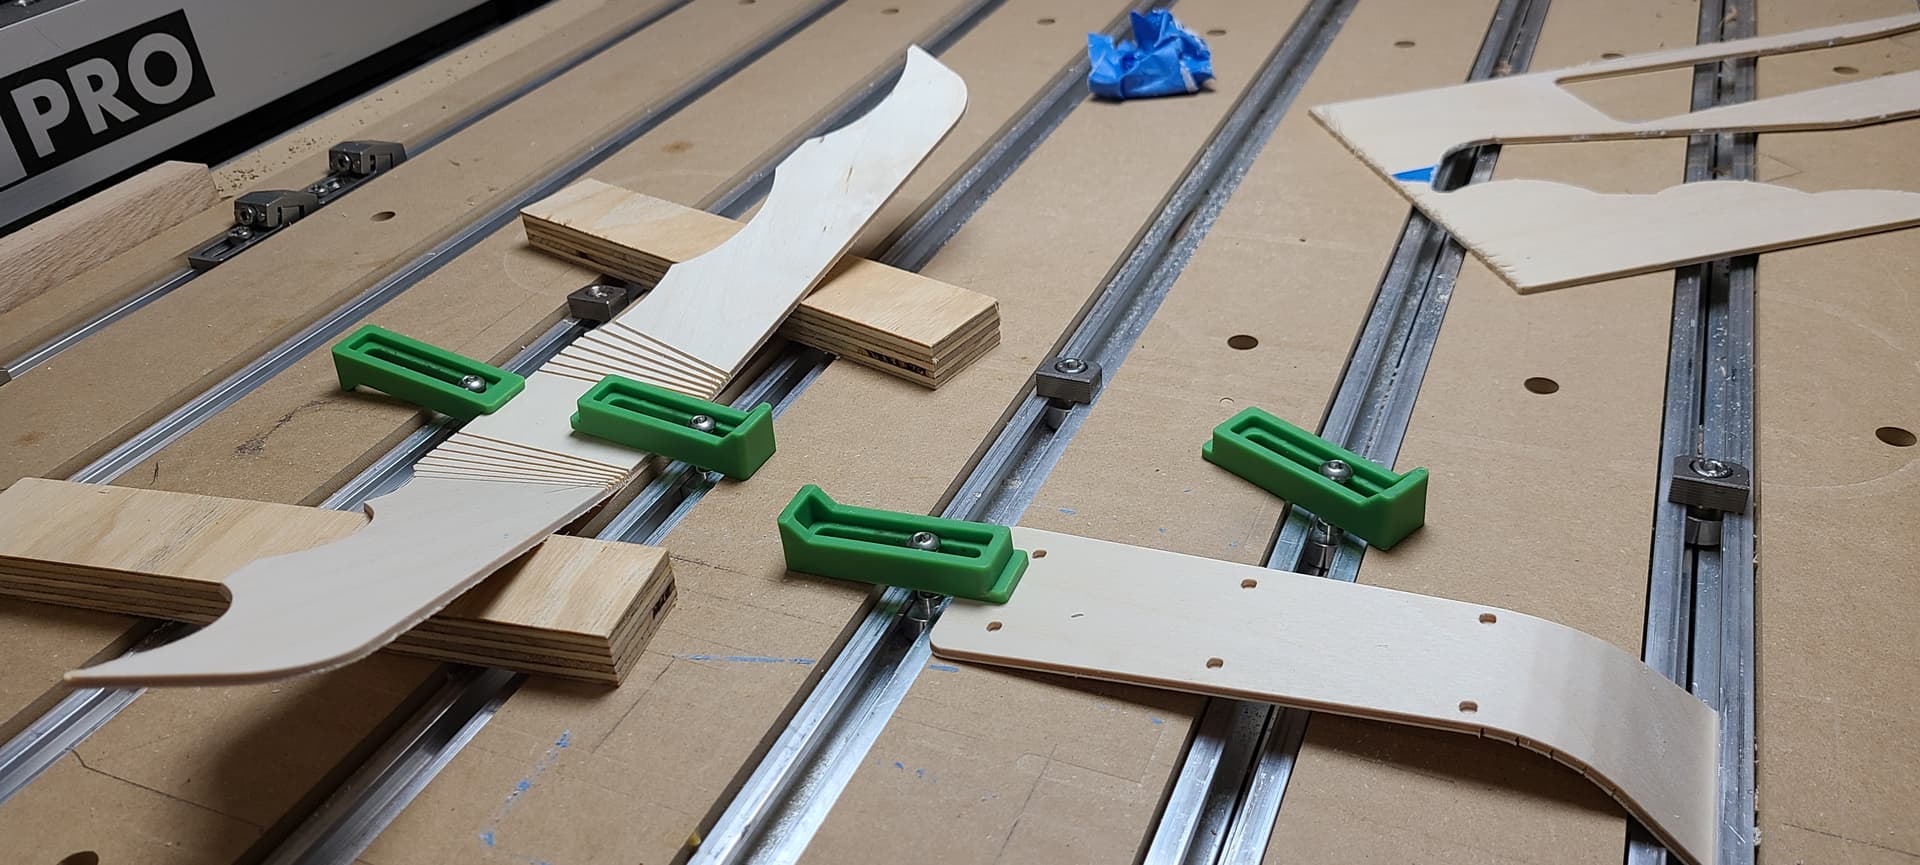
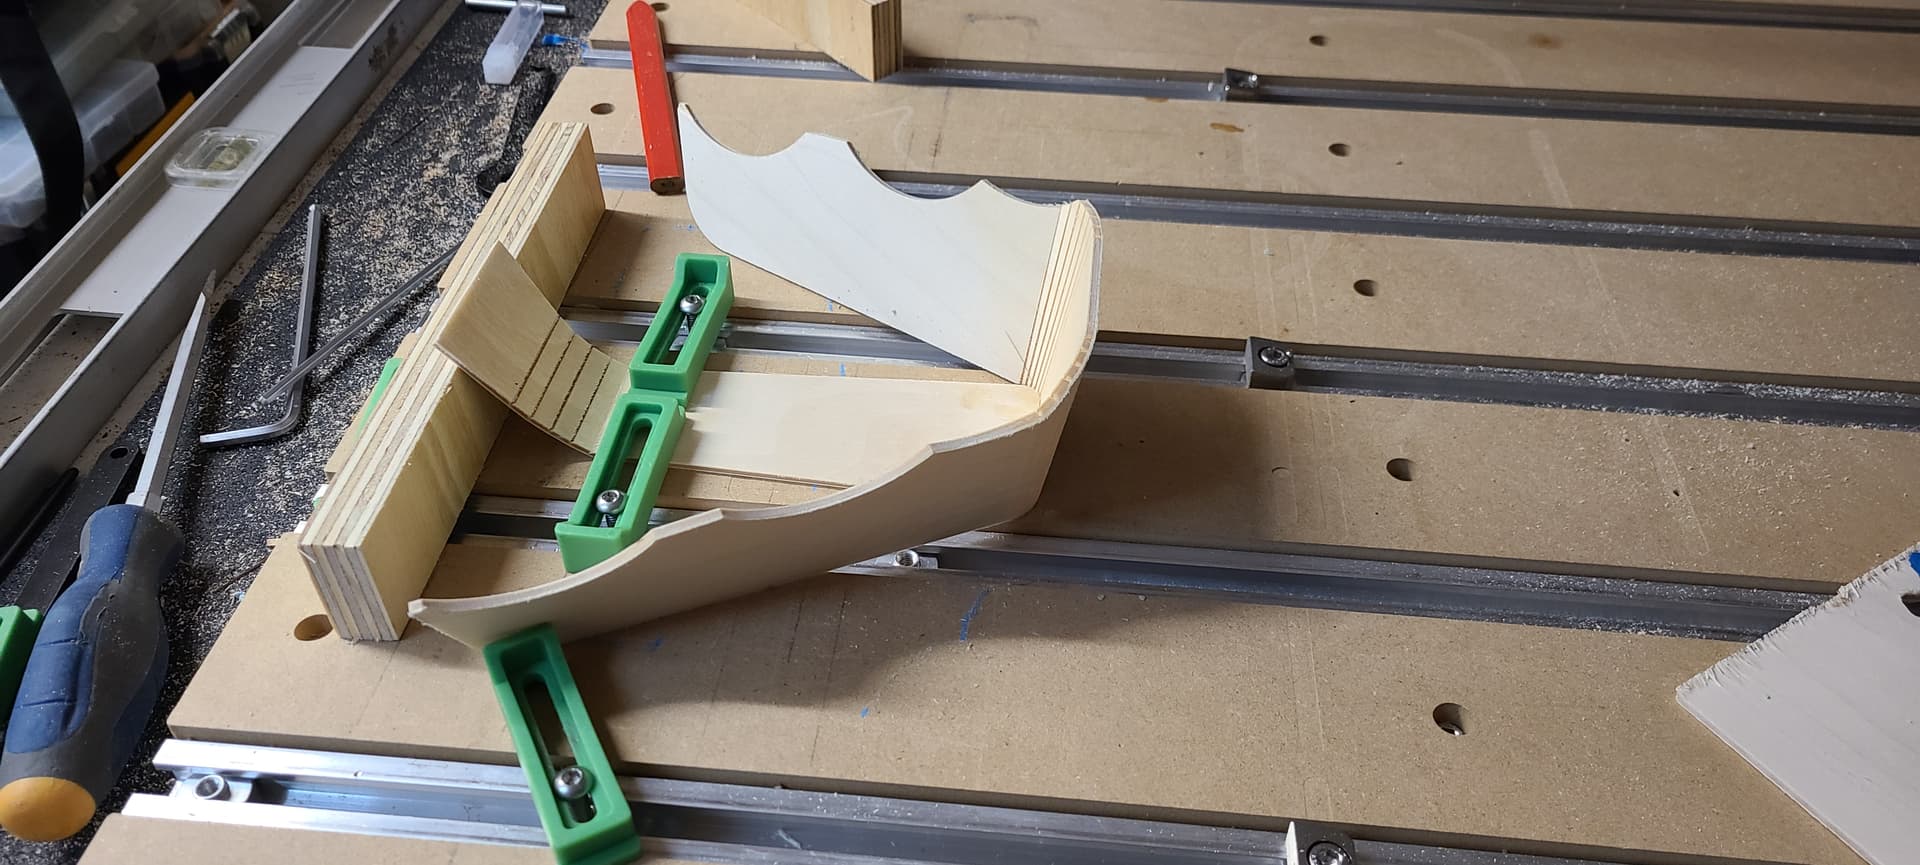
Thanks for the feedback. It’s only been about 30 minutes and it’s already softening/giving quiet a bit more. Also noticing some of the cuts starting to close tight so hopefully by the time I’m done their all closed tight. That said I’ll take my time to get the rest of the curve because I’m thinking I’m close to the part where wood fibers will give way and tear.
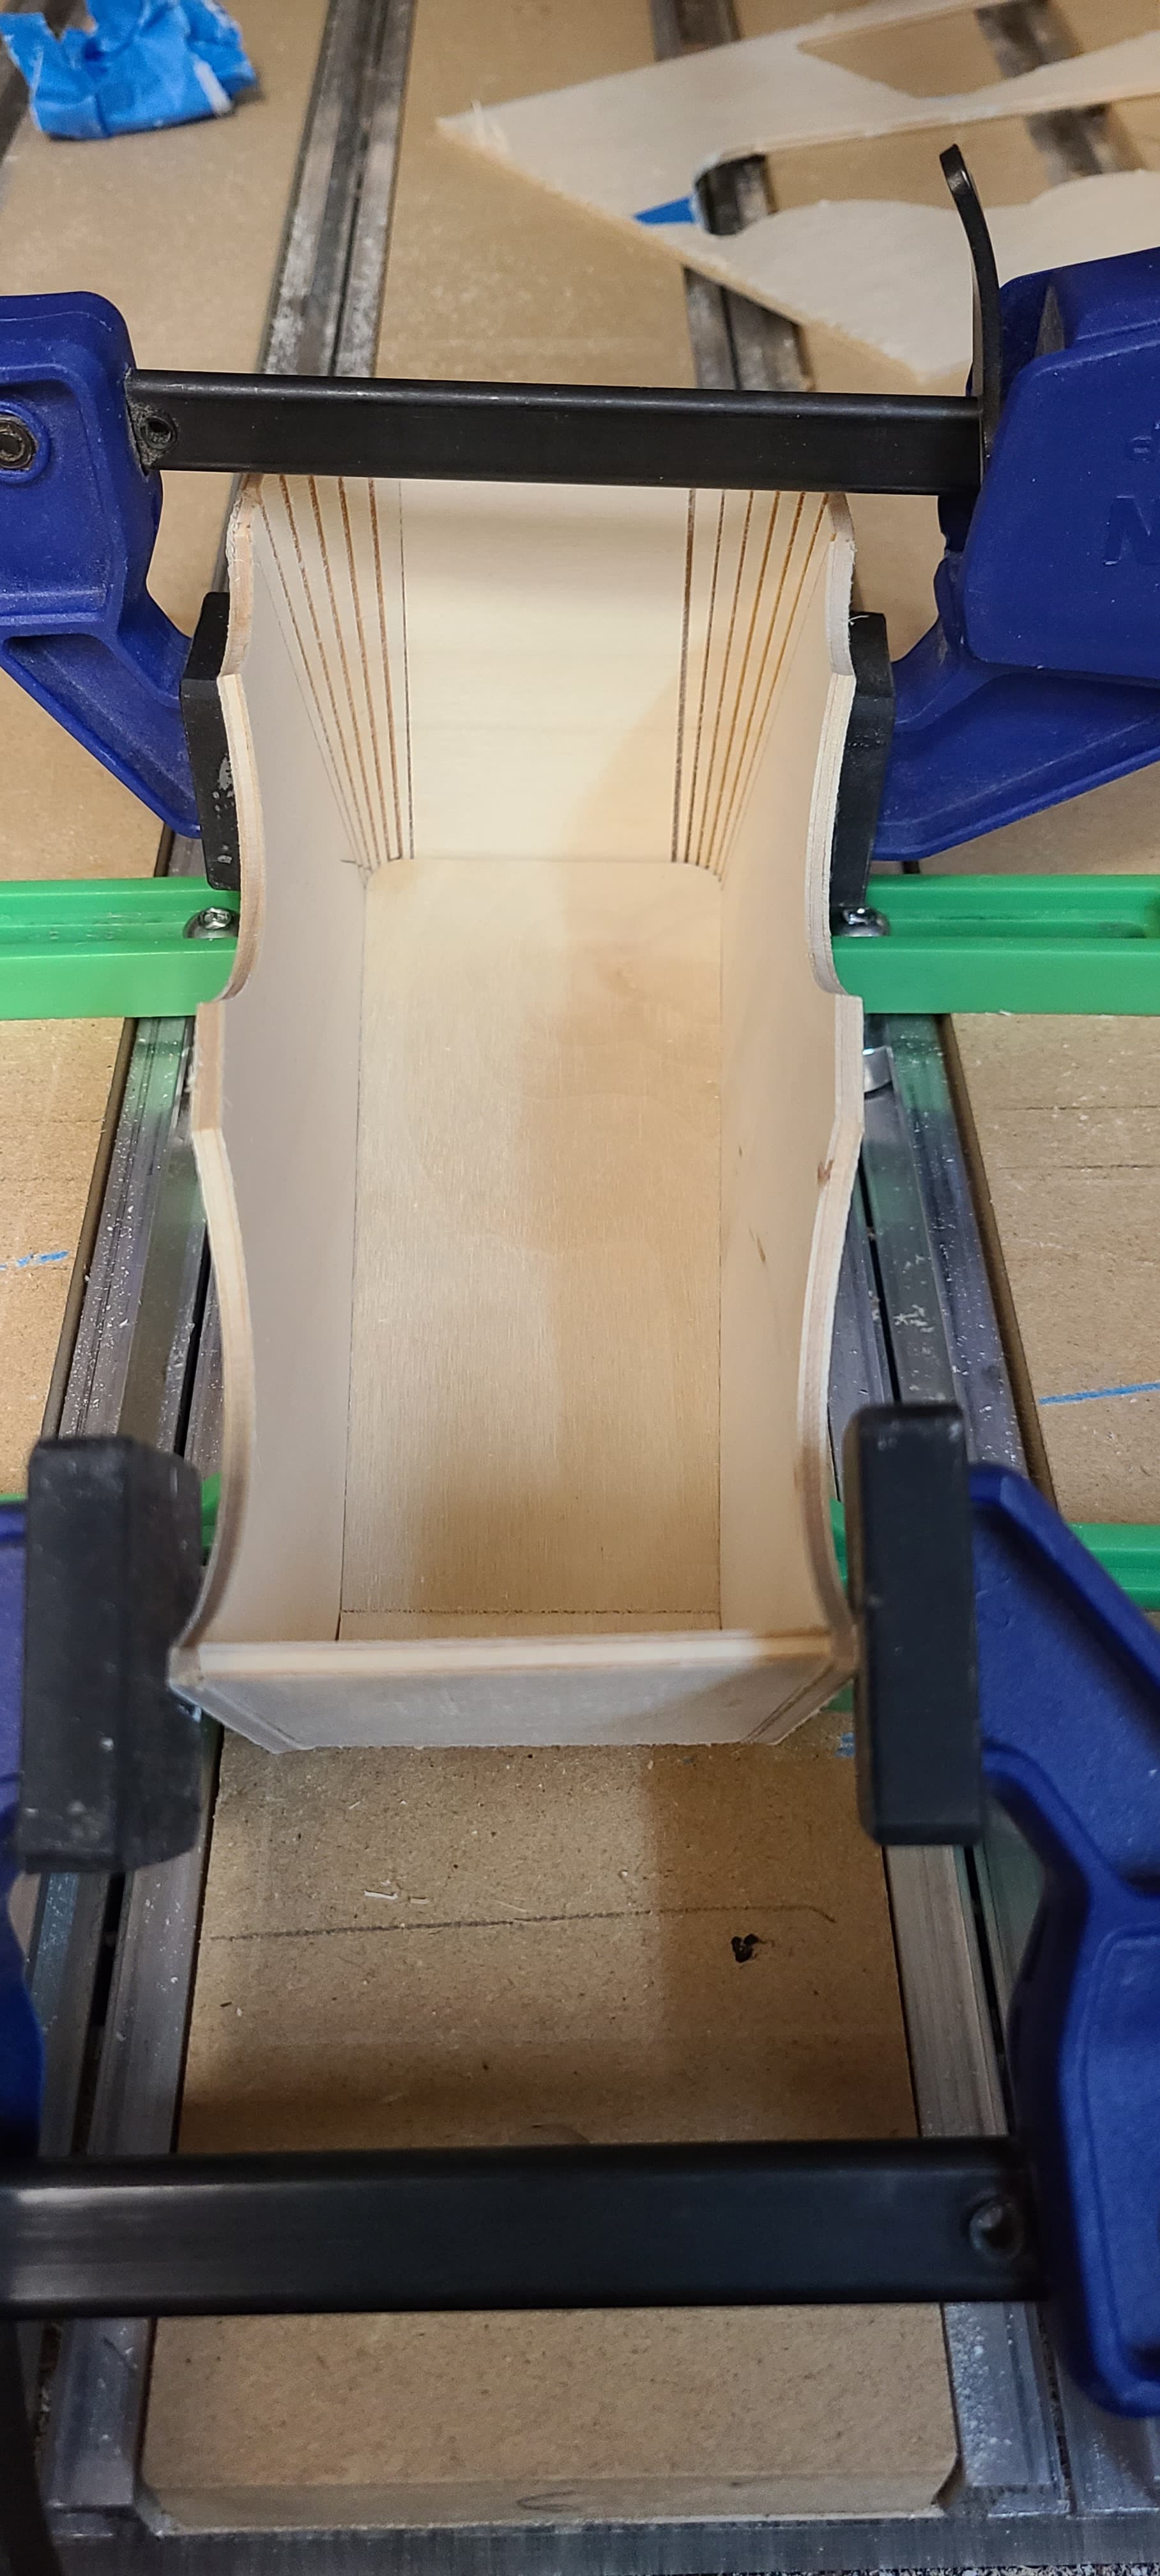
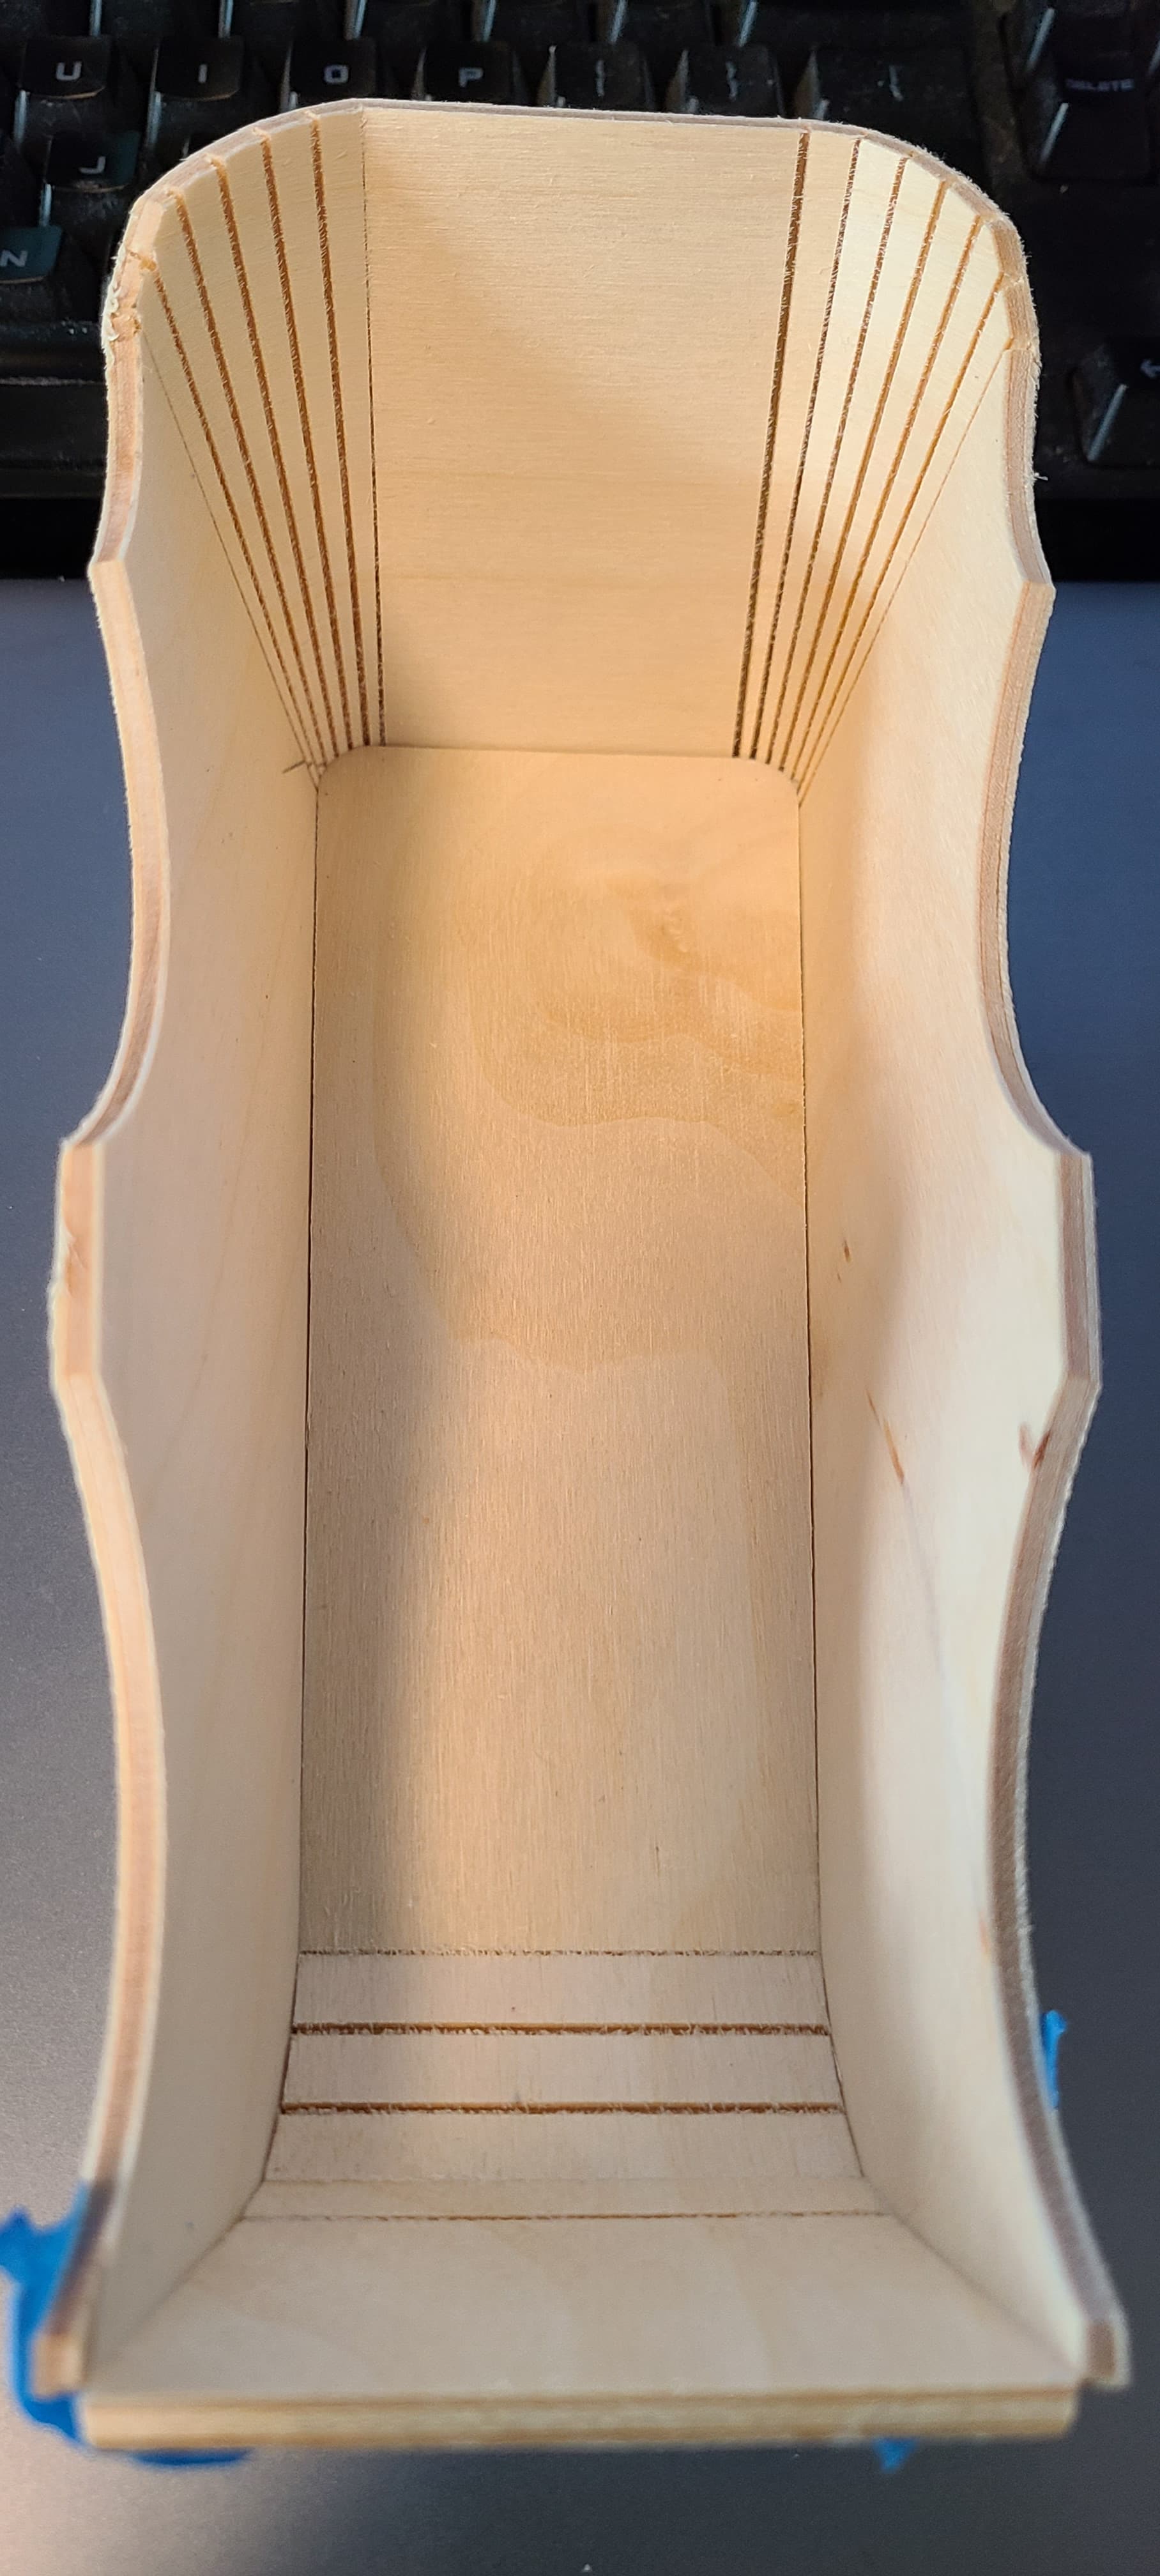
Well that was faster then expected and it’s almost a perfect match for the flat pattern. That said my slots for the kerf cut remained open more than I would have liked but for a first go that turned out not too bad. Will probably mix some sawdust and glue to close the cuts in the bend radius. Pretty sure what happened the 20deg bit I purchase for this the tip broke off so I ran the toolpath again but it went deeper meaning at the surface it also took away more material so the gaps remain. All part of learning some tricks of the trade I guess
EDIT: Now I’ll just let it dry like this and then glue it together. Guess I need to print the brackets and skis now.
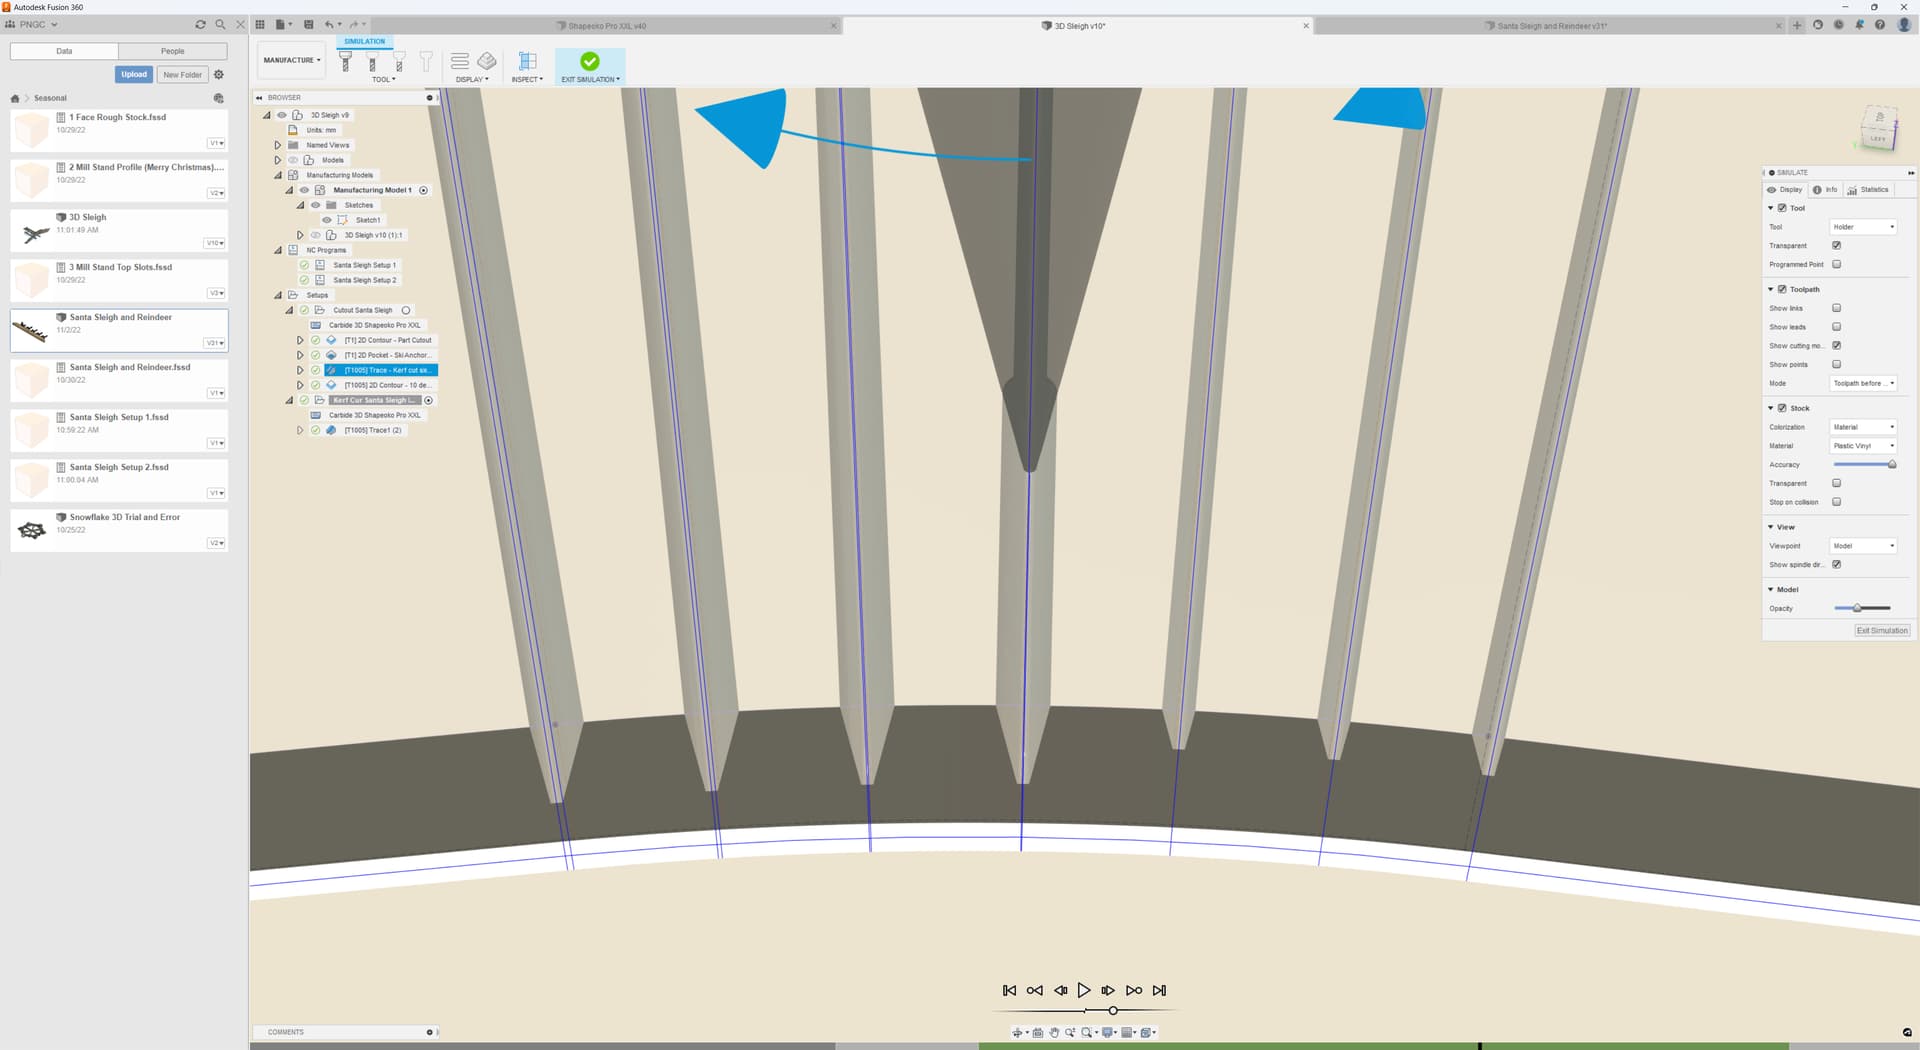
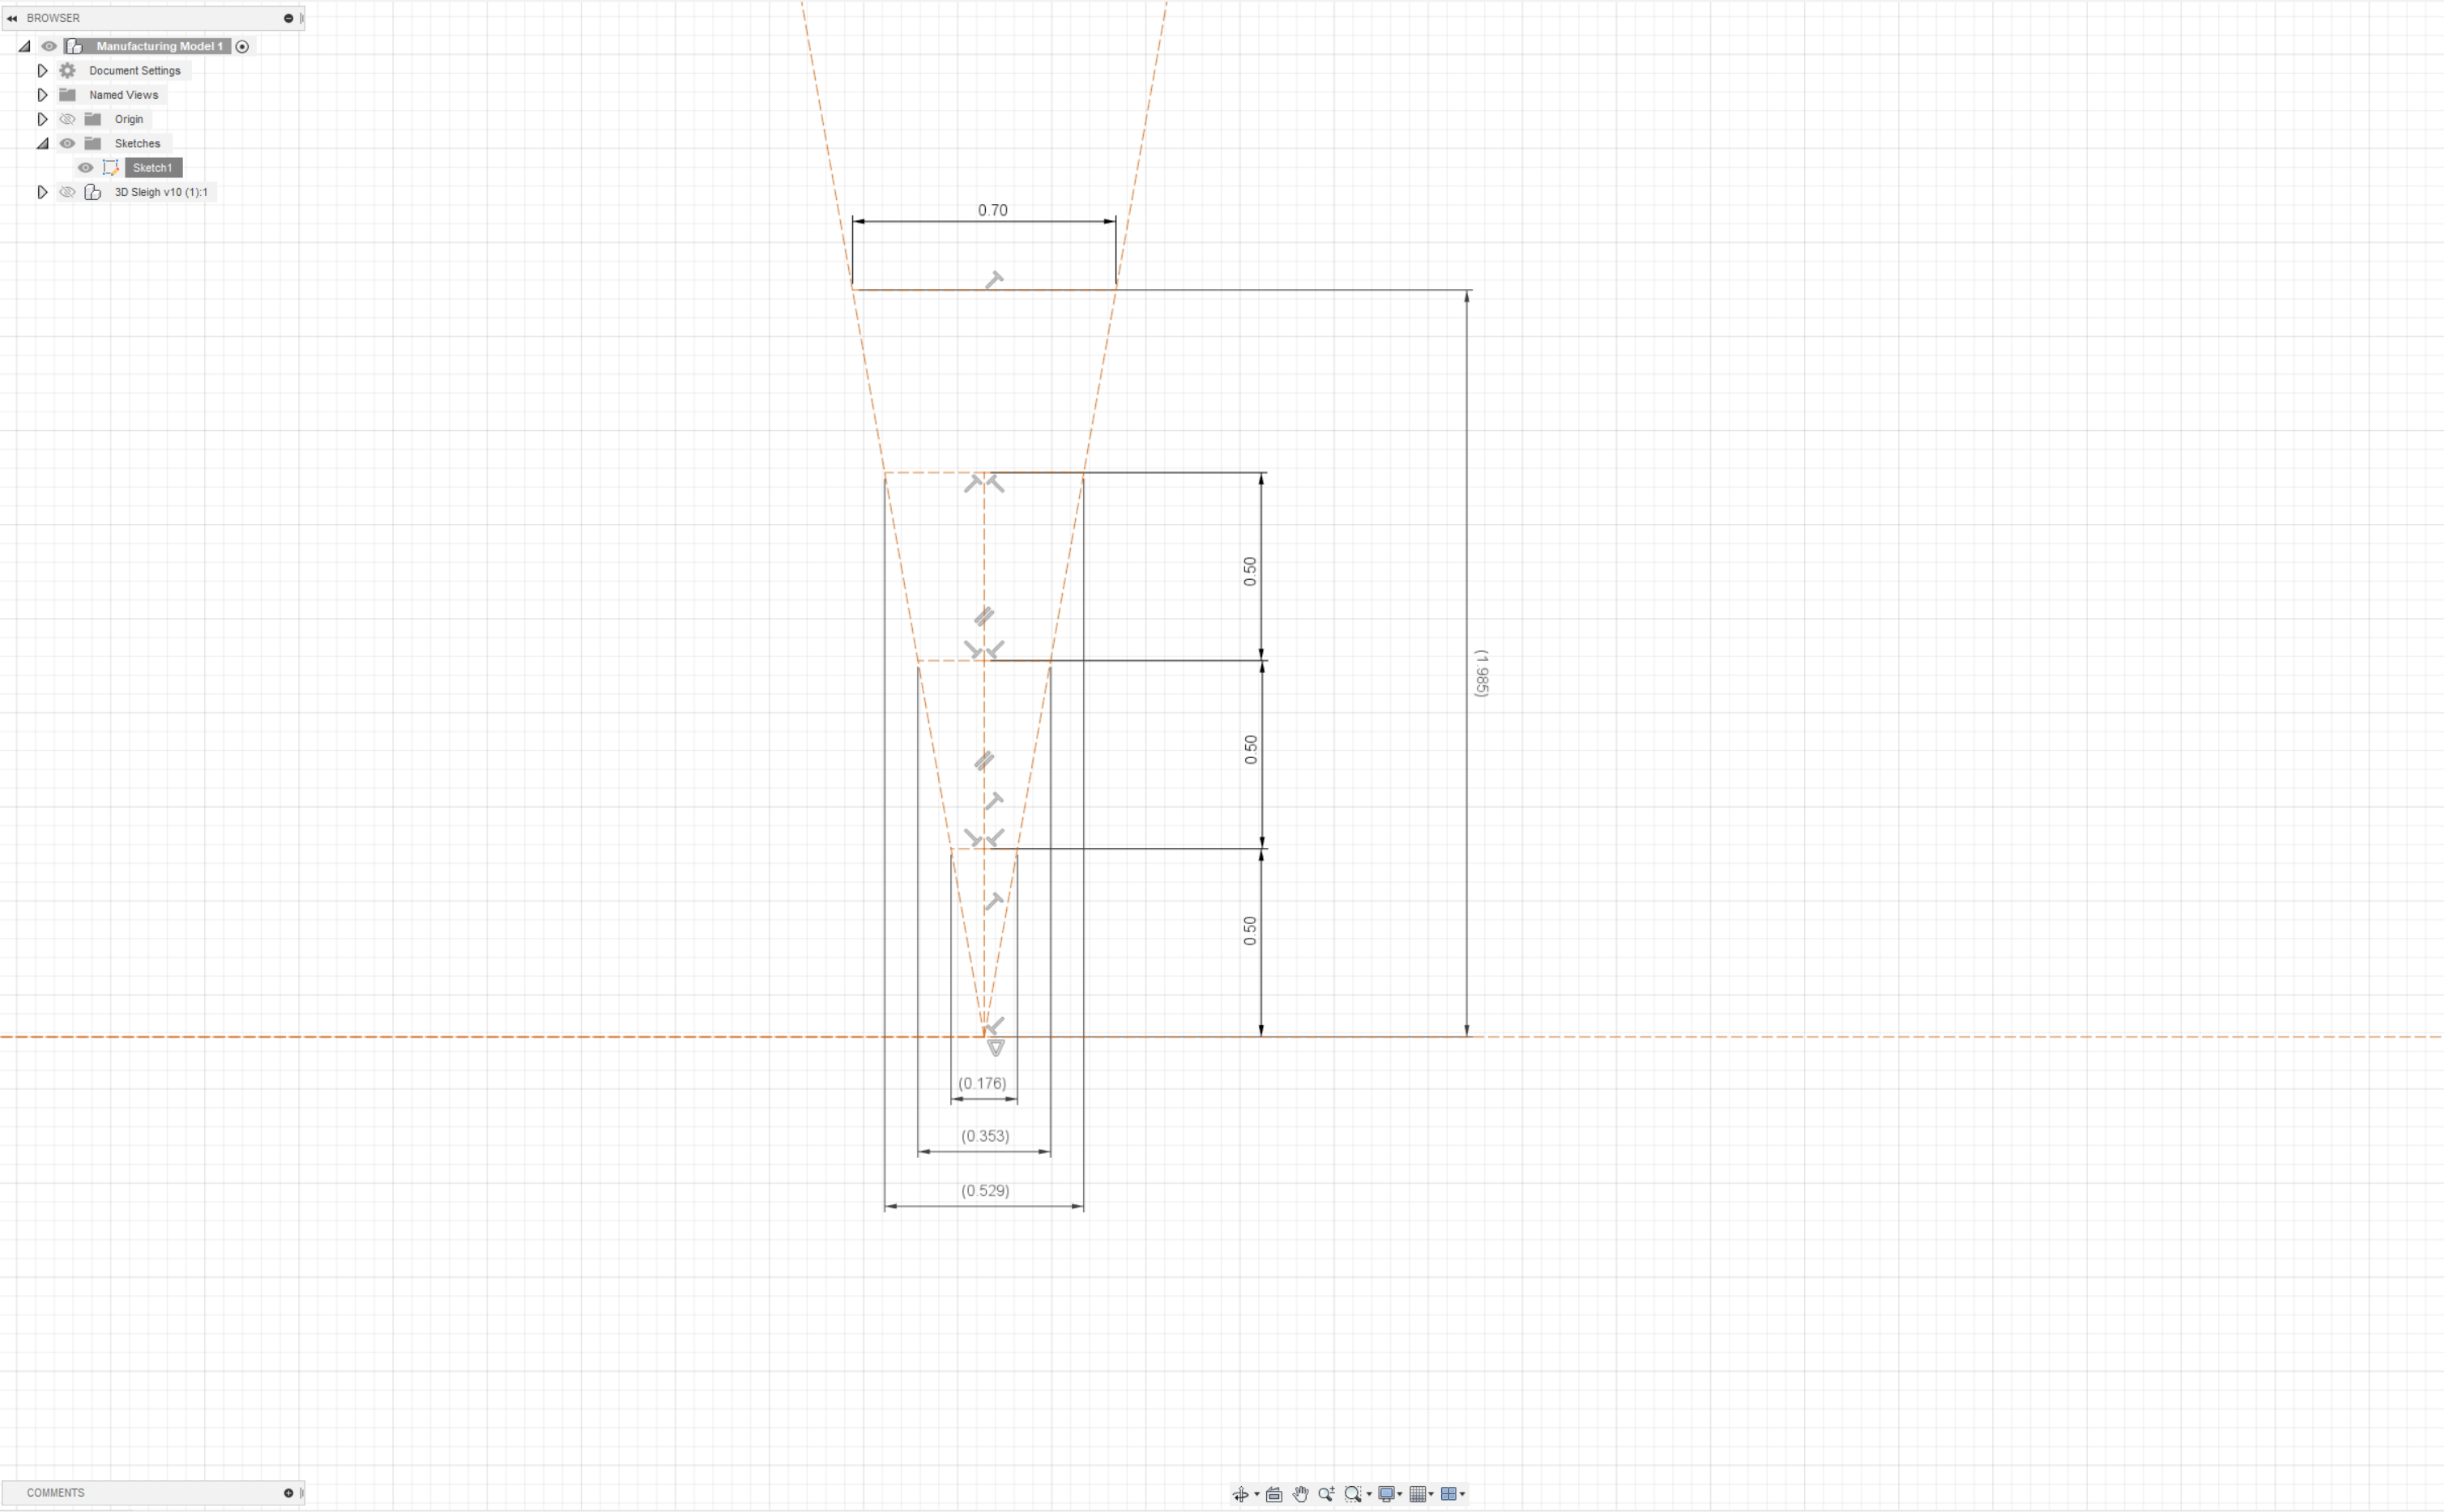
It is just a decoration and the plywood is only 3mm thick. The kerf cuts go 2mm deep leaving just 1mm holding it all together. I could have gone with a flat end mill and take more material out which would have made it easier to bend but I was trying to have a finish with no void yielding tight glue seams (wood on wood). I didn’t want to waste the opportunity of learning how to get tight V Seams for a later project where that extra strength may matter. I think what got me is when the tip of the bit broke off so it may not have gone the full 2mm deep. There’s also the “K” value in Fusion Metal Bending tools I could probably play with to compensate better for the material I’m working where the wood fibers are under tension vs. compression while being bent.
I was considering more kerf kerf cuts with an even finer bit which is why I calculated the following. With the bit I had at 2mm deep the slot at the surface is only 0.7mm which is fairly fine but definitely something to experiment with and all part of the fun, thanks for the feedback.