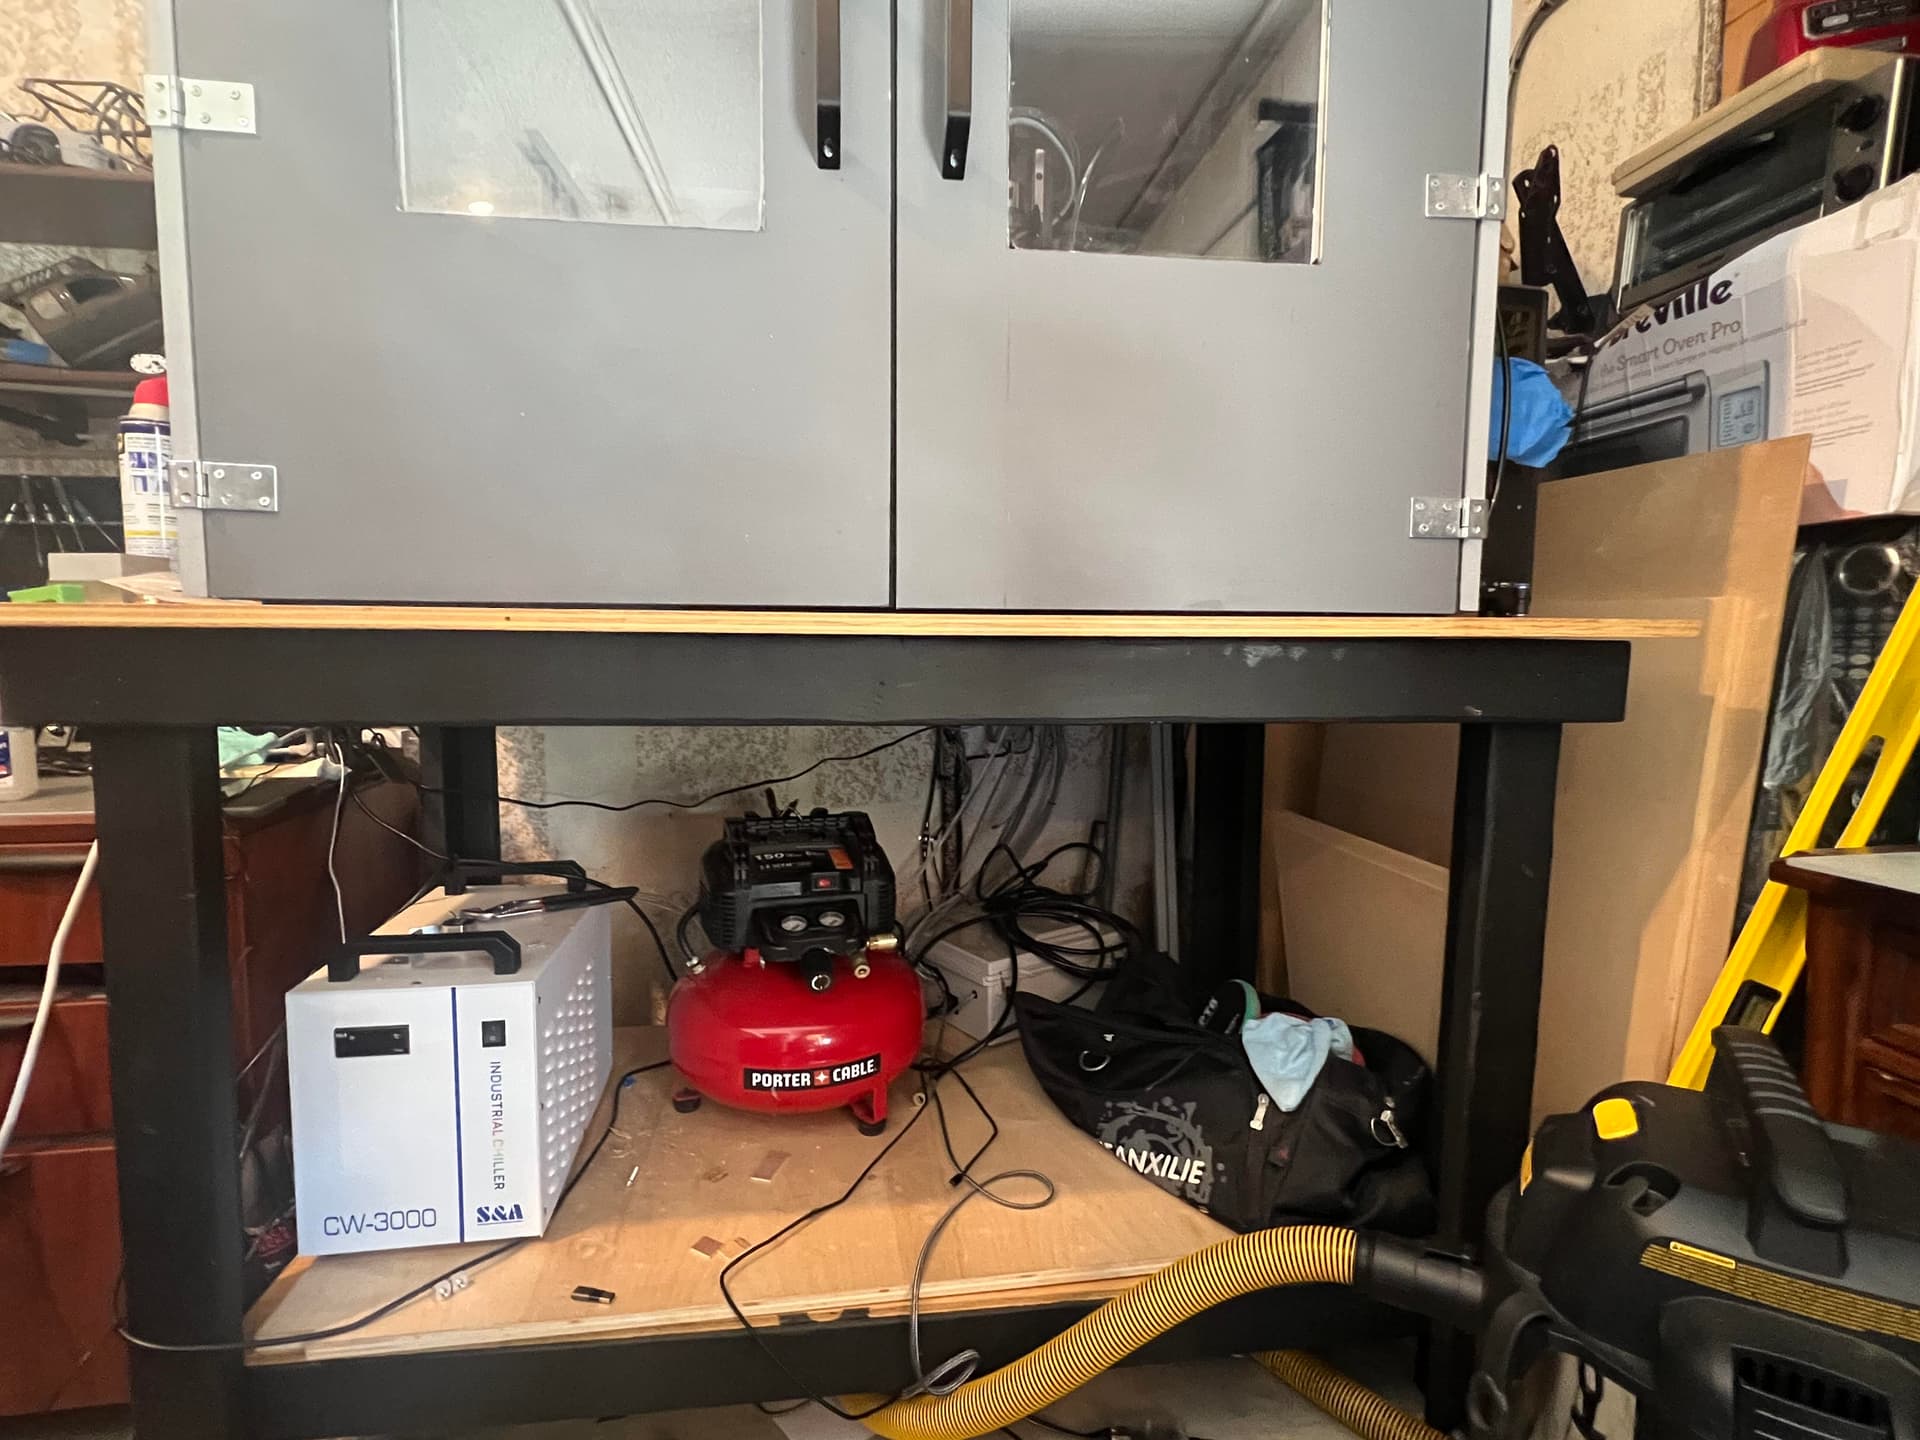
I made the mistake of building a cheap table out of 2x4s, and I now suffer the consequences. Running a dial test indicator across the frame of the HDM, I get 10 thou of variation from left to right. The workbench that it rests on is visually twisted and has about a 1/8-inch gap on both corners when placing a straight edge on top. I could spend the time to try and shim it but the MDF enclosure on top has already taken a twisted shape even with a layer of foam and is twisted in so many directions that it probably wouldn’t be practical to shim.
I saw another thread about tapping the holes at the bottom and using screws to add a bit of leveling support, but at this point I think it would be more effective to lift and level the entire machine by tapping M8 threads in to the holes and usng some leveling feet. Would four feet on the outermost corners work? And is this even a good idea? This would be my last ditch attempt at leveling my machine out before getting an actually flat workbench, but I’d rather at least try some options before spending the money for a better workbench. Thanks
I went to Harbor Freight and picked up some Anti-Fatigue pads. They are soft allowing the machine to nestledown taking up some of the unsupported spots. I turned mine upside down, the bottom is softer.
Do you think your 2x4s have stopped twisting yet? Or are they still moving with ambient conditions? One option, if you’ve only skinned the top of the table, is to pull it flat and skin the bottom as well to turn it into a torsion box which may reduce the movement.
Problem is, you really don’t want the underlying support to move around or the machine is likely to keep changing shape as the table does which could leave you chasing your tail.
As Michael says, a compliant support may reduce this, but… I’d still prefer to stabilise the table. If you can stop it moving then shimming out a top plate with a long level is not such a bad job.
I’ve used the anti fatigue mats under my s3 xxl and they’re also under my s5. They conform to the bottom of your machine and also help reduce vibrations. I used a level across all directions to ensure it was flat and level and I’ve never had a problem with my s3. I’ve had it 3 years now.
I’m currently using 2 layers of 1/2 xps foam, one under the mdf enclosure and one directly under the frame of the machine. It helps a bit but I think there might be too much of a bend for the foam to correct.
I’ve had the table for about a year now. It’s not really a fancy design, just a really simple frame with a sheet of 3/4 plywood on the top at the surface. I think it’s settled in to shape but it was pretty poorly built by me, the legs are of slightly different heights and it isn’t square. Its also in the corner of my garage where the concrete has this weird concavity to it. I think the table is mostly stabalised but I’m not even sure how I would start to shim it. I tried shimming the plywood surface before but it didn’t help too much.
Griff
(Well crap, my hypometric precursor device is blown…)
8
I suspect the HDM will literally shake your table to pieces. At least as you’ve described it so far.
You want a really solid foundation to support that heavy gantry slinging around at full tilt.
There are options at the big box stores. Or you could build a cabinet/torsion combo from MDF, BB etc.
I originally didn’t build the table for a CNC, just a normal workbench. I suspected that it was probably not up to the task but I’m going to be moving it in a year or so so I think it’ll last until then.
At this point im looking more or less a temporary solution like leveling feet.
I was thinking to upgrade the table once I move the machine out. As is, I don’t have space to get the workbench out of my workspace without moving pretty much everything out of the garage.
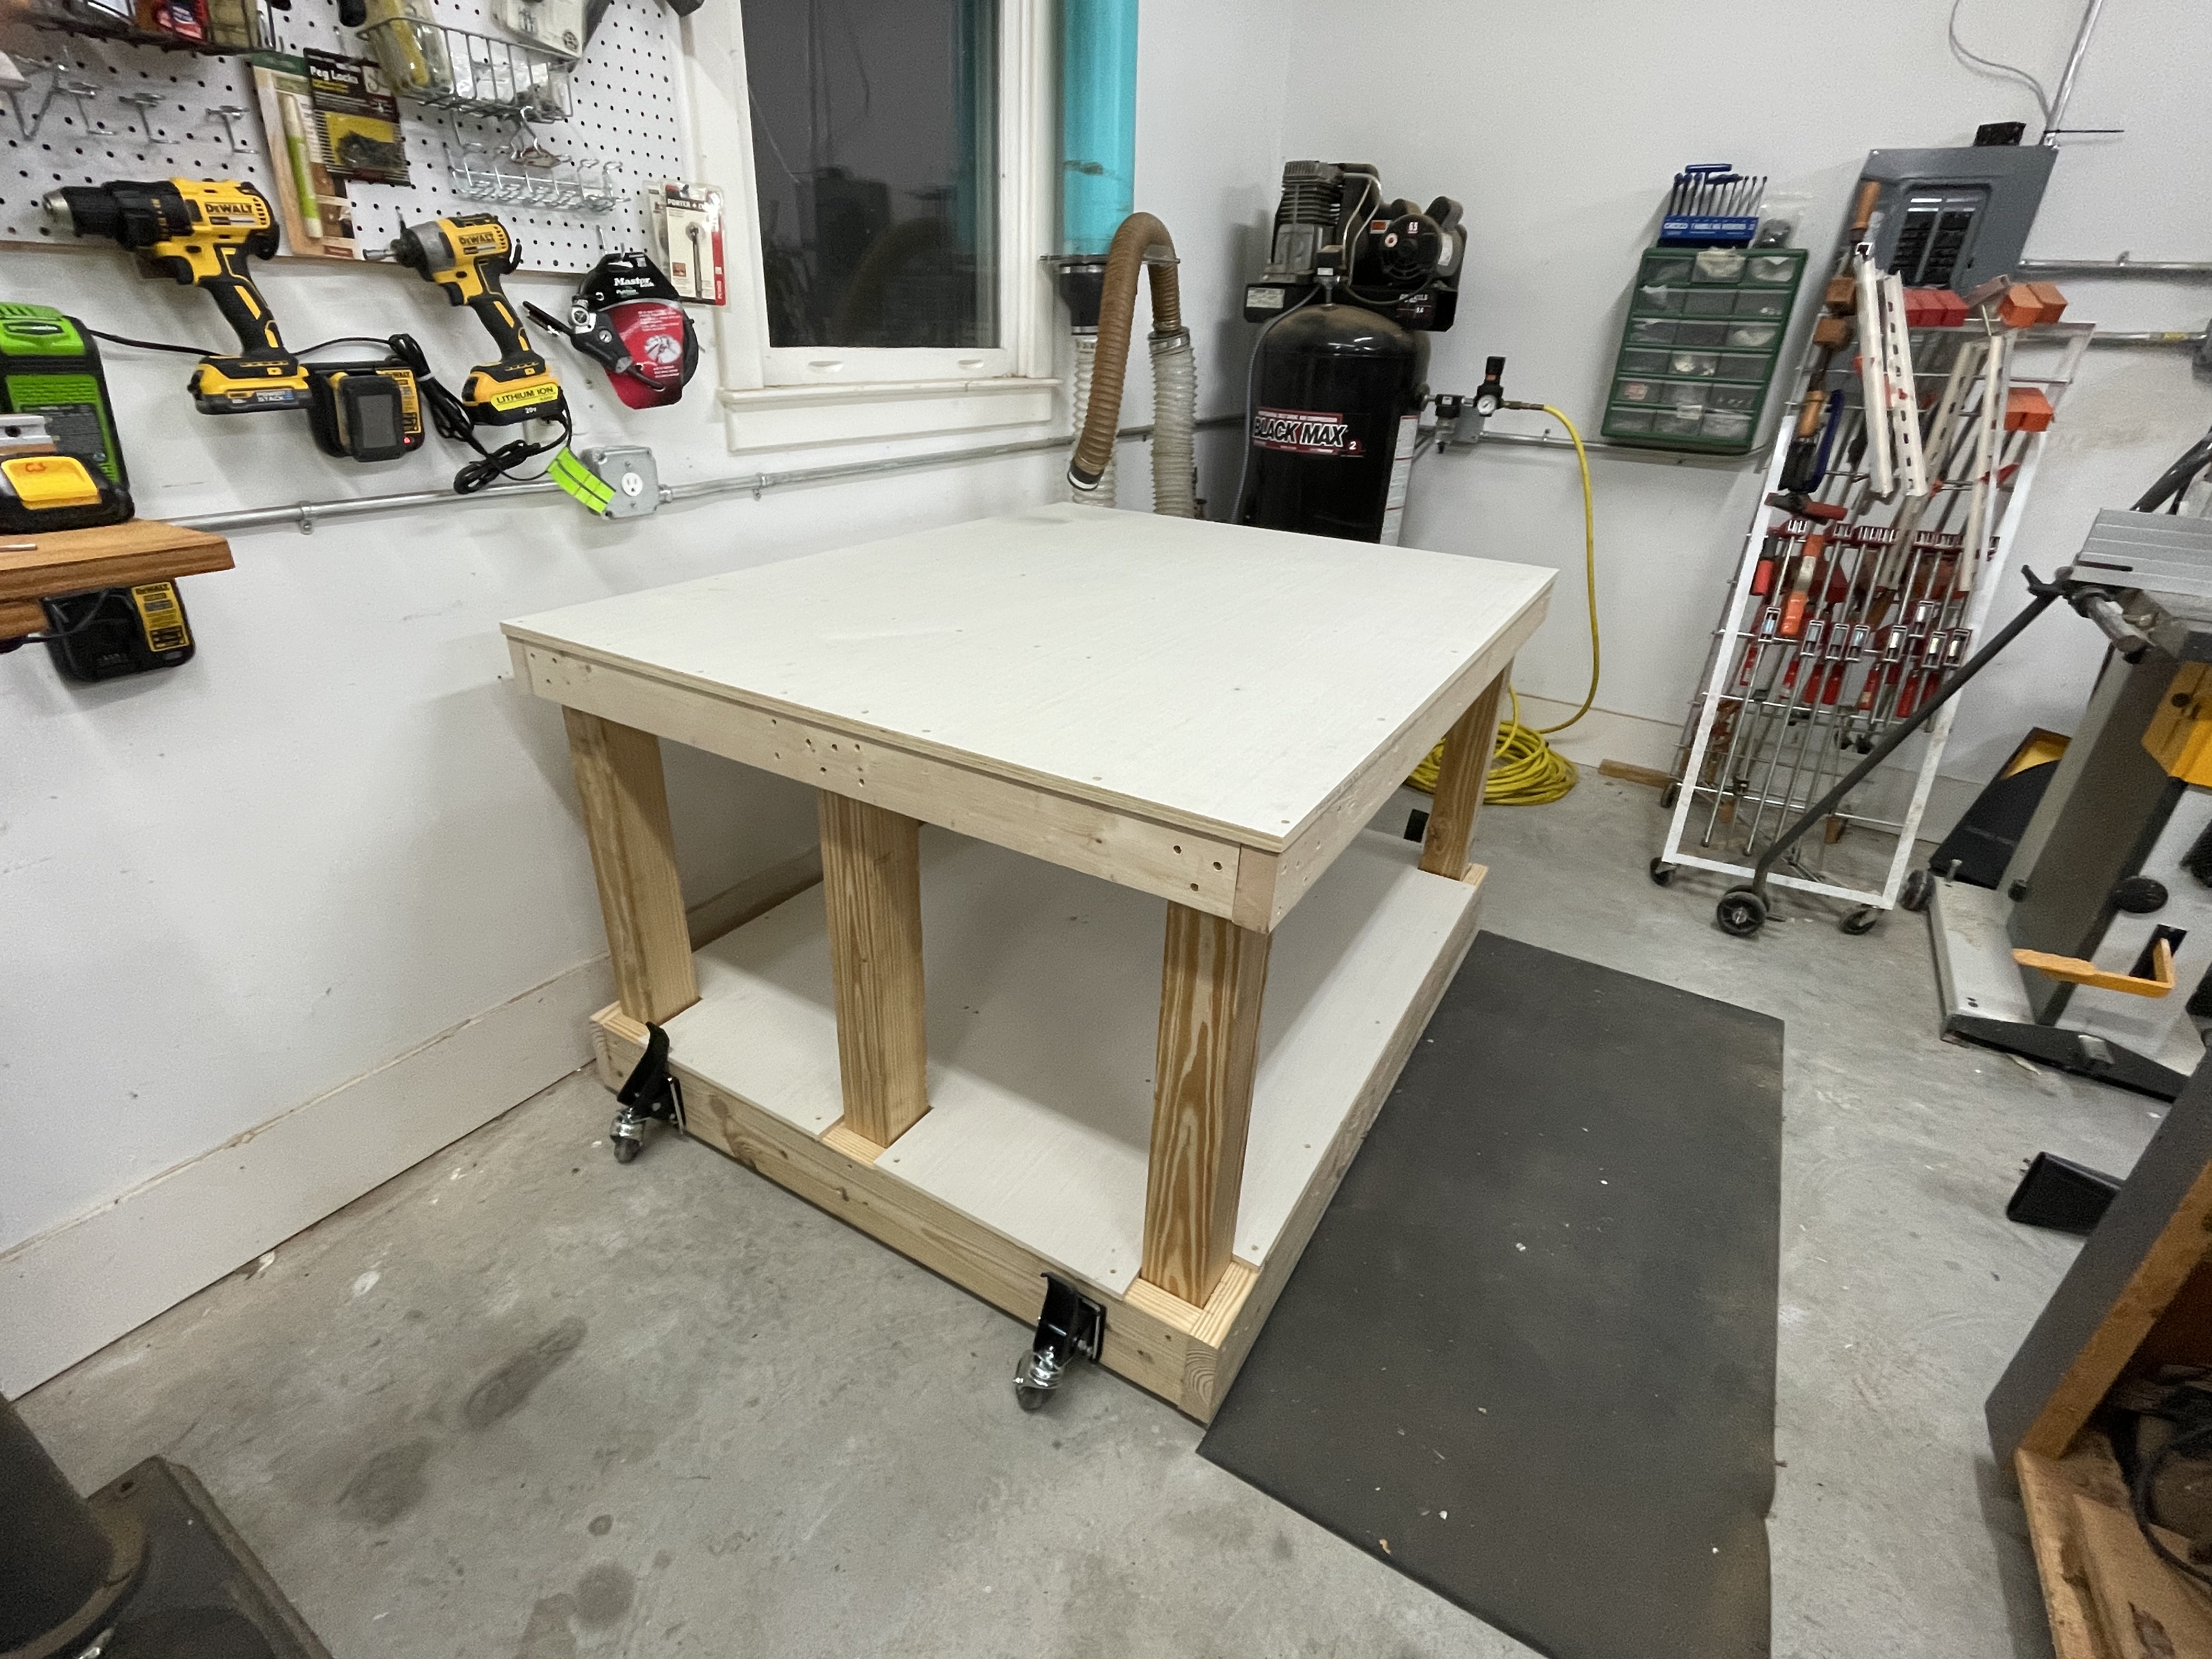
That doesn’t look like the rickety card table you described.
Mine is a similar 4x4 and 2x6 construction with lots of bracing. I did use 6 4x4 legs instead of 4 though, 3 on each side. 3/4 plywood screwed down all over the top and 1/2” for the bottom shelf. I do thing I will add some diagonal bracing. To the back and maybe the sides.
Blockquote Mine is a similar 4x4 and 2x6 construction with lots of bracing. I did use 6 4x4 legs instead of 4 though, 3 on each side. 3/4 plywood screwed down all over the top and 1/2” for the bottom shelf. I do thing I will add some diagonal bracing. To the back and maybe the sides.
It’s alright in terms of holding static weight, but once the CNC really gets going the table starts to shake. I was thinking of adding some cross braces in the back and sides but I have to first get the flatness issue sorted. Your table looks a lot sturdier than mine though
I was thinking if I used leveling feet I could at the very least get under 5 thou of difference across the entire machine, which would be precise enough for what I’m doing considering I’m not going to be surfacing anything.
Is 4 on each corner sufficient to prop the entire machine up or should I be using more? I was looking at onefinity’s system https://www.onefinitycnc.com/product-page/any-surface-leveling-system
Things I might consider doing to straighten it and add some rigidity to prolong it’s life before moving;
Not sure how the legs are attached, but some diagonal bracing would likely help, some triangles of ply between the horizontals and the legs, they don’t need to be very large, 8-12" on a side
Do you have any 2x4s running across the middle of the top deck to brace it? If not, I’d consider adding about 4, two front to back and two left to right, simple half lap joints between them and screwed into the 2x4s on the sides would work
I’d cut another sheet of ply to go underneath the top ring of 2x4 to turn that whole top into a torsion box, I cut out holes for the legs on mine but it’s probably good enough to just chop out the corners. The idea (as Griff said) is to use the 2x4 simply to hold the two sheets of ply at a constant distance from each other so that flex of the table requires stretching those ply sheets, which they resist pretty well. Screw or glue the top and bottom sheet to the 2x4s every 12" or so along all the 2x4s to make the structure.
Put some adjustable feet on the legs to level it onto the uneven floor - these are the ones I used, I just drilled a hole in the bottom of each leg, put an M12 tee nut in it and screwed these in https://www.amazon.co.uk/gp/product/B018UHJMKI/
Making the torsion box top and adjustable feet should stabilise the shape of the top, you can now make shims to go under the feet of the HDM that give you a level platform, you can use a long spirit level to measure side to side, front to back and corner to corner to get a flat set of pads for the HDM to sit on, or just put adjustable feet on it and jack it up to flat.
Thanks for the advice, a cross brace is definitely planned but I want to get the flatness issue sorted out first so I don’t pour more money into something that isn’t going to work. I do have a 2x4 running across the center of the plywood surface. I think the rigidity issue would be sorted out by cross braces.
The thing is I feel like the frame of the table is too screwed up for it to be effectively flattened. I built it as a beginners project during the pandemic with not much more than a circular saw. It looks fine but accuracy wise its a mess. I think a torsion box would definitely solve most of the issues but with the lack of proper woodworking tools and insane lumber prices (SF bay area), I think I would be better off just getting a new table.
I was thinking of another possible option of getting some tabletop epoxy, sealing the top sheet of plywood and pouring a thin layer to establish a flat surface, and just cross brace the table. Its probably more complicated than I think but I think that would be the most cost-effective option. However, the mdf enclosure on top has also kind of taken on a bowed shape. I assume that the mdf is flexible enough to become flat again with a 250 pound machine sitting on top of it.
Apologies for the long rant, just the the mistakes I’ve made are all compounding up. But hey at least I’m leaning from them.
For now, I want to give leveling feet on the bottom of the frame of the HDM itself a try, maybe I’m not realizing something but shouldn’t putting leveling feet directly under the frame solve the worst of the issues? I don’t need it to be really precise across the entire cutting area, just 10 thou is way too much.
I dont have an HDM but for my SO3XXL I built a torsion box. That is stable and I put a 3/4" piece of building foam under it due to the sagging frame on SO3 XXL’s.
Here is my document on how to build a torsion box. You can adapt it for your HDM.
Is this something that can be fixed or did I bend the frame? The machine is held up by 1/8 aluminum extrusions placed on the Y linear rail frame pieces. I noticed this right after propping it up.
Is the bend in the frame something that will undo itself after placing it on a flat surface? My HDM has been sitting on the bowed surface of the table/enclosure for about a year now and it looks like it picked up a bit of the bowed shape, only I feel like that small amount shouldn’t be enough to permanently bend the frame right? I think at this point I’m going to try doing a thin epoxy pour on top of the enclosure to get a flat surface.
I also checked with a dial indicator which I know isn’t as accurate because it relies on the gantry as a reference, but the center of the frame is about 5 thou higher than both sides. This is after propping it up, before it was closer to 10 thou.