First off I am a CNC newb so please be kind… If I understand correctly after I load a job (a simple pocket square) no matter where I set my material on the waste board, I set the machine to zero on my material I want cut. I Jog all my X Y Z to the bottom left corner of my material I want to cut, the nomad should cut it where I set Zero? Am I correct on this? I hope this makes sense.
When zeroing you have to match your CAM program zero and your machine zero.
When creating your pocket job you will define your Program zero which can be set in different places, it can be in the center or lower left, top left, etc.
Then when setting your Machine Zero, it needs to match the program zero.
1 Like
I am going to Necro this because my question is relevant. Going a little further is defining ZERO can someone explain where in the X/Y plane you would place the BIT for a corner zero?
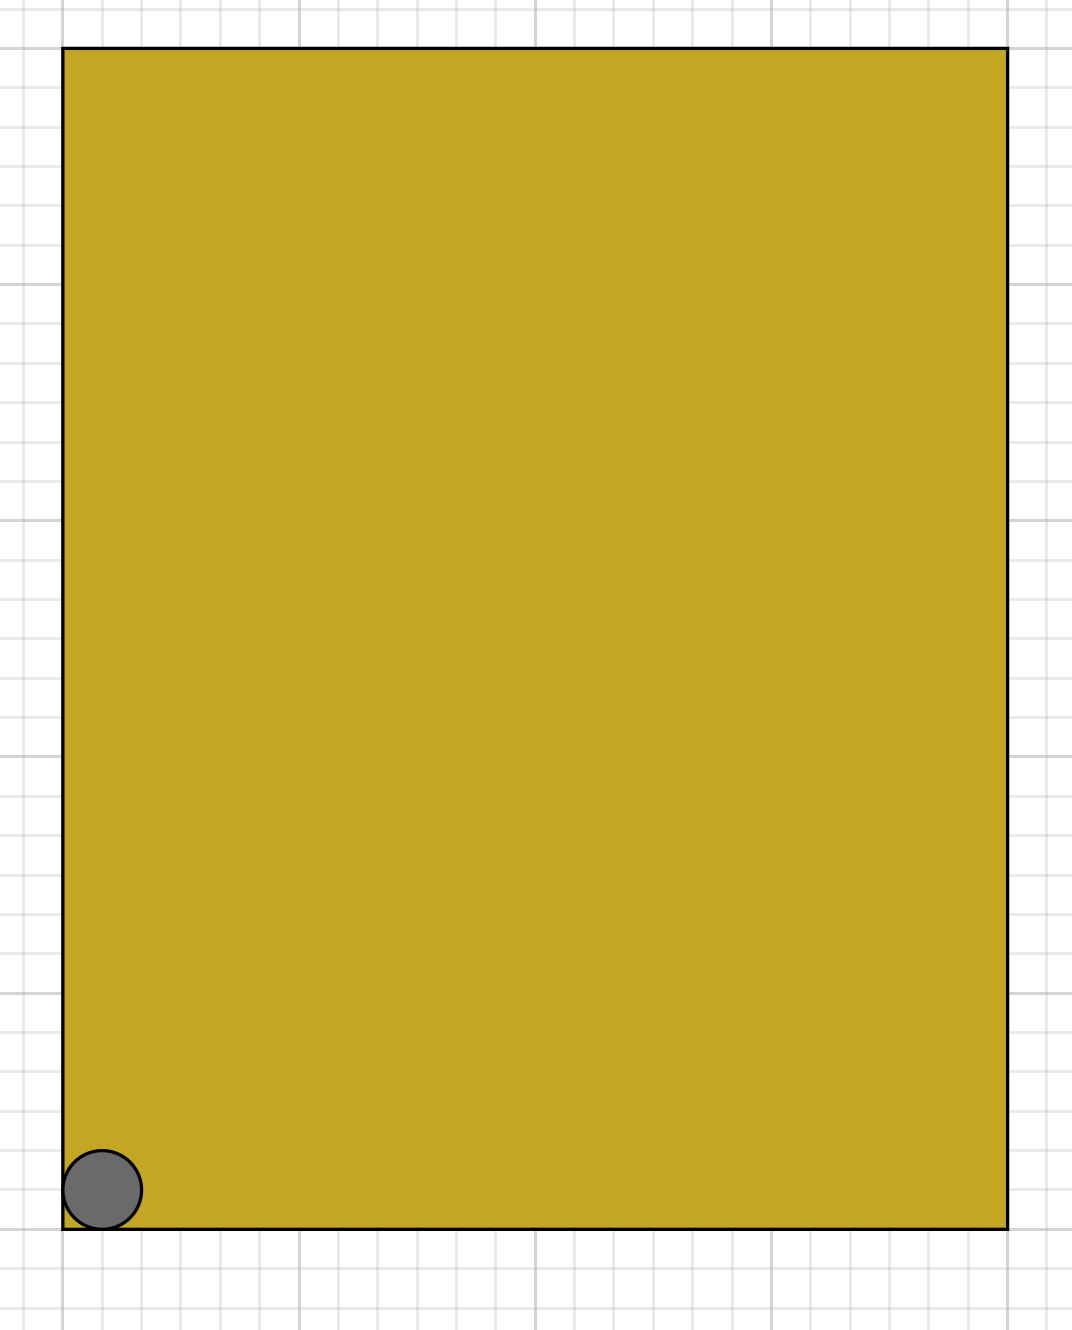
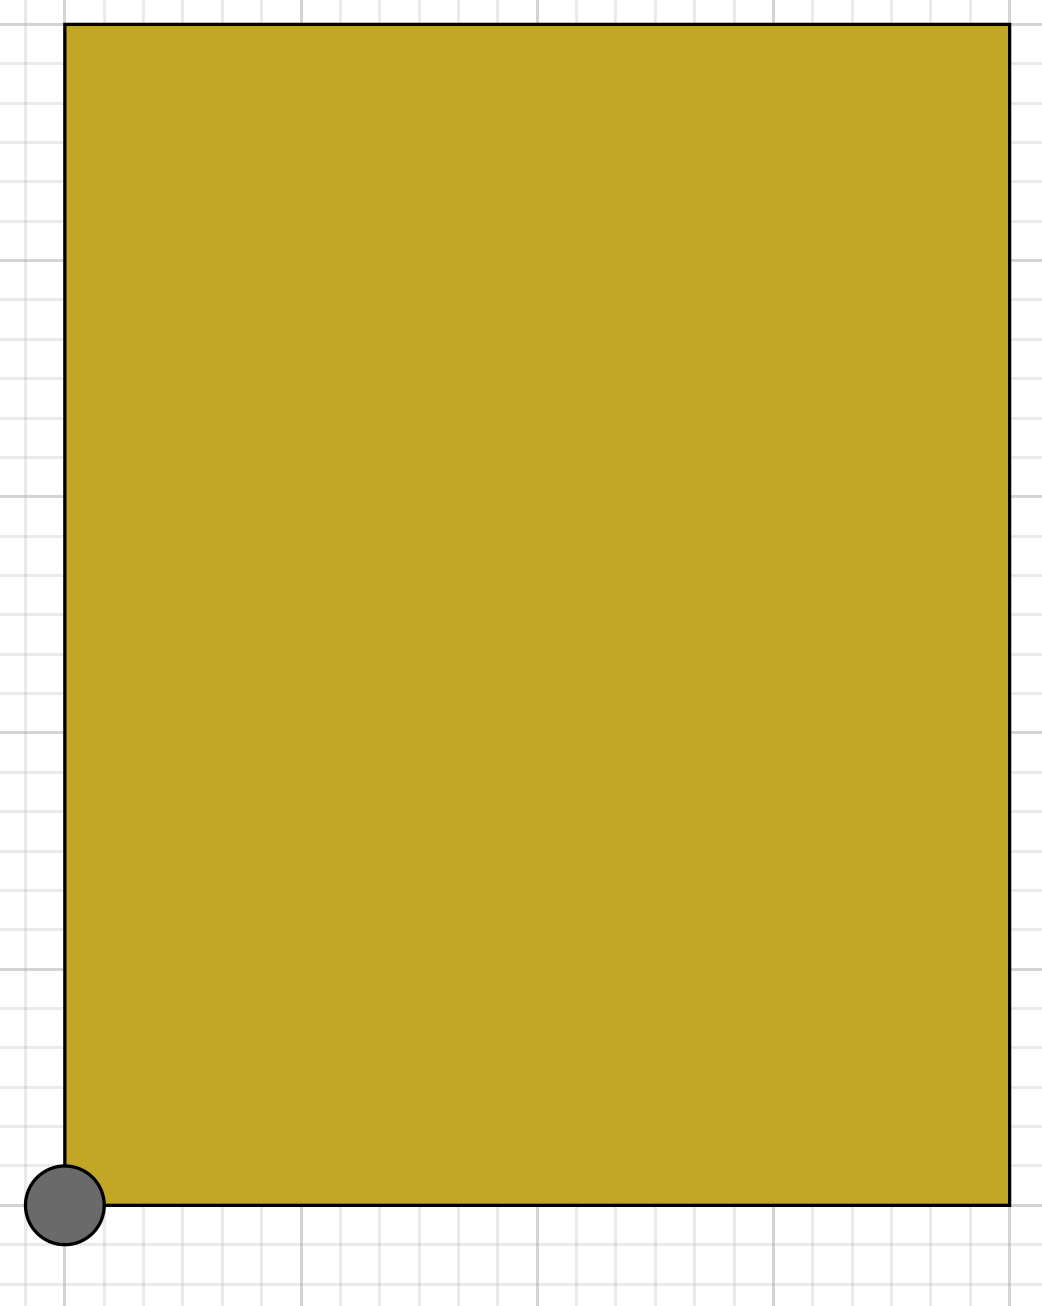
I have used the bottom left as the example in these 3 screenshots. SO far all the tutorials I have seen on Carbide’s website all use the CENTER of the project for Zero and using a corner hasn’t been explained. This is a real NEWBIE question that I am sure others have wondered beside me.
is it INSIDE the materials corner
Centered on the Materials corner
Or outside the Materials corner
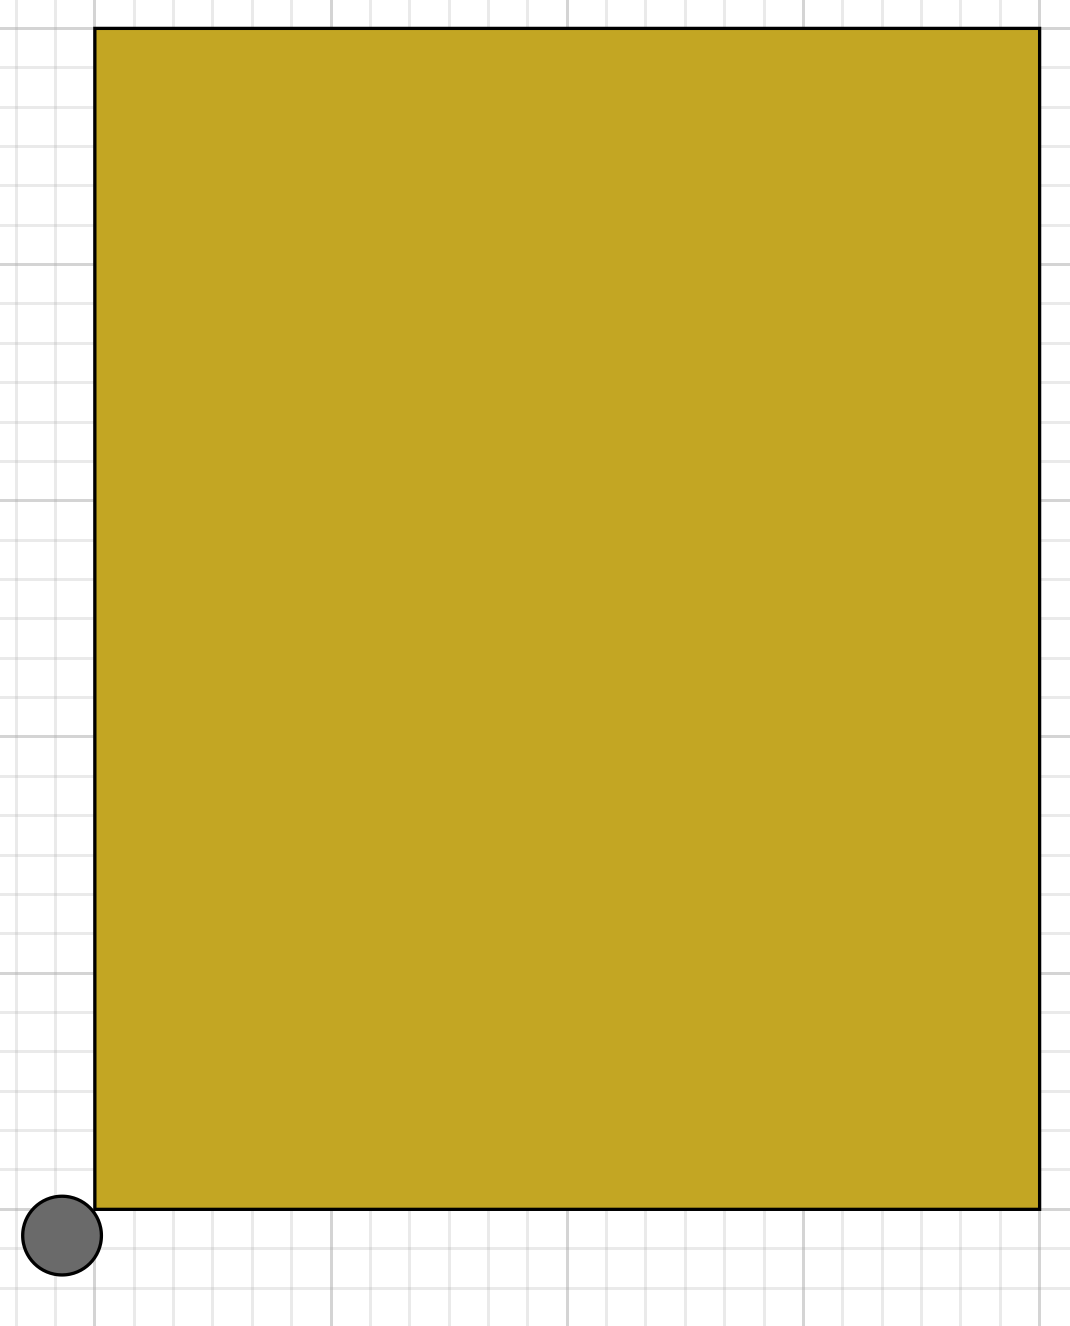
The bit is centered on the corner. Thus the middle picture is the correct orientation. By doing it this way, the size of the bit never matters. You can zero your machine for the XY plane once and never have to do it again that session. All you have to do is zero the machine in the Z direction for the depth each session.
2 Likes
That makes sense… but If I really need to be very accurate ( and I don’t because my boards are always oversized on the table ) I am just curious what is the traditional method that would be universally accepted? Is it centered? I would think the method that makes the most sense and is the easiest to find the true edge of your work piece is to use the OUTSIDE example… touch off the X edge & zero then touch off the Y edge and zero.
I am trying to understand what the software is thinking when I tell it to design my project using one of the corner edges of a board.
Most software uses 1/2 the bit diameter you are using to calculate the center of the bit when you touch it off with a probe. I am not sure how the Shapeoko edge finder works with Carbide Motion.
I’m also a newbie. I wish Carbide Motion (CM), had a prompt to set zero when starting a job. It feels like I’m telling it to Jog over to get to the BitZero V2, and I’m forcing it to do something it doesn’t like. “Measure tool first?”, “Don’t change tool during jog”, etc. A simple “Do you want to set zero or use current zero?”. Set zero steps would be, 1. CNC moves to bottom right, and prompts to install the dowel rod, 2. Prompt to Jog to zero and position the BitZero V2, 3. Only one button will pop up, “Probe”. 4. Select the corner, middle, etc. Let the probe sequence do its thing. 5. Don’t let you hit “Zero” after the probing. I’ve cut air ~3/4" above the workpiece. I’ve also bored a hole through my workpiece, before I could hit the panic button. Still have no idea what I did to cause that.
You will get better with more practice. Interpreting the terminology of the instructions is the first tough part.
When I set zero, it is usually to Bottom/Left. When using an odd shaped piece of material, it is often better to use Center. It sometimes requires a bit change, but I try to use a V-bit when setting zero so I can see where the point is. Either way, I never try to maximize the material to an extreme and always have scrap material left over.
1 Like
For that, please see:
Naturally if any terms or concepts are not clear, please check in here or at support@carbide3d.com and we will do our best to assist.
The resource network for Carbide Create is tremendous. For a beginner guy, the notion of feed vs speed is daunting, never mind BitZero/Setting Zero/Bit Setter/Machine Zero.
It’s not hard but it can take some time.
1 Like