Trying to v carve some smallish (.5") text with a 60 deg v bit. Even in hard maple the letters are not smooth and have alot of fuzz. I just used the default settings for the bit. Is there a better way?
1 Like
Is the machine mechanically sound? Which machine are you using? What Z-axis?
Try running a second V carving at full depth?
Could you post a photo?
1 Like
Hi Will! As I was trying to figure things out I noticed that the z axis router mount was loose. One of the v wheels was pretty loose. I guess that I figured out that I had to remove the router mounting to access the eccentric nuts. I tightened the eccentrics to get rid of slop and then checked both sides of the y rails and found similar issues. i looked back through the assembly instructions and either I can’t find it (it was late and I was bushed) or the instruction do not tell you to tighten those v wheels. I tightened them but have not tried to cut text yet. When I get back to it I’ll post again. Hoping that that clears it up. Thanks so much for your help!
Scott
Hi Scott - Hopefully your machine adjustments will get you where you want to be.
I’ve carved signs with small letters for several years now (1/8" all the way to 8") by hand using a palm router. For small letters I almost always use a profile bit, such as the one linked below and the text comes out near perfect, yet I’ve never used a 60 degree v on small letters as I usually save that for letters that are at least 2-3", so I would love to hear about your results as I’m new to CNC. Guessing you will be cutting very shallow?
https://www.makeawoodsign.com/shop/index.php?route=product/product&path=4&product_id=4
1 Like
Hey Brandon!
Using a VBit on a palm router is a little bit different to using one in a “VCarve” toolpath on a CNC.
The reason a VBit is used in these sorts of toolpaths is that the width of the cut is proportional to the depth of the cut. So very thin and fine lines can be etched out by having the CNC raise the bit, and wider lines cut by the CNC lowering the bit. In other words, a VCarve is a 3D toolpath, where the depth is proportional to the width of the cut.
To these toolpaths, a “pointier” VBit (15 or 30 degrees) will cut deeper that an “blunter” one (60-90 degrees) for a line of a given thickness. But in most cases the depth of the cut varies depending on the width of the line.
So, Scott will be cutting both shallow and deep for the same cut.
2 Likes
Hi Brandon - I was trying to vcarve some small text, like 1/4" high. I think that I will just laser the text onto the platter that I am making. I’m also finding that many of the screws on my 4 xxl are coming loose with use. I’m going to go through the whole machine before I do much else!
Hi Gerry - So does VCarve automatically move the Z axis up and down to accommodate the text depth/width or is that something you have to do manually within the program/toolpath? I’ve watched a lot of videos and a few of them had VCarve elements, yet I still feel like a total noob, so the additional information is great.
I will say when I carve text with a palm router I also make bit depth/width adjustments, yet I do it manually as I go over several passes (Human Guided Toolpath) :-), so perhaps it’s not that different.
Scott - You had me at laser. That sounds fantastic. I’ve been looking at purchasing a Shapeoko 4 XXL as well. The loose screw issue sounds like a real problem. Do you think that is a common issue or perhaps a setup issue? Thoughts?
Brandon
The Z axis is moved up and down automatically.
Here’s a triangle with a VCarve toolpath to cut it.
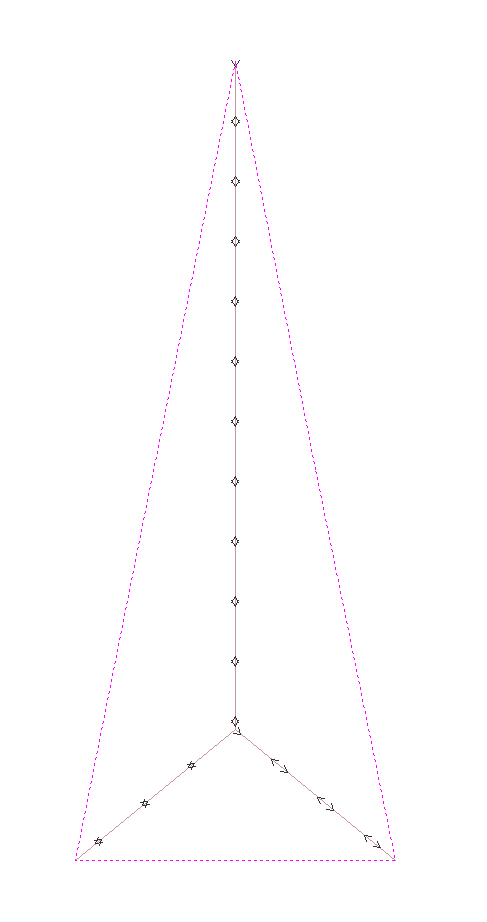
You can see that there are really just three lines routed out.
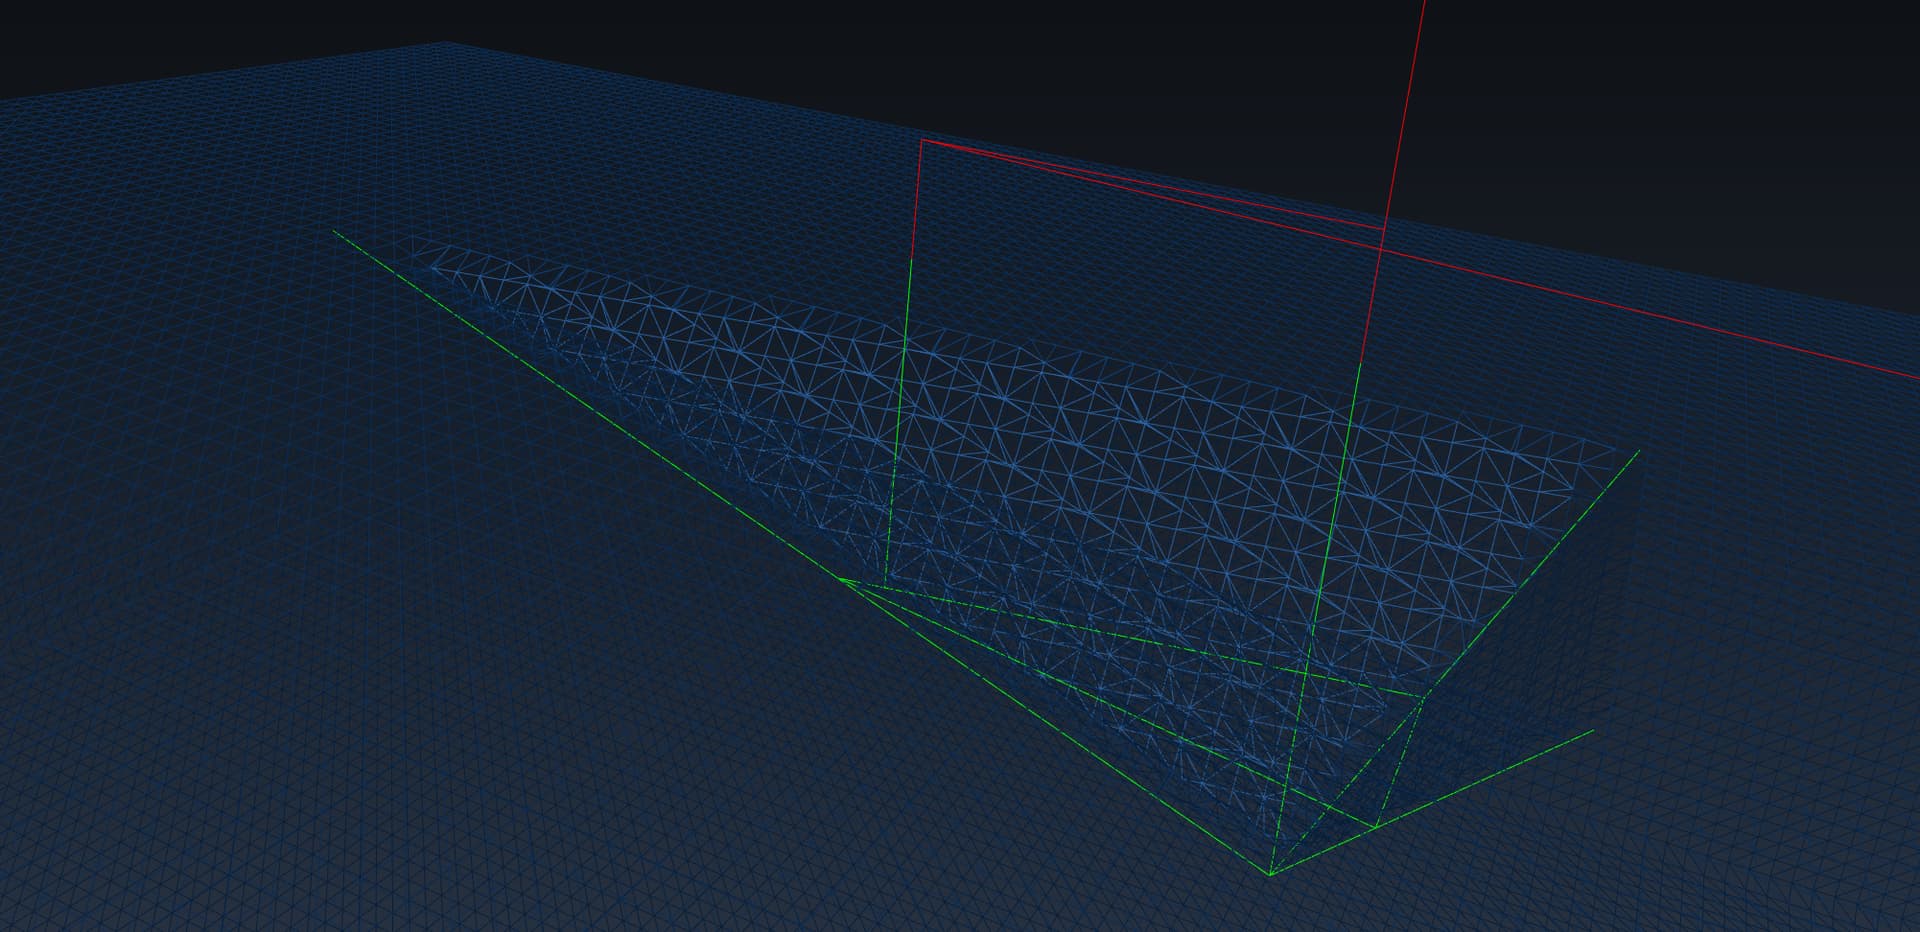
If we look at it in 3D, it looks like this (the green lines trace the tip of the VBit):
and generates this:
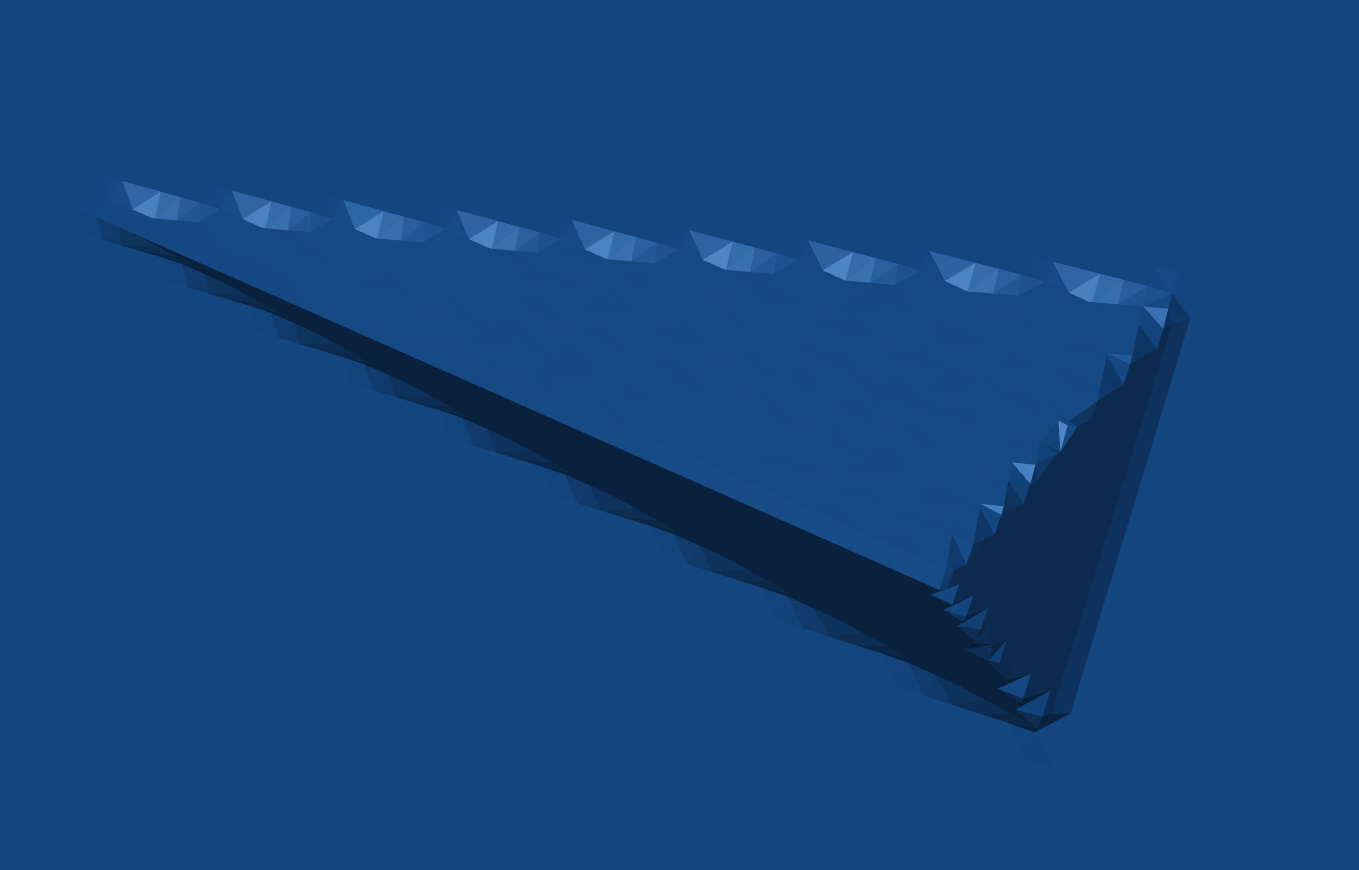
2 Likes
Hi Brandon - not sure if the loose screw is common or not. The screws that I mentioned were factory installed. I have been going over my machine and found a couple fasteners that needed tightening. I’ll be watching in the future! There’s a lot of vibration when milling wood, especially as I’m still learning how fast and how deep I can mill different woods. If I find more I’ll be investing in some loctite to put on the screws.
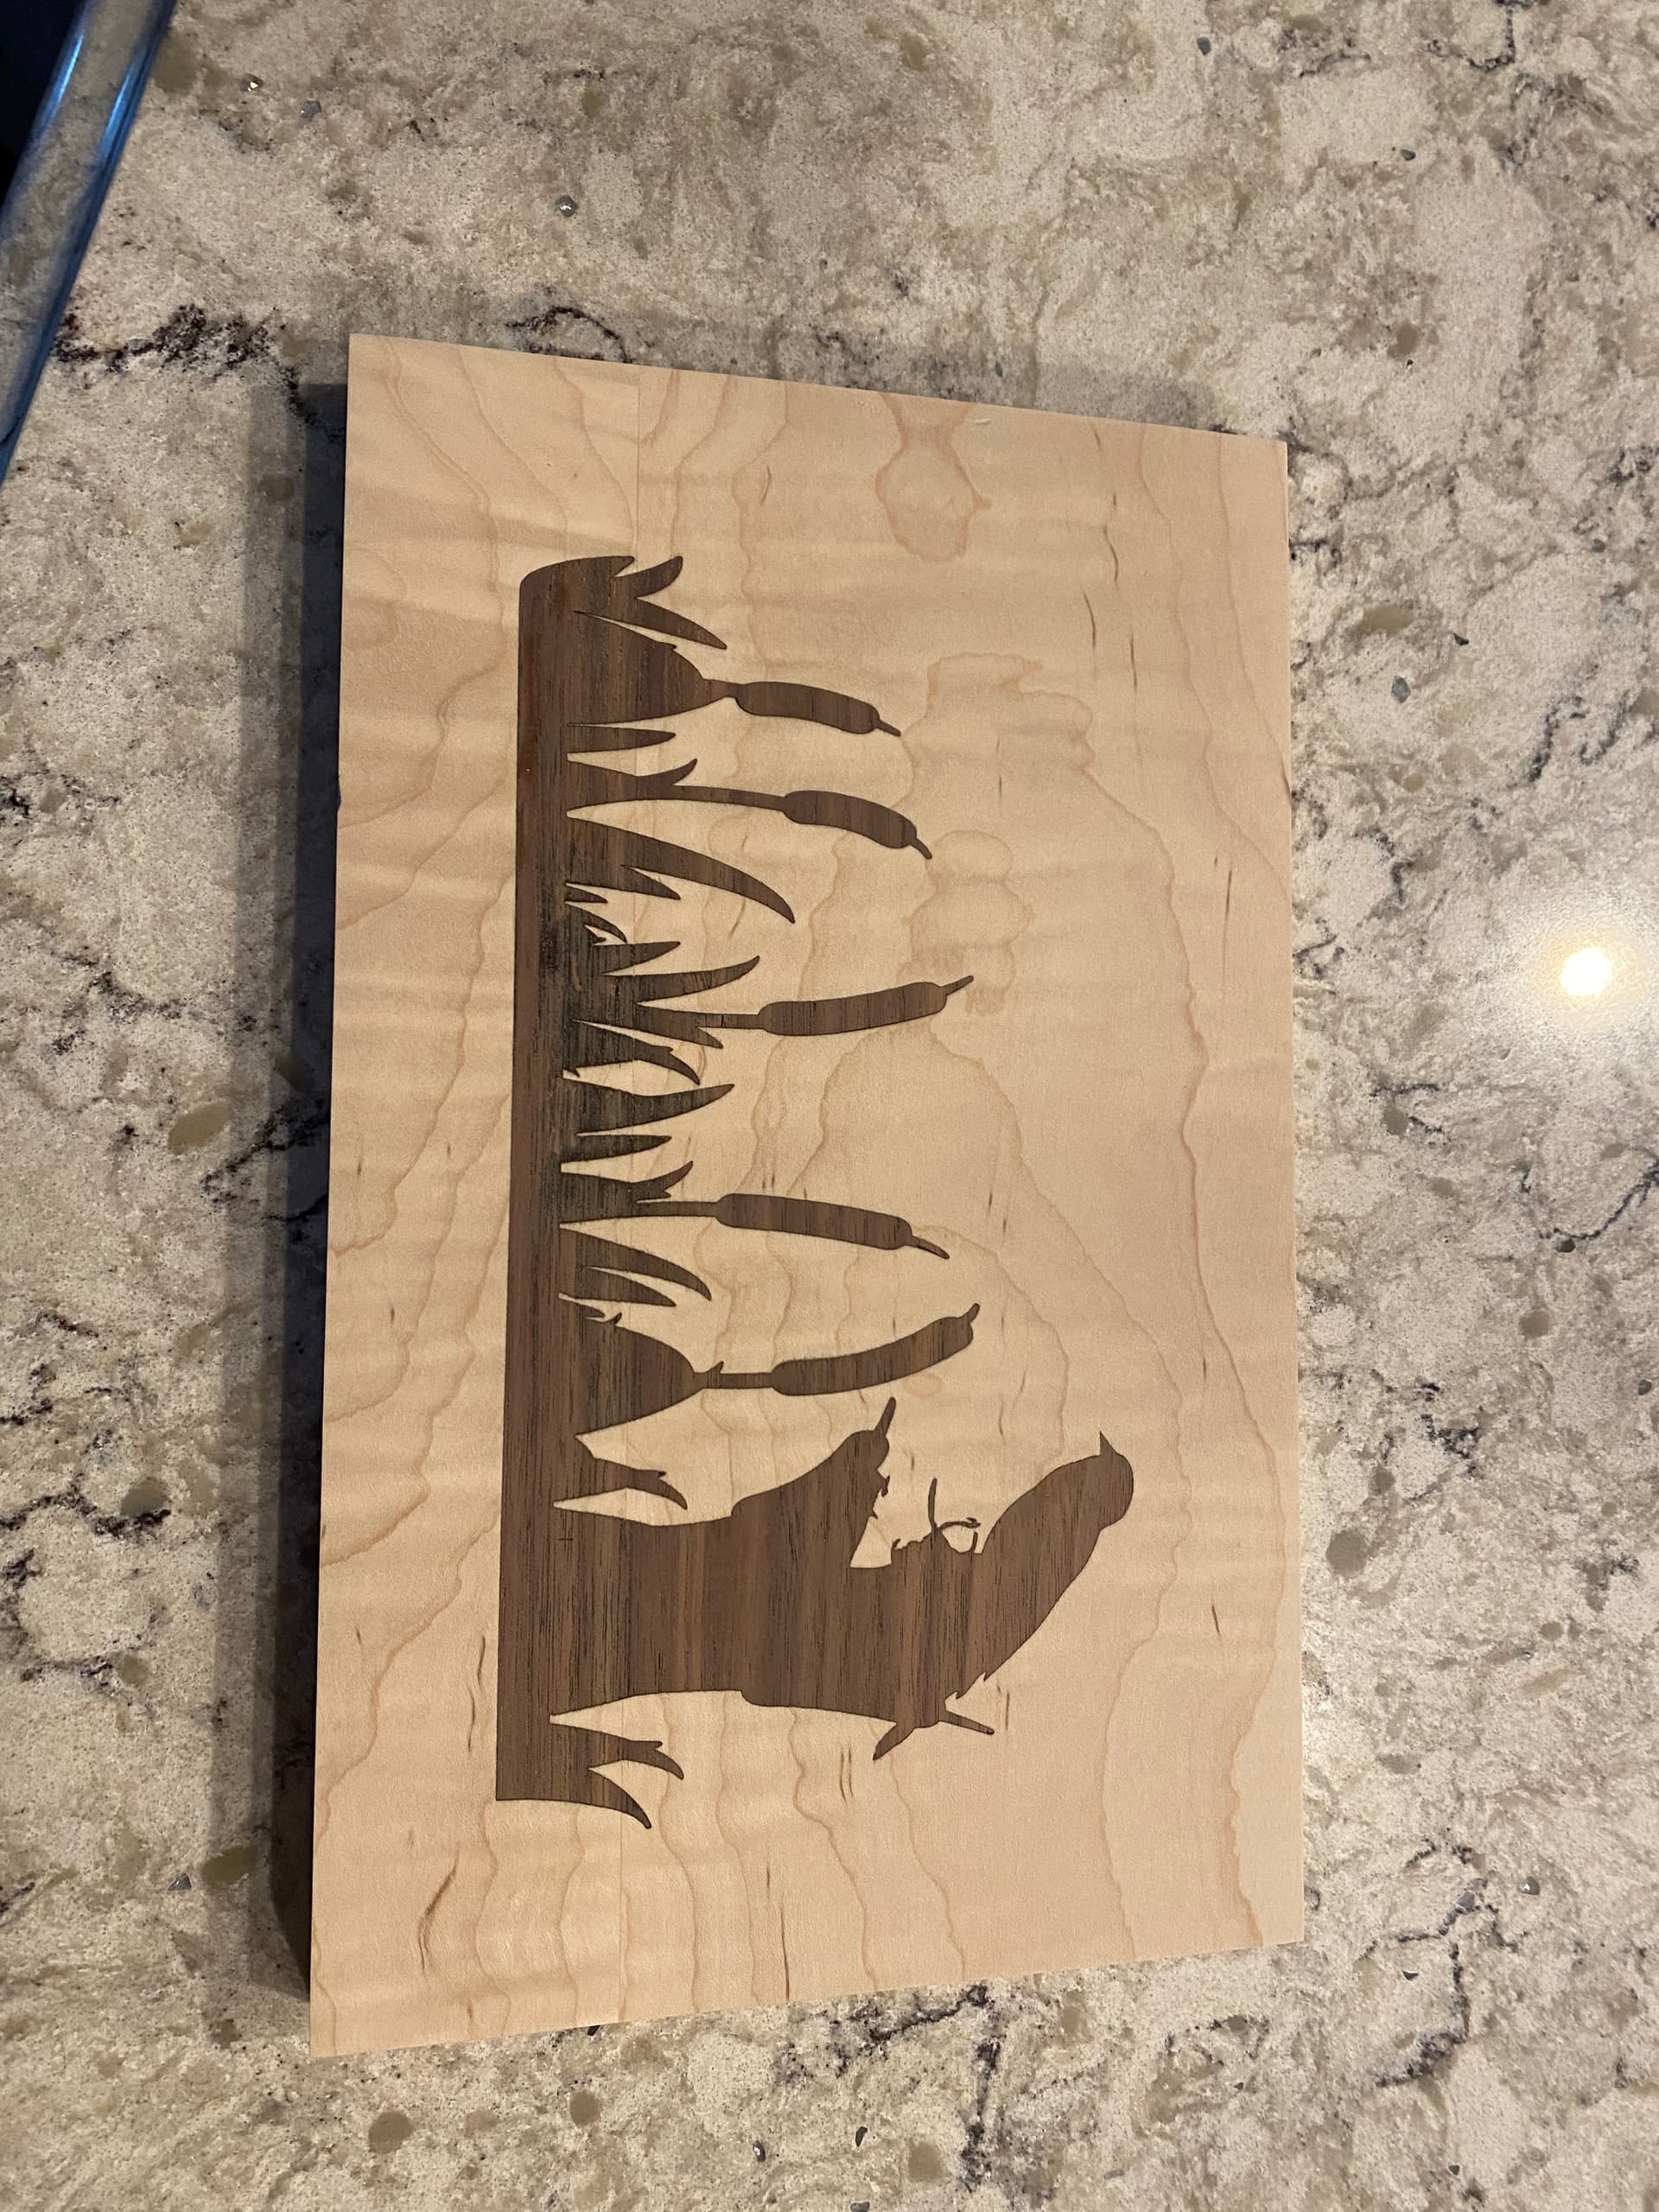
I have an Ortur Laser Maser 2 Pro that I have been playing with. I burn logos into wood products that I make here and have been experimenting with other things like inlay.
Here’s my first try at inlay. I first burned the pocket into the curly maple and then burned the black walnut veneer and glued in place. Had to figure out the kerf width for the laser and adjust the size of the inlay. Worked pretty well but I think it was a bit ambitious for my first try. The next ones with be less intricate! I am dying to try inlaying a cutting board on the cnc!
1 Like
Thanks Gerry - Very cool.
Wow! That’s incredible. I’m starting to understand the accuracy of a laser. Would something like that even be possible with a CNC router?
i doubt it as there are some extremely sharp corners on the cattail leaves, etc. It was nerve racking getting the whole thing glued into the pocket and two of the pieces did break off but I just glued them into place. I am currently gluing up some boards to do some end grain cutting boards with and I plan on doing some inlay with them. Some of the stuff that I have been watching on youtube is very cool!
1 Like
@WillAdams - I made my first sign today using a 90 deg v carve for lettering and advanced v carve for our logo. I had a cedar board lying around so used that. Worked pretty well except I had a little tear out in the lettering (2" high). Nothing I couldn’t live with. I’m sure it would be better in a harder wood. One thing I wish we had was rpm control on the router. I keep forgetting to adjust it when I change bits from 1/4" down cut to the v bit. So far so good!
1 Like
This topic was automatically closed after 30 days. New replies are no longer allowed.