My Pro is setup and I’m milling!
My experiences:
-
Wrong parts were included. My Pro came with S4 end caps in a clearly marked “S4” box. The Carbide cutter and mount were also in a box marked “S4.” Carbide3D support was great and shipped out replacements right away and emailed a label for my return.
-
I think the Carbide Cutter box, which also contained the drag chains and spindle mount, ended up having the right parts, while the replacement box contained drag chains for an XL. It was a simple matter to remove unused drag chain segments.
-
There are no written instructions, so I worked off Winston’s assembly video. It’s a good video, but it misses on a few points:
A) It doesn’t emphasize enough, IMO, that you really want to be sure the X-axis gantry is touching both end plates when you tighten things down. I ended up having to resquare my unit, which is a bit of a pain since you also have to remove the MDF slats from the hybrid table and loosen all the screws holding the aluminum channels in place, as well as loosening the drag chain plates and, of course, the Y-axis rail shoulder bolts. I used some light duty clamps with rubber pads to hold the gantry against the end plates while I tightened things down and still ended up with a gap of a few thousandths on one side.
B) Winston runs through the wiring connections very quickly. That’s OK if you’ve assembled a CNC before, but for a newbie like myself I mixed up the X-axis and Z-axis motor connections (duh!). It would be good for Carbide3D to label those wires as well.
C) As I’ve read elsewhere, and Winston mentions one “might” have to do it in the video, I had to swap the Y-axis motor connections.
D) It’s pretty tight in and around the control box. I ended up having to do some wire routing so that there wasn’t so much slack. The board inside the box is upside down relative to how you’re instructed to install the box, so that was weird. Also the holes in the lid were really hard to line up with the threaded holes of the box, so I ended up enlarging the lid holes a tad, which really helped.
E) I ended up having a bad Z-axis limit switch wire. Support was great at helping me isolate the problem via a Facetime-like video call, and sent out replacements right away. But, when I installed the replacements, nothing worked. I sent an email to Support, but in desperation I re-opened the control box and just kind of pushed on all the wire connections. Viola! A working machine! It’s been fine since, although it’s only been a week or so. -
Surfacing the spoilboard was a big learning experience. In retrospect, I should have just cut a few things for fun first to learn the machine. Getting the right parameters in Carbide Create to cover the entire range of the machine proved difficult and my first attempt found the cutter doing deep into the MDF of one slat before I stopped the machine. I turned that slat around, but in the end I decided to make a new slat. I made my new slats 75mm wide, which fits the hybrid table aluminum channels better (I’ll probably hear the slop was intentional to accommodate expansion).
In the end I ended up needing multiple jobs to surface the spoilboard. I did remove the bitsetter out of caution, which I think was a good thing since I was using the McFly 1" diameter cutter. And then, of course, (another duh!) found out that surfacing meant the surrounding areas are higher, which means potential interference when tiling long pieces or even cutting pockets into pieces wider than the usable width. I read about the idea of moving all the MDF slats forward to be able to cut the back, but decided that I would try my hand at using Carbide Create to make jobs that would mill certain areas to a depth just slightly deeper than my surfacing. I removed on MDF slat at a time and clamped it to the spoilboard with Tiger clamps. That worked great and I thought taught me a lot about zeroing (Bit Zero on order now) - but see below.
- The surface of my spoilboard has ridges I couldn’t feel but could see with low angled light. I had decided to buy the Edge Technology Mini Pro Tram. Figured I could also use it on my drill press. While the hybrid table is great in many ways, it’s not the continuous surface tramming really wants, and the tram calibration magnet really wants a metal surface. So, I used my Starrett straightedge laid flat and taped to the table. This also had the benefit of spanning multiple slats. Here are the results:
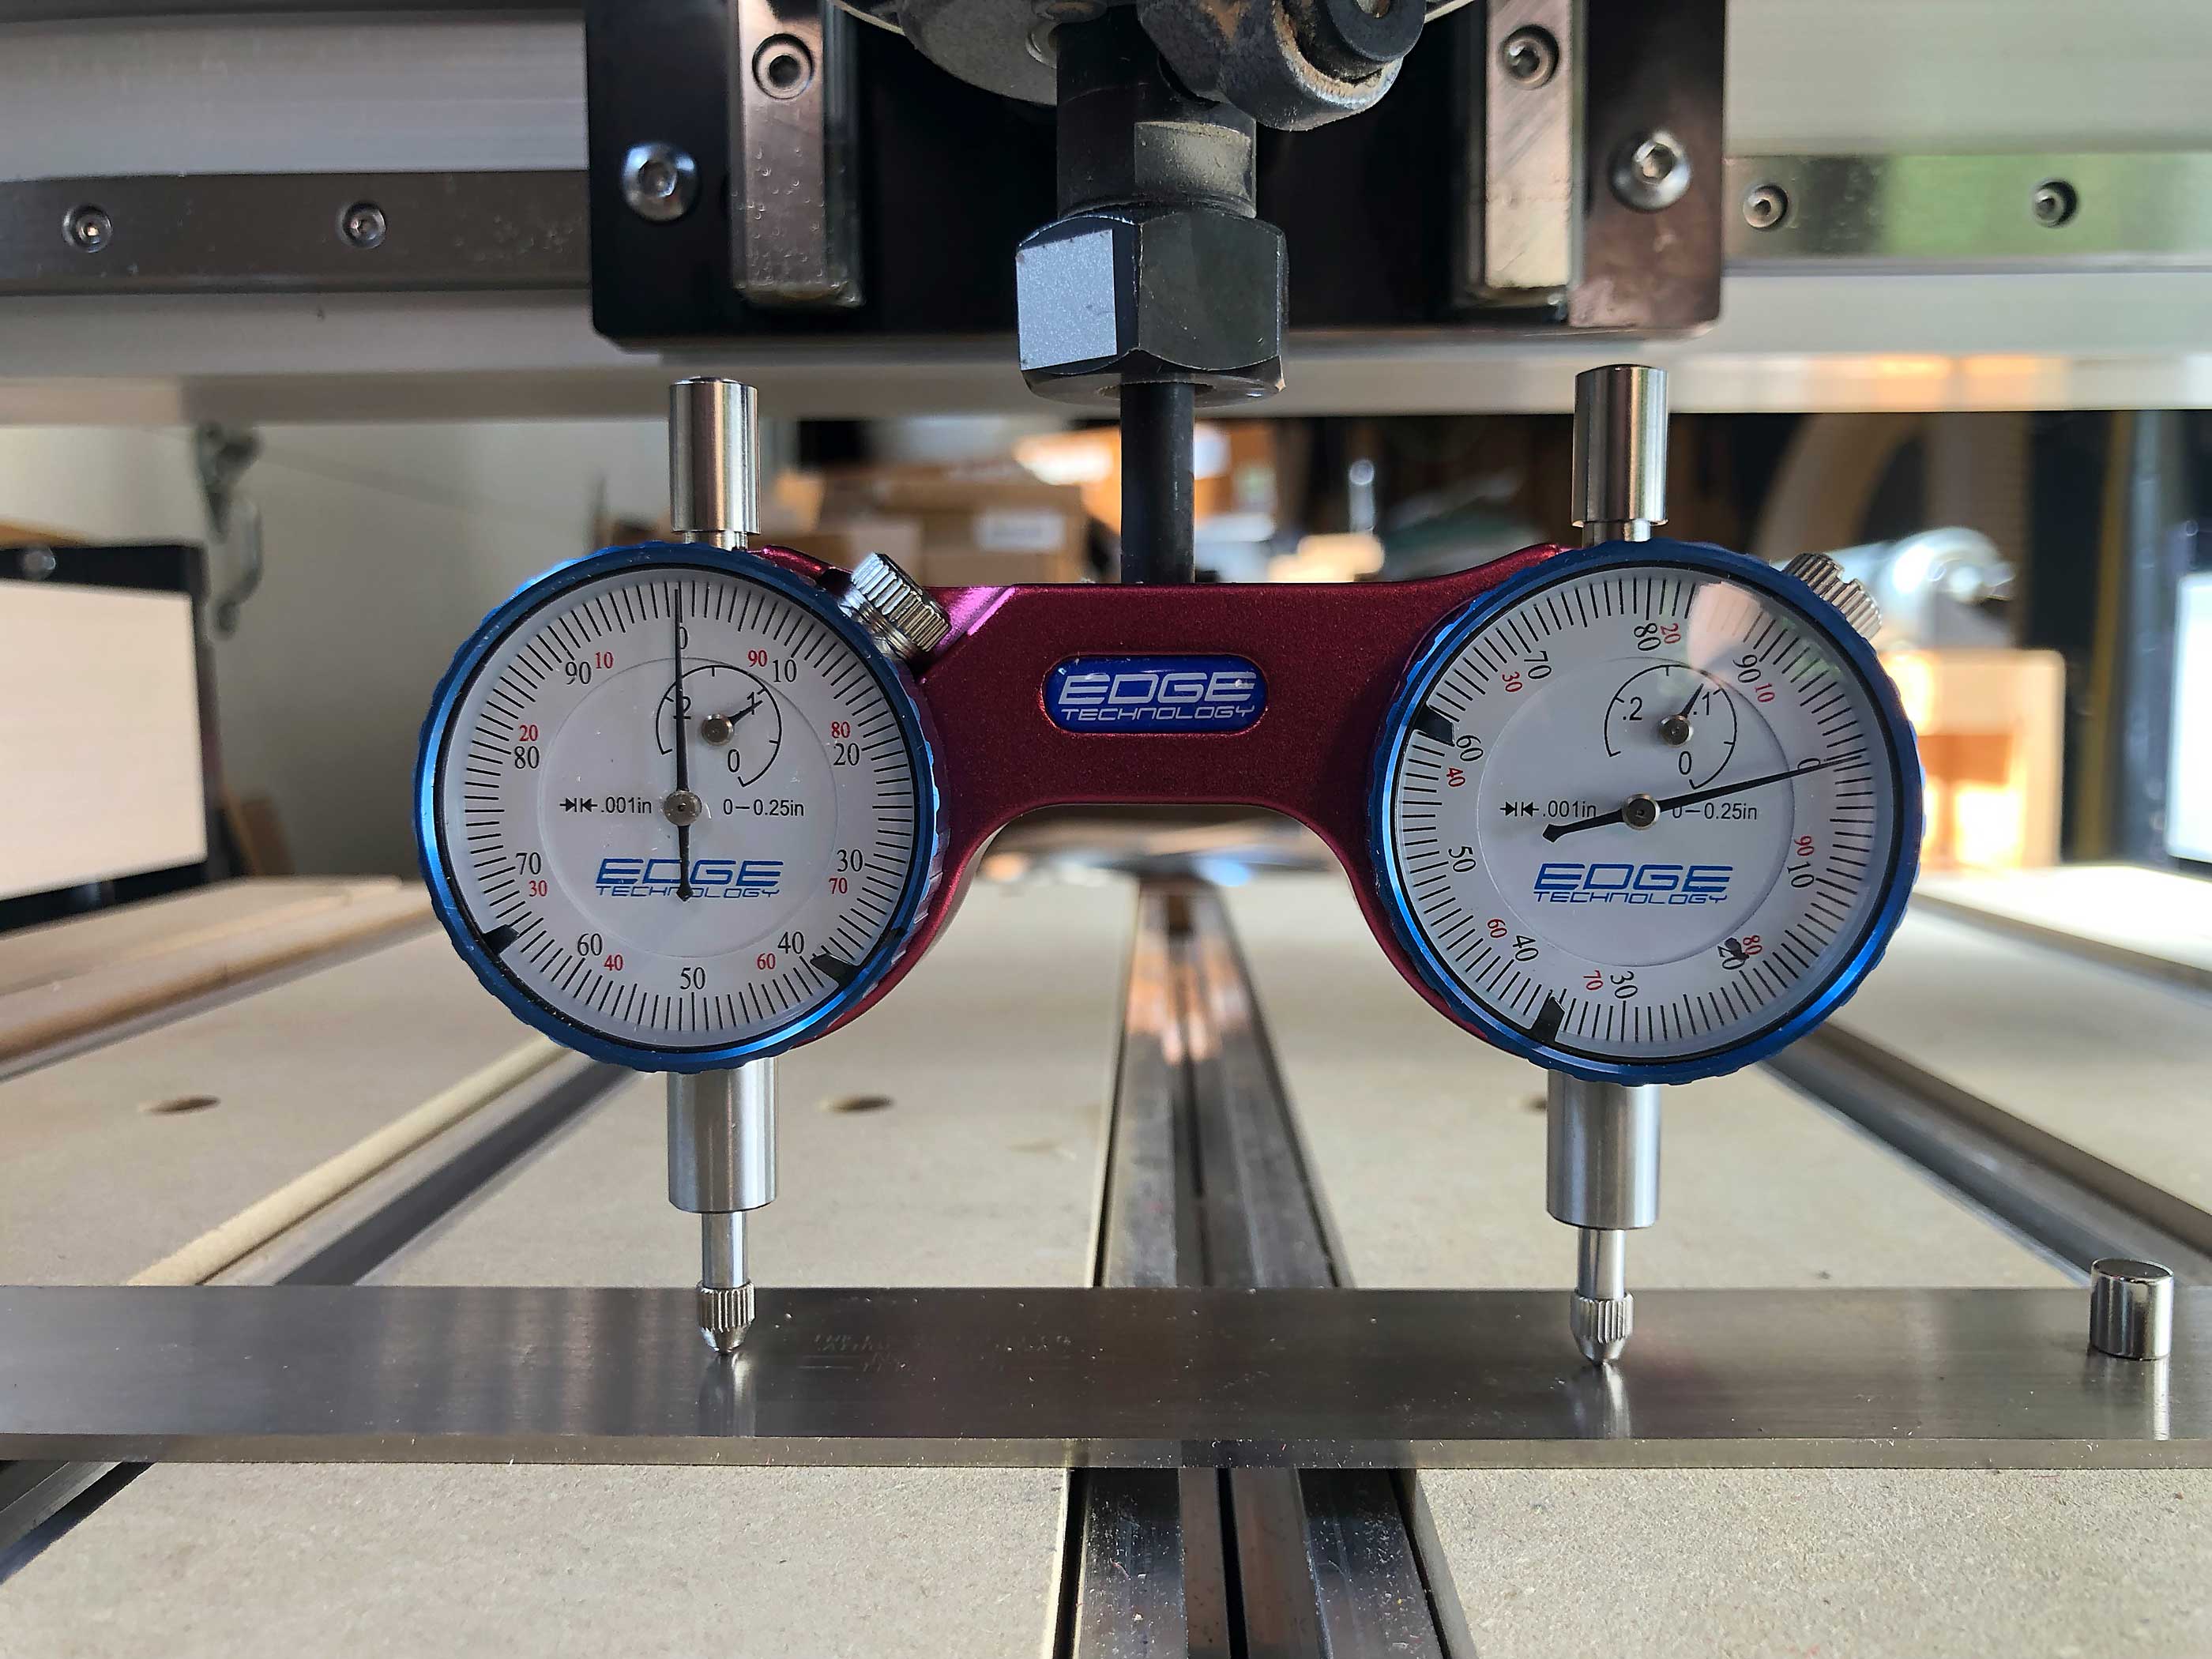
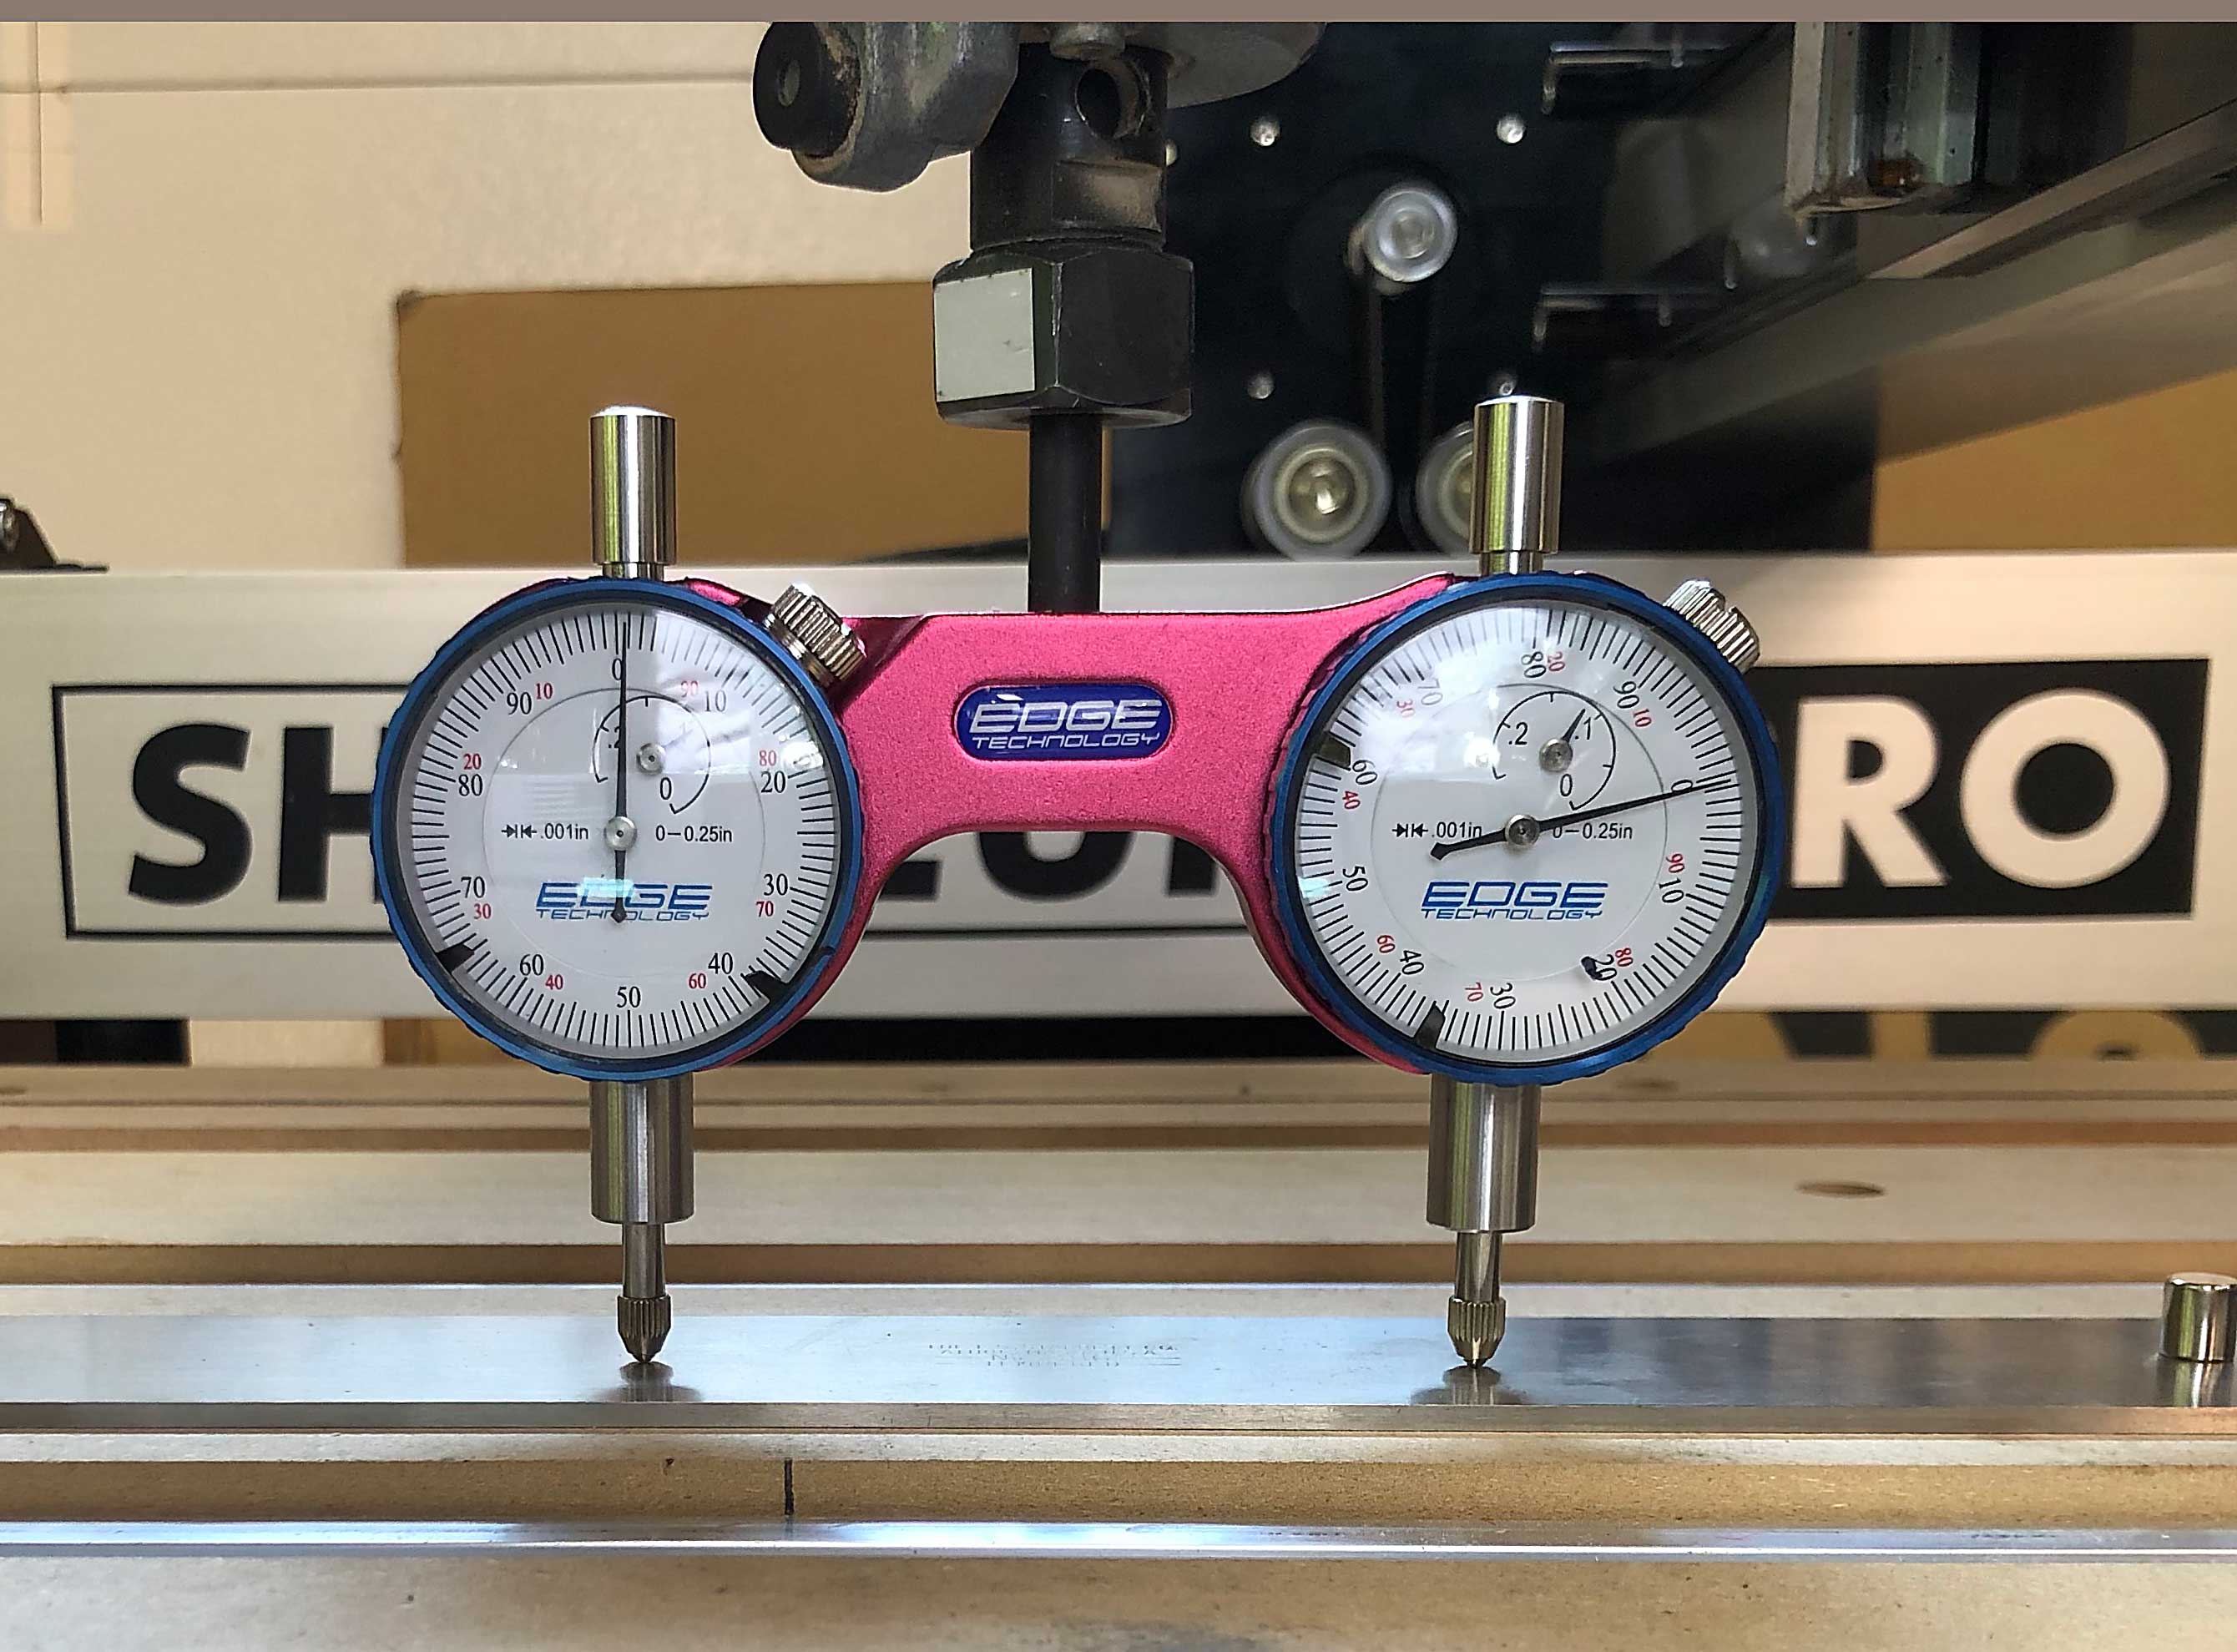
Note that the right dial is rotated with respect to the left. This is how calibration is done. You put the magnet down and raise/lower the unit using Carbide Motion until the left dial indicator is spot-on zero. Then you rotate the tram until the right dial indicator is over the magnet (which hasn’t moved) and you turn the dial until it reads zero. Then rotate back to recheck. You only need this calibration done once.
- Impressed with my calibration results, I decided to cut a protruding 100mm square in some scrap to measure my unit’s accuracy in both dimension and squareness. Well, I screwed up the zero point and milled two of my Tiger Clamps! I’ll contact Carbide3D to see that that’s covered in their “mistakes on us” policy.
In the meantime, I’m learning Fusion360. There are a bunch of YouTube videos which help, but the little things are hard - like moving sketches to align at certain points, etc. And now I’m getting into the whole tool path thing and finding all sorts of variables I’m not sure how to set, but I know I’ll get there eventually. I’ve decided to recut my test square using Fusion360, so there’s a couple more hours to go there.
- This may be too “meta,” but coming from decades of traditional modern woodworking, digital measuring and CNC milling are game changers. The ability to cut parts to a few thousandths of an inch without the trial and error cut-measure-recut-measure-recut-measure routine is pretty revolutionary. I have Wixey digital readouts on my tablesaw and drum sander, and the Shapeoko looks to be opening all new ways of working. There are so many techniques (some call them tricks) in traditional woodworking that just will soon be lost forever. The Bridge City Toolworks “kerfmaker” jig, for instance, is a way to accurately cut things like half lap joints using machines with wobbly blades and inaccurate fences, but those kind of things are just going to go away now. Not to mention simply “sneaking up” on a cut and then being sure to cut all your pieces at the same setting since it would be hard to replicate that fence/blade position accurately later.
Sorry this was so long. Between this community and Carbide3D support, I’m happy with where I’m at, even if it’s taking me longer than I expected to cut even simple things. I’m already envisioning projects needing more Z-range than I have, so looking forward to an HDZ upgrade for my Pro. And I hope that I don’t regret getting the Standard. My thinking there was that solid wood pieces are rarely larger than 12" wide anyway so I’d just tile then lengthwise when/if needed. I may regret that, but then I’d have to reconfigure my shop to accommodate the larger machine.