I’m slowly cornering the market on the caster aisle at Home Depot myself ![]()
Dan
I’m slowly cornering the market on the caster aisle at Home Depot myself ![]()
Dan
Wow. I did almost the same thing awhile back. Like you I have zero space left in my garage and I also needed a worktable in my man-cave. I’ve been making due with this setup for a few months now. I would prefer not to have to kneel down to access the machine but sometimes the lack of space outweighs the need to stand in front of the machine.
I actually got frustrated with my door access and just took them off.
@Griff Some great ideas there. I will keep those in mind if I find this wont work.
@kfgreenwald Hah nice. Yeah How is the dust without the doors?
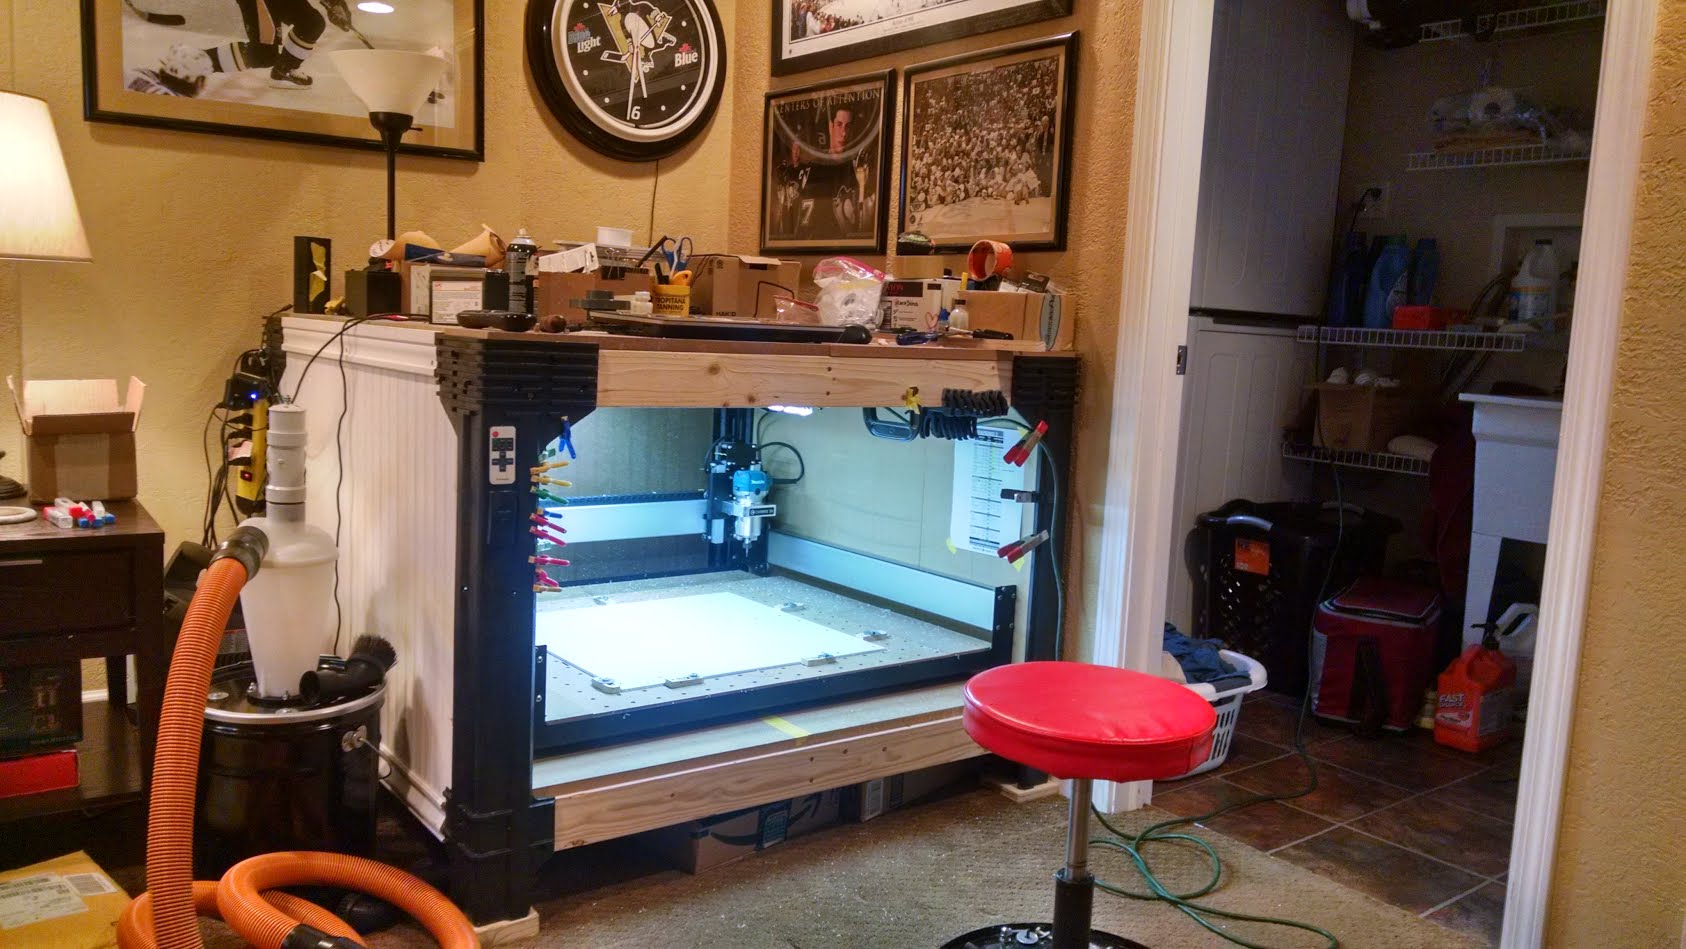
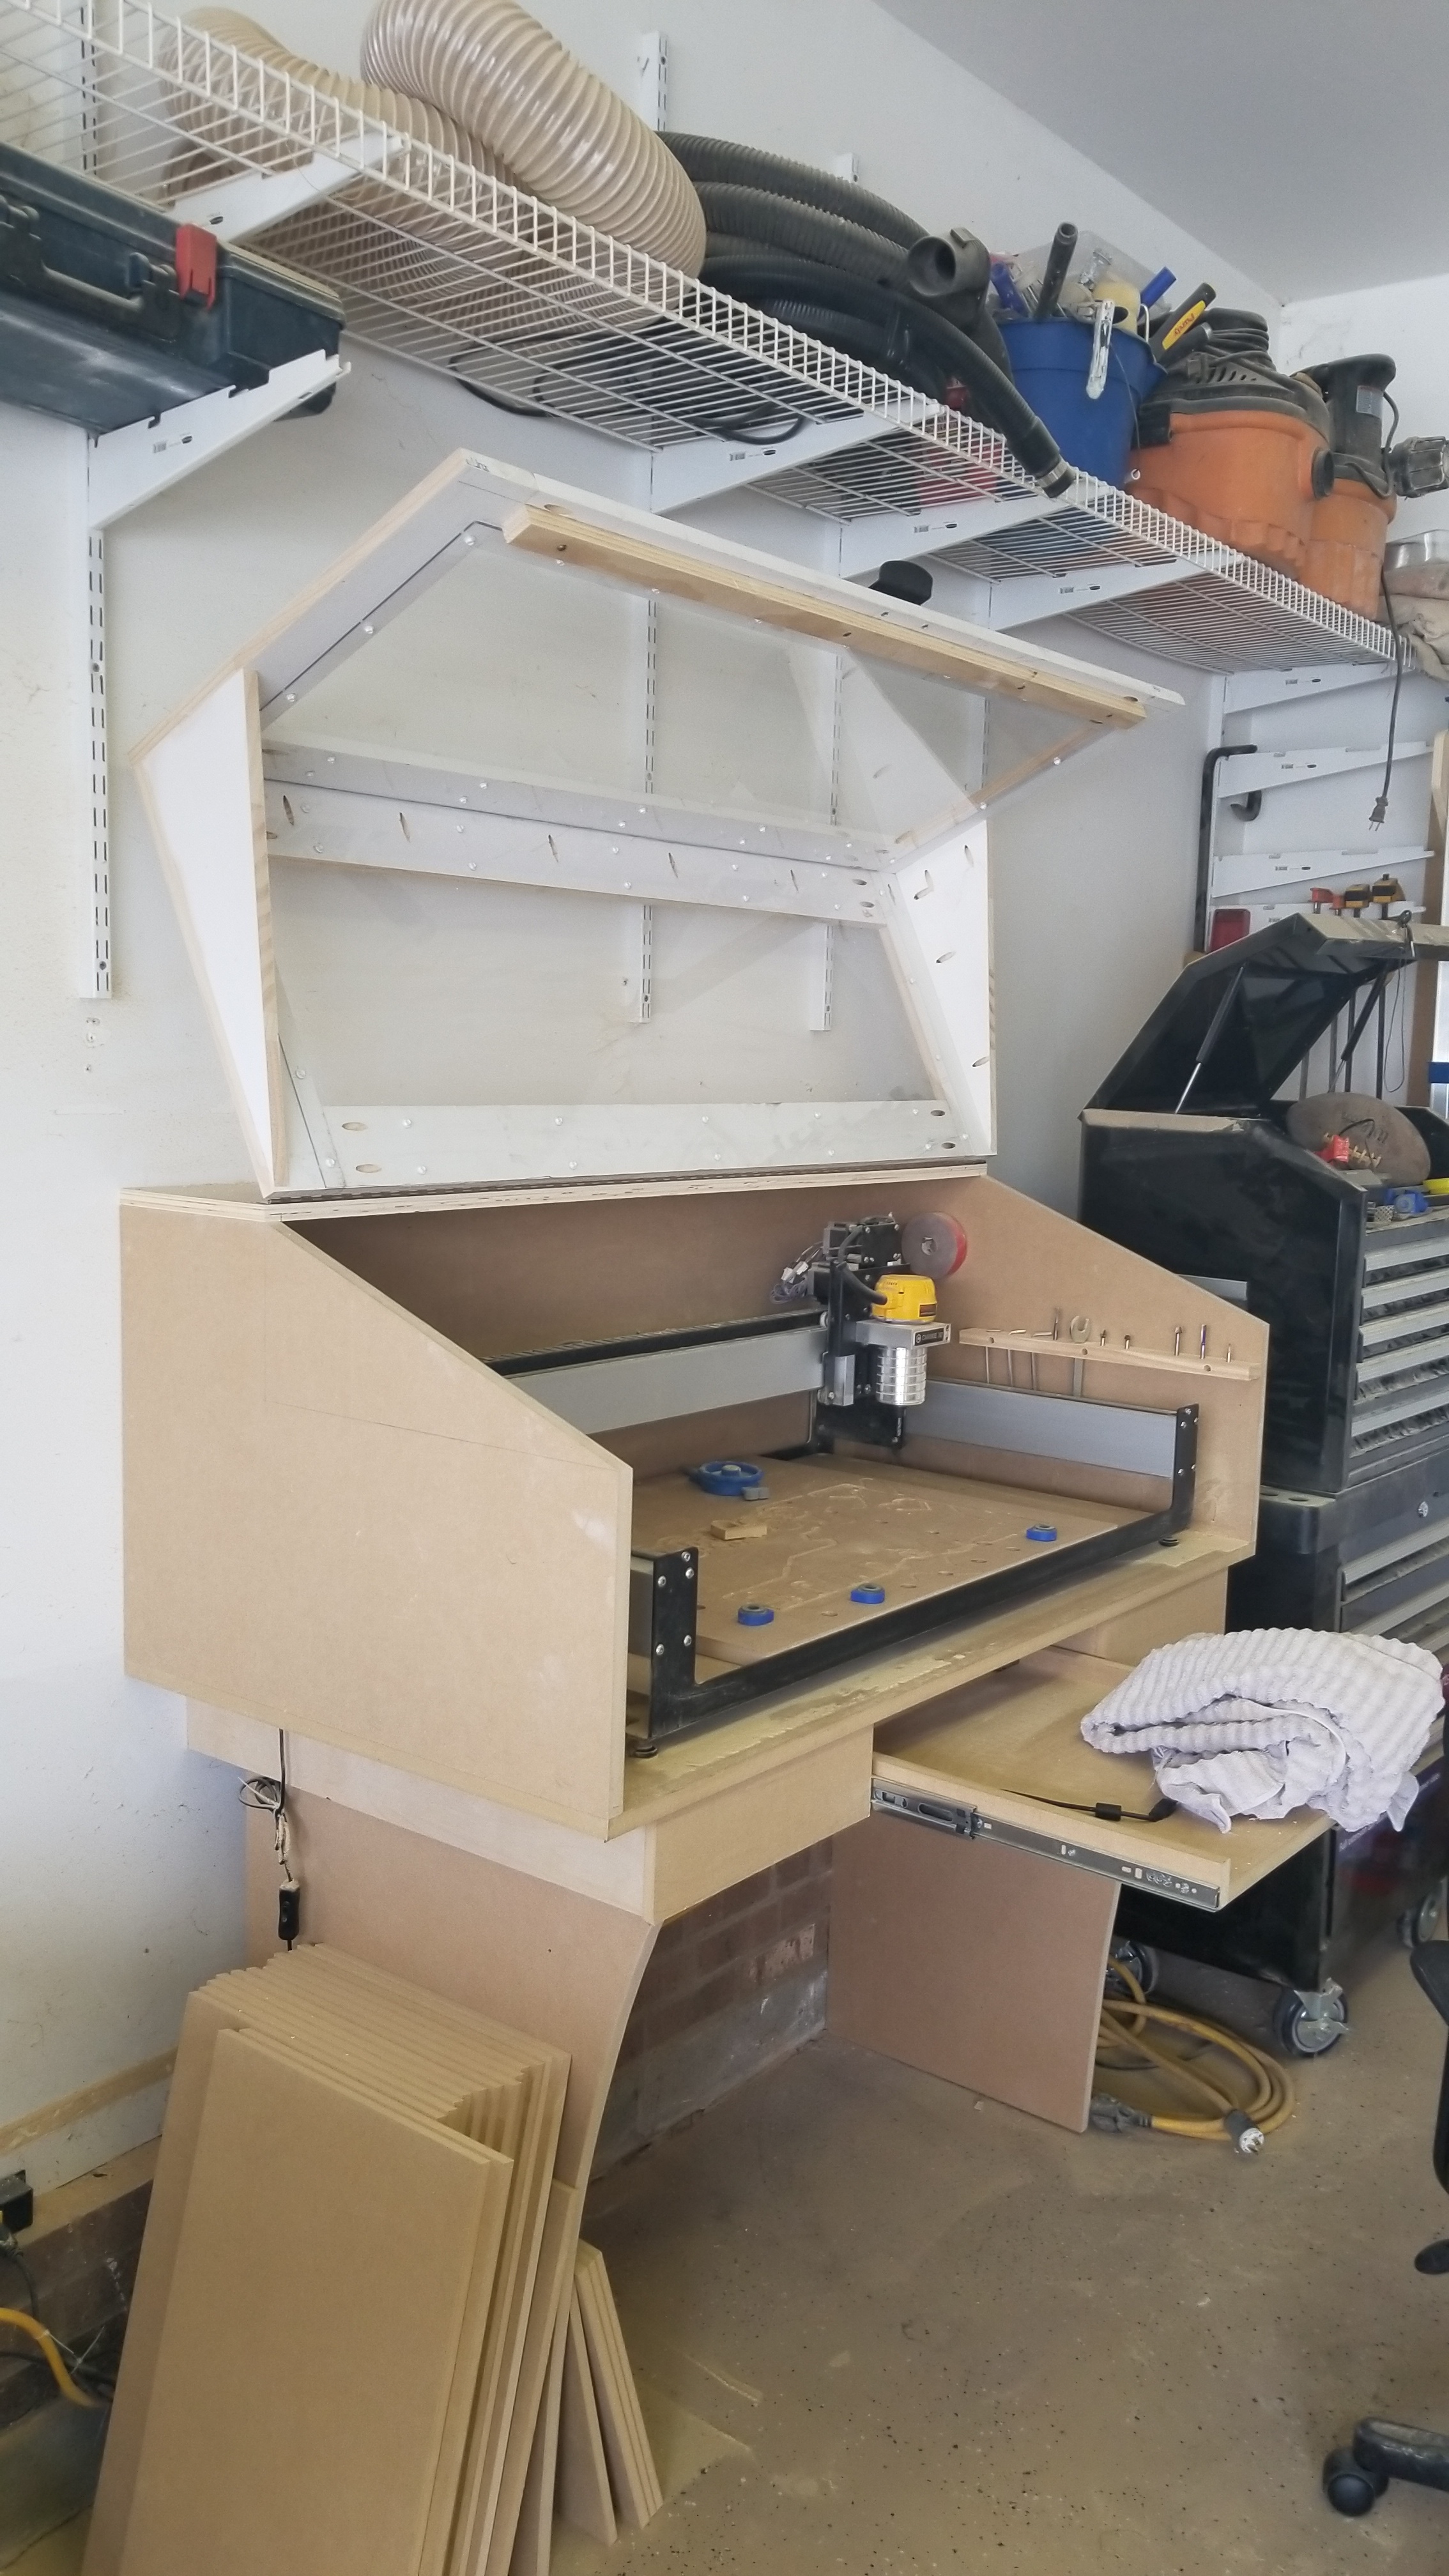
Got the CNC in place. The doors are off while I work on it.

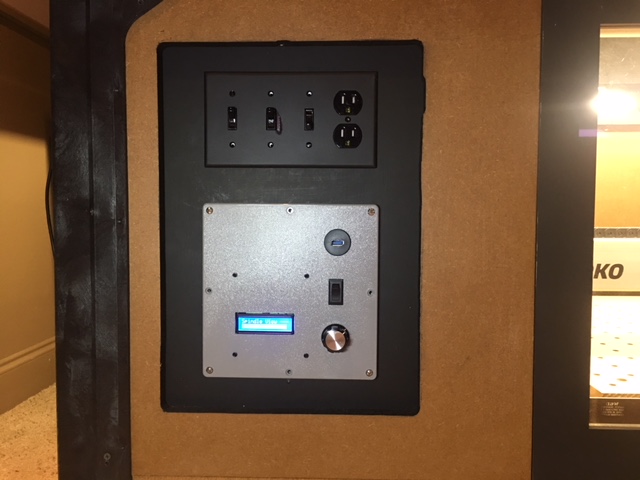
Here is a view of the “facilities compartment”. You can see I chose to move the Shapeoko controller board to this side. Also I mounted a utility box to the front side where I can place the SuperPID, switches, and potential e-stop.

Does anyone think not having the controller board’s heatsink mounted to the rail of the Shapeoko will cause issues with heat dissipation? I put spacers between the heatsink and the MDF wall so it has full access to the surrounding air.
Yeah, the dust part is not ideal, but I mostly machine plastic which is manageable in that it creates larger chips and not actually a fine dust.
Need to add a fan if it’s not on a heat sink.
Just to clarify I do have it on the original heat sink. The heat sink is just not mounted to the CNC extrusion (reducing its thermal performance to some degree). Do you still think it needs a fan?

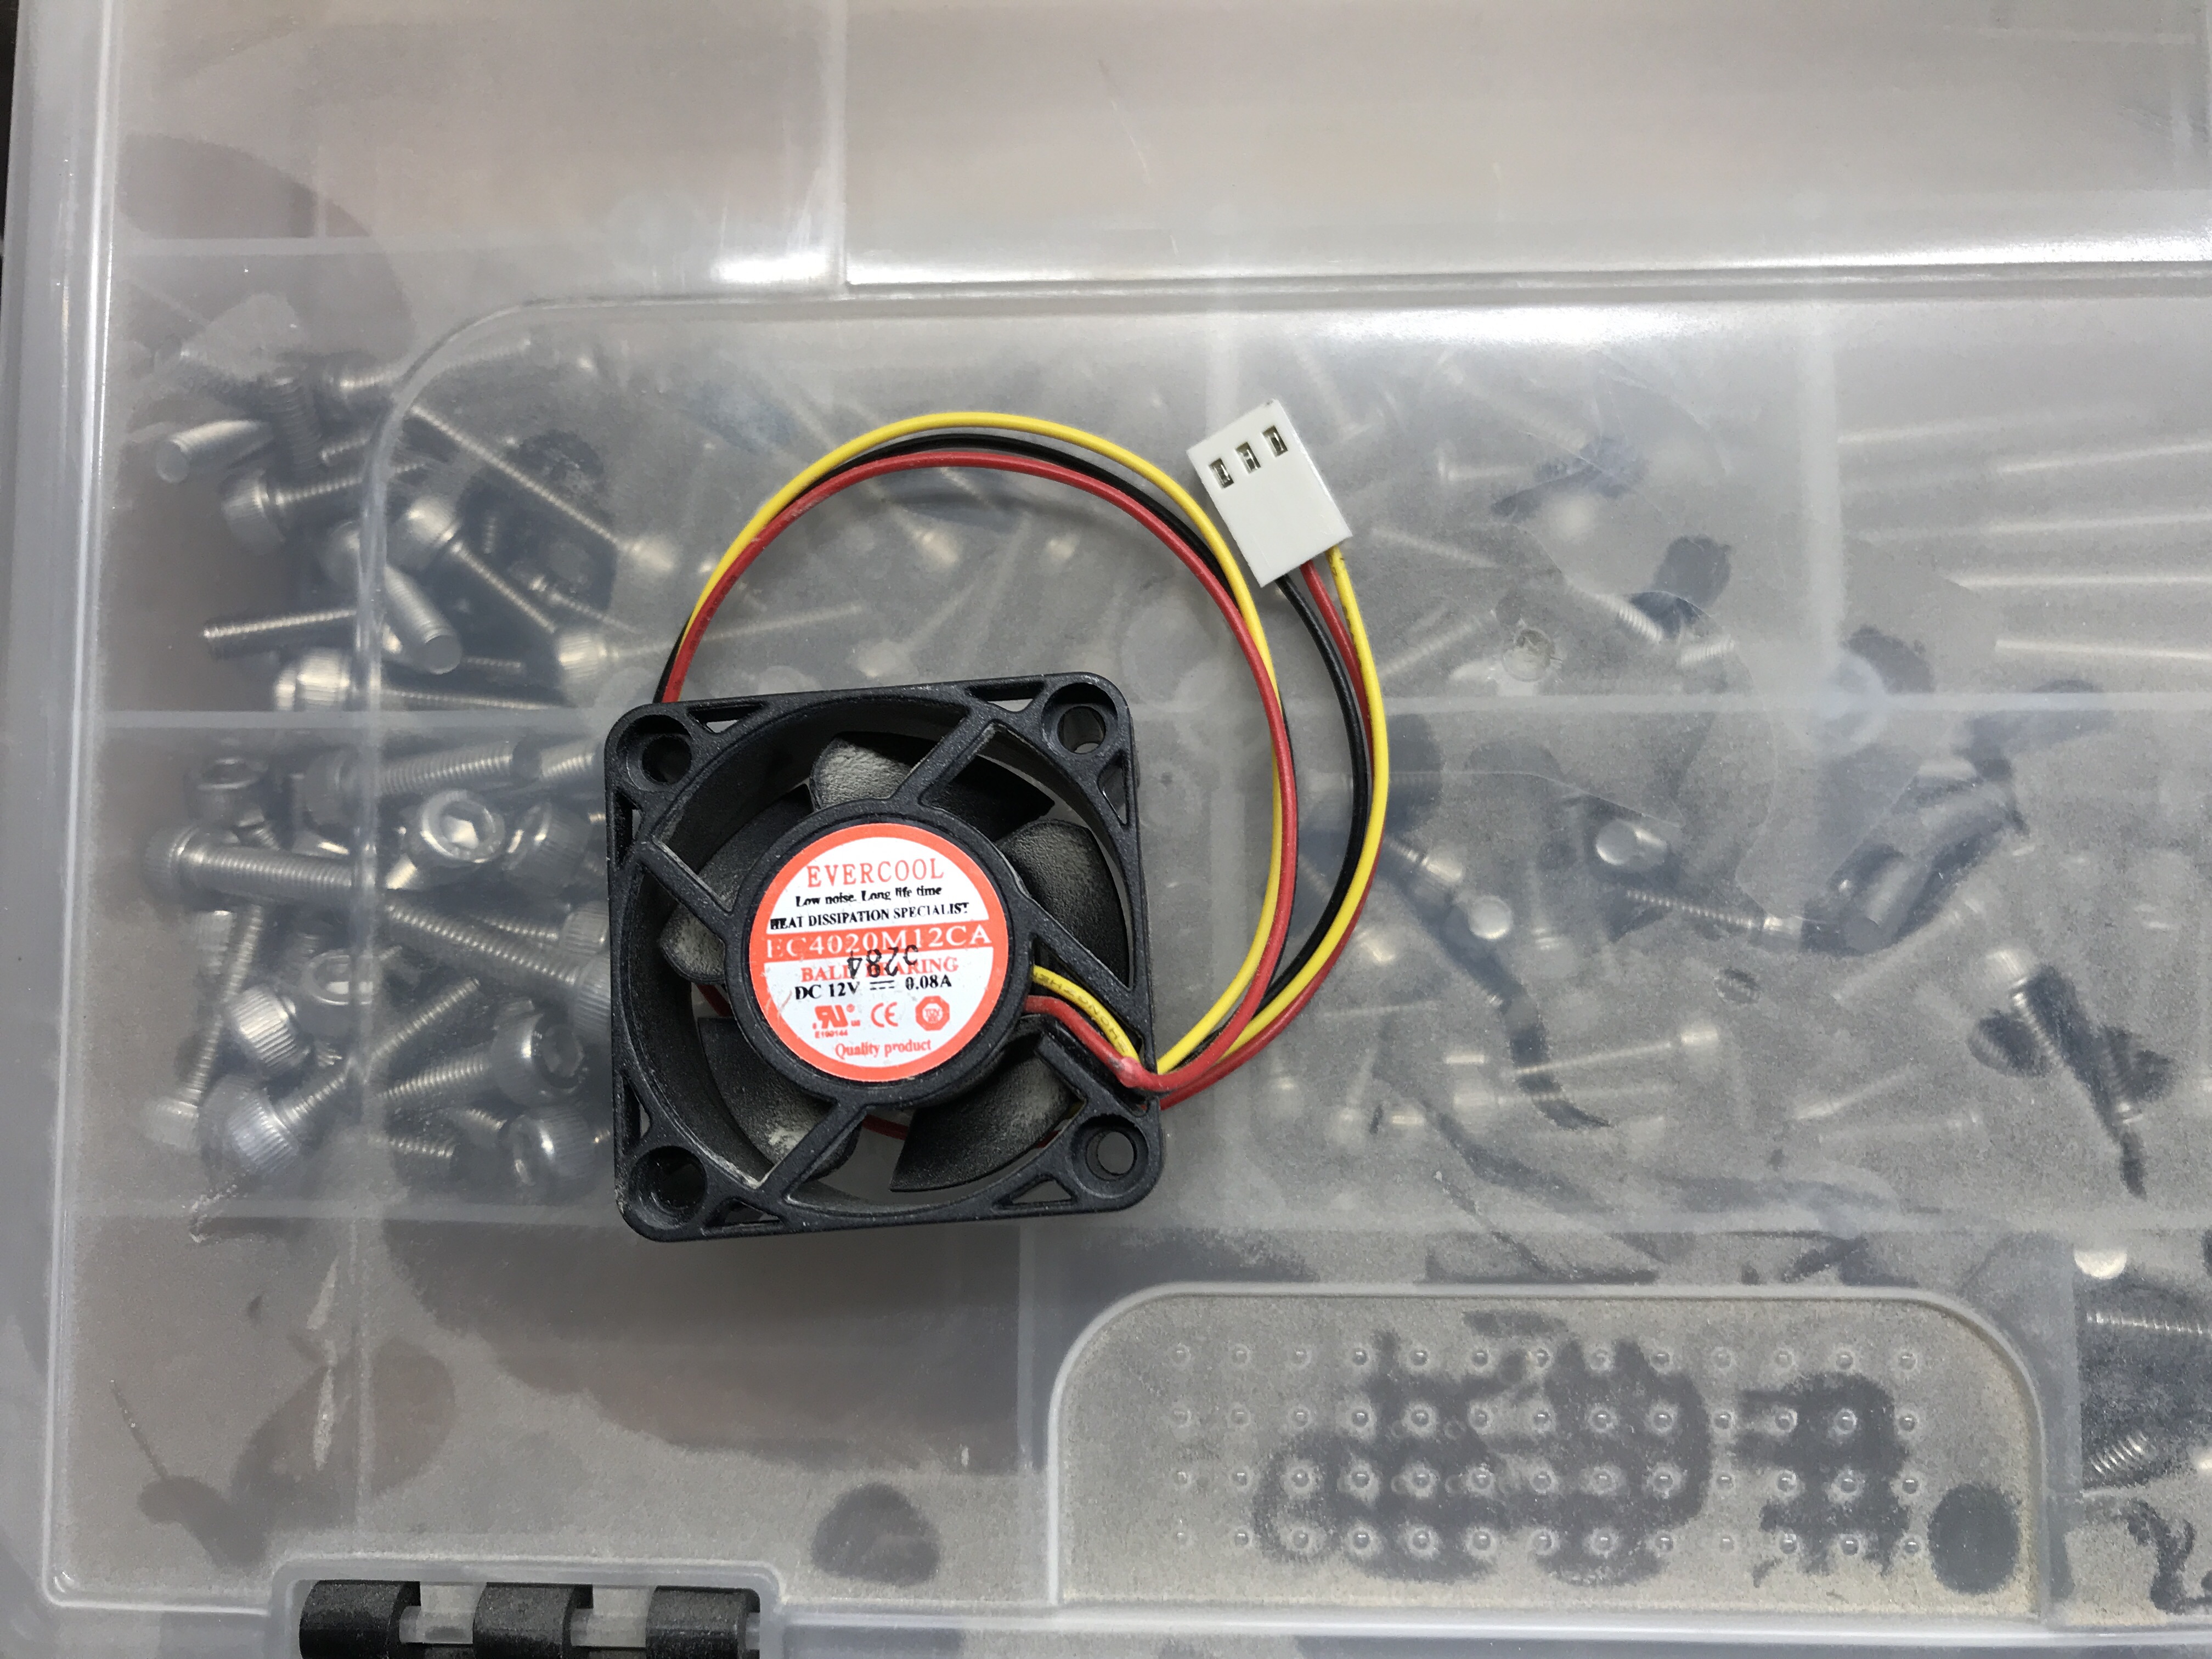
I took exactly the same setup and used double stick tape to mount the board outside my original case. I was advised by C3D or this forum to add a fan
This is the fan I used. I have since relocated the board to a y rail and no longer use the fan.
I emailed support just to confirm the thermal requirements for the latest control boards. At least for the 2.4d+ version, you don’t need a fan.
You won’t need a fan, all the thermal characterization we did on the board was with the heatsink alone so you should be good to go.
–
Jorge Sanchez
support@carbide3d.com
Progress report on my dust management system.
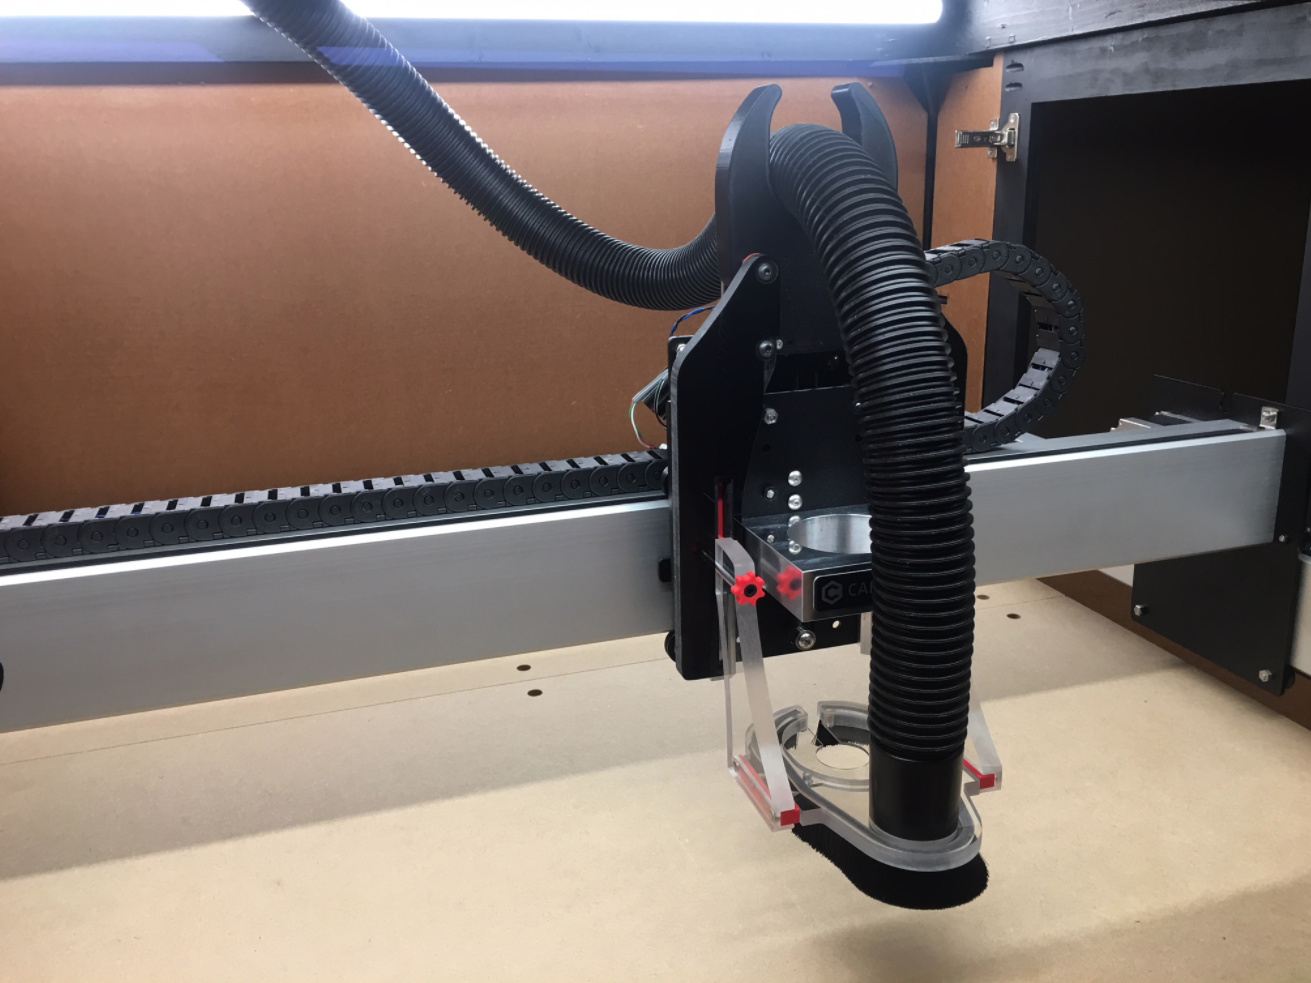
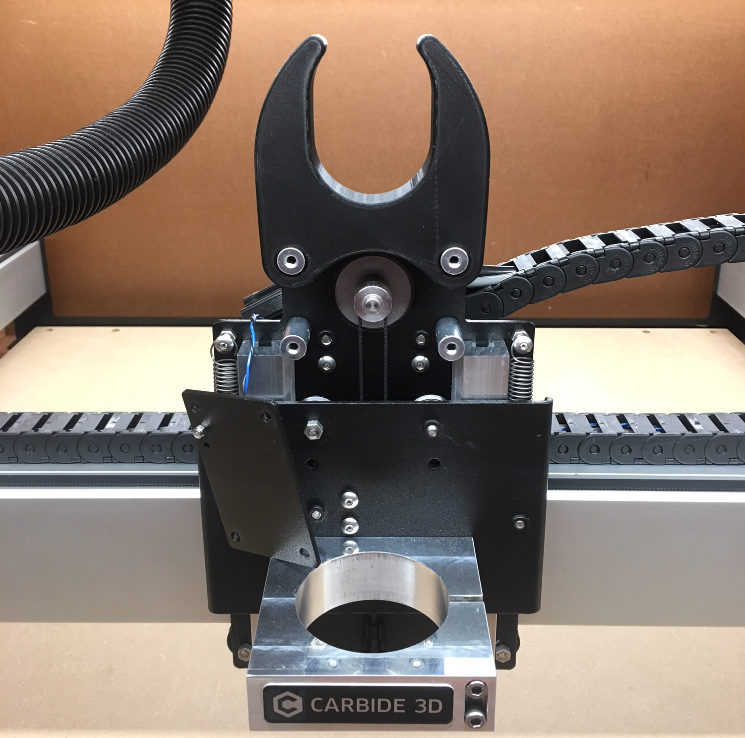
Here is the CNC end. Got my Suckit Dust Boost the other day (thanks Jenn!). One thing I struggled with is how to handle the hose. My original plan was a 2.5" flex hose like you see on the dust collector below. But ended up using the Shop Vac 1-1/2" hose it came with. Its the perfect balance of rigid and flexible.
In order to keep the hose under control for the entire range of travel I drew up a hose clip in Fusion 360 and 3D printed it. Works perfectly.
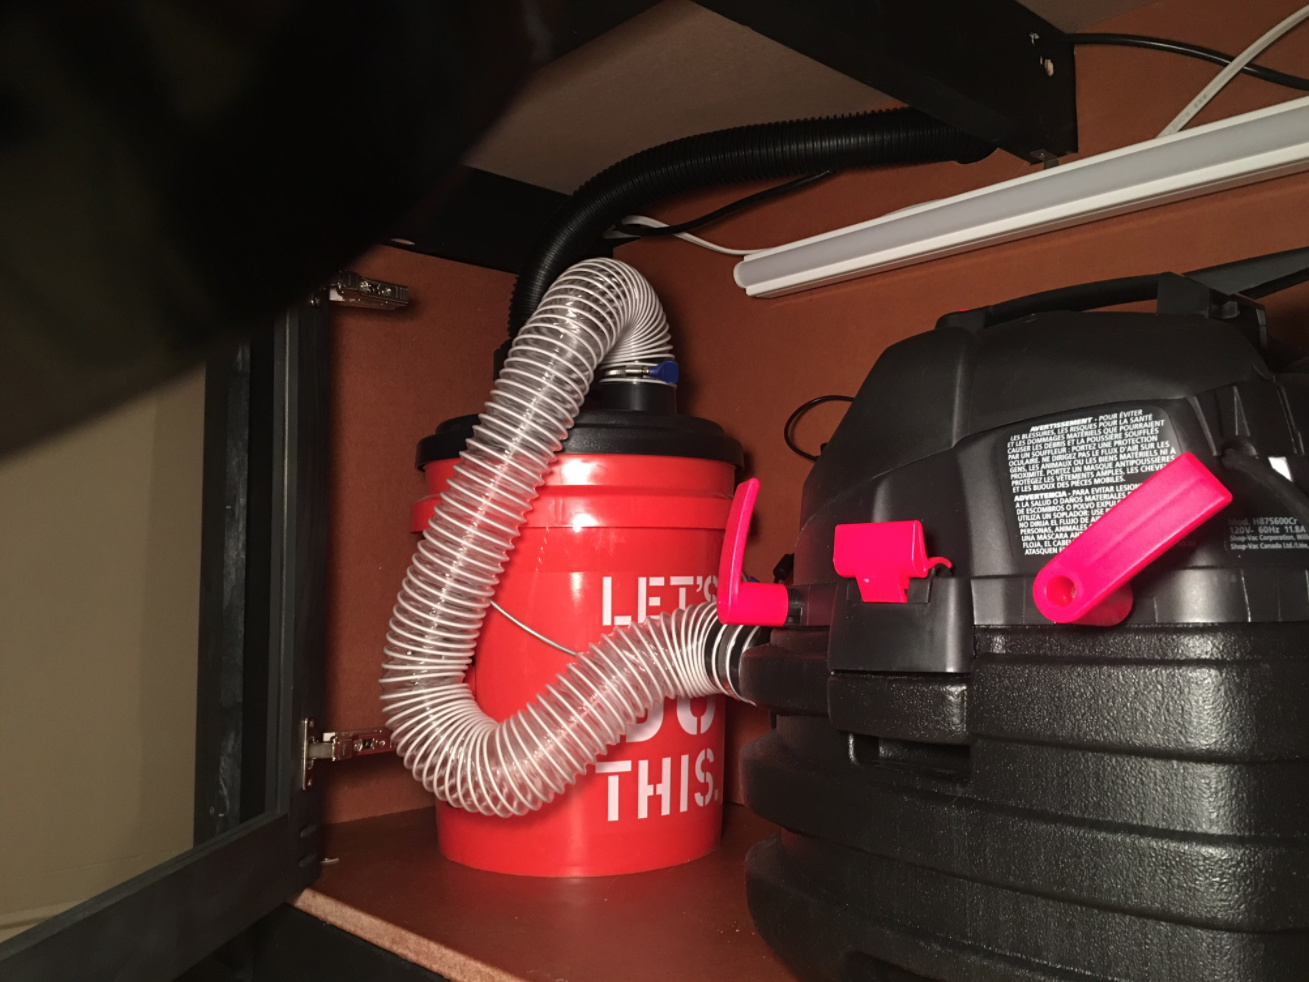
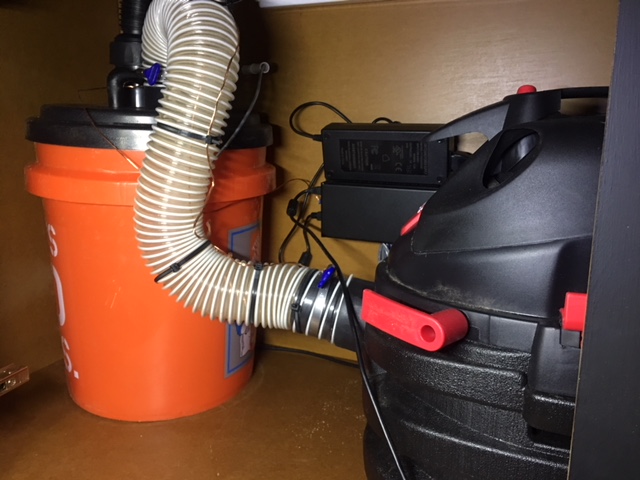
Here is the vacuum side of the table. Unfortunately I do not have the available height for a Dust Deputy, so trying one of those cheap bucket cap solutions. Preliminary testing just vacuuming up a pile of trash are good. I hope it works ok.
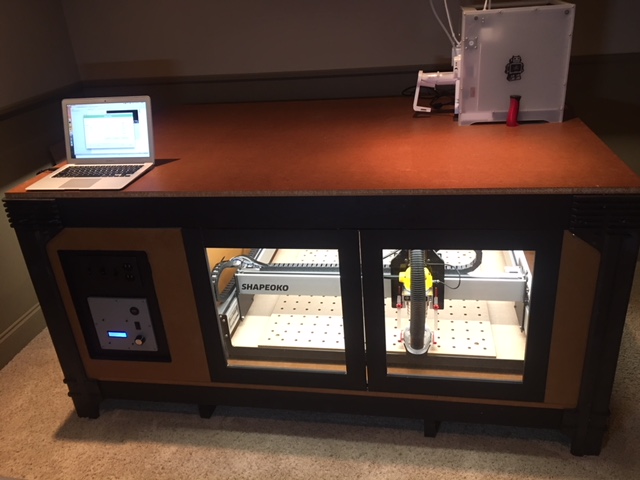
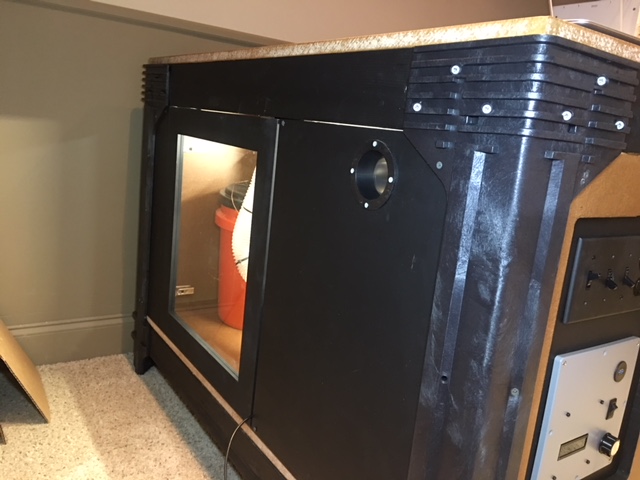
All done! Here are some final pictures. Doors with glass installed, and SuperPID control box installed.
I am SUPER pleased with how the dust lid preforms. I have never used the Dust Deputy, but comparing the dust that gets through this thing into the ShopVac, to similar pictures of the Dust Deputy, it seems to work about as well. And for only $17US!
Here you can see the port that the ShopVac vents the outgoing air through (via a hose connection).This hopefully helps to create somewhat of a negative pressure inside the CNC cabinet.
Where did you get those plastic legs from? I really like those.
Thank you, I’ll have to keep these in mind when I redo my current enclosure.
I’m torn because I’m not a big fan of having to bend down / get on the floor to access the machine, but having the desktop open to work on is very nice. That aside you have quite the sexy work space there sir, very well done!
@neilferreri Sorry for the delay getting the link. I wanted to iterate another version before I shared it. The old design’s hose opening was too tight making it inconvenient to get the hose in and out. This updated rev has a perfect fit now.
(btw this is for a 1-1/2 in hose diameter)

Some things I would have done differently (or plan to improve).
This topic was automatically closed 30 days after the last reply. New replies are no longer allowed.