Shapeoko 3 XXL Enclosure Build

Thought I would share the Shapeoko 3 XXL enclosure I am working on as it unfolds. My Shapeoko is scheduled to arrive tomorrow :rofl:, but thought I would get a jump on the enclosure.

My primary goal was to design something that I can use indoors (I hope I dont regret this). I am out of room in my garage, plus really dont like the idea of the Shapeoko being in an un-climate controlled space (southern high humidity, and cold winters). So sound and dust resistance is a high priority as you can imagine. Also, I have limited space in the room I am putting it, and wanted to optimized things by incorporating a workbench on top of the enclosure.

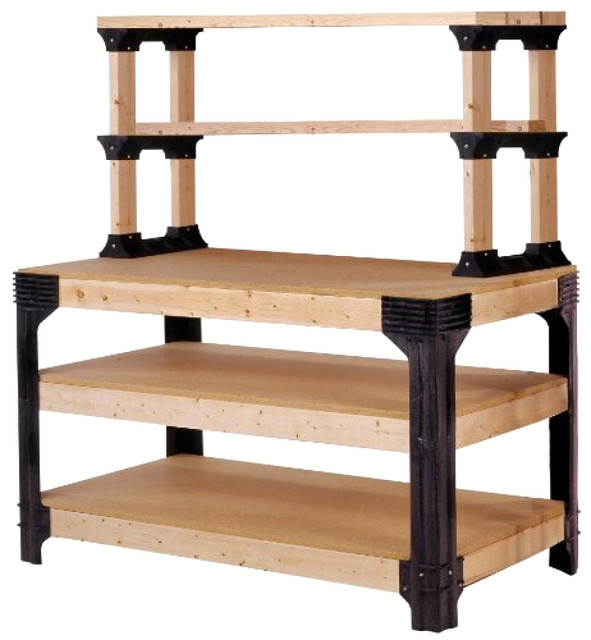
I started with this as the basis of my enclosure. Its a Hopkins 2x4 Basics Workbench. It includes the black supports, you just provide the lumber. Its supports a footprint of up to 8’ x 4’ (or smaller).

I started out planning to put the CNC on top, and building an enclosure around that. But then I realized that if I skipped the middle shelf, I could put the CNC on the bottom shelf, add walls, and voila, a CNC enclosure with workbench on top! Not the most ergonomic design, but with my design goals, I think it will work out well.

So I whipped up this CAD drawing with my ideas:

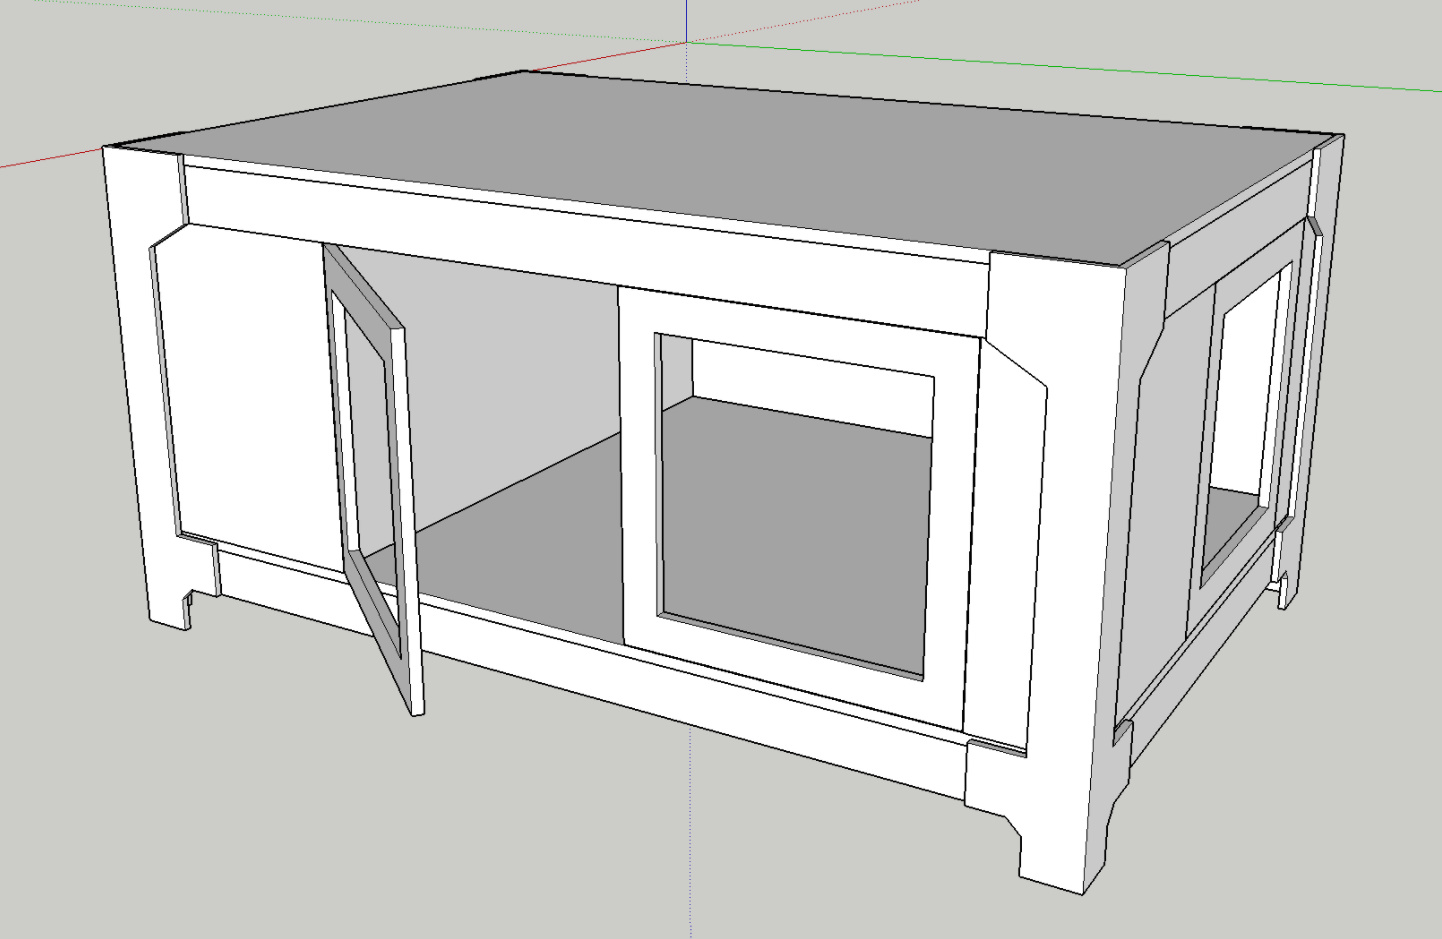
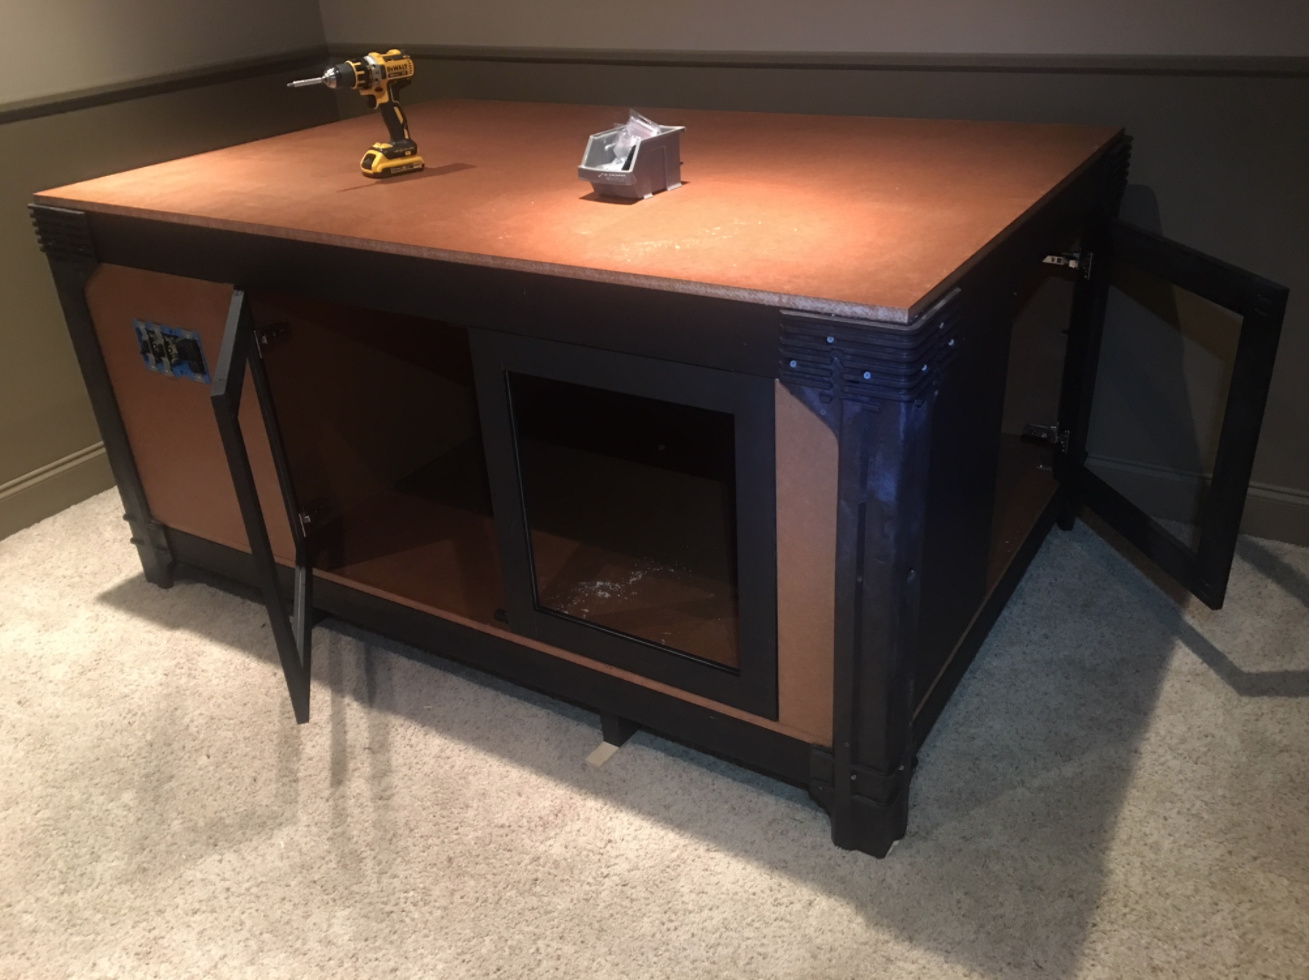
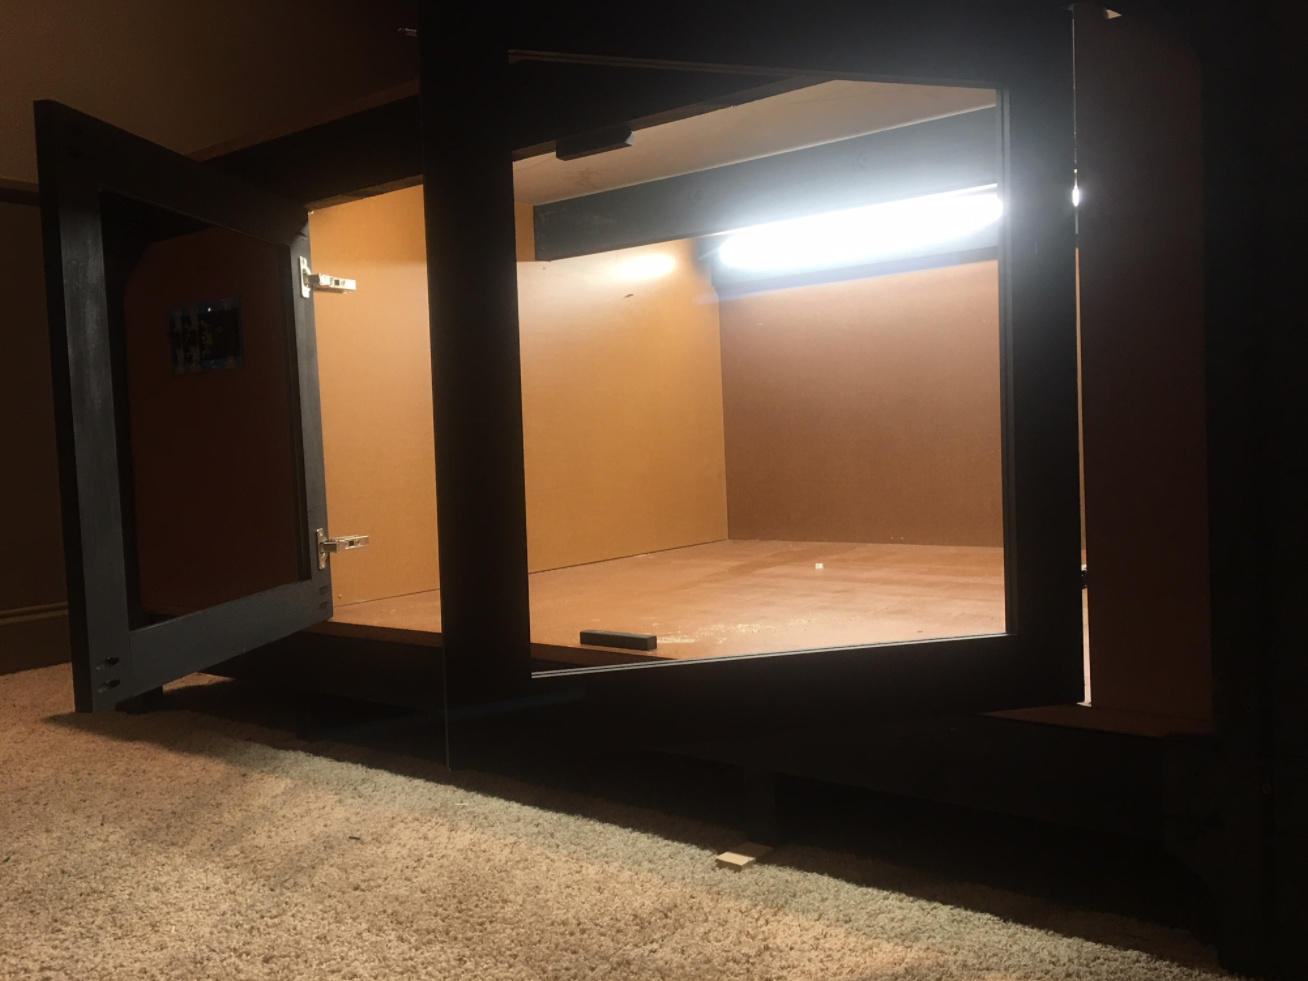
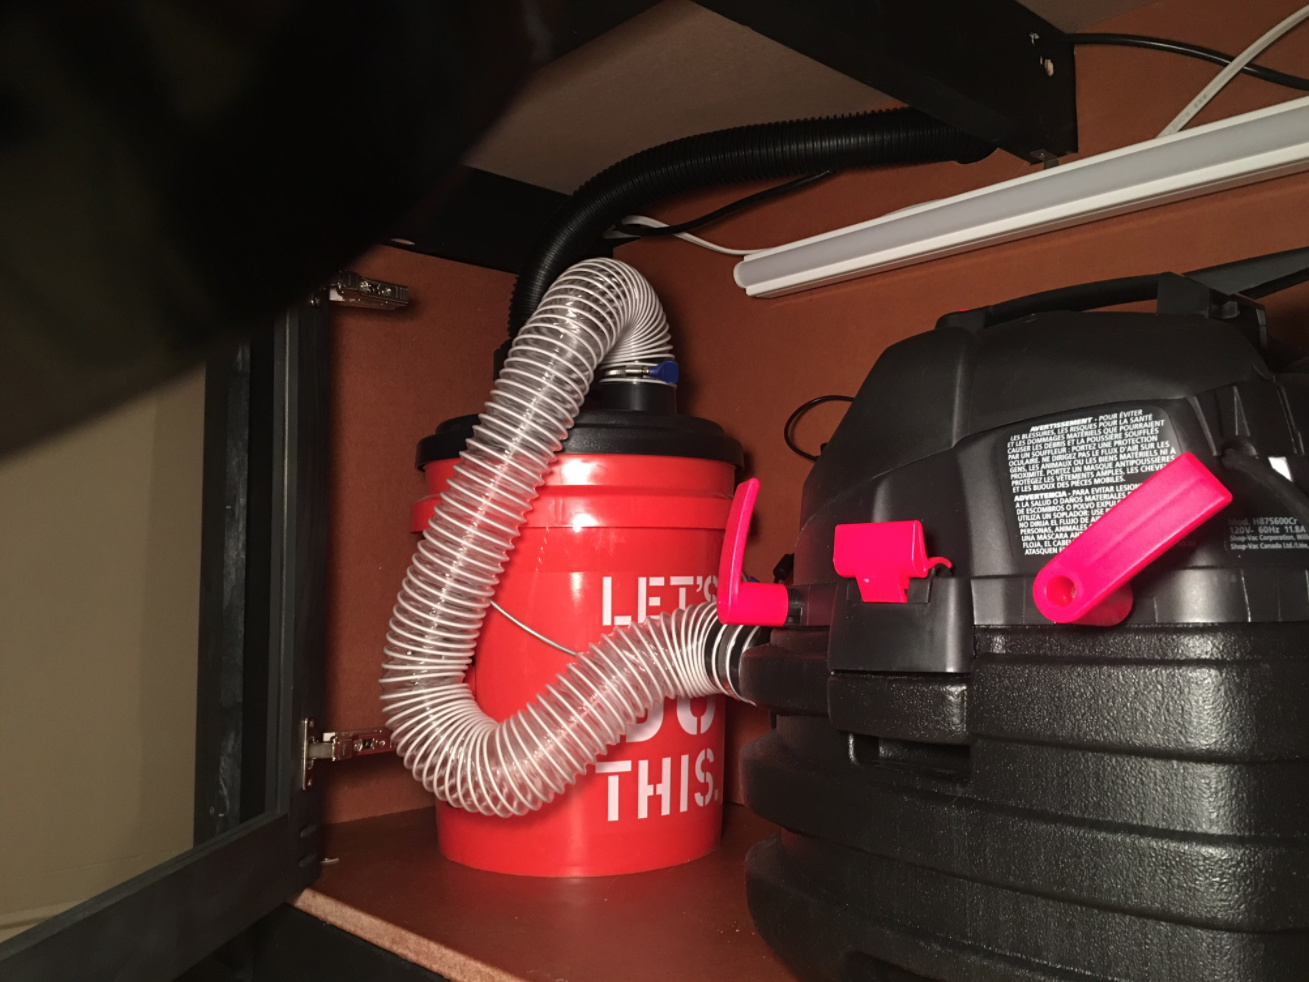
The total dimension is 6’ W x 4’ D x 36" H. The lower space for the CNC is 54" W, 47.5" D, 27.25" H. The remaining fully enclosed area on the lower left is for a wet/dry vac and Dust Deputy.

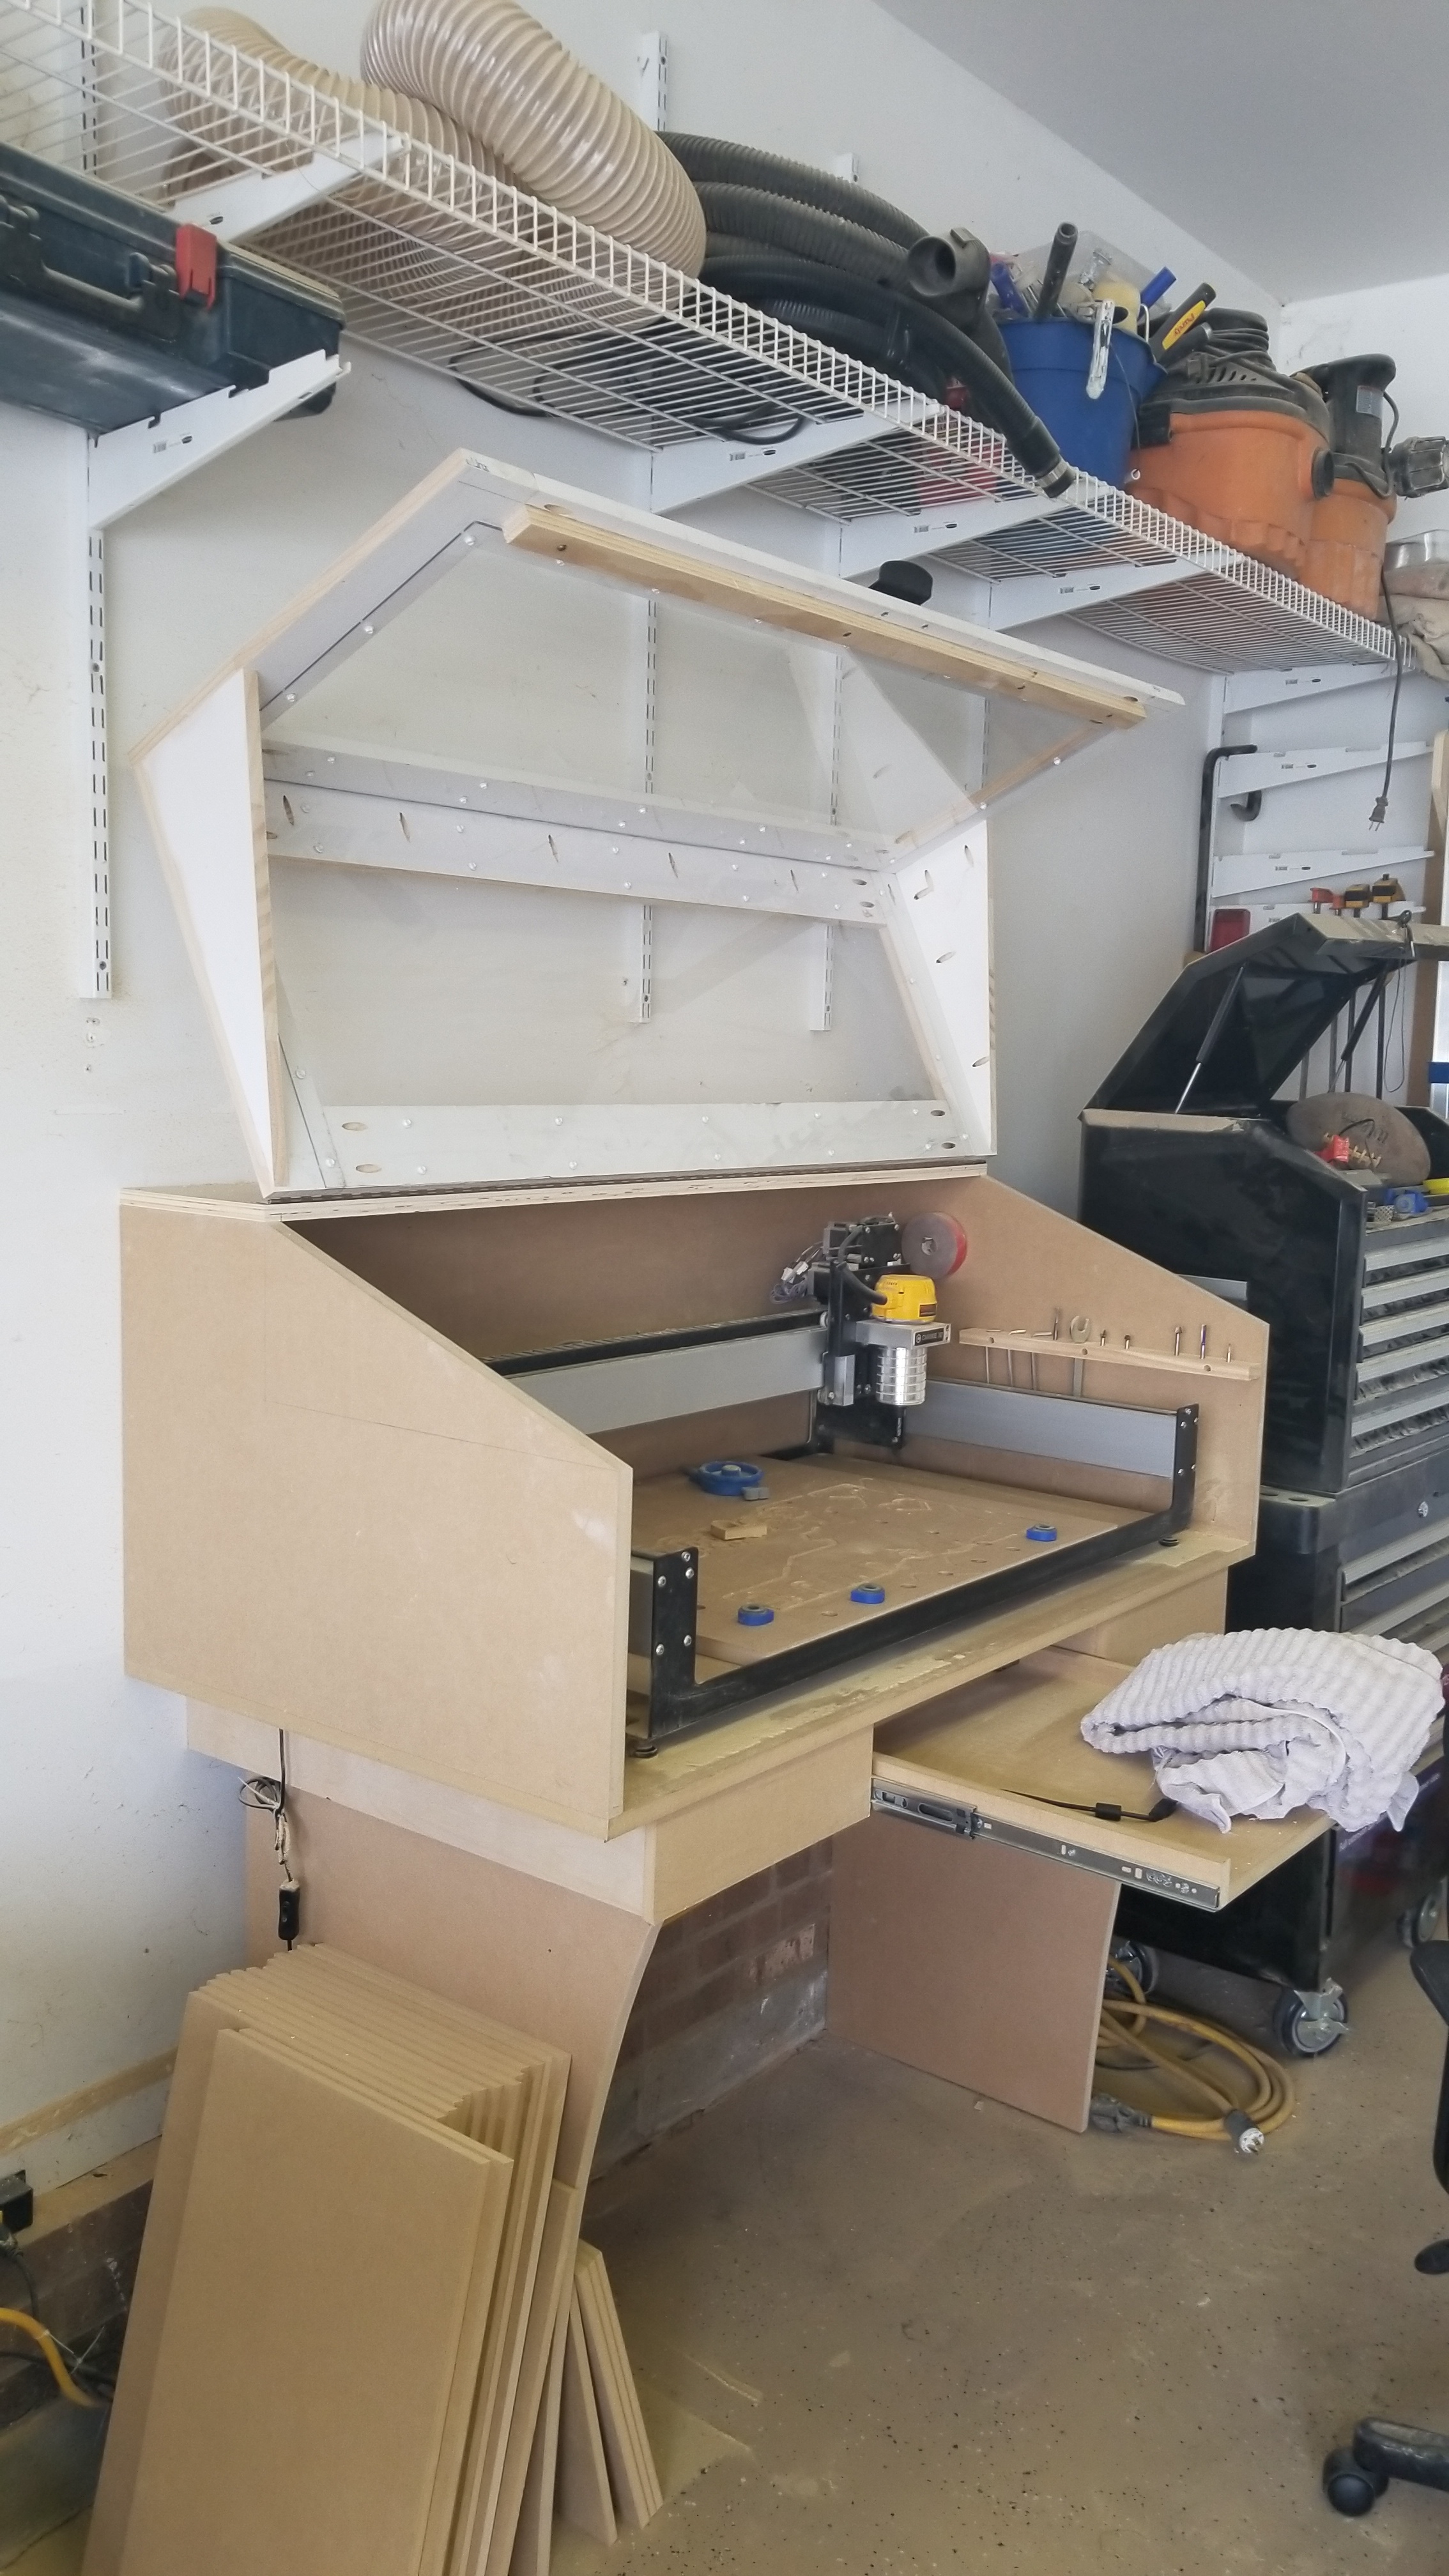
So this weekend I got starting putting things together. I cut all the 2x4 and 2x6 lumber, and 2 sheets of 3/4" MDF. I painted the lumber black, and did 4 coats of poly on the MDF. This is the result:

I was impressed by how well it turned out. Almost seems like it should go in the Kitchen, not a used as a CNC enclosure!

Next steps are to begin working on the panels and doors to enclose the bottom, then work out where to mount switches, buttons, vacuum ports, etc, and how to route it all.

Anyway. Hope some gets ideas from this as I progress. And please, feel free to give me ideas and input!

3 Likes

I would suggest whilst having it on the bottom seems like a good idea (very logical) I think it having it on floor level would be really uncomfortable long term.

Its not quite the same as a 3d printer where you can just set it and go. You are likely to spend some time setting up and cleaning up the machine each time you use it. Unless you only use the same size stock.

3 Likes

Yeah I do worry about the inconvenience. On the plus side the panel and door system for the lower section will be easily removable. So I can always reconfigure it if things are just too much of a pita.

I have to go with what Luke is saying here. I spend a lot of time standing in front of my machine, adjusting fixtures, moving stock around, changing bits, etc… I also have two 3D printers which live on the floor, the XXL is a totally different animal. I think you are going to hate spending time on your knees crawling inside your enclosure. I’d put the whole thing on top of another bench, say 30+ inches off the ground. Looking at that enclosure with my bad knees/back/shoulders makes me cringe. I see in your model you have made side access doors, that will be a huge plus!

Dan

3 Likes

Seeing that the Shapeoko 3 has a max height of just under 15", I’m wondering if it would be possible to create a sliding shelf on the middle level around that height so the unit isnt actually sitting on the ground. Im still not sure if Im going to build a custom bench for the XXL and use the 2x4basics as my workbench next to it or not. I like the idea of being able to tuck it out of the way when not in use.

Build update. Got all the panels and doors cut, painted, and stained. Also installed two 48" LED lights in the CNC compartment, and one 24" LED light in the other compartment. Also ran AC power to a 4 gang distribution box. ATM I have one switch for the lights, one switch/outlet for the vacuum. Still need to add a switch/outlet for the CNC itself.

One thing that surprised me is just how rock solid this construction method with 2x4 Basics is. It does not flex or move at all. Pretty impressed.

View showing 3 of the 4 total doors. My local glass shop should be getting the custom sized tempered glass in on Monday that goes into the doors.

Oooh lights.

One of the two LED lights. The other is on the front side pointing to the back. This view shows the concealed Blum hinges. Because I did inset doors as opposed to overlay, you end up with the mass of the hinge sticking into the cabinet. Not super happy about that, but should still have plenty of space.

The other compartment with power control and access door for vacuum system.
CloudApp

4 Likes

Nice design and great execution. Love the doors.

Will you be mounting it on a base of any kind, I hope? My knees hurt just thinking about crawling around on the floor changing bits, setups, making adjustments. :smiley:

No, the CNC will be fixed to the bottom shelf. I know its not ideal. But as much as I will be using it during the coarse of the year, vs how much use the workbench on top will get, I think its a compromise I can work with. If it does not work out, nothing is set in stone. I can always move it to the top later. I wish I had more space to dedicate to multiple tables…

Yeah, space is always a consideration.

Possibly think about mounting that beautiful cabinet to the wall, something like this.

. The white box is for a soon to arrive 3D printer. The cabinet under is on wheels and doubles as a work surface, table saw extension etc.

Hanging it on the wall enables you to roll a bench under it when you don’t need the bench. My shop is full of boxes on wheels ha ha.

Just some ideas, food for thought.

I’m slowly cornering the market on the caster aisle at Home Depot myself :+1:

Dan

Wow. I did almost the same thing awhile back. Like you I have zero space left in my garage and I also needed a worktable in my man-cave. I’ve been making due with this setup for a few months now. I would prefer not to have to kneel down to access the machine but sometimes the lack of space outweighs the need to stand in front of the machine.

I actually got frustrated with my door access and just took them off.

@Griff Some great ideas there. I will keep those in mind if I find this wont work.

@kfgreenwald Hah nice. Yeah How is the dust without the doors?

Got the CNC in place. The doors are off while I work on it.

CloudApp

Here is a view of the “facilities compartment”. You can see I chose to move the Shapeoko controller board to this side. Also I mounted a utility box to the front side where I can place the SuperPID, switches, and potential e-stop.

CloudApp

Does anyone think not having the controller board’s heatsink mounted to the rail of the Shapeoko will cause issues with heat dissipation? I put spacers between the heatsink and the MDF wall so it has full access to the surrounding air.

Yeah, the dust part is not ideal, but I mostly machine plastic which is manageable in that it creates larger chips and not actually a fine dust.

Need to add a fan if it’s not on a heat sink.

Just to clarify I do have it on the original heat sink. The heat sink is just not mounted to the CNC extrusion (reducing its thermal performance to some degree). Do you still think it needs a fan?

CloudApp

I took exactly the same setup and used double stick tape to mount the board outside my original case. I was advised by C3D or this forum to add a fan

This is the fan I used. I have since relocated the board to a y rail and no longer use the fan.

I emailed support just to confirm the thermal requirements for the latest control boards. At least for the 2.4d+ version, you don’t need a fan.

You won’t need a fan, all the thermal characterization we did on the board was with the heatsink alone so you should be good to go.
–
Jorge Sanchez
support@carbide3d.com

1 Like

Progress report on my dust management system.

Here is the CNC end. Got my Suckit Dust Boost the other day (thanks Jenn!). One thing I struggled with is how to handle the hose. My original plan was a 2.5" flex hose like you see on the dust collector below. But ended up using the Shop Vac 1-1/2" hose it came with. Its the perfect balance of rigid and flexible.

In order to keep the hose under control for the entire range of travel I drew up a hose clip in Fusion 360 and 3D printed it. Works perfectly.

Here is the vacuum side of the table. Unfortunately I do not have the available height for a Dust Deputy, so trying one of those cheap bucket cap solutions. Preliminary testing just vacuuming up a pile of trash are good. I hope it works ok.

1 Like

4 Likes