I’m having an issue with tramming my shapeoko 4 with z plus. I watched a video on tramming from Winston @ Carbide, which recommended loosening the rail and re-tightening. That seems fine and square. The problem is in the spindle assembly itself. How do I adjust the tilt on that?

Is the rail plumb? If not, adjust it to be vertical.
If the problem is the carriage, check the number/placement of washers on the V-wheels?
1 Like
I had the same issue on my pro4xxl. I bought a cheap feeler guage at HF and jammed about .007 behind (yours will be different) and an electronic magnetic angle level, plus a rigged up square in a .25 collet. I went for a general 90 degree…my zplus looked exactly as yours. This got us in the ballark. Then I surface the spoilboard. used the collet square again. (‘Real’ workshops would have used a professional Tramming square system, such as that sold by SST…maybe c3d sells it I don’t know.) It was sqaure and still is. I don’t run her hard, though.
1 Like
Ultimately, what matters is how perpendicular the spindle is to the work surface – tramming. The orientation of the face of the X-axis rail doesn’t matter at all. I would suggest pivoting the gantry rail until the Z-axis is perpendicular and use that as a starting point. Tramming the spindle with some sort of gage or indicator would be the way to fine-tune it.
Another question worth asking is: how square is your square? They’re not all created equal.
2 Likes
About the square, yes that’s not the best one. I have used a much better square to verify the rail is straight, but the router assembly isnt.
There’s nothing wrong v’s and bearings:
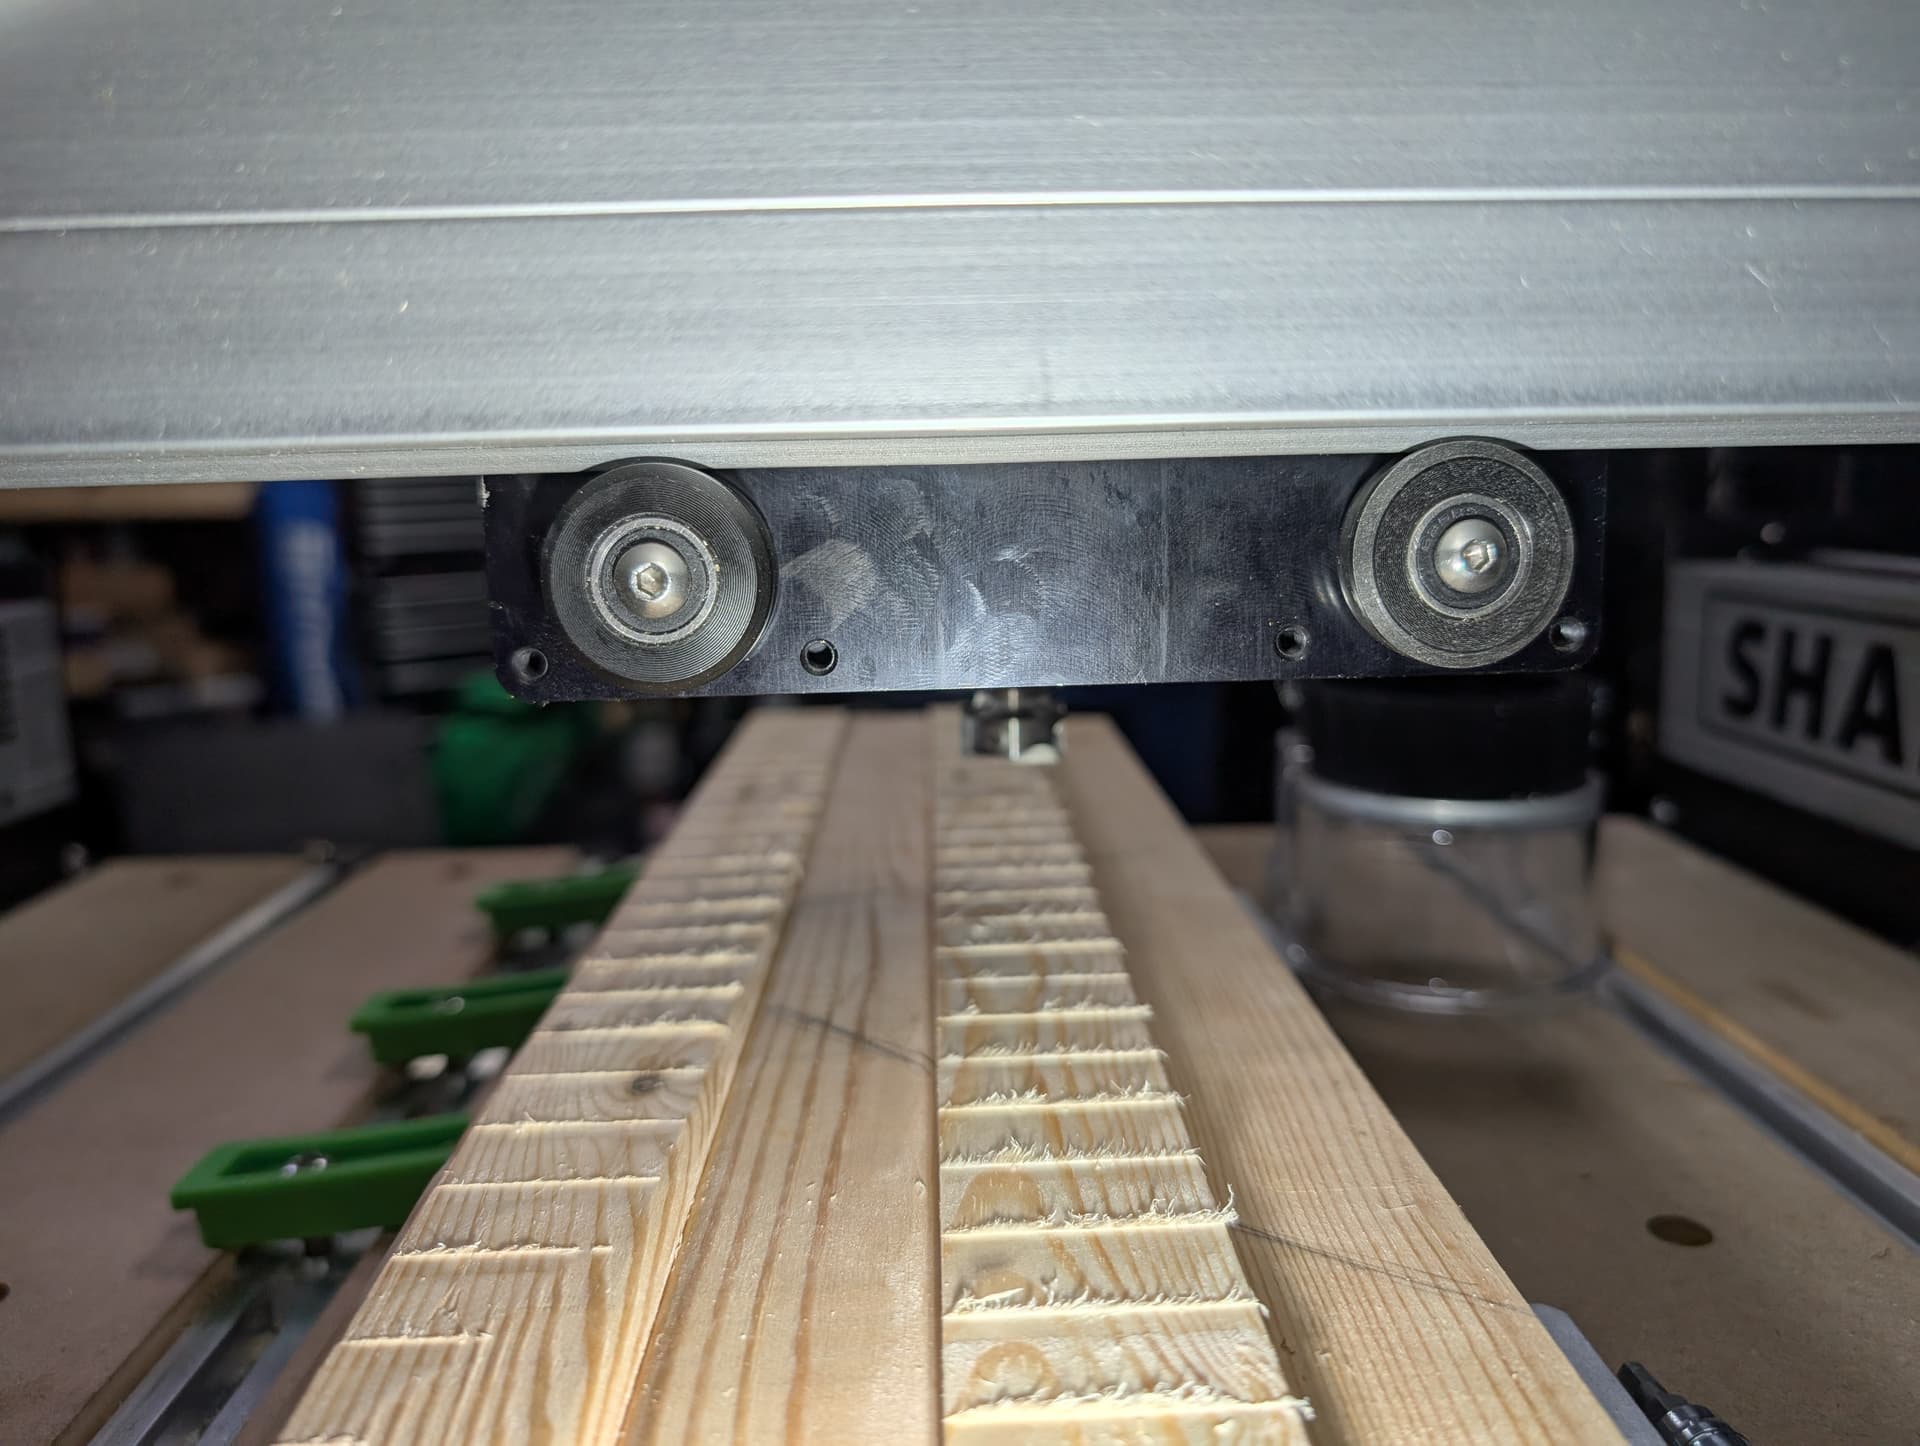
Here’s the square rail and the wood you can see due to this issue

The video I saw didn’t specifically say which screws to adjust for the rail, it just said “3”. I have more than that and they are all machines it seems to to in a specific spot.
I’m fine tilting the gantry, but I’m not sure how still.
All of these seemed engineered to have a specific spot. I did loosen the 4 around the rail and twist it backwards as much as I could before re-tightening, but it wasn’t enough to fix the issue.
There is a little play in the assembly where it rocks back and forth, is that normal? Maybe my v wheels are worn down?
https://1drv.ms/v/c/27af1323fc64616b/ER6bQNZwVJxIgmNHMA8buUIBVzZuCr_iEEPw2lN2Lo9sBg
You need to adjust the v-wheel eccentrics to correct and up and down motion. You loosen the bolt with an allen key. Then turn the eccentric with a wrench until the v-wheel is snug. Just snug not TIGHT. Then hold the wrench on the eccentric nut and tighten up the bolt. If you dont hold the eccentric nut in place it will move with the torque of tightening the bolt. Only the bottom 6 v-wheels, 2 on Z and 2 on each end of gantry, need to be adjusted. The top v-wheels are fixed. If you remove a v-wheel there is a small washer between the frame and v-wheel. Be sure to put that back on after disassembly to keep the wheel from rubbing on the frame.
If you need to tram the router front to back you shim behind the Z-Plus frame top or bottom depending on which way the Z needs to move. You can use paper, aluminum foil or brass shims. Aluminum foil is likely readily available and you just fold a piece over and over to the required thickness. It likely will not take much.
2 Likes
Correct me if im wrong but there are no eccentrics on the bottom of the z plate. I have the same play in my 4SL. My z plate and router are pretty close to 90° to the spoilboard. The only time I have an issue is when I flatten material but its nothing near what is in Jayme’s first pic. I get minor tool marks across the grain and a quick sanding takes them out.
1 Like
I am down to minor tool marks now too! It’s 90% better easily. I loosened the wheels, slowly rotated them until the rail set deep in the groove, then tightened just a bit.
So much better. I can quickly sand the top and clean it up now.
If I want to fine tune it even more, where exactly do I put the tinfoil? Do I remove the metal plate (in front of the ruler in my first picture) and place it between that plate and the main assembly?
Thank you all so much!
There are two parallel linear guide rails. Do not touch them. Where the Z-Plus plate attaches to the linear bearings that is where you put the shims. This will tip the router back if you put them at the top and if you put them at the bottom that will kick the front of the router up. Just put the same amount of shim on both sides. There are two screws (8 total) on each bearing. Loosen all, place shims, tighten all. Because you are loosening the bearing screws you may have to adjust the router right/left after getting the front to back stowed away. There might be enough play of the bolts that the router plate shifts right/left. So get it trammed front to back with shims and them check left right. The HDZ has eccentrics to move the router mount left/right but not sure about Z-Plus so loosen the router mount bolts and move left/right if there is no eccentrics to adjust left/right.
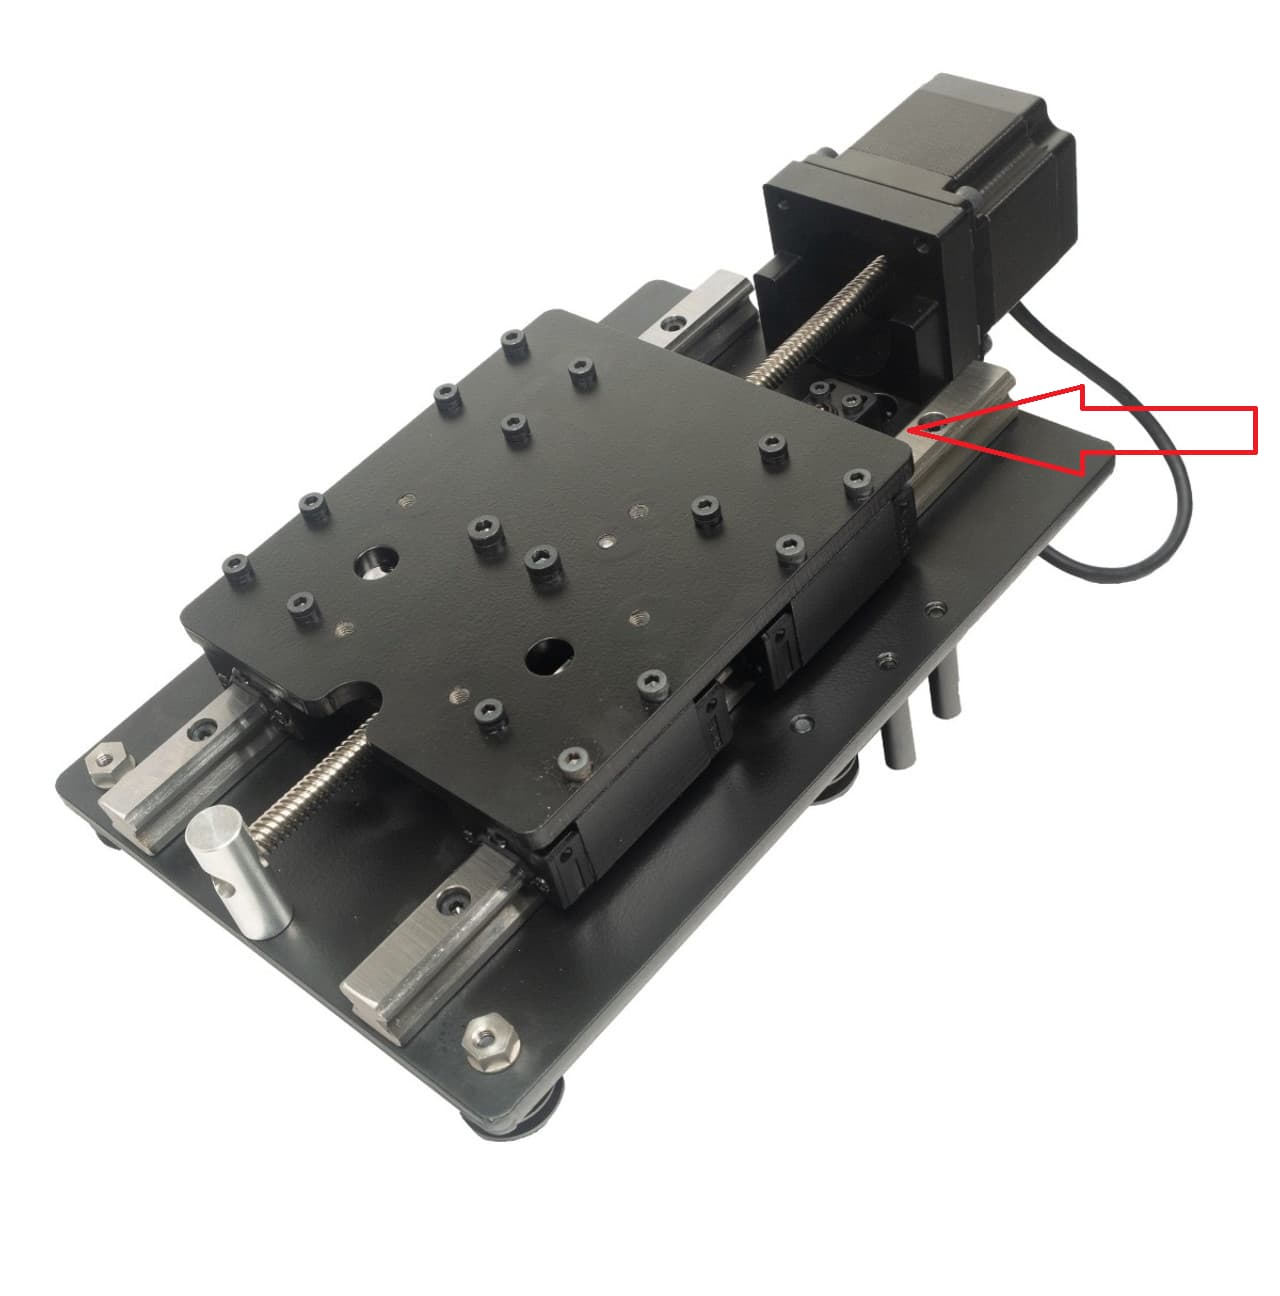
When I drew the arrow in MS Paint it is just a little bit high.
1 Like
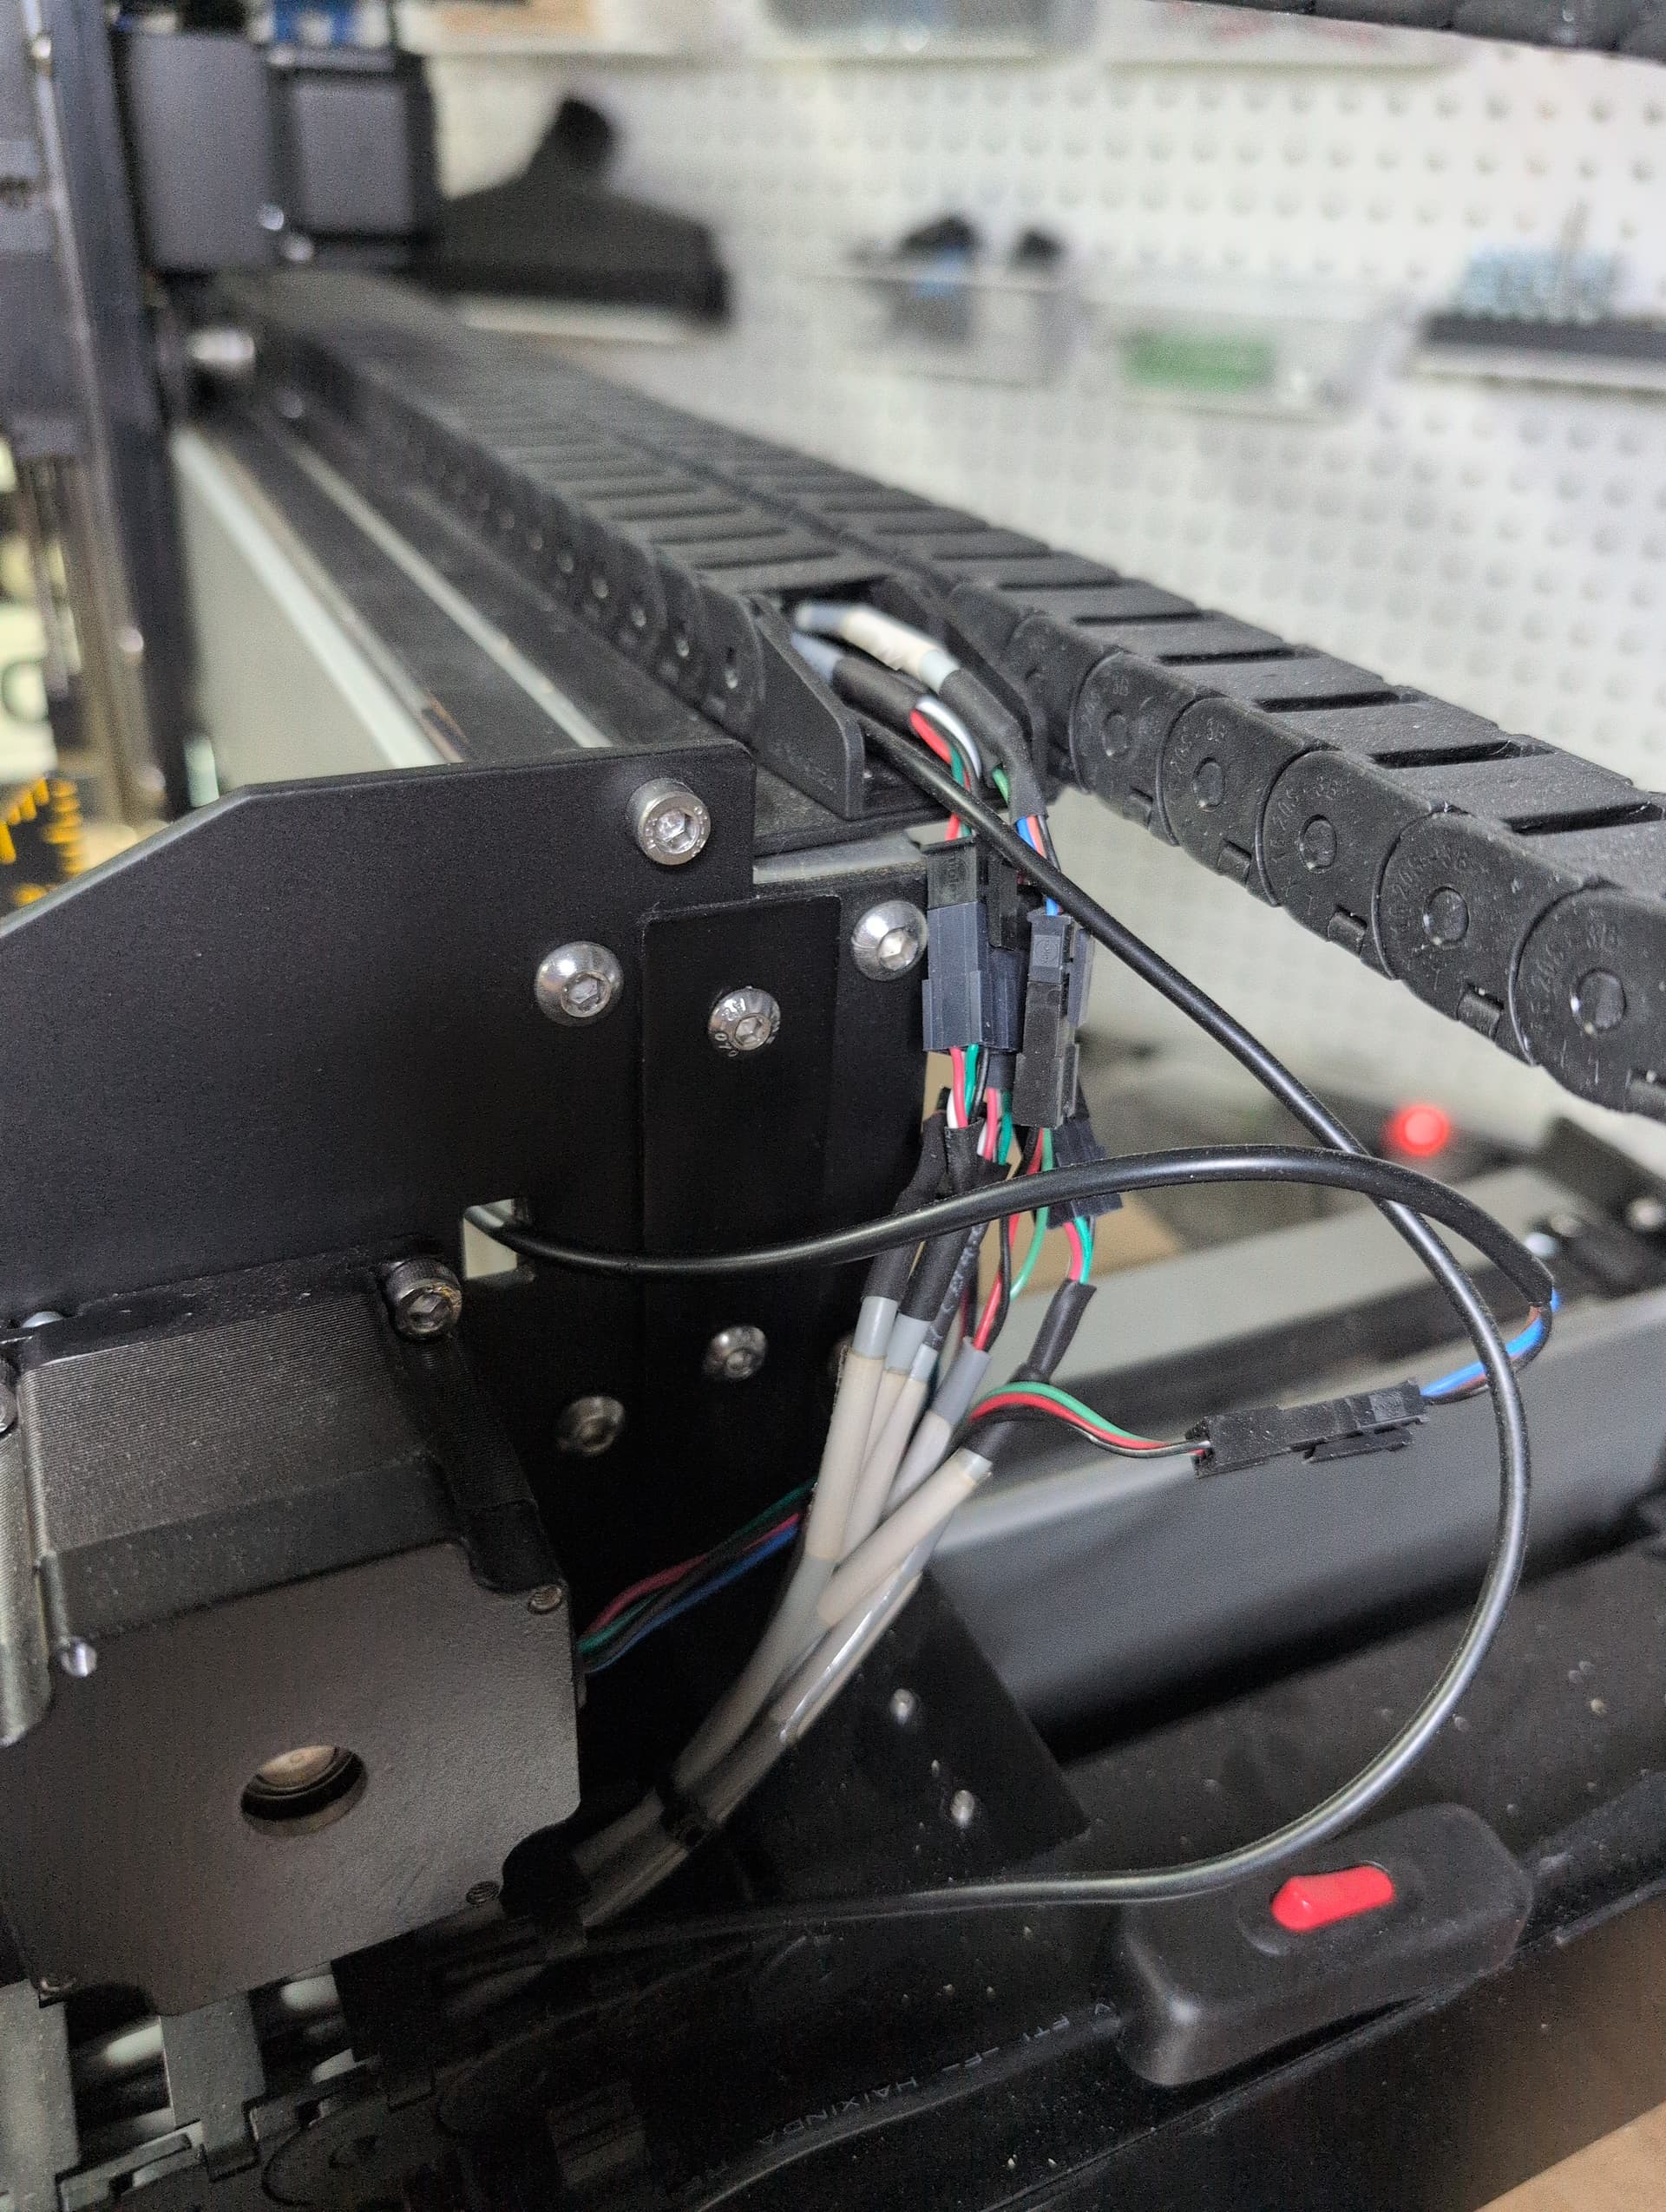
The Z-axis assembly needs to be removed to access the eccentric nuts on the Shapeoko 4. The carriage plate it’s mounted to is where the eccentric nuts are located.
(The one Guy posted is the Z-axis for the Shapeoko 3.)
2 Likes
OK thanks for the info Winston. ![]()
1 Like
Thanks again everyone. Just wanted to follow up to say everything is great now. I followed the directions for the eccentric nut tightening - fortunately I didn’t have any need to use a shim to get it level.
Wanted to leave a couple of pics for anyone in the future:
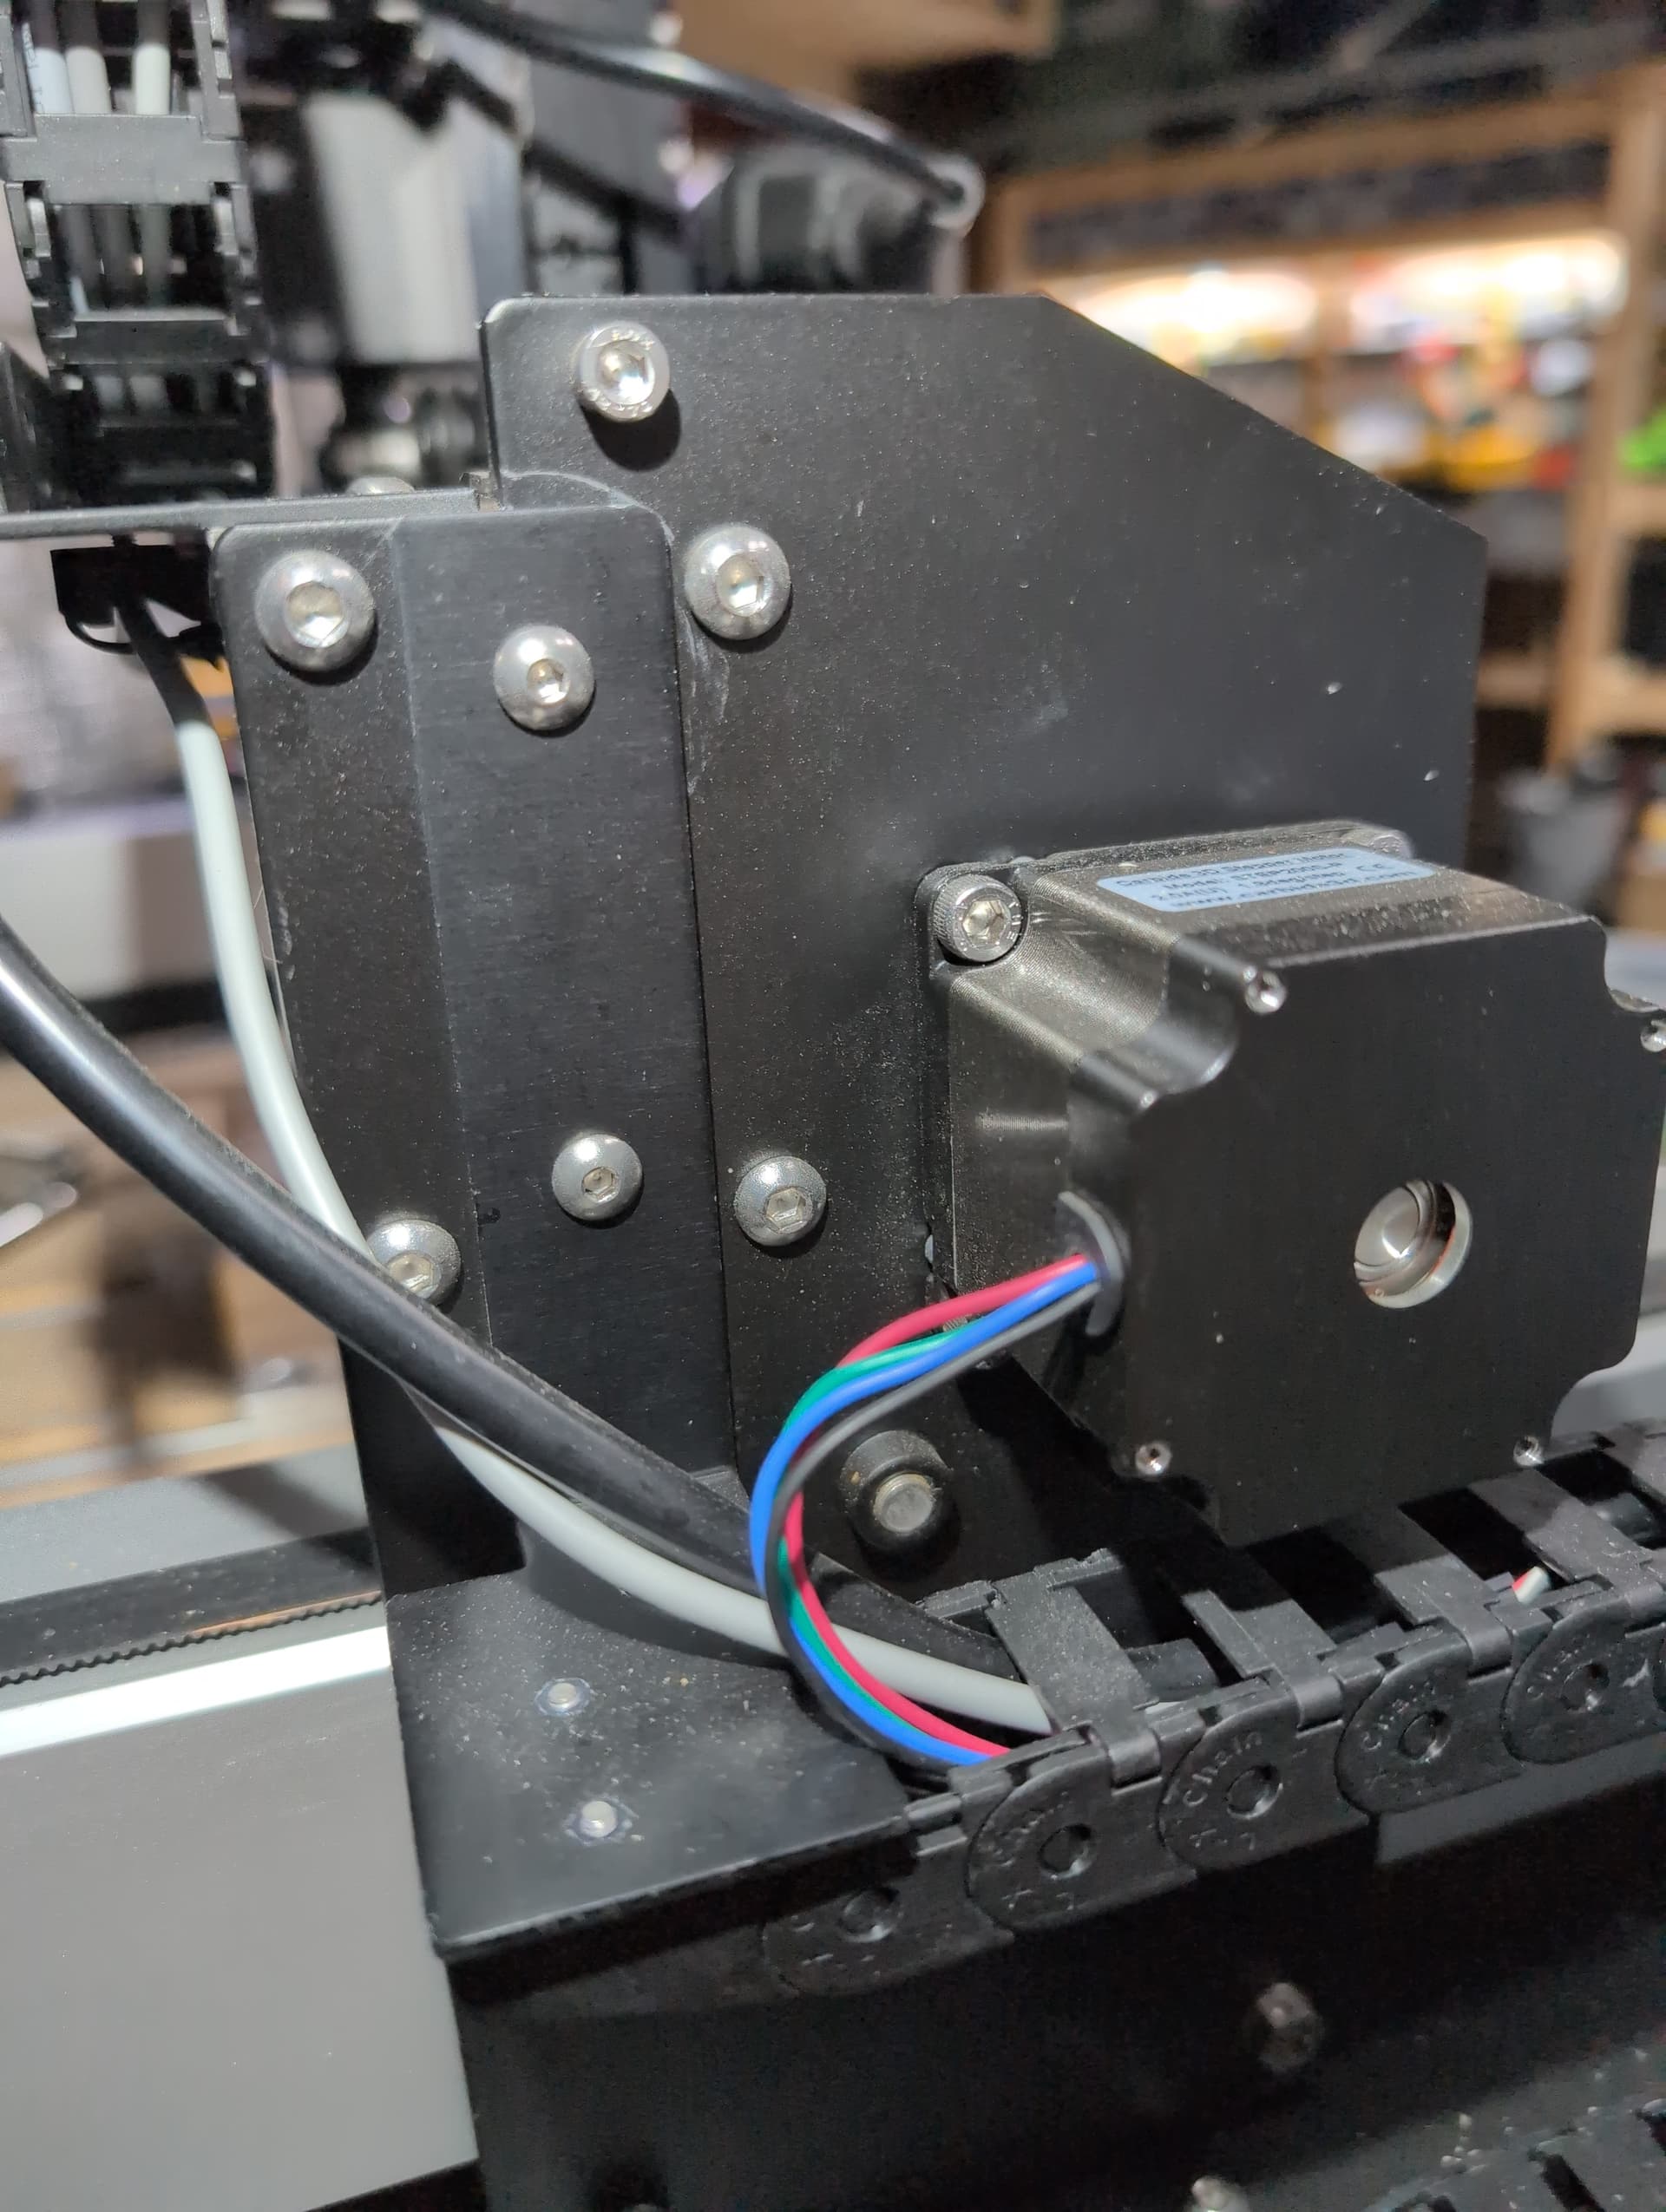
This was what it looks like with the front plate off - the eccentric nuts:
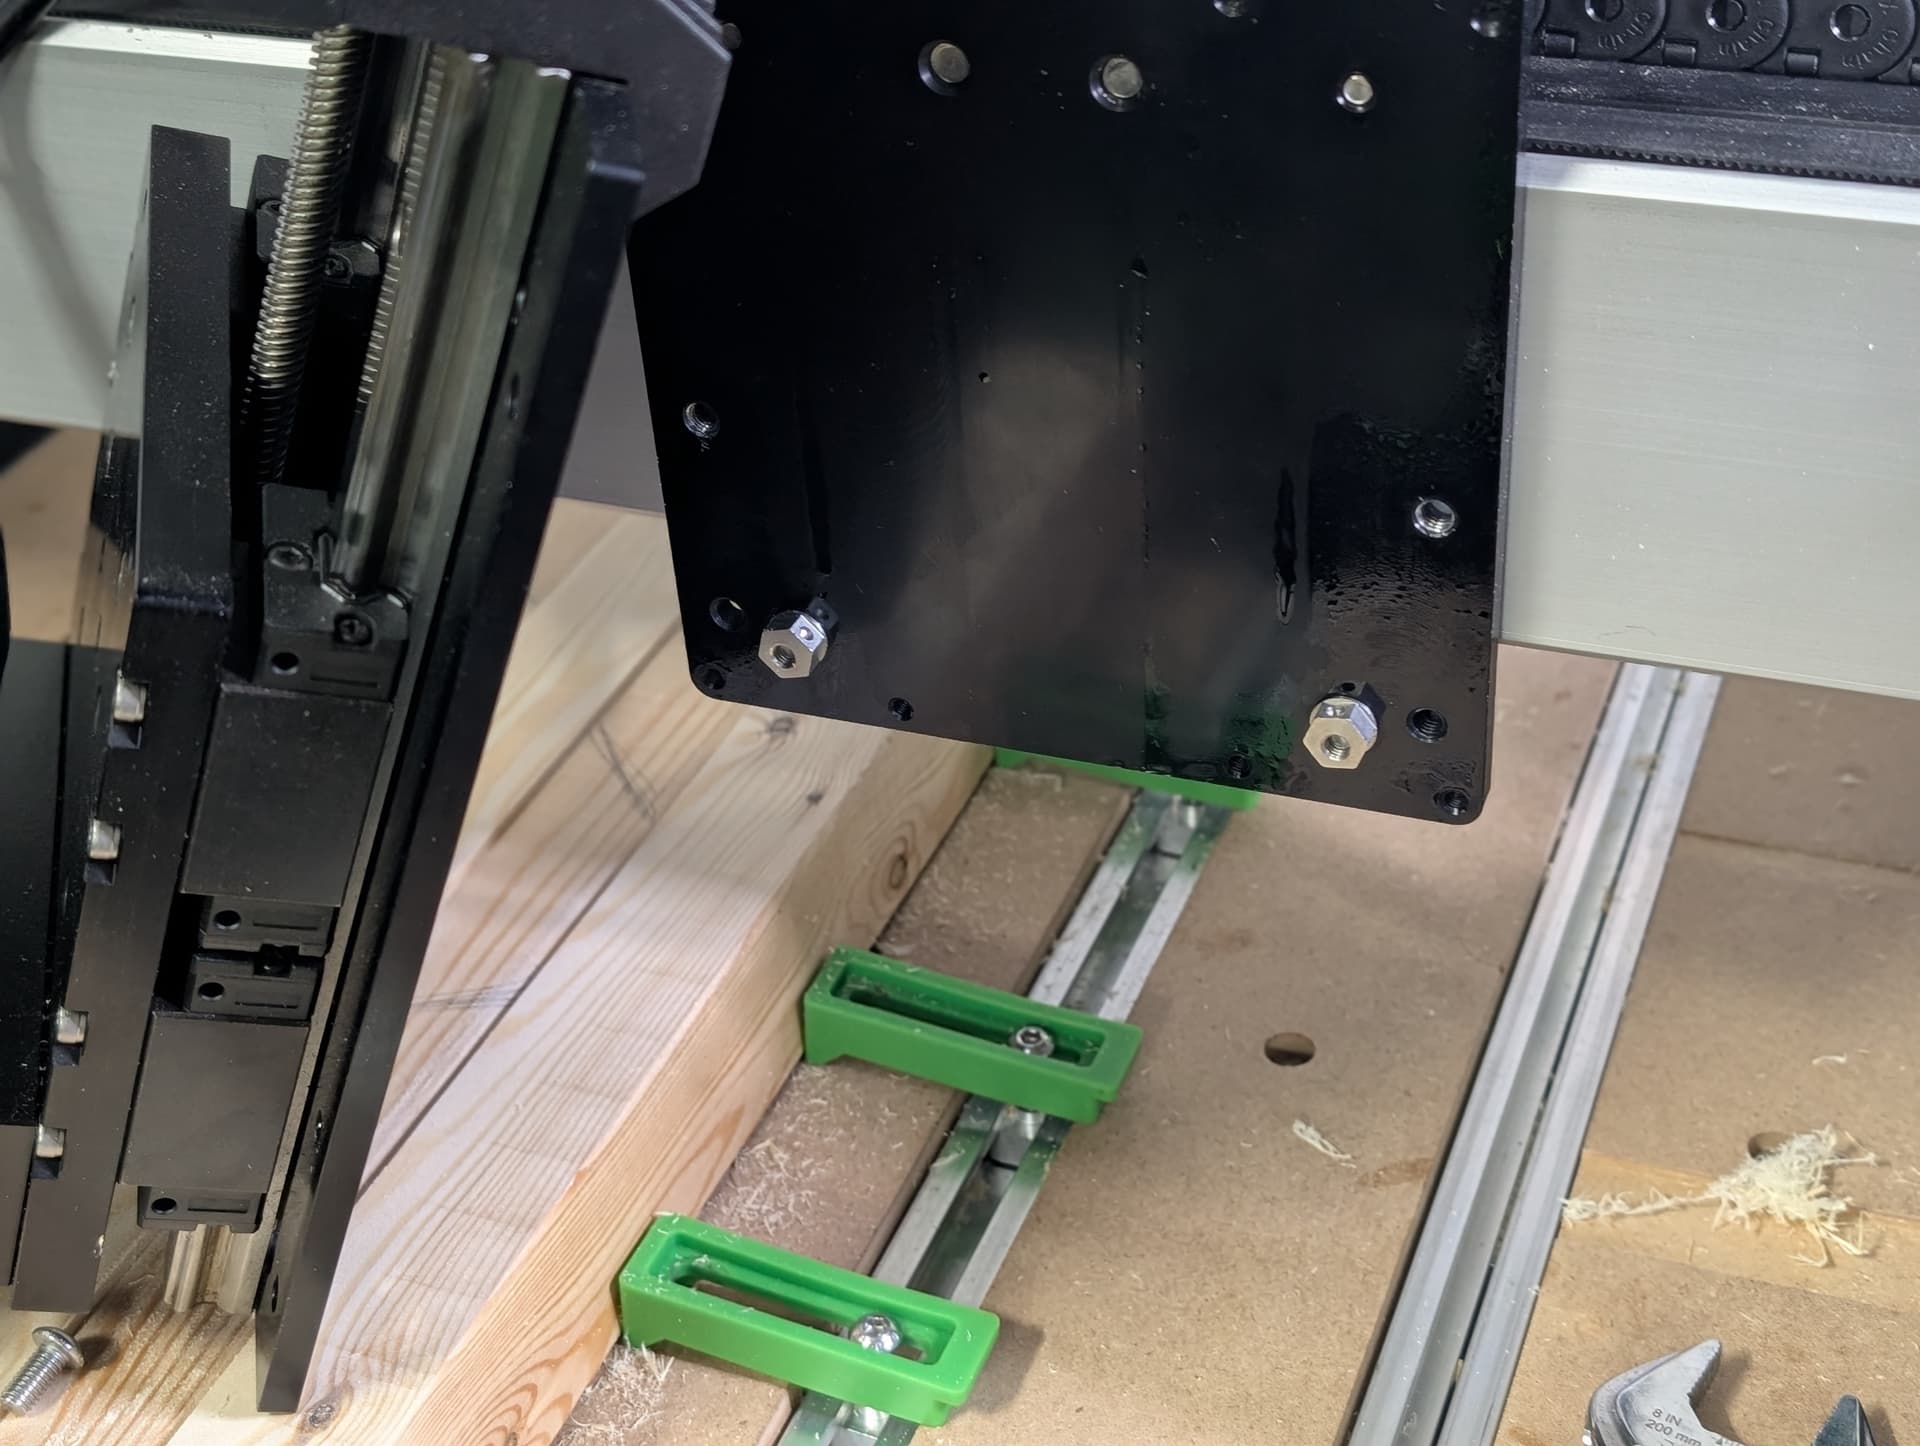
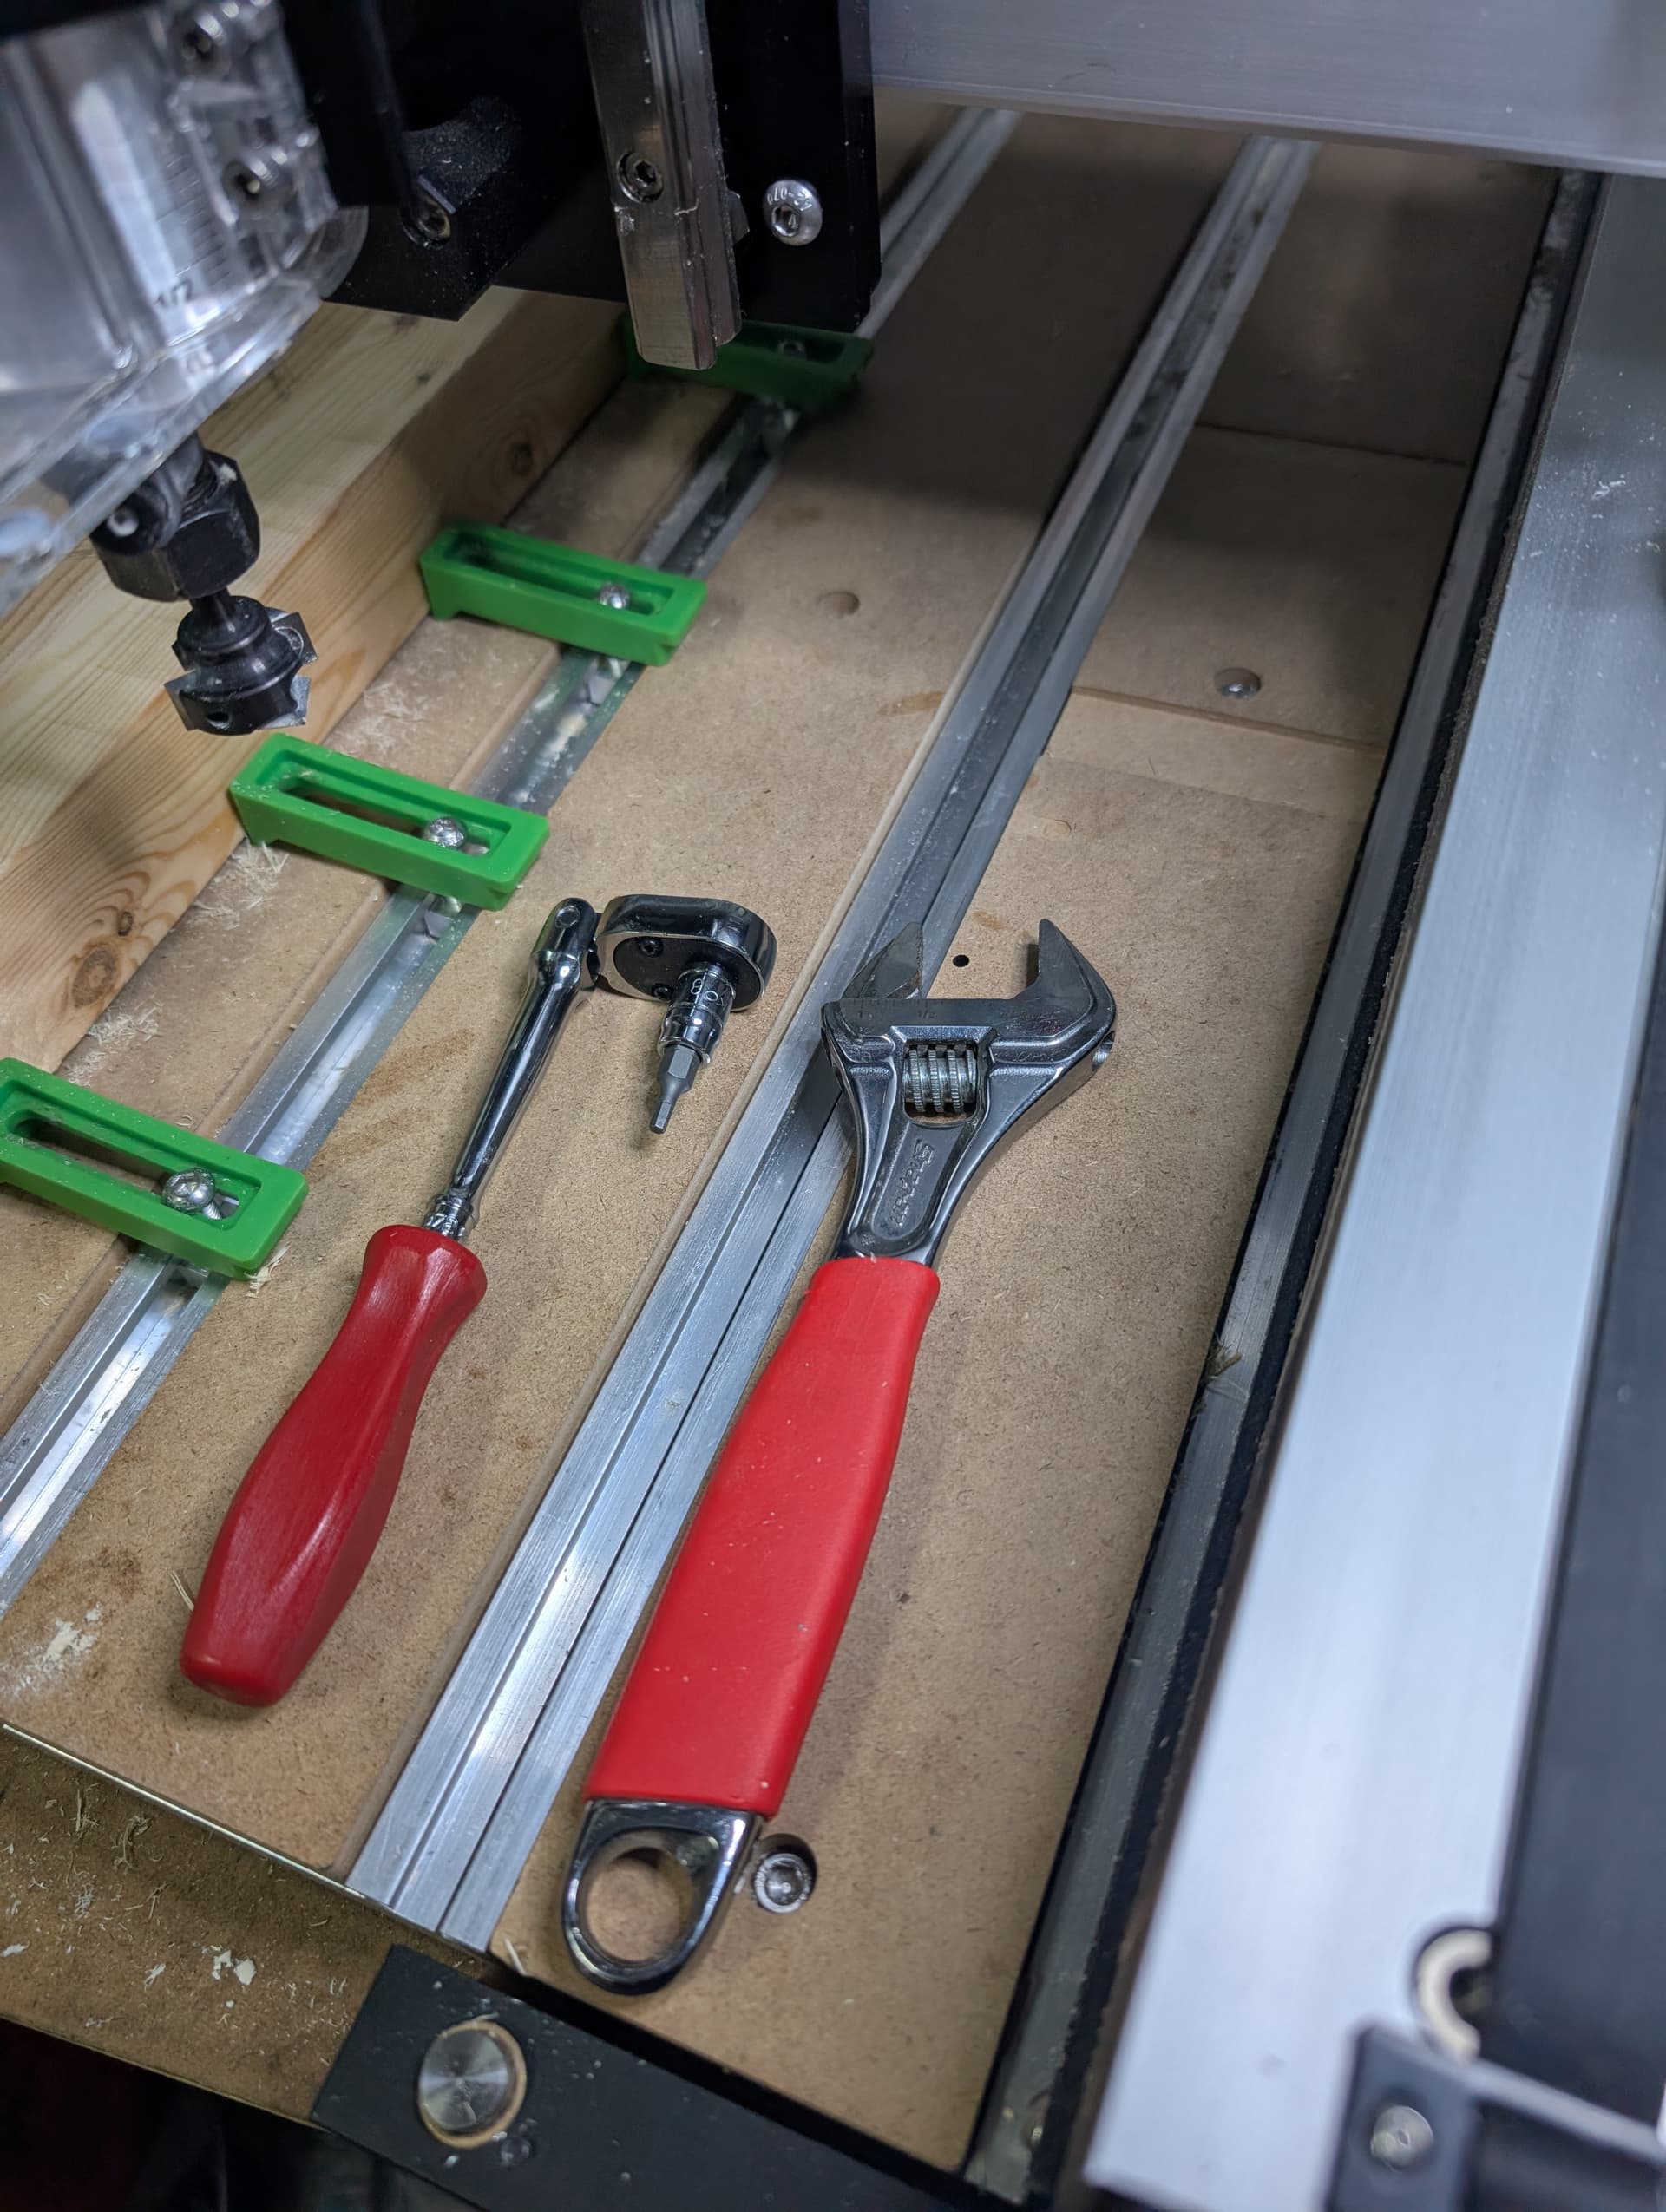
I highly recommend a flex-head ratchet. Makes it a very easy job from one side:
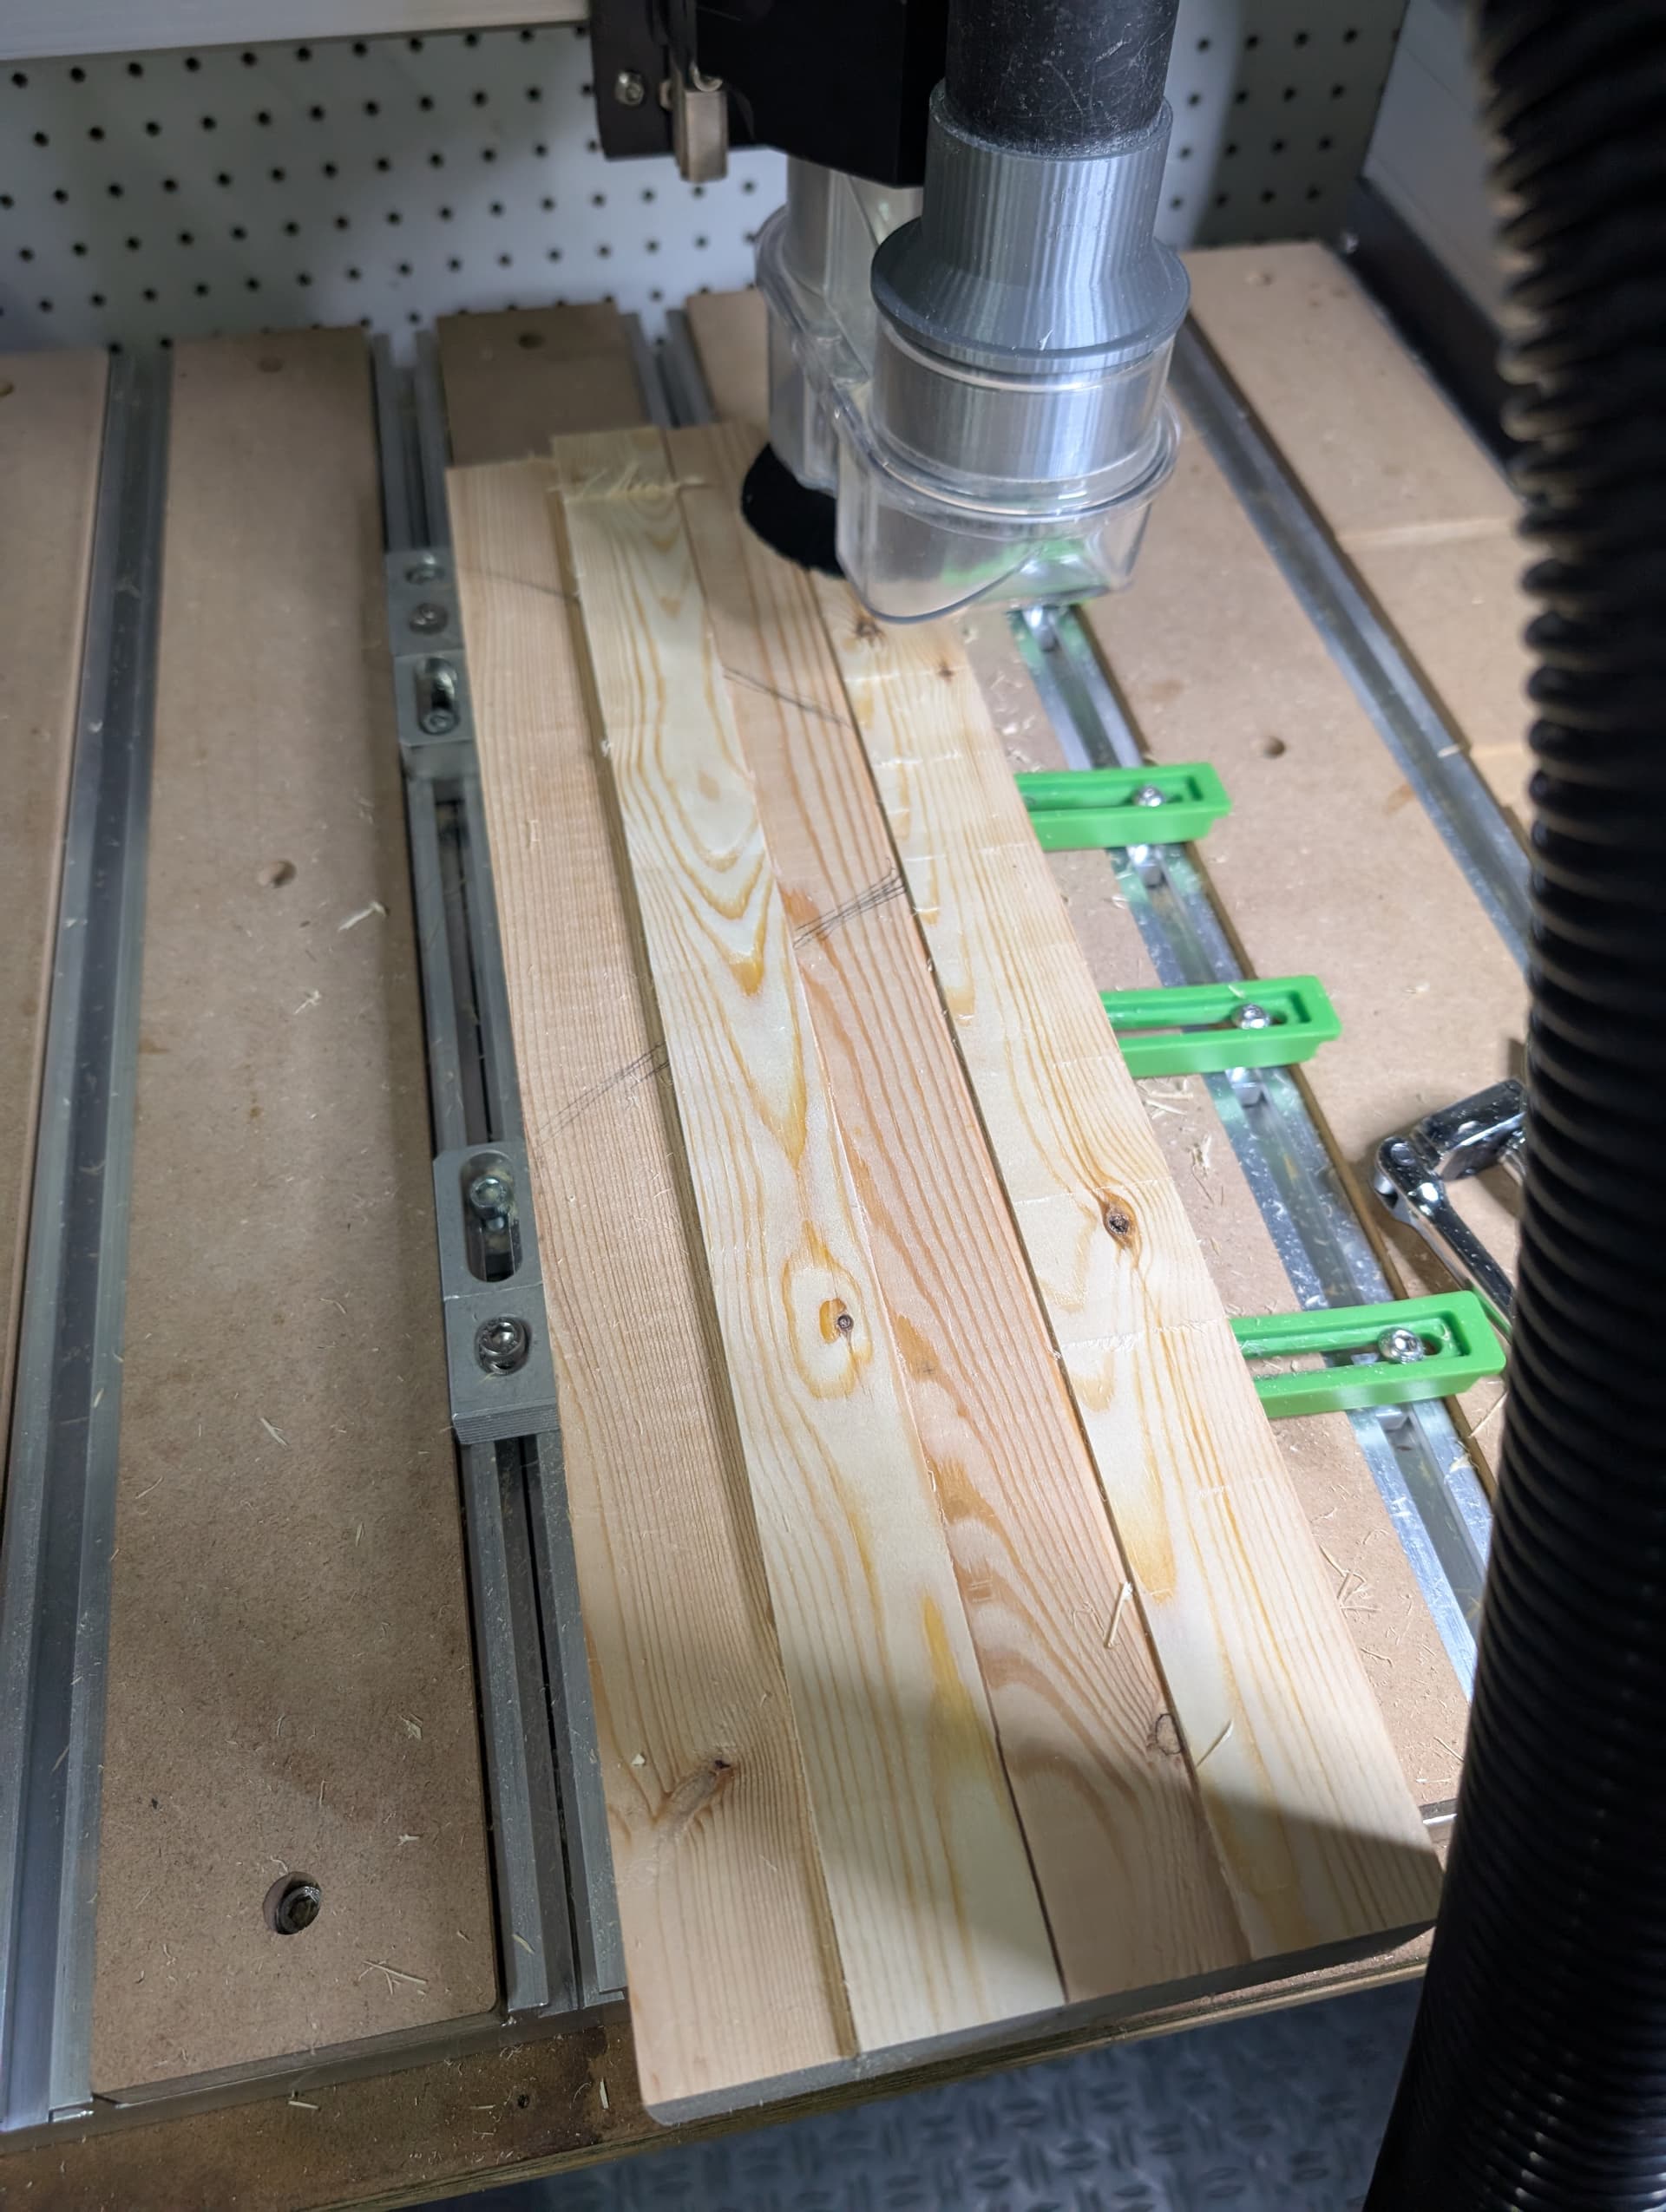
How this looks now - minor fuzz is all that’s left - if any:
Thank you folks! What a great community!
3 Likes
Glad you got it worked out! If I have time today I’m going to do an adjustment on mine as well. I now remember doing it when I assemble my 4SL in August last year but your post got me thinking so I checked the V wheels the other day and one is a little loose.
1 Like
That is exactly what I did…but I just used shim stock…worked great
3 Likes
This topic was automatically closed 24 hours after the last reply. New replies are no longer allowed.