Shapeoko 5.1 Mods and Customization

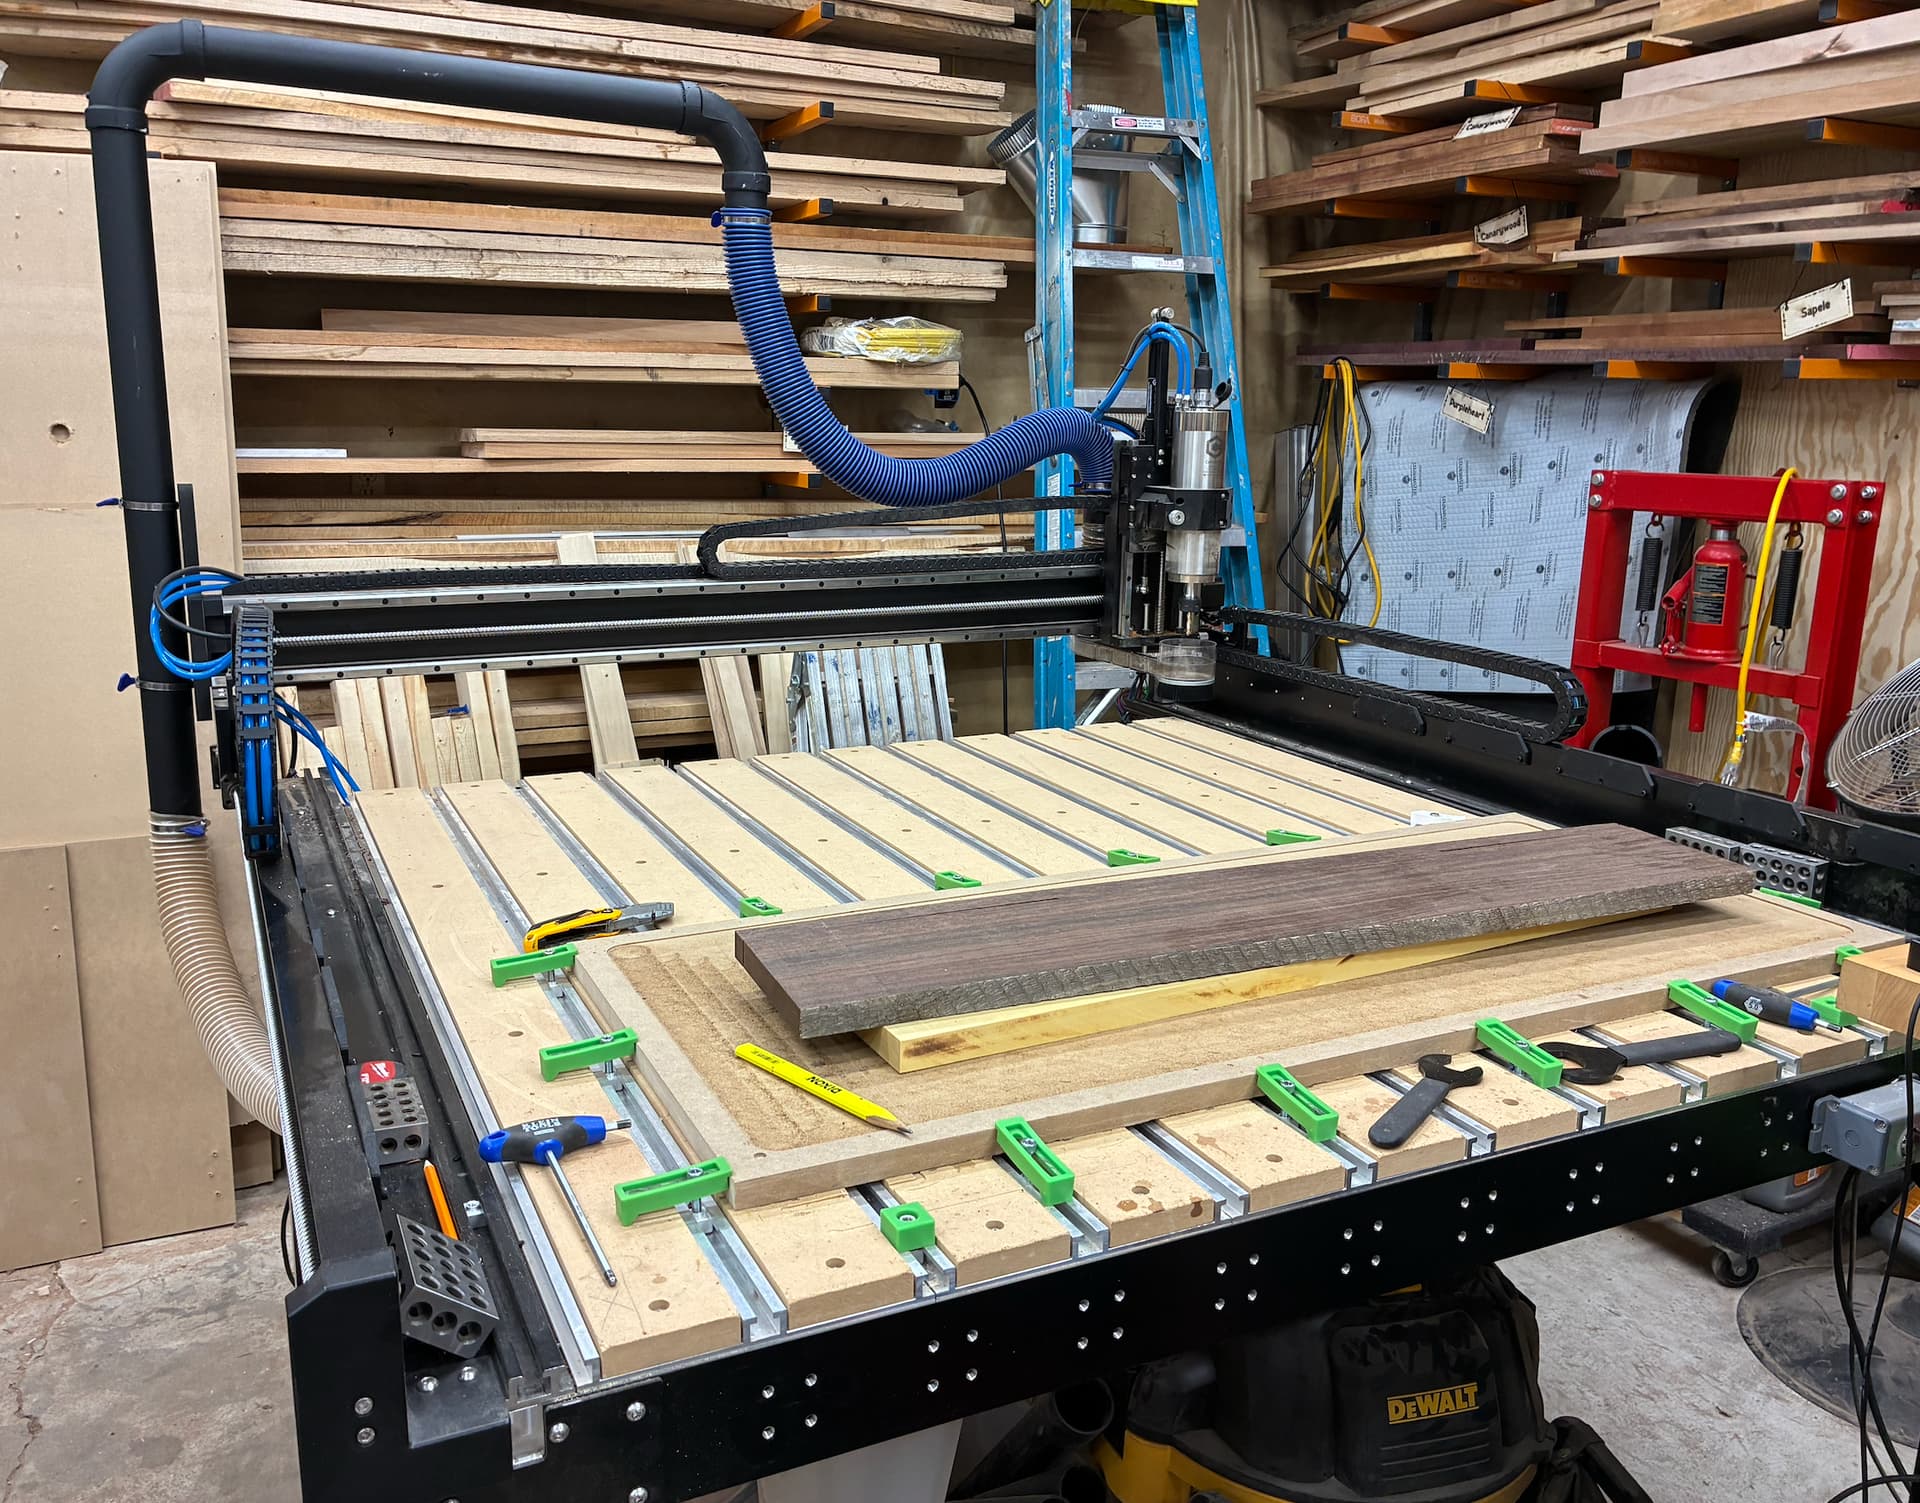
I wanted to share some of the ways we’ve been customizing our Shapeoko 5 in the shop, in the hopes that some of you might find it useful for your own setups. All of this is driven by the notion of “what would make our lives easier”.
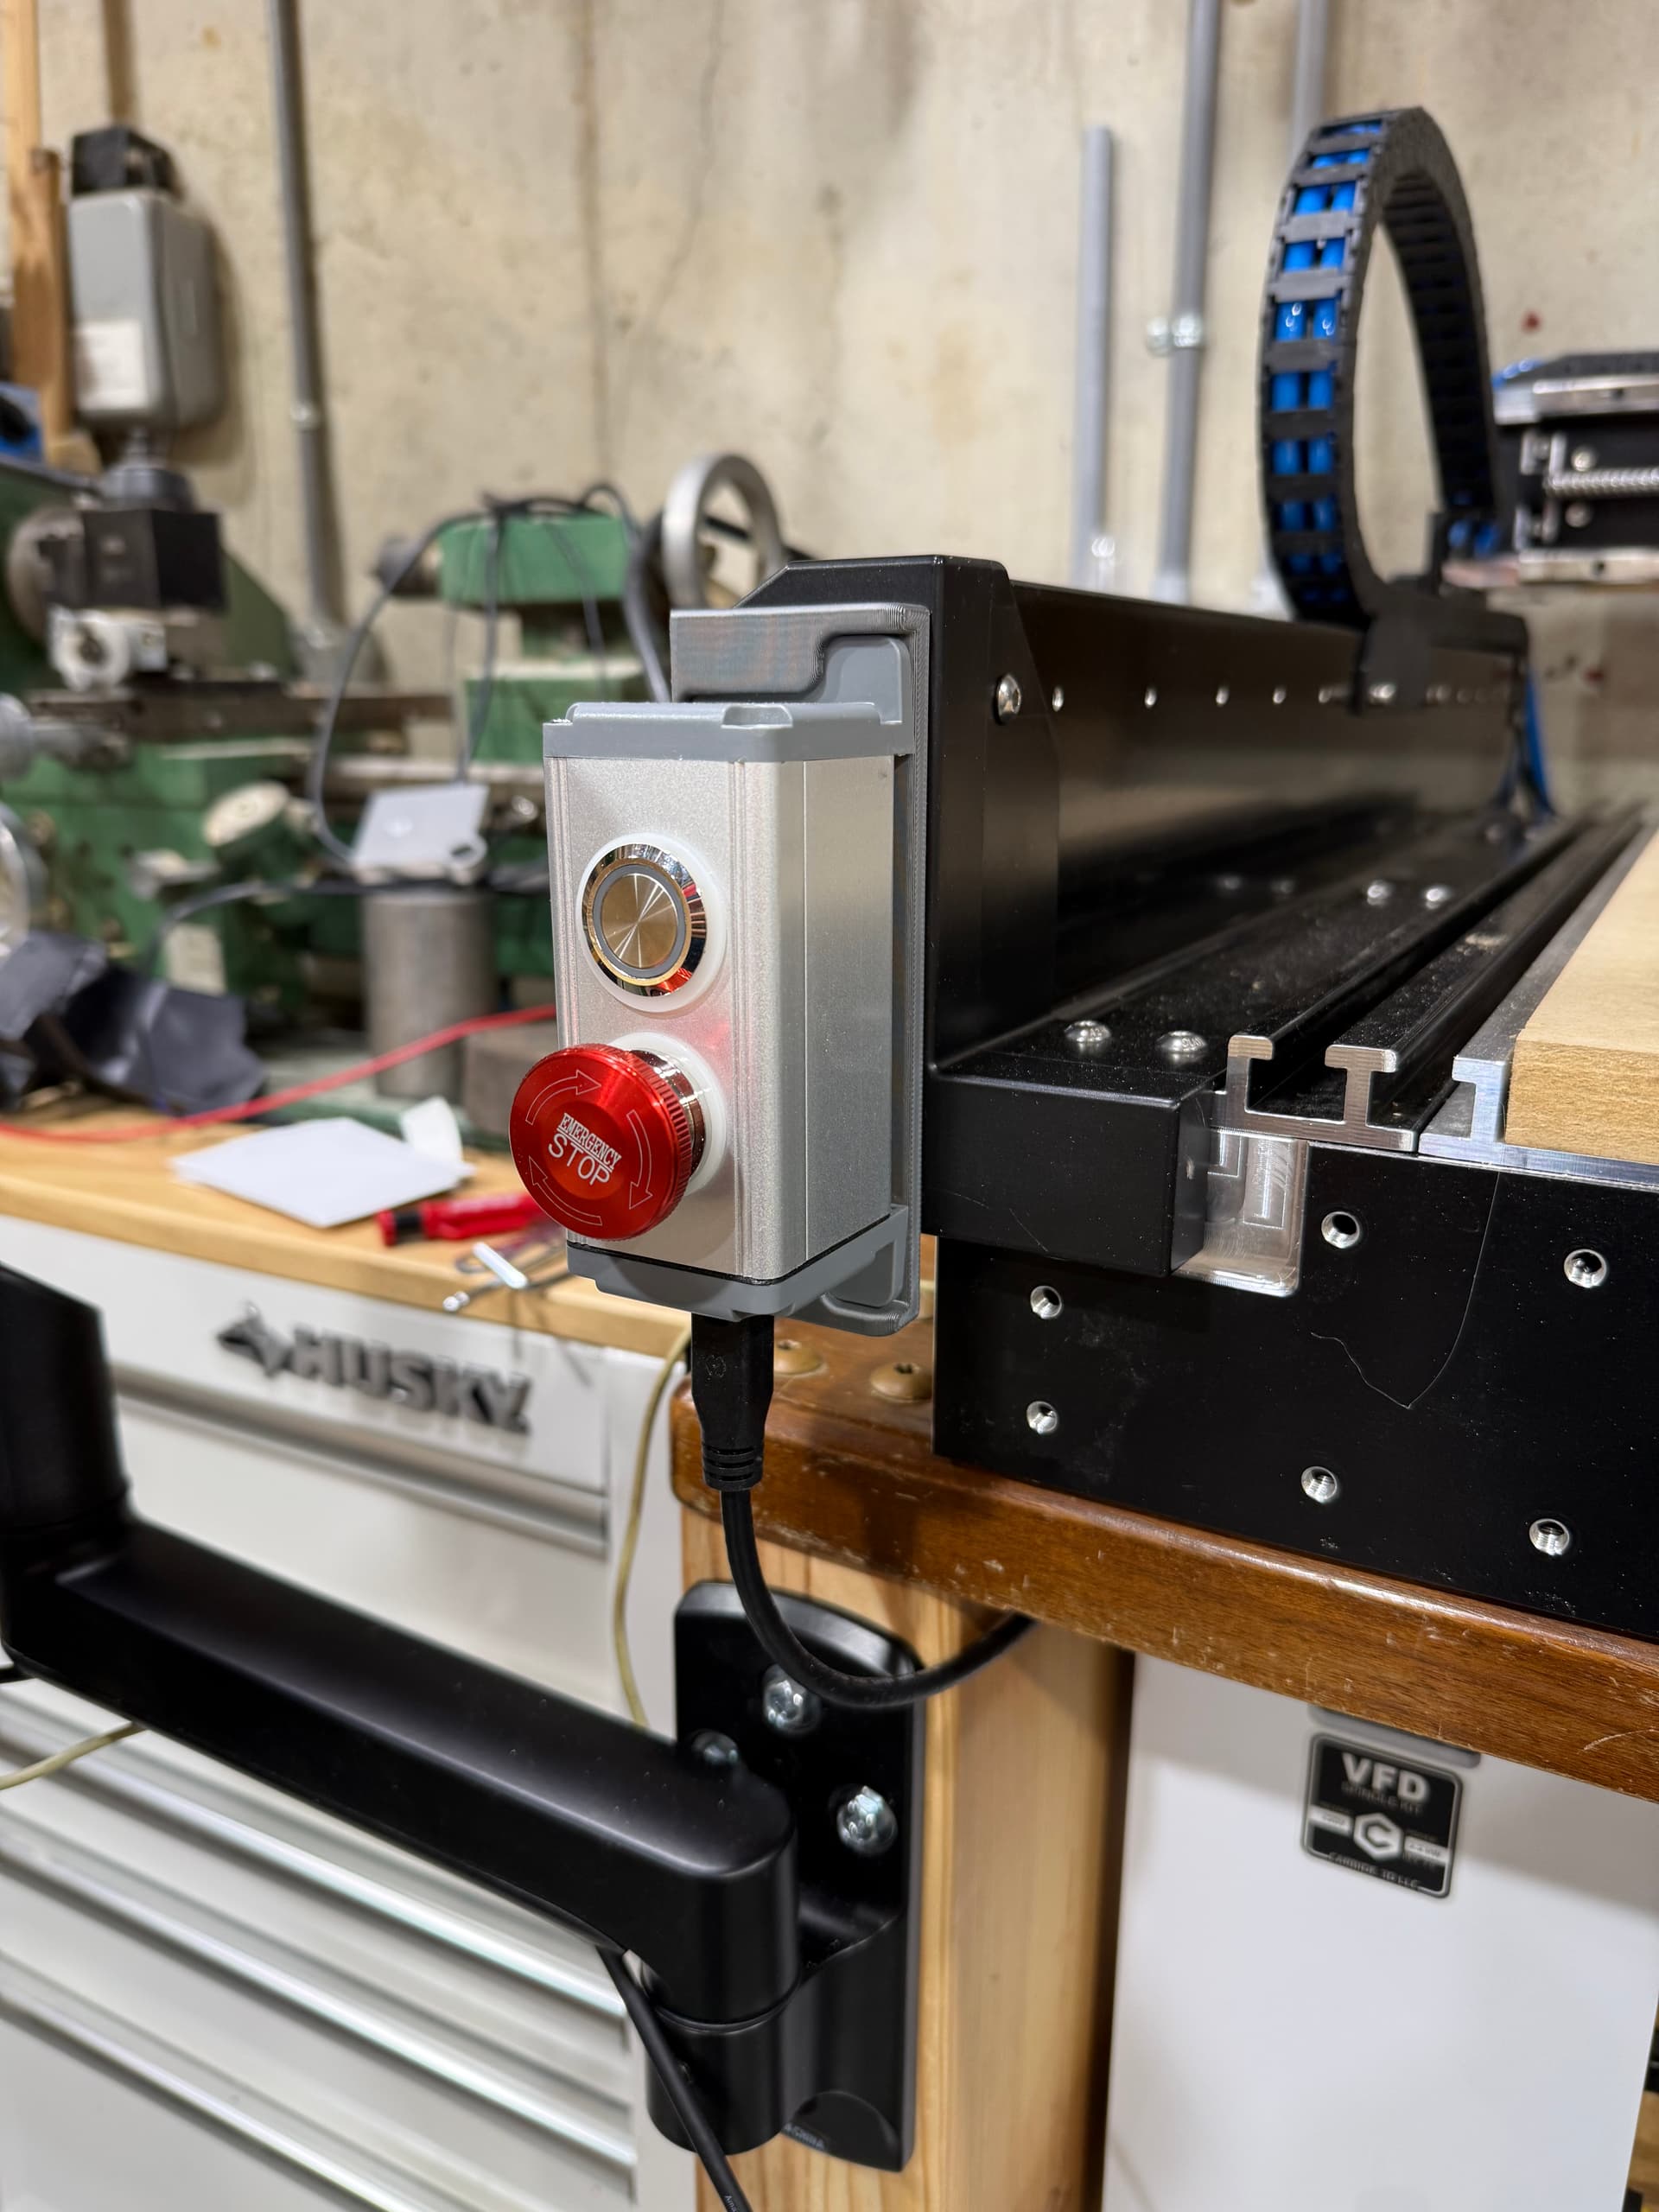
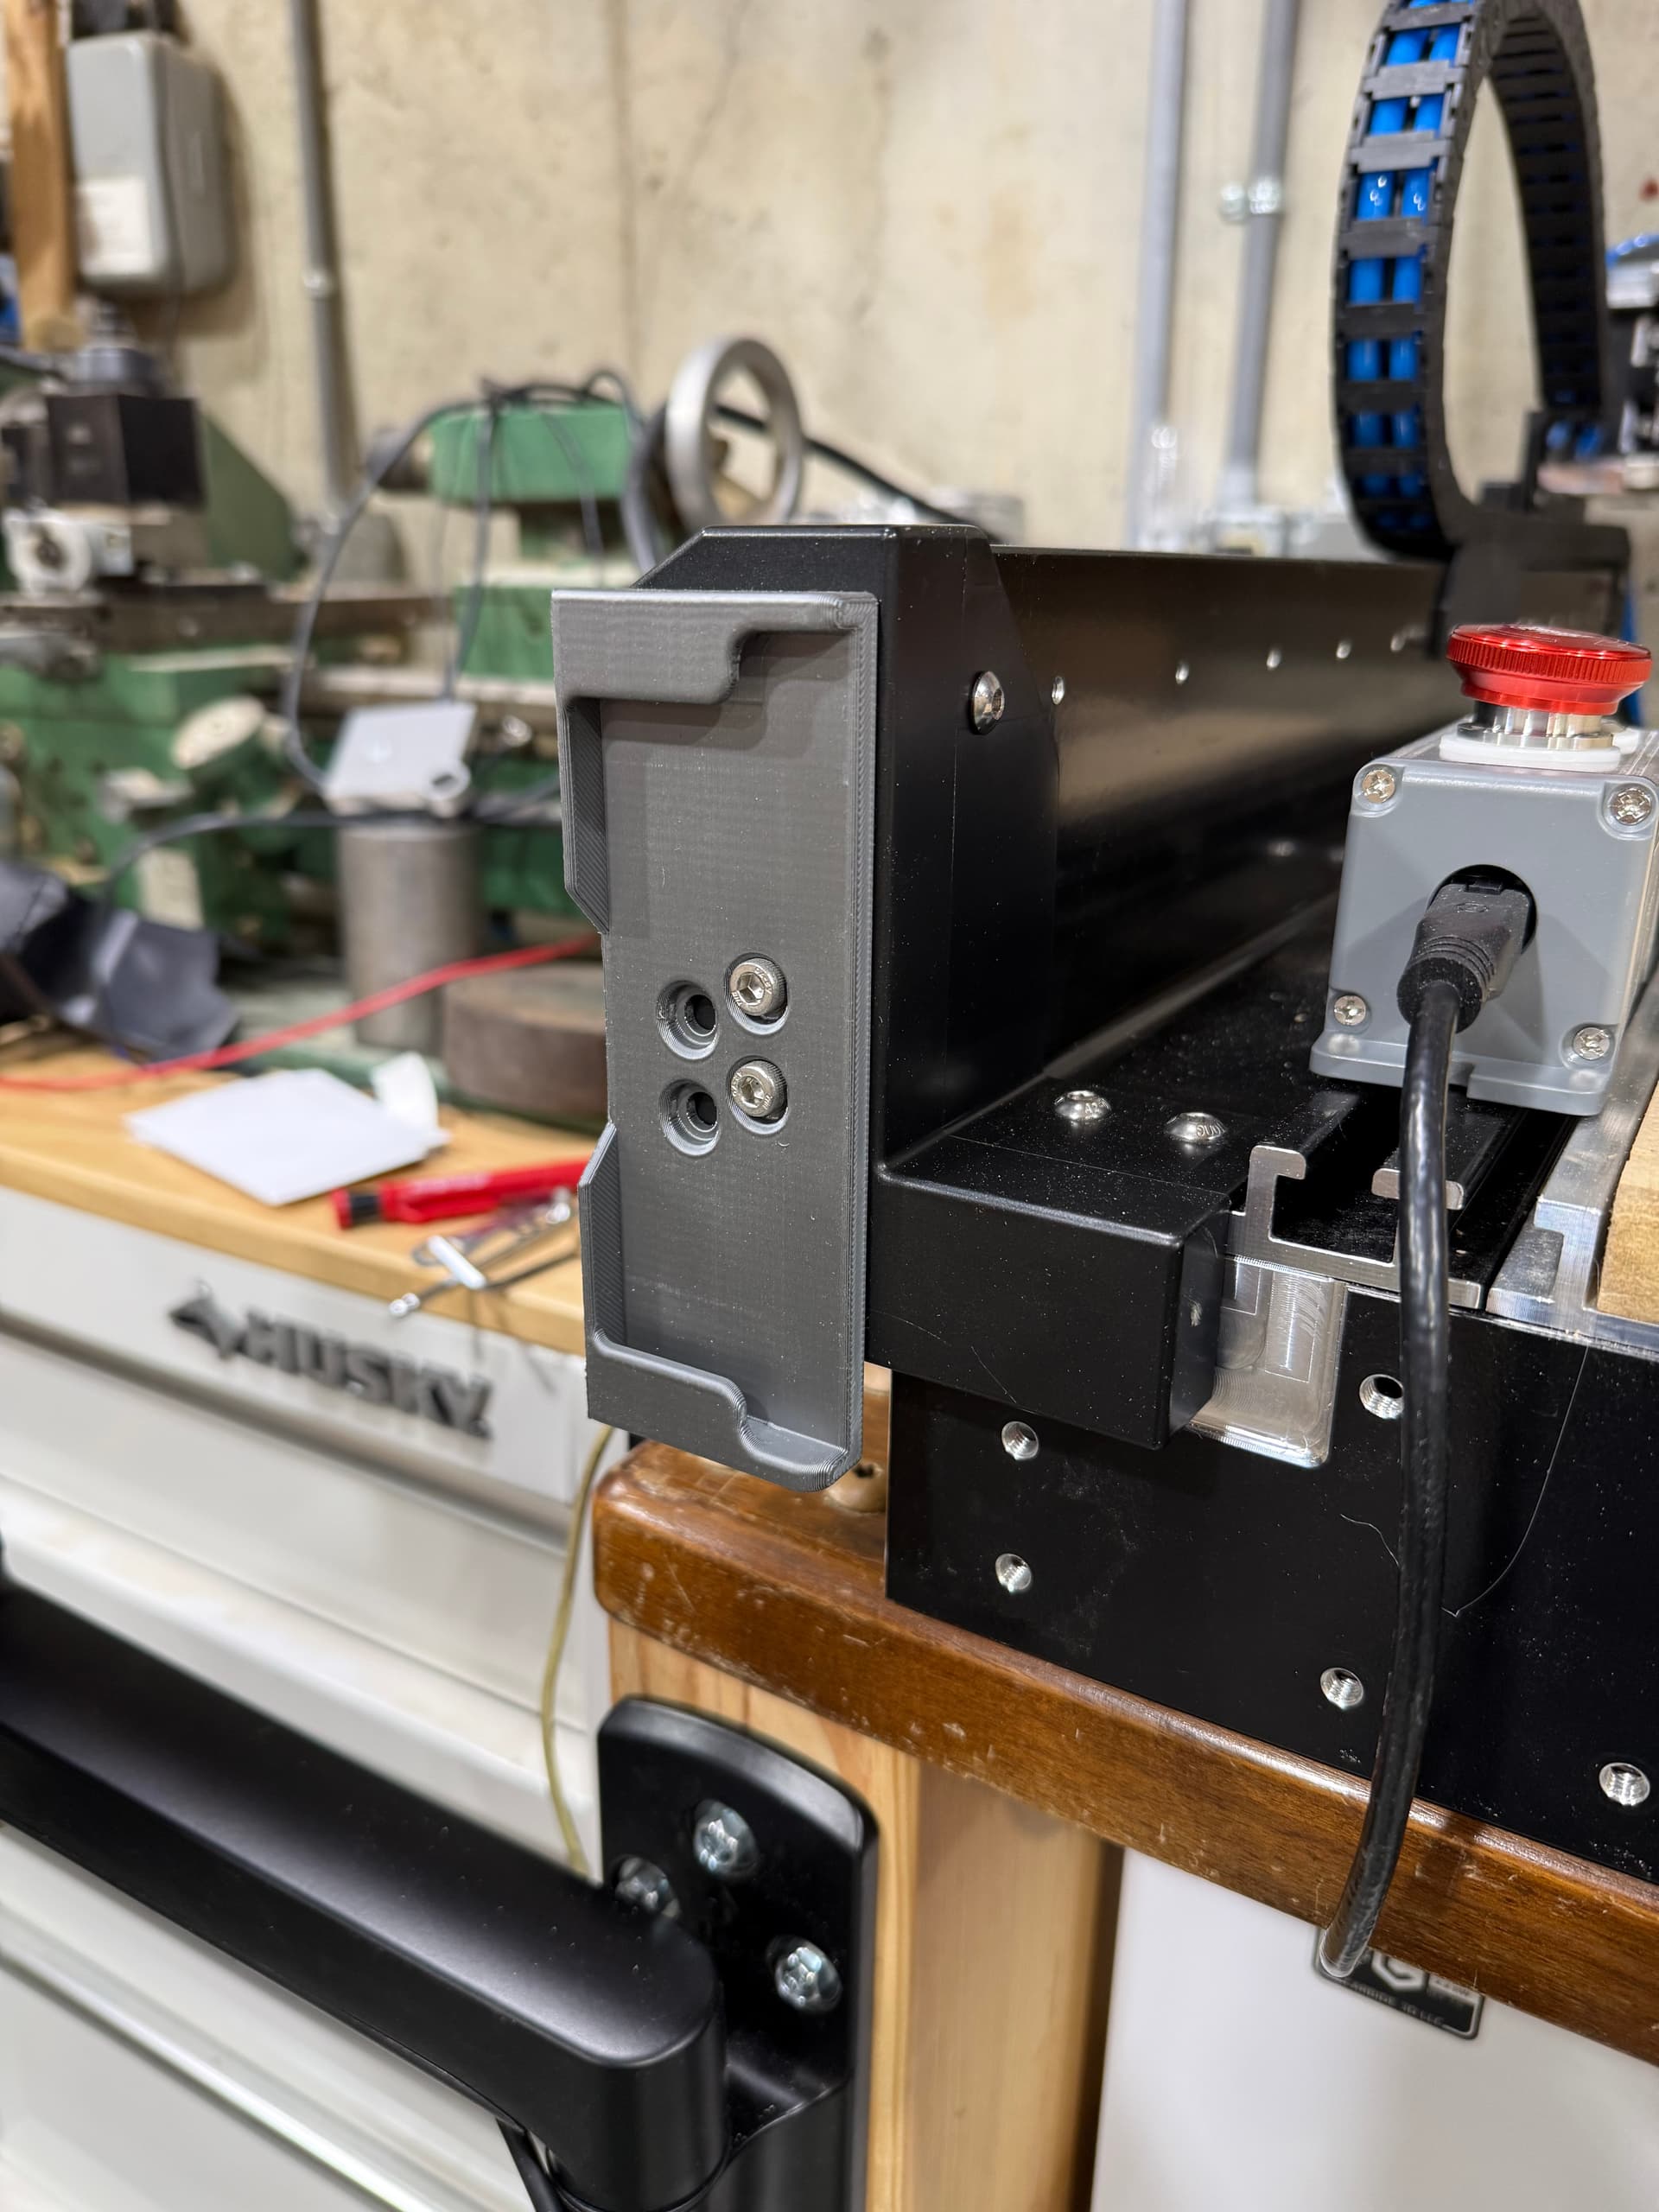
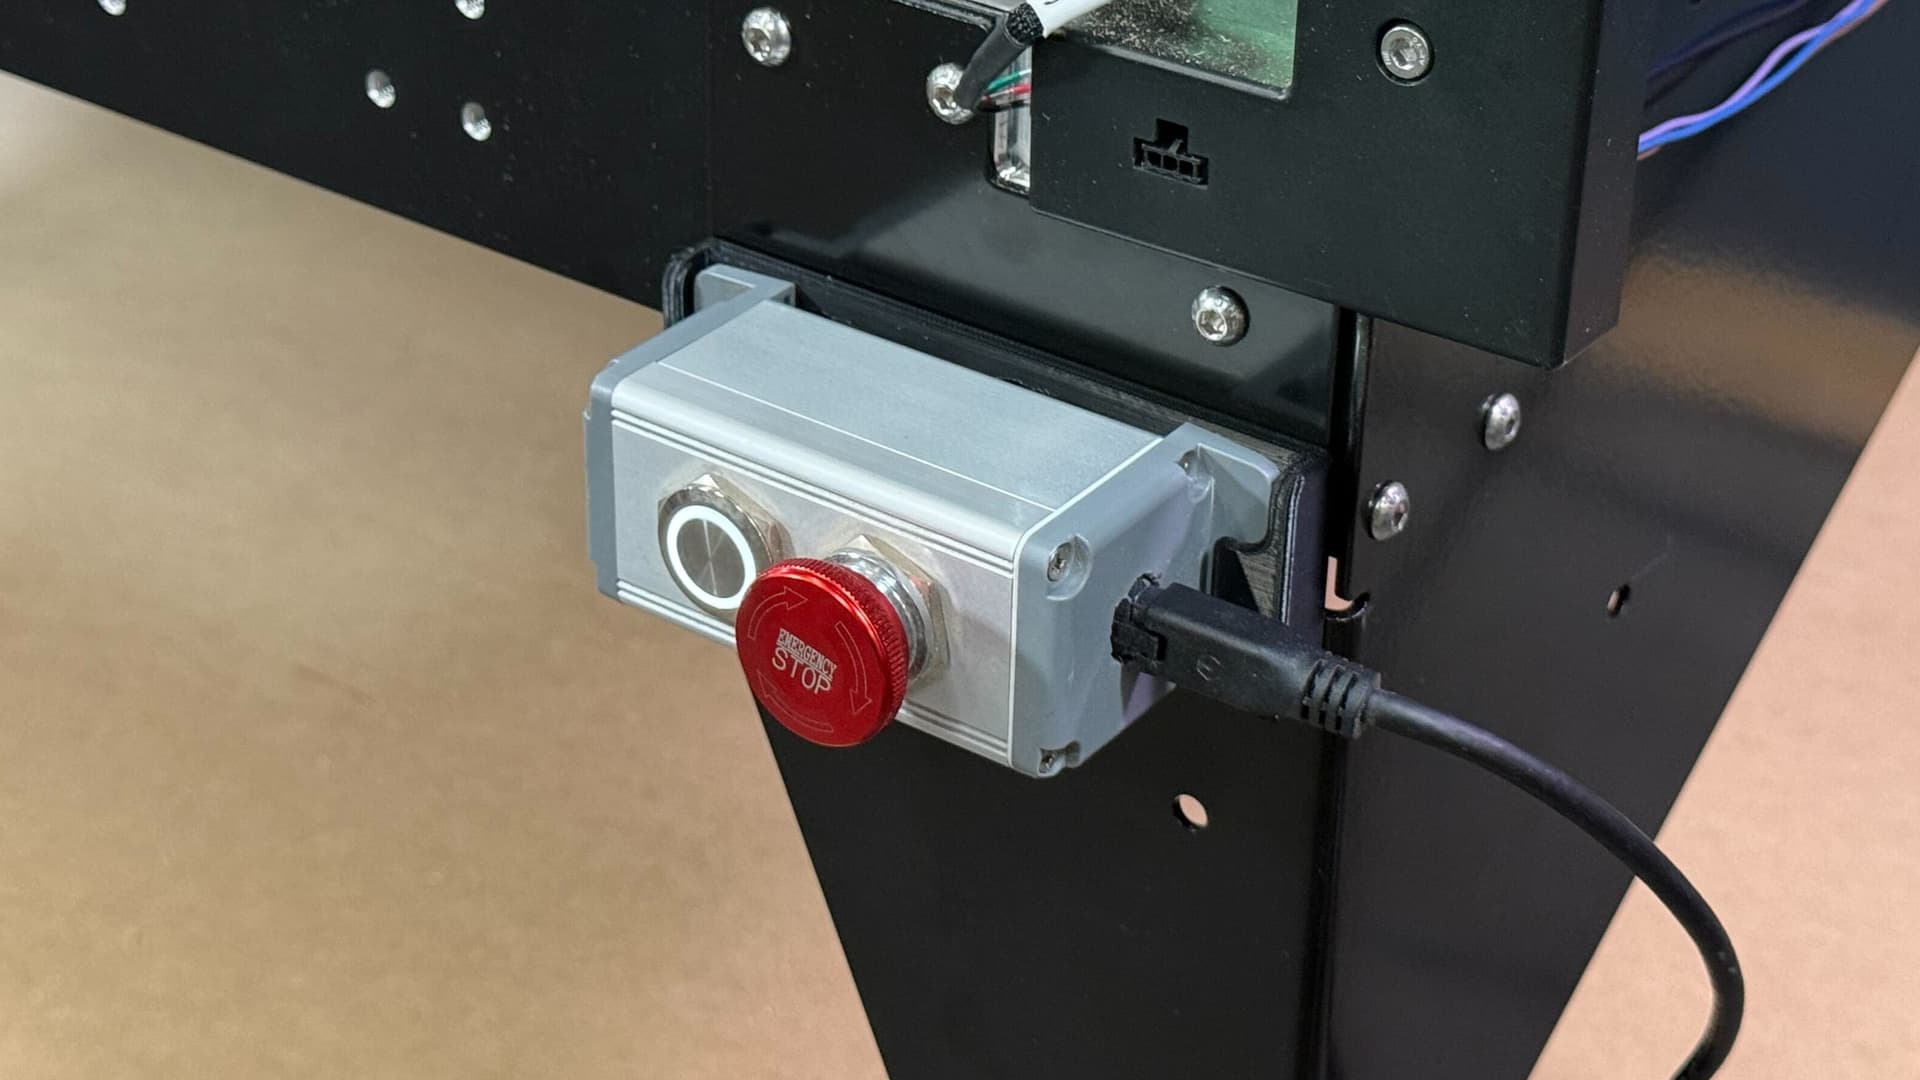
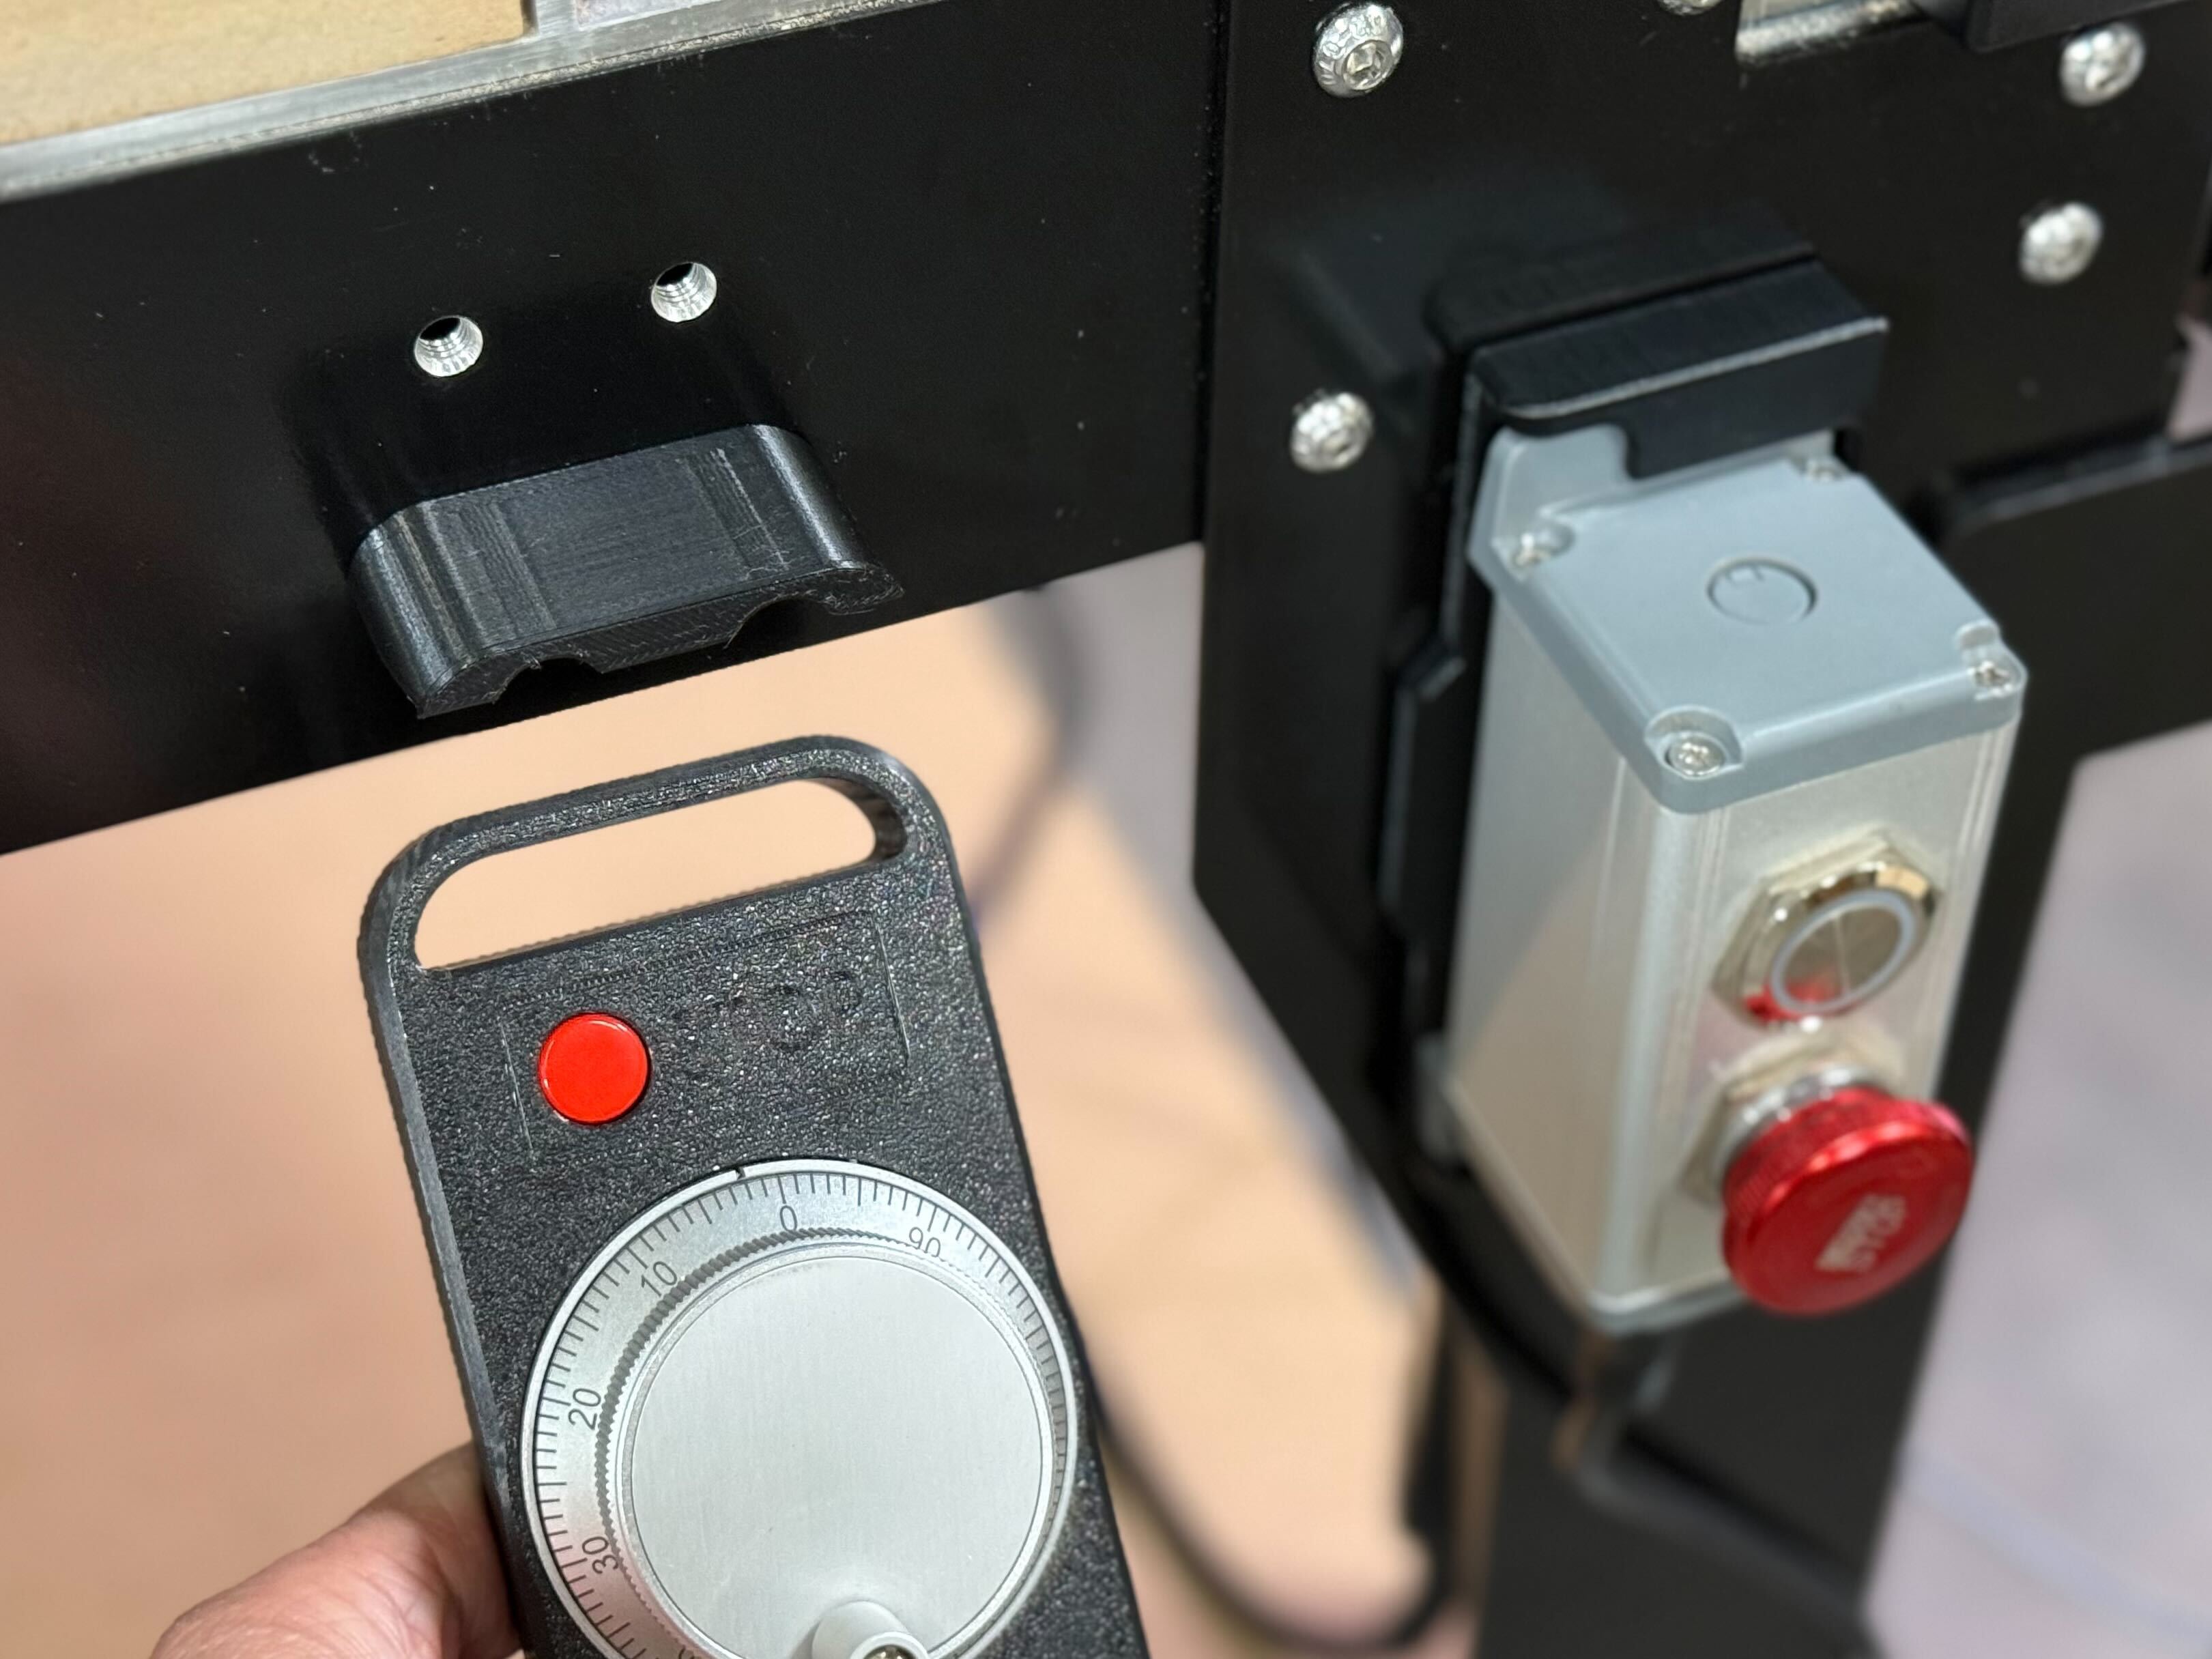
E-Stop Pendant Dock
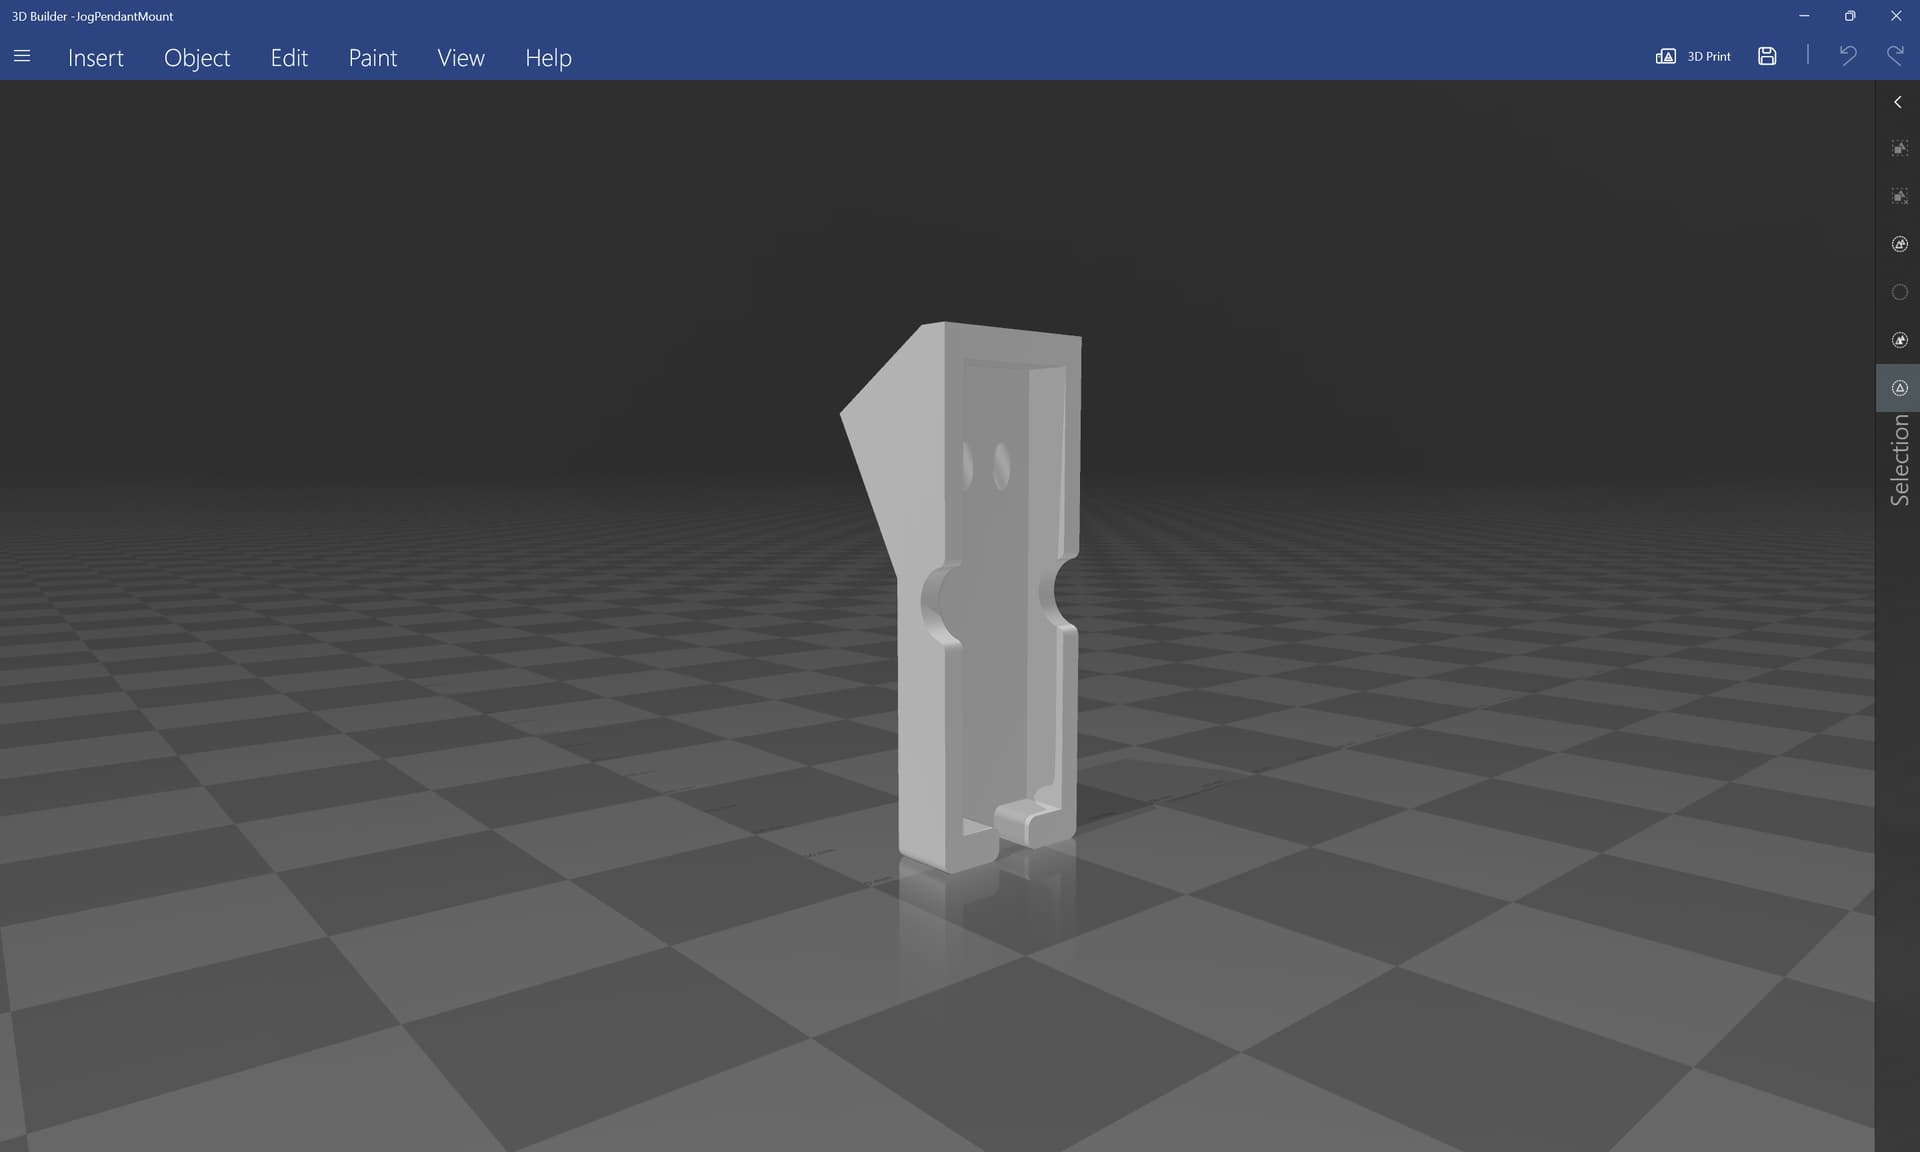
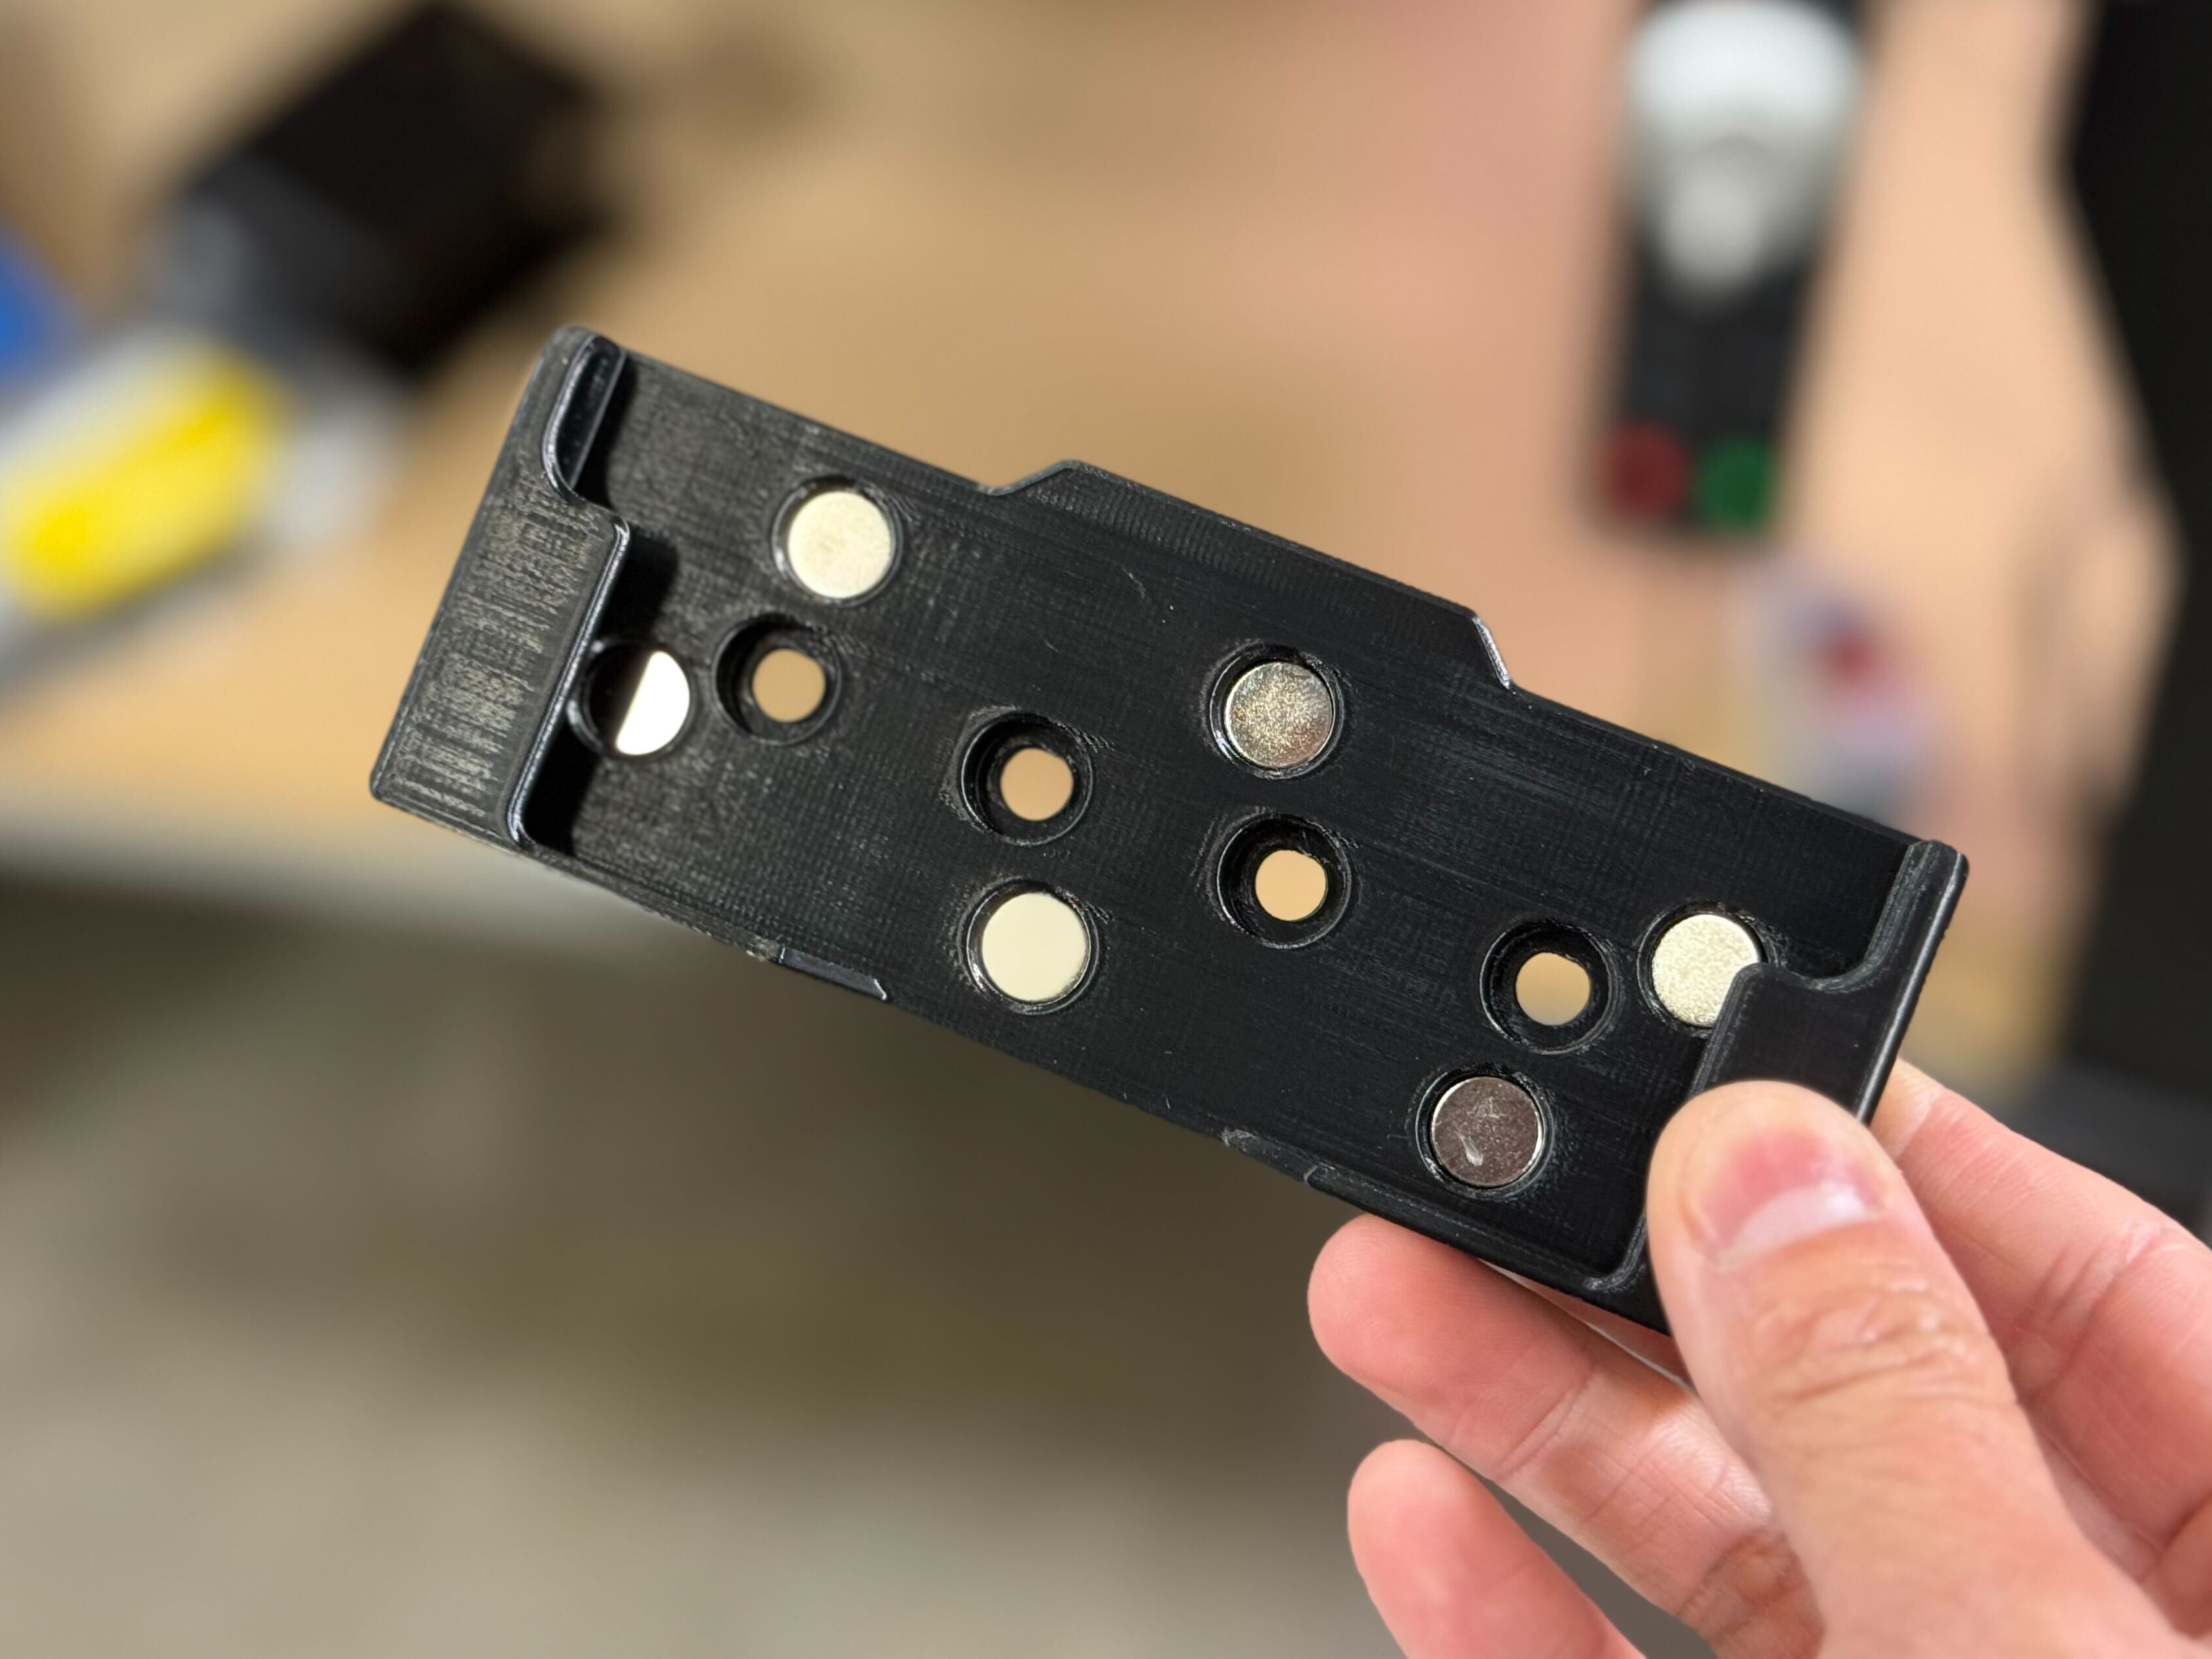
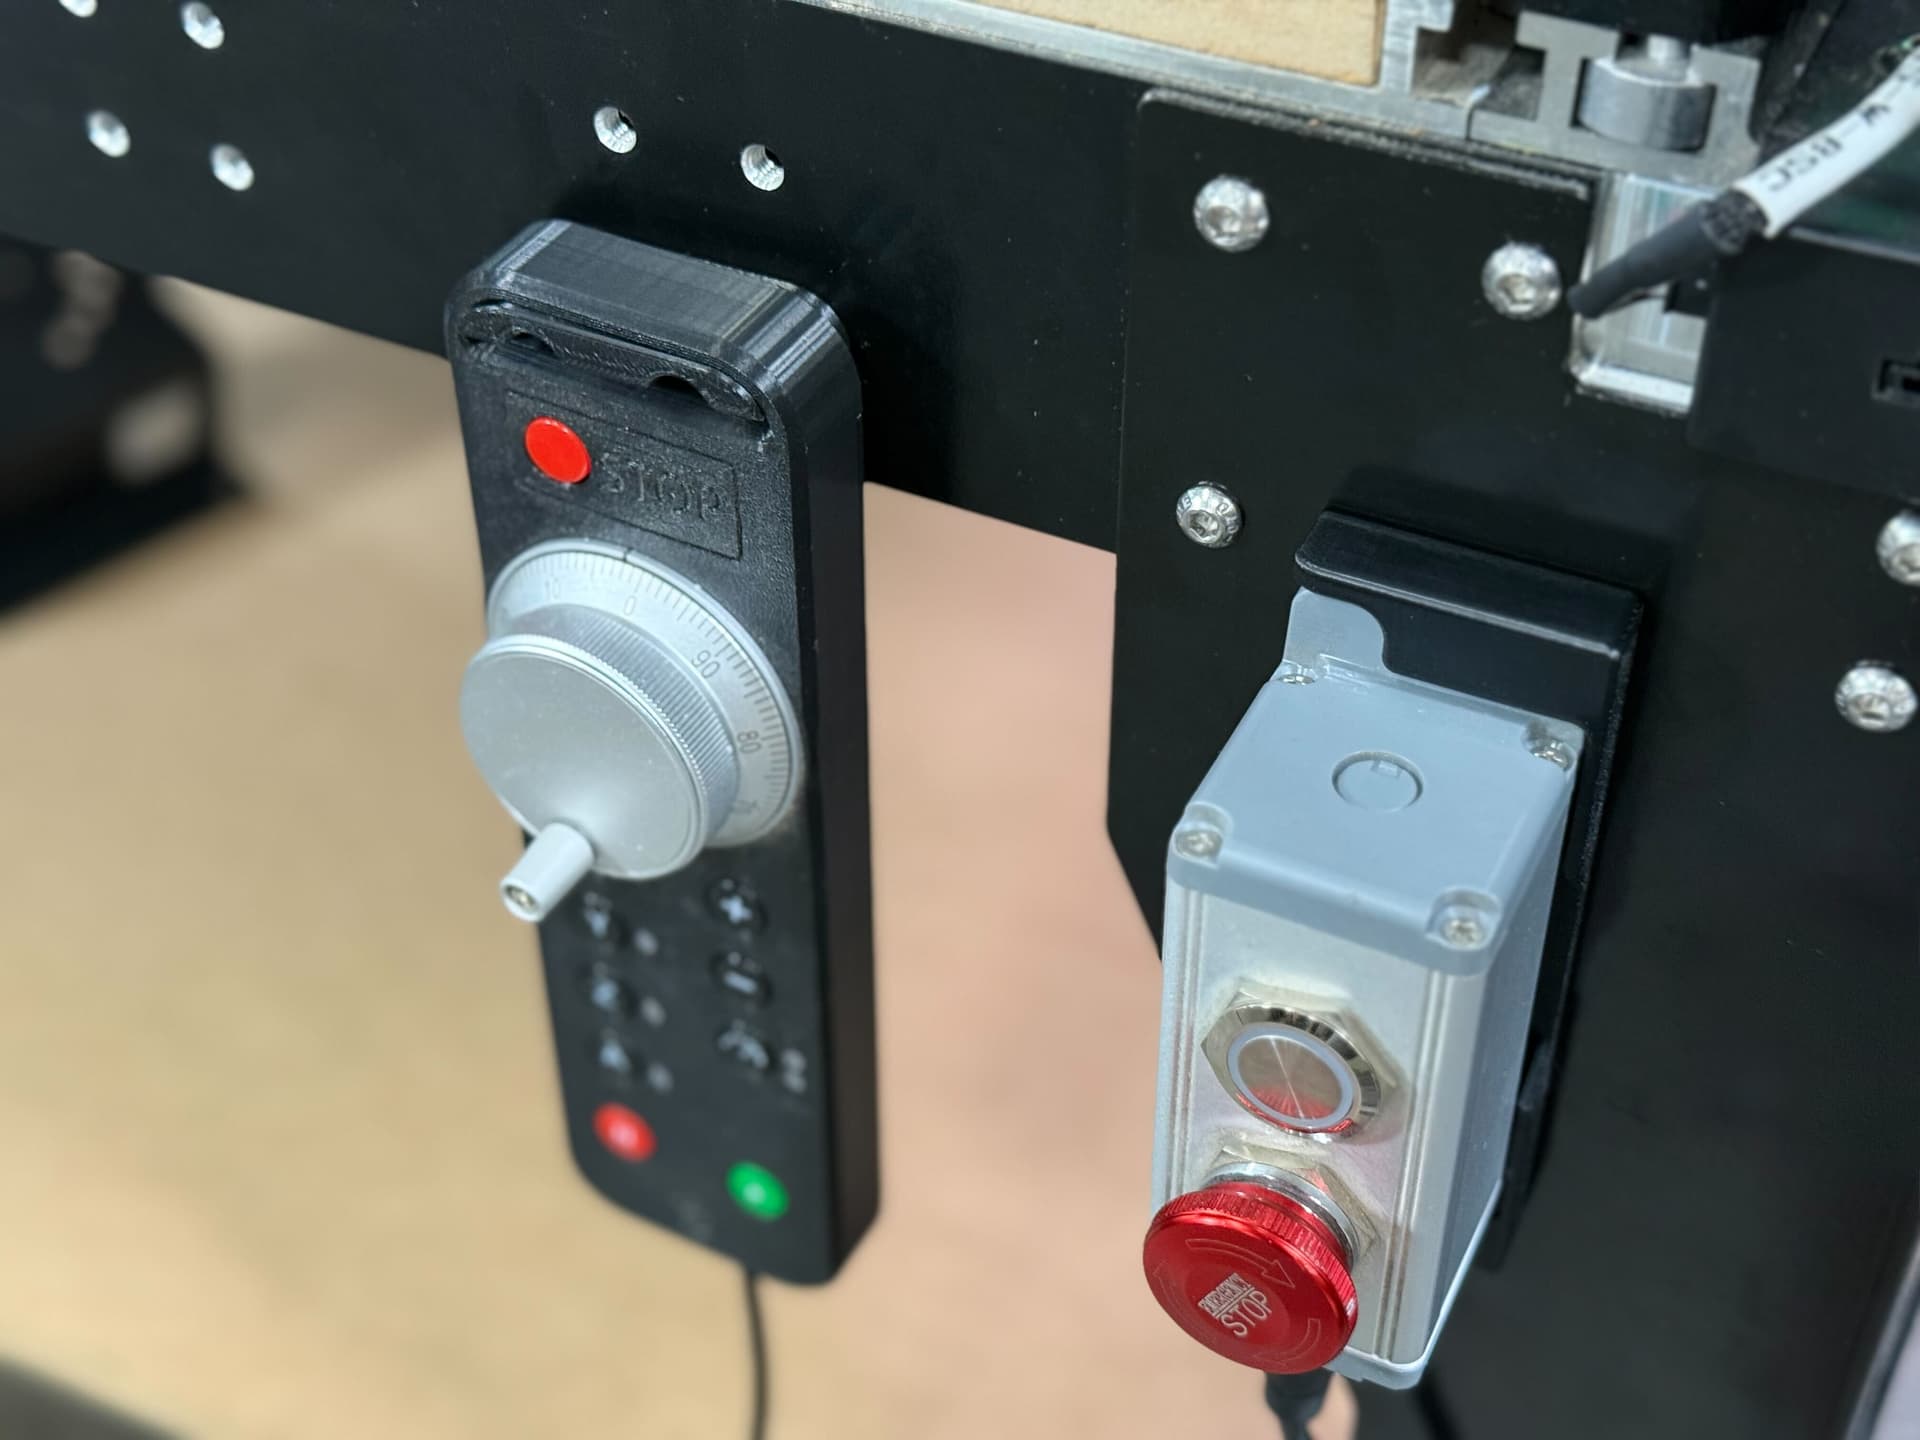
Ever since we got our leg kit, I’ve thought the steel frame would be great for magnets. So I designed a prototype with 6x 10mm disc magnets (fits 3-5mm thickness). And I liked it a lot, but Rob felt that magnets alone created a risk of the pendant sliding down over time, or falling. So I added recesses on the back of the holder that would sit over the button head screws holding on the leg kit. And then I also added some counterbored holes in it so you could attach is rigidly to the front of the Shapeoko 5.1’s tube frame.

This dock (and hole pattern) is reversible, so you can position it in any orientation on the front-right corner of the machine. When I was working on this earlier, I would slap it on the side of the table, out of view. That position is also good if you don’t want to accidentally bump the e-stop button, but you do you.

I recommend printing it on it’s side (no support needed), and I used 0.12mm layer height (Bambu slicer) so that the holes would print as round as possible (despite the overhangs). The holes might be a little snug for your magnets, so I like to use something non magnetic to help shove them in (wooden dowel, or butt end of a sharpie worked well for me). Glue is optional if your magnets fit as tightly as mine do.

E-Stop Power Pendant Holder.zip (336.4 KB)
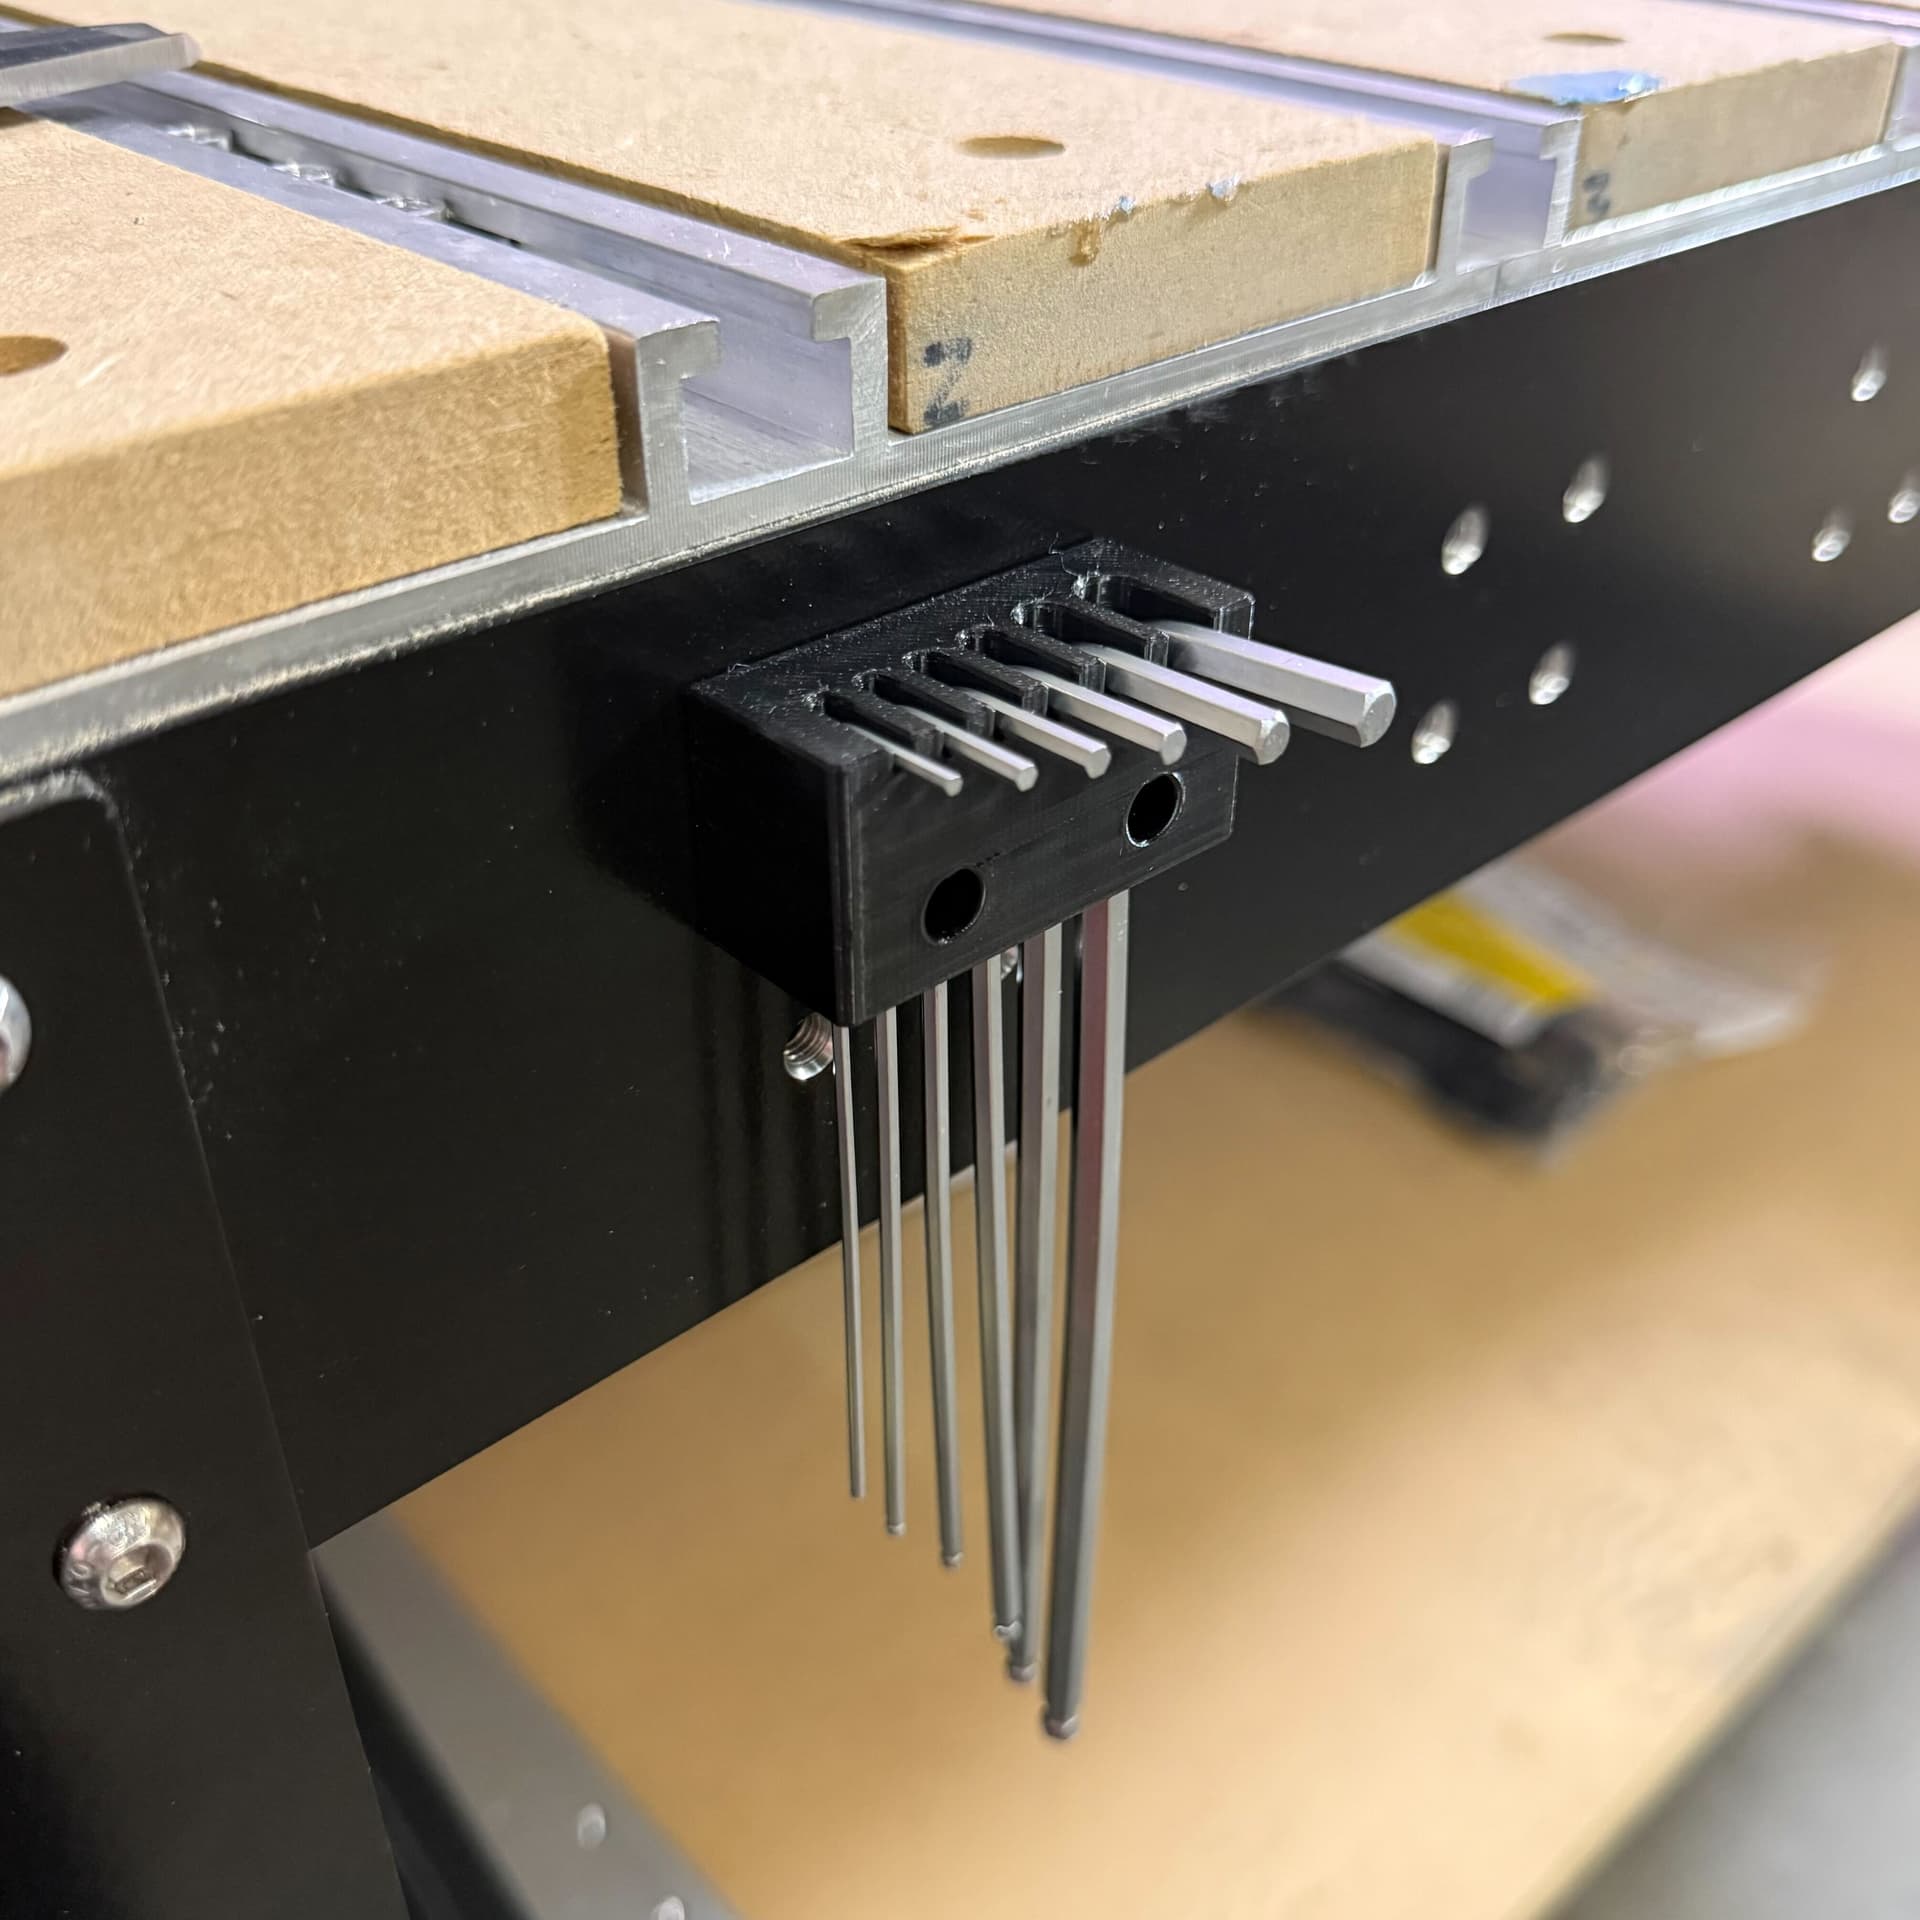
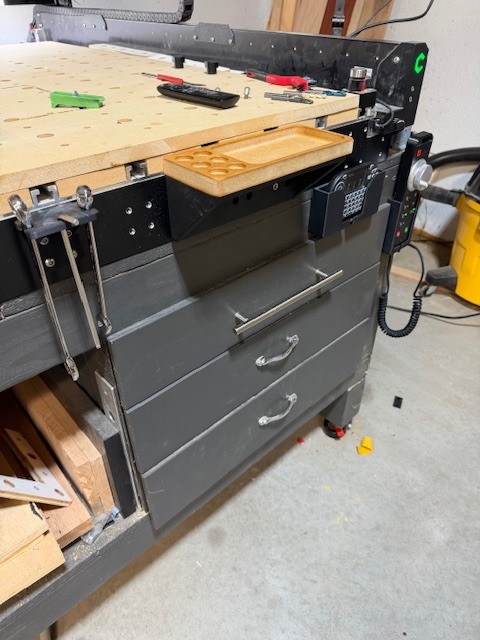
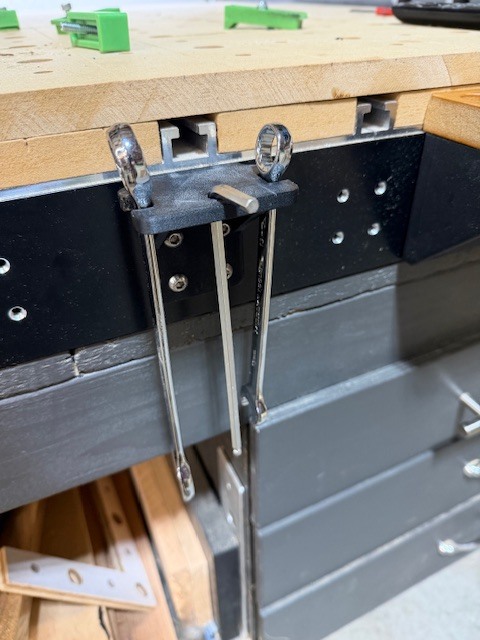
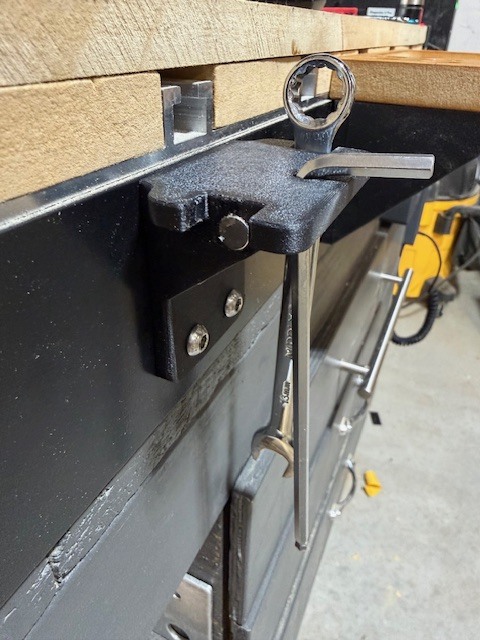
Jog Pendant Hook

I wanted a simple place to hang my jog pendant. I know some other people have come up with solutions, which I’m sure work great as well- this is just my take on it. Bolts to the front of the machine with 2x M6 button head screws.


Pendant Hook Prototype.zip (263.5 KB)

If you’ve got some ideas/mods of your own you want to share, feel free to add to this thread. The Shapeoko 5.1 has so much potential for customizing, and I’m sure I’ll be adding a few more things here down the road.

Note: The 3mf files attached do not contain optimized print settings, since I don’t know what printer you have. But I suggest using PETG and 3-4 wall perimeters if you have a 0.4mm nozzle. I find that’s a good sweet spot for “strong enough” prints that aren’t completely solid and waste filament.

15 Likes

Thank you for these, Winston. Jog pendant hook is on our H2D here at work right now, even though I did not see a Nomad-specific version of the hook… :wink: I think that I can manage to run a couple of Strong-Tie screws through the holes into my workbench frame though…

2 Likes

I was surprised at the gratuitous use of PETG-CF, 8 walls all around and 30% gyroid infill, but then I remembered I had just recently had a mug of strong coffee… :smiley:

3 Likes

You know I like it when subtractive and additive mix. Great, functional designs!

1 Like

Nice designs, for the E-stop I mounted mine on the outside of the leg, I kept hitting with my leg and shutting down the cnc lol. The only other mods I did for my leg kit was drill new holes for mounting the spindle control and cnc control box to the inside so the machine would sit closer to the wall and nothing would knock into it.

3 Likes

I got tired of tools walking away from the machine, so I made a holder for the hex keys that come with the Shapeoko. Secured with two M6 button heads, and fits the hole pattern on the front base frame tube.

This is a simpler V1. If I end up stabbing my leg too often when I lean over the table, I might do a revision where the heights of the wrenches are staggered and I can rotate them 90 degrees.

S5.1 Allen Key Holder.zip (240.0 KB)

6 Likes

I’ve been thinking of the same, but just for 4mm and 5mm T-wrenches to match the workholding.

3 Likes

Those are definitely the most useful ones. But since I will often assemble various things on the Shapeoko right after machining, I like having hex keys that will fit M3/M4 screws handy. And if I’m going to have those, might as well just keep the whole family here.

5 Likes

I’m w/ @SLCJedi T-handles make so much more sense than fiddly Allen keys/L-shaped hex keys… in particular, the Bondhus set is so readily available, it’s hard not to justify it.

For my part, I have to ask — am I the only person who prefers to use a ratcheting tool for workholding?

I’m even indulging myself for my birthday by getting a battery-powered screwdriver:

https://www.jbtools.com/vessel-rechargeable-ball-grip-screwdriver-limited-kit-220usb11glul1/

(which will be perfect if its powered 2NM torque will be sufficient for tightening down an Essential Clamp — at least enough for one twist to then fully tighten)

2 Likes

I don’t use ratcheting tools, but I designed/3DP/sell short handles for bits to make things faster. I also wanted to be able to tighten workholding with the gantry in the way of a t-handle, so made these short. Judging by how much I haven’t sold…no one cares. :smiley:

5 Likes

@WillAdams

I prefer the T handles, I have learned over the years to spin them faster that I could use a ratchet. It’s all personnel preference.

@SLCJedi

I have tried those short handles and in certain cases worked well. I have to take the bit out each time or they don’t store well for me. Stands too tall in a short drawer or always rolling it seems.

@wmoy
Once I get a project out of the way I will get the upgrade table base, looking forward to utilizing the front of the machine.

I appreciate this thread and the discussion about increasing the functionality of the S5 Pro.

5 Likes

@SLCJedi , those handles look nice. The only thing I would do (being me) is to specify the top layer as “concentric”, then visually it would blend in more with the sloped surface pattern…

3 Likes

Not a bad Idea, thanks for the suggestion. I have had a tendency to just run them with generic settings for all parts as I have to print batches and they vary in number, colors, etc. But with 3MF files in Bambu storing things like settings, I should optimize things like that more. :slight_smile:

2 Likes

I fully agree. That’s why I have a holder for them. I like things I use often out in the open and in a specified location that is consistent. I blame a decade in the aerospace industry. :smiley: I have modified the file to fit the 5.1 bolt pattern so they can fit there as well as use a generic screw to whatever base.

1 Like

@SLCJedi

Well…… there goes my excuse! Looks like the rack works well from keeping them rolling around.

2 Likes

I’ve found I really like the short keys from wera:
https://www.wera.de/en/tools/950-9-hex-plus-4-l-key-set-metric-chrome-plated
They can get at most anything I’ve come across.

At one point I treated myself to a wiha set with an ergostar holder. The holder looks sort of like a standard staggered holder but rotating one key rotates the entire set making it really quick to access any key. The wife saw that functionally and claimed it for her tool box :person_facepalming:
Turns out they sell just the holder for a reasonable price.

I might mock up a print that does this rotating but keeps all of the keys on one plane for low profile mounting to the base.
If I get around to it, I’ll post it here :beers:

Lastly, just because we’re on the topic of hex key holders. These are cool. I just want one for my desk :sweat_smile:

4 Likes

Your pendant dock was a great idea for 5 Pro’s with legs but mine is legless so I modeled one following to yours design for legless 5 Pro’s.

6 Likes

I added a small piece of plywood to the gantry end cap, and mounted the pvc so that it moves along with the gantry. I had to move the VFD to the backside, otherwise the PVC/hose would run into it.

5 Likes

as requested on support…

David Christiansen asked:

Please share my STL file for attaching the jog pendant to the front of the 5.1. I’ve attached the file and am happy to have you share it, modify it, etc. It’s also available in the OnShape community

JogPendantMount.stl (217.7 KB)

2 Likes

I printed a few items for my upgraded 5.1 rails. I find that I really only use the wrenches and the one allen used for the clamps.

2 Likes