Was hoping to get the CNC machine assembled over the weekend, but ran into a block.
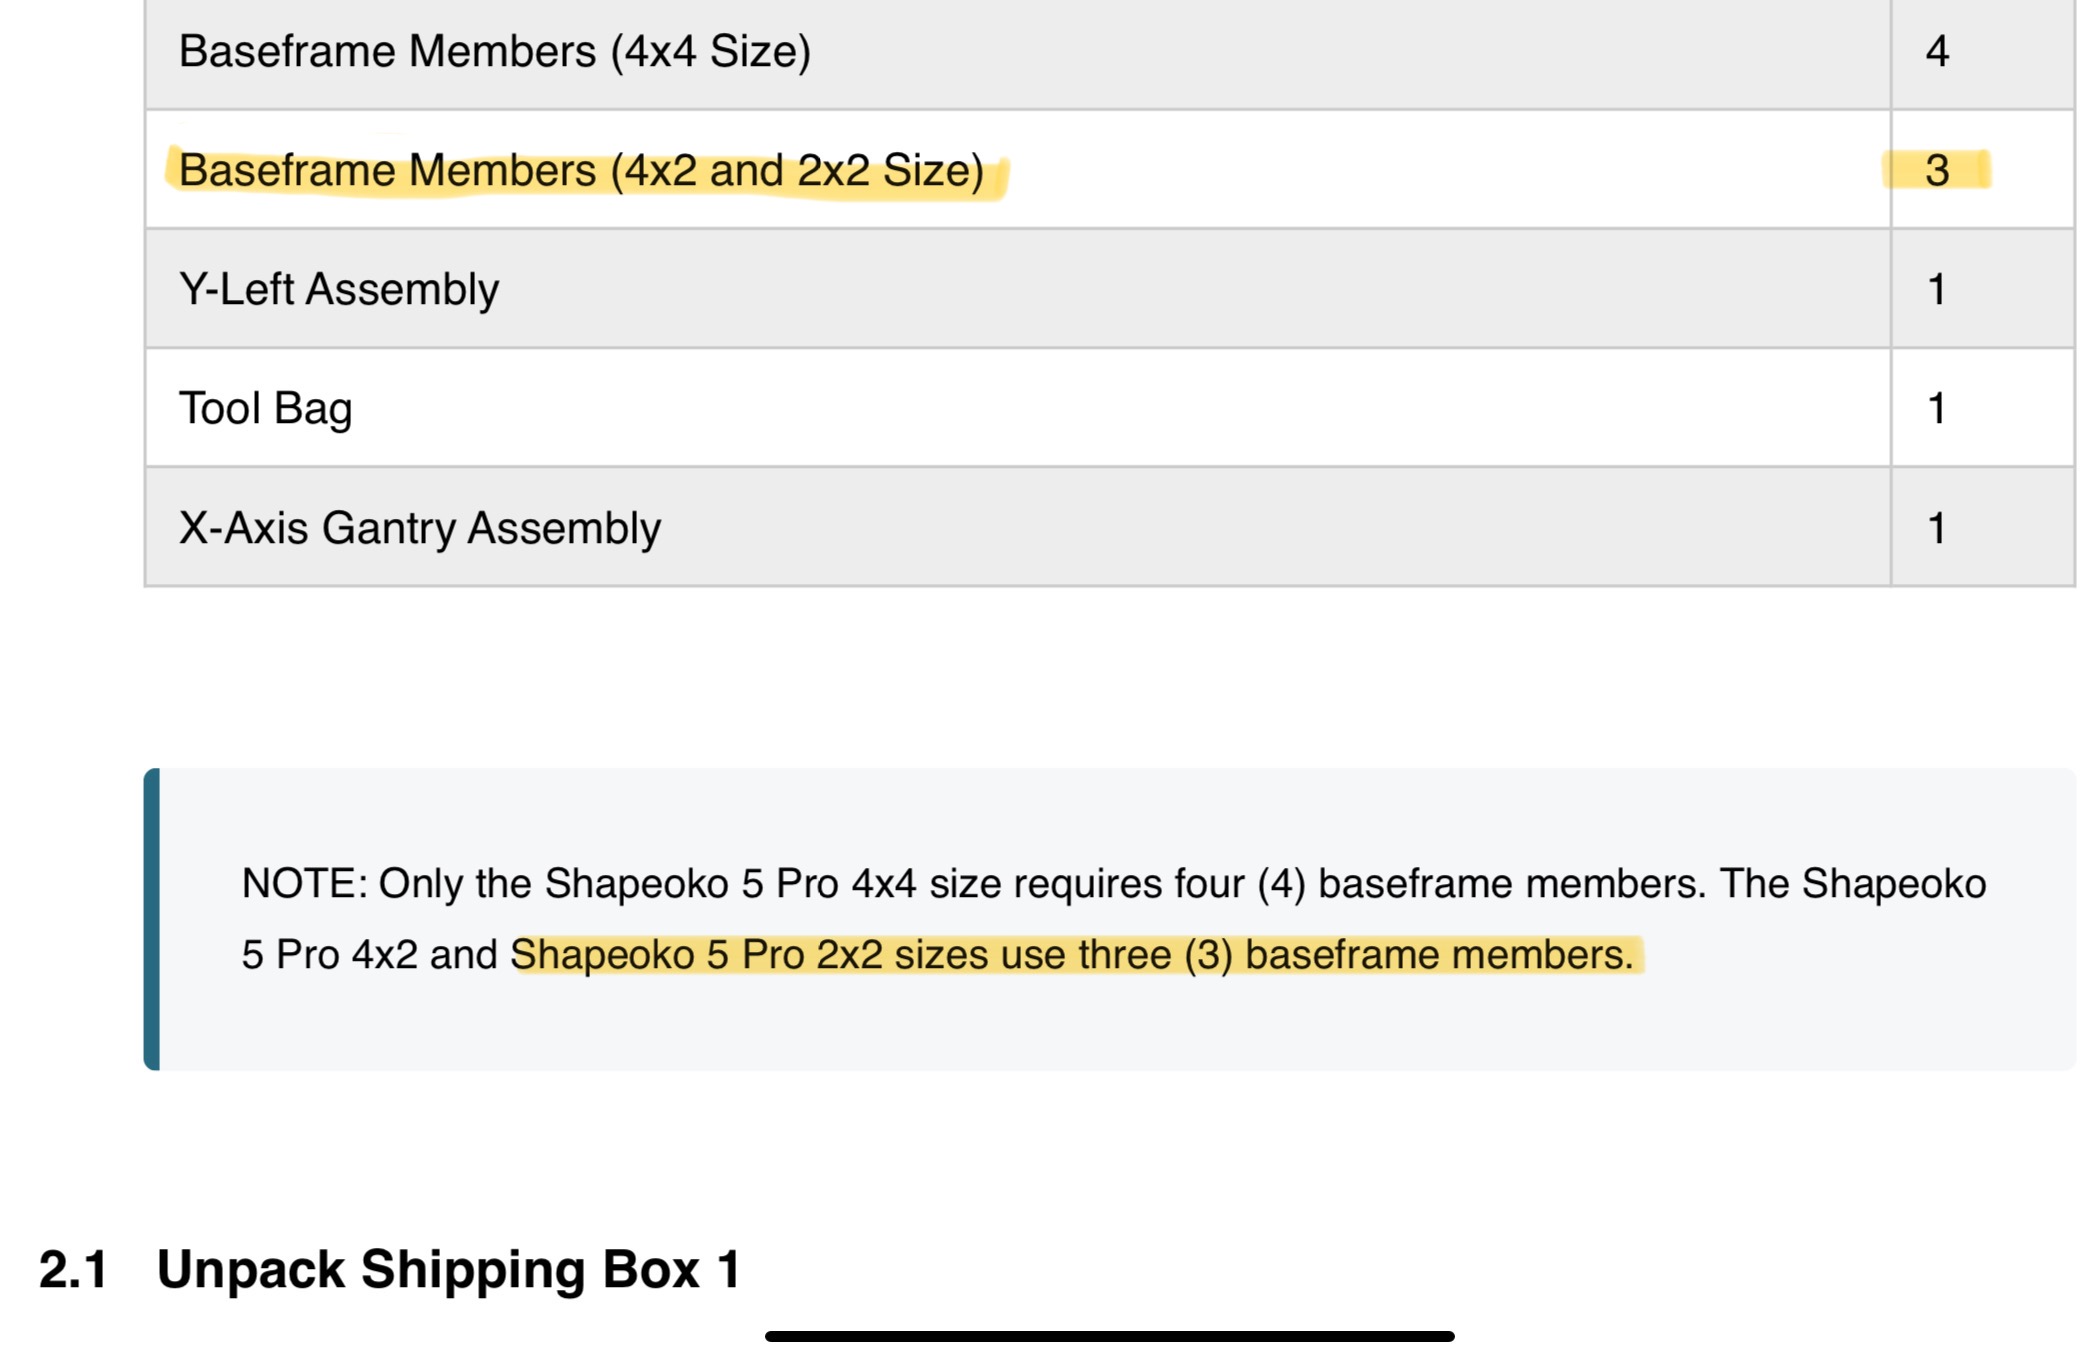
I’m attempting to assemble a Shapeoko 5 Pro 2x2, but may have received the wrong instructions. The very first step says place the 3 baseframes 15.7 inches apart, but I only received 3 baseframes…and how would there be enough room for them to be 45"+ total (15.7"x3) on a 2x2?
and for the 2x2, it will be necessary to take into account that some items are shorter, others are more closely spaced, and there are fewer of certain items — just proportionally adjust for the differences as need be.
If you have difficulty with anything, send photos in to support@carbide3d.com and we’ll work through it with you.
Unfortunately, I’m not seeing any drawings for the 2x2 in that manual you linked.
There’s also 4 sets of holes on the Y axis rails, so it would appear to need 4 baseframes…or some explanation of which sets of holes out of the 4 we are supposed to use.
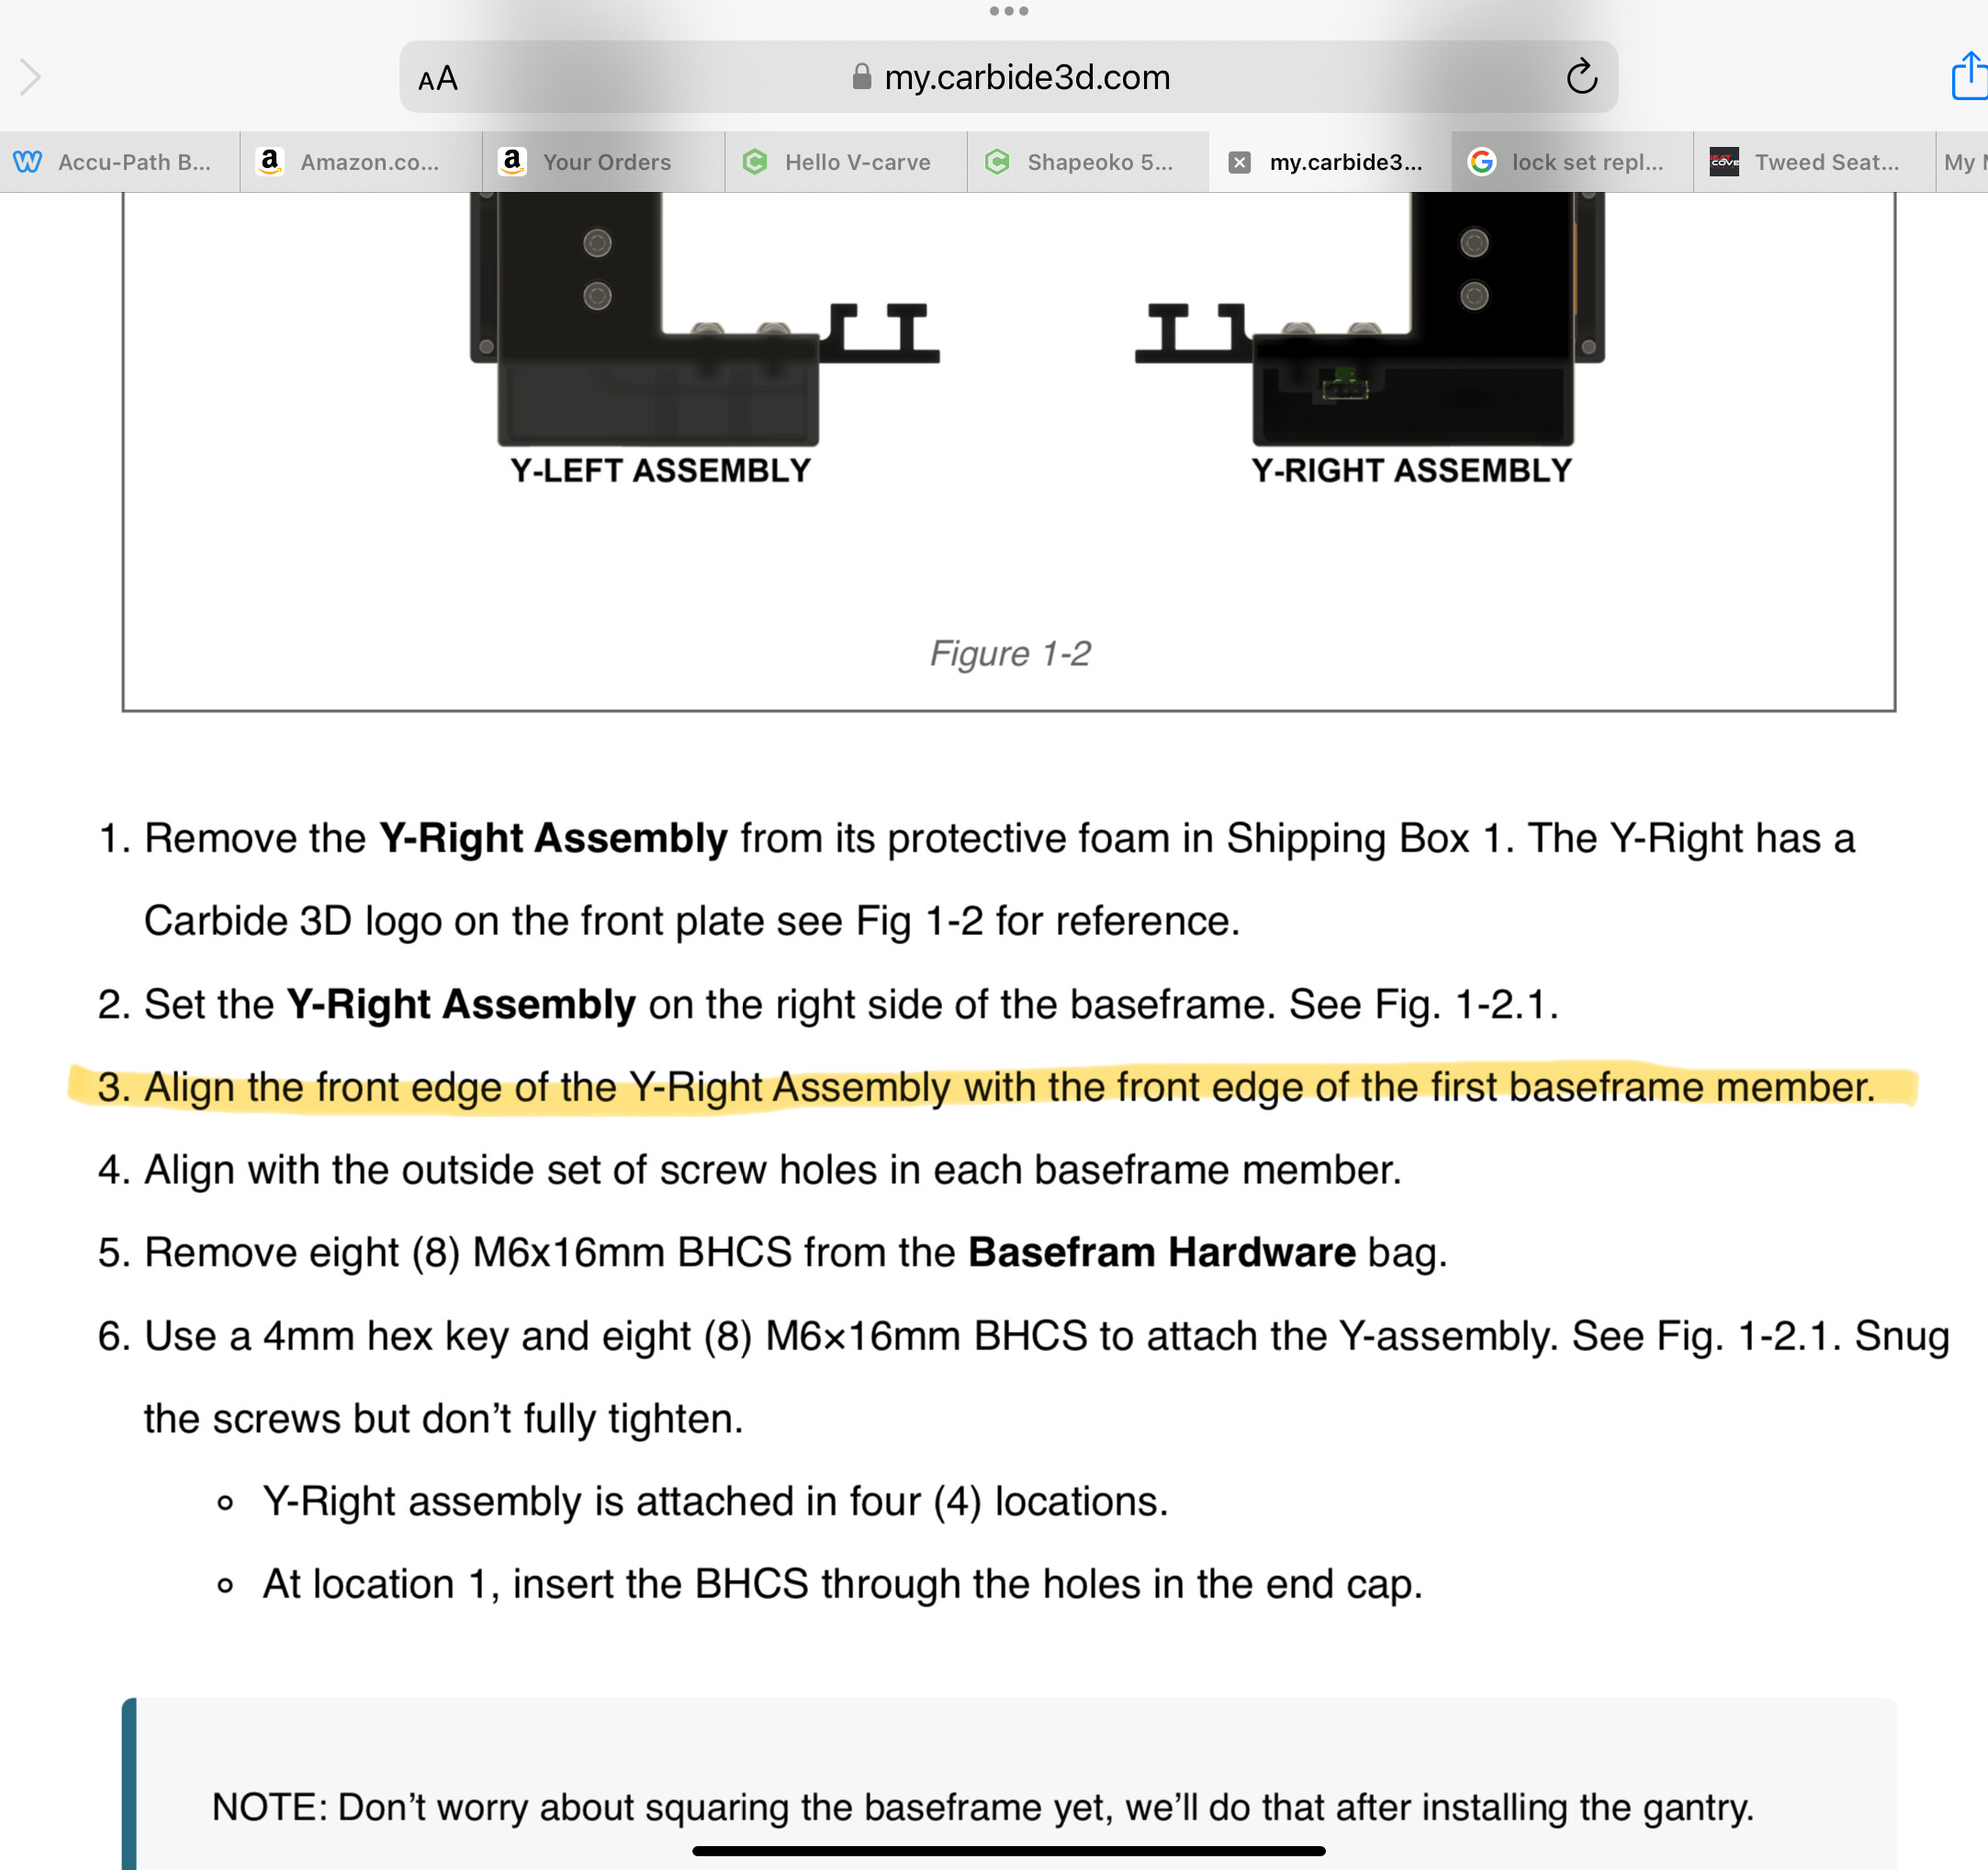
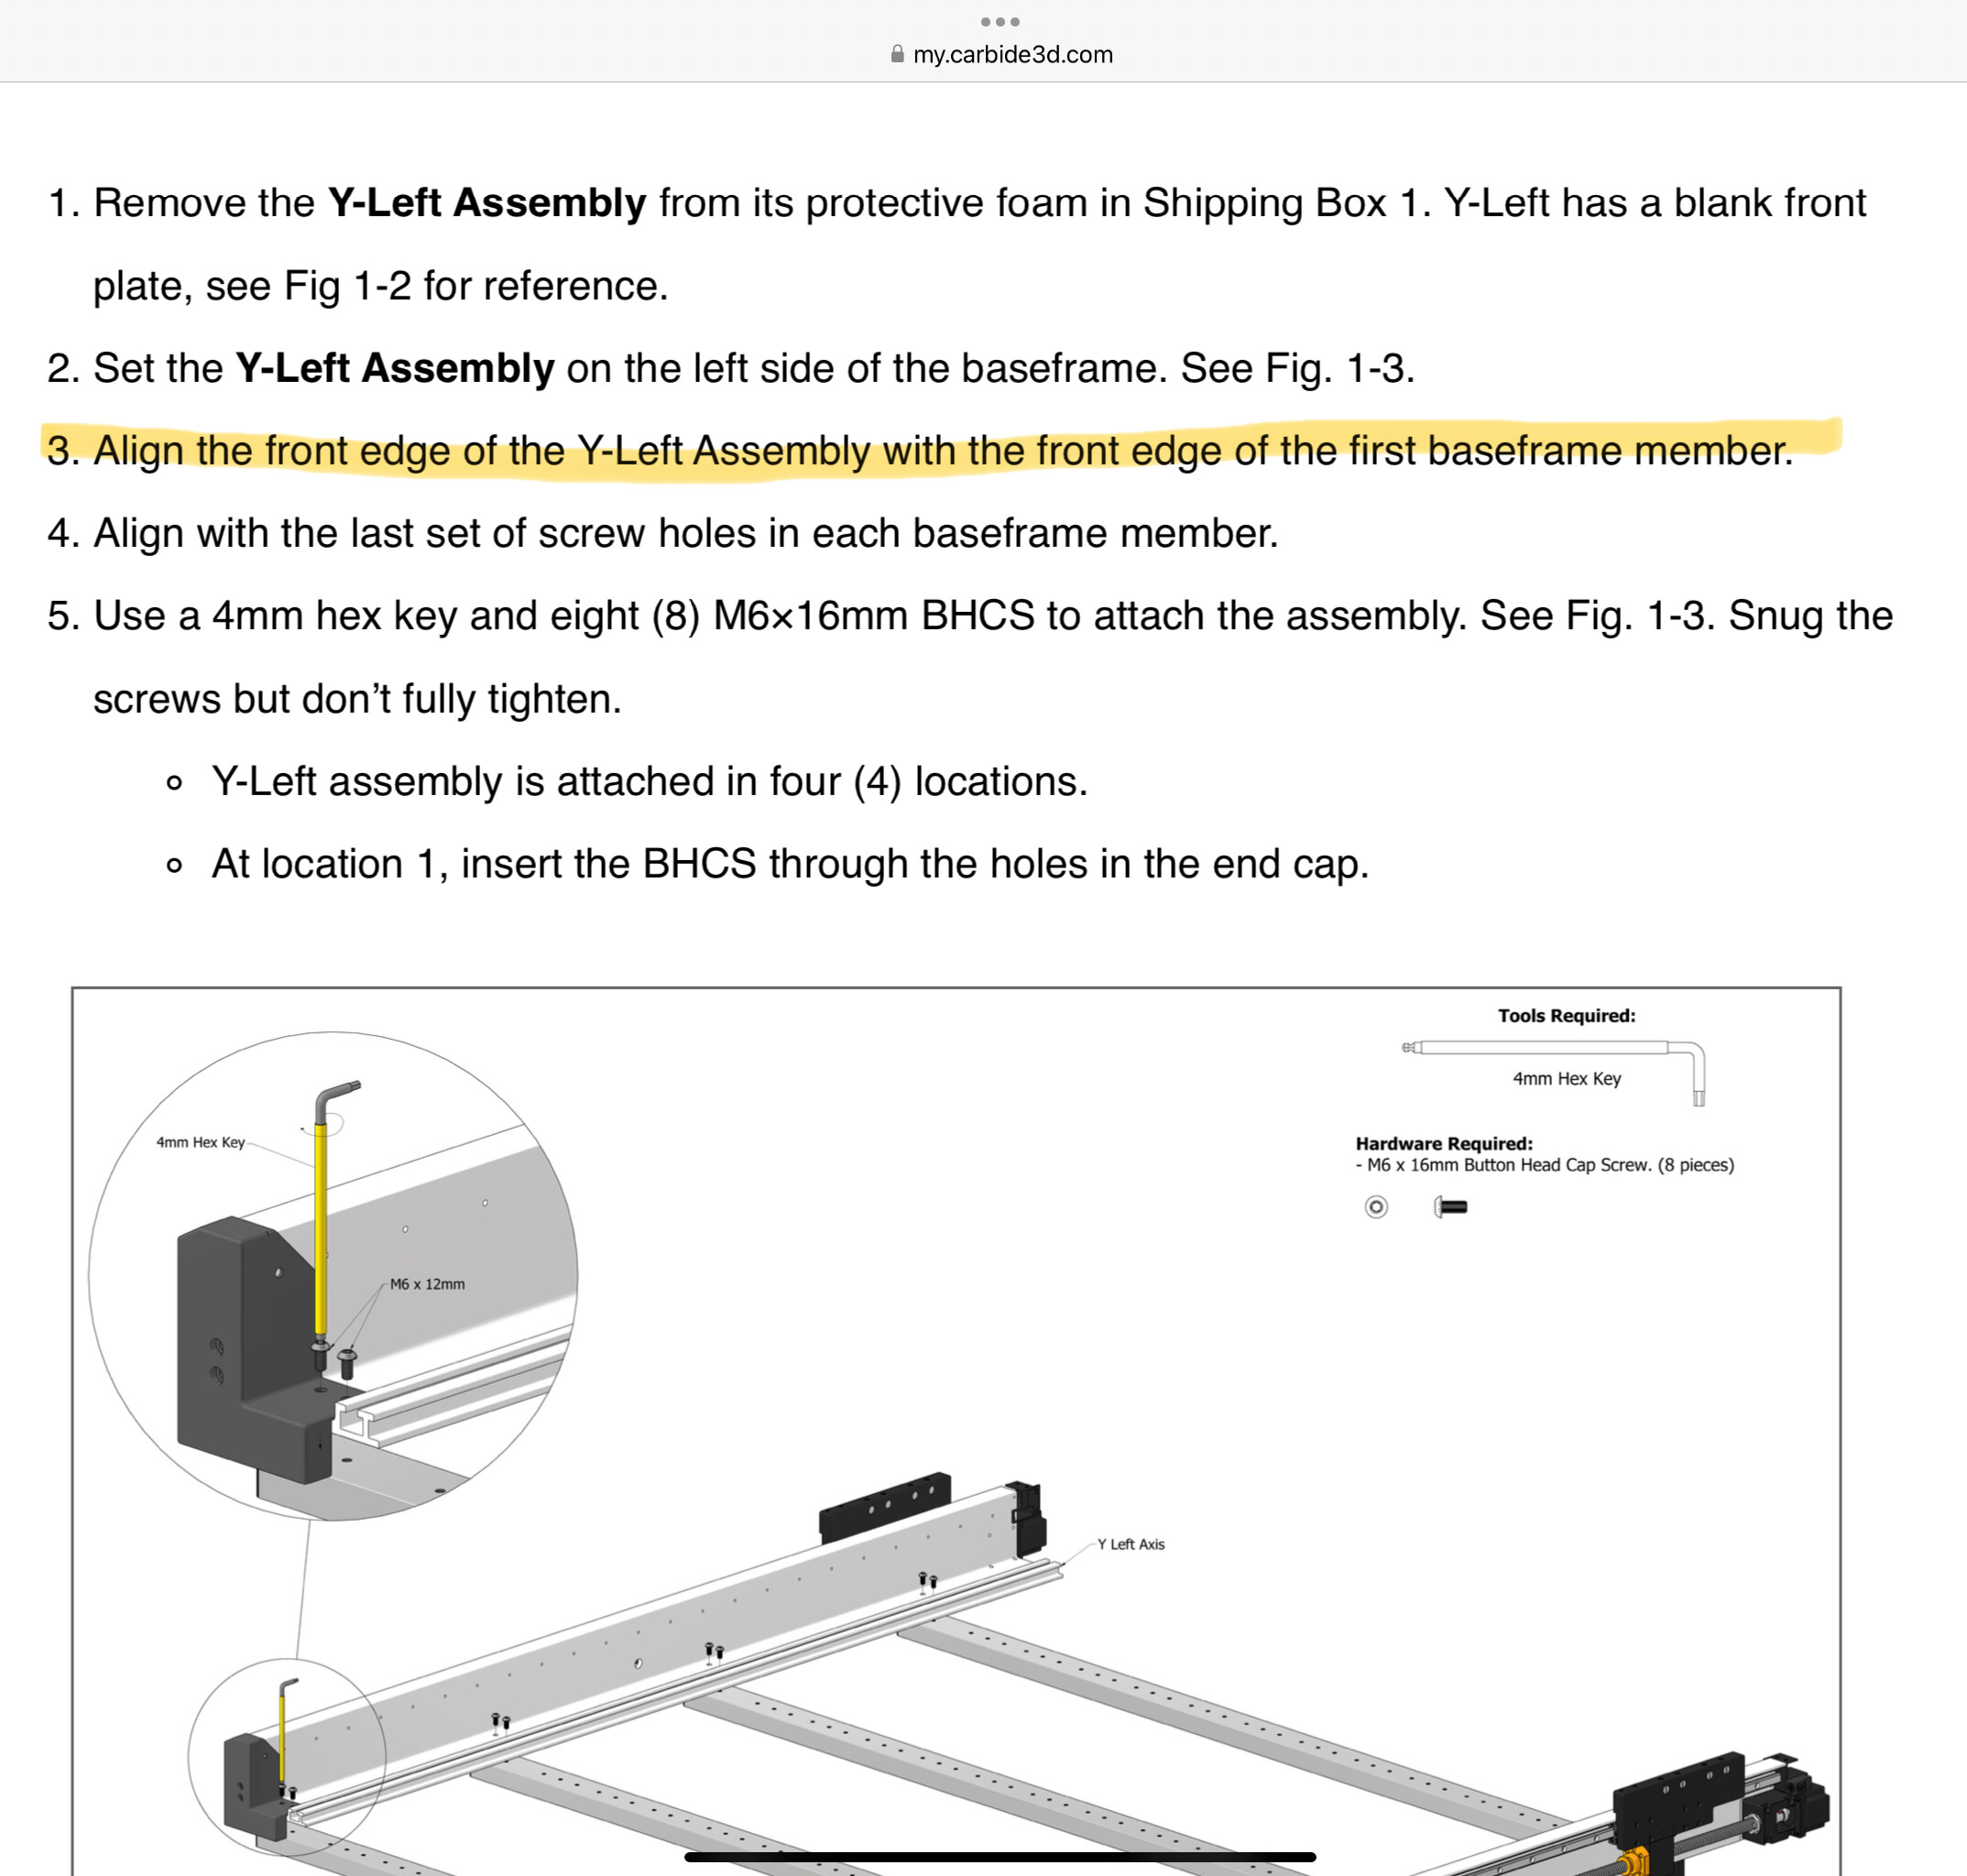
We just finished assembling the Shapeoko 5 Pro 4x2 and ran into the same issue. You should attach the 3 baseframes with the first one starting at the front of the machine. The 4th set of holes will be for the wire harness that goes on the bottom of the machine in a later step.
One other issue we ran into was that the drag chain mount at the front of the machine was not mounted, even though it shows it as mounted in the instructions. We looked everywhere for the mounting holes for the front of the drag chain and realized that you have to install the drag chain mount first. That wasn’t in the instructions. Otherwise, the instructions are very helpful and the install video is a good backup.
A note on the first step and baseplate diagram noting the difference in the 2x2 would be helpful. I only noted it in the unpacking steps because of your helpful highlights.
You’re welcome, that’s what the forum is for.
Having all three sizes in the setup manual helps with updates to only one document when needed. I am used to having manuals with several different models included and reading the fine print so to speak.
Yes, many brands include multiple sizes - I’m just saying the Shapeoko assembly manual could be more clear in a few spots and I hope that such feedback can be received in a productive way.