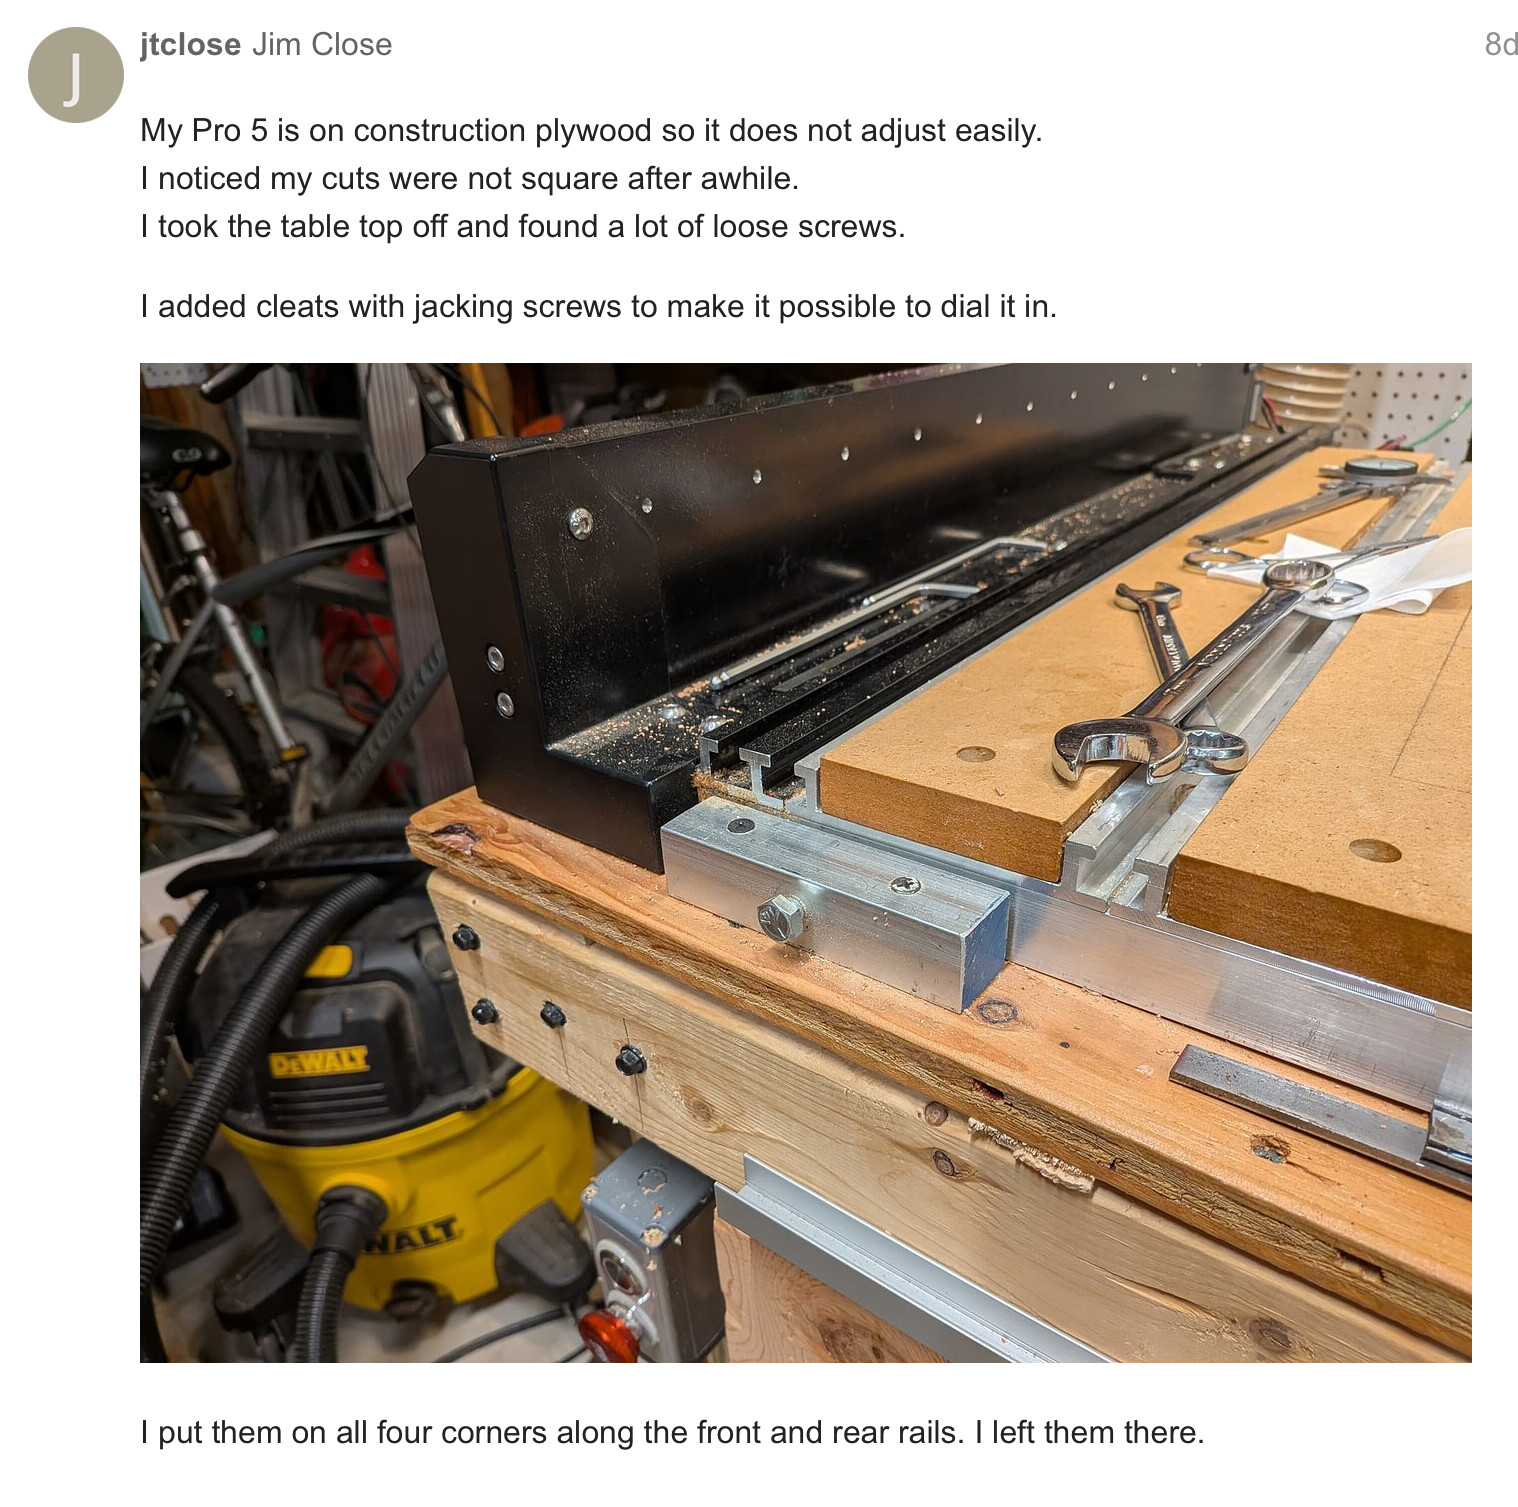
My Pro 5 is on construction plywood so it does not adjust easily.
I noticed my cuts were not square after awhile.
I took the table top off and found a lot of loose screws.
I added cleats with jacking screws to make it possible to dial it in.
@wmoy Yes! This is what I’m looking to try next as that’s what I’m seeing in the videos from some other setups.
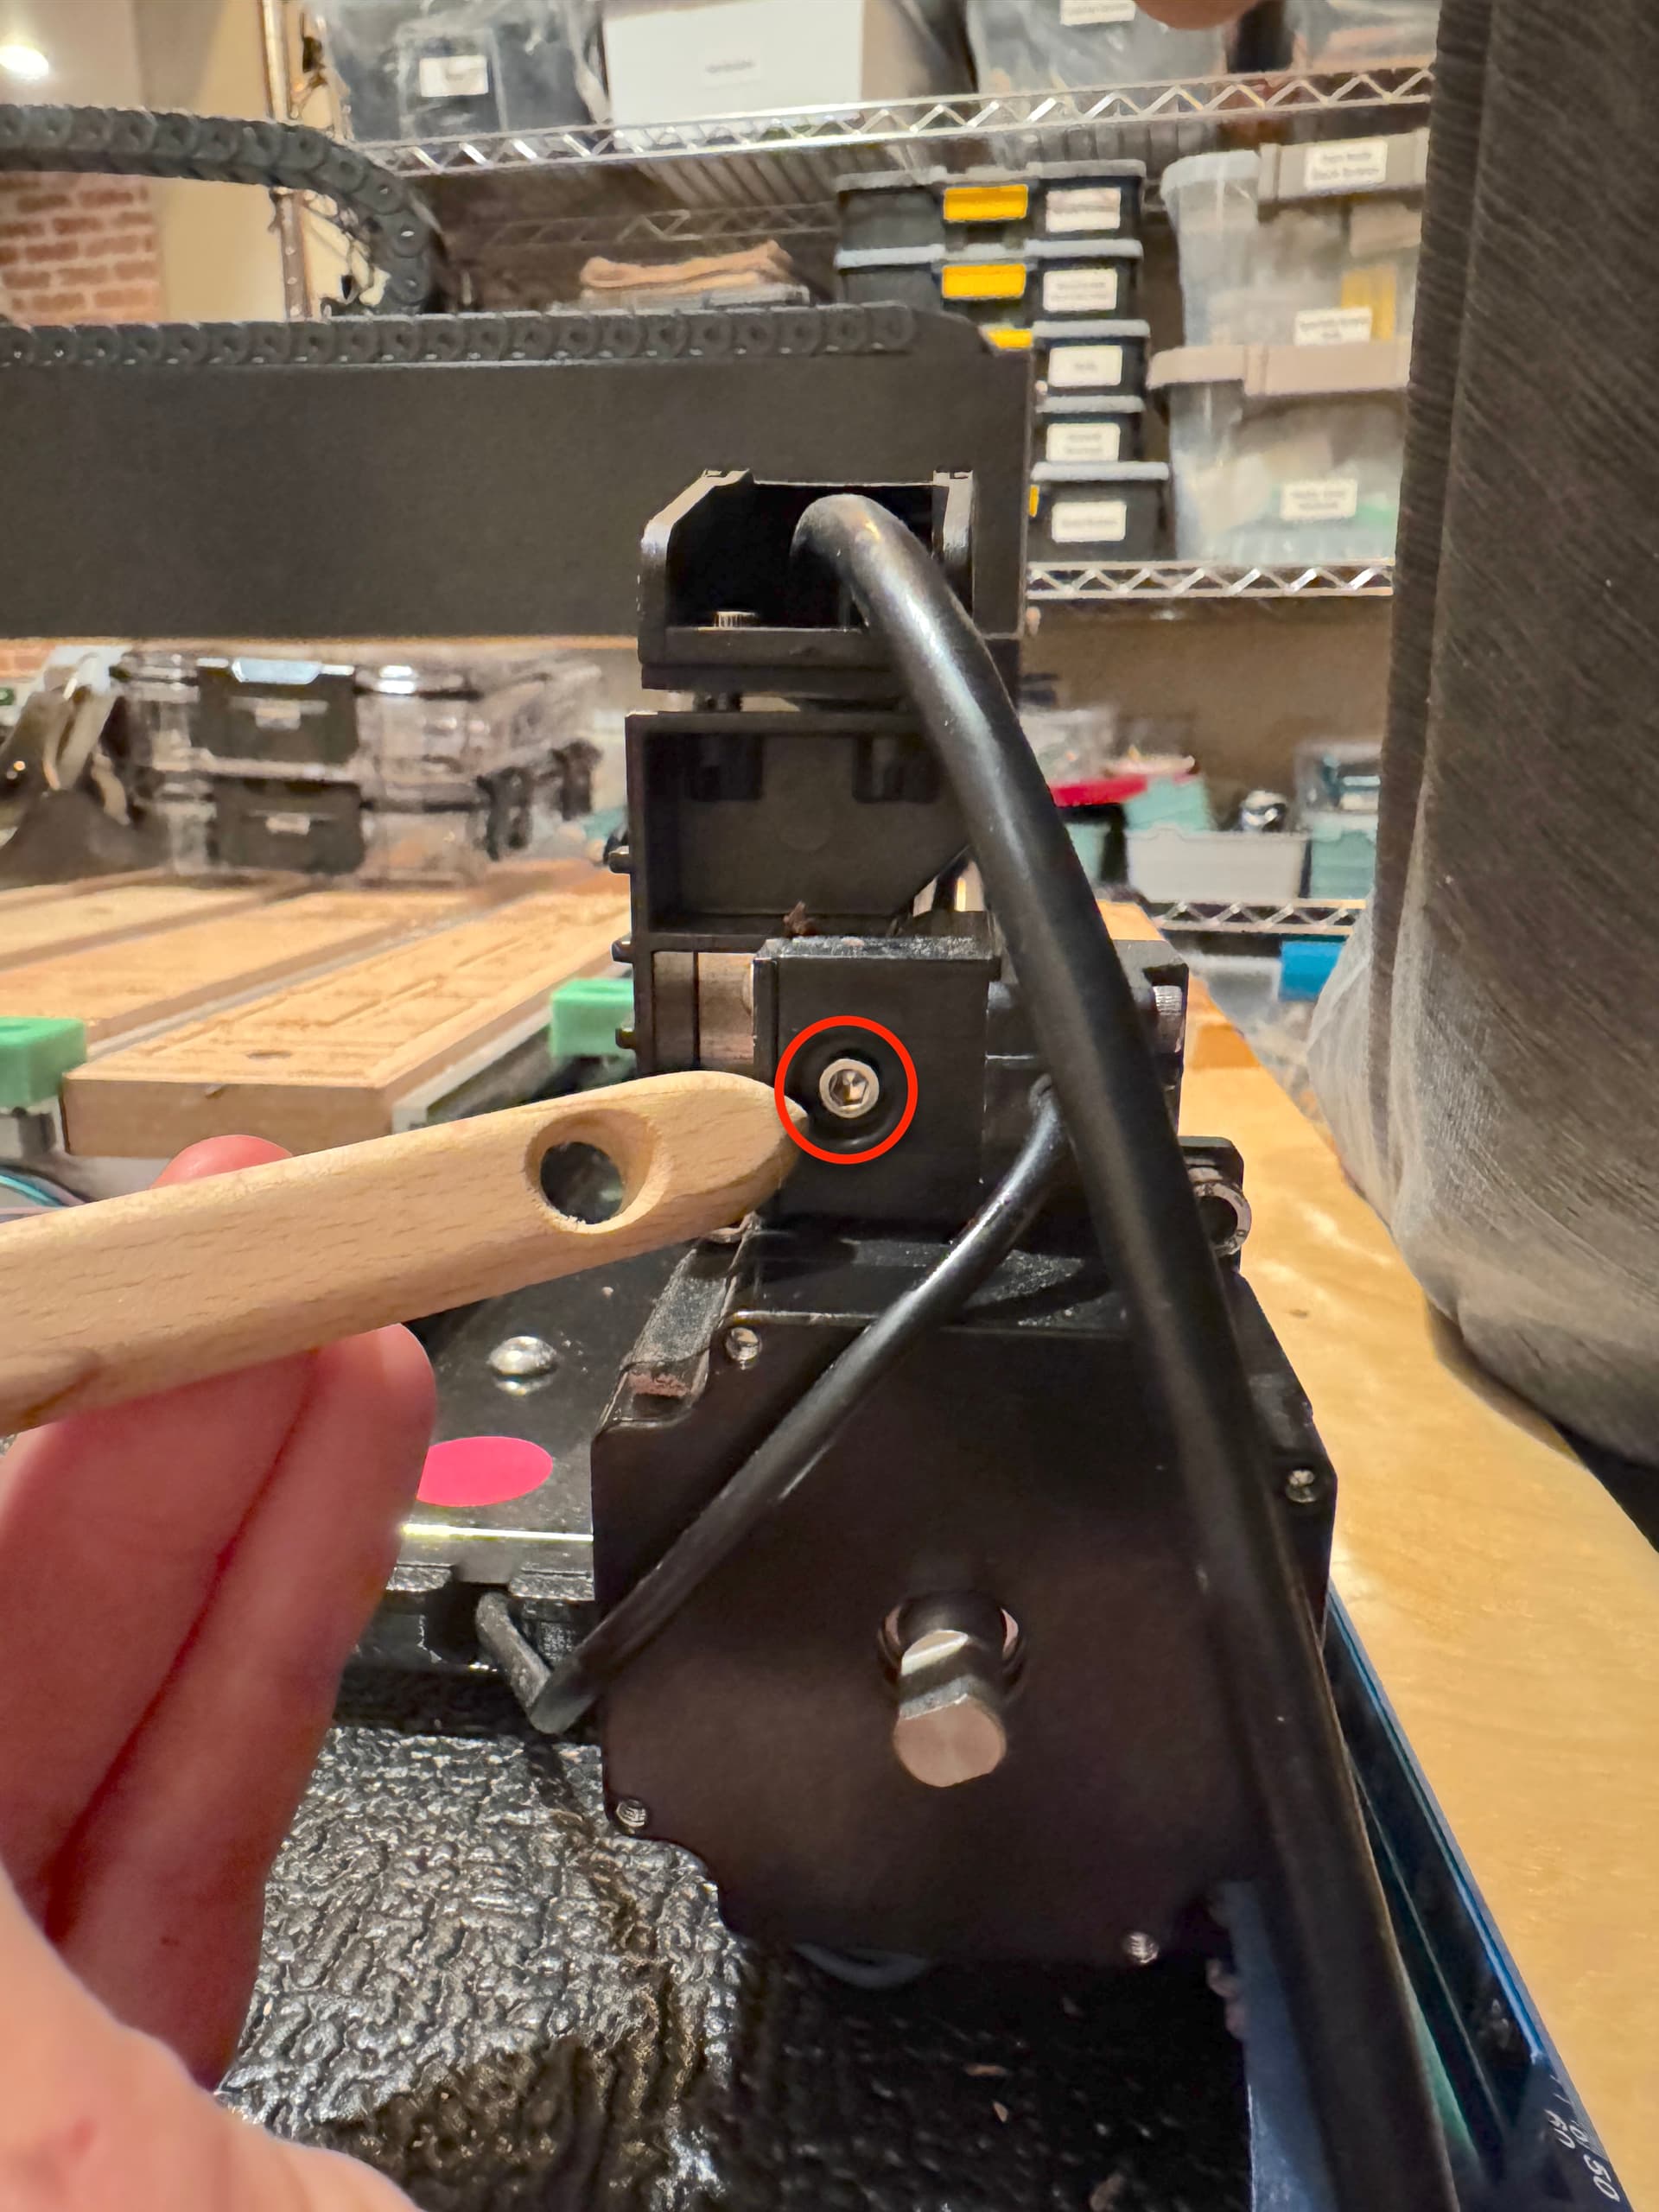
I’ll look for those micro-adjustment screws, but welcome any photos you have.
No, the machine should suffice unto itself to hold square if assembled squarely and all hardware properly tightened.
Cutting square is then a matter of setting up toolpaths and feeds and speeds and managing tooling engagement so that the tool will not be pulled into the cut (or deflected away from it).
If you continue to have difficulties, the folks at support@carbide3d.com should be able to assist.
@WillAdams yes, the actual cutting setup is something I’m working on designing, although it surprising that cutting a simple square in 1/2 MDF needs such a custom approach, just to be fully square.
However, are you disregarding what @wmoy said above about the homing device calibration? His suggestion does align with other manufacturers approach to fine tuning their CNC machines for square, so I was happy to hear Shapeoko also has that capability.
No machine is going to be able to cut well if toolpaths are set up in such a way that the tooling, feeds and speeds, and tooling engagement exceed the capabilities of the machine.
No, in concert, I am saying that the folks at support@carbide3d.com will guide you through this process if you have any difficulty with it.
Yep, that’s the one. I believe it’s an m3 screw, if I remember correctly, so based on the pitch of the screw, one full turn will shift the homing point about half a mm.
Basically it is how much slop there is in a mechanical system. Ball Screws have virtually no backlash, but if something is lose it can introduce it. For instance a nut on my Z axis had come lose a while ago and it was causing my cuts to not be at the correct depth.
Depending on how bad the backlash is you might be able to see it with your naked eye or you might need a dial test indicator and stand to see it. Turn your machine on and home it so the motors are engaged. Move the spindle to where you can hold onto it and try to move it back and forth. If you see if moving you definitely have backlash. If not you will need to attach a dial indicator to the frame of your system and point it so it is measuring the X axis. Try to move the spindle around and see how much deflection you have with the indicator. Switch it so it is pointed at the Y axis and repeat.
Now the S5 Pro is not some massive milling machine with a solid cast iron frame. It is a CNC router with an aluminum extrusion frame. Meaning there is going to be some deflection no matter what you do. The question is how much? 0.5mm of deflection might explain what you are seeing. 0.05mm not likely.
The left bottom right angle of a square is 89.9° and the right bottom is 90.1°. I tested by making multiple square cuts…surface level contours, sharpie attachment, and stock to leave methods.
I used the 3-4-5 Pythagorean test, compass measurements, and a Japanese square to check
After squaring the machine physically (or as close as I possibly can), I fiddled with the micro-adjustments, but they didn’t seem to correct sufficiently so I took it a little further…
Moving the switches - I loosened the homing switch on the left and slid it forward. I think it can move about 4mm-5mm. The right back homing switch is as far back as it will go.
This got the machine cutting almost perfect (as I mentioned above) at 90.1°, but that’s not reliable enough.
Note: I didn’t see the homing switches moving when I turn the micro-adjustment screws, but I understand it’s “micro”.
What’s some next steps to get this thing cutting square…as in 90 degree corners?