I have been looking for a decent calibration test to check out my setup on my new Shapeoko 3 XXL. I finally found one over on the Inventables project page. See link below.
Inventables Calibration Test Pattern
The test pattern looks like this.
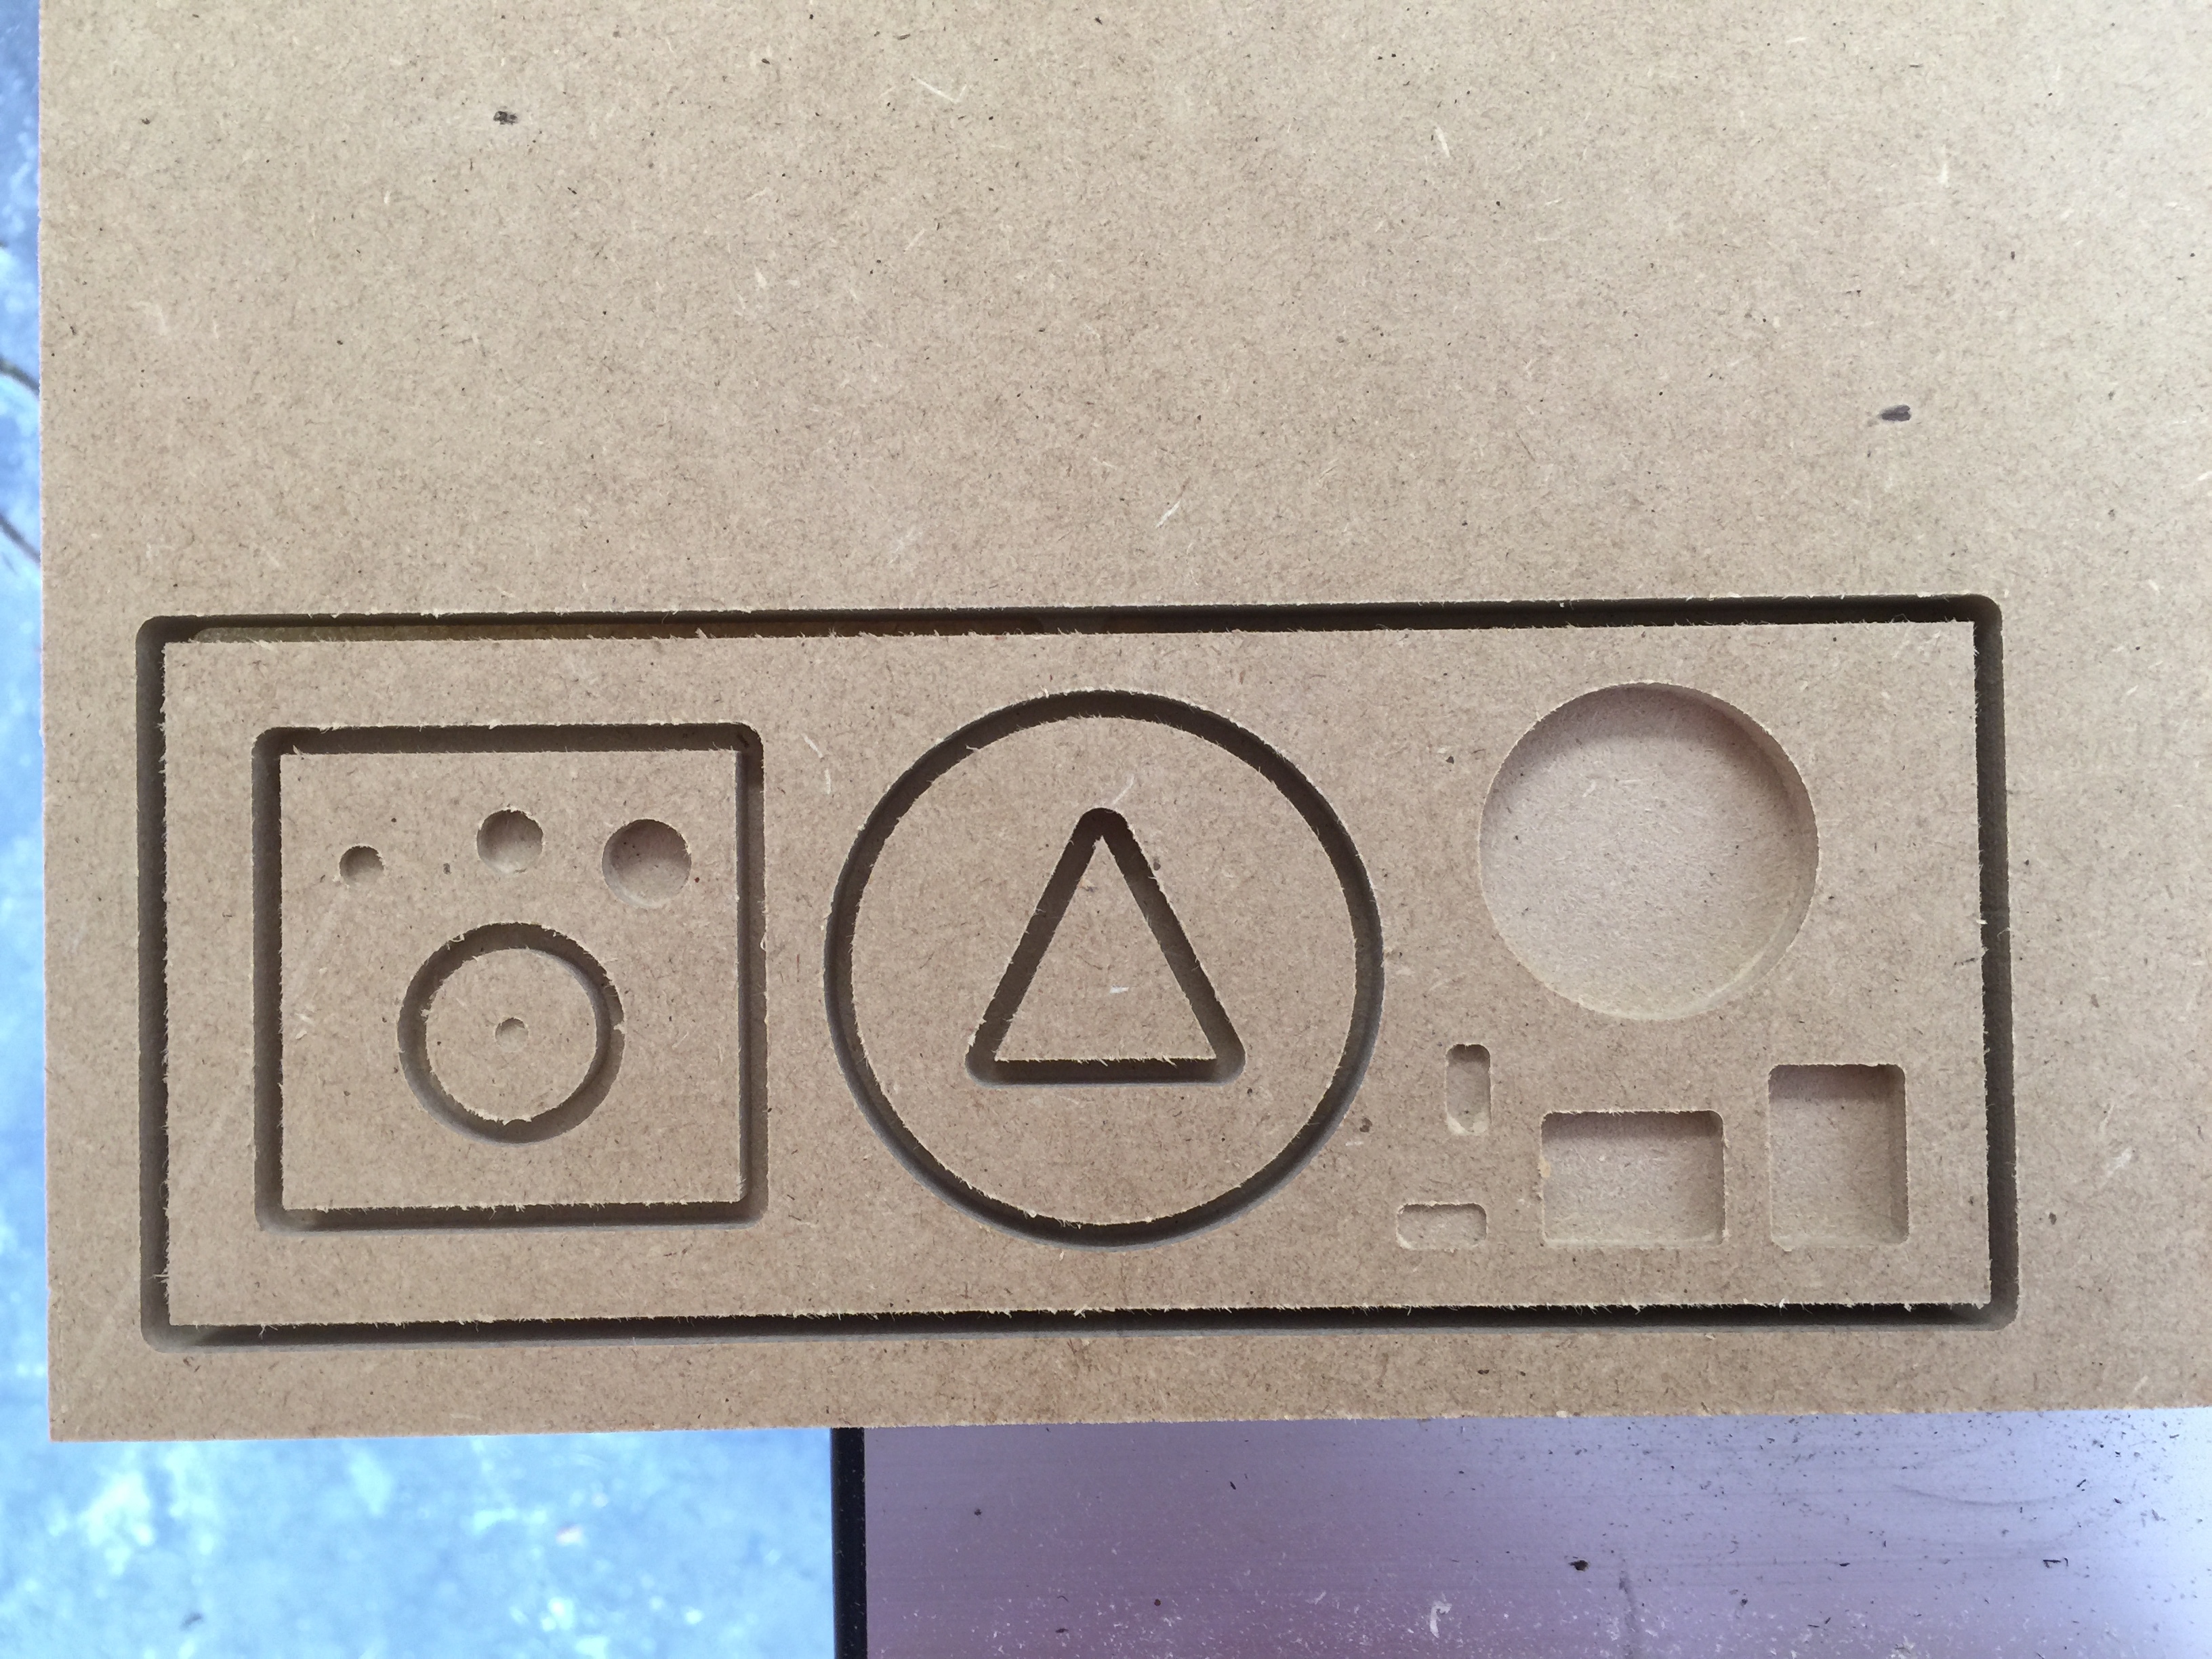
Overall my results are pretty decent. However I do have a problem with depth of cut. Either I didnt zero the CNC well enough, am still having too much flex or the spoil board isnt flat. I plan to put another section of spoil board on and flatten it and see how it comes out. Results are here.
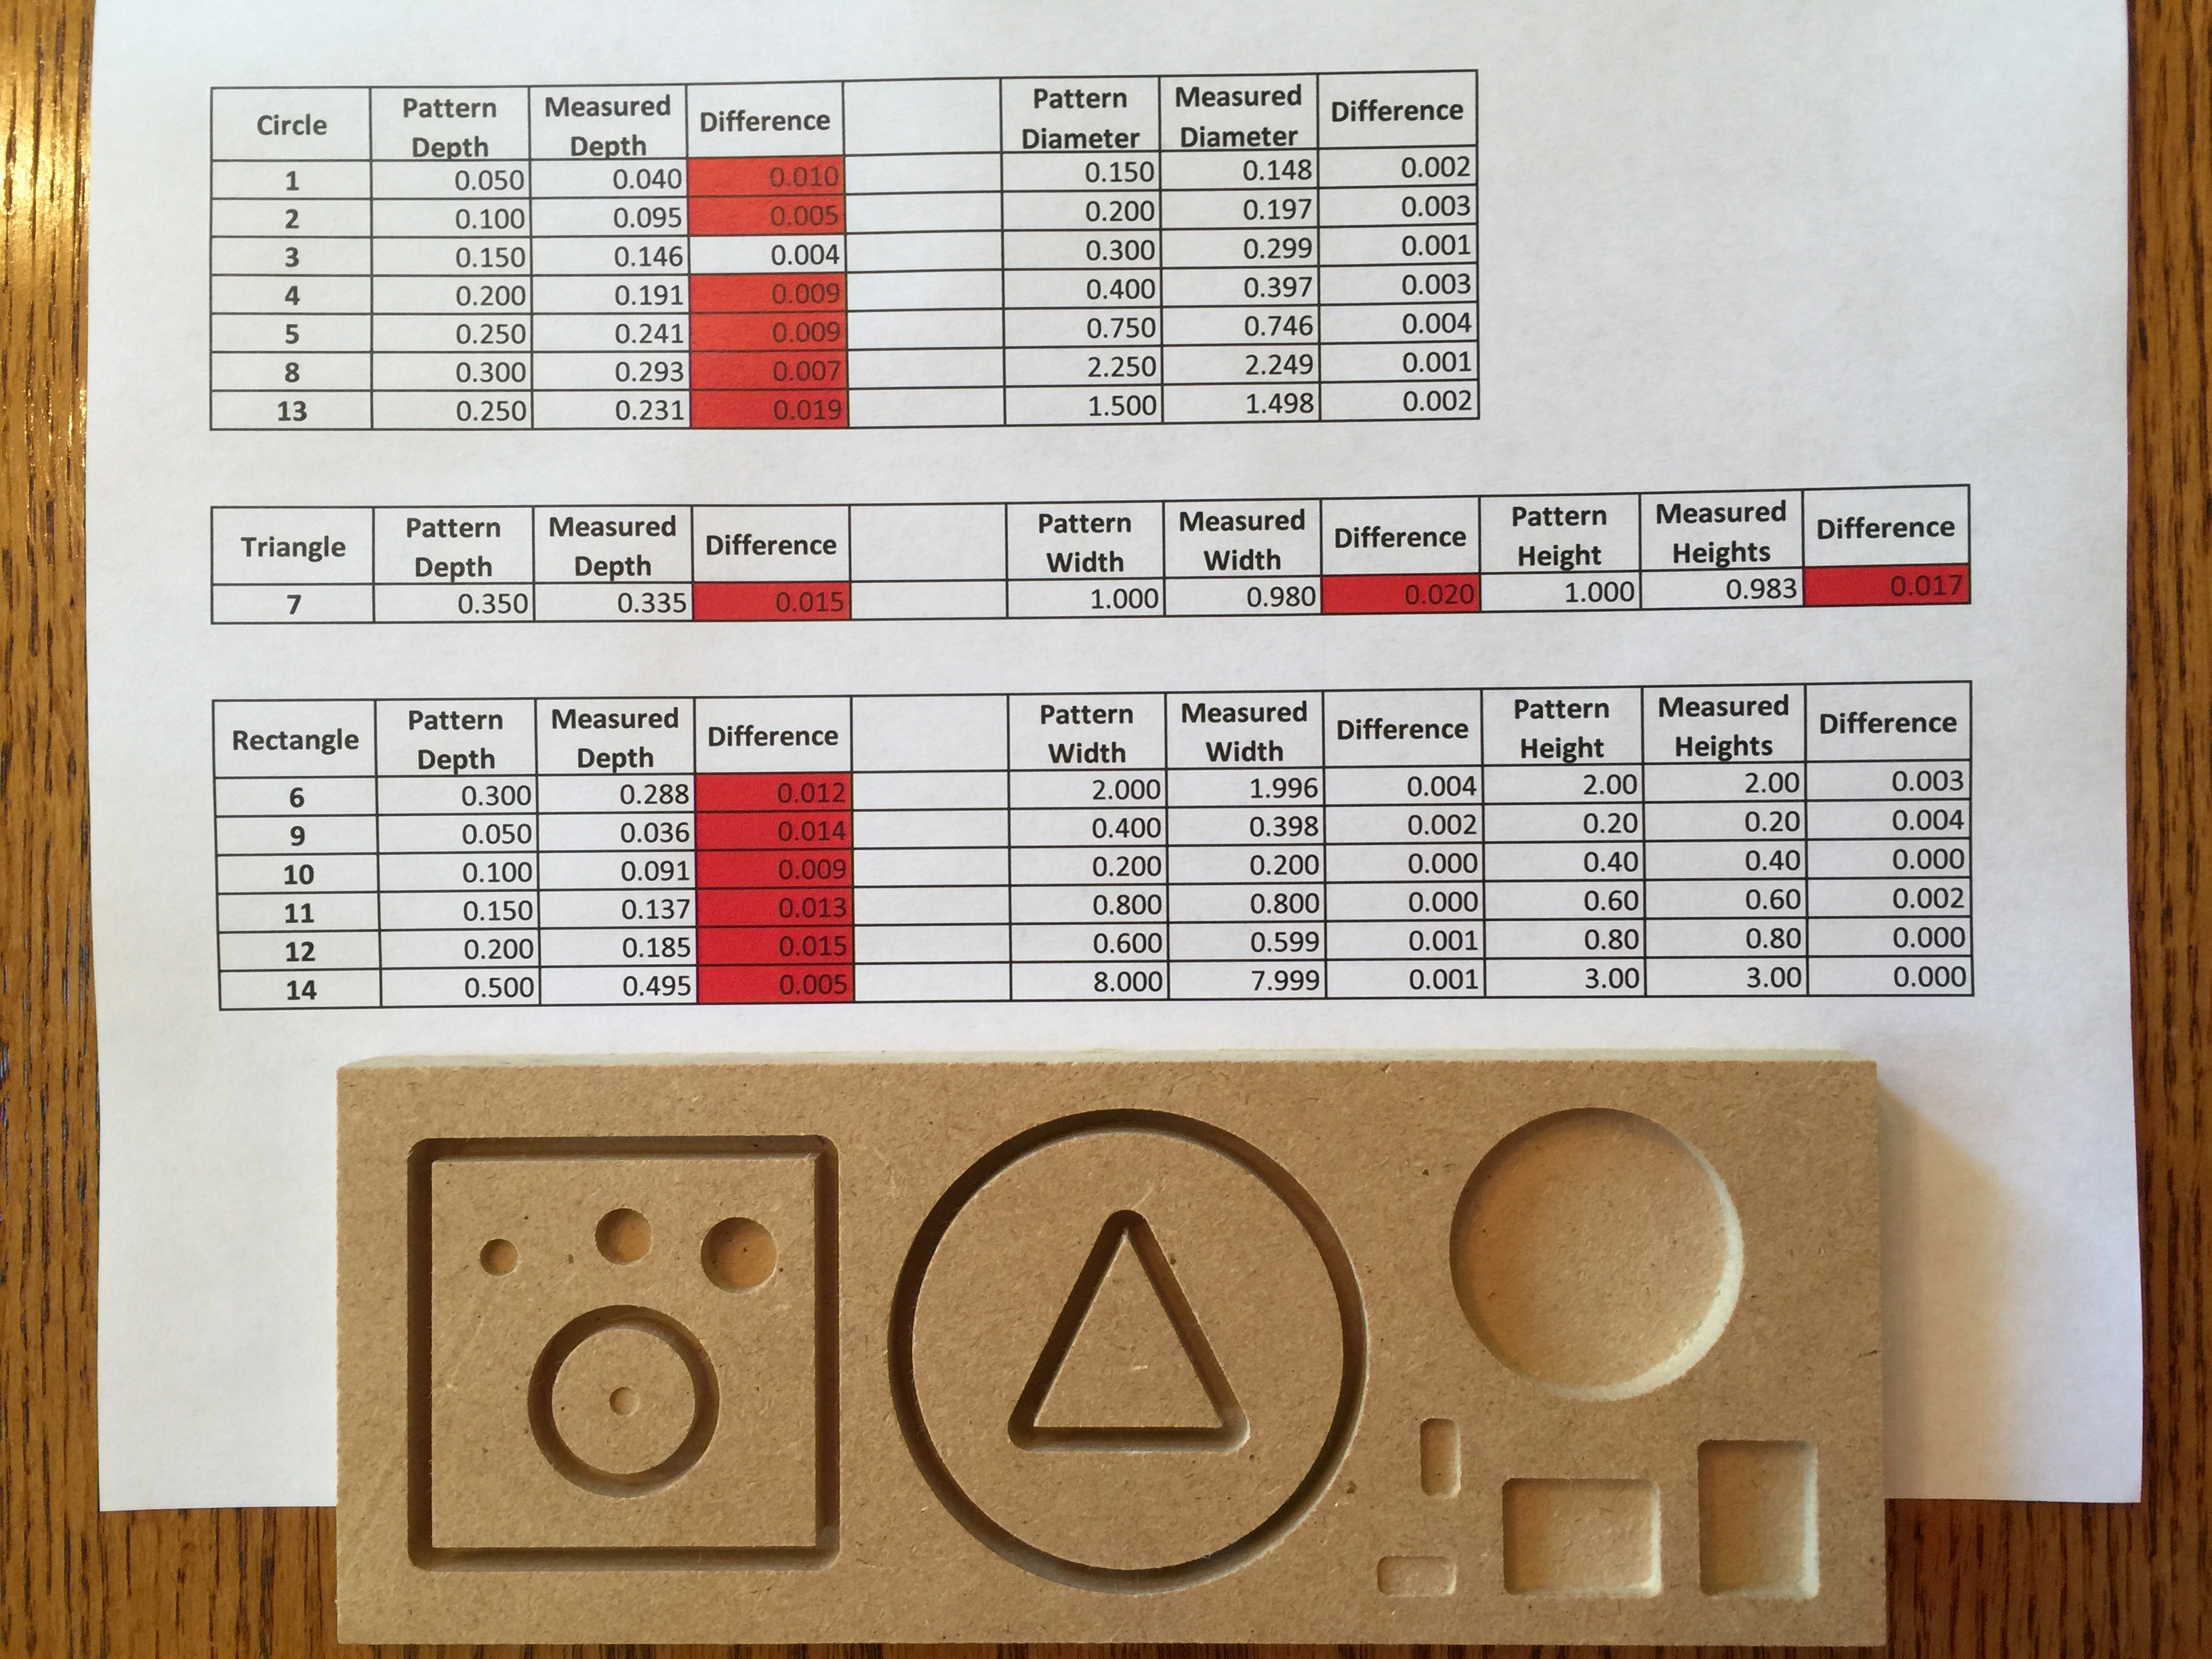
Attach is my Excel spreadsheet for calculating the accuracy. It is pretty basic. Enter your measurements in the light blue cells to calculate the difference between the expected result and your test result. I used .005 as the value to flag the cell red.
CNC Calibration Test Pattern Results.zip (9.2 KB)
Hopefully others will find this calibration pattern useful with their new machines and help them dial the machines into good accuracy.